Embed Size (px)
Citation preview

User manual for Certified Assessor (AR) to Assess Batches - ToT ToA

P a g e 1 | 35
Table of Contents 1 Introduction .......................................................................................................................................... 2
2 Batches .................................................................................................................................................. 3
2.1 View All Batches ............................................................................................................................ 3
2.2 View Batch Details ........................................................................................................................ 5
2.3 Accept Batch ................................................................................................................................. 8
2.4 Reject Batch ................................................................................................................................ 10
3 Assessment (Mobile App) ................................................................................................................... 13
4 Upload Marks ...................................................................................................................................... 27
5 Edit Marks ........................................................................................................................................... 29
6 View Marks ......................................................................................................................................... 31
7 Submit for Approval to Assessment Agency ....................................................................................... 33

P a g e 2 | 35
1 Introduction The User Manual for Assessor – ToT ToA is designed to provide information on the role of the certified Assessor to assess ToT/ToA batches. The Assessor can perform the functionalities as listed below.
• Batches o View All Batches o View Batch Details o Accept Batch o Reject Batch
• Assessment Mobile App
• Edit Marks
• Upload Marks
• View Marks
• Submit for Approval to Assessment Agency

P a g e 3 | 35
2 Batches The Batch screen allows the Assessor to view all batches and also allows to accept or reject batches.
2.1 View All Batches The View All Batches screen allows the Assessor to view all assigned ToT/ToA batches. To Navigate Home - - > Assessor Dashboard - - > Assessment Request - - > View All Batches - - > Assessment Batch Request - - > Pending Requests
➢ The View All Batches screen displays all the batches assigned by Assessment Agency.

P a g e 4 | 35
➢ The batches are categorized on the basis of the status of batch applications. The categories of batches
are as listed below.
• Pending Request
• Accepted
• Rejected ➢ The Assessor can also search for a particular batch on the basis of Scheme/Program/Model, Sector.
Batch Type, Job Role, State, Batch Status and Keyword Search. Click Apply, to search for a particular batch.
➢ The View All Batches screen lists all the assigned batches along with the details of the batches such
as Scheme/Program/Model, Batch Type, Batch ID, Job Role Code (QP Code), TC Name Location, Batch Size, Enrolled Candidates, Dropout Candidates Size, Preferred Assessment Language, Request Type, Assessment Dates, Status and allows to accept/reject the batches.

P a g e 5 | 35
2.2 View Batch Details The View Batch Details screen allows the Assessor to view the batch details of assigned ToT – ToA batch. To Navigate Home - - > Assessor Dashboard - - > Assessment Request - - > View All Batches - - > Assessment Batch Request - - > Accepted - - > Action - - > View Batch Details
➢ The View All Batches screen lists all the assigned batches along with the details of the batches such
as Scheme/Program/Model, Batch Type, Batch ID, Job Role Code (QP Code), TC Name Location, Batch Size, Enrolled Candidates, Dropout Candidates Size, Preferred Assessment Language, Request Type, Assessment Dates, Status and Action Date.
➢ Click View Batch Details, the View Batch Details screen appears.

P a g e 6 | 35
➢ The View Batch Details screen hosts two tabs as listed below.
• Batch Details
• Enrolled Applicants ➢ The Batch details screen displays the details of the batch and also hosts four sections as listed below.
• Batch Details
• Training Centre Details
• Domain Job Role
• Platform Job Role ➢ The Batch Details section displays the batch details such as Batch Name, Batch Size, Batch ID and
Batch Duration.
➢ The Training Centre Details section displays the Training Centre details such as Training Centre,
Training Centre Id, Centre Rating by Smart, Training Partner Name, State, District, Geo Location, Latitude, Longitude, and Status.
➢ The Domain Job Role section displays the domain job role details such as Job Role Name, Assigned
Agency, Assigned Assessor, Assessment Dates and Status.

P a g e 7 | 35
➢ The Platform Job Role section displays the domain job role details such as Job Role Name, Assigned Agency, Assigned Assessor, Assessment Dates and Status.
➢ The Approved Applicants section displays the details of the approved applicants such as Candidate
ID, Candidate Name, Email Address, Mobile Number and Status.
➢ Click Go Back, to navigate to the Accepted screen.

P a g e 8 | 35
2.3 Accept Batch The Accept Batch screen allows the Assessor to accept the assigned ToT/ToA batches. To Navigate Home - - > Assessor Dashboard - - > Assessment Request - - > Pending Requests - - > Actions - - > Accept Batch
➢ Click Accept Batch, the following screen appears.
P a g e 9 | 35
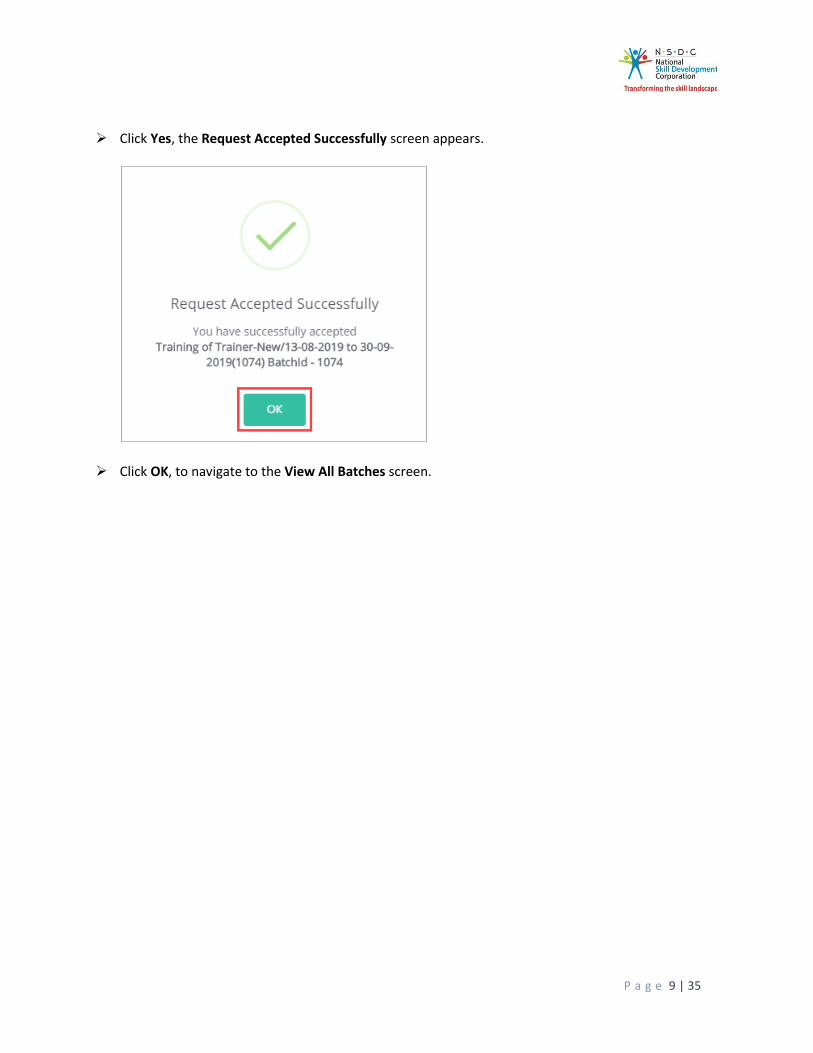
➢ Click Yes, the Request Accepted Successfully screen appears.
➢ Click OK, to navigate to the View All Batches screen.

P a g e 10 | 35
2.4 Reject Batch The Reject Batch screen allows the Assessor to reject the assigned ToT/ToA batches. To Navigate Home - - > Assessor Dashboard - - > Assessment Request - - > Pending Request - - > Actions - - > Reject Batch
➢ Click Reject Batch, the Reason for Rejecting Batch screen appears.

P a g e 11 | 35
➢ The Reason for Rejecting Batch screen allows the Assessor to reject the batch by selecting the appropriate reason.
➢ Select the appropriate rejection reason from the drop-down list.
➢ Enter the appropriate remarks to reject the particular batch.
Note: The Assessor must enter the appropriate reason for rejecting the batch assigned by Assessment Agency.

P a g e 12 | 35
➢ Click Save and Submit, the following screen appears.
➢ Click Yes, the following screen appears.
➢ Click OK, to navigate to the Pending Requests screen.

P a g e 13 | 35
3 Assessment (Mobile App) The Assessment (Mobile App) screen is designed to provide the information on, how an Assessor can use the mobile app for assessments. To Navigate Home - - > Skill India App
➢ Tap the Skill India App, and choose the user group as Assessor.

P a g e 14 | 35
➢ Tap Assessor, the login page appears as follows.
➢ Enter the appropriate Username / Unique ID and relevant Password. ➢ Single Tap Login, to navigate to My Dashboard.
NOTE: Single Tap Forgot Password, to retrieve the password.

P a g e 15 | 35
➢ The My Dashboard hosts two tabs as listed below.
• Pending Request
• Accepted
➢ The Pending Request screen lists all the batches assigned for the Assessor. ➢ The Accepted screen lists all the accepted assigned batches.

P a g e 16 | 35
➢ The Pending Requests screen lists all the assigned assessment requests along with the details such as Batch Type, Batch Duration, Batch ID, Sector Name, and QP Code. Also displays the information of the Training Centre.
➢ Tap Accept, the Accepted Successfully screen appears.
➢ Tap OK, to navigate to the Pending Request screen.

P a g e 17 | 35
➢ The Accepted screen displays all the accepted batches along with the details such as Batch Type, Batch Duration, Batch ID, Sector Name, and Training Centre ID.
➢ Tap the Batch Name, the Batch Details screen appears.
Note: The Assessor can start the assessment only for the batches with the status as Assessment Pending.

P a g e 18 | 35
➢ The Batch Details screen displays the details of the respective batches such as Assessment Date,
Training Centre Address, Sector/Sub Sector Names, Job Role/QP Code/Level and Number of Candidates needs to be assessed in the batch.
➢ The Training Centre SPOC (Single Point of Contact) Details section displays the SPOC details such as
Name of SPOC, Mobile Number of SPOC and Email address of SPOC.

P a g e 19 | 35
➢ Tap Start Assessment, the verification screen appears.
➢ Tap Allow, the Success screen appears.
➢ Tap OK, to navigate to the Attendance screen.

P a g e 20 | 35
➢ The Attendance screen allows the Assessor to mark the candidate attendance. Tap the slider button
of the respective candidate to mark the present.

P a g e 21 | 35
➢ The Add Classroom Photos section allows the Assessor to add the classroom photos. Tap the
respective section to add the classroom photos. The following permission screen appears.
➢ Tap ALLOW, to Geotag the images. Click six different photos of the classroom. Tap STOP
ASSESSMENTS.
➢ Tap UPLOAD MARKS, the Candidate List screen appears.

P a g e 22 | 35
➢ The Candidate List section displays all (present and absent) the candidates of the batch.
➢ Tap on +, to navigate to the Job Role List screen.

P a g e 23 | 35
➢ The Job Role List screen displays all the job role for the batch.
➢ Tap on +, to upload the marks for respective NOS. ➢ The Upload Marks screen allows the Assessor to add the marks for all the NOS of the particular job
role of the candidate.

P a g e 24 | 35
➢ The Compulsory NOS section allows the Assessor to enter the appropriate score gained by a candidate for Compulsory NOS, in Theory, Practical, OJT and Viva against the maximum score. The system auto calculates the total marks and displays the total.
➢ Tap Save, the Successfully Saved screen appears.
➢ Tap OK, to navigate to the Upload Marks screen. ➢ Tap Next, to navigate to the Elective NOS screen. ➢ The Elective NOS screen allows the Assessor to enter the respective score gained by a candidate for
Elective NOS, in Theory, Practical, OJT and Viva against the maximum score. The system auto calculates the total marks and displays the total.

P a g e 25 | 35
➢ Tap Save, the Successfully Saved screen appears.
➢ Tap OK, to navigate to the Upload Marks screen. ➢ Tap Next, to navigate to the Options NOS screen. ➢ The Options NOS section allows the Assessor to enter the respective score gained by a candidate for
Optional NOS, in Theory, Practical, OJT and Viva against the maximum score. The system auto calculates the total marks and displays the total.

P a g e 26 | 35
➢ Tap Save, the Successfully Saved screen appears.
➢ Tap OK, to navigate to the Upload Marks screen. ➢ Tap Next, the Success screen appears.
➢ Tap OK, to navigate to the Candidate List screen.
➢ The appears after all the scores uploaded.
Note: The Assessor must upload all the assigned candidates’ marks and attendance for the batches conducted.

P a g e 27 | 35
4 Upload Marks The Upload Marks screen allows the Assessor to upload the marks of the candidate. To Navigate Home - - > Assessor Dashboard - - > Assessment Request - - > Assessed Batch Request - - > Pending Requests - - > Actions - - > View Details - - > Approved Applicants - - > Action - - > View Job Role Details - - > Action - - > Upload Marks
➢ The Upload Marks screen allows the Assessor to upload marks of the applicant. ➢ The Candidate ID screen displays the marks given for all the QP’s under different categories such as
Theory, Practical, OJT, Viva and also displays Total marks.

P a g e 28 | 35
➢ The Assessor can upload the marks for all the QP’s such as NOS Code. Also displays Core NOSs Total Marks, Non-Core NOSs Total Marks, and Grand Total.
➢ Click Save & Upload, to save and upload the Marks.
Note: The Assessor can upload the marks of the candidates for all the QP’s.

P a g e 29 | 35
5 Edit Marks The Edit Marks screen allows the Assessor to edit/update marks of the candidates. To Navigate Home - - > Assessor Dashboard - - > Assessment Request - - > Assessed Batch Request- - > Pending Requests - - > Action - - > View Details - - > Approved Applicants - - > Action - - > View Job Role Details - - > Listing of Job Role - - > Action - - > Edit Marks
➢ The Listing of Job Role (Qualification Packs) of the Batch screen displays the details such as QP Code,
Job Role Name, Marks, Percentage, Result, Attendance Status, Status and also allows the Assessor to edit marks of the candidate under Action.
➢ The Candidate screen displays the NOS Name & ID details along with the marks given for all the QP’s
under different categories such as Theory, Practical, OJT, Viva, and Total marks. ➢ Click Edit Marks, the following screen appears.

P a g e 30 | 35
➢ The Assessor can view/edit the marks given for all the QP’s and also displays Core NOSs Total Marks, Non-Core NOSs Total Marks, and Grand Total.
➢ Click Save & Upload, the Marks Uploaded Successfully screen appears.
➢ Click OK, to navigate to the Listing of Job Role (Qualified Packs) of the Batch screen.

P a g e 31 | 35
6 View Marks The View Marks screen allows the Assessor to view the marks of the applicants. To Navigate Home - - > Assessor Dashboard - - > Assessment Request - - > Assessed Batch Request - - > Submitted - - > Action - - > View Details - - > Approved Applicant - - > View Job Role Details - - > Action - - > View Marks
➢ The Listing of Job Role section displays the listing of job role details such as QP Code, Job Role Name,
Marks, Percentage, Result, Attendance Status, Status and also allows to view marks under Action.
➢ Click View Marks, the marks screen appears.

P a g e 32 | 35
➢ The Candidate screen displays all the marks of the candidate.
➢ The Candidate screen displays the marks given for all the QP’s under different categories such as
Theory, Practical, OJT, Viva, and Total marks. ➢ The Assessor can view the marks given for all the QP’s such as Compulsory (Core). Also displays Nos
Name & ID, Nos Type, Total Marks, Non-Core NOSs Total Marks, and Grand Total. ➢ Click Go Back, to navigate to the Listing of Job Role (Qualified Packs) of the Batch screen.
P a g e 33 | 35
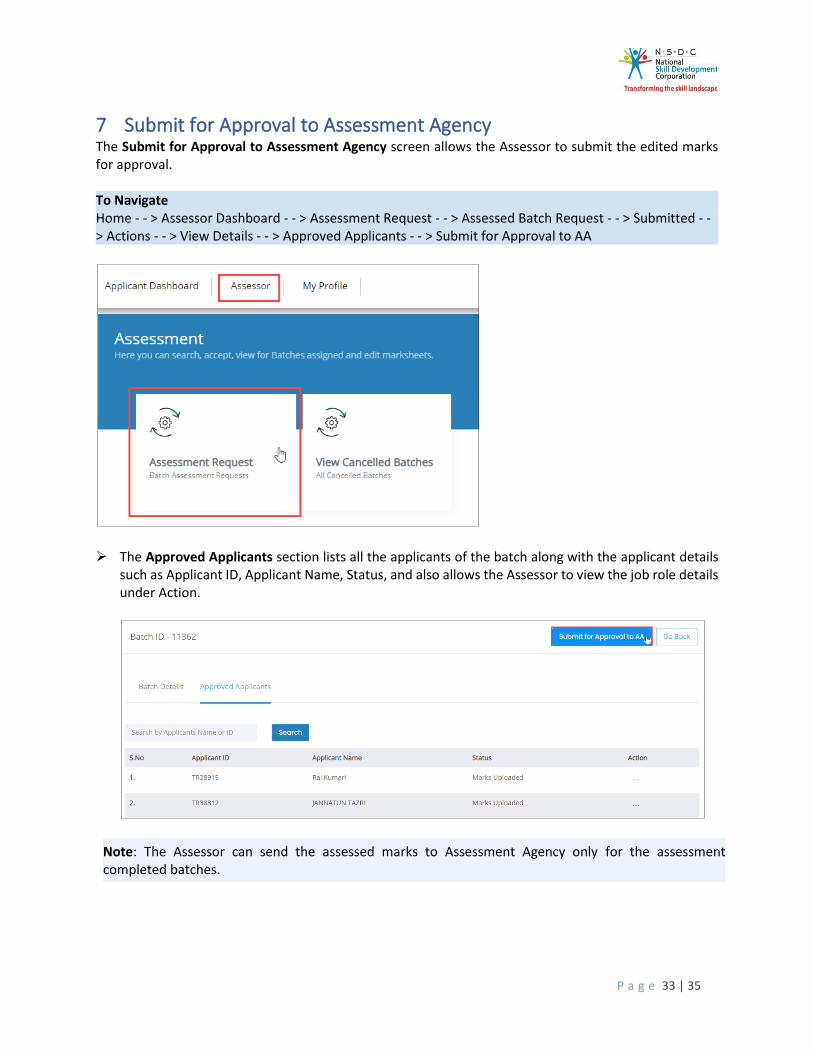
7 Submit for Approval to Assessment Agency The Submit for Approval to Assessment Agency screen allows the Assessor to submit the edited marks for approval. To Navigate Home - - > Assessor Dashboard - - > Assessment Request - - > Assessed Batch Request - - > Submitted - - > Actions - - > View Details - - > Approved Applicants - - > Submit for Approval to AA
➢ The Approved Applicants section lists all the applicants of the batch along with the applicant details
such as Applicant ID, Applicant Name, Status, and also allows the Assessor to view the job role details under Action.
Note: The Assessor can send the assessed marks to Assessment Agency only for the assessment completed batches.

P a g e 34 | 35
➢ Click Submit for Approval to AA, the following screen appears.
➢ Click Yes, the Do you want to add Supporting Document screen appears. ➢ The Do you want to add Supporting Document screen allows the Assessor to upload supporting
documents for all the job roles of the batch.

P a g e 35 | 35
➢ Click Browse to upload the appropriate Supporting Documents for all the job roles of the batch. The
Assessor can upload the only in pdf, docx, jpeg, jpg, png, and the maximum file size is five MB. Click Upload. On successful upload of the document the message appears as FileName.ext uploaded successfully.
➢ Click Submit, the following screen appears.
➢ Click OK, to navigate to the Approved Applicants screen.