Embed Size (px)
Citation preview

Invacare® AVIVA™ RX SeriesAVIVA RX20, AVIVA RX40, AVIVA RX40HD
en Power WheelchairUser Manual
This manual MUST be given to the user of the product.BEFORE using this product, this manual MUST be read and saved forfuture reference.

© 2020 Invacare CorporationAll rights reserved. Republication, duplication or modification in whole or in part is prohibitedwithout prior written permission from Invacare. Trademarks are identified by ™ and ®. All trademarksare owned by or licensed to Invacare Corporation or its subsidiaries unless otherwise noted.Making Life's Experiences Possible is a registered trademark in the U.S.A.BraunAbility is a registered trademark of BraunAbility.

Contents
1 General . . . . . . . . . . . . . . . . . . . . . . . . . . . . . . . . . . . . . . . . . 51.1 Introduction . . . . . . . . . . . . . . . . . . . . . . . . . . . . . . . . . . 51.2 Symbols in This Manual. . . . . . . . . . . . . . . . . . . . . . . . . . 51.3 Compliance . . . . . . . . . . . . . . . . . . . . . . . . . . . . . . . . . . . 51.3.1 Product-Specific Standards . . . . . . . . . . . . . . . . . . . . . 6
1.4 Usability . . . . . . . . . . . . . . . . . . . . . . . . . . . . . . . . . . . . . 61.5 Warranty Information . . . . . . . . . . . . . . . . . . . . . . . . . . . 61.6 Service Life . . . . . . . . . . . . . . . . . . . . . . . . . . . . . . . . . . . 71.7 Limitation of Liability. . . . . . . . . . . . . . . . . . . . . . . . . . . . 7
2 Safety . . . . . . . . . . . . . . . . . . . . . . . . . . . . . . . . . . . . . . . . . . 82.1 General Safety Notes. . . . . . . . . . . . . . . . . . . . . . . . . . . . 82.2 Safety Information on the Electrical System . . . . . . . . . . . 112.3 Safety Information on Electromagnetic Interference . . . . . 132.4 Safety Information on Driving and Freewheel Mode . . . . . 142.5 Safety Information With Regard to Care and
Maintenance. . . . . . . . . . . . . . . . . . . . . . . . . . . . . . . . . 172.6 Safety Information Regarding Changes and
Modifications to the Mobility Device . . . . . . . . . . . . . . . 182.7 Safety Information on Wheelchairs with a Lifter . . . . . . . . 19
3 Product Overview . . . . . . . . . . . . . . . . . . . . . . . . . . . . . . . . . 213.1 Product Description. . . . . . . . . . . . . . . . . . . . . . . . . . . . . 213.2 Intended Use . . . . . . . . . . . . . . . . . . . . . . . . . . . . . . . . . 213.3 Indications . . . . . . . . . . . . . . . . . . . . . . . . . . . . . . . . . . . 213.4 Type Classification . . . . . . . . . . . . . . . . . . . . . . . . . . . . . . 213.5 Labels on Product . . . . . . . . . . . . . . . . . . . . . . . . . . . . . . 223.6 Main Parts of Wheelchair . . . . . . . . . . . . . . . . . . . . . . . . 253.7 User Inputs . . . . . . . . . . . . . . . . . . . . . . . . . . . . . . . . . . . 253.8 The Lifter . . . . . . . . . . . . . . . . . . . . . . . . . . . . . . . . . . . . 25
4 Accessories . . . . . . . . . . . . . . . . . . . . . . . . . . . . . . . . . . . . . . 274.1 Posture Belts. . . . . . . . . . . . . . . . . . . . . . . . . . . . . . . . . . 274.1.1 Types of posture belts . . . . . . . . . . . . . . . . . . . . . . . . 274.1.2 Adjusting Posture Belt Correctly . . . . . . . . . . . . . . . . . 28
4.2 Using Cane Holder . . . . . . . . . . . . . . . . . . . . . . . . . . . . . 284.3 Luggage Carrier . . . . . . . . . . . . . . . . . . . . . . . . . . . . . . . . 29
5 Setup. . . . . . . . . . . . . . . . . . . . . . . . . . . . . . . . . . . . . . . . . . . 305.1 General Setup Information. . . . . . . . . . . . . . . . . . . . . . . . 30
6 Usage . . . . . . . . . . . . . . . . . . . . . . . . . . . . . . . . . . . . . . . . . . 316.1 Driving . . . . . . . . . . . . . . . . . . . . . . . . . . . . . . . . . . . . . . 316.2 Before Driving for First Time . . . . . . . . . . . . . . . . . . . . . . 316.3 Parking and Stationary . . . . . . . . . . . . . . . . . . . . . . . . . . 316.3.1 Using Manual Wheel Locks. . . . . . . . . . . . . . . . . . . . . 316.3.2 Cleaning Battery Terminals . . . . . . . . . . . . . . . . . . . . . 32
6.4 Getting in and out of Mobility Device . . . . . . . . . . . . . . . 326.4.1 Removing Standard Armrest for Side Transfer . . . . . . . 326.4.2 Information About Getting in and out. . . . . . . . . . . . . 336.4.3 Swivelling Nucleus Midline Holder to Side. . . . . . . . . . 346.4.4 Swivelling Swing-Away Display Holder to Side . . . . . . . 346.4.5 Swivelling Chin Control to Side . . . . . . . . . . . . . . . . . . 34
6.5 Taking Obstacles . . . . . . . . . . . . . . . . . . . . . . . . . . . . . . . 356.5.1 Maximum Obstacle Height . . . . . . . . . . . . . . . . . . . . . 356.5.2 Safety Information When Taking Obstacles . . . . . . . . . 356.5.3 Correct Way to Take Obstacles . . . . . . . . . . . . . . . . . . 35
6.6 Driving up and down Gradients . . . . . . . . . . . . . . . . . . . . 366.7 Use on Public Roads . . . . . . . . . . . . . . . . . . . . . . . . . . . . 376.8 Pushing the mobility device in freewheel mode . . . . . . . . 376.8.1 Disengaging Motors . . . . . . . . . . . . . . . . . . . . . . . . . . 37
7 Controls System . . . . . . . . . . . . . . . . . . . . . . . . . . . . . . . . . . . 397.1 Controls Protection System . . . . . . . . . . . . . . . . . . . . . . . 397.1.1 Using Circuit Breaker . . . . . . . . . . . . . . . . . . . . . . . . . 39
7.2 Batteries . . . . . . . . . . . . . . . . . . . . . . . . . . . . . . . . . . . . . 407.2.1 General Information on Charging . . . . . . . . . . . . . . . . 407.2.2 General Instructions on Charging . . . . . . . . . . . . . . . . 407.2.3 Charging Batteries . . . . . . . . . . . . . . . . . . . . . . . . . . . 417.2.4 Disconnecting Mobility Device After Charging . . . . . . . 427.2.5 Storage and Maintenance. . . . . . . . . . . . . . . . . . . . . . 427.2.6 Instructions on Using Batteries . . . . . . . . . . . . . . . . . . 427.2.7 Transporting Batteries . . . . . . . . . . . . . . . . . . . . . . . . 43
7.2.8 General Instructions on Handling Batteries . . . . . . . . . 437.2.9 Handling Damaged Batteries Correctly . . . . . . . . . . . . 43
8 Transport . . . . . . . . . . . . . . . . . . . . . . . . . . . . . . . . . . . . . . . . 458.1 General Information on Transport . . . . . . . . . . . . . . . . . . 458.2 Transferring Mobility Device to Vehicle . . . . . . . . . . . . . . 458.3 Use Mobility Device as Vehicle Seat. . . . . . . . . . . . . . . . . 468.3.1 Anchoring Mobility Device Used as Vehicle Seat . . . . . 488.3.2 Using Additional Tie-Down Points . . . . . . . . . . . . . . . . 498.3.3 Securing User in Mobility Device . . . . . . . . . . . . . . . . 49
8.4 Transporting Mobility Device Without Occupant . . . . . . . . 518.5 Dahl Docking System . . . . . . . . . . . . . . . . . . . . . . . . . . . . 51
9 Maintenance . . . . . . . . . . . . . . . . . . . . . . . . . . . . . . . . . . . . . 559.1 Maintenance Introduction . . . . . . . . . . . . . . . . . . . . . . . . 559.2 Inspection Checks . . . . . . . . . . . . . . . . . . . . . . . . . . . . . . 559.2.1 Before Each Use of Mobility Device . . . . . . . . . . . . . . 559.2.2 Weekly . . . . . . . . . . . . . . . . . . . . . . . . . . . . . . . . . . . 569.2.3 Monthly. . . . . . . . . . . . . . . . . . . . . . . . . . . . . . . . . . . 56
9.3 Wheels and Tyres . . . . . . . . . . . . . . . . . . . . . . . . . . . . . . 579.4 Short-Term Storage . . . . . . . . . . . . . . . . . . . . . . . . . . . . . 589.5 Long-Term Storage . . . . . . . . . . . . . . . . . . . . . . . . . . . . . 589.6 Cleaning and Disinfection . . . . . . . . . . . . . . . . . . . . . . . . 589.6.1 General safety information . . . . . . . . . . . . . . . . . . . . . 589.6.2 Cleaning Intervals. . . . . . . . . . . . . . . . . . . . . . . . . . . . 599.6.3 Cleaning . . . . . . . . . . . . . . . . . . . . . . . . . . . . . . . . . . 599.6.4 Disinfection . . . . . . . . . . . . . . . . . . . . . . . . . . . . . . . . 60
10 After Use . . . . . . . . . . . . . . . . . . . . . . . . . . . . . . . . . . . . . . . 6110.1 Reconditioning . . . . . . . . . . . . . . . . . . . . . . . . . . . . . . . 6110.2 Disposal . . . . . . . . . . . . . . . . . . . . . . . . . . . . . . . . . . . . 61
11 Technical Data . . . . . . . . . . . . . . . . . . . . . . . . . . . . . . . . . . . 6211.1 Technical Specifications . . . . . . . . . . . . . . . . . . . . . . . . . 62
12 Service . . . . . . . . . . . . . . . . . . . . . . . . . . . . . . . . . . . . . . . . . 6912.1 Inspections Performed . . . . . . . . . . . . . . . . . . . . . . . . . . 69

General
1 General
1.1 IntroductionThis user manual contains important information about thehandling of the product. To ensure safety when using theproduct, read the user manual carefully and follow thesafety instructions.
Note that there may be sections in this document, which arenot relevant to your product, since this document appliesto all available models (on the date of printing). If nototherwise stated, each section in this document refers to allmodels of the product.
The models and configurations available in your country canbe found in the country-specific sales documents.
Invacare reserves the right to alter product specificationswithout further notice.
Before reading this document, make sure you have thelatest version. You find the latest version as a PDF on theInvacare website.
If you find that the font size in the printed document isdifficult to read, you can download the PDF version from thewebsite. The PDF can then be scaled on screen to a fontsize that is more comfortable for you.
For more information about the product, for exampleproduct safety notices and product recalls, contact yourInvacare distributor. See addresses at the end of thisdocument.
In case of a serious incident with the product, you shouldinform the manufacturer and the competent authority inyour country.
1.2 Symbols in This ManualSymbols and signal words are used in this manual and applyto hazards or unsafe practices which could result in personalinjury or property damage. See the information below fordefinitions of the signal words.
WARNINGIndicates a hazardous situation that could resultin serious injury or death if it is not avoided.
CAUTIONIndicates a hazardous situation that could resultin minor or slight injury if it is not avoided.
IMPORTANTIndicates a hazardous situation that could resultin damage to property if it is not avoided.
TipsGives useful tips, recommendations andinformation for efficient, trouble-free use.
ToolsIdentifies required tools, components and itemswhich are needed to carry out certain work.
1.3 ComplianceQuality is fundamental to the company’s operation, workingwithin the disciplines of ISO 13485.
1654649-D 5

Invacare® AVIVA™ RX Series
This product features the CE mark, in compliance with theMedical Device Regulation 2017/745 Class I. The launch dateof this product is stated in the CE declaration of conformity.
We are continuously working towards ensuring that thecompany’s impact on the environment, locally and globally,is reduced to a minimum.
We only use REACH compliant materials and components.
We comply with the current environmental legislationsWEEE and RoHS.
1.3.1 Product-Specific Standards
The product has been tested and conforms to DIN EN12184 (Electrically powered wheelchairs, scooters and theirchargers) and all related standards.
When equipped with an appropriate lighting system, theproduct is suitable for use on public roads.
For further information about local standards andregulations, contact your local Invacare distributor. Seeaddresses at the end of this document.
1.4 UsabilityOnly use a mobility device when it is in perfect workingorder. Otherwise, you might put yourself and others at risk.
The following list does not claim to be exhaustive. It is onlyintended to show some of the situations that could affectthe usability of your mobility device.
In certain situations, you should immediately stop usingyour mobility device. Other situations allow you to use themobility device to get to your provider.
You should immediately stop using your mobility device ifits usability is restricted due to:
• Unexpected driving behaviour• brake failure
You should immediately contact an authorised Invacareprovider if the usability of your mobility device is restricteddue to:
• the lighting system (if fitted) failing or being defective• reflectors falling off• worn thread or insufficient tire pressure• damage to the armrests (e.g. torn armrest padding)• damage to the legrest hangers (e.g. missing or torn
heel straps)• damage to the postural belt• damage to the joystick (joystick cannot be moved into
the neutral position)• cables that are damaged, kinked, pinched or have come
loose from the fixation• the mobility device drifting when braking• the mobility device pulling to one side when moving• unusual sounds developing or occurring
Or if you have the feeling that something is wrong withyour mobility device.
1.5 Warranty InformationWe provide a manufacturer’s warranty for the productin accordance with our General Terms and Conditions ofBusiness in the respective countries.
Warranty claims can only be made through the providerfrom whom the product was obtained.
6 1654649-D

General
1.6 Service LifeWe estimate a service life of five years for this product,provided it is used in strict accordance with the intendeduse as set out in this document and all maintenance andservice requirements are met. The estimated service life canbe exceeded if the product is carefully used and properlymaintained, and provided technical and scientific advancesdo not result in technical limitations. The service life canalso be considerably reduced by extreme or incorrect usage.The fact that we estimate a service life for this product doesnot constitute an additional warranty.
1.7 Limitation of LiabilityInvacare accepts no liability for damage arising from:
• Non-compliance with the user manual• Incorrect use• Natural wear and tear• Incorrect assembly or set-up by the purchaser or a
third party• Technical modifications• Unauthorised modifications and/or use of unsuitable
spare parts
1654649-D 7

Invacare® AVIVA™ RX Series
2 Safety
2.1 General Safety Notes
DANGER!Risk of Death, Serious Injury, or DamageLighted cigarettes dropped onto an upholsteredseating system can cause a fire resulting indeath, serious injury, or damage. Mobility deviceoccupants are at particular risk of death orserious injury from these fires and resultingfumes because they may not have the ability tomove away from the mobility device.– DO NOT smoke while using this mobility device.
WARNING!Risk of Injury, Damage or DeathImproper monitoring or maintenance may causeinjury, damage or death due to ingestion orchoking on parts or materials.– Closely supervise children, pets, or people withphysical/mental disabilities.
WARNING!Risk of Death, Serious Injury or DamageImproper routing of cables may cause a trippingentanglement or strangulation hazard that mayresult in death, serious injury or damage.– Ensure all cables are routed and securedproperly.
– Ensure there are no loops of excess cableextending away from the wheelchair.
WARNING!Risk of Serious Injury or DamageImproper use of this product may cause injuryor damage.– If you are unable to understand the warnings,cautions or instructions, contact a health careprofessional or provider before attempting touse this equipment.
– Do not use this product or any availableoptional equipment without first completelyreading and understanding these instructionsand any additional instructional material suchas user manual, service manual or instructionsheet supplied with this product or optionalequipment.
8 1654649-D
Safety
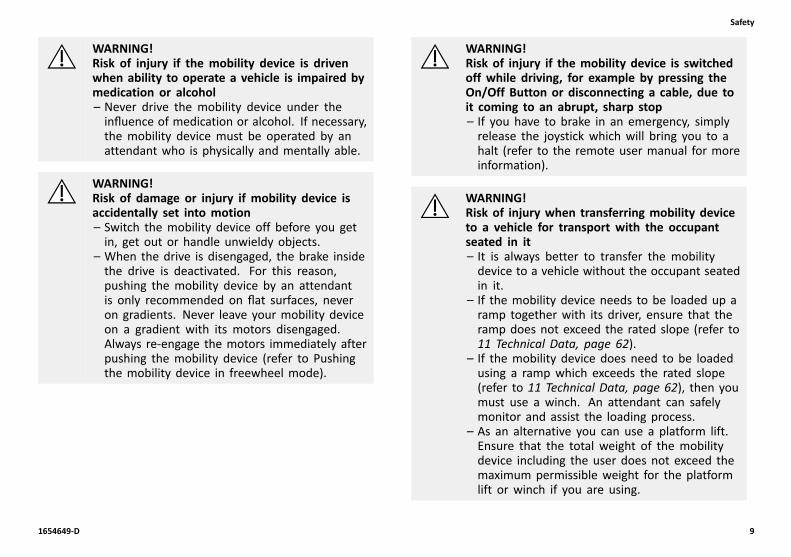
WARNING!Risk of injury if the mobility device is drivenwhen ability to operate a vehicle is impaired bymedication or alcohol– Never drive the mobility device under theinfluence of medication or alcohol. If necessary,the mobility device must be operated by anattendant who is physically and mentally able.
WARNING!Risk of damage or injury if mobility device isaccidentally set into motion– Switch the mobility device off before you getin, get out or handle unwieldy objects.
– When the drive is disengaged, the brake insidethe drive is deactivated. For this reason,pushing the mobility device by an attendantis only recommended on flat surfaces, neveron gradients. Never leave your mobility deviceon a gradient with its motors disengaged.Always re-engage the motors immediately afterpushing the mobility device (refer to Pushingthe mobility device in freewheel mode).
WARNING!Risk of injury if the mobility device is switchedoff while driving, for example by pressing theOn/Off Button or disconnecting a cable, due toit coming to an abrupt, sharp stop– If you have to brake in an emergency, simplyrelease the joystick which will bring you to ahalt (refer to the remote user manual for moreinformation).
WARNING!Risk of injury when transferring mobility deviceto a vehicle for transport with the occupantseated in it– It is always better to transfer the mobilitydevice to a vehicle without the occupant seatedin it.
– If the mobility device needs to be loaded up aramp together with its driver, ensure that theramp does not exceed the rated slope (refer to11 Technical Data, page 62).
– If the mobility device does need to be loadedusing a ramp which exceeds the rated slope(refer to 11 Technical Data, page 62), then youmust use a winch. An attendant can safelymonitor and assist the loading process.
– As an alternative you can use a platform lift.Ensure that the total weight of the mobilitydevice including the user does not exceed themaximum permissible weight for the platformlift or winch if you are using.
1654649-D 9

Invacare® AVIVA™ RX Series
WARNING!Risk of falling out of the mobility device– Do not slide forward on the seat, do not leanforward between your knees, do not leanbackwards out over the top of the backrest, forexample to reach an object.
– If a posture belt is installed, it should becorrectly adjusted and used each time you usethe mobility device.
– When transferring to a different seat, positionthe mobility device as close as possible to thenew seat.
WARNING!Risk of Serious Injury or DamageStoring or using the mobility device near openflame or combustible products can result inserious injury or damage.– Avoid storing or using the mobility device nearopen flame or combustible products.
CAUTION!Risk of injury if maximum permissible load isexceeded– Do not exceed the maximum permissible load(refer to 11 Technical Data, page 62).
– The mobility device is only designed for use bya single occupant whose maximum weight doesnot exceed the maximum permissible load ofthe device. Never use the mobility device totransport more than one person.
CAUTION!Risk of injury due to wrong lifting or droppingof heavy components– When maintaining, servicing or lifting any partof your mobility device, take into account theweight of the individual components especiallythe batteries. Be sure at all times to adopt thecorrect lifting posture and ask for assistanceif necessary.
CAUTION!Risk of injury by moving parts– Make sure that no injury is incurred by movingparts of the mobility device, like wheels or oneof the lifter modules (if fitted), especially whenchildren are around.
CAUTION!Risk of injury from hot surfaces– Do not leave the mobility device in directsunlight for prolonged periods. Metal partsand surfaces such as the seat and armrests canbecome very hot.
10 1654649-D

Safety
CAUTION!Risk of fire or breaking down due to electricdevices being connected– Do not connect any electric devices to yourmobility device that are not expressly certifiedby Invacare for this purpose. Have all electricalinstallations done by your authorized Invacareprovider.
2.2 Safety Information on the Electrical System
WARNING!Risk of death, serious injury or damageMisuse of the mobility device may cause themobility device to start smoking, sparking, orburning. Death, serious injury, or damage mayoccur due to fire.– DO NOT use the mobility device other than itsintended purpose.
– If the mobility device starts smoking, sparking,or burning, discontinue using the mobilitydevice and seek service IMMEDIATELY.
WARNING!Risk of fireSwitched on lamps produce heat. If you coverthe lamps with fabrics such as clothes, there is arisk that the fabric may catch fire.– NEVER cover the light system with fabric.
WARNING!Risk of death, serious injury or damage whencarrying along oxygen systemsTextiles and other materials that normally wouldnot burn are easily ignited and burn with greatintensity in oxygen enriched air.– Check the oxygen tubing daily, from thecylinder to the delivery site, for leaks and holdaway from electrical sparks and any source ofignition.
WARNING!Risk of injury or damage due to electrical shortsConnector pins on cables connected to the powermodule can still be live even when the systemis off.– Cables with live pins should be connected,restrained or covered (with non-conductivematerials) so that they are not exposed tohuman contact or materials that could causeelectrical shorts.
– When cables with live pins have to bedisconnected, for example, when removing thebus cable from the remote for safety reasons,make sure to restrain or cover the pins (withnon-conductive materials).
1654649-D 11

Invacare® AVIVA™ RX Series
WARNING!Risk of death, serious injury, or damageCorroded electrical components due to water orliquid exposure can result in death, serious injury,or damage.– Minimize exposure of electrical components towater and/or liquids.
– Electrical components damaged by corrosionMUST be replaced immediately.
– Mobility devices that are frequently exposedto water/liquids may require replacement ofelectrical components more frequently.
WARNING!Risk of death or serious injuryFailure to observe these warnings can cause anelectrical short resulting in death, serious injury,or damage to the electrical system.– The POSITIVE (+) RED battery cable MUSTconnect to the POSITIVE (+) batteryterminal(s)/post(s). The NEGATIVE (-) BLACKbattery cable MUST connect to the NEGATIVE(-) battery terminal(s)/post(s).
– NEVER allow any of your tools and/or batterycable(s) to contact BOTH battery post(s) at thesame time. An electrical short may occur andserious injury or damage may occur.
– Install protective caps on positive and negativebattery terminals.
– Replace cable(s) immediately if cable(s)insulation becomes damaged.
– DO NOT remove fuse or mounting hardwarefrom POSITIVE (+) red battery cable mountingscrew.
WARNING!Risk of death or serious injuryElectric shock can cause death or serious injury– To avoid electric shock, inspect plug and cordfor cuts and/or frayed wires. Replace cut cordsor frayed wires immediately.
12 1654649-D

Safety
Risk of damage to the mobility deviceA failure in the electric system can lead tounusual behavior such as continuous light, nolight, or noises from the magnetic brakes.– If a failure exists, switch off the remote andswitch it on again.
– If a failure still exists, then disconnect orremove the power source. Depending on themobility device model, you can either removethe battery packs or disconnect the batteriesfrom the power module. If in doubt whichcable to disconnect, contact your provider.
– In any case, contact your provider.
2.3 Safety Information on ElectromagneticInterferenceThis powered mobility device was successfully tested inaccordance with International standards as to its compliancewith Electromagnetic Interference (EMI) regulations.However, electromagnetic fields, such as those generated byradio and television transmitters, and cellular phones caninfluence the functions of powered mobility devices. Also,the electronics used in our mobility devices can generate alow level of electromagnetic interference, which howeverwill remain within the tolerance permitted by law. Forthese reasons we ask you to please observe the followingprecautions:
WARNING!Risk of malfunction due to electromagneticinterference– Do not switch on or operate portabletransceivers or communication devices (such asradio transceivers or cellular phones) when themobility device is switched on.
– Avoid getting near strong radio and televisiontransmitters.
– In case the mobility device should be setin motion unintentionally or the brakes arereleased, switch it off immediately.
– Adding electrical accessories and othercomponents or modifying the mobility devicein any way can make it susceptible toelectromagnetic interference. Keep in mindthat there is no sure way to determine theeffect such modifications will have on theoverall immunity of the electronic system.
– Report all occurrences of unintentionalmovement of the mobility device, or release ofthe electric brakes to the manufacturer.
1654649-D 13

Invacare® AVIVA™ RX Series
2.4 Safety Information on Driving and FreewheelMode
DANGER!Risk of death, serious injury, or damageMalfunctioning joystick could causeunintended/erratic movement resulting indeath, serious injury, or damage– If unintended/erratic movement occurs, stopusing the wheelchair immediately and contacta qualified technician.
14 1654649-D

Safety
WARNING!Risk of injury if the mobility device tips over– Inclines and declines can only be travelledup to the maximum safe slope (refer to 11Technical Data, page 62).
– Always return the backrest of your seat or theseat tilt to an upright position before ascendingslopes. We recommend that you position theseat backrest and the seat tilt (if fitted) slightlyto the rear before descending slopes.
– Only ever drive downhill at a maximum of 2/3of the top speed. Avoid abrupt braking oraccelerating on gradients.
– If at all possible, avoid driving on wet, slippery,icy, or oily surfaces (such as snow, gravel, iceetc.) where there is a risk of you losing controlover the vehicle, especially on a gradient.This may include certain painted or otherwisetreated wood surfaces. If driving on such asurface is inevitable, then always drive slowlyand with the utmost caution.
– Never attempt to overcome an obstacle whenon an uphill or downhill gradient.
– Never attempt to drive up or down a flight ofsteps with your mobility device.
– When overcoming obstacles, always observethe maximum obstacle height (refer to 11Technical Data, page 62 and information aboutovercoming obstacles in 6.5 Taking Obstacles,page 35).
– Avoid shifting your centre of gravity as wellas abrupt joystick movements and changes ofdirection when the mobility device is in motion.
WARNING!Risk of injury if the mobility device tips over(continued)– Never use the mobility device to transportmore than one person.
– Do not exceed the overall maximum permissibleload or the maximum load per axle (refer to 11Technical Data, page 62).
– Note that the mobility device will brake oraccelerate if you change the driving modewhilst the mobility device is in motion.
WARNING!Risk of serious injury or damageImproper positioning while leaning or bendingcould cause the wheelchair to tip forwardresulting in serious injury or damage– To assure stability and proper operation of yourmobility device, you must at all times maintainproper balance. Your power wheelchair hasbeen designed to remain upright and stableduring normal daily activities as long as you DONOT move beyond the centre of gravity.
– DO NOT lean forward out of the mobility deviceany further than the length of the armrests.
– DO NOT attempt to reach objects if you haveto move forward in the seat or pick them upfrom the floor by reaching down between yourknees.
1654649-D 15

Invacare® AVIVA™ RX Series
WARNING!Risk of breaking down in adverse weatherconditions, i.e. extreme cold, in an isolated area– If you are a user with severely limited mobility,we advise that in the case of adverse weatherconditions DO NOT attempt a journey withoutan accompanying attendant.
WARNING!Risk of injury if your foot slides off the footrestand gets caught underneath the mobility devicewhen it is in motion– Make sure each time before you drive themobility device that your feet are squarely andsecurely in place on the footplates, and thatboth legrests are properly locked into place.
WARNING!Risk of injury if you collide with an obstaclewhen driving through narrow passages such asdoorways and entrances– Drive through narrow passages in the lowestdriving mode and with due caution.
WARNING!Risk of injuryIf your mobility device has been fitted withelevating legrests, there is a risk of personalinjury and damage to the mobility device if youdrive the mobility device with the legrests raised.– To avoid unwanted displacement of the mobilitydevice centre of gravity to the front (especiallywhen travelling downhill) and in order toavoid damage to the mobility device, elevatinglegrests must always be lowered during normaltravelling.
WARNING!Tipping hazard if antitippers are removed,damaged or changed to a position different tothe factory settings– Antitippers should only ever be removed fordismantling the mobility device for transport ina vehicle or for storage.
– The antitippers must always be fitted if themobility device is being used.
16 1654649-D

Safety
WARNING!Risk of tippingAntitippers (stabilizers) are only effective on firmground. They sink in on soft ground such asgrass, snow or mud if the mobility device restsitself on them. They lose their effect and themobility device can tip over.– Only drive with extreme care on soft ground,especially during uphill and downhill journeys.In the process pay increased attention to thetip stability of the mobility device.
2.5 Safety Information With Regard to Care andMaintenance
WARNING!Risk of death, serious injury, or damageIncorrect repair and/or servicing of this mobilitydevice performed by users/caregivers orunqualified technicians can result in death,serious injury, or damage.– DO NOT attempt to carry out maintenancework that is not described in this user manual.Such repair and/or service MUST be performedby a qualified technician. Contact a provideror Invacare technician.
CAUTION!Risk of accident and loss of warranty ifmaintenance is insufficient– For reasons of safety and in order to avoidaccidents which result from unnoticed wear, itis important that this mobility device undergoesan inspection once every year under normaloperating conditions (see inspection plancontained in service instructions).
– Under difficult operating conditions such asdaily travel on steep slopes, or in the caseof use in medical care cases with frequentlychanging mobility device users, it would beexpedient to carry out intermediate checks onthe brakes, accessories and running gear.
– If the mobility device is to be operated onpublic roads, the vehicle driver is responsiblefor ensuring that it is in an operationally reliablecondition. Inadequate or neglected care andmaintenance of the mobility device will resultin a limitation of the manufacturer's liability.
1654649-D 17

Invacare® AVIVA™ RX Series
2.6 Safety Information Regarding Changes andModifications to the Mobility Device
WARNING!Risk of serious injury or damageUse of incorrect or improper replacement(service) parts may cause injury or damage– Replacement parts MUST match originalInvacare parts.
– Always provide the wheelchair serial number toassist in ordering the correct replacement parts.
CAUTION!Risk of injuries and damage to mobility devicedue to unapproved components and accessorypartsSeating systems, additions and accessory partswhich have not been approved by Invacare foruse with this mobility device can affect thetipping stability and increase tipping hazards.– Only ever use seating systems, additions andaccessory parts which have been approved byInvacare for this mobility device.
Seating systems which are not approved byInvacare for use with this mobility device donot, under certain circumstances, comply withthe valid standards and could increase theflammability and the risk of skin irritation.– Only use seating systems that have beenapproved by Invacare for this mobility device.
Electrical and electronic components which havenot been approved by Invacare for use with thismobility device can cause fire hazards and leadto electromagnetic damage.– Only ever use electrical and electroniccomponents which have been approved byInvacare for this mobility device.
Batteries which have not been approved byInvacare for use with this mobility device cancause chemical burns.– Only ever use batteries which have beenapproved by Invacare for this mobility device.
18 1654649-D

Safety
CAUTION!Risk of injuries, and damage to the mobilitydevice, if unapproved backrests are usedA retrofitted backrest which is not approved byInvacare for use with this mobility device mayoverload the backrest tube and thus increase therisk of injuries and of damage to the mobilitydevice.– Please contact your Invacare specialist providerwho will perform risk analyses, calculations,stability checks etc. to ensure that the backrestcan be used safely.
CE marking of the mobility device– The conformity assessment/CE marking wascarried out according to the respective validregulations and only applies to the completeproduct.
– The CE marking is invalidated if components oraccessories are replaced or added that havenot been approved for this product by Invacare.
– In this case, the company that adds or replacesthe components or accessories is responsiblefor the conformity assessment/CE marking orfor registering the mobility device as a specialdesign and for the relevant documentation.
Important information about maintenance worktools– Some maintenance work which is described inthis manual and can be carried out by the userwithout problems require the correct tools forproper work. If you do not have the correcttool available we do not recommend that youtry to carry out the relevant work. In this case,we urgently recommend that you contact anauthorized specialist workshop.
2.7 Safety Information on Wheelchairs with aLifter
WARNING!Risk of injury by moving parts– Never let objects get caught in the spaceunderneath a raised lifter.
– Make sure that neither you nor anyone else isinjured by placing hands, feet or other bodyextremities under the raised seat.
– Should you not be able to view under the seat,for example, due to limited manoeuvrability,turn the wheelchair once on its own axle beforeyou lower the seat. This will allow you to makesure that nobody is located in the danger zone.
1654649-D 19

Invacare® AVIVA™ RX Series
CAUTION!Risk of injury if the wheelchair tips over– Never exceed the maximum permissible load(see chapter 11 Technical Data, page 62).
– Avoid dangerous driving situations when thelifter is in a raised position, such as trying toovercome obstacles like curbs or driving up ordown steep gradients.
– Never lean out of the seat when the lifter israised.
– Inspect the lifter module at least once a monthto make sure the automatic speed reductionfunction, which reduces the speed of thewheelchair when the lifter is raised, is workingproperly (see chapter The Lifter). Notify yourauthorized provider immediately if it is notworking properly.
CAUTION!Risk of malfunction of the lifter module– Inspect the lifter module at regular intervalsto make sure there are no foreign objects orvisible damage, and to make sure the electricplugs are firmly inserted into their sockets.
CAUTION!Damage to wheelchair caused by one-sidedloading on lifter pillar– One-sided loading occurs if the seat is raisedand/or tilted. Always return your seat backrestto the upright position and the seat tilting tothe horizontal position before ascending slopes.Never subject the lifter pillar to continuoussingle-sided loading. The raising and tiltingfunction of the seat only provides additionalrest positions.
Important information regarding speed reductionwith raised lifter– If the lifter has been raised above a certainpoint, the drive electronics considerablyreduces the speed of the wheelchair. If speedreduction has been activated, drive mode canonly be used to carry out minor movements ofthe wheelchair and not for regular driving. Todrive normally, lower the lifter until the speedreduction has been deactivated again. Seechapter The Lifter for details.
20 1654649-D

Product Overview
3 Product Overview
3.1 Product DescriptionThe AVIVA RX is a power wheelchair that can be establishedwith a multitude of configurations.
The AVIVA RX20 is the basic model with limitedconfigurations.
The AVIVA RX40 is equipped with a 120 A power moduleand a 60 Ah battery by default. The AVIVA RX40 also hasmore powered seating functions available and is moreconfigurable.
The AVIVA RX40HD is equipped with a 120 A power moduleand a 60 Ah battery by default. The AVIVA RX40HD also hasa HD suspension (additional suspension) available so themaximum user weight can be up to 160 kg.
3.2 Intended UseThis mobility device was designed for persons whose abilityto walk is impaired, but who are still in terms of theireyesight and physically and mentally able to operate anelectric mobility device.
3.3 IndicationsThe use of this power wheelchair is recommended for thefollowing indications:
• The inability or a greatly restricted ability to walk withinthe scope of the basic requirement to be able to movewithin one’s own four walls.
• The need to leave the dwelling place in order to getsome fresh air during a short walk or to reach thoseplaces generally to be found at close distance to thedwelling and where everyday business is carried out.
Provision of power wheelchairs for interior and exteriorareas is advisable if the use of hand-operated wheelchairs isno longer possible on account of the disability, yet properoperation of an electromotive drive unit is still practicable.
Contraindications
There are no contraindications known.
3.4 Type ClassificationThis vehicle has been classified according to EN 12184 as aclass B mobility product (for indoor and outdoor areas). Itis therefore compact and agile enough for indoor areas, butalso able to overcome many obstacles in outdoor areas.
1654649-D 21

Invacare® AVIVA™ RX Series
3.5 Labels on Product
Fig. 3-1
A If the mobility deviceis fitted with a tray,it is imperative that itis removed and safelystowed when transportingthe mobility device in avehicle.
B Identification of the tie-down points at the front andback:
If the symbol appears ona bright yellow sticker, theanchoring point is suitablefor fixation of the mobilitydevice in a vehicle for useas a vehicle seat.
C Warning that the mobilitydevice may not be usedas a vehicle seat
This mobility devicedoes not satisfy therequirements of ISO7176-19.
D Identification label stickeron the chassis at theright.
For details see below.
E Warning regarding theuse of the lifter.
For details see below.
F Indication of themaximum width to whichthe armrest can be set
G Battery wiring diagramlabel
22 1654649-D

Product Overview
H Identification of theposition of the couplinglever for driving and pushoperation (only the rightside visible in the picture).
For details see below.
I Indication not to strainback with more than 6 kg.
J Indication of pinch pointsthat could occur on themobility device.
K Identification of theON/OFF position of thecircuit breaker switch (onthe left side of mobilitydevice).
For details see below.
L Maximum speed label onthe remote.
The maximum speed isreduced to 3 km/h.
Explanation of Symbols on Labels
Manufacturer
Date of manufacture
European Conformity
Medical device
Serial number
WEEE Conformity
Do not lean out when the lifter is raised!
Do not drive up or down slopes when thelifter is raised!
Do not allow any body parts to get under araised seat!
1654649-D 23

Invacare® AVIVA™ RX Series
Never drive with two people!
Never drive over uneven surfaces when thelifter is raised!
This symbol indicates the “Drive” positionof the coupling lever. In this position themotor is engaged and the motor brakesare operational. You can drive the mobilitydevice.
• Note that for driving purposes bothmotors must always be engaged.
This symbol indicates the “Push” positionof the coupling lever. In this position themotor is disengaged and the motor brakesare not operational. The mobility device canbe pushed by an attendant and the wheelsturn freely.
• Note that the remote must be switchedoff.
• Also note the information provided insection 6.8 Pushing the mobility devicein freewheel mode, page 37.
This symbol indicates the OFF position of thecircuit breaker switch. In this position thebattery source is isolated and the mobilitydevice cannot be operated or charged.
This symbol indicates the ON position ofthe circuit breaker switch. In this positionthe battery source is connected and themobility device can be operated or charged.
This symbol indicates the circuit breaker.
Read the user manual. This symbol appearson the identification label.
Read the user manual. This symbol appearson different labels and positions.
24 1654649-D

Product Overview
3.6 Main Parts of Wheelchair
Fig. 3-2
A Remote
B Legrests
C Castor wheels
D Drive wheels
E Lever for disengaging motor (only visible onright-hand side of picture)
F Push handle
G Headrest (optional)
H Armrest
3.7 User InputsYour mobility device may be fitted with one of severaldifferent user inputs. For information on the differentfunctions and how to operate a particular user input, referto its corresponding user manual (enclosed).
3.8 The LifterThe electric lifter is operated from the remote. Refer to theremote manual for more information.
Information regarding operation of the lifter attemperatures of less than 0 °C• Invacare mobility devices are fitted with safety
mechanisms that prevent capacity overloadof the electronic components. At operatingtemperatures below freezing point this can, inparticular, lead to the lifter actuator being shutdown after approx. 1 second operating time.
• The lifter can be raised or lowered gradually byrepeatedly operating the joystick. In many casesthis generates sufficient heat for the actuatorto operate as normal.
1654649-D 25
Invacare® AVIVA™ RX Series
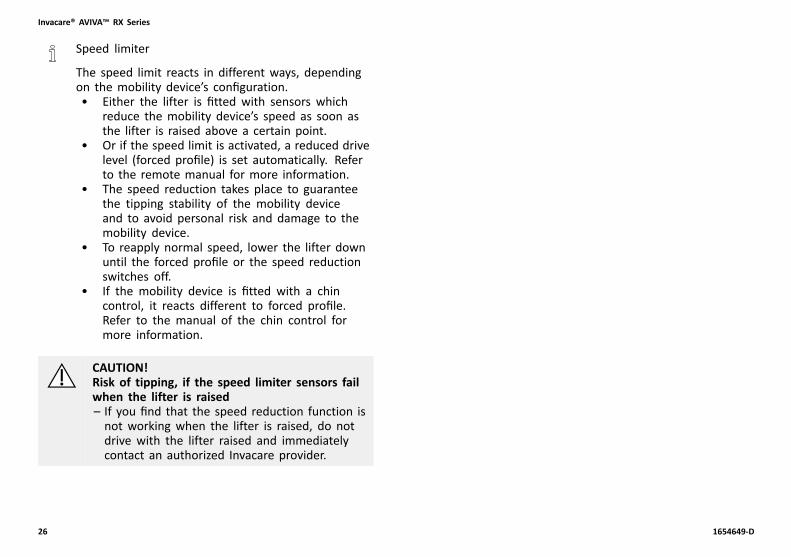
Speed limiter
The speed limit reacts in different ways, dependingon the mobility device’s configuration.• Either the lifter is fitted with sensors which
reduce the mobility device’s speed as soon asthe lifter is raised above a certain point.
• Or if the speed limit is activated, a reduced drivelevel (forced profile) is set automatically. Referto the remote manual for more information.
• The speed reduction takes place to guaranteethe tipping stability of the mobility deviceand to avoid personal risk and damage to themobility device.
• To reapply normal speed, lower the lifter downuntil the forced profile or the speed reductionswitches off.
• If the mobility device is fitted with a chincontrol, it reacts different to forced profile.Refer to the manual of the chin control formore information.
CAUTION!Risk of tipping, if the speed limiter sensors failwhen the lifter is raised– If you find that the speed reduction function isnot working when the lifter is raised, do notdrive with the lifter raised and immediatelycontact an authorized Invacare provider.
26 1654649-D

Accessories
4 Accessories
4.1 Posture BeltsA posture belt is an option which can either be fixed tothe mobility device ex-works or can be retrofitted by yourspecialist provider. If your mobility device is fitted with aposture belt, your specialist provider will have informed youabout fitting and usage.
The posture belt is used to help the mobility device userkeep an optimum seating position. Correct use of thebelt assists the user in sitting securely, comfortably andwell-positioned in the mobility device, especially for suchusers who do not have such a good sense of balance whilesitting.
We recommend using the posture belt whenever themobility device is used.
4.1.1 Types of posture belts
Your mobility device can be fitted with the following posturebelt types ex-works. If your mobility device has been fittedwith a different belt to those listed below, please ensurethat you have received the manufacturer's documentationwith regard to correct fitting and use.
Belt with metal buckle, adjustable both sides
Belt can be adjusted on both sides. This means that thebuckle can be centrally positioned.Belt with plastic buckle, adjustable both sides
Belt can be adjusted on both sides. This means that thebuckle can be centrally positioned.
1654649-D 27

Invacare® AVIVA™ RX Series
Harness with metal buckle, adjustable on both sides
Harness can be adjusted on both sides. This ensures thatthe buckle is always centrally positioned.
4.1.2 Adjusting Posture Belt Correctly
The belt should be tight enough to ensure that youare sitting comfortably and that your body is in thecorrect sitting position.
1. Ensure that you are sitting correctly, which means thatyou are sitting right at back of seat, your pelvis ispositioned erect and as symmetrically as possible, notto front, to side or at one edge of seat.
2. Position posture belt so that your hipbones can beeasily felt above belt.
3. Adjust belt length using one of adjustment aidsdescribed above. The belt should be adjusted so thatyou can fit a flat hand between belt and your body.
4. Buckle should be positioned as centrally as possible. Indoing so, carry out adjustments on both sides as muchas possible.
5. Check your belt every week to ensure that it is still ingood working condition, to ensure it has no damage orwear, and that it is fixed properly to mobility device. Ifbelt is only fastened with a bolted connection, ensurethat connection has not loosened or come undone. Youcan find more information about maintenance work onbelts in the service manual, which is available fromInvacare.
4.2 Using Cane HolderIf your mobility device is fitted with a cane holder, it can beused for the safe transport of a walking cane, underarmor forearm crutches. The cane holder consists of a plasticcontainer (bottom) and a hook-and-loop fastener (top).
CAUTION!Risk of InjuryA walking cane or crutches that are not securedduring transport (on the user's lap, for example)can cause injury to the user or other persons.– During transport, walking canes or crutchesshould always be secured using a cane holder.
28 1654649-D
Accessories
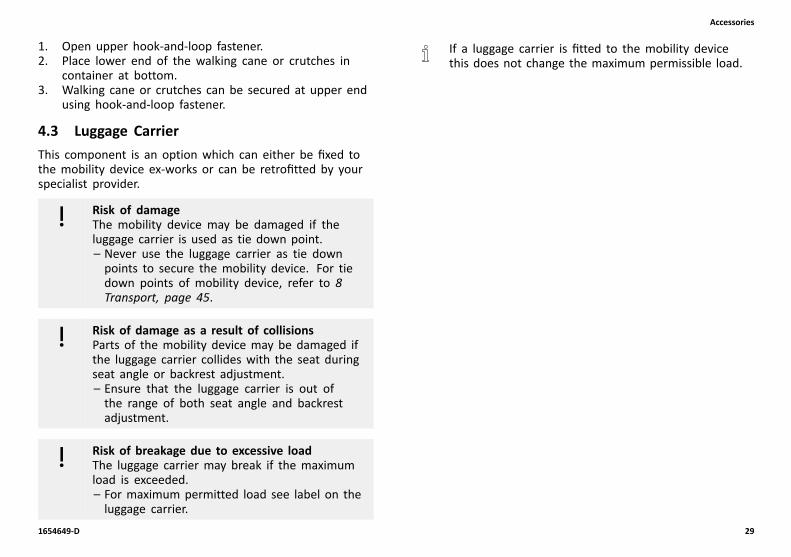
1. Open upper hook-and-loop fastener.2. Place lower end of the walking cane or crutches in
container at bottom.3. Walking cane or crutches can be secured at upper end
using hook-and-loop fastener.
4.3 Luggage CarrierThis component is an option which can either be fixed tothe mobility device ex-works or can be retrofitted by yourspecialist provider.
Risk of damageThe mobility device may be damaged if theluggage carrier is used as tie down point.– Never use the luggage carrier as tie downpoints to secure the mobility device. For tiedown points of mobility device, refer to 8Transport, page 45.
Risk of damage as a result of collisionsParts of the mobility device may be damaged ifthe luggage carrier collides with the seat duringseat angle or backrest adjustment.– Ensure that the luggage carrier is out ofthe range of both seat angle and backrestadjustment.
Risk of breakage due to excessive loadThe luggage carrier may break if the maximumload is exceeded.– For maximum permitted load see label on theluggage carrier.
If a luggage carrier is fitted to the mobility devicethis does not change the maximum permissible load.
1654649-D 29

Invacare® AVIVA™ RX Series
5 Setup
5.1 General Setup InformationFor more information about setup, see the user manual ofthe seating system.
30 1654649-D

Usage
6 Usage
6.1 DrivingThe maximum load capacity that is stated in thetechnical data only states that the system is designedfor this mass in total. However, this does not meanthat one can sit a person with this body weight inthe mobility device without restrictions. Attentionmust be paid to the body proportions, such asheight, weight distribution, abdominal belt, legand calf strap and seat depth. These factors havea strong influence on driving features such as tiltstability and traction. The permissible axle loads inparticular must be adhered to (refer to 11 TechnicalData, page 62). It may possibly be necessary to carryout adaptations to the seat system.
6.2 Before Driving for First TimeBefore you take your first trip, you should familiarise yourselfwell with the operation of the mobility device and with alloperating elements. Take your time to test all functionsand driving modes.
If installed, make sure to properly adjust and use theposture belt each time you use the mobility device.
Sitting comfortably = Driving safely
Before each trip, make sure that:• You are within easy reach of all operating controls.• The battery charge is sufficient for the distance you
intend to travel.
• The posture belt (if installed) is in perfect order.• The rear mirror (if installed) is adjusted so you can look
behind at all times without having to bend forward orshift your seating position.
6.3 Parking and StationaryWhen parking your mobility device or if your mobility deviceis stationary for a prolonged period:
1. Switch the mobility device’s power system off (ON-/OFFkey).
2. Activate your anti-theft lock, if existing.
6.3.1 Using Manual Wheel Locks
The mobility device is equipped with automatic brakes toprevent any unintentional movement, e.g. stopping on anincline or pushing the wheelchair.
Your mobility device can also be equipped with manualwheel locks. These prevent the mobility device from rockingduring transport, for example in the case of play in thetransmission.
Fig. 6-1
1654649-D 31

Invacare® AVIVA™ RX Series
Engaging Manual Wheel Lock
1. Push lever A forwards.
Disengaging Manual Wheel Lock
1. Pull lever A backwards.
6.3.2 Cleaning Battery Terminals
WARNING!– Most batteries are not sold with instructions.However, warnings are frequently noted on thecell caps. Read them carefully.
– DO NOT allow the liquid in the battery tocome in contact with skin, clothes or otherpossessions. It is a form of acid and harmful ordamaging burns may result. Should the liquidtouch your skin, wash the area IMMEDIATELYand thoroughly with cool water. In seriouscases or if eye contact is made, seek medicalattention IMMEDIATELY.
1. Examine battery terminals for corrosion.2. Verify the plastic caps are in place over battery cell
holes.3. Clean terminals by using a battery cleaning tool, wire
brush, or medium grade sand paper.Upon completion, areas should be shiny, notdull.
4. Carefully dust off all metal particles.
6.4 Getting in and out of Mobility Device
– The armrest must be removed or swiveledup in order to get into or out of the mobilitydevice from the side.
6.4.1 Removing Standard Armrest for Side Transfer
This chapter relates to the standard armrest. Formore information about other armrests, see the usermanual of the seating system.
Depending on version, the armrest is fixed with one ofseveral fastener options:
• Clamping lever• Hand screw• Locking pin• Locking screw
The graphic below serves as an example.
Depending on which side the remote is installed on, youneed to disconnect the remote cable before removing thearmrest.
32 1654649-D

Usage
Fig. 6-2
1. Pull plug A of remote cable to disconnect remote.2. If necessary, remove remote cable from clip B.3. Loosen fastener C.4. Remove armrest from holder.
6.4.2 Information About Getting in and out
Fig. 6-3
WARNING!Risk of serious injury or damageImproper transfer techniques may cause seriousinjury or damage– Before attempting transfers, consult ahealthcare professional to determine propertransfer techniques for the user and type ofwheelchair.
– Follow the instructions below.
If you do not have sufficient muscle strength, youshould ask other persons for help. Use a slidingboard, if possible.
Getting into Mobility Device:
1. Position your mobility device as close as possible toyour seat. This might have to be done by an attendant.
2. Align casters parallel to drive wheels to improve stabilityduring transfer.
3. Always switch your mobility device off.4. Always engage both motor locks/clutches and free
wheel hubs (if fitted) to prevent wheels from moving.5. Depending on armrest type of your mobility device,
detach armrest or swivel it up.6. Now slide into mobility device.
Getting out of Mobility Device:
1. Position your mobility device as close as possible toyour seat.
2. Align casters parallel to drive wheels to improve stabilityduring transfer.
3. Always switch your mobility device off.1654649-D 33

Invacare® AVIVA™ RX Series
4. Always engage both motor locks/clutches and freewheel hubs (if fitted) to prevent wheels from moving.
5. Depending on armrest type of your mobility device,detach armrest or swivel it up.
6. Now slide onto your new seat.
6.4.3 Swivelling Nucleus Midline Holder to Side
1. Push button A and swivel up or down nucleus.
6.4.4 Swivelling Swing-Away Display Holder to Side
The swing-away display holder only locks in placewhen swivelled to its default position. 1. Push knob A and swivel display holder to side.
6.4.5 Swivelling Chin Control to Side
1.
Press locking device C (behind headrest) and swiveljoystick or egg switch inwards or outwards until it clicksin place.
34 1654649-D
Usage
6.5 Taking Obstacles6.5.1 Maximum Obstacle Height
You can find information about maximum obstacle heights inthe chapter entitled 11 Technical Data, page 62.
6.5.2 Safety Information When Taking Obstacles
CAUTION!Risk of tipping over– Never approach obstacles at an angle but at 90degrees as shown below.
– Approach obstacles followed by a gradient withcaution. If unsure whether the gradient is toosteep or not, move away from the obstacle andif possible try to find another location.
– Never approach obstacles on an uneven and/orloose ground.
– Never drive with too low tire pressure.– Put your backrest into an upright positionbefore ascending an obstacle.
CAUTION!Risk of falling out of the mobility device anddamage to the mobility device such as brokencasters– Never approach obstacles that are higher thanthe maximum climbable obstacle height.
– Never let the footrest/legrest touch the groundwhen descending an obstacle.
– If unsure whether taking an obstacle is possibleor not, move away from the obstacle and ifpossible find another location.
6.5.3 Correct Way to Take Obstacles
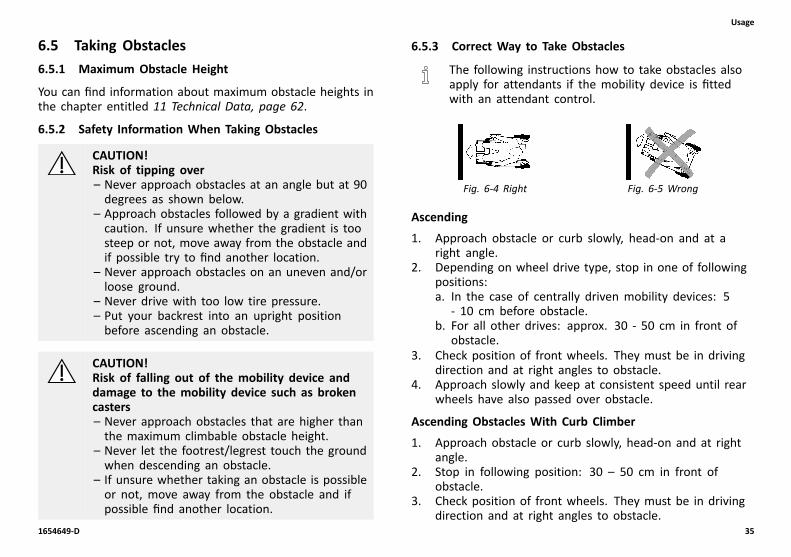
The following instructions how to take obstacles alsoapply for attendants if the mobility device is fittedwith an attendant control.
Fig. 6-4 Right Fig. 6-5 Wrong
Ascending
1. Approach obstacle or curb slowly, head-on and at aright angle.
2. Depending on wheel drive type, stop in one of followingpositions:a. In the case of centrally driven mobility devices: 5
- 10 cm before obstacle.b. For all other drives: approx. 30 - 50 cm in front of
obstacle.3. Check position of front wheels. They must be in driving
direction and at right angles to obstacle.4. Approach slowly and keep at consistent speed until rear
wheels have also passed over obstacle.
Ascending Obstacles With Curb Climber
1. Approach obstacle or curb slowly, head-on and at rightangle.
2. Stop in following position: 30 – 50 cm in front ofobstacle.
3. Check position of front wheels. They must be in drivingdirection and at right angles to obstacle.
1654649-D 35

Invacare® AVIVA™ RX Series
4. Approach with full speed until curb climber makescontact with obstacle. Impetus will lift both frontwheels over obstacle.
5. Keep at consistent speed until rear wheels have alsopassed over obstacle.
Descending
The approach to descend an obstacle is the same as toascend it with the difference that you need not to stopbefore descending.
1. Descend obstacle with medium speed.When descending an obstacle too slowly it couldhappen that the antitippers get stuck and lift thedrive wheels off the ground. Driving the mobilitydevice is then no longer possible.
6.6 Driving up and down GradientsFor information concerning the maximum safe slope, referto 11 Technical Data, page 62.
CAUTION!Risk of tipping over– Only ever drive downhill at a maximum of 2/3of the top speed. Avoid sudden changes ofdirection or abrupt braking when driving onslopes.
– Always return the backrest of your seat or theseat tilt (if adjustable seat tilt is available) toan upright position before ascending slopes.We recommend that you position the seatbackrest or the seat tilt slightly to the rearbefore descending slopes.
– Always lower the lifter (if fitted) to its lowestposition before ascending or descending aslope.
– Never attempt to ascend or descend a slopeon slippery surfaces or where there is a risk ofskidding (such as wet pavement, ice etc).
– Avoid trying to get out of the mobility deviceon an incline or a gradient.
– Always drive straight in the direction theroad or path you are on goes, rather thanattempting to zigzag.
– Never attempt to turn around on an incline ora slope.
CAUTION!Braking distance is much longer on a downhillslope than on even terrain– Never drive down a slope that exceeds therated slope (refer to 11 Technical Data, page62).
36 1654649-D
Usage
6.7 Use on Public RoadsIf you wish to use your mobility device on public roads andlighting is required by national legislation, then your mobilitydevice needs to be fitted with an appropriate lighting system.
Contact your Invacare provider if you have any questions.
6.8 Pushing the mobility device in freewheelmodeThe motors of the mobility device are equipped withautomatic brakes, preventing that the mobility device startsrolling out of control when the remote is switched off. Whenpushing the mobility device manually whilst freewheeling,the magnetic brakes must be disengaged.
Pushing the mobility device by hand may requiremore physical force than expected (more than 100N). The necessary force nevertheless complies withthe requirements of ISO 7176-14.
The intended use of the freewheel mode is tomaneuver the mobility device over short distances.The push handles or push bars support this function,but be aware that there might be some impairmentbetween the feet of the assistant and the rear partof the mobility device.
6.8.1 Disengaging Motors
CAUTION!Risk of the mobility device running away– When the motors are disengaged (forpush operation whilst freewheeling), theelectromagnetic motor brakes are deactivated.When the mobility device is parked, the leversfor engaging and disengaging the motorsmust without fail be locked firmly into the"DRIVE" position (electromagnetic motor brakesactivated).
The motors may only be disengaged by an attendant,not by the user.
This ensures that the motors are only disengagedif an attendant is available to secure the mobilitydevice and prevent unintended rolling.
The engaging turn knobs for disengaging the motors arelocated on each motor.
1654649-D 37

Invacare® AVIVA™ RX Series
Fig. 6-6
1. Switch off remote.2. Turn engaging turn knob A clockwise B.
Motor is disengaged.3. Turn engaging turn knob counterclockwise C.
Motor is engaged.
38 1654649-D
Controls System
7 Controls System
7.1 Controls Protection SystemThe wheelchair controls system is fitted with an overloadprotection.
If the drive is severely overloaded over a long period of time(for example, when driving up a steep hill) and especiallywhen the ambient temperature is high, the controls systemcould overheat. In this case, the wheelchair performance isgradually reduced until it comes to a halt. The status displayshows a corresponding error code (refer to the user manualof your remote). By switching the remote off and back onagain, the error code is cleared and the controls system isswitched back on. It can however take up to five minutesuntil the controls system has cooled down enough for thedrive to restore full performance again.
If the drive is stalled by an insurmountable obstacle, forexample, a curb or similar which is too high, and the driverattempts driving for more than 20 seconds against thisobstacle, the controls system automatically switches off toprevent the motors from being damaged. The status displayshows a corresponding error code (refer to the user manualof your remote). By switching the remote off and back onagain, the error code is cleared and the controls system isswitched back on.
7.1.1 Using Circuit Breaker
The circuit breaker must not be used as an ON/OFFbutton.
When the circuit breaker is used, the LiNX systemcould loose information such as the correct timedisplayed on the remote.
There is no need to use the circuit breaker whentransporting the mobility device in a vehicle.
The mobility device cannot be charged when thecircuit breaker is turned off.
A defective circuit breaker may be replaced only afterchecking the entire controls system. A specialisedInvacare provider must perform the replacement.For more information about the circuit breaker type,see 11 Technical Data, page 62.
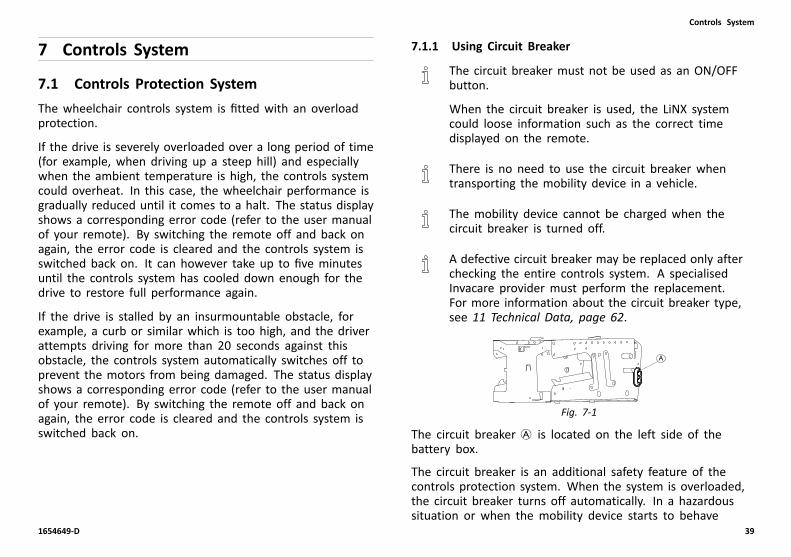
Fig. 7-1
The circuit breaker A is located on the left side of thebattery box.
The circuit breaker is an additional safety feature of thecontrols protection system. When the system is overloaded,the circuit breaker turns off automatically. In a hazardoussituation or when the mobility device starts to behave
1654649-D 39
Invacare® AVIVA™ RX Series
erratically, the circuit breaker can be used to isolate thebattery source quickly.
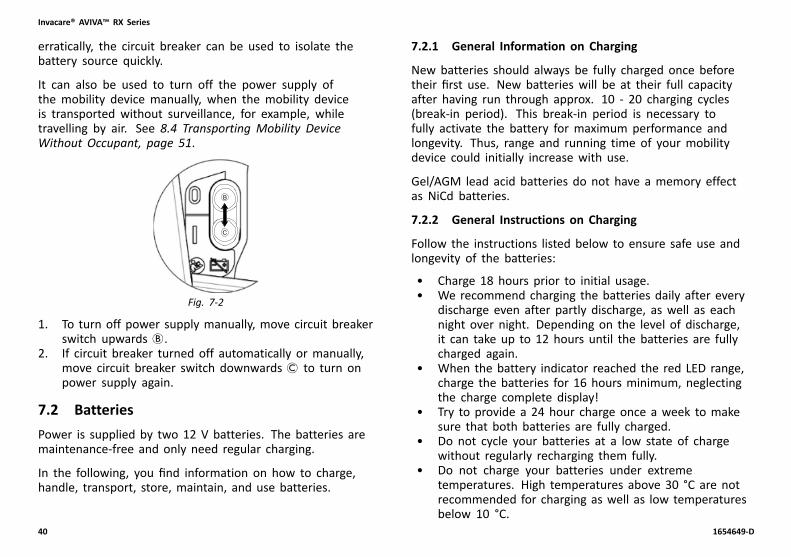
It can also be used to turn off the power supply ofthe mobility device manually, when the mobility deviceis transported without surveillance, for example, whiletravelling by air. See 8.4 Transporting Mobility DeviceWithout Occupant, page 51.
Fig. 7-2
1. To turn off power supply manually, move circuit breakerswitch upwards B.
2. If circuit breaker turned off automatically or manually,move circuit breaker switch downwards C to turn onpower supply again.
7.2 BatteriesPower is supplied by two 12 V batteries. The batteries aremaintenance-free and only need regular charging.
In the following, you find information on how to charge,handle, transport, store, maintain, and use batteries.
7.2.1 General Information on Charging
New batteries should always be fully charged once beforetheir first use. New batteries will be at their full capacityafter having run through approx. 10 - 20 charging cycles(break-in period). This break-in period is necessary tofully activate the battery for maximum performance andlongevity. Thus, range and running time of your mobilitydevice could initially increase with use.
Gel/AGM lead acid batteries do not have a memory effectas NiCd batteries.
7.2.2 General Instructions on Charging
Follow the instructions listed below to ensure safe use andlongevity of the batteries:
• Charge 18 hours prior to initial usage.• We recommend charging the batteries daily after every
discharge even after partly discharge, as well as eachnight over night. Depending on the level of discharge,it can take up to 12 hours until the batteries are fullycharged again.
• When the battery indicator reached the red LED range,charge the batteries for 16 hours minimum, neglectingthe charge complete display!
• Try to provide a 24 hour charge once a week to makesure that both batteries are fully charged.
• Do not cycle your batteries at a low state of chargewithout regularly recharging them fully.
• Do not charge your batteries under extremetemperatures. High temperatures above 30 °C are notrecommended for charging as well as low temperaturesbelow 10 °C.
40 1654649-D
Controls System
• Use only charging devices in Class 2. This class ofchargers may be left unattended during charging. Allcharging devices which are supplied by Invacare complywith these requirements.
• You cannot overcharge the batteries when using thecharger supplied with your mobility device, or a chargerthat has been approved by Invacare.
• Protect your charger from sources of heat such asheaters and direct sunlight. If the battery chargeroverheats, charging current will be reduced and thecharging process delayed.
7.2.3 Charging Batteries
Refer to the user manuals for your remote and batterycharger for the position of the charging socket and furtherinformation about charging the batteries.
WARNING!Risk of explosion and destruction of batteries ifthe wrong battery charger is used– Only ever use the battery charger suppliedwith your mobility device, or a charger that hasbeen approved by Invacare.
WARNING!Risk of electric shock and damage to the batterycharger if it gets wet– Protect the battery charger from water.– Always charge in a dry environment.
WARNING!Risk of short circuit and electric shock if thebattery charger has been damaged– Do not use the battery charger if it has beendropped or damaged.
WARNING!Risk of electric shock and damage to thebatteries– NEVER attempt to recharge the batteriesby attaching cables directly to the batteryterminals.
WARNING!Risk of fire and electric shock if a damagedextension cable is used– Only ever use an extension cable if it isabsolutely necessary. In case you must useone, make sure it is in good condition.
WARNING!Risk of injury if using the mobility device duringcharging– DO NOT attempt to recharge the batteries andoperate the mobility device at the same time.
– DO NOT sit in the mobility device whilecharging the batteries.
1. Switch off mobility device.2. Connect battery charger to charger socket.3. Connect battery charger to power supply.
1654649-D 41

Invacare® AVIVA™ RX Series
7.2.4 Disconnecting Mobility Device After Charging
1. Once charging is complete, first disconnect batterycharger from power supply, then disconnect plug fromremote.
7.2.5 Storage and Maintenance
Follow the instructions listed below to ensure safe use andlongevity of the batteries:
• Always store the batteries fully charged.• Do not leave the batteries in a low state of charge
for an extended length of time. Charge a dischargedbattery as soon as possible.
• In case your mobility device is not used for a longerperiod of time (that is more than two weeks), thebatteries must be charged at least once a month tomaintain a full charge and always be charged beforeuse.
• Avoid hot and cold extremes when storing. Werecommend to store batteries at a temperature of 15°C.
• Gel and AGM batteries are maintenance-free. Anyperformance issues should be handled by a properlytrained mobility device technician.
7.2.6 Instructions on Using Batteries
CAUTION!Risk of damaging the batteries.– Avoid ultra-deep discharges and never drainyour batteries completely.
• Pay attention to the Battery Charge Indicator! Chargethe batteries when the Battery Charge Indicator showsthat battery charge is low.How fast the batteries discharge depends on manycircumstances, such as ambient temperature, conditionof the surface of the road, tire pressure, weight of thedriver, way of driving and utilisation of lighting, if fitted.
• Try to charge the batteries always before you reach thered LED range.The last 3 LED (two red and one orange) mean aremaining capacity of about 15 %.
• Driving with flashing red LED’s means an extreme stressfor the battery and should be avoided under normalcircumstances.
• When only one red LED is flashing, the BatterySafe feature is enabled. From this time, speed andacceleration is reduced drastically. It will allow you tomove the mobility device slowly out of a dangeroussituation before the electronic finally cuts off. This isdeep discharging and should be avoided.
• Be aware that for temperatures below 20 °C, thenominal battery capacity starts to decline. For example,at -10 °C the capacity is reduced to about 50 % of thenominal battery capacity.
• To avoid damaging the batteries, never allow them tobe fully discharged. Do not drive on heavily dischargedbatteries if it is not absolutely necessary, as this willstrain the batteries unduly and shorten their lifeexpectancy.
• The earlier you recharge the batteries, the longer theylive.
42 1654649-D

Controls System
• The depth of discharge affects the cycle life. The hardera battery has to work, the shorter is its life expectancy.Examples:– One deep discharge stresses the same as 6 normal
cycles (green /orange display off).– The battery life is about 500 cycles at 80 % discharge
(first 7 LED off), or about 5000 cycles at 10 %discharge (one LED off).
The number of LED can vary depending onthe remote type.
• Under normal operation, once a month the batteryshould be discharged until all green and orange LED areoff. This should be done within one day. A 16 hourcharge afterwards is necessary as reconditioning.
7.2.7 Transporting Batteries
The batteries supplied with your mobility device arenot hazardous goods. This classification is based on theGerman GGVS Hazardous Goods Road Transport Ordinances,and the IATA/DGR Hazardous Goods Rail Transport / AirTransport Ordinances. Batteries may be transported withoutrestrictions, whether by road, rail or by air. Individualtransport companies have, however, guidelines which canpossibly restrict or forbid certain transport procedures.Please ask the transport company regarding each individualcase.
7.2.8 General Instructions on Handling Batteries
• Never mix and match different battery manufactures ortechnologies, or use batteries that do not have similardate codes.
• Never mix gel with AGM batteries.
• The batteries reach their end of life when the driverange is significantly smaller than usual. Contact yourprovider or service technician for details.
• Always have your batteries installed by a properlytrained mobility device technician or a person withadequate knowledge. They have the necessary trainingand tools to do the job safely and correctly.
7.2.9 Handling Damaged Batteries Correctly
CAUTION!Corrosion and burns from acid leakage ifbatteries are damaged– Remove clothes that have been soiled by acidimmediately.
After contact with skin:– Immediately wash affected area with lots ofwater.
After contact with eyes:– Immediately rinse eyes under running water forseveral minutes; consult a physician.
• Always wear safety goggles and appropriate safetyclothing when handling damaged batteries.
• Place damaged batteries in an acid-resistant receptacleimmediately after removing them.
• Only ever transport damaged batteries in an appropriateacid-resistant receptacle.
• Wash all objects that have come into contact with acidwith lots of water.
Disposing of Dead or Damaged Batteries Correctly
1654649-D 43

Invacare® AVIVA™ RX Series
Dead or damaged batteries can be given back to yourprovider or directly to Invacare.
44 1654649-D

Transport
8 Transport
8.1 General Information on Transport
WARNING!Risk of death or serious injury to the mobilitydevice user and potentially any other nearbyoccupant of the vehicle, if a mobility deviceis secured using a 4-point tie-down systemavailable from a third party supplier and theunladen weight of the mobility device exceedsthe maximum weight for which the tie-downsystem is certified– Make sure the weight of the mobility devicedoes not exceed the weight for which thetie-down system is certified. Consult thetie-down manufacturer's documentation.
– If you are unsure how much your mobilitydevice weighs, then you must have it weighedusing calibrated scales.
CAUTION!Risk of injury or material damage if a mobilitydevice which is fitted with a tray is transportedin a vehicle– If a tray is fitted, always remove it beforetransporting the mobility device.
Fig. 8-1
8.2 Transferring Mobility Device to Vehicle
WARNING!Mobility device is at risk of tipping over iftransferred to a vehicle while user is still seatedin mobility device– Transfer mobility device without user wheneverpossible.
– If mobility device with user must be transferredto vehicle using a ramp, ensure that ramp doesnot exceed rated slope.
– If mobility device must be transferred to vehicleusing a ramp that does exceed rated slope, awinch must then be used. An attendant canthen safely monitor and assist transfer process.
– Alternatively, a platform lift may be used.– Ensure that total weight of mobility deviceincluding user does not exceed maximumpermitted total weight for ramp or platform lift.
– Mobility device should always be transferredto vehicle with backrest in upright position,seat lifter lowered and tilt in upright position(refer to 6.6 Driving up and down Gradients,page 36).
1654649-D 45

Invacare® AVIVA™ RX Series
WARNING!Risk of injury and damage to mobility deviceand vehicleRisk of tipping over or uncontrolled movementsof mobility device if transferred to vehicle using aramp that exceeds rated slope.– Transfer mobility device to vehicle without user.– An attendant must assist transfer process.– Ensure that all carer fully understand manualof ramp and winch.
– Ensure that winch is suitable for your mobilitydevice.
– Use only suitable tie-down points. Do not useremovable or movable components of mobilitydevice as tie-down points.
WARNING!Risk of injury and damage to mobility deviceIf mobility device must be transferred to vehiclevia a lift, when remote is turned on, there is arisk that device may act erratically and fall off lift.– Before transferring mobility device via lift, turnoff product and disconnect either bus cablefrom remote or batteries from system.
1. Drive or push your mobility device into transport vehicleusing suitable ramp.
8.3 Use Mobility Device as Vehicle SeatNot every mobility device does automatically have thepermission to be used as a vehicle seat. The following
labels explain whether the mobility device can be used asa vehicle seat or not.
If the mobility device mayNOT be used as a vehicleseat, this is identified bythe following label:
If the mobility device canbe used as a vehicle seat,the tie-down points areidentified by the followinglabel:
In order to use a mobility device as a vehicle seat, it mustbe fitted with tie-down points to enable anchoring in themotor vehicle. These accessories may be included in thestandard scope of mobility device order and delivery insome countries (UK for example), but may also be obtainedfrom Invacare as an option in other countries.
A mobility device permitted as vehicle seat complies withthe requirements of ISO 7176-19 and may be used as avehicle seat in connection with an anchoring system that hasbeen checked and approved in accordance with ISO 10542.The transporting vehicle must be professionally convertedto anchor the mobility device. Contact your vehicle’smanufacturer for more information.
A mobility device permitted as vehicle seat has undergonea crash test in which it was anchored in the transportingvehicle's direction of travel. Other configurations were nottested. The crash test dummy was secured using pelvic andupper body safety belts. Both types of safety belt should
46 1654649-D

Transport
be used in order to minimize the risk of injuries to head orupper body.
Invacare tests with a 4–point tie-down systemfrom BraunAbility® Safety Systems.– Contact BraunAbility for more information onhow to obtain such a system for your countryand vehicle type. For information concerningthe curb weight, refer to 11 Technical Data,page 62.
It is imperative that the mobility device is inspected by anauthorised provider before being used again after beinginvolved in a crash. Alterations to the mobility deviceanchoring points may not be carried out without themanufacturer's permission.
WARNING!Risk of injurySafety restraint devices must only be used whenthe wheelchair user's weight is 22 kg or more.– When the user weight is lower than 22 kg, donot use the wheelchair as a seat in a vehicle.
CAUTION!There is an injury hazard if a backrest which isnot suitable for the transportation of passengersis used– Angle-adjustable backrests which are manuallyadjusted using a self-arresting quick-disconnectare NOT approved for the transportation ofpassengers.
CAUTION!There is a risk of injury if the wheelchair is notproperly secured during use as a vehicle seat– If possible, the user should always leave thewheelchair to use a vehicle seat and the safetybelts provided with the vehicle.
– The wheelchair should always be anchoredfacing in the transport vehicle's intendeddirection of travel.
– The wheelchair must always be secured inaccordance with the wheelchair and anchoringsystem manufacturers’ operating manual.
– Always remove and secure any accessory partsfixed to the wheelchair such as chin controlsor tables.
– If your wheelchair is equipped with an angleadjustable backrest, then it must be placed inan upright position.
– Fully lower elevated legrests, if fitted.– Fully lower the seat lifter, if fitted.
CAUTION!Risk of injury exists if a power wheelchair thatis not equipped with leak-proof batteries istransported in a vehicle– Only ever use leak-proof batteries.
1654649-D 47

Invacare® AVIVA™ RX Series
CAUTION!Risk of injury or damage to the wheelchair or tothe transporting vehicle, if the legrests are in araised position while the wheelchair is used asa vehicle seat– Always completely lower height-adjustablelegrests, if fitted.
8.3.1 Anchoring Mobility Device Used as Vehicle Seat
The mobility device is fitted with tie-down points. Snaphooks or belt loops can be used for fixation. Fig. 8-2 Base Tie-Down Points – All Wheelchairs
Fig. 8-3 Seat Tie-Down Points – Wheelchairs with Lifter and UltraLow Maxx Seating
48 1654649-D

Transport
1. Secure mobility device with tie-down system belts atfollowing locations:a. All Wheelchairs — four tie-down points A on
wheelchair base (two at front and two at rear).b. Systems with Lifter and Ultra Low Maxx Seating —
two additional tie-down points B on each side ofseat at front of seat rails.
2. Secure mobility device by tensioning belts in accordancewith tie-down system manufacturer's user manual.
8.3.2 Using Additional Tie-Down Points
Fig. 8-4
The mobility device can be fitted with additional tie-downpoints A for easier access.
If the additional tie-down points are used foranchoring the mobility device, the standard tie-downpoints on the front B must not be used anymore.
8.3.3 Securing User in Mobility Device
CAUTION!Risk of injury if the user is not properly securedwithin the mobility device– Even if the mobility device is fitted with aposture belt, this is no substitute for a propersafety belt which complies with ISO 10542 inthe transport vehicle. Always use the safetybelt installed in the transport vehicle.
– Safety belts must be in contact with the user'sbody. They must not be held at a distance fromthe user's body using parts of the mobilitydevice such as armrests or wheels.
– Safety belts must be pulled as tightly aspossible without causing the user discomfort.
– Safety belts must not be positioned whiletwisted.
– Ensure that the third seat belt anchorage pointis not fixed directly to the vehicle floor, but toone of the vehicle uprights.
1654649-D 49

Invacare® AVIVA™ RX Series
CAUTION!Risk of injury during use of the mobility deviceas a vehicle seat if a headrest is wronglyadjusted or not installedThis can cause the neck to be hyperextendedduring collisions.– A headrest must be installed. The headrestoptionally supplied for this mobility device byInvacare is perfectly suitable for use duringtransport.
– The headrest must be adjusted to the user'sear height.
Fig. 8-5
Fig. 8-6
Seat belts may not be held at a distance from the user'sbody using parts of the mobility device such as armrestsor wheels.
Fig. 8-7
The pelvic belt should be positioned in the area between theuser's pelvis and thighs so that it is unobstructed and nottoo loose. The ideal angle of the pelvic belt to the horizontalis between 45° and 75°. The maximum permissible angleis between 30° and 75°. The angle should never be lessthan 30°!
50 1654649-D
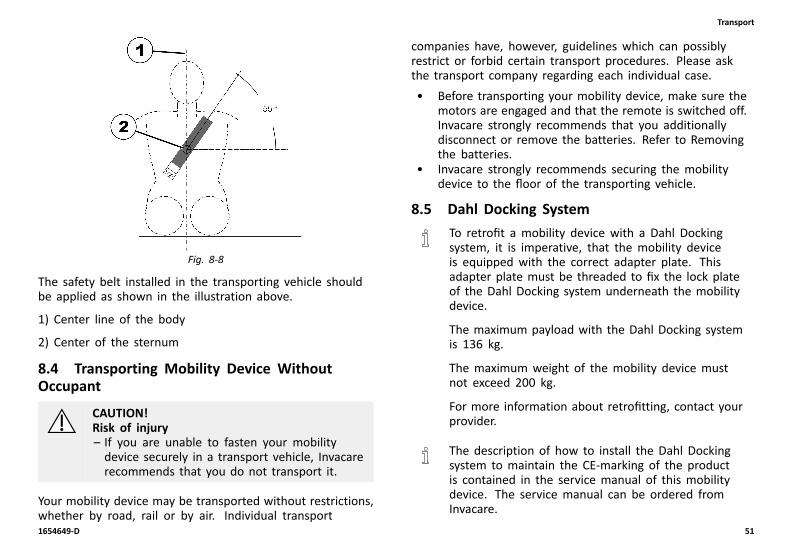
Transport
Fig. 8-8
The safety belt installed in the transporting vehicle shouldbe applied as shown in the illustration above.
1) Center line of the body
2) Center of the sternum
8.4 Transporting Mobility Device WithoutOccupant
CAUTION!Risk of injury– If you are unable to fasten your mobilitydevice securely in a transport vehicle, Invacarerecommends that you do not transport it.
Your mobility device may be transported without restrictions,whether by road, rail or by air. Individual transport
companies have, however, guidelines which can possiblyrestrict or forbid certain transport procedures. Please askthe transport company regarding each individual case.• Before transporting your mobility device, make sure the
motors are engaged and that the remote is switched off.Invacare strongly recommends that you additionallydisconnect or remove the batteries. Refer to Removingthe batteries.
• Invacare strongly recommends securing the mobilitydevice to the floor of the transporting vehicle.
8.5 Dahl Docking SystemTo retrofit a mobility device with a Dahl Dockingsystem, it is imperative, that the mobility deviceis equipped with the correct adapter plate. Thisadapter plate must be threaded to fix the lock plateof the Dahl Docking system underneath the mobilitydevice.
The maximum payload with the Dahl Docking systemis 136 kg.
The maximum weight of the mobility device mustnot exceed 200 kg.
For more information about retrofitting, contact yourprovider.
The description of how to install the Dahl Dockingsystem to maintain the CE-marking of the productis contained in the service manual of this mobilitydevice. The service manual can be ordered fromInvacare.
1654649-D 51

Invacare® AVIVA™ RX Series
Positioning the occupant restraint when using itwith the Dahl Docking system only
When using mobility device with a Dahl Dockingsystem, the floor anchorage points for the occupantrestraint system should be located 10 – 60 mmoutside wheels on each side. The pelvic belt mustbe worn low across the front of the pelvis so thatthe angle of the pelvic belt is within the preferredzone of 30° to 45° as shown. A steeper angle withinthe optional zone, 45° to 75° is desirable, but neverexceeding 75°.
Components of Dahl Docking System
Fig. 8-9
(1) Dahl Docking station
(2) Lock plate and 8 mm spacer
(3) Locking pin
(4) Red LED
(5) Green LED
(6) Control panel
(7) Release button
(8) Manual emergency release lever
(9) Manual operating lever (optional)
52 1654649-D
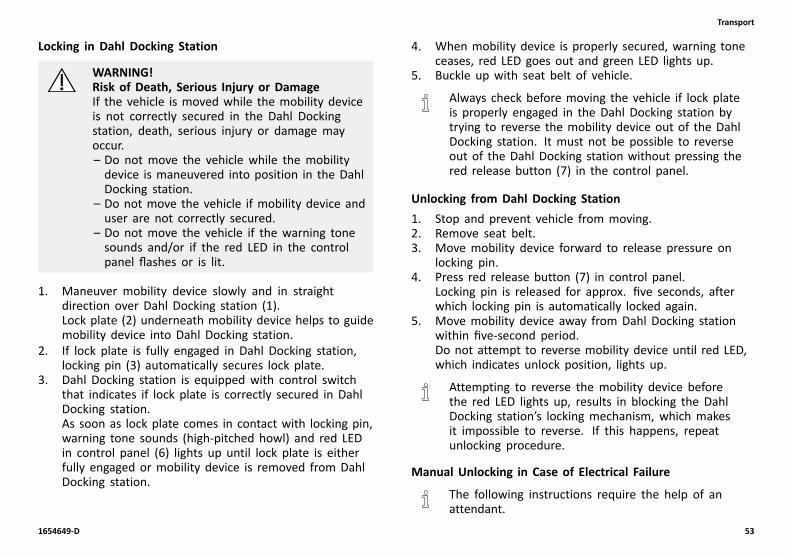
Transport
Locking in Dahl Docking Station
WARNING!Risk of Death, Serious Injury or DamageIf the vehicle is moved while the mobility deviceis not correctly secured in the Dahl Dockingstation, death, serious injury or damage mayoccur.– Do not move the vehicle while the mobilitydevice is maneuvered into position in the DahlDocking station.
– Do not move the vehicle if mobility device anduser are not correctly secured.
– Do not move the vehicle if the warning tonesounds and/or if the red LED in the controlpanel flashes or is lit.
1. Maneuver mobility device slowly and in straightdirection over Dahl Docking station (1).Lock plate (2) underneath mobility device helps to guidemobility device into Dahl Docking station.
2. If lock plate is fully engaged in Dahl Docking station,locking pin (3) automatically secures lock plate.
3. Dahl Docking station is equipped with control switchthat indicates if lock plate is correctly secured in DahlDocking station.As soon as lock plate comes in contact with locking pin,warning tone sounds (high-pitched howl) and red LEDin control panel (6) lights up until lock plate is eitherfully engaged or mobility device is removed from DahlDocking station.
4. When mobility device is properly secured, warning toneceases, red LED goes out and green LED lights up.
5. Buckle up with seat belt of vehicle.
Always check before moving the vehicle if lock plateis properly engaged in the Dahl Docking station bytrying to reverse the mobility device out of the DahlDocking station. It must not be possible to reverseout of the Dahl Docking station without pressing thered release button (7) in the control panel.
Unlocking from Dahl Docking Station1. Stop and prevent vehicle from moving.2. Remove seat belt.3. Move mobility device forward to release pressure on
locking pin.4. Press red release button (7) in control panel.
Locking pin is released for approx. five seconds, afterwhich locking pin is automatically locked again.
5. Move mobility device away from Dahl Docking stationwithin five-second period.Do not attempt to reverse mobility device until red LED,which indicates unlock position, lights up.
Attempting to reverse the mobility device beforethe red LED lights up, results in blocking the DahlDocking station’s locking mechanism, which makesit impossible to reverse. If this happens, repeatunlocking procedure.
Manual Unlocking in Case of Electrical Failure
The following instructions require the help of anattendant.
1654649-D 53
Invacare® AVIVA™ RX Series
1. Move mobility device forward to release pressure onlocking pin.
2. Push manual emergency release lever (8) to one sideand hold it there, while mobility device moves away.
3. A cable-activated manual operating lever (9) can alsobe fitted (accessory).Push lever to one side and hold it there, while mobilitydevice moves away.
If the manual unlocking procedure fails, anemergency release tool made from red plastic comeswith each Dahl Docking station.
1. Move mobility device forward to release pressure onlocking pin.
2.
Fig. 8-10
Place emergency release tool in gap between lockingplate and Dahl Docking station.
3.
Fig. 8-11
Push emergency release tool and mobility deviceforward until locking pin has been forced down.
4. Move mobility device away from Dahl Docking station.
54 1654649-D

Maintenance
9 Maintenance
9.1 Maintenance IntroductionThe term “Maintenance“ means any task performed toensure that a medical device is in good working orderand ready for use as intended. Maintenance encompassesdifferent areas, such as everyday care and cleaning,inspection checks, repair tasks and refurbishment.
Have your vehicle checked once a year by anauthorised Invacare provider to maintain its drivingsafety and roadworthiness.
9.2 Inspection ChecksThe following tables list inspection checks that should beperformed by the user and their intervals. If the mobilitydevice fails to pass one of the inspection checks, refer tothe chapter indicated or contact your authorised Invacareprovider. A more comprehensive list of inspection checksand instructions for maintenance work can be found in theservice manual for this device, which can be obtained fromInvacare. That manual, however, is intended to be used bytrained and authorised service technicians, and describestasks which are not intended to be performed by the user.
9.2.1 Before Each Use of Mobility Device
Item Inspection Check If Inspection is not Passed
Screwed connections Check all connections, such as backrests and wheels, for tightfit.
Contact your provider.
Signal horn Check for correct function. Contact your provider.
Lighting system Check that all lights, such as turn indicators, head lamps andtail lights, are functioning correctly.
Contact your provider.
Battery box locking system Check to ensure that the battery box locking system isfunctioning correctly. Locking pins must be completelyengaged in the holes provided for them (see chapter 8.4Transporting Mobility Device Without Occupant, page 51).
Contact your provider.
Batteries Make sure the batteries are charged. See the user manualprovided with your remote for a description of the batterycharge indicator.
Charge the batteries (seechapter 7.2.3 ChargingBatteries, page 41).
1654649-D 55
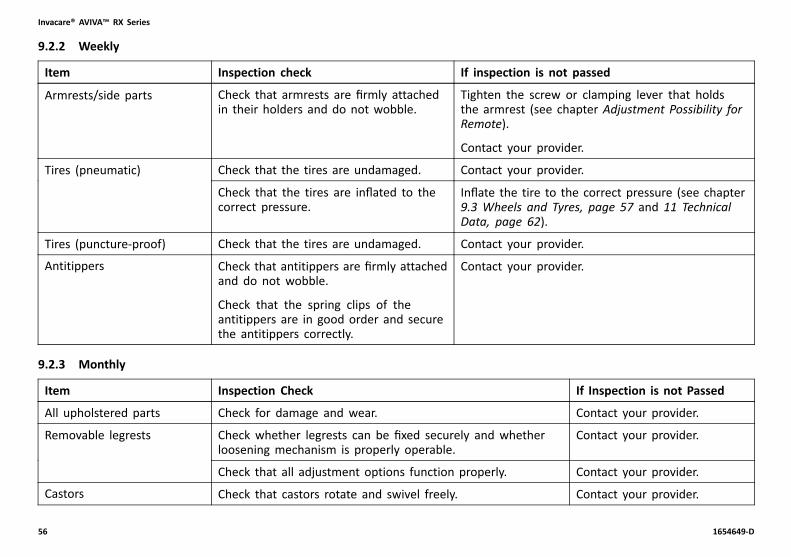
Invacare® AVIVA™ RX Series
9.2.2 Weekly
Item Inspection check If inspection is not passed
Armrests/side parts Check that armrests are firmly attachedin their holders and do not wobble.
Tighten the screw or clamping lever that holdsthe armrest (see chapter Adjustment Possibility forRemote).
Contact your provider.
Tires (pneumatic) Check that the tires are undamaged. Contact your provider.
Check that the tires are inflated to thecorrect pressure.
Inflate the tire to the correct pressure (see chapter9.3 Wheels and Tyres, page 57 and 11 TechnicalData, page 62).
Tires (puncture-proof) Check that the tires are undamaged. Contact your provider.
Antitippers Check that antitippers are firmly attachedand do not wobble.
Check that the spring clips of theantitippers are in good order and securethe antitippers correctly.
Contact your provider.
9.2.3 Monthly
Item Inspection Check If Inspection is not Passed
All upholstered parts Check for damage and wear. Contact your provider.
Removable legrests Check whether legrests can be fixed securely and whetherloosening mechanism is properly operable.
Contact your provider.
Check that all adjustment options function properly. Contact your provider.
Castors Check that castors rotate and swivel freely. Contact your provider.
56 1654649-D
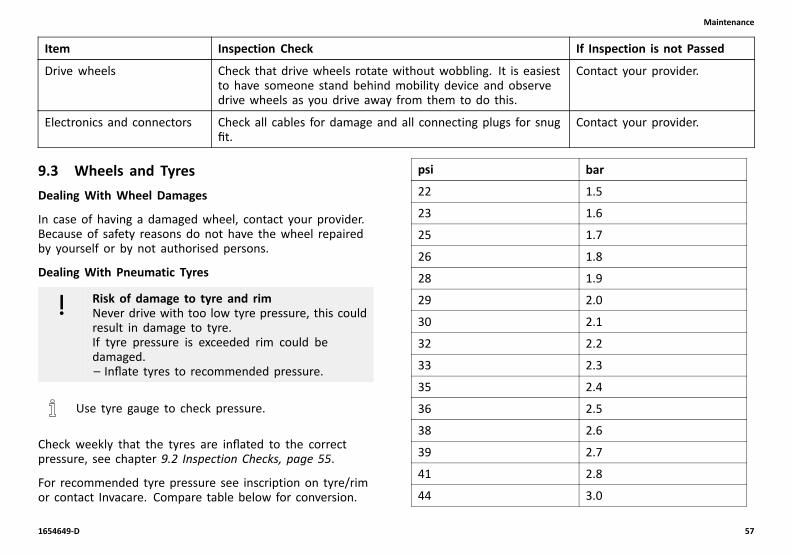
Maintenance
Item Inspection Check If Inspection is not Passed
Drive wheels Check that drive wheels rotate without wobbling. It is easiestto have someone stand behind mobility device and observedrive wheels as you drive away from them to do this.
Contact your provider.
Electronics and connectors Check all cables for damage and all connecting plugs for snugfit.
Contact your provider.
9.3 Wheels and TyresDealing With Wheel Damages
In case of having a damaged wheel, contact your provider.Because of safety reasons do not have the wheel repairedby yourself or by not authorised persons.
Dealing With Pneumatic Tyres
Risk of damage to tyre and rimNever drive with too low tyre pressure, this couldresult in damage to tyre.If tyre pressure is exceeded rim could bedamaged.– Inflate tyres to recommended pressure.
Use tyre gauge to check pressure.
Check weekly that the tyres are inflated to the correctpressure, see chapter 9.2 Inspection Checks, page 55.
For recommended tyre pressure see inscription on tyre/rimor contact Invacare. Compare table below for conversion.
psi bar
22 1.5
23 1.6
25 1.7
26 1.8
28 1.9
29 2.0
30 2.1
32 2.2
33 2.3
35 2.4
36 2.5
38 2.6
39 2.7
41 2.8
44 3.0
1654649-D 57

Invacare® AVIVA™ RX Series
9.4 Short-Term StorageIn case a serious fault is detected, a number of safetymechanisms are built into your mobility device and willprotect it. The power module prevents your mobility devicefrom driving.
When the mobility device is in such a condition and whilewaiting for repair:
1. Switch off power.2. Disconnect the batteries.
Depending on the mobility device model, you can eitherremove the battery packs or disconnect the batteriesfrom the power module. Refer to the correspondingchapter about disconnecting the batteries.
3. Contact your provider.
9.5 Long-Term StorageIn case your mobility device is not used for a longer periodof time, you need to prepare it for storage to ensure alonger life for your mobility device and batteries.
Storing Mobility Device and Batteries
• We recommend to store the mobility device at atemperature of 15 °C, avoid hot and cold extremeswhen storing to ensure a long service life of the productand batteries.
• The components are tested and approved for greatertemperature ranges as detailed below:– Allowable temperature range to store the mobility
device is -40° up to 65 °C.– Allowable temperature range to store batteries is
-25° up to 65 °C.
• Even not being used, batteries discharge themselves.Best practice is to disconnect the battery supply fromthe power module if storing the mobility device longerthan two weeks. Depending on the mobility devicemodel, you can either remove the battery packs ordisconnect the batteries from the power module. Referto the corresponding chapter about disconnecting thebatteries. If in doubt which cable to disconnect, contactyour provider.
• Batteries should always be fully charged before storing.• If storing the mobility device longer than four weeks,
check the batteries once a month and recharge asneeded (before gauge reads half full) to avoid damage.
• Store in a dry, well-ventilated environment protectedfrom outer influences.
• Slightly overinflate pneumatic tyres.• Position the mobility device on flooring that is not
discoloured by contact with tyre rubber.
Preparing Mobility Device for Use
• Re-connect the battery supply to the power module.• The batteries must be charged before use.• Have the mobility device checked by an authorised
Invacare provider.
9.6 Cleaning and Disinfection9.6.1 General safety information
CAUTION!Risk of contamination– Take precautions for yourself and useappropriate protective equipment.
58 1654649-D

Maintenance
CAUTION!Risk of electric shock and product damage– Switch off the device and disconnect frommains, if applicable.
– When cleaning electronic components considertheir protection class regarding water ingress.
– Make sure that no water splashes to the plugor the wall outlet.
– Do not touch the power socket with wet hands.
IMPORTANT!Wrong fluids or methods can harm or damagethe product.– All cleaning agents and disinfectants used mustbe effective, compatible with one another andmust protect the materials they are used toclean.
– Never use corrosive fluids (alkalines, acid etc.)or abrasive cleaning agents. We recommendan ordinary household cleaning agent such asdishwashing liquid, if not specified otherwise inthe cleaning instructions.
– Never use a solvent (cellulose thinner, acetoneetc.) that changes the structure of the plasticor dissolves the attached labels.
– Always make sure that the product iscompletely dried before taking into use again.
For cleaning and disinfection in clinical or long-termcare environments, follow your in-house procedures.
9.6.2 Cleaning Intervals
IMPORTANT!Regular cleaning and disinfection enhancessmooth operation, increases the service life andprevents contamination.Clean and disinfect the product– regularly while it is in use,– before and after any service procedure,– when it has been in contact with any bodyfluids,
– before using it for a new user.
9.6.3 Cleaning
IMPORTANT!– The product does not tolerate cleaning inautomatic washing plants, with high-pressurecleaning equipment or steam.
IMPORTANT!Dirt, sand and seawater can damage the bearingsand steel parts can rust if the surface is damaged.– Only expose the wheelchair to sand andseawater for short periods and clean it afterevery trip to the beach.
– If the wheelchair is dirty, wipe off the dirt assoon as possible with a damp cloth and dryit carefully.
1654649-D 59

Invacare® AVIVA™ RX Series
1. Remove any installed optional equipment (only optionalequipment which does not require tools).
2. Wipe down the individual parts using a cloth or softbrush, ordinary household cleaning agents (pH = 6 -8) and warm water.
3. Rinse the parts with warm water.4. Thoroughly dry the parts with a dry cloth.
Car polish and soft wax can be used on painted metalsurfaces to remove abrasions and restore gloss.
Cleaning upholstery
For cleaning upholstery refer to the instructions on thelabels of the seat, cushion and backrest cover.
9.6.4 Disinfection
Information on recommended disinfectantsand methods can be found on https://vah-online.de/en/for-users.
1. Wipe down all generally accessible surfaces with a softcloth and ordinary household disinfectant.
2. Allow the product to air-dry.
60 1654649-D

After Use
10 After Use
10.1 ReconditioningThis product is suitable for reuse. To recondition the productfor a new user, carry out the following actions:
• Inspection according to service plan. See servicemanual, available from Invacare.
• Cleaning and disinfection. Refer to 9 Maintenance,page 55.
• Adaptation to the new user. Refer to 5 Setup, page 30.
Make sure that the user manual is handed over with theproduct.
If any damage or malfunction is detected, do not reusethe product.
10.2 Disposal
WARNING!Environmental HazardDevice contains batteries.This product may contain substances that couldbe harmful to the environment if disposed ofin places (landfills) that are not appropriateaccording to legislation.– DO NOT dispose of batteries in normalhousehold waste.
– Batteries MUST be taken to a proper disposalsite. The return is required by law and freeof charge.
– Do only dispose discharged batteries.– Cover terminals of lithium batteries prior todisposal.
– For information on the battery type see batterylabel or chapter 11 Technical Data, page 62.
Be environmentally responsible and recycle this productthrough your recycling facility at its end of life.
Disassemble the product and its components, so the differentmaterials can be separated and recycled individually.
The disposal and recycling of used products and packagingmust comply with the laws and regulations for wastehandling in each country. Contact your local wastemanagement company for information.
1654649-D 61

Invacare® AVIVA™ RX Series
11 Technical Data
11.1 Technical SpecificationsThe technical information provided hereafter applies to a standard configuration or represents maximum achievable values.These can change if accessories are added. The precise changes to these values are detailed in the sections for the respectiveaccessories.
Note that there may be values in this list, which are not relevant to your product, since this list applies to all available models(on the date of printing). If not otherwise stated, each value in this list refers to all models of the product.
The models and configurations available in your country can be found in the country-specific sales documents.
Note that in some cases the measured values may vary up to ± 10 mm.
Permissible Operating and Storage Conditions
Temperature Range for OperationAccording to ISO 7176-9
• -25 °C – +50 °C
Recommended Storage Temperature • +15 °C
Temperature Range for StorageAccording to ISO 7176-9
• -25 °C – +65 °C with batteries• -40 °C – +65 °C without batteries
Electrical System
Motors • 2 x 324 W• 2 x 340 W (12 km/h)
Batteries1 • 2 x 12 V / 73.5 Ah (C20) / 63 Ah (C5) sealed VRLA gel• 2 x 12 V / 60 Ah (C20) / 47.4 Ah (C5) sealed VRLA gel• 2 x 12 V / 52 Ah (C20) / 46.6 Ah (C5) sealed VRLA AGM Gel
62 1654649-D

Technical Data
Electrical System
Main Fuse • 63 A
Degree of Protection IPX42
Charging Device
Output Current • 8 A• 10 A
Output Voltage • 24 V nominal
Drive Wheel Tyres
Tyre Type • 14 inch puncture–protected, puncture-proof, pneumatic
Tyre Pressure The recommended maximum tyre pressure in bar or kpa is marked on the sidewall of the tyre or the rim. If more than one value is listed, the lower one in thecorresponding units applies.
(Tolerance = -0.3 bar, 1 bar = 100 kpa)
Castor Tyres
Tyre Type • 9 inch puncture-protected, puncture-proof, pneumatic• 8 inch puncture-proof
Tyre Pressure The recommended maximum tyre pressure in bar or kpa is marked on the sidewall of the tyre or the rim. If more than one value is listed, the lower one in thecorresponding units applies.
(Tolerance = -0.3 bar, 1 bar = 100 kpa)
1654649-D 63

Invacare® AVIVA™ RX Series
Driving Characteristics
Speed • 3 km/h• 6 km/h• 10 km/h• 12 km/h
Min. Braking Distance:
Normal Operation • 400 mm (3 km/h)• 1000 mm (6 km/h)• 2100 mm (10 km/h)• 2900 mm (12 km/h)
Emergency Operation • 800 mm (6 km/h)• 2000 mm (10 km/h)• 2800 mm (12 km/h)
Max. Climbable Obstacle Height • Forward without kerb climber 60 mm• Forward with kerb climber 100 mm• Reverse 25 mm
Rated Slope3:
Modulite without Lifter • 10° (17.6 %) according to manufacturer’s specifications with 160 kg payload, 4°seat angle, 20° backrest angle
Modulite with Lifter • 6° (10.5 %) according to manufacturer’s specifications with 160 kg payload, 4°seat angle, 20° backrest angle
Ultra Low Maxx • 6° (10.5 %) according to manufacturer’s specifications with 136 kg payload, 4°seat angle, 20° backrest angle
Max. Slope With Engaged ParkingBrakes
• 17.4° (uphill)• 12.5° (downhill)
Lateral Dynamic Stability:
64 1654649-D

Technical Data
Driving Characteristics
Min. Diameter for Turning inCircles at Max. Speed
• 3200 mm (Ultra Low Maxx)• 4400 mm (Modulite)
Stable While Turning Suddenly Yes
Continuous Driving Distance Range in Accordance with ISO 7176-44:
Ultra Low Maxx 73.5 Ah batteries • 34 km (6 km/h)• 31 km (10 km/h)• 26 km (12 km/h)
60 Ah batteries • 25 km (6 km/h)
Modulite 73.5 Ah batteries • 47 km (6 km/h)• 40 km (10 km/h)• 34 km (12 km/h)
60 Ah batteries • 35 km (6 km/h)• 30 km (10 km/h)• 26 km (12 km/h)
52 Ah batteries • 34 km (6 km/h)• 30 km (10 km/h)
Manoeuvring Distance Range in Accordance with ISO 7176-44:
Ultra Low Maxx • 14 km (6 km/h)• 10 km (10 km/h)• 7 km (12 km/h)
Modulite • 19 km (6 km/h)• 14 km (10 km/h)• 10 km (12 km/h)
1654649-D 65

Invacare® AVIVA™ RX Series
Turning Diameter • 1506 – 2086 mm (Modulite)• 1975 – 2105 mm (Ultra Low Maxx)
Pivot Width • 1300 – 1575 mm
Required Width of Angled Corridor • 1100 mm (Ultra Low Maxx)• 930 mm (Modulite)
Required Doorway Entry Depth • 1500 mm (Ultra Low Maxx)• 1260 mm (Modulite)
Required Corridor Width for Side Opening • 1140 mm (Ultra Low Maxx)• 990 mm (Modulite)
Seat Type
Dimensions According to ISO 7176–15 Ultra Low Maxx Modulite
Seat-to-Floor Height5:
With Tilt Module • 420 mm (Ultra Low Maxx only)• 435 mm• 460 mm• 485 mm
With Lifter / Tilt Module • 420 – 720 mm (Ultra Low Maxx only)• 435 – 735 mm• 460 – 760 mm• 485 – 785 mm
Max. Total Height • 1101 – 1210 mm • 1000 – 1335 mm
Max. Total Width (depending on SeatWidth and Base Width)
• 565 – 865 mm • 565 – 690 mm• 565 — 730 mm (Modulite HD)
Total Length (With Standard Legrests) • 1251 – 1300 mm • 1026 – 1300 mm
66 1654649-D

Technical Data
Seat Type
Dimensions According to ISO 7176–15 Ultra Low Maxx Modulite
Stowage Length • 830 – 1006 mm
Stowage Width • 565 – 865 mm • 565 – 690 mm
Stowage Height • 1101 – 1210 mm • 1000 – 1180 mm
Ground Clearance • 70 mm
Seat Type
Kerb Weight6 Ultra Low Maxx Modulite
• 148.6 – 190.1 kg • 105 – 185.2 kg
Component Weights
73.5 Ah Batteries • approx. 23 kg per battery
60 Ah Batteries • approx. 20 kg per battery
52 Ah Batteries • approx. 12.6 kg per battery
Seat Type
Payload Ultra Low Maxx Modulite
Max. occupant mass • 136 kg • 136 kg (Narrow base)• 160 kg (Wide base)
Axle Loads
Max. Front Axle Load • 144.4 kg
Max. Rear Axle Load • 267.2 kg
1654649-D 67

Invacare® AVIVA™ RX Series
1 Usable battery capacity depending on the discharge time.C20: Discharge over a period of 20 hours.C5: Discharge over a period of 5 hours.
2 IPX4 classification means that the electrical system is protected against spray water.
3 Static stability downhill, uphill, and sideways according to ISO 7176-1 = 9° (15.8 %)
Dynamic stability according to ISO 7176-2 = 6° (10.5 %)
4 Note: The drive range of a mobility device is strongly influenced by external factors, such as the speed setting of thewheelchair, the charging state of the batteries, surrounding temperature, local topography, road surface characteristics,tyre pressure, weight of user, drive style and use of batteries for lighting, servos etc.
The specified values are theoretical maximum achievable values measured according to ISO 7176-4.
5 Measured without seat cushion
6 The actual kerb weight depends on the fittings your mobility device has been supplied with. Every Invacare mobilitydevice is weighed when leaving the works. Refer to the nameplate for the kerb weight (including batteries) measured.
68 1654649-D
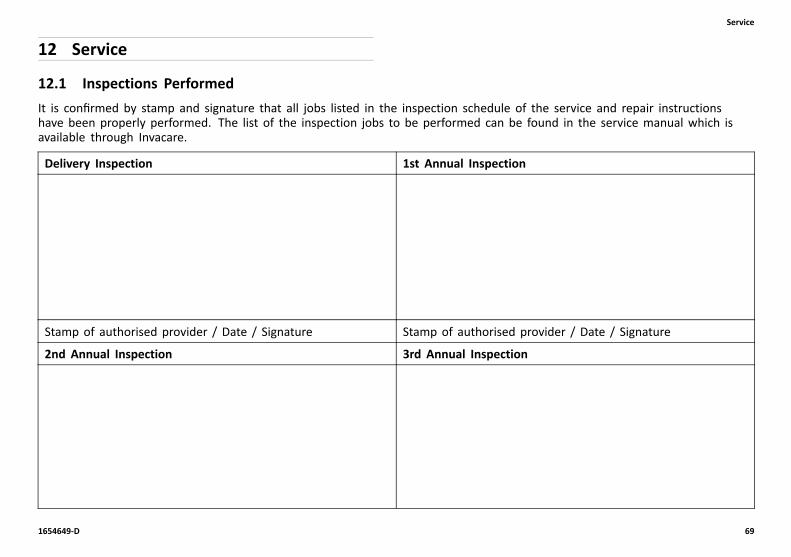
Service
12 Service
12.1 Inspections PerformedIt is confirmed by stamp and signature that all jobs listed in the inspection schedule of the service and repair instructionshave been properly performed. The list of the inspection jobs to be performed can be found in the service manual which isavailable through Invacare.
Delivery Inspection 1st Annual Inspection
Stamp of authorised provider / Date / Signature Stamp of authorised provider / Date / Signature
2nd Annual Inspection 3rd Annual Inspection
1654649-D 69

Invacare® AVIVA™ RX Series
Stamp of authorised provider / Date / Signature Stamp of authorised provider / Date / Signature
4th Annual Inspection 5th Annual Inspection
Stamp of authorised provider / Date / Signature Stamp of authorised provider / Date / Signature
70 1654649-D

Notes

Invacare Distributors
Australia:Invacare Australia Pty. Ltd.1 Lenton Place, North Rocks NSW2151AustraliaPhone: 1800 460 460Fax: 1800 814 [email protected]
Canada:Invacare Canada L.P.570 Matheson Blvd East, Unit 8CDN Mississauga, On. L4Z 4G4Phone: (905) 890 8300Toll Free: 800.668.5324www.invacare.ca
Ireland:Invacare Ireland Ltd,Unit 5 Seatown Business CampusSeatown Road, Swords, County DublinTel : (353) 1 810 7084Fax: (353) 1 810 [email protected]
New Zealand:Invacare New Zealand Ltd4 Westfield Place, Mt Wellington 1060New ZealandPhone: 0800 468 222Fax: 0800 807 [email protected]
United Kingdom:Invacare LimitedPencoed Technology Park, PencoedBridgend CF35 5AQTel: (44) (0) 1656 776 222Fax: (44) (0) 1656 776 [email protected]
Eastern Europe, Middle East & CIS:Invacare EU ExportAm Achener Hof 8D-88316 IsnyTel: (49) (0)7562 700 [email protected]
Invacare GmbHAm Achener Hof 8D-88316 IsnyGermany
1654649-D 2020-08-10
*1654649D*Making Life’s Experiences Possible®