Embed Size (px)
Citation preview

Version 1.0July 2008
Office Finisher LX
User Guide

Microsoft, MS-DOS, Windows, Windows NT, Microsoft Network, and Windows Server are either trademarks or registered trademarks of Microsoft Corporation in the United States and/or other countries.
Novell, NetWare, IntranetWare and NDS are registered trademarks of Novell, Inc. in the United States and other countries.
Adobe, Acrobat, PostScript, PostScript3, and PostScript Logo are trademarks of Adobe Systems Incorporated.
Apple, AppleTalk, EtherTalk, LocalTalk, Macintosh, MacOS and TrueType are trademarks of Apple Computer, Inc., registered in the U.S. and other countries.
HP, HPGL, HPGL/2, and HP-UX are registered trademarks of Hewlett-Packard Corporation.
All product/brand names are trademarks or registered trademarks of the respective holders.
The data saved in the hard disk of the machine may be lost if there is any problem in the hard disk. Xerox is not responsible for any direct and indirect damages arising from or caused by such data loss.Xerox is not responsible for any breakdown of machines due to infection of computer virus or computer hacking.
Important(1) This manual is copyrighted with all rights reserved. Under the copyright laws, this manual may not be copied or modified in whole or part, without the written consent of the publisher.(2) Parts of this manual are subject to change without prior notice.(3) We welcome any comments on ambiguities, errors, omissions, or missing pages.(4) Never attempt any procedure on the machine that is not specifi cally described in this manual. Unauthorised operation can cause faults or accidents.
Xerox is not liable for any problems resulting from unauthorised operation of the equipment.
An export of this product is strictly controlled in accordance with Laws concerning Foreign Exchange and Foreign Trade of Japan and/or the export control regulations of the United States.
Xerox and Ethernet are registered trademarks.
© Copyright 2008 Xerox Corporation
Office Finisher LX - User Guide 1-1
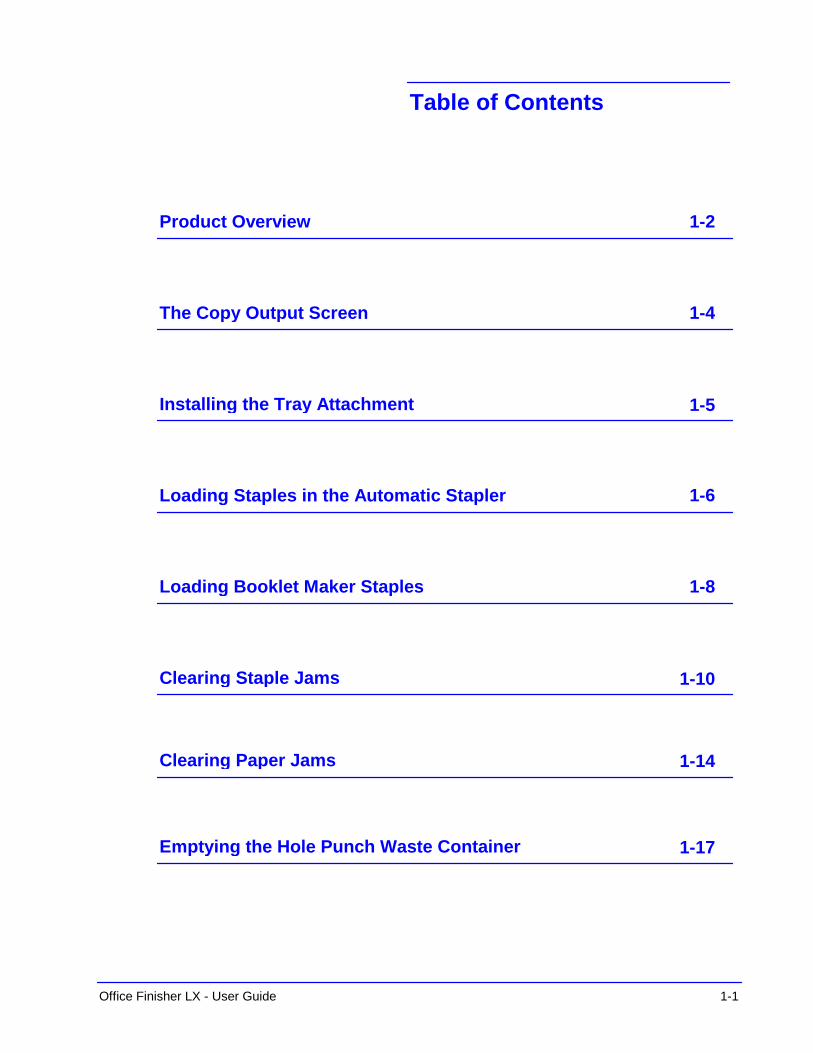
Clearing Paper Jams 1-14
Clearing Staple Jams 1-10
Loading Booklet Maker Staples 1-8
Loading Staples in the Automatic Stapler 1-6
Installing the Tray Attachment 1-5
The Copy Output Screen 1-4
Product Overview 1-2
Emptying the Hole Punch Waste Container 1-17
Table of Contents
Product Overview
1-2 Office Finisher LX - User Guide
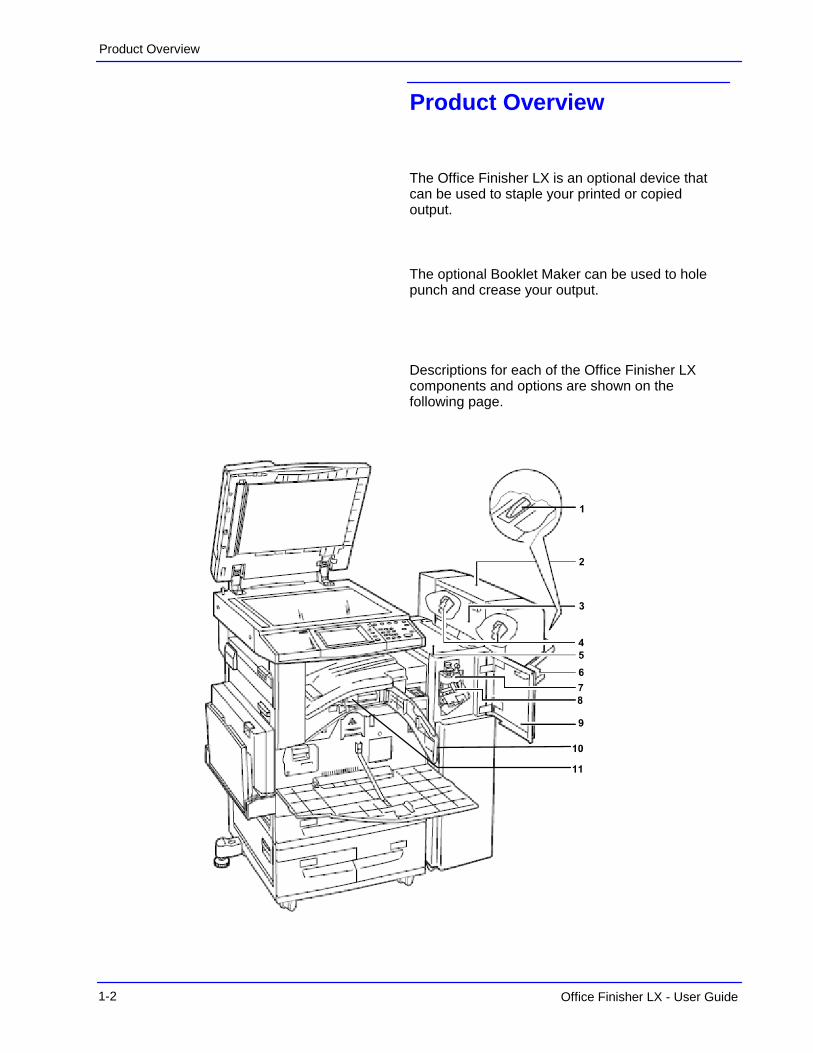
Product Overview
The Office Finisher LX is an optional device that can be used to staple your printed or copied output.
Descriptions for each of the Office Finisher LX components and options are shown on the following page.
The optional Booklet Maker can be used to hole punch and crease your output.
Office Finisher LX - User Guide 1-3
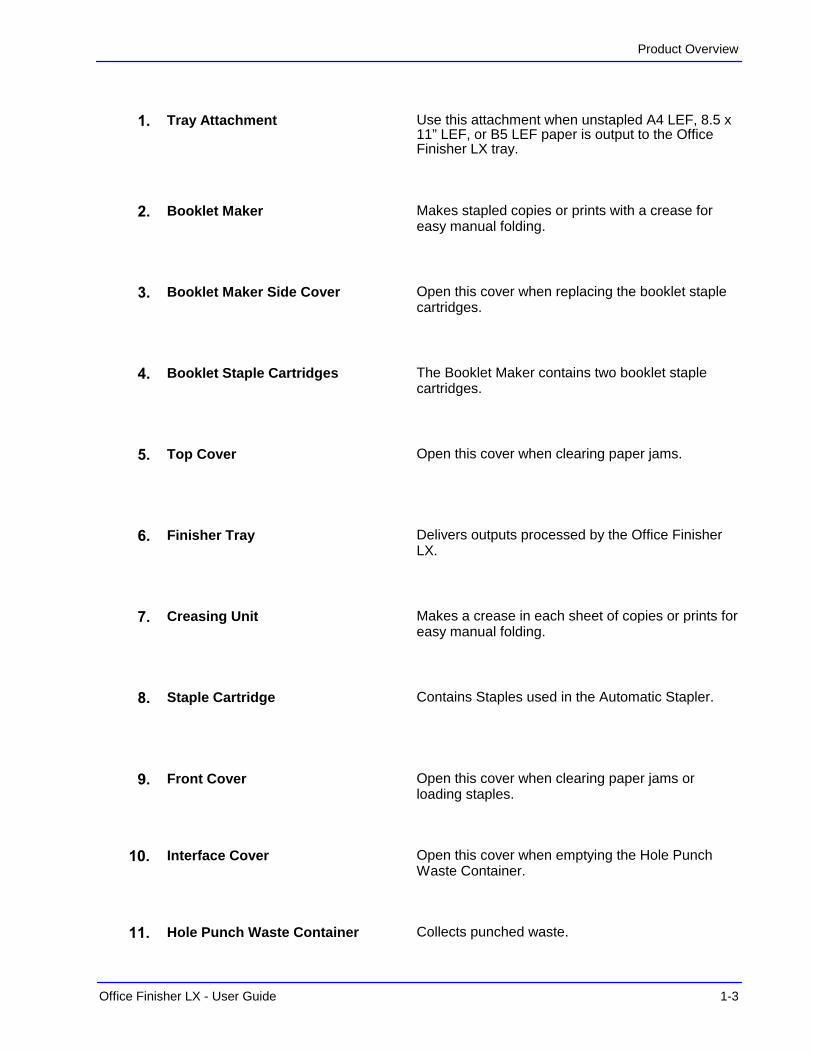
Product Overview
Front Cover Open this cover when clearing paper jams or loading staples.
Staple Cartridge Contains Staples used in the Automatic Stapler.
Creasing Unit Makes a crease in each sheet of copies or prints for easy manual folding.
Finisher Tray Delivers outputs processed by the Office Finisher LX.
Top Cover Open this cover when clearing paper jams.
Booklet Staple Cartridges The Booklet Maker contains two booklet staple cartridges.
Booklet Maker Side Cover Open this cover when replacing the booklet staple cartridges.
Booklet Maker Makes stapled copies or prints with a crease for easy manual folding.
Tray Attachment Use this attachment when unstapled A4 LEF, 8.5 x 11” LEF, or B5 LEF paper is output to the Office Finisher LX tray.
Interface Cover Open this cover when emptying the Hole Punch Waste Container.
Hole Punch Waste Container Collects punched waste.
The Copy Output Screen
1-4 Office Finisher LX - User Guide
Copy Output Cancel Save
Top
3 Hole punch
2 Hole punch
No Hole punch
Hole punch
2 Staples
1 Staple
No Staple
Staple
2 Staples
Auto Paper Select
Paper Supply
With Separators
Uncollated
Collated
Collation
Center Tray
Output Destination
The Copy Output Screen
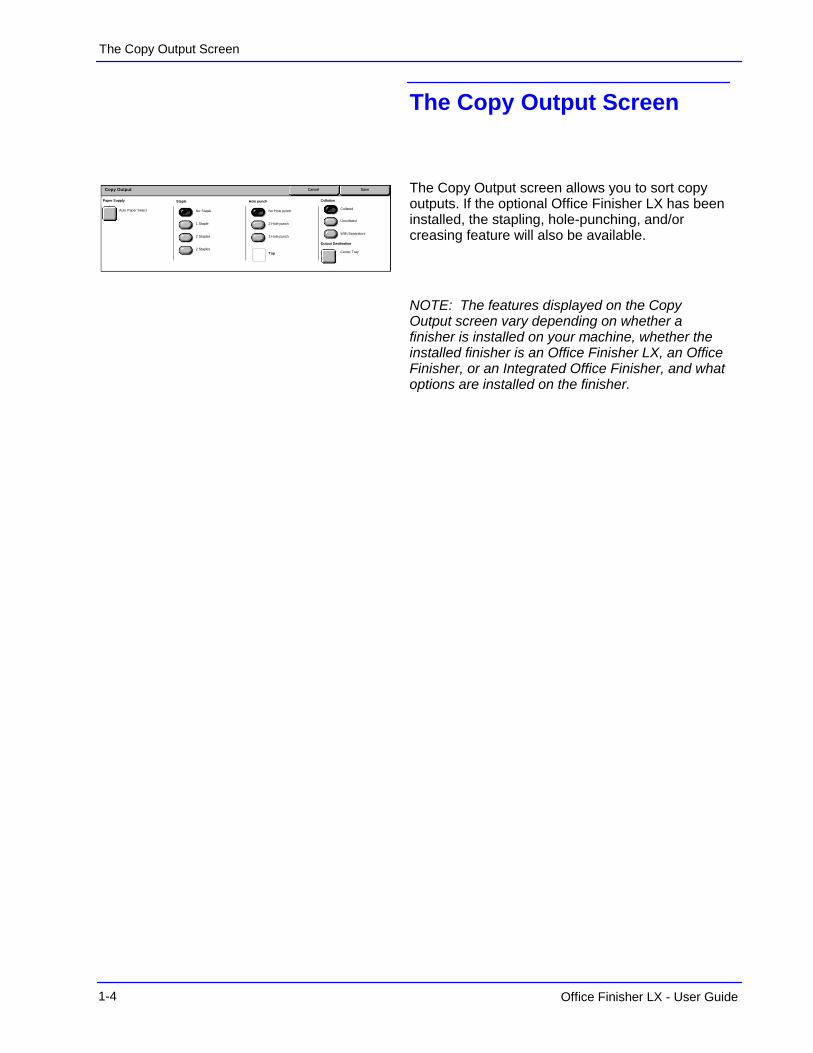
The Copy Output screen allows you to sort copy outputs. If the optional Office Finisher LX has been installed, the stapling, hole-punching, and/or creasing feature will also be available.
NOTE: The features displayed on the Copy Output screen vary depending on whether a finisher is installed on your machine, whether the installed finisher is an Office Finisher LX, an Office Finisher, or an Integrated Office Finisher, and what options are installed on the finisher.
Office Finisher LX - User Guide 1-5
Installing the Tray Attachment
Installing the Tray Attachment
When unstapled A4 LEF, 8.5 x 11” LEF, or B5 LEF paper is output to the Finisher tray, it is recommended to use the Tray Attachment.
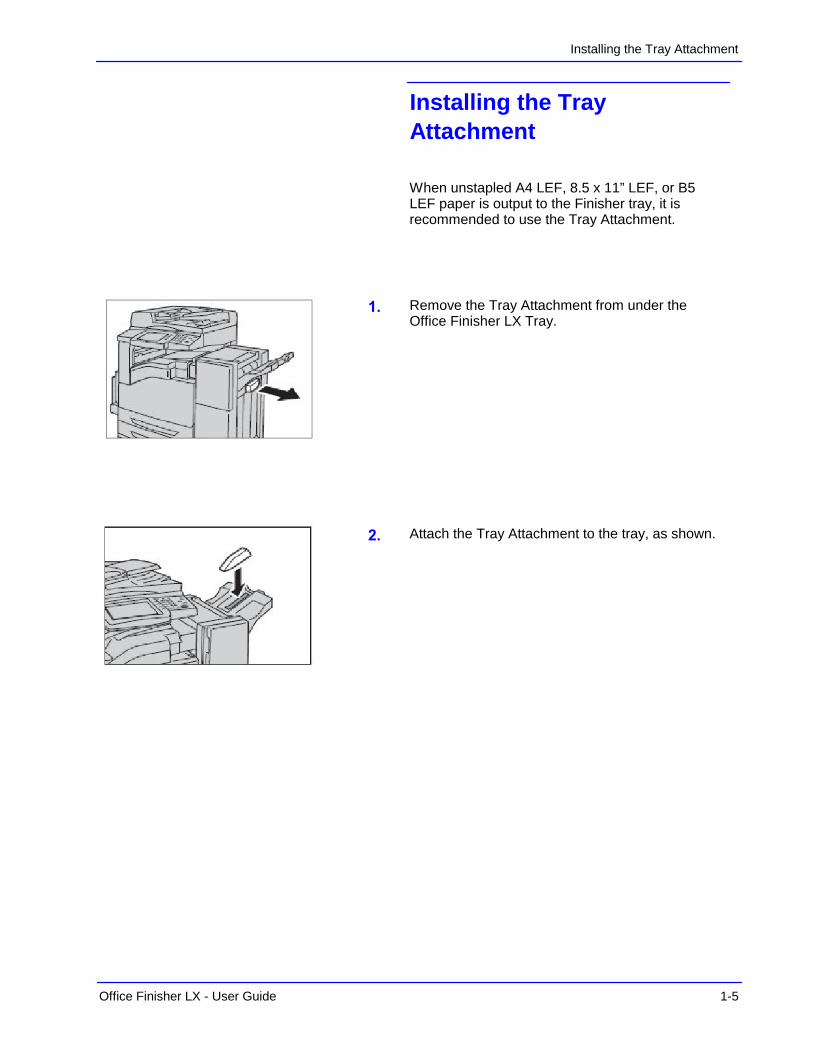
Remove the Tray Attachment from under the Office Finisher LX Tray.
Attach the Tray Attachment to the tray, as shown.
Loading Staples in the Automatic Stapler
1-6 Office Finisher LX - User Guide
Loading Staples in the Automatic Stapler
The optional Office Finisher LX contains an automatic stapler. When the finisher runs out of staples, a message appears on the touch screen. When this message is displayed, load a new staple case into the staple cartridge.
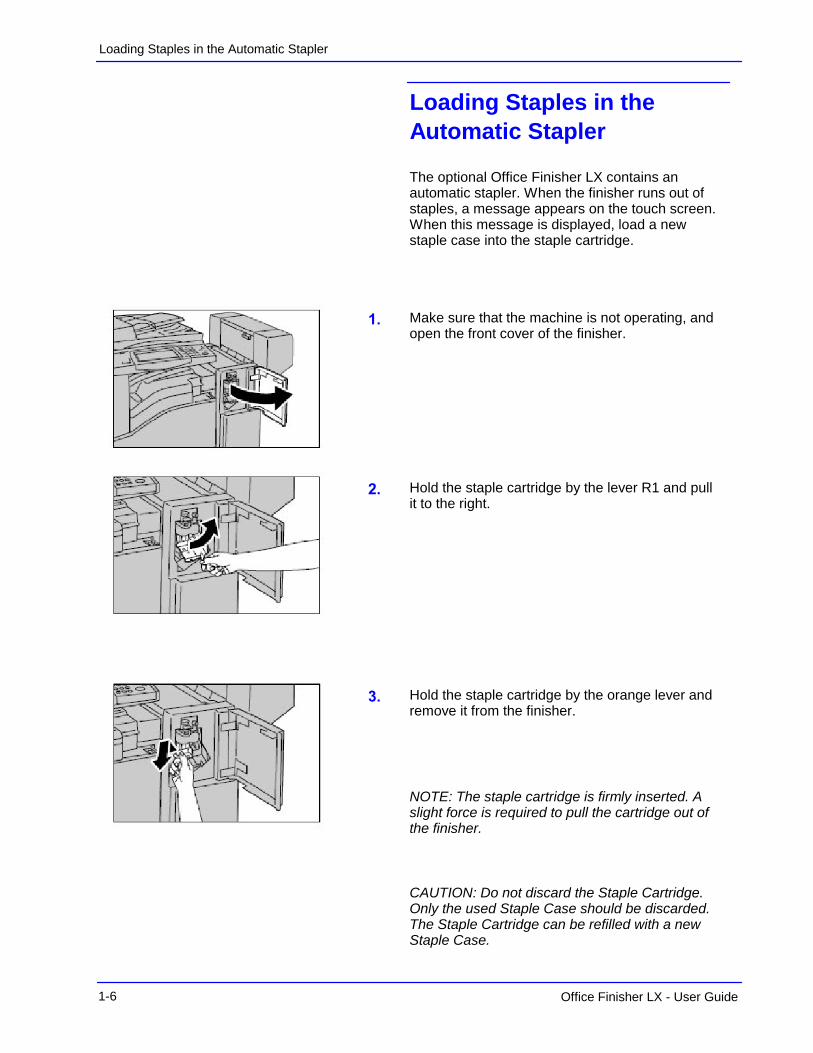
Make sure that the machine is not operating, and open the front cover of the finisher.
Hold the staple cartridge by the lever R1 and pull it to the right.
Hold the staple cartridge by the orange lever and remove it from the finisher.
NOTE: The staple cartridge is firmly inserted. A slight force is required to pull the cartridge out of the finisher.
CAUTION: Do not discard the Staple Cartridge. Only the used Staple Case should be discarded. The Staple Cartridge can be refilled with a new Staple Case.
Office Finisher LX - User Guide 1-7
Loading Staples in the Automatic Stapler
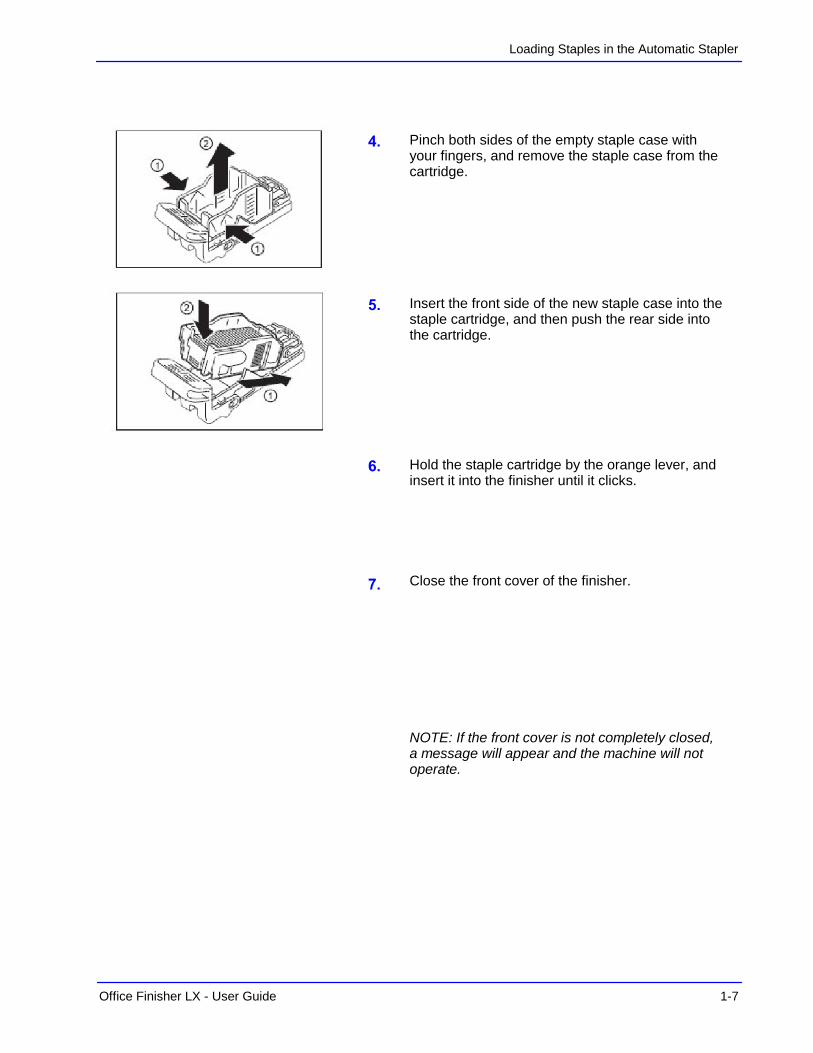
Pinch both sides of the empty staple case with your fingers, and remove the staple case from the cartridge.
Insert the front side of the new staple case into the staple cartridge, and then push the rear side into the cartridge.
Hold the staple cartridge by the orange lever, and insert it into the finisher until it clicks.
Close the front cover of the finisher.
NOTE: If the front cover is not completely closed, a message will appear and the machine will not operate.
Loading Booklet Maker Staples
1-8 Office Finisher LX - User Guide
Loading Booklet Maker Staples
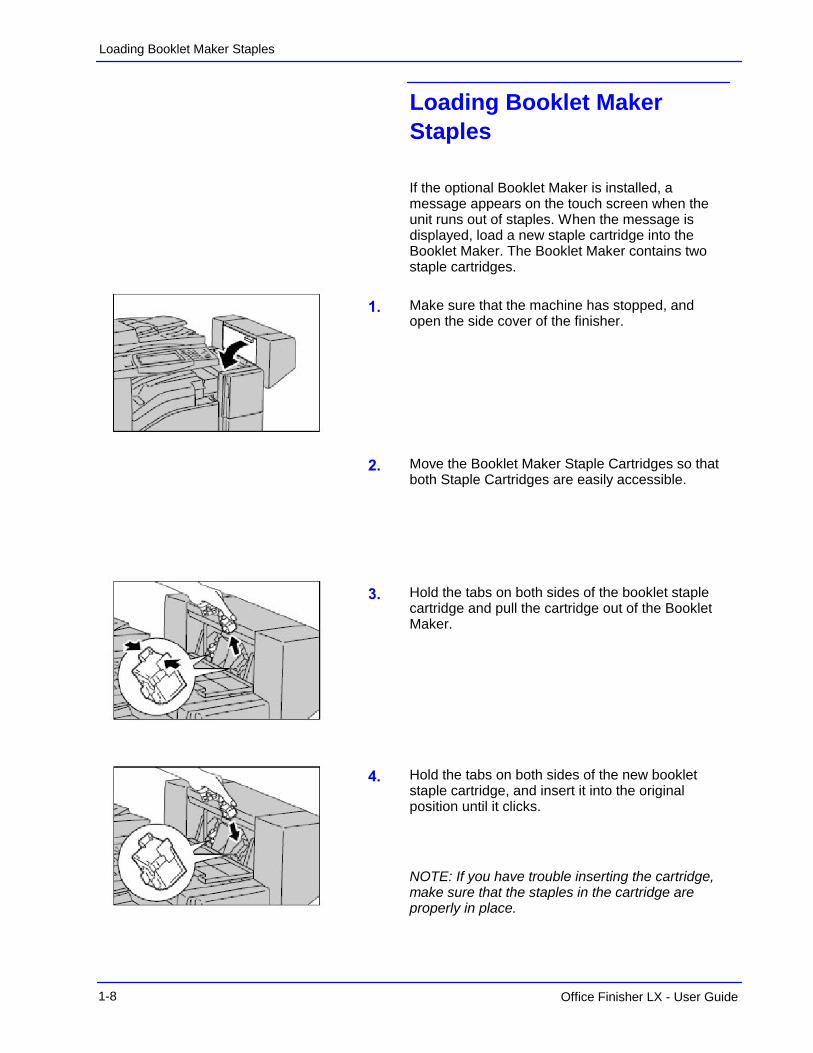
If the optional Booklet Maker is installed, a message appears on the touch screen when the unit runs out of staples. When the message is displayed, load a new staple cartridge into the Booklet Maker. The Booklet Maker contains two staple cartridges.
Make sure that the machine has stopped, and open the side cover of the finisher.
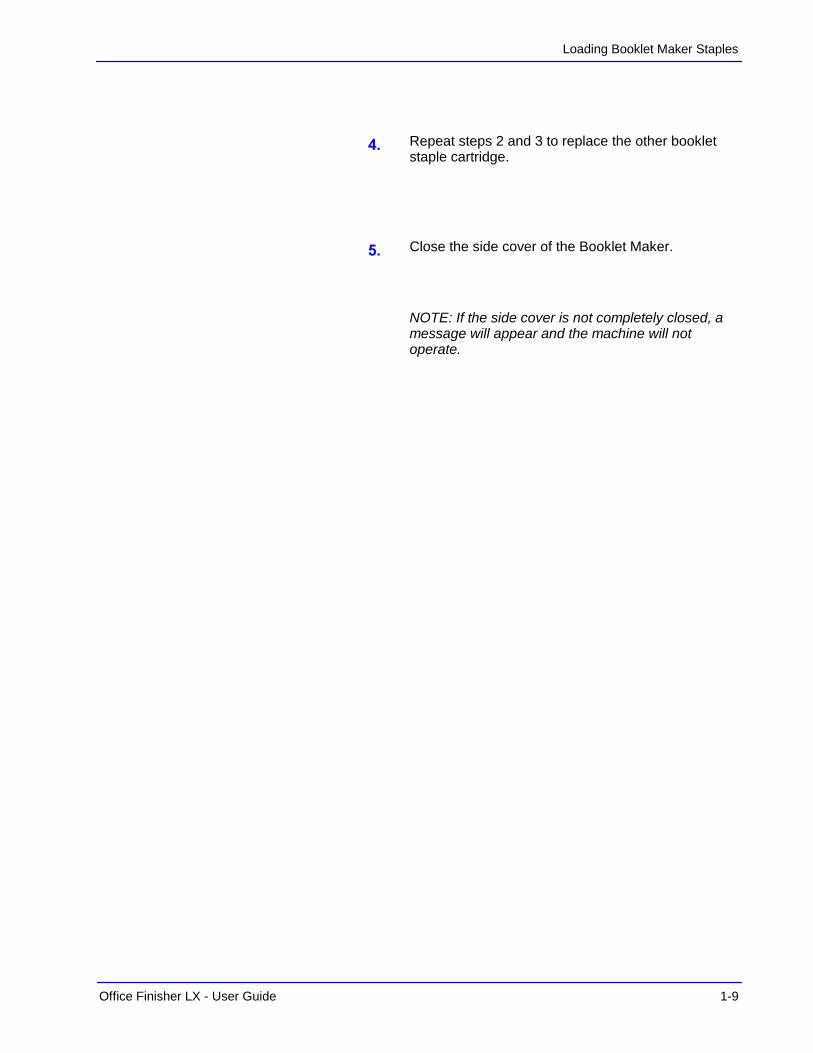
Hold the tabs on both sides of the booklet staple cartridge and pull the cartridge out of the Booklet Maker.
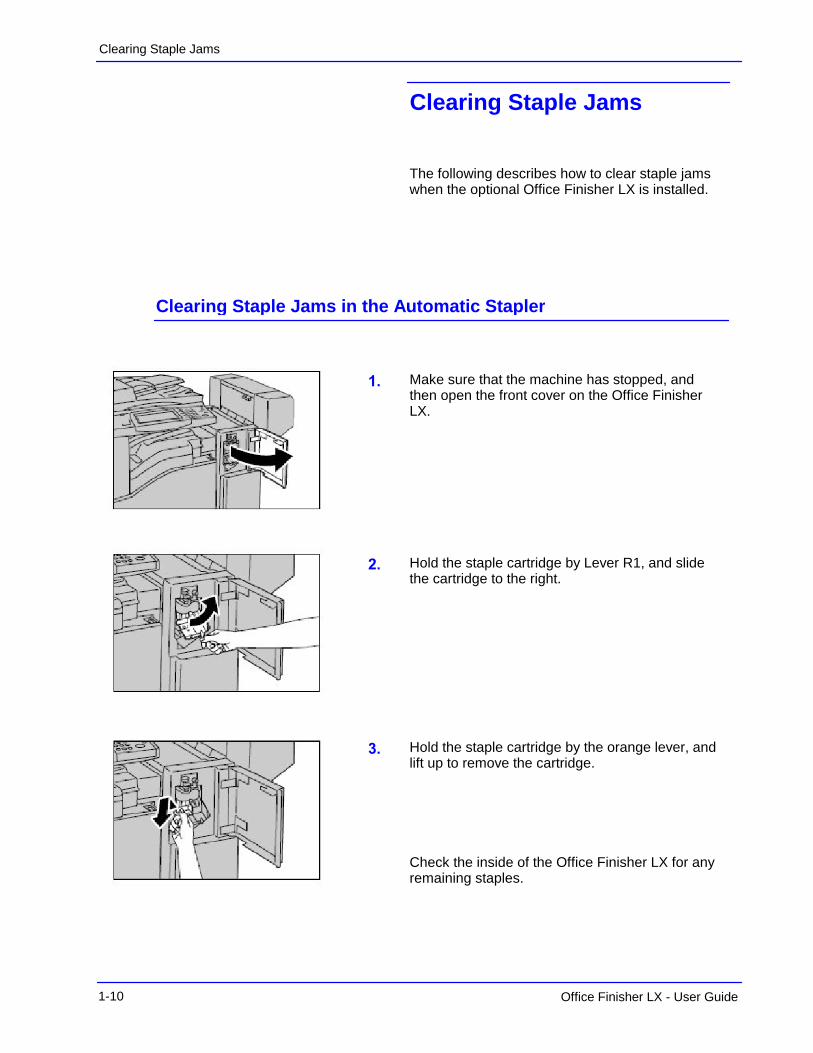
Hold the tabs on both sides of the new booklet staple cartridge, and insert it into the original position until it clicks.
NOTE: If you have trouble inserting the cartridge, make sure that the staples in the cartridge are properly in place.
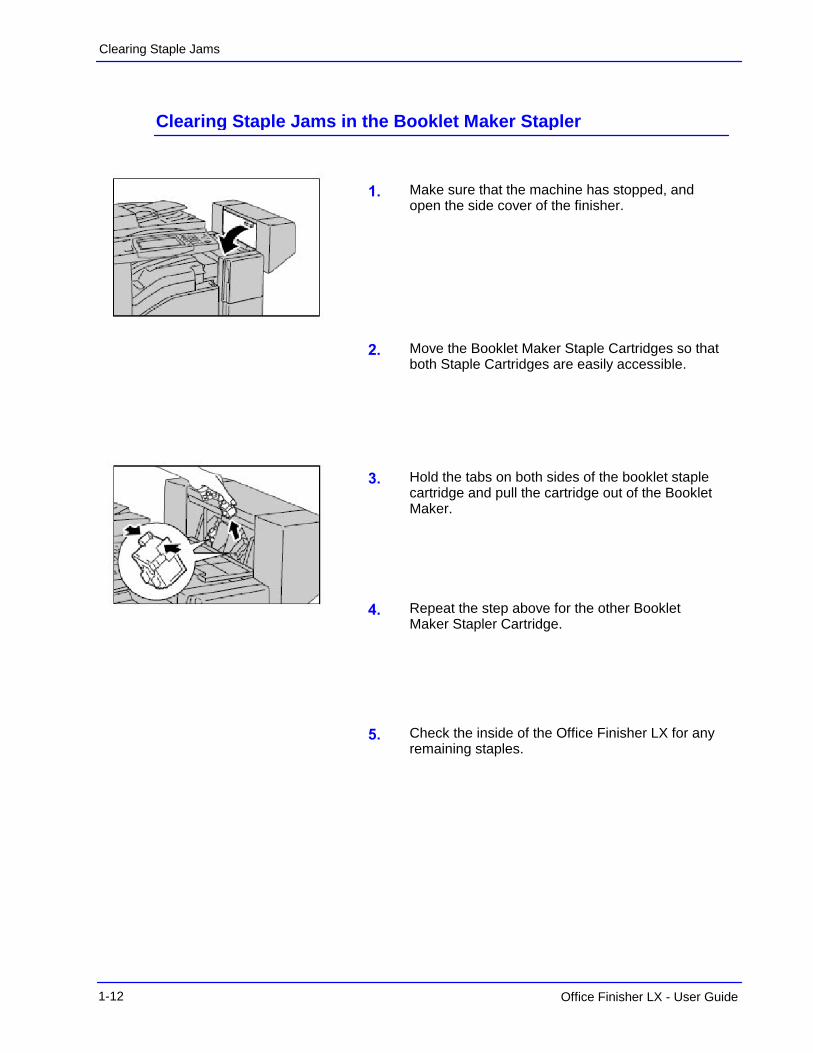
Move the Booklet Maker Staple Cartridges so that both Staple Cartridges are easily accessible.
Office Finisher LX - User Guide 1-9
Loading Booklet Maker Staples
Repeat steps 2 and 3 to replace the other booklet staple cartridge.
Close the side cover of the Booklet Maker.
NOTE: If the side cover is not completely closed, a message will appear and the machine will not operate.
Clearing Staple Jams
1-10 Office Finisher LX - User Guide
Clearing Staple Jams
The following describes how to clear staple jams when the optional Office Finisher LX is installed.
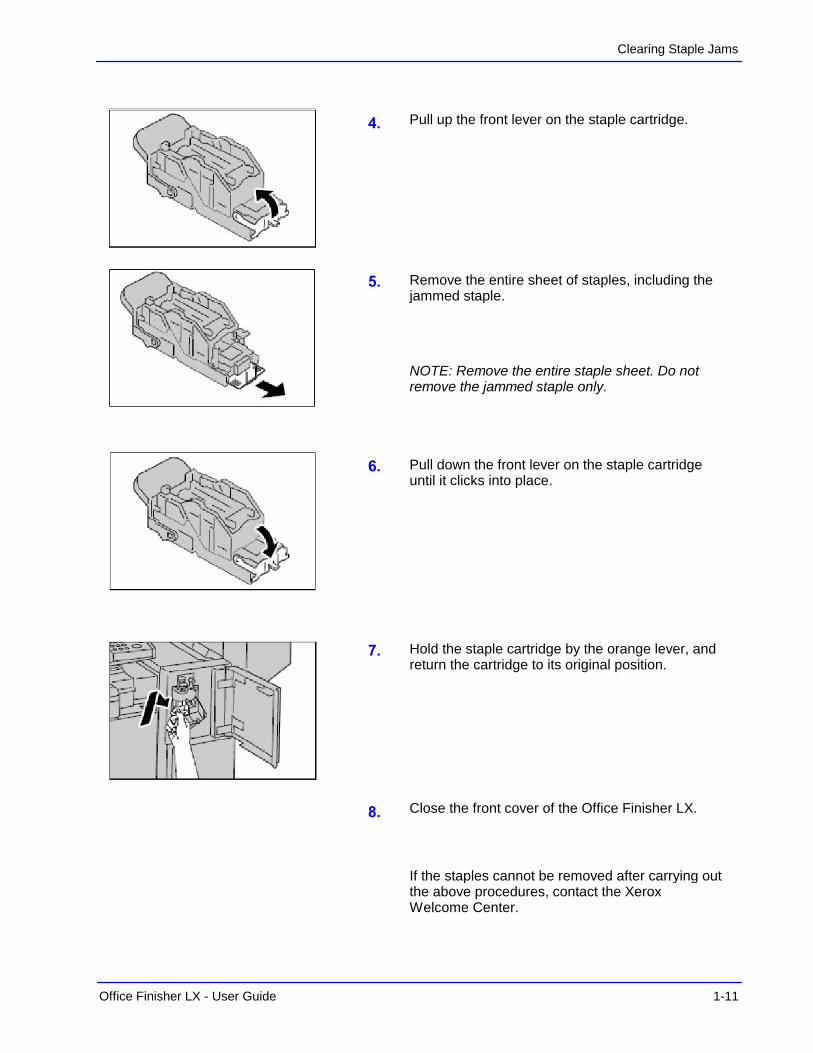
Make sure that the machine has stopped, and then open the front cover on the Office Finisher LX.
Hold the staple cartridge by Lever R1, and slide the cartridge to the right.
Hold the staple cartridge by the orange lever, and lift up to remove the cartridge.
Check the inside of the Office Finisher LX for any remaining staples.
Clearing Staple Jams in the Automatic Stapler
Office Finisher LX - User Guide 1-11
Clearing Staple Jams
Remove the entire sheet of staples, including the jammed staple.
Pull down the front lever on the staple cartridge until it clicks into place.
Hold the staple cartridge by the orange lever, and return the cartridge to its original position.
Close the front cover of the Office Finisher LX.
NOTE: Remove the entire staple sheet. Do not remove the jammed staple only.
If the staples cannot be removed after carrying out the above procedures, contact the Xerox Welcome Center.
Pull up the front lever on the staple cartridge.
Clearing Staple Jams
1-12 Office Finisher LX - User Guide
Clearing Staple Jams in the Booklet Maker Stapler
Make sure that the machine has stopped, and open the side cover of the finisher.
Hold the tabs on both sides of the booklet staple cartridge and pull the cartridge out of the Booklet Maker.
Move the Booklet Maker Staple Cartridges so that both Staple Cartridges are easily accessible.
Repeat the step above for the other Booklet Maker Stapler Cartridge.
Check the inside of the Office Finisher LX for any remaining staples.

Office Finisher LX - User Guide 1-13
Clearing Staple Jams
Close the side cover of the Booklet Maker.
NOTE: If you have trouble inserting the cartridge, make sure that the staples in the cartridge are properly in place.
Hold the tabs on both sides of the new booklet staple cartridge, and insert it into the original position until it clicks.
Repeat the step above for the other Booklet Maker Stapler Cartridge.
Clearing Paper Jams
1-14 Office Finisher LX - User Guide
Clearing Paper Jams
Follow the steps below to clear paper jams in the optional Office Finisher LX.
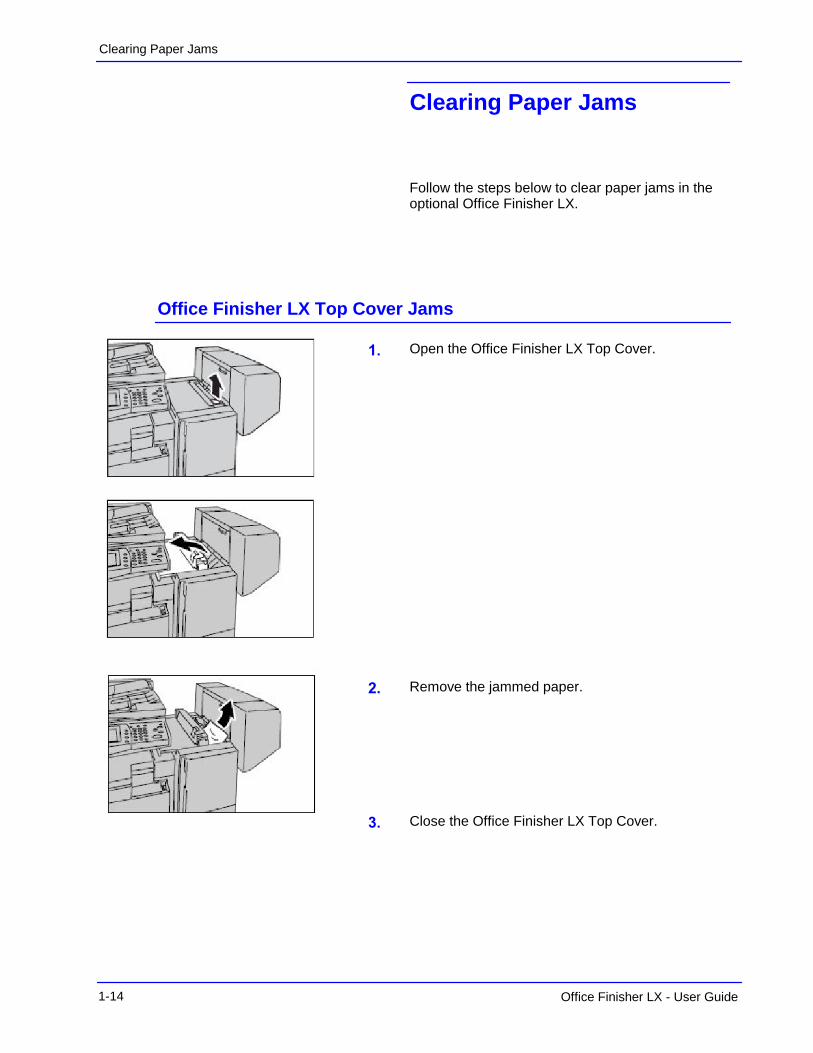
Office Finisher LX Top Cover Jams
Open the Office Finisher LX Top Cover.
Remove the jammed paper.
Close the Office Finisher LX Top Cover.
Office Finisher LX - User Guide 1-15
Clearing Paper Jams
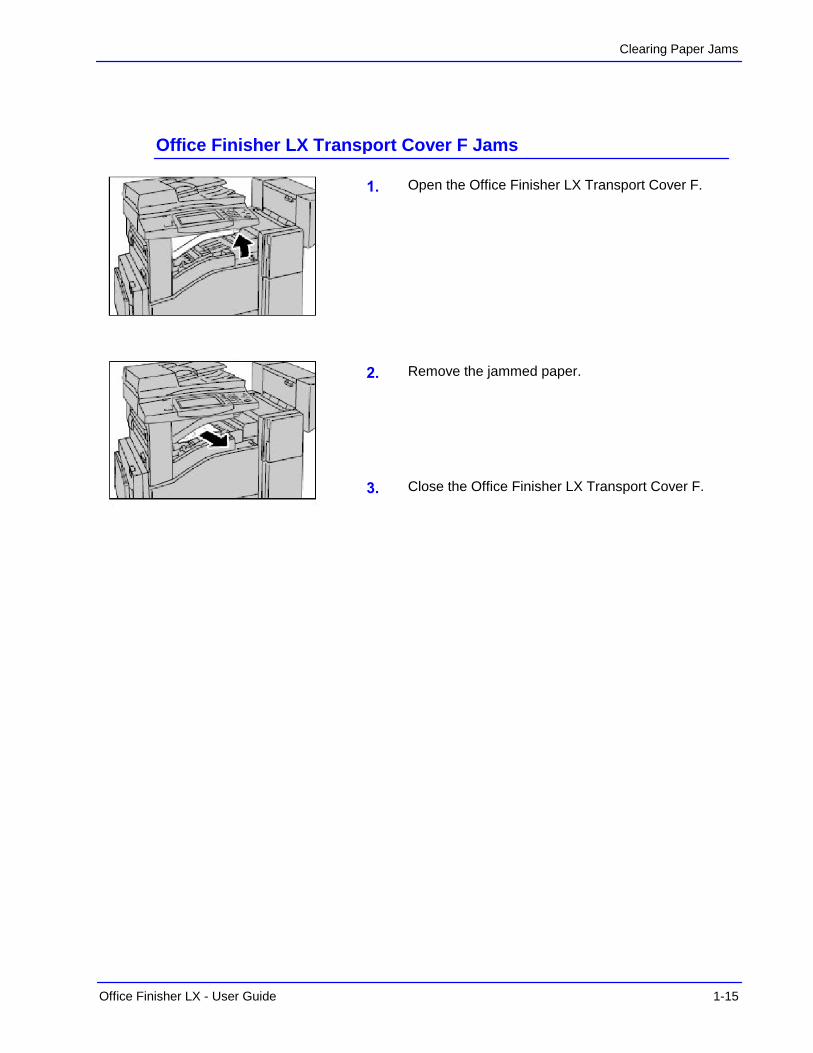
Office Finisher LX Transport Cover F Jams
Open the Office Finisher LX Transport Cover F.
Remove the jammed paper.
Close the Office Finisher LX Transport Cover F.
Clearing Paper Jams
1-16 Office Finisher LX - User Guide
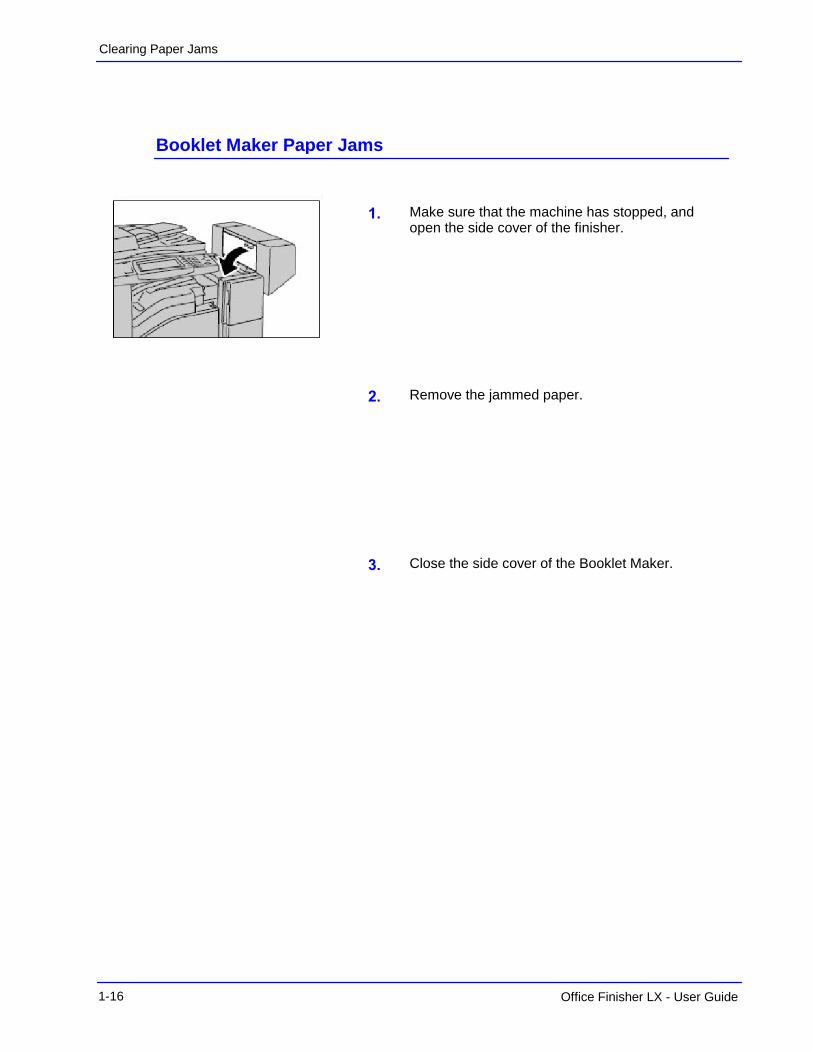
Booklet Maker Paper Jams
Make sure that the machine has stopped, and open the side cover of the finisher.
Remove the jammed paper.
Close the side cover of the Booklet Maker.
Office Finisher LX - User Guide 1-17
Emptying the Hole Punch Waste Container
Emptying the Hole Punch Waste Container
Make sure that the machine has stopped, and then open the Interface Cover on the Office Finisher LX.
NOTE: Leave the power on when emptying the Hole Punch Waste Container. If the power is turned off, the machine will not recognize that the waste container has been emptied.
Pull out the Hole Punch Waste Container.
Dispose of the Hole Punch waste.
Push in the Hole Punch Waste Container.
Close the Interface Cover on the Office Finisher LX.
NOTE: If the Interface Cover is not completely closed, a message will appear and the machine will not operate.