Embed Size (px)
Citation preview
PWA Reports
1
User Guide
Extra PWA
Reports

PWA Reports
2
Overview
Extra PWA Reports add three powerful reports to Project Web Access.
These reports display the following details:
“Unapproved Hours” Report shows the working hours that are not
approved by the project manager for the resources filtered
according to the user's choice.
“Reported Hours” Report shows the reported working hours in
relation to the quota working hours per day for the resources filtered
according to the user’s choice.
“Late Tasks” Report shows the tasks that their finish date passed and
they have not been completed yet.
The Business Need
Often, project manager wants to know in real time what the resources
status or the tasks status is.
The project manager is able to get these data only after publishing the
project.
The Solution
Extra PWA Reports present the information in real time without the need
of the project to be published.
PWA Reports
3
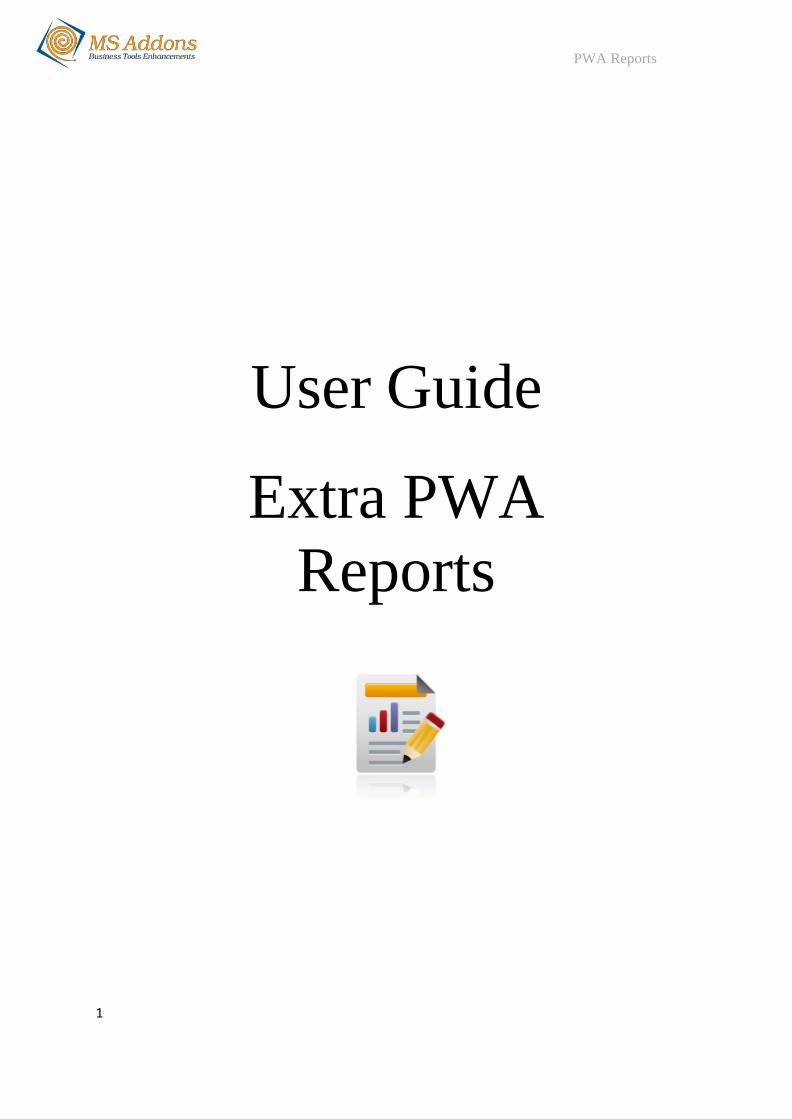
Enter the Project Web App.
Click on button, the following web page will appear:
PWA Reports
4
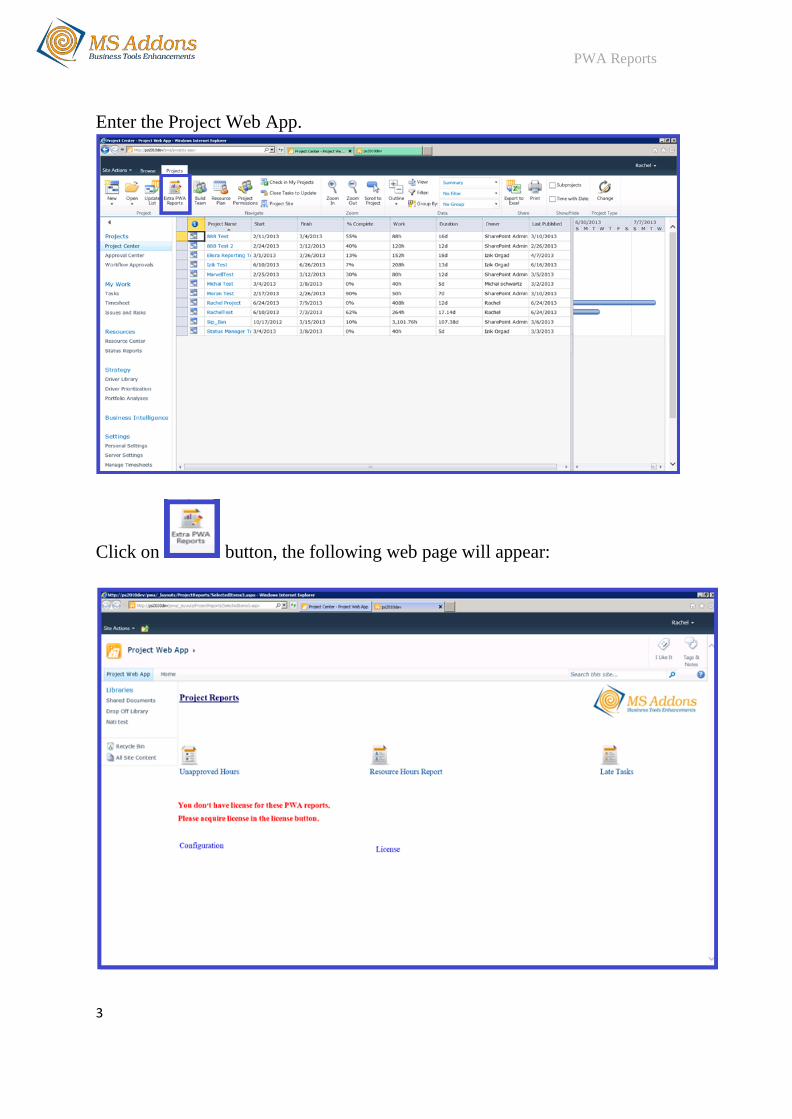
Before using Extra PWA Reports
The reports’ buttons are not enabled.
1. Click on button:
Database Details: Fill in your SQL server name (the server that holds PWA
databases) and the actual name of PWA published database and PWA
Reporting database on your server.
After you filled in the details click on button to save it.
If you want to close the configuration panel without any change click on
button.
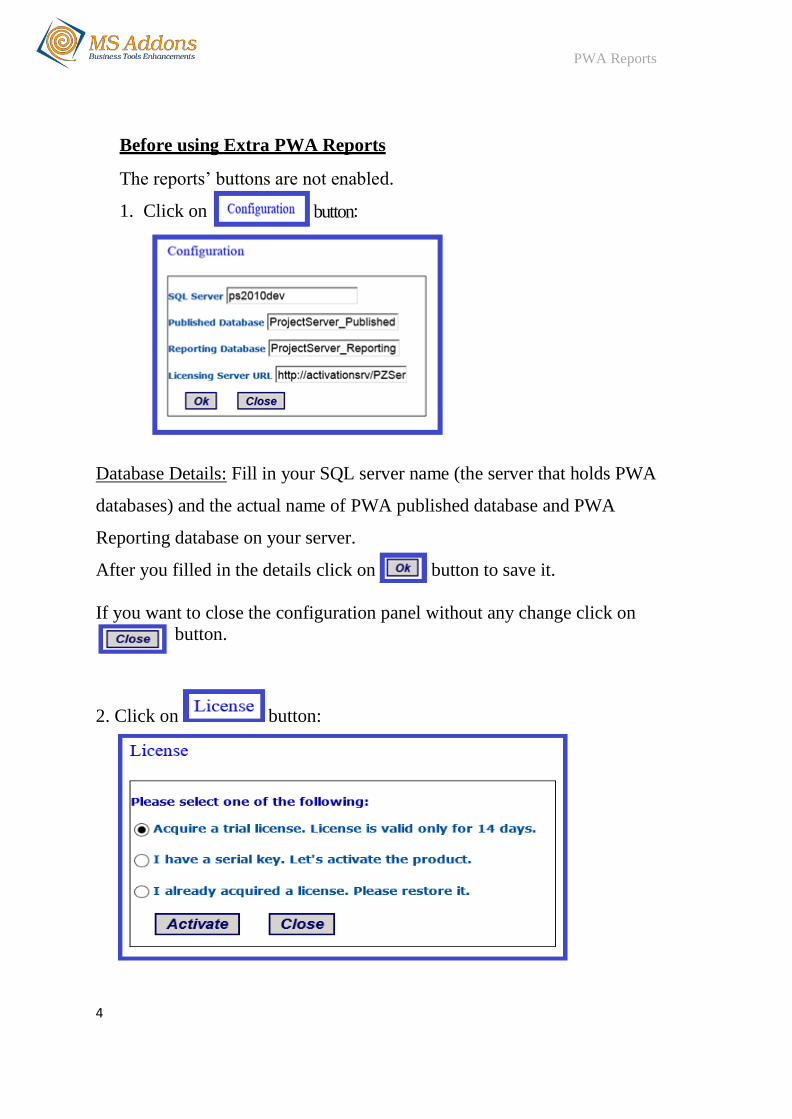
2. Click on button:
PWA Reports
5
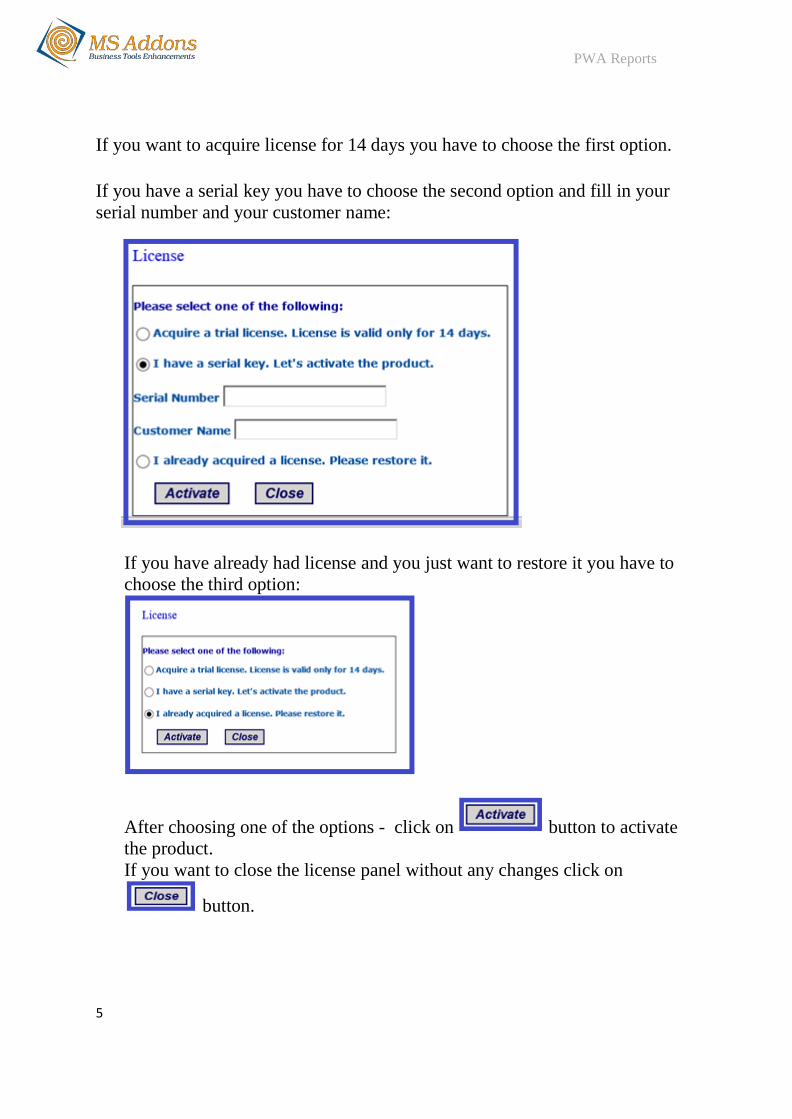
If you want to acquire license for 14 days you have to choose the first option.
If you have a serial key you have to choose the second option and fill in your
serial number and your customer name:
If you have already had license and you just want to restore it you have to
choose the third option:
After choosing one of the options - click on button to activate
the product.
If you want to close the license panel without any changes click on
button.
PWA Reports
6
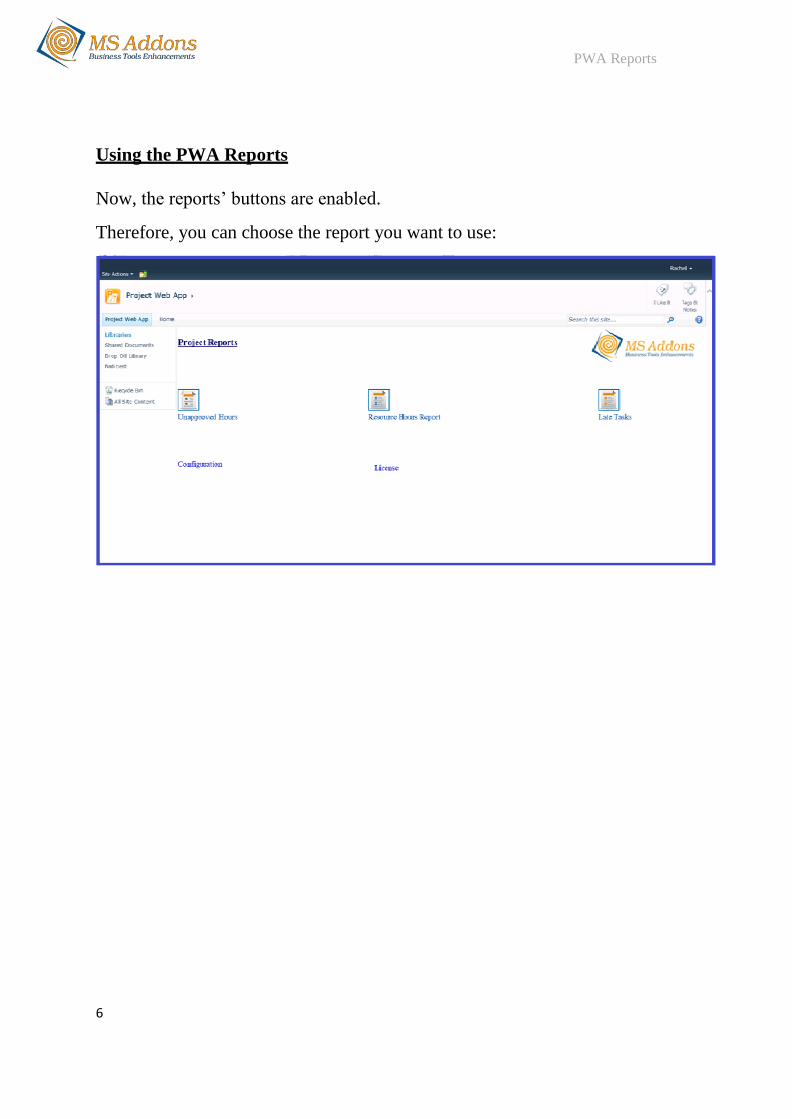
Using the PWA Reports
Now, the reports’ buttons are enabled.
Therefore, you can choose the report you want to use:
PWA Reports
7
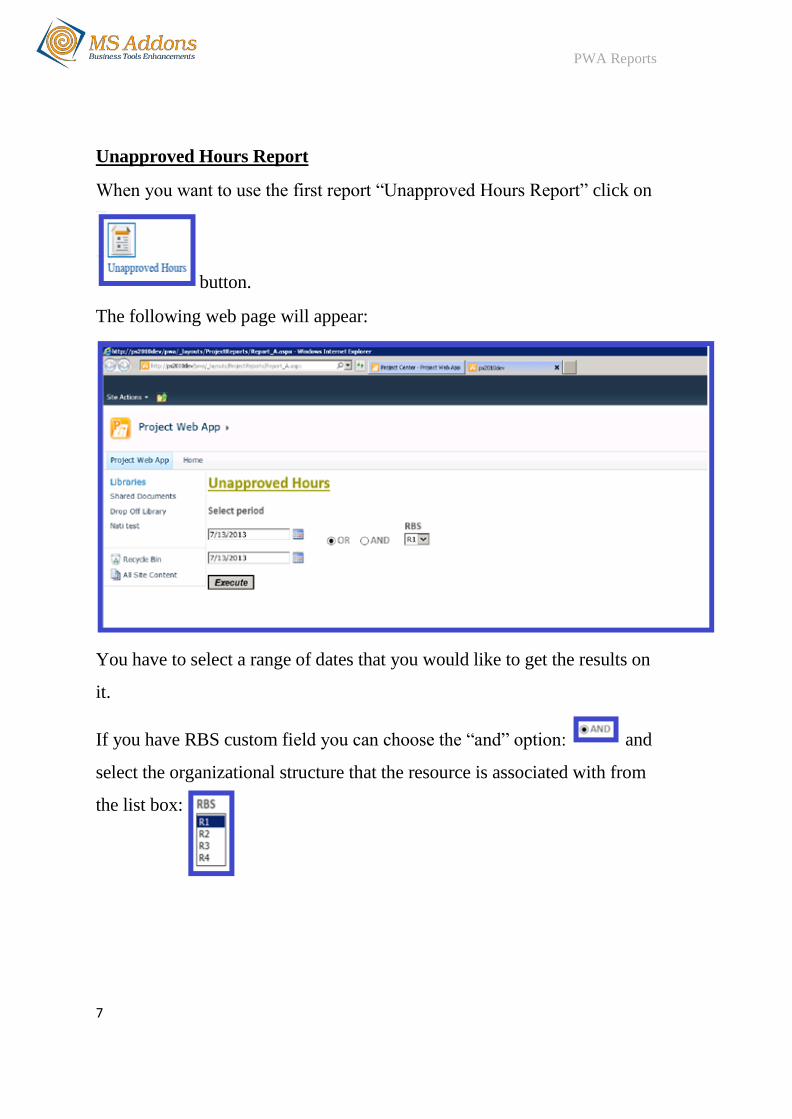
Unapproved Hours Report
When you want to use the first report “Unapproved Hours Report” click on
button.
The following web page will appear:
You have to select a range of dates that you would like to get the results on
it.
If you have RBS custom field you can choose the “and” option: and
select the organizational structure that the resource is associated with from
the list box:
PWA Reports
8
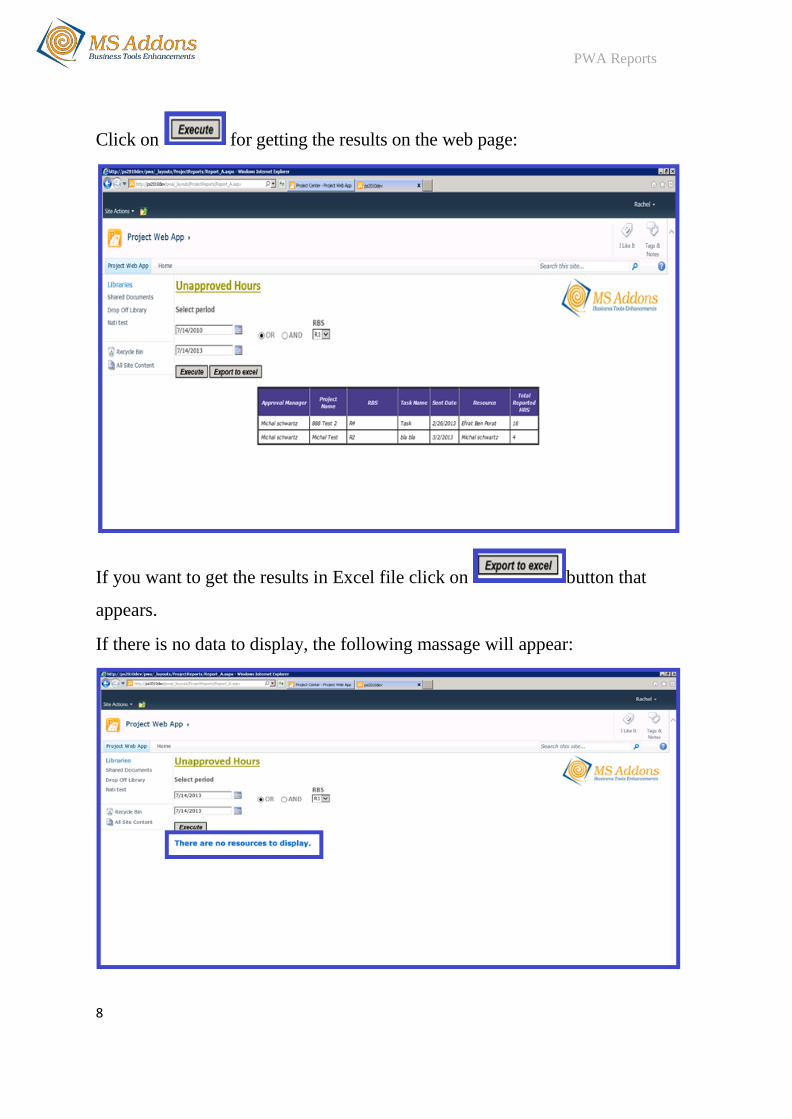
Click on for getting the results on the web page:
If you want to get the results in Excel file click on button that
appears.
If there is no data to display, the following massage will appear:
PWA Reports
9
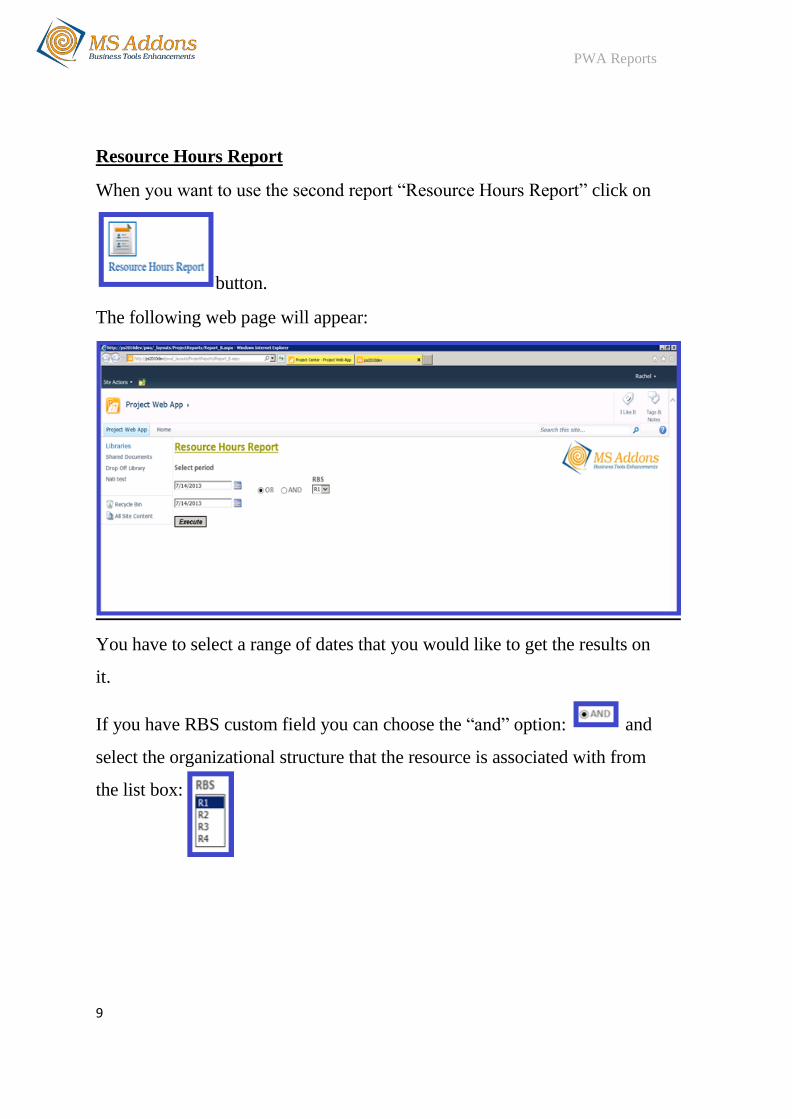
Resource Hours Report
When you want to use the second report “Resource Hours Report” click on
button.
The following web page will appear:
You have to select a range of dates that you would like to get the results on
it.
If you have RBS custom field you can choose the “and” option: and
select the organizational structure that the resource is associated with from
the list box:
PWA Reports
10
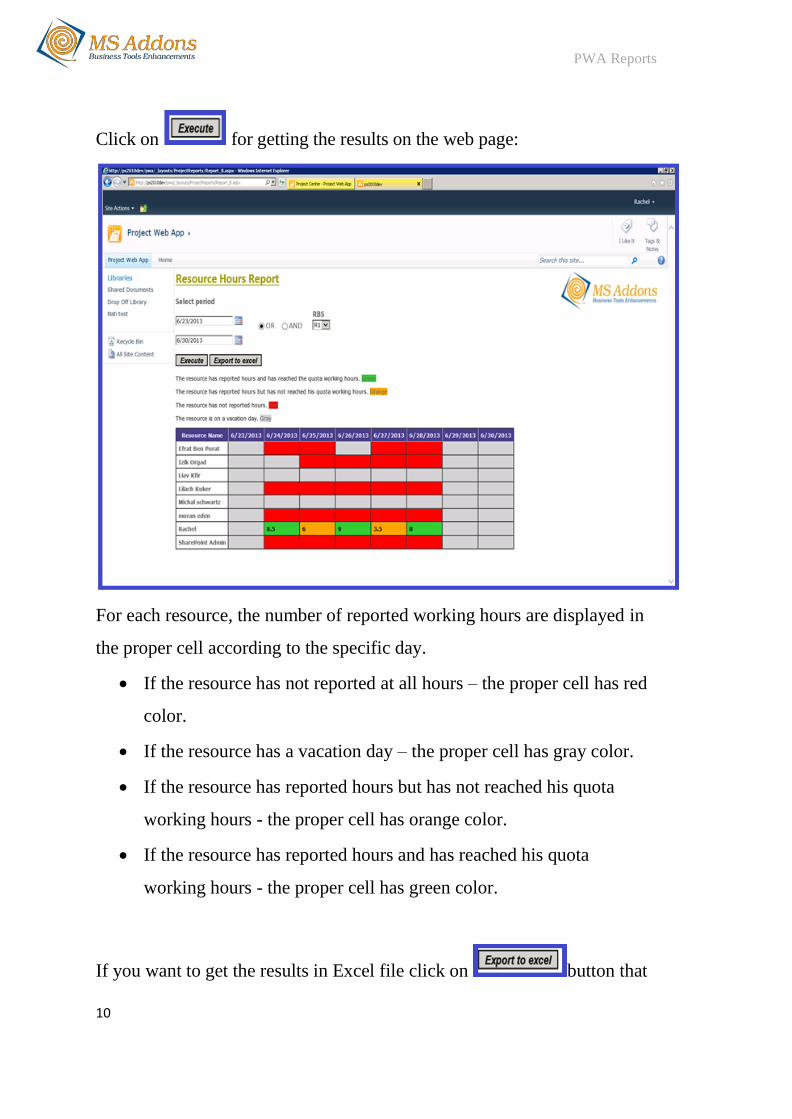
Click on for getting the results on the web page:
For each resource, the number of reported working hours are displayed in
the proper cell according to the specific day.
If the resource has not reported at all hours – the proper cell has red
color.
If the resource has a vacation day – the proper cell has gray color.
If the resource has reported hours but has not reached his quota
working hours - the proper cell has orange color.
If the resource has reported hours and has reached his quota
working hours - the proper cell has green color.
If you want to get the results in Excel file click on button that
PWA Reports
11
appears.
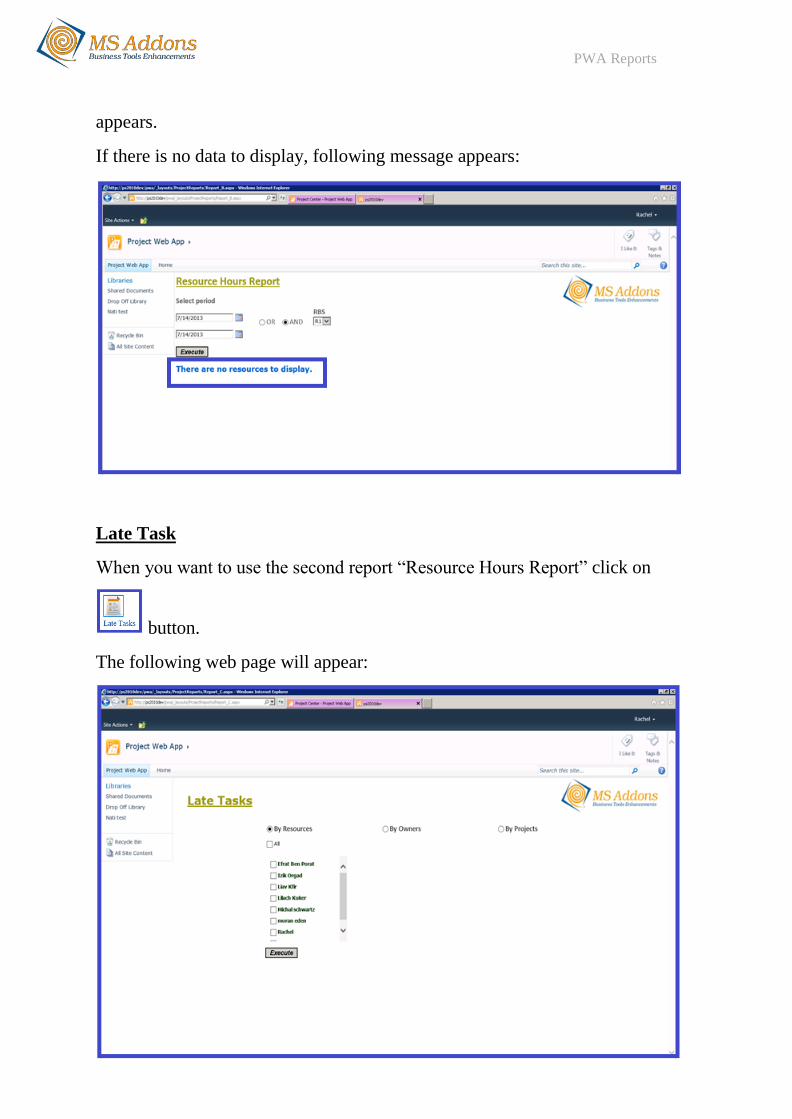
If there is no data to display, following message appears:
Late Task
When you want to use the second report “Resource Hours Report” click on
button.
The following web page will appear:
PWA Reports
12
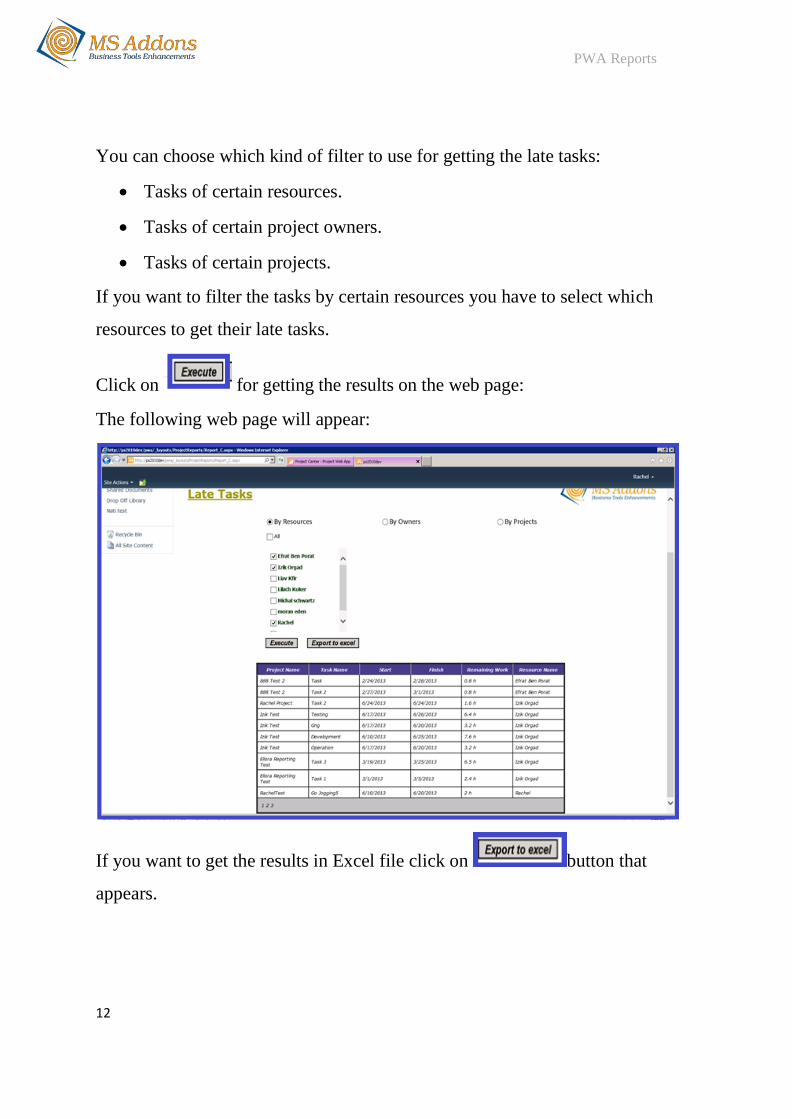
You can choose which kind of filter to use for getting the late tasks:
Tasks of certain resources.
Tasks of certain project owners.
Tasks of certain projects.
If you want to filter the tasks by certain resources you have to select which
resources to get their late tasks.
Click on for getting the results on the web page:
The following web page will appear:
If you want to get the results in Excel file click on button that
appears.
PWA Reports
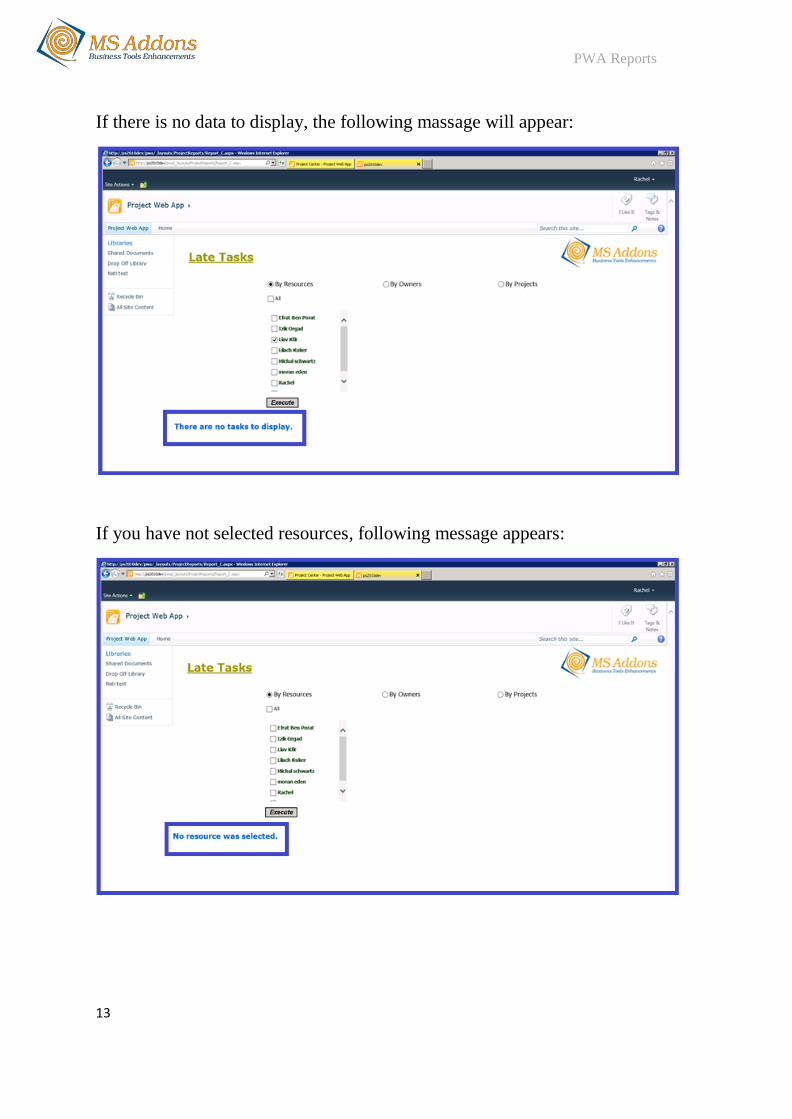
13
If there is no data to display, the following massage will appear:
If you have not selected resources, following message appears:
PWA Reports
14
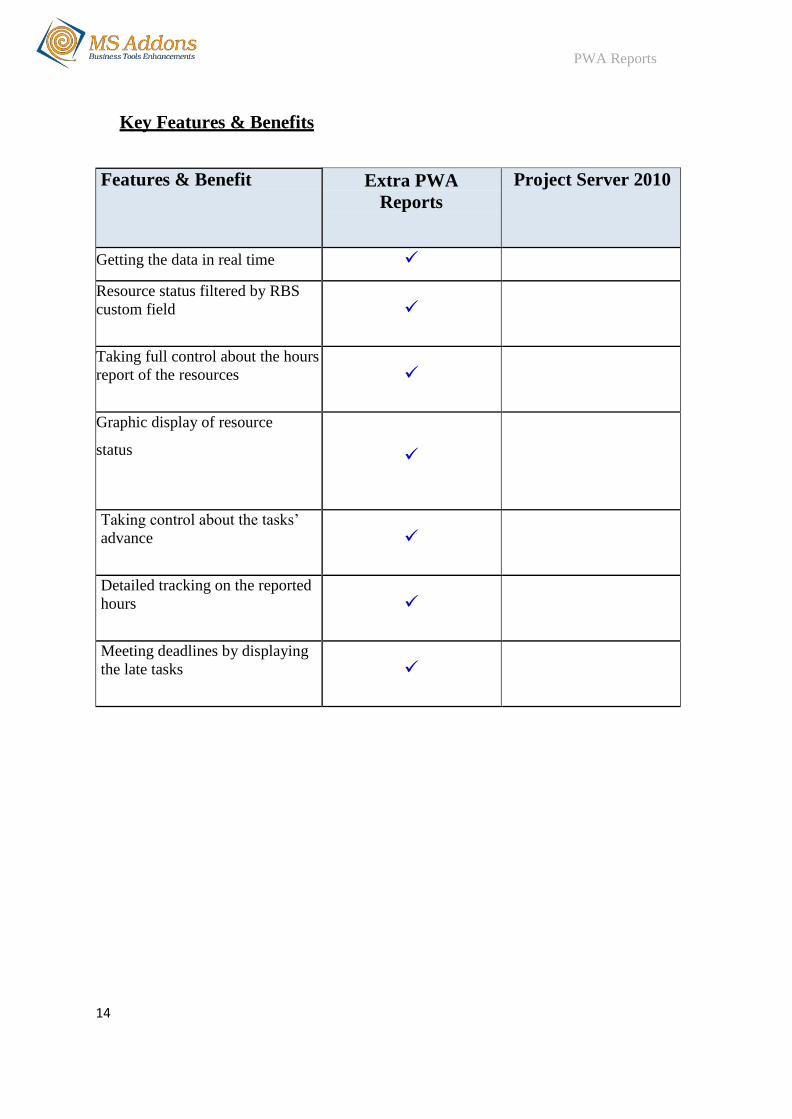
Key Features & Benefits
Features & Benefit Extra PWA
Reports
Project Server 2010
Getting the data in real time
Resource status filtered by RBS
custom field
Taking full control about the hours
report of the resources
Graphic display of resource
status
Taking control about the tasks’
advance
Detailed tracking on the reported
hours
Meeting deadlines by displaying
the late tasks
PWA Reports
15
System Requirements
.NET Framework 3.5 SP1 or Higher
http://download.microsoft.com/download/2/0/e/20e90413-712f-438c-
988e-fdaa79a8ac3d/dotnetfx35.exe
Visual Studio Tools for the Microsoft Office System (version 3.0
Runtime
http://www.microsoft.com/downloads/en/details.aspx?FamilyID=54eb3a
5a-0e52-40f9-a2d1-eecd7a092dcb&displaylang=en
Visual Studio Tools for the Microsoft Office System (version 3.0
Runtime) Service pack 1
http://www.microsoft.com/downloads/en/details.aspx?FamilyID=d8eb49
21-891a-4b5e-973f-0b96e6ccf376

PWA Reports
16
Installation Procedure
1. Double click on the Setup.exe file to start the installation process.
2. The wizard will show the Welcome screen:
3. Click Next to advance to the System Checks step.
4. The setup application will run the necessary checks and will indicate their status. 5. Click Next.
PWA Reports
17
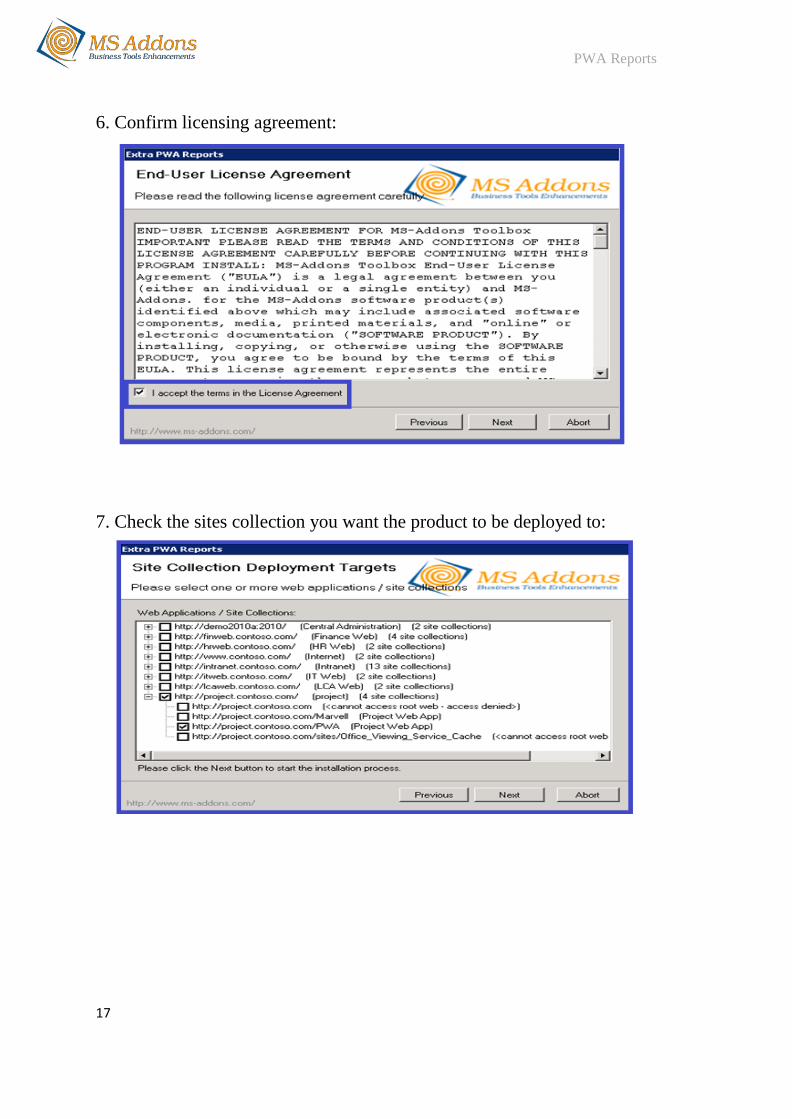
6. Confirm licensing agreement: 7. Check the sites collection you want the product to be deployed to:
PWA Reports
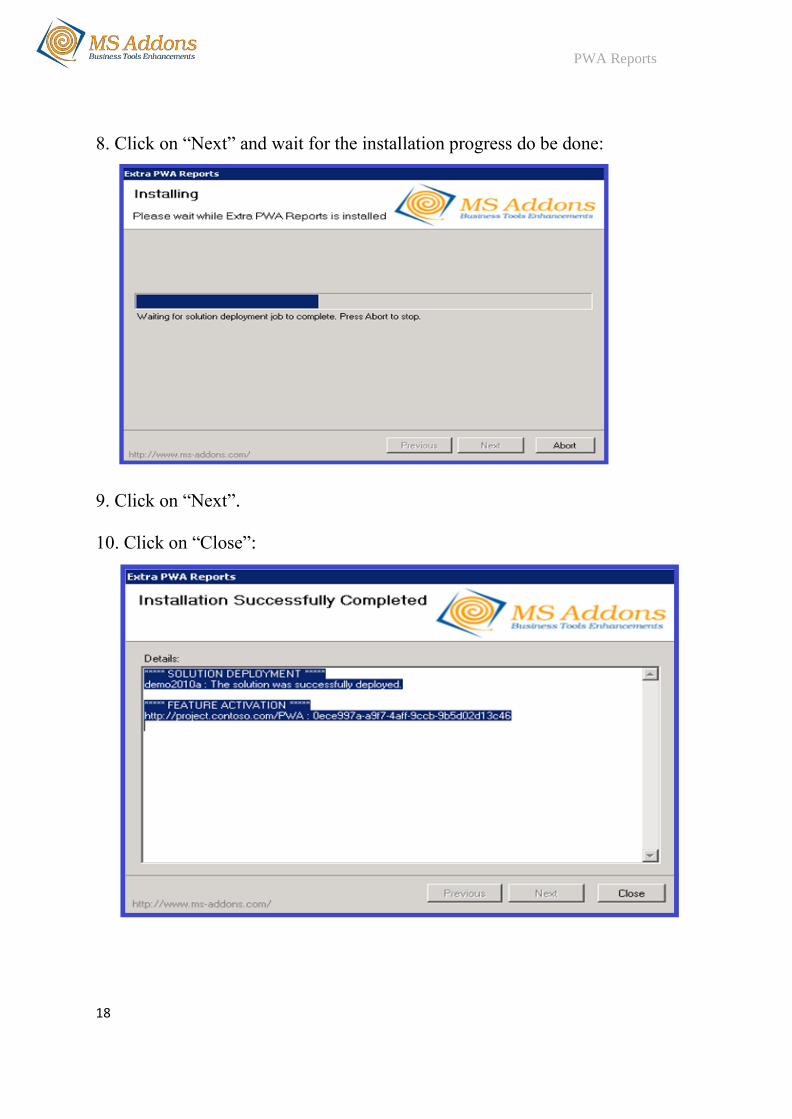
18
8. Click on “Next” and wait for the installation progress do be done: 9. Click on “Next”. 10. Click on “Close”: