Embed Size (px)
Citation preview
Useful Solaris Commands
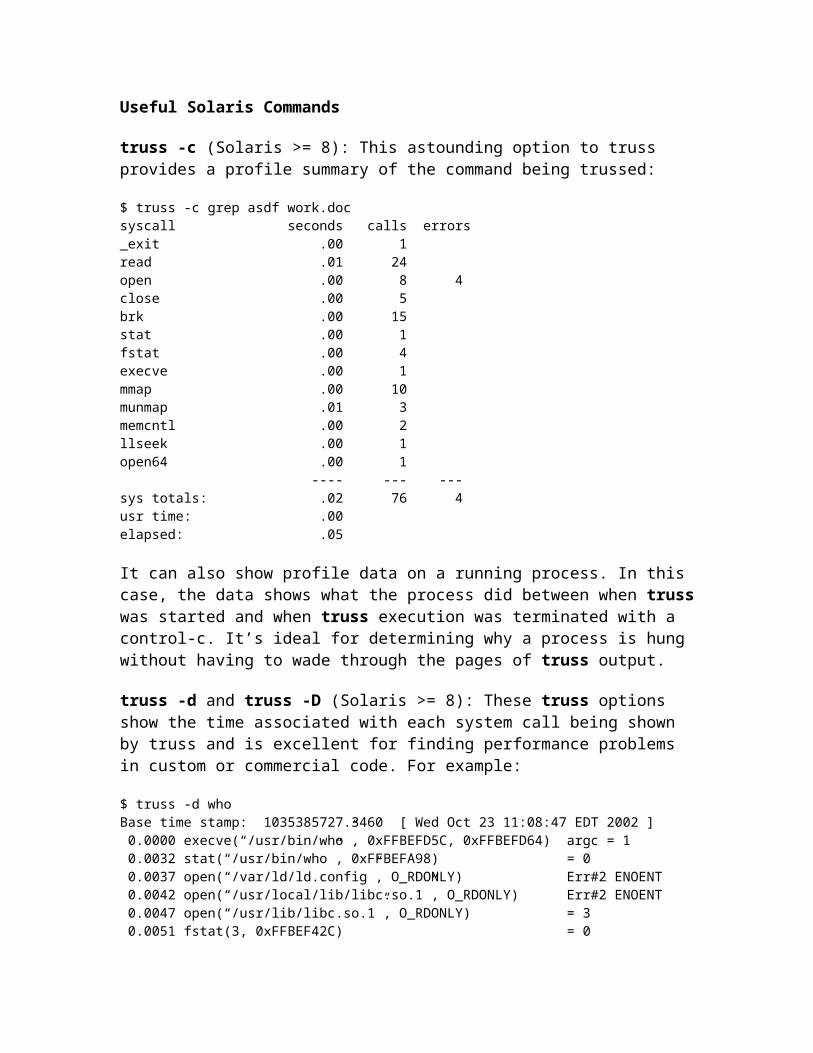
truss -c (Solaris >= 8): This astounding option to truss provides a profile summary of the command being trussed:
$ truss -c grep asdf work.docsyscall seconds calls errors_exit .00 1read .01 24open .00 8 4close .00 5brk .00 15stat .00 1fstat .00 4execve .00 1mmap .00 10munmap .01 3memcntl .00 2llseek .00 1open64 .00 1 ---- --- ---sys totals: .02 76 4usr time: .00elapsed: .05
It can also show profile data on a running process. In this case, the data shows what the process did between when truss was started and when truss execution was terminated with a control-c. It’s ideal for determining why a process is hung without having to wade through the pages of truss output.
truss -d and truss -D (Solaris >= 8): These truss options show the time associated with each system call being shown by truss and is excellent for finding performance problems in custom or commercial code. For example:
$ truss -d whoBase time stamp: 1035385727.3460 [ Wed Oct 23 11:08:47 EDT 2002 ] 0.0000 execve(“/usr/bin/who”, 0xFFBEFD5C, 0xFFBEFD64) argc = 1 0.0032 stat(“/usr/bin/who”, 0xFFBEFA98) = 0 0.0037 open(“/var/ld/ld.config”, O_RDONLY) Err#2 ENOENT 0.0042 open(“/usr/local/lib/libc.so.1”, O_RDONLY) Err#2 ENOENT 0.0047 open(“/usr/lib/libc.so.1”, O_RDONLY) = 3 0.0051 fstat(3, 0xFFBEF42C) = 0. . .
truss -D is even more useful, showing the time delta between system calls:
Dilbert> truss -D who 0.0000 execve(“/usr/bin/who”, 0xFFBEFD5C, 0xFFBEFD64) argc = 1 0.0028 stat(“/usr/bin/who”, 0xFFBEFA98) = 0 0.0005 open(“/var/ld/ld.config”, O_RDONLY) Err#2 ENOENT 0.0006 open(“/usr/local/lib/libc.so.1”, O_RDONLY) Err#2 ENOENT 0.0005 open(“/usr/lib/libc.so.1”, O_RDONLY) = 3 0.0004 fstat(3, 0xFFBEF42C) = 0
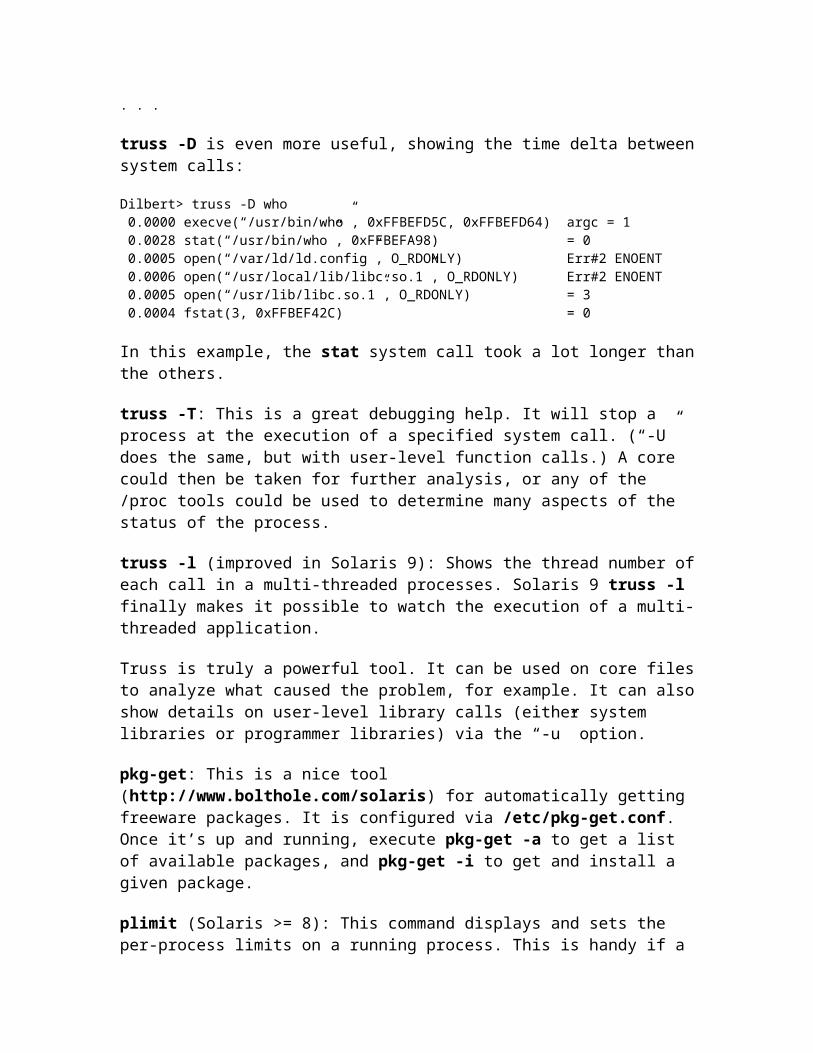
In this example, the stat system call took a lot longer than the others.
truss -T: This is a great debugging help. It will stop a process at the execution of a specified system call. (“-U” does the same, but with user-level function calls.) A core could then be taken for further analysis, or any of the /proc tools could be used to determine many aspects of the status of the process.
truss -l (improved in Solaris 9): Shows the thread number of each call in a multi-threaded processes. Solaris 9 truss -l finally makes it possible to watch the execution of a multi-threaded application.
Truss is truly a powerful tool. It can be used on core files to analyze what caused the problem, for example. It can also show details on user-level library calls (either system libraries or programmer libraries) via the “-u” option.
pkg-get: This is a nice tool (http://www.bolthole.com/solaris) for automatically getting freeware packages. It is configured via /etc/pkg-get.conf. Once it’s up and running, execute pkg-get -a to get a list of available packages, and pkg-get -i to get and install a given package.
plimit (Solaris >= 8): This command displays and sets the per-process limits on a running process. This is handy if a long-running process is running up against a limit (for example, number of open files). Rather than using limit and restarting the command, plimit can modify the running process.
coreadm (Solaris >= 8): In the “old” days (before coreadm), core dumps were placed in the process’s working directory. Core files would also overwrite each other. All this and more has been addressed by coreadm, a tool to manage core file creation. With it, you can specify whether to save cores, where cores should be stored, how many versions should be retained, and more. Settings can be retained between reboots by coreadm modifying /etc/coreadm.conf.
pgrep (Solaris >= 8): pgrep searches through /proc for processes matching the given criteria, and returns their process-ids. A great option is “-n”, which returns the newest process that matches.
preap (Solaris >= 9): Reaps zombie processes. Any processes stuck in the “z” state (as shown by ps), can be removed from the system with this command.
pargs (Solaris >= 9): Shows the arguments and environment variables of a process.
nohup -p (Solaris >= 9): The nohup command can be used to start a process, so that if the shell that started the process closes (i.e., the process gets a “SIGHUP” signal), the process will keep running. This is useful for backgrounding a task that should continue running no matter what happens around it. But what happens if you start a process and
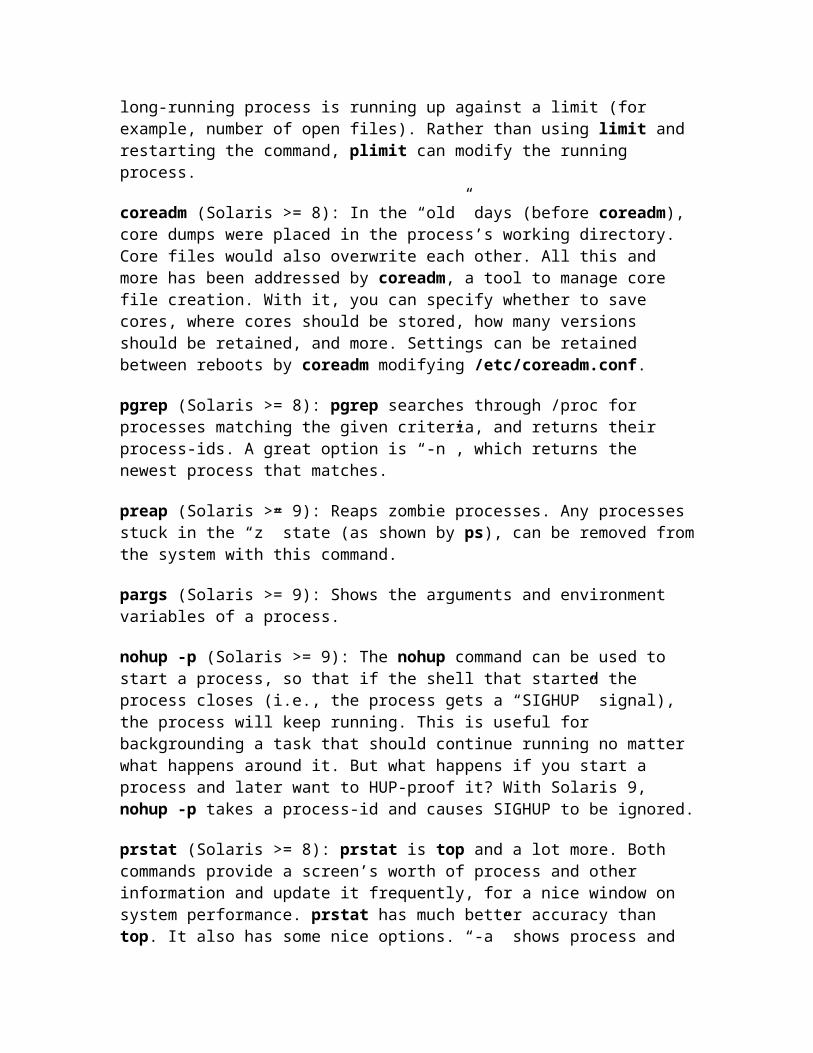
later want to HUP-proof it? With Solaris 9, nohup -p takes a process-id and causes SIGHUP to be ignored.
prstat (Solaris >= 8): prstat is top and a lot more. Both commands provide a screen’s worth of process and other information and update it frequently, for a nice window on system performance. prstat has much better accuracy than top. It also has some nice options. “-a” shows process and user information concurrently (sorted by CPU hog, by default). “-c” causes it to act like vmstat (new reports printed below old ones). “-C” shows processes in a processor set. “-j” shows processes in a “project”. “-L” shows per-thread information as well as per-process. “-m” and “-v” show quite a bit of per-process performance detail (including pages, traps, lock wait, and CPU wait). The output data can also be sorted by resident-set (real memory) size, virtual memory size, execute time, and so on. prstat is very useful on systems without top, and should probably be used instead of top because of its accuracy (and some sites care that it is a supported program).
trapstat (Solaris >= 9): trapstat joins lockstat and kstat as the most inscrutable commands on Solaris. Each shows gory details about the innards of the running operating system. Each is indispensable in solving strange happenings on a Solaris system. Best of all, their output is good to send along with bug reports, but further study can reveal useful information for general use as well.
vmstat -p (Solaris >= 8): Until this option became available, it was almost impossible (see the “se toolkit”) to determine what kind of memory demand was causing a system to page. vmstat -p is key because it not only shows whether your system is under memory stress (via the “sr” column), it also shows whether that stress is from application code, application data, or I/O. “-p” can really help pinpoint the cause of any mysterious memory issues on Solaris.
pmap -x (Solaris >= 8, bugs fixed in Solaris >= 9): If the process with memory problems is known, and more details on its memory use are needed, check out pmap -x. The target process-id has its memory map fully explained, as in:
# pmap -x 17791779: -ksh Address Kbytes RSS Anon Locked Mode Mapped File00010000 192 192 - - r-x-- ksh00040000 8 8 8 - rwx-- ksh00042000 32 32 8 - rwx-- [ heap ]FF180000 680 664 - - r-x-- libc.so.1FF23A000 24 24 - - rwx-- libc.so.1FF240000 8 8 - - rwx-- libc.so.1FF280000 568 472 - - r-x-- libnsl.so.1FF31E000 32 32 - - rwx-- libnsl.so.1FF326000 32 24 - - rwx-- libnsl.so.1FF340000 16 16 - - r-x-- libc_psr.so.1FF350000 16 16 - - r-x-- libmp.so.2FF364000 8 8 - - rwx-- libmp.so.2FF380000 40 40 - - r-x-- libsocket.so.1FF39A000 8 8 - - rwx-- libsocket.so.1FF3A0000 8 8 - - r-x-- libdl.so.1
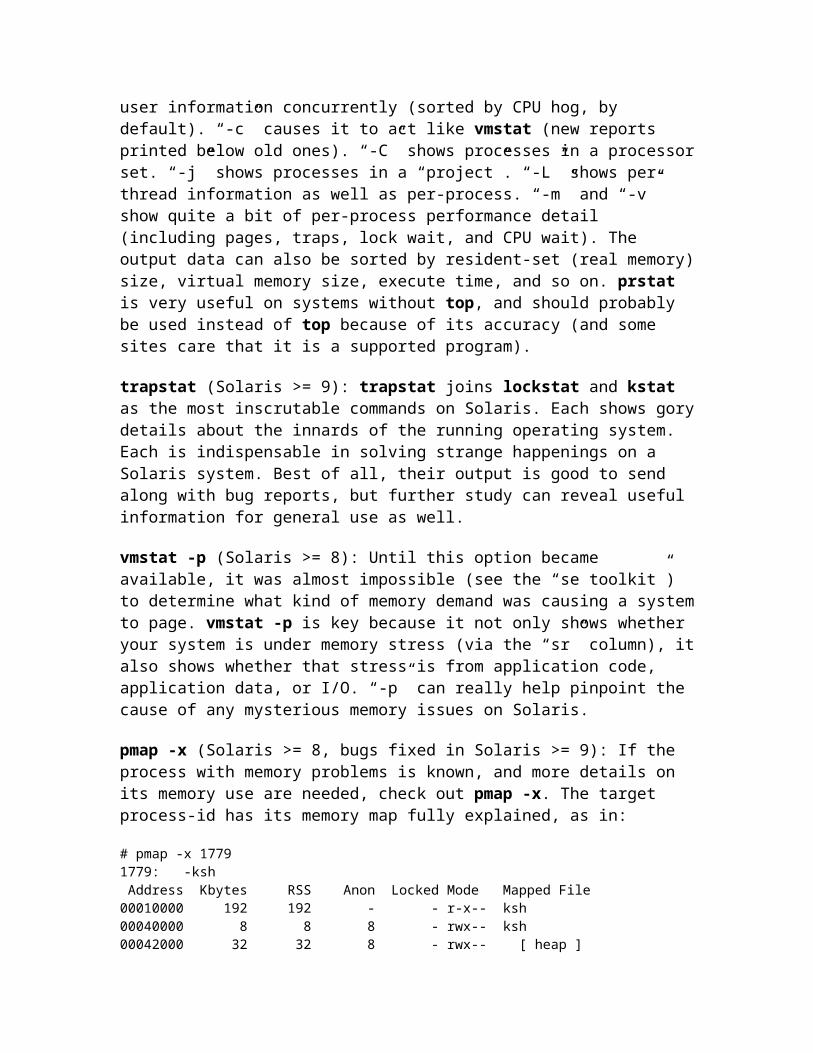
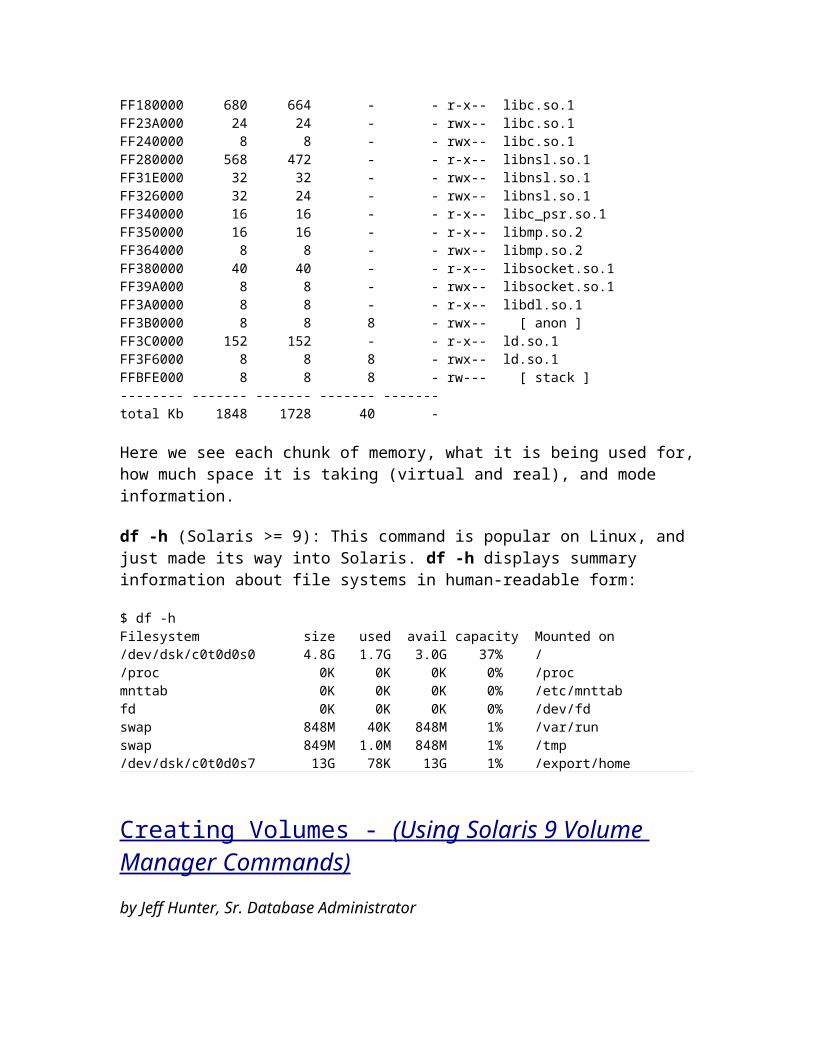
FF3B0000 8 8 8 - rwx-- [ anon ]FF3C0000 152 152 - - r-x-- ld.so.1FF3F6000 8 8 8 - rwx-- ld.so.1FFBFE000 8 8 8 - rw--- [ stack ]-------- ------- ------- ------- -------total Kb 1848 1728 40 -
Here we see each chunk of memory, what it is being used for, how much space it is taking (virtual and real), and mode information.
df -h (Solaris >= 9): This command is popular on Linux, and just made its way into Solaris. df -h displays summary information about file systems in human-readable form:
$ df -hFilesystem size used avail capacity Mounted on/dev/dsk/c0t0d0s0 4.8G 1.7G 3.0G 37% //proc 0K 0K 0K 0% /procmnttab 0K 0K 0K 0% /etc/mnttabfd 0K 0K 0K 0% /dev/fdswap 848M 40K 848M 1% /var/runswap 849M 1.0M 848M 1% /tmp/dev/dsk/c0t0d0s7 13G 78K 13G 1% /export/home
Creating Volumes - (Using Solaris 9 Volume Manager Commands)
by Jeff Hunter, Sr. Database Administrator
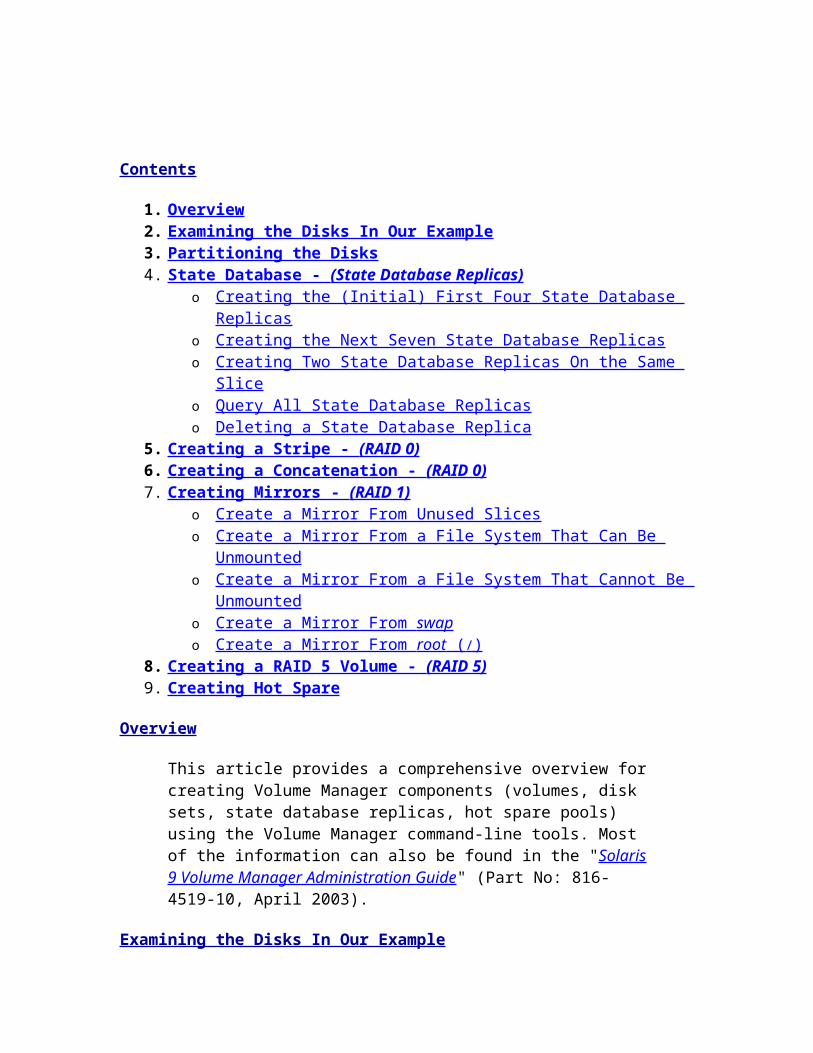
Contents
1. Overview 2. Examining the Disks In Our Example 3. Partitioning the Disks 4. State Database - (State Database Replicas)
o Creating the (Initial) First Four State Database Replicas o Creating the Next Seven State Database Replicas o Creating Two State Database Replicas On the Same Slice o Query All State Database Replicas o Deleting a State Database Replica
5. Creating a Stripe - (RAID 0) 6. Creating a Concatenation - (RAID 0) 7. Creating Mirrors - (RAID 1)
o Create a Mirror From Unused Slices o Create a Mirror From a File System That Can Be Unmounted
o Create a Mirror From a File System That Cannot Be Unmounted o Create a Mirror From swap o Create a Mirror From root ( / )
8. Creating a RAID 5 Volume - (RAID 5) 9. Creating Hot Spare
Overview
This article provides a comprehensive overview for creating Volume Manager components (volumes, disk sets, state database replicas, hot spare pools) using the Volume Manager command-line tools. Most of the information can also be found in the "Solaris 9 Volume Manager Administration Guide" (Part No: 816-4519-10, April 2003).
Examining the Disks In Our Example
This article is all about providing definitions and examples of Volume Manager's command line tools.
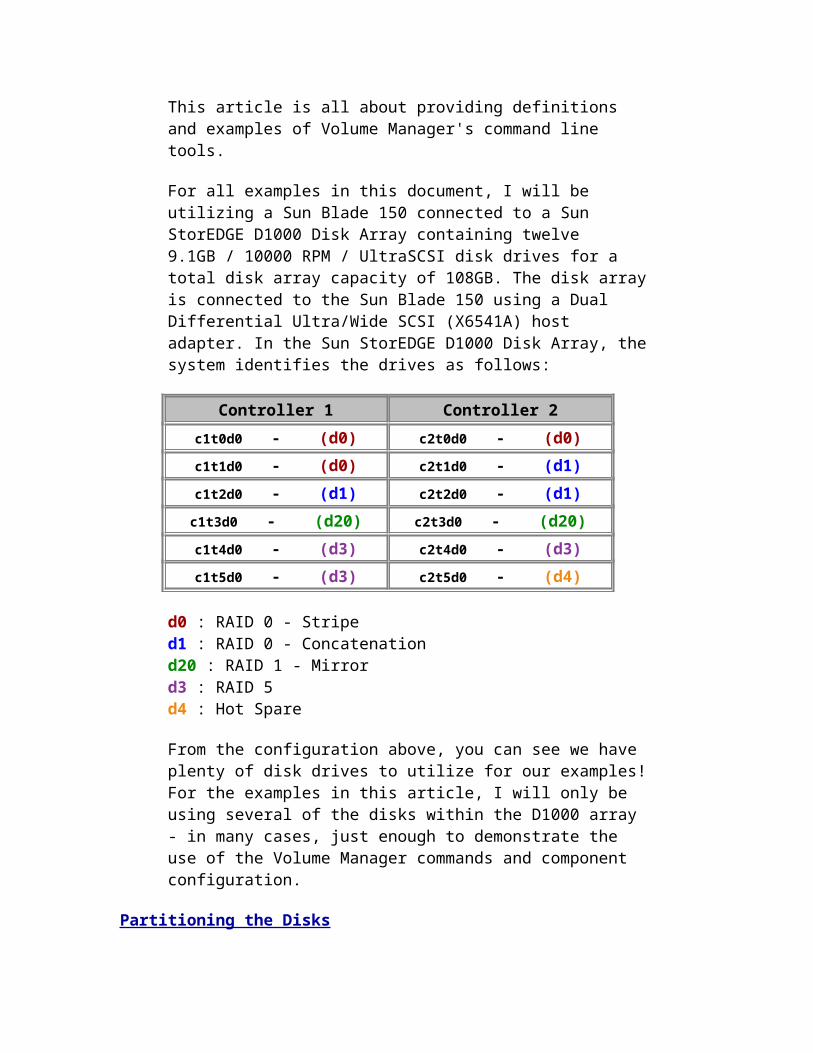
For all examples in this document, I will be utilizing a Sun Blade 150 connected to a Sun StorEDGE D1000 Disk Array containing twelve 9.1GB / 10000 RPM / UltraSCSI disk drives for a total disk array capacity of 108GB. The disk array is connected to the Sun Blade 150 using a Dual Differential Ultra/Wide SCSI (X6541A) host adapter. In the Sun StorEDGE D1000 Disk Array, the system identifies the drives as follows:
Controller 1 Controller 2
c1t0d0 - (d0) c2t0d0 - (d0)
c1t1d0 - (d0) c2t1d0 - (d1)
c1t2d0 - (d1) c2t2d0 - (d1)
c1t3d0 - (d20) c2t3d0 - (d20)
c1t4d0 - (d3) c2t4d0 - (d3)
c1t5d0 - (d3) c2t5d0 - (d4)
d0 : RAID 0 - Striped1 : RAID 0 - Concatenationd20 : RAID 1 - Mirrord3 : RAID 5d4 : Hot Spare
From the configuration above, you can see we have plenty of disk drives to utilize for our examples! For the examples in this article, I will only be using several of the disks within the D1000 array - in many cases, just
enough to demonstrate the use of the Volume Manager commands and component configuration.
Partitioning the Disks
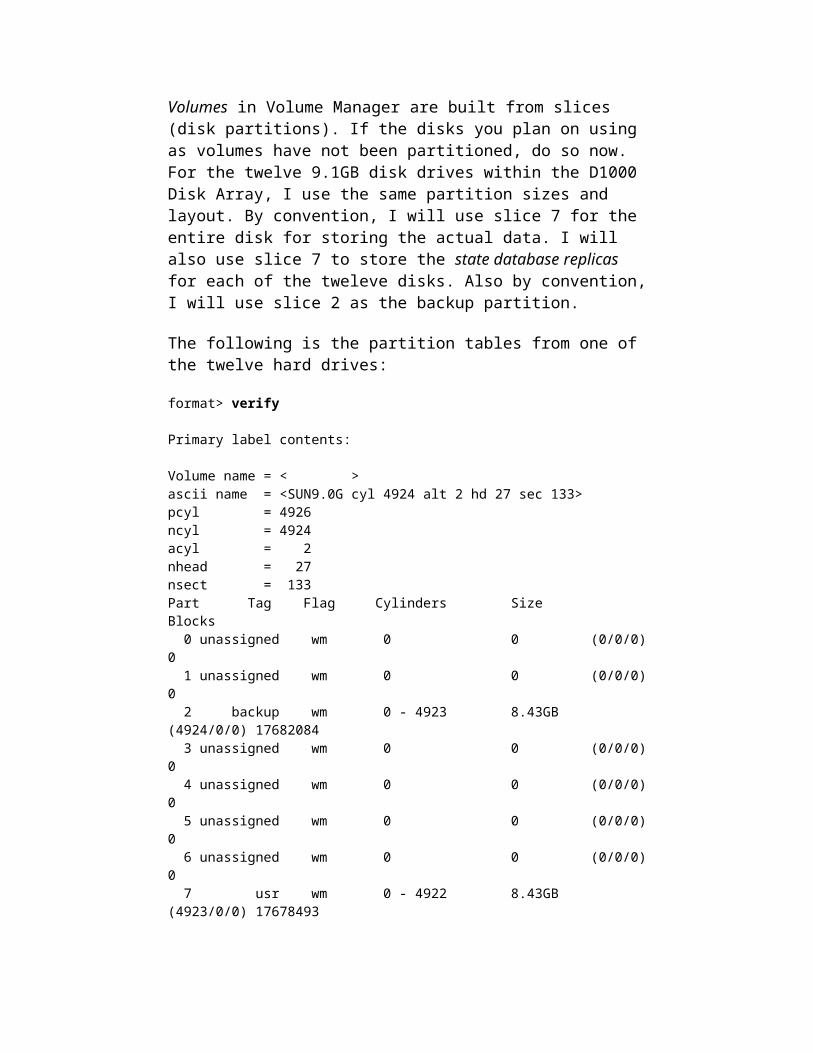
Volumes in Volume Manager are built from slices (disk partitions). If the disks you plan on using as volumes have not been partitioned, do so now. For the twelve 9.1GB disk drives within the D1000 Disk Array, I use the same partition sizes and layout. By convention, I will use slice 7 for the entire disk for storing the actual data. I will also use slice 7 to store the state database replicas for each of the tweleve disks. Also by convention, I will use slice 2 as the backup partition.
The following is the partition tables from one of the twelve hard drives:
format> verify
Primary label contents:
Volume name = < >ascii name = <SUN9.0G cyl 4924 alt 2 hd 27 sec 133>pcyl = 4926ncyl = 4924acyl = 2nhead = 27nsect = 133Part Tag Flag Cylinders Size Blocks 0 unassigned wm 0 0 (0/0/0) 0 1 unassigned wm 0 0 (0/0/0) 0 2 backup wm 0 - 4923 8.43GB (4924/0/0) 17682084 3 unassigned wm 0 0 (0/0/0) 0 4 unassigned wm 0 0 (0/0/0) 0 5 unassigned wm 0 0 (0/0/0) 0 6 unassigned wm 0 0 (0/0/0) 0 7 usr wm 0 - 4922 8.43GB (4923/0/0) 17678493
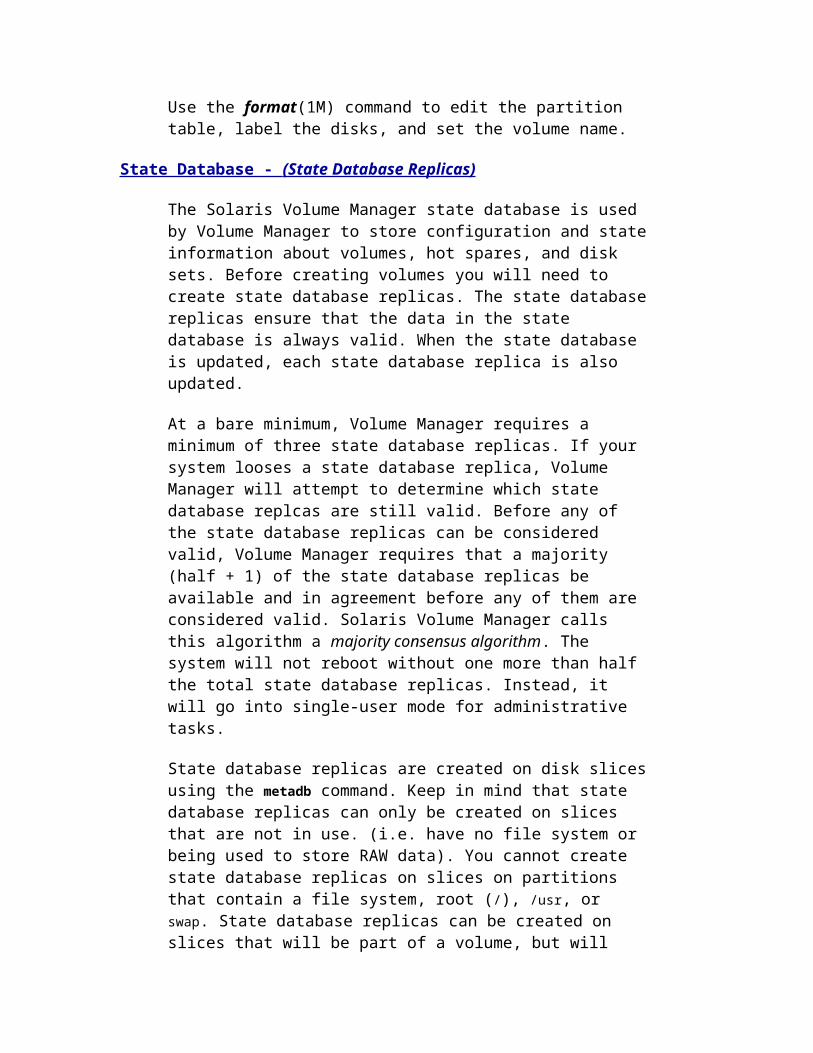
Use the format(1M) command to edit the partition table, label the disks, and set the volume name.
State Database - (State Database Replicas)
The Solaris Volume Manager state database is used by Volume Manager to store configuration and state information about volumes, hot spares, and
disk sets. Before creating volumes you will need to create state database replicas. The state database replicas ensure that the data in the state database is always valid. When the state database is updated, each state database replica is also updated.
At a bare minimum, Volume Manager requires a minimum of three state database replicas. If your system looses a state database replica, Volume Manager will attempt to determine which state database replcas are still valid. Before any of the state database replicas can be considered valid, Volume Manager requires that a majority (half + 1) of the state database replicas be available and in agreement before any of them are considered valid. Solaris Volume Manager calls this algorithm a majority consensus algorithm. The system will not reboot without one more than half the total state database replicas. Instead, it will go into single-user mode for administrative tasks.
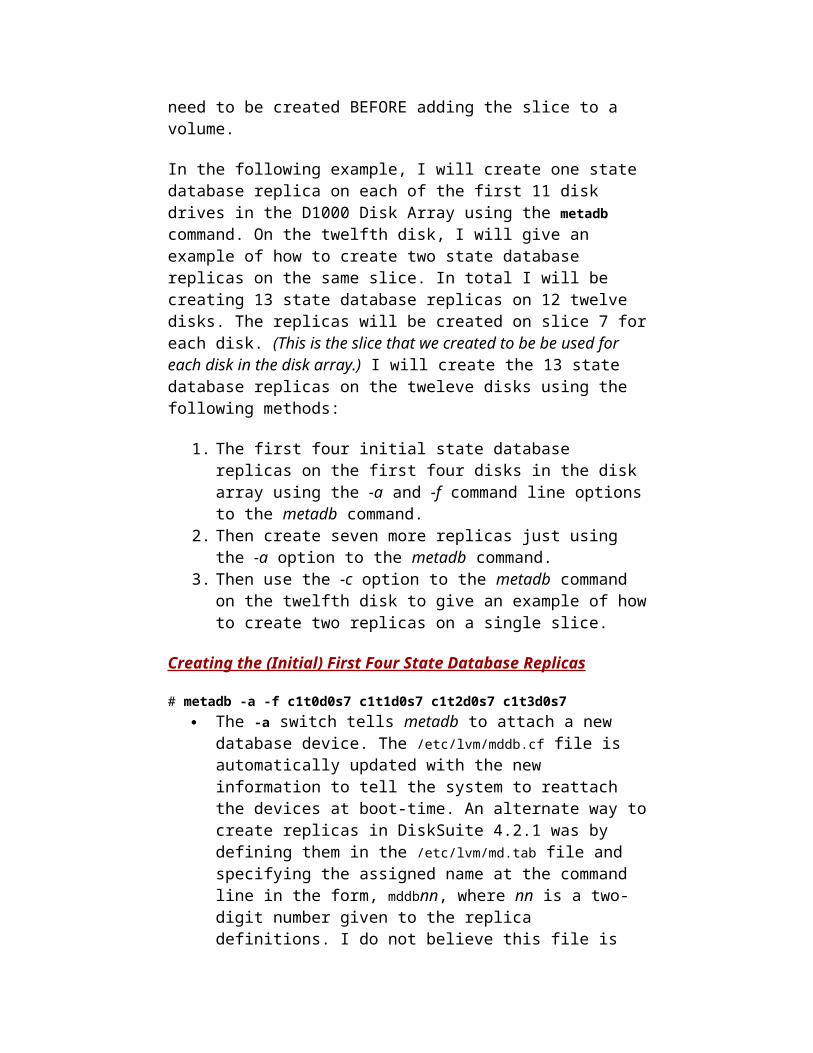
State database replicas are created on disk slices using the metadb command. Keep in mind that state database replicas can only be created on slices that are not in use. (i.e. have no file system or being used to store RAW data). You cannot create state database replicas on slices on partitions that contain a file system, root (/), /usr, or swap. State database replicas can be created on slices that will be part of a volume, but will need to be created BEFORE adding the slice to a volume.
In the following example, I will create one state database replica on each of the first 11 disk drives in the D1000 Disk Array using the metadb command. On the twelfth disk, I will give an example of how to create two state database replicas on the same slice. In total I will be creating 13 state database replicas on 12 twelve disks. The replicas will be created on slice 7 for each disk. (This is the slice that we created to be be used for each disk in the disk array.) I will create the 13 state database replicas on the tweleve disks using the following methods:
1. The first four initial state database replicas on the first four disks in the disk array using the -a and -f command line options to the metadb command.
2. Then create seven more replicas just using the -a option to the metadb command.
3. Then use the -c option to the metadb command on the twelfth disk to give an example of how to create two replicas on a single slice.
Creating the (Initial) First Four State Database Replicas
# metadb -a -f c1t0d0s7 c1t1d0s7 c1t2d0s7 c1t3d0s7
The -a switch tells metadb to attach a new database device. The /etc/lvm/mddb.cf file is automatically updated with the new
information to tell the system to reattach the devices at boot-time. An alternate way to create replicas in DiskSuite 4.2.1 was by defining them in the /etc/lvm/md.tab file and specifying the assigned name at the command line in the form, mddbnn, where nn is a two-digit number given to the replica definitions. I do not believe this file is used in Solaris 9 Volume Manager. Refer to the md.tab(4) man page for instructions on setting up replicas in that file.
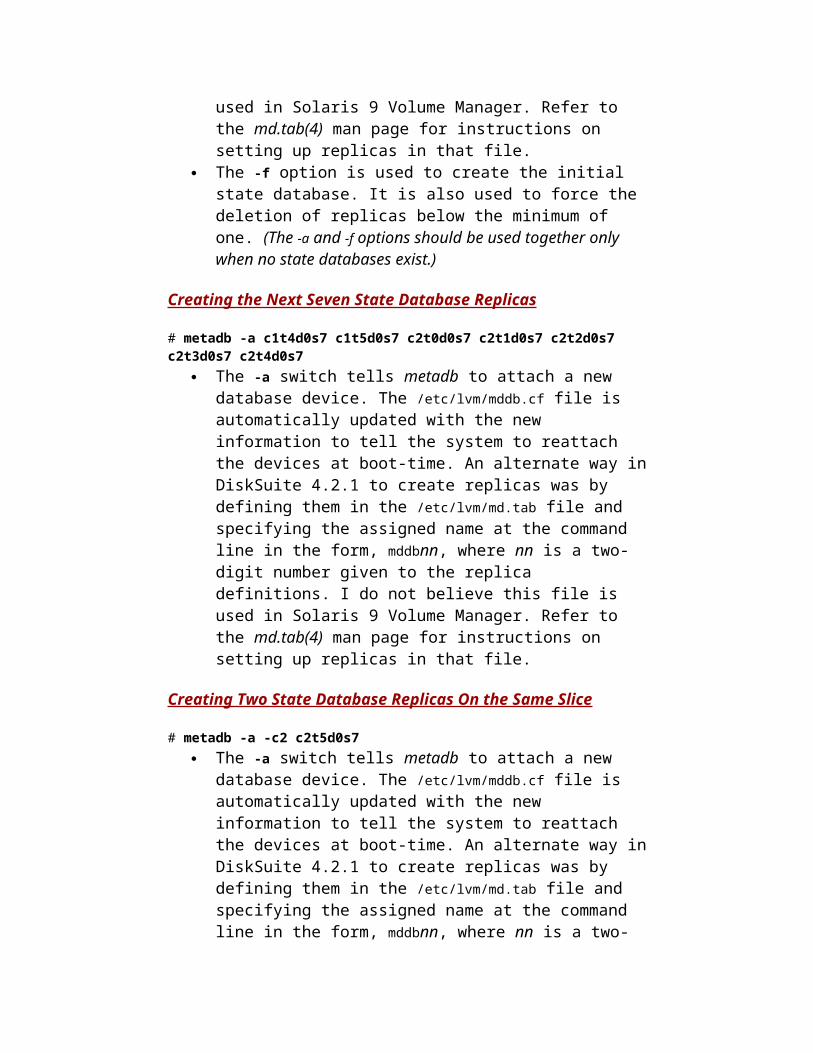
The -f option is used to create the initial state database. It is also used to force the deletion of replicas below the minimum of one. (The -a and -f options should be used together only when no state databases exist.)
Creating the Next Seven State Database Replicas
# metadb -a c1t4d0s7 c1t5d0s7 c2t0d0s7 c2t1d0s7 c2t2d0s7 c2t3d0s7 c2t4d0s7
The -a switch tells metadb to attach a new database device. The /etc/lvm/mddb.cf file is automatically updated with the new information to tell the system to reattach the devices at boot-time. An alternate way in DiskSuite 4.2.1 to create replicas was by defining them in the /etc/lvm/md.tab file and specifying the assigned name at the command line in the form, mddbnn, where nn is a two-digit number given to the replica definitions. I do not believe this file is used in Solaris 9 Volume Manager. Refer to the md.tab(4) man page for instructions on setting up replicas in that file.
Creating Two State Database Replicas On the Same Slice
# metadb -a -c2 c2t5d0s7
The -a switch tells metadb to attach a new database device. The /etc/lvm/mddb.cf file is automatically updated with the new information to tell the system to reattach the devices at boot-time. An alternate way in DiskSuite 4.2.1 to create replicas was by defining them in the /etc/lvm/md.tab file and specifying the assigned name at the command line in the form, mddbnn, where nn is a two-digit number given to the replica definitions. I do not believe this file is used in Solaris 9 Volume Manager. Refer to the md.tab(4) man page for instructions on setting up replicas in that file.
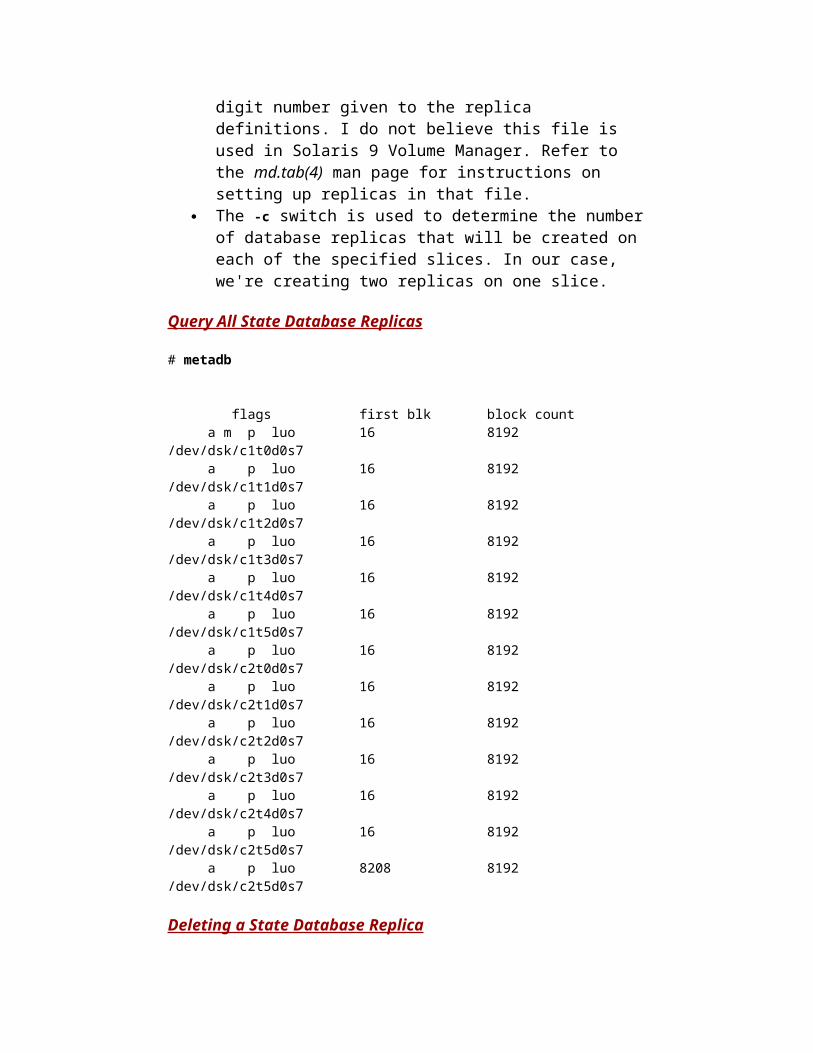
The -c switch is used to determine the number of database replicas that will be created on each of the specified slices. In our case, we're creating two replicas on one slice.
Query All State Database Replicas
# metadb
flags first blk block count a m p luo 16 8192 /dev/dsk/c1t0d0s7 a p luo 16 8192 /dev/dsk/c1t1d0s7 a p luo 16 8192 /dev/dsk/c1t2d0s7 a p luo 16 8192 /dev/dsk/c1t3d0s7 a p luo 16 8192 /dev/dsk/c1t4d0s7 a p luo 16 8192 /dev/dsk/c1t5d0s7 a p luo 16 8192 /dev/dsk/c2t0d0s7 a p luo 16 8192 /dev/dsk/c2t1d0s7 a p luo 16 8192 /dev/dsk/c2t2d0s7 a p luo 16 8192 /dev/dsk/c2t3d0s7 a p luo 16 8192 /dev/dsk/c2t4d0s7 a p luo 16 8192 /dev/dsk/c2t5d0s7 a p luo 8208 8192 /dev/dsk/c2t5d0s7
Deleting a State Database Replica
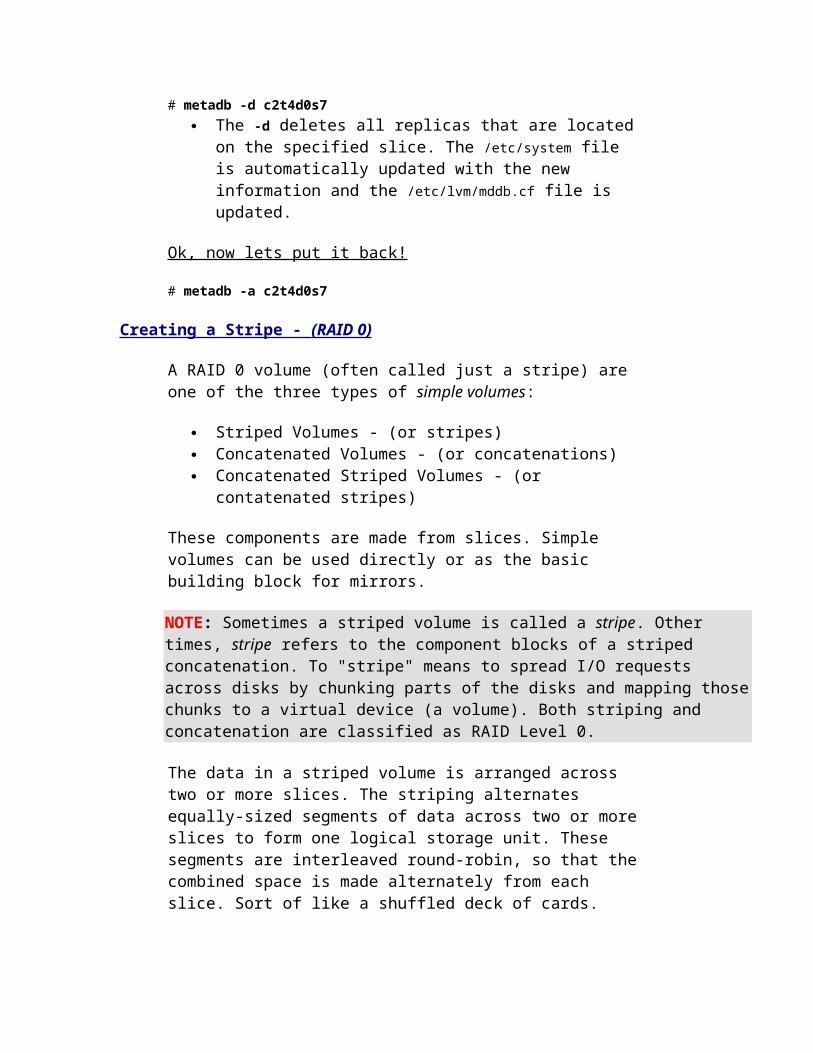
# metadb -d c2t4d0s7
The -d deletes all replicas that are located on the specified slice. The /etc/system file is automatically updated with the new information and the /etc/lvm/mddb.cf file is updated.
Ok, now lets put it back!
# metadb -a c2t4d0s7
Creating a Stripe - (RAID 0)
A RAID 0 volume (often called just a stripe) are one of the three types of simple volumes:
Striped Volumes - (or stripes) Concatenated Volumes - (or concatenations) Concatenated Striped Volumes - (or contatenated stripes)
These components are made from slices. Simple volumes can be used directly or as the basic building block for mirrors.
NOTE: Sometimes a striped volume is called a stripe. Other times, stripe refers to the component blocks of a striped concatenation. To "stripe" means to spread I/O requests across disks by chunking parts of the disks and mapping those chunks to a virtual device (a volume). Both striping and concatenation are classified as RAID Level 0.
The data in a striped volume is arranged across two or more slices. The striping alternates equally-sized segments of data across two or more slices to form one logical storage unit. These segments are interleaved round-robin, so that the combined space is made alternately from each slice. Sort of like a shuffled deck of cards.
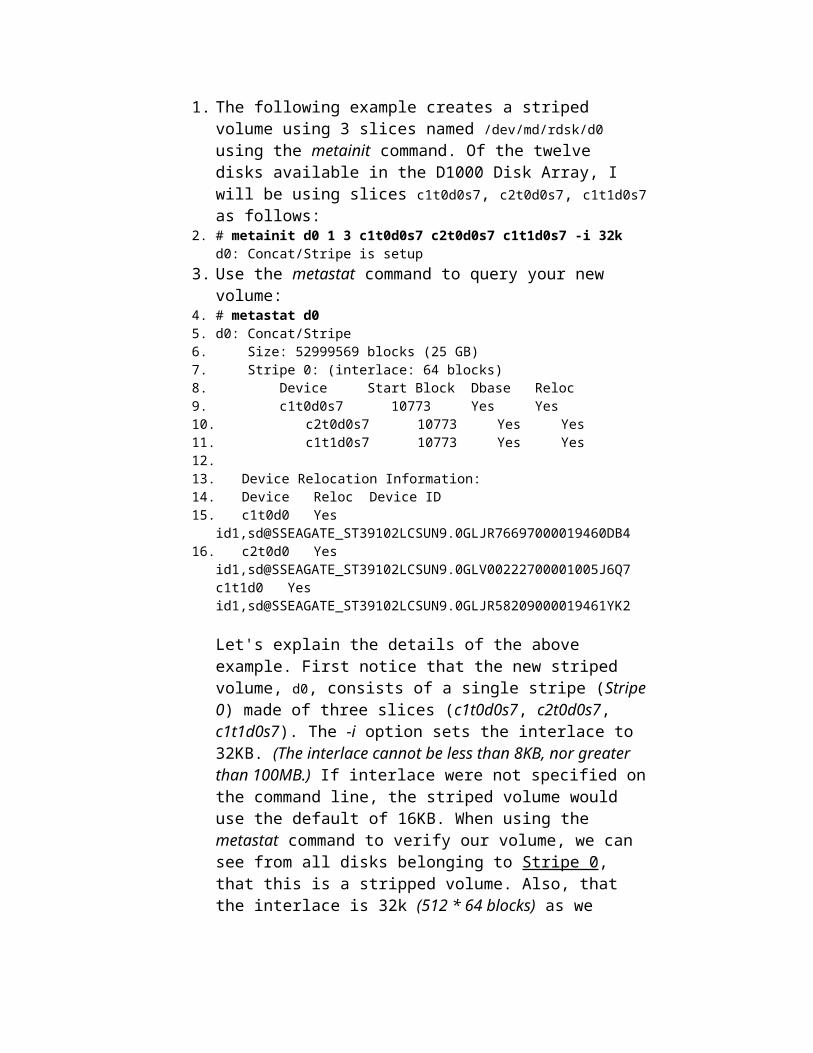
1. The following example creates a striped volume using 3 slices named /dev/md/rdsk/d0 using the metainit command. Of the twelve disks available in the D1000 Disk Array, I will be using slices c1t0d0s7, c2t0d0s7, c1t1d0s7 as follows:
2. # metainit d0 1 3 c1t0d0s7 c2t0d0s7 c1t1d0s7 -i 32kd0: Concat/Stripe is setup
3. Use the metastat command to query your new volume: 4. # metastat d05. d0: Concat/Stripe6. Size: 52999569 blocks (25 GB)7. Stripe 0: (interlace: 64 blocks)8. Device Start Block Dbase Reloc9. c1t0d0s7 10773 Yes Yes10. c2t0d0s7 10773 Yes Yes11. c1t1d0s7 10773 Yes Yes12.13. Device Relocation Information:14. Device Reloc Device ID15. c1t0d0 Yes
id1,sd@SSEAGATE_ST39102LCSUN9.0GLJR76697000019460DB416. c2t0d0 Yes
id1,sd@SSEAGATE_ST39102LCSUN9.0GLV00222700001005J6Q7c1t1d0 Yes id1,sd@SSEAGATE_ST39102LCSUN9.0GLJR58209000019461YK2
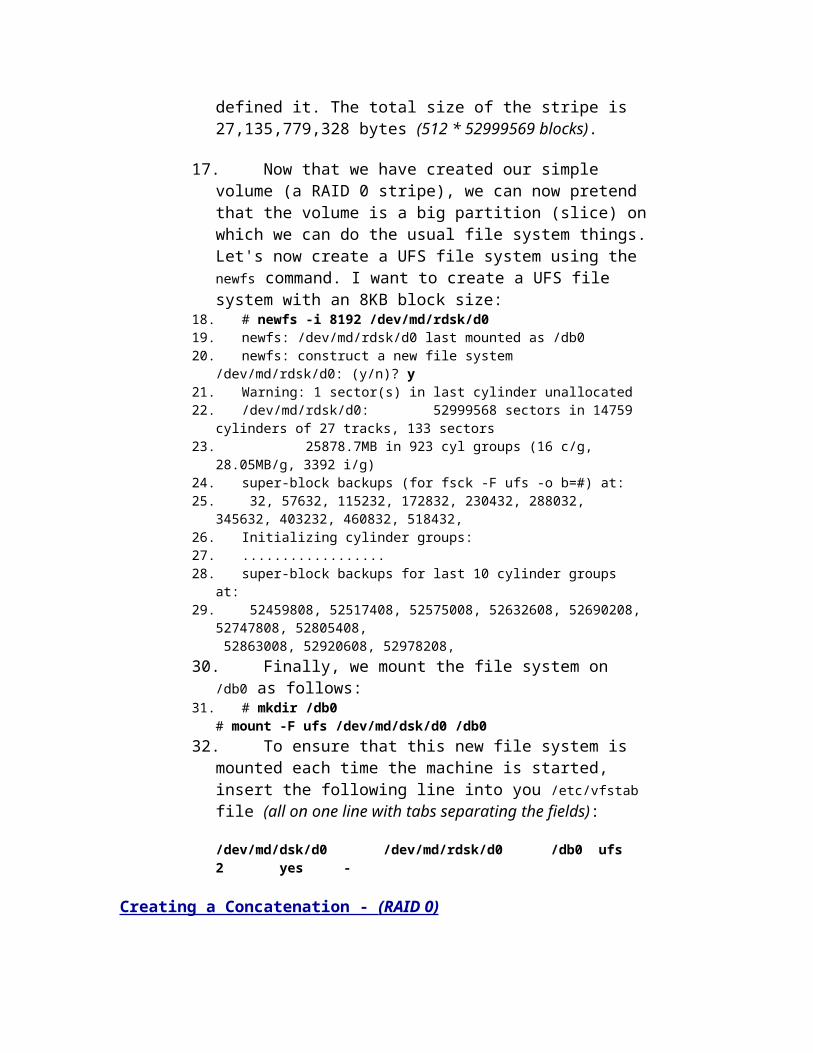
Let's explain the details of the above example. First notice that the new striped volume, d0, consists of a single stripe (Stripe 0) made of three slices (c1t0d0s7, c2t0d0s7, c1t1d0s7). The -i option sets the interlace to 32KB. (The interlace cannot be less than 8KB, nor greater than 100MB.) If interlace were not specified on the command line, the striped volume would use the default of 16KB. When using the metastat command to verify our volume, we can see from all disks belonging to Stripe 0, that this is a stripped volume. Also, that the interlace is 32k (512 * 64 blocks) as we defined it. The total size of the stripe is 27,135,779,328 bytes (512 * 52999569 blocks).
17. Now that we have created our simple volume (a RAID 0 stripe), we can now pretend that the volume is a big partition (slice) on which we can do the usual file system things. Let's now create a UFS file system using the newfs command. I want to create a UFS file system with an 8KB block size:
18. # newfs -i 8192 /dev/md/rdsk/d019. newfs: /dev/md/rdsk/d0 last mounted as /db020. newfs: construct a new file system
/dev/md/rdsk/d0: (y/n)? y21. Warning: 1 sector(s) in last cylinder unallocated22. /dev/md/rdsk/d0: 52999568 sectors in 14759
cylinders of 27 tracks, 133 sectors23. 25878.7MB in 923 cyl groups (16 c/g,
28.05MB/g, 3392 i/g)24. super-block backups (for fsck -F ufs -o b=#) at:25. 32, 57632, 115232, 172832, 230432, 288032,
345632, 403232, 460832, 518432,26. Initializing cylinder groups:27. ..................28. super-block backups for last 10 cylinder groups
at:29. 52459808, 52517408, 52575008, 52632608, 52690208,
52747808, 52805408, 52863008, 52920608, 52978208,
30. Finally, we mount the file system on /db0 as follows: 31. # mkdir /db0
# mount -F ufs /dev/md/dsk/d0 /db0
32. To ensure that this new file system is mounted each time the machine is started, insert the following line into you /etc/vfstab file (all on one line with tabs separating the fields):
/dev/md/dsk/d0 /dev/md/rdsk/d0 /db0 ufs 2 yes -
Creating a Concatenation - (RAID 0)
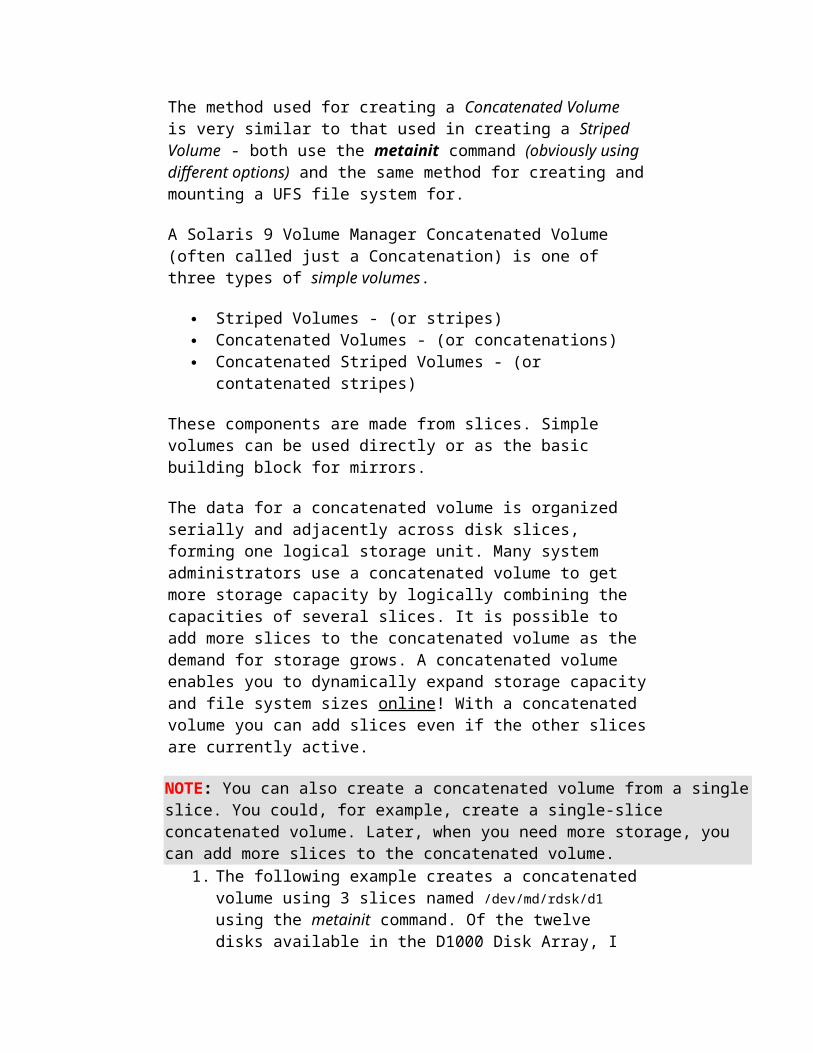
The method used for creating a Concatenated Volume is very similar to that used in creating a Striped Volume - both use the metainit command (obviously using different options) and the same method for creating and mounting a UFS file system for.
A Solaris 9 Volume Manager Concatenated Volume (often called just a Concatenation) is one of three types of simple volumes.
Striped Volumes - (or stripes) Concatenated Volumes - (or concatenations) Concatenated Striped Volumes - (or contatenated stripes)
These components are made from slices. Simple volumes can be used directly or as the basic building block for mirrors.
The data for a concatenated volume is organized serially and adjacently across disk slices, forming one logical storage unit. Many system administrators use a concatenated volume to get more storage capacity by logically combining the capacities of several slices. It is possible to add more slices to the concatenated volume as the demand for storage grows. A concatenated volume enables you to dynamically expand storage capacity and file system sizes online! With a concatenated volume you can add slices even if the other slices are currently active.
NOTE: You can also create a concatenated volume from a single slice. You could, for example, create a single-slice concatenated volume. Later, when you need more storage, you can add more slices to the concatenated volume.
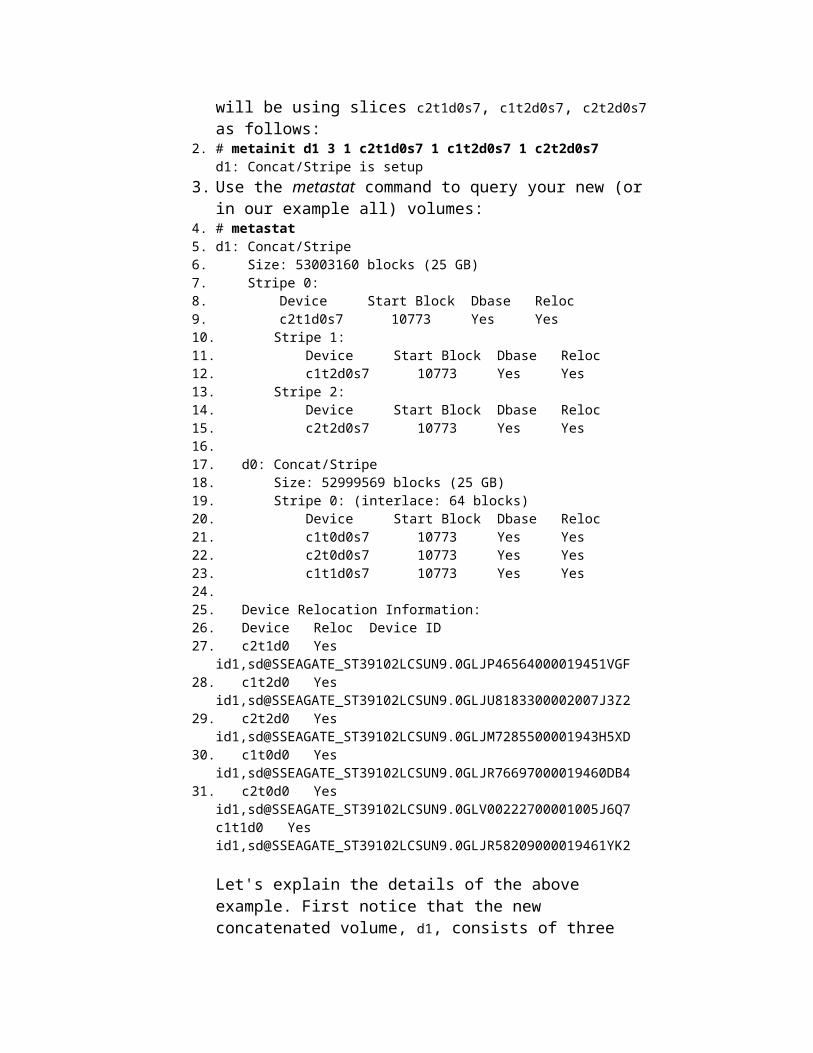
1. The following example creates a concatenated volume using 3 slices named /dev/md/rdsk/d1 using the metainit command. Of the twelve disks available in the D1000 Disk Array, I will be using slices c2t1d0s7, c1t2d0s7, c2t2d0s7 as follows:
2. # metainit d1 3 1 c2t1d0s7 1 c1t2d0s7 1 c2t2d0s7d1: Concat/Stripe is setup
3. Use the metastat command to query your new (or in our example all) volumes:
4. # metastat5. d1: Concat/Stripe6. Size: 53003160 blocks (25 GB)7. Stripe 0:8. Device Start Block Dbase Reloc9. c2t1d0s7 10773 Yes Yes10. Stripe 1:11. Device Start Block Dbase Reloc12. c1t2d0s7 10773 Yes Yes13. Stripe 2:14. Device Start Block Dbase Reloc15. c2t2d0s7 10773 Yes Yes16.17. d0: Concat/Stripe18. Size: 52999569 blocks (25 GB)19. Stripe 0: (interlace: 64 blocks)20. Device Start Block Dbase Reloc21. c1t0d0s7 10773 Yes Yes22. c2t0d0s7 10773 Yes Yes23. c1t1d0s7 10773 Yes Yes24.25. Device Relocation Information:26. Device Reloc Device ID27. c2t1d0 Yes
id1,sd@SSEAGATE_ST39102LCSUN9.0GLJP46564000019451VGF28. c1t2d0 Yes
id1,sd@SSEAGATE_ST39102LCSUN9.0GLJU8183300002007J3Z229. c2t2d0 Yes
id1,sd@SSEAGATE_ST39102LCSUN9.0GLJM7285500001943H5XD30. c1t0d0 Yes
id1,sd@SSEAGATE_ST39102LCSUN9.0GLJR76697000019460DB4
31. c2t0d0 Yes id1,sd@SSEAGATE_ST39102LCSUN9.0GLV00222700001005J6Q7c1t1d0 Yes id1,sd@SSEAGATE_ST39102LCSUN9.0GLJR58209000019461YK2
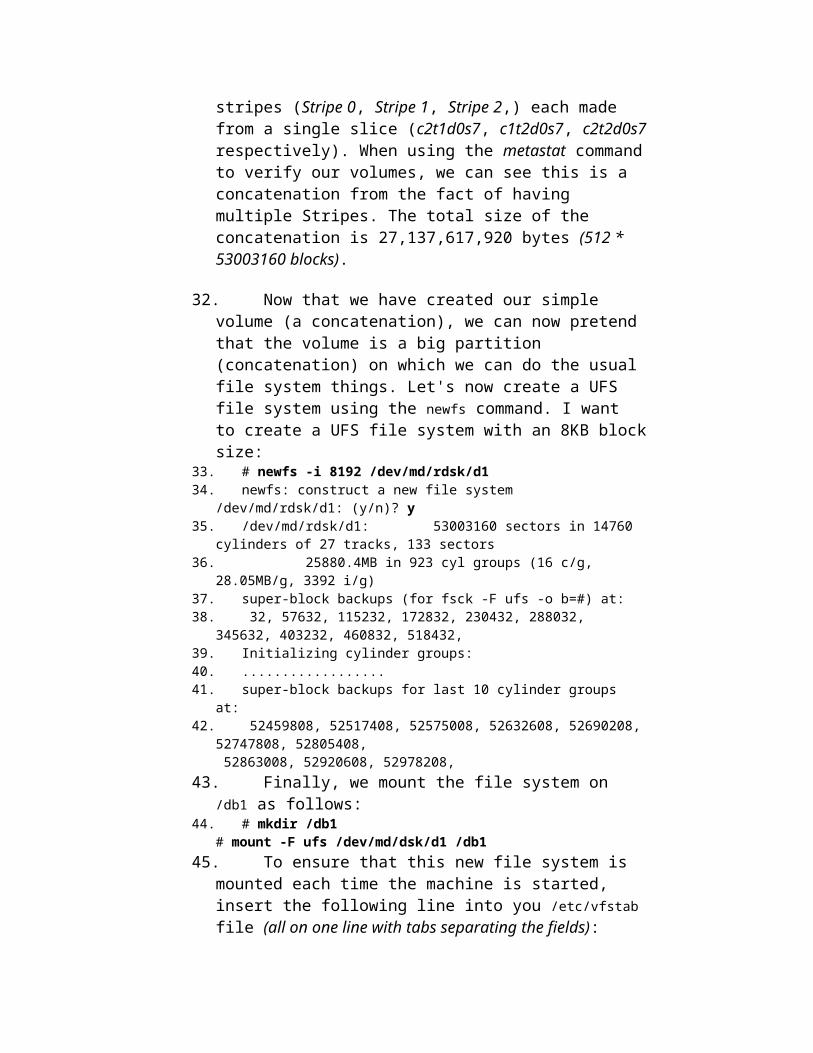
Let's explain the details of the above example. First notice that the new concatenated volume, d1, consists of three stripes (Stripe 0, Stripe 1, Stripe 2,) each made from a single slice (c2t1d0s7, c1t2d0s7, c2t2d0s7 respectively). When using the metastat command to verify our volumes, we can see this is a concatenation from the fact of having multiple Stripes. The total size of the concatenation is 27,137,617,920 bytes (512 * 53003160 blocks).
32. Now that we have created our simple volume (a concatenation), we can now pretend that the volume is a big partition (concatenation) on which we can do the usual file system things. Let's now create a UFS file system using the newfs command. I want to create a UFS file system with an 8KB block size:
33. # newfs -i 8192 /dev/md/rdsk/d134. newfs: construct a new file system
/dev/md/rdsk/d1: (y/n)? y35. /dev/md/rdsk/d1: 53003160 sectors in 14760
cylinders of 27 tracks, 133 sectors36. 25880.4MB in 923 cyl groups (16 c/g,
28.05MB/g, 3392 i/g)37. super-block backups (for fsck -F ufs -o b=#) at:38. 32, 57632, 115232, 172832, 230432, 288032,
345632, 403232, 460832, 518432,39. Initializing cylinder groups:40. ..................41. super-block backups for last 10 cylinder groups
at:42. 52459808, 52517408, 52575008, 52632608, 52690208,
52747808, 52805408, 52863008, 52920608, 52978208,
43. Finally, we mount the file system on /db1 as follows: 44. # mkdir /db1
# mount -F ufs /dev/md/dsk/d1 /db1
45. To ensure that this new file system is mounted each time the machine is started, insert the following line into you /etc/vfstab file (all on one line with tabs separating the fields):
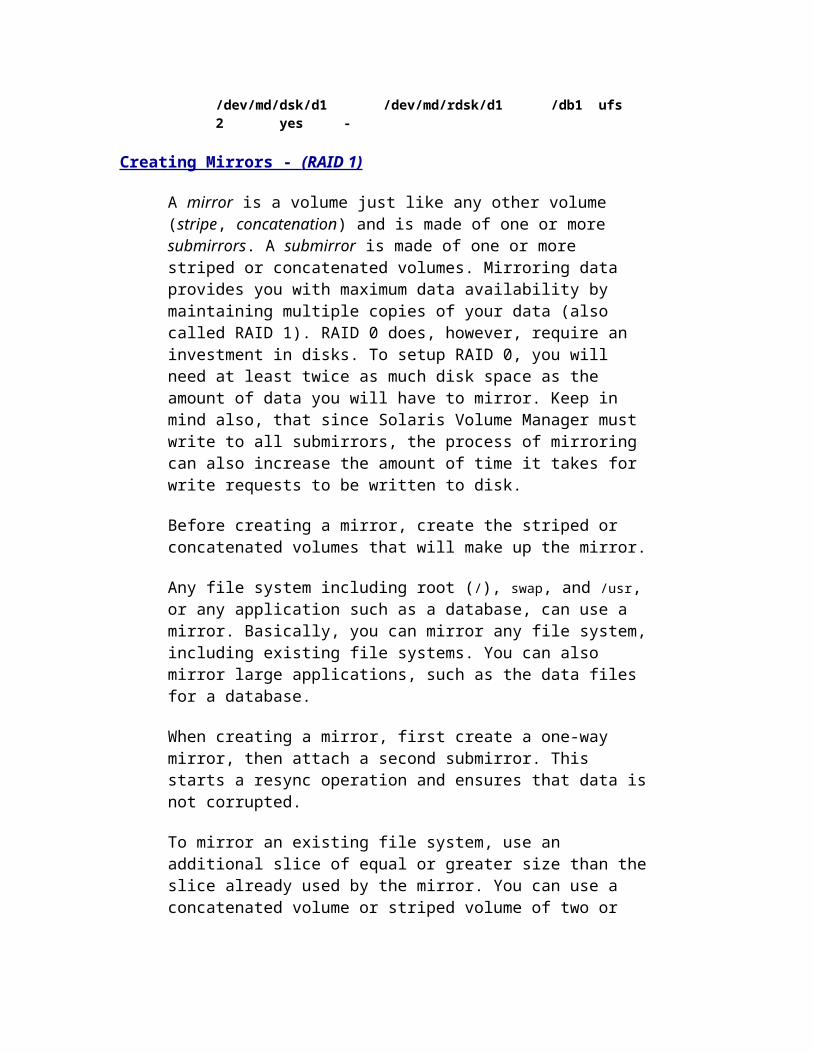
/dev/md/dsk/d1 /dev/md/rdsk/d1 /db1 ufs 2 yes -
Creating Mirrors - (RAID 1)
A mirror is a volume just like any other volume (stripe, concatenation) and is made of one or more submirrors. A submirror is made of one or more striped or concatenated volumes. Mirroring data provides you with maximum data availability by maintaining multiple copies of your data
(also called RAID 1). RAID 0 does, however, require an investment in disks. To setup RAID 0, you will need at least twice as much disk space as the amount of data you will have to mirror. Keep in mind also, that since Solaris Volume Manager must write to all submirrors, the process of mirroring can also increase the amount of time it takes for write requests to be written to disk.
Before creating a mirror, create the striped or concatenated volumes that will make up the mirror.
Any file system including root (/), swap, and /usr, or any application such as a database, can use a mirror. Basically, you can mirror any file system, including existing file systems. You can also mirror large applications, such as the data files for a database.
When creating a mirror, first create a one-way mirror, then attach a second submirror. This starts a resync operation and ensures that data is not corrupted.
To mirror an existing file system, use an additional slice of equal or greater size than the slice already used by the mirror. You can use a concatenated volume or striped volume of two or more slices that have adequate space to contain the mirror.
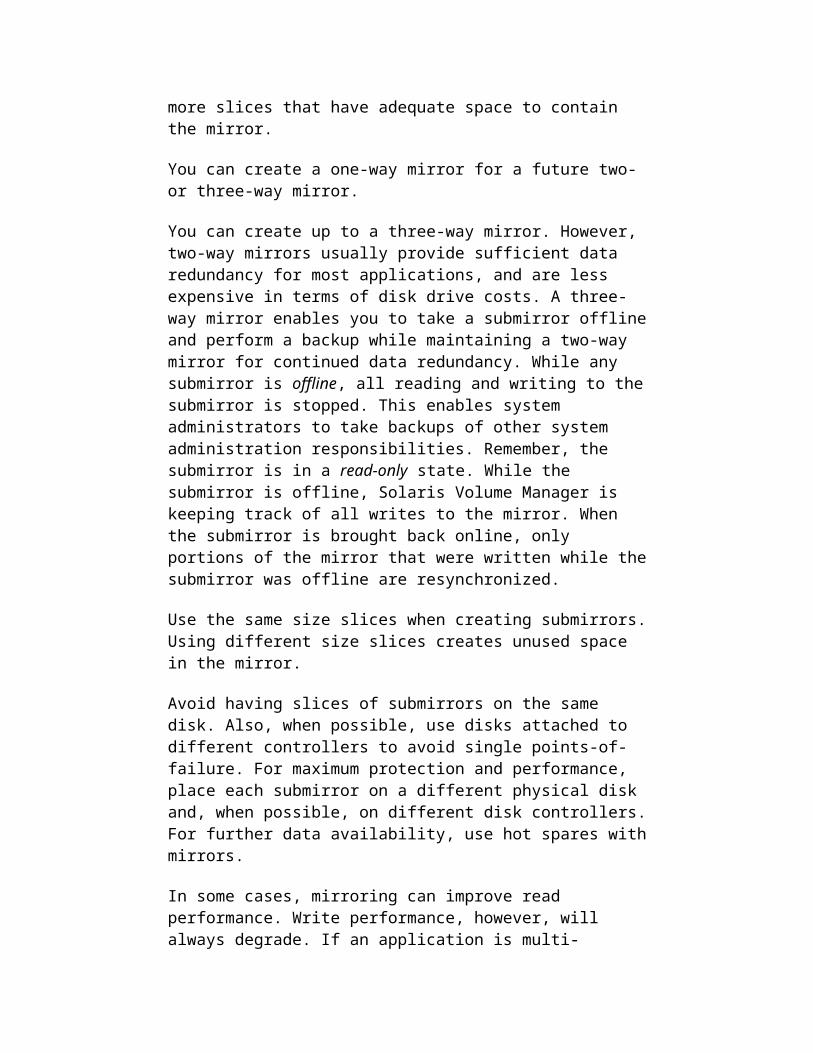
You can create a one-way mirror for a future two- or three-way mirror.
You can create up to a three-way mirror. However, two-way mirrors usually provide sufficient data redundancy for most applications, and are less expensive in terms of disk drive costs. A three-way mirror enables you to take a submirror offline and perform a backup while maintaining a two-way mirror for continued data redundancy. While any submirror is offline, all reading and writing to the submirror is stopped. This enables system administrators to take backups of other system administration responsibilities. Remember, the submirror is in a read-only state. While the submirror is offline, Solaris Volume Manager is keeping track of all writes to the mirror. When the submirror is brought back online, only portions of the mirror that were written while the submirror was offline are resynchronized.
Use the same size slices when creating submirrors. Using different size slices creates unused space in the mirror.
Avoid having slices of submirrors on the same disk. Also, when possible, use disks attached to different controllers to avoid single points-of-failure. For maximum protection and performance, place each submirror on a
different physical disk and, when possible, on different disk controllers. For further data availability, use hot spares with mirrors.
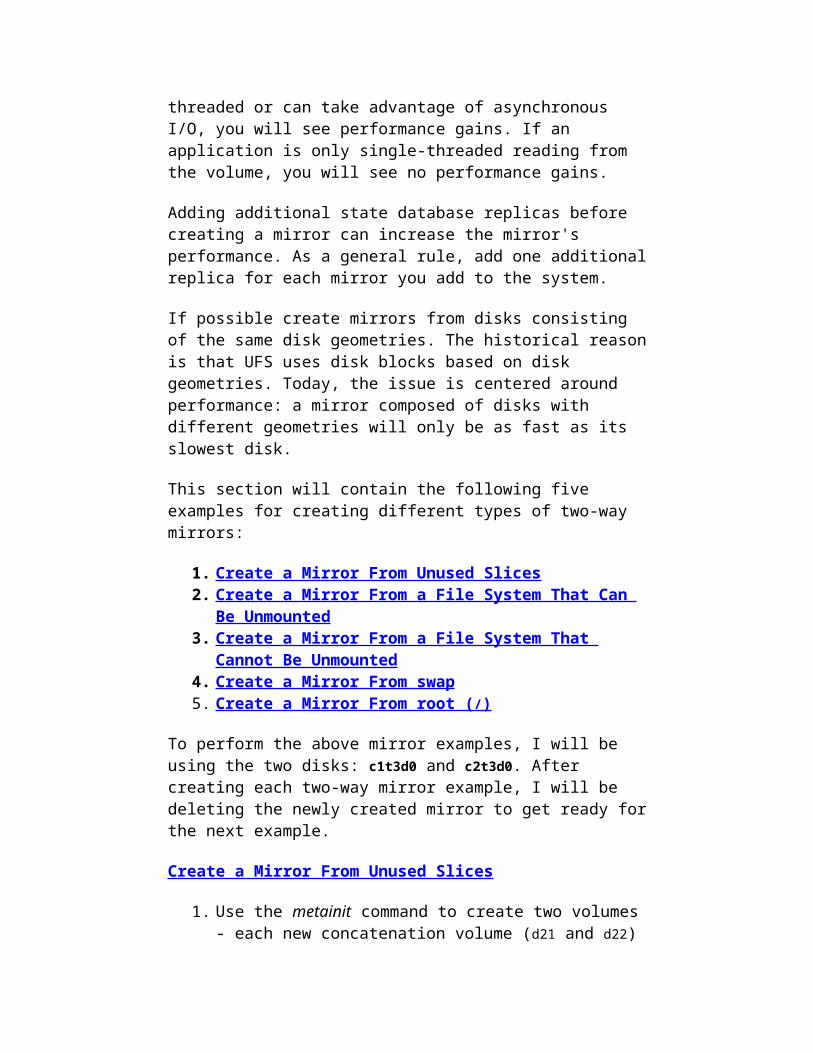
In some cases, mirroring can improve read performance. Write performance, however, will always degrade. If an application is multi-threaded or can take advantage of asynchronous I/O, you will see performance gains. If an application is only single-threaded reading from the volume, you will see no performance gains.
Adding additional state database replicas before creating a mirror can increase the mirror's performance. As a general rule, add one additional replica for each mirror you add to the system.
If possible create mirrors from disks consisting of the same disk geometries. The historical reason is that UFS uses disk blocks based on disk geometries. Today, the issue is centered around performance: a mirror composed of disks with different geometries will only be as fast as its slowest disk.
This section will contain the following five examples for creating different types of two-way mirrors:
1. Create a Mirror From Unused Slices 2. Create a Mirror From a File System That Can Be Unmounted 3. Create a Mirror From a File System That Cannot Be
Unmounted 4. Create a Mirror From swap 5. Create a Mirror From root ( / )
To perform the above mirror examples, I will be using the two disks: c1t3d0 and c2t3d0. After creating each two-way mirror example, I will be deleting the newly created mirror to get ready for the next example.
Create a Mirror From Unused Slices
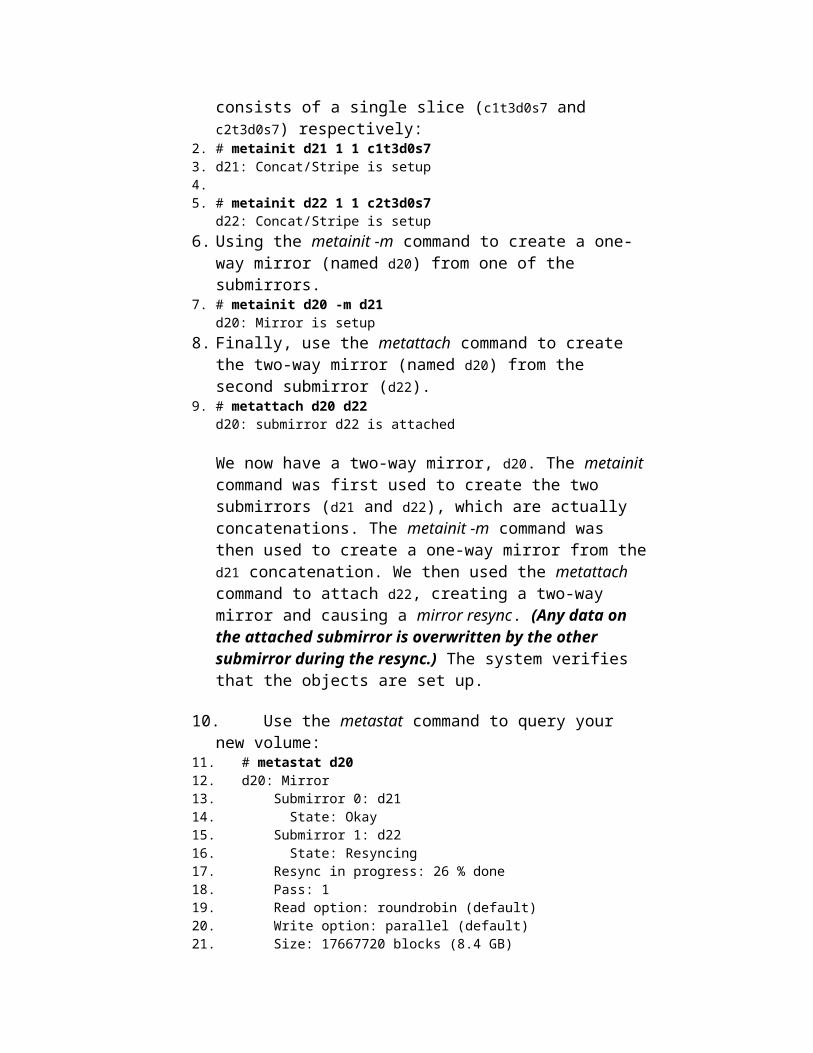
1. Use the metainit command to create two volumes - each new concatenation volume (d21 and d22) consists of a single slice (c1t3d0s7 and c2t3d0s7) respectively:
2. # metainit d21 1 1 c1t3d0s73. d21: Concat/Stripe is setup4.5. # metainit d22 1 1 c2t3d0s7
d22: Concat/Stripe is setup
6. Using the metainit -m command to create a one-way mirror (named d20) from one of the submirrors.
7. # metainit d20 -m d21d20: Mirror is setup
8. Finally, use the metattach command to create the two-way mirror (named d20) from the second submirror (d22).
9. # metattach d20 d22d20: submirror d22 is attached
We now have a two-way mirror, d20. The metainit command was first used to create the two submirrors (d21 and d22), which are actually concatenations. The metainit -m command was then used to create a one-way mirror from the d21 concatenation. We then used the metattach command to attach d22, creating a two-way mirror and causing a mirror resync. (Any data on the attached submirror is overwritten by the other submirror during the resync.) The system verifies that the objects are set up.
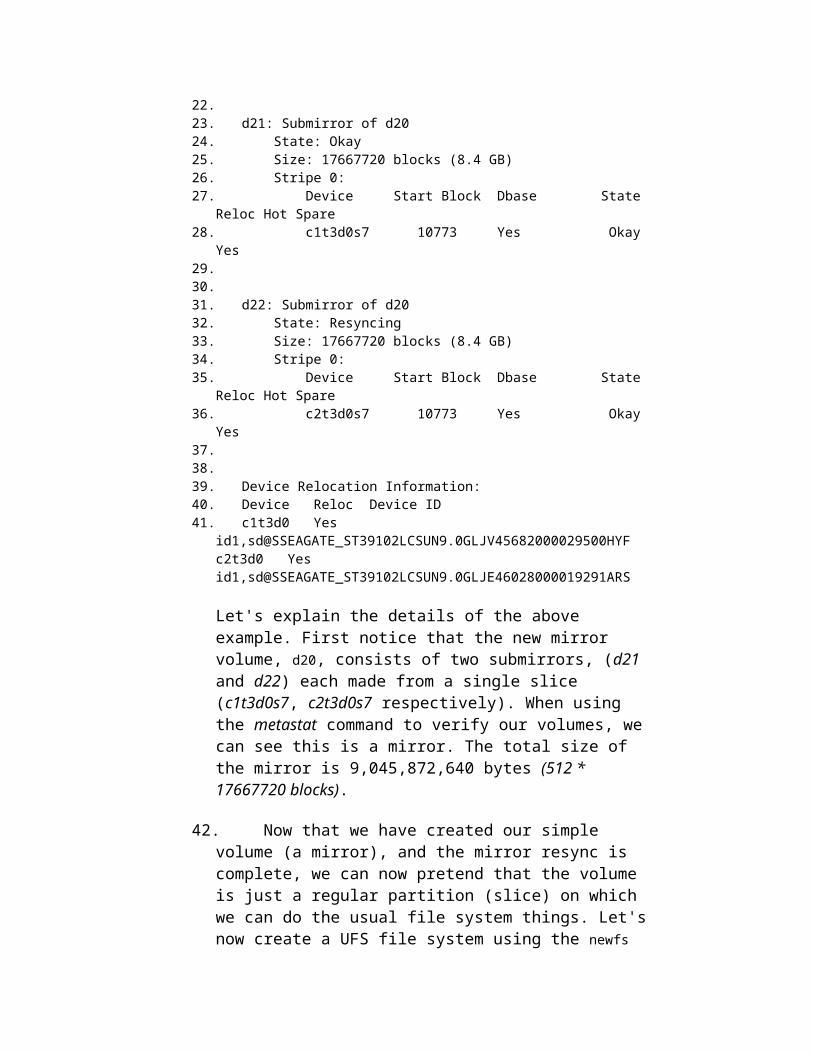
10. Use the metastat command to query your new volume: 11. # metastat d2012. d20: Mirror13. Submirror 0: d2114. State: Okay15. Submirror 1: d2216. State: Resyncing17. Resync in progress: 26 % done18. Pass: 119. Read option: roundrobin (default)20. Write option: parallel (default)21. Size: 17667720 blocks (8.4 GB)22.23. d21: Submirror of d2024. State: Okay25. Size: 17667720 blocks (8.4 GB)26. Stripe 0:27. Device Start Block Dbase State
Reloc Hot Spare28. c1t3d0s7 10773 Yes Okay
Yes29.30.31. d22: Submirror of d2032. State: Resyncing33. Size: 17667720 blocks (8.4 GB)34. Stripe 0:35. Device Start Block Dbase State
Reloc Hot Spare36. c2t3d0s7 10773 Yes Okay
Yes37.38.39. Device Relocation Information:40. Device Reloc Device ID41. c1t3d0 Yes
id1,sd@SSEAGATE_ST39102LCSUN9.0GLJV45682000029500HYFc2t3d0 Yes id1,sd@SSEAGATE_ST39102LCSUN9.0GLJE46028000019291ARS
Let's explain the details of the above example. First notice that the new mirror volume, d20, consists of two submirrors, (d21 and d22) each made from a single slice (c1t3d0s7, c2t3d0s7 respectively). When using the metastat command to verify our volumes, we can see this is a mirror. The total size of the mirror is 9,045,872,640 bytes (512 * 17667720 blocks).
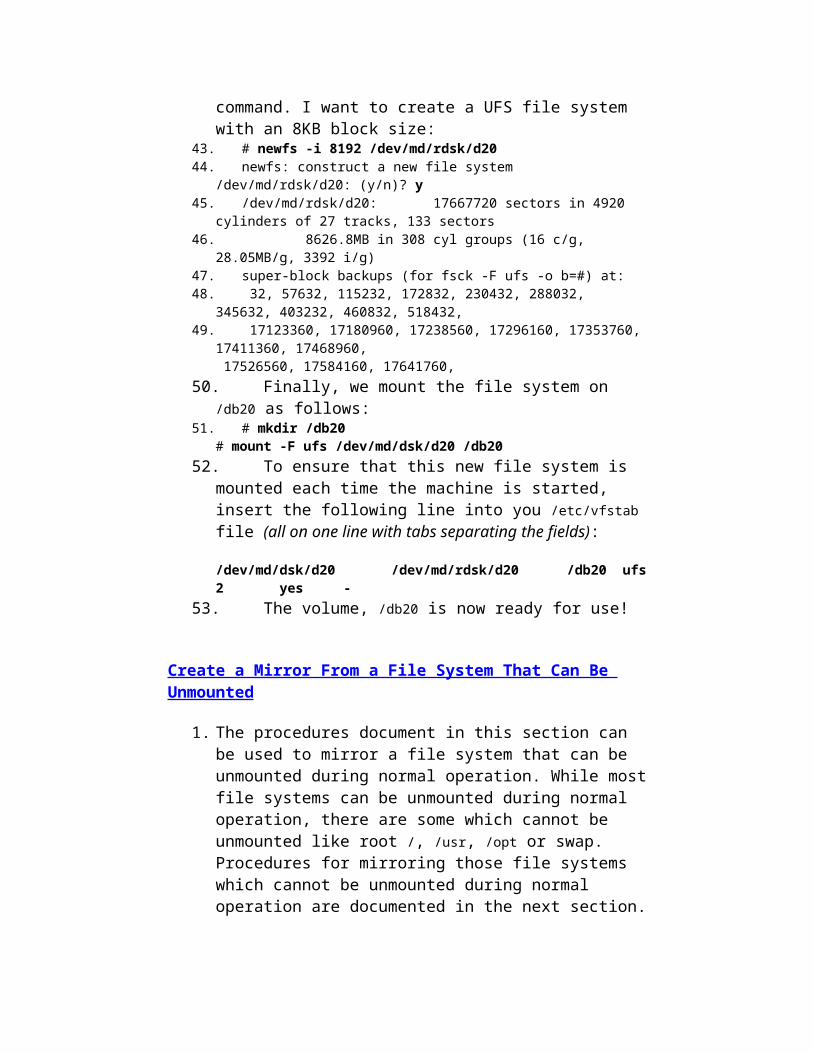
42. Now that we have created our simple volume (a mirror), and the mirror resync is complete, we can now pretend that the volume is just a regular partition (slice) on which we can do the usual file system things. Let's now create a UFS file system using the newfs command. I want to create a UFS file system with an 8KB block size:
43. # newfs -i 8192 /dev/md/rdsk/d2044. newfs: construct a new file system
/dev/md/rdsk/d20: (y/n)? y45. /dev/md/rdsk/d20: 17667720 sectors in 4920
cylinders of 27 tracks, 133 sectors46. 8626.8MB in 308 cyl groups (16 c/g,
28.05MB/g, 3392 i/g)47. super-block backups (for fsck -F ufs -o b=#) at:48. 32, 57632, 115232, 172832, 230432, 288032,
345632, 403232, 460832, 518432,49. 17123360, 17180960, 17238560, 17296160, 17353760,
17411360, 17468960, 17526560, 17584160, 17641760,
50. Finally, we mount the file system on /db20 as follows: 51. # mkdir /db20
# mount -F ufs /dev/md/dsk/d20 /db20
52. To ensure that this new file system is mounted each time the machine is started, insert the following line into you /etc/vfstab file (all on one line with tabs separating the fields):
/dev/md/dsk/d20 /dev/md/rdsk/d20 /db20 ufs 2 yes -
53. The volume, /db20 is now ready for use!
Create a Mirror From a File System That Can Be Unmounted
1. The procedures document in this section can be used to mirror a file system that can be unmounted during normal operation. While most file systems can be unmounted during normal operation, there are some which cannot be unmounted like root /, /usr, /opt or swap. Procedures for mirroring those file systems which cannot be unmounted during normal operation are documented in the next section.
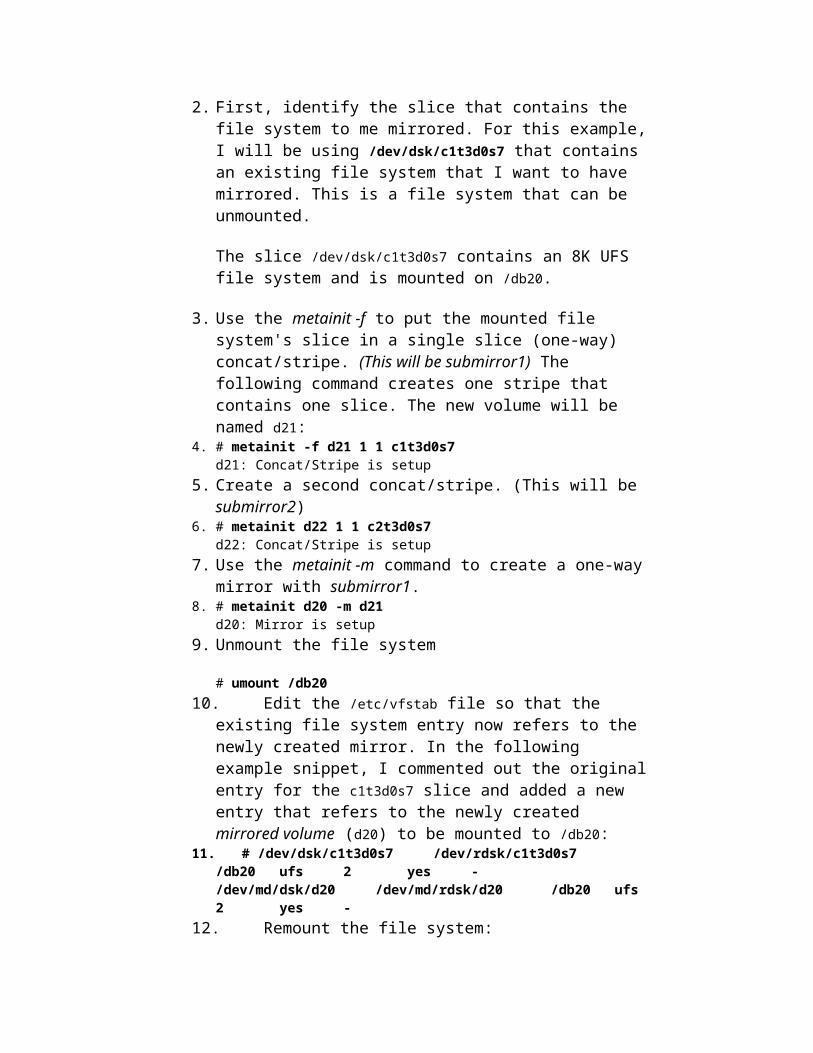
2. First, identify the slice that contains the file system to me mirrored. For this example, I will be using /dev/dsk/c1t3d0s7 that
contains an existing file system that I want to have mirrored. This is a file system that can be unmounted.
The slice /dev/dsk/c1t3d0s7 contains an 8K UFS file system and is mounted on /db20.
3. Use the metainit -f to put the mounted file system's slice in a single slice (one-way) concat/stripe. (This will be submirror1) The following command creates one stripe that contains one slice. The new volume will be named d21:
4. # metainit -f d21 1 1 c1t3d0s7d21: Concat/Stripe is setup
5. Create a second concat/stripe. (This will be submirror2) 6. # metainit d22 1 1 c2t3d0s7
d22: Concat/Stripe is setup
7. Use the metainit -m command to create a one-way mirror with submirror1.
8. # metainit d20 -m d21d20: Mirror is setup
9. Unmount the file system
# umount /db20
10. Edit the /etc/vfstab file so that the existing file system entry now refers to the newly created mirror. In the following example snippet, I commented out the original entry for the c1t3d0s7 slice and added a new entry that refers to the newly created mirrored volume (d20) to be mounted to /db20:
11. # /dev/dsk/c1t3d0s7 /dev/rdsk/c1t3d0s7 /db20 ufs 2 yes -/dev/md/dsk/d20 /dev/md/rdsk/d20 /db20 ufs 2 yes -
12. Remount the file system:
# mount /db20
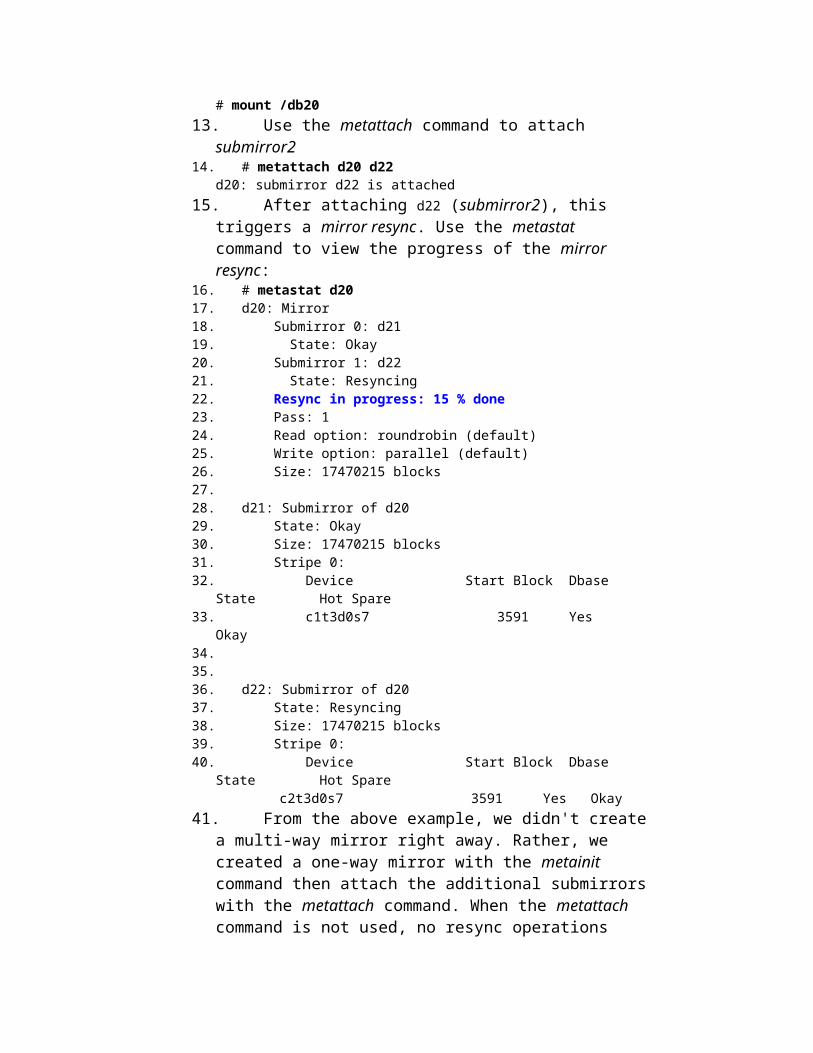
13. Use the metattach command to attach submirror2 14. # metattach d20 d22
d20: submirror d22 is attached
15. After attaching d22 (submirror2), this triggers a mirror resync. Use the metastat command to view the progress of the mirror resync:
16. # metastat d2017. d20: Mirror18. Submirror 0: d2119. State: Okay20. Submirror 1: d2221. State: Resyncing22. Resync in progress: 15 % done23. Pass: 124. Read option: roundrobin (default)25. Write option: parallel (default)26. Size: 17470215 blocks
27.28. d21: Submirror of d2029. State: Okay30. Size: 17470215 blocks31. Stripe 0:32. Device Start Block Dbase
State Hot Spare33. c1t3d0s7 3591 Yes
Okay34.35.36. d22: Submirror of d2037. State: Resyncing38. Size: 17470215 blocks39. Stripe 0:40. Device Start Block Dbase
State Hot Spare c2t3d0s7 3591 Yes Okay
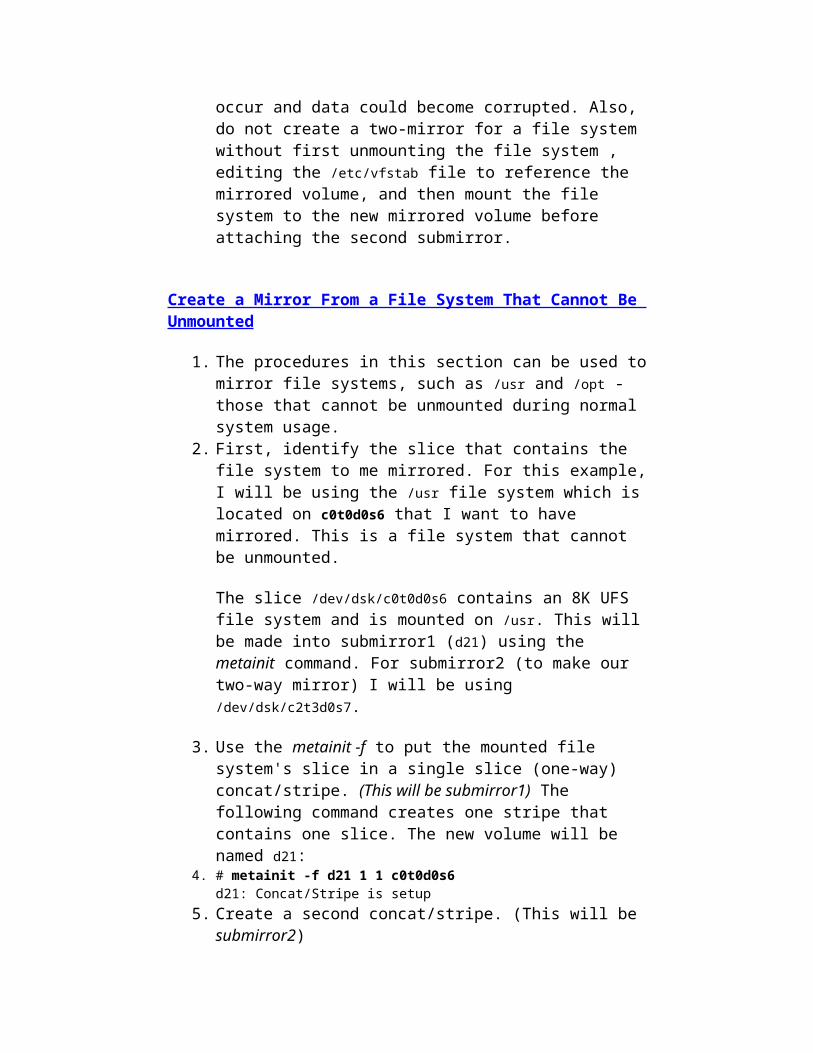
41. From the above example, we didn't create a multi-way mirror right away. Rather, we created a one-way mirror with the metainit command then attach the additional submirrors with the metattach command. When the metattach command is not used, no resync operations occur and data could become corrupted. Also, do not create a two-mirror for a file system without first unmounting the file system , editing the /etc/vfstab file to reference the mirrored volume, and then mount the file system to the new mirrored volume before attaching the second submirror.
Create a Mirror From a File System That Cannot Be Unmounted
1. The procedures in this section can be used to mirror file systems, such as /usr and /opt - those that cannot be unmounted during normal system usage.
2. First, identify the slice that contains the file system to me mirrored. For this example, I will be using the /usr file system which is located on c0t0d0s6 that I want to have mirrored. This is a file system that cannot be unmounted.
The slice /dev/dsk/c0t0d0s6 contains an 8K UFS file system and is mounted on /usr. This will be made into submirror1 (d21) using the metainit command. For submirror2 (to make our two-way mirror) I will be using /dev/dsk/c2t3d0s7.
3. Use the metainit -f to put the mounted file system's slice in a single slice (one-way) concat/stripe. (This will be submirror1) The following command creates one stripe that contains one slice. The new volume will be named d21:
4. # metainit -f d21 1 1 c0t0d0s6d21: Concat/Stripe is setup
5. Create a second concat/stripe. (This will be submirror2) 6. # metainit d22 1 1 c2t3d0s7
d22: Concat/Stripe is setup
7. Use the metainit -m command to create a one-way mirror with submirror1.
8. # metainit d20 -m d21d20: Mirror is setup
9. Edit the /etc/vfstab file so that the file system (/usr) now refers to the newly created mirror. In the example snippet, I commented out the original entry for the c0t0d0s6 slice and added a new entry that refers to the newly created mirror to be mounted to /usr:
10. # /dev/dsk/c0t0d0s6 /dev/rdsk/c0t0d0s6 /usr ufs 1 no -/dev/md/dsk/d20 /dev/md/rdsk/d20 /usr ufs 1 no -
11. Reboot the system
# reboot
12. Use the metattach command to attach submirror2 13. # metattach d20 d22
d20: submirror d22 is attached
14. After attaching d22 (submirror2), this triggers a mirror resync. Use the metastat command to view the progress of the mirror resync:
15. # metastat d2016. d20: Mirror17. Submirror 0: d2118. State: Okay19. Submirror 1: d2220. State: Resyncing21. Resync in progress: 8 % done22. Pass: 123. Read option: roundrobin (default)24. Write option: parallel (default)25. Size: 16781040 blocks26.27. d21: Submirror of d2028. State: Okay29. Size: 16781040 blocks30. Stripe 0:31. Device Start Block Dbase
State Hot Spare32. c0t0d0s6 0 No
Okay33.34.35. d22: Submirror of d2036. State: Resyncing37. Size: 17470215 blocks38. Stripe 0:39. Device Start Block Dbase
State Hot Spare c2t3d0s7 3591 Yes Okay
40. From the above example, we didn't create a multi-way mirror right away for the /usr file system. Rather, we created a one-way mirror with the metainit command then attach the additional submirrors with the metattach command (after rebooting the server). When the metattach command is not used, no resync operations occur and data could become corrupted. Also, do not create a two-mirror for a file system without first editing the /etc/vfstab file to reference the mirror volume and then rebooting the server before attaching the second submirror.
Create a Mirror From swap
1. The procedures in this section of the documentation can be used to mirror the swap file system. The swap file system, like /usr and /opt, cannot be unmounted during normal system usage.
2. First, identify the slice that contains the swap file system to me mirrored. For this example, the swap file system it is located on c0t0d0s3 that I want to have mirrored. This is a file system that cannot be unmounted.
The slice /dev/dsk/c0t0d0s3 contains the swap file system. This will be made into submirror1 (d21) using the metainit command. For submirror2 (to make our two-way mirror) I will be using /dev/dsk/c2t3d0s7.
3. Use the metainit -f to put the mounted file system (swap) in a single slice (one-way) concat/stripe. (This will be submirror1) The following command creates one stripe that contains one slice. The new volume will be named d21:
4. # metainit -f d21 1 1 c0t0d0s3d21: Concat/Stripe is setup
5. Create a second concat/stripe. (This will be submirror2) 6. # metainit d22 1 1 c2t3d0s7
d22: Concat/Stripe is setup
7. Use the metainit -m command to create a one-way mirror with submirror1.
8. # metainit d20 -m d21d20: Mirror is setup
9. Edit the /etc/vfstab file so that the swap file system now refers to the newly created mirror. In the example snippet, I commented out the original swap entry for the c0t0d0s3 slice and added a new entry that refers to the newly created mirror:
10. # /dev/dsk/c0t0d0s3 - - swap - no -/dev/md/dsk/d20 - - swap - no -
11. Reboot the system
# reboot
12. Use the metattach command to attach submirror2 13. # metattach d20 d22
d20: submirror d22 is attached
14. After attaching d22 (submirror2), this triggers a mirror resync. Use the metastat command to view the progress of the mirror resync:
15. # metastat d2016. d20: Mirror17. Submirror 0: d2118. State: Okay19. Submirror 1: d2220. State: Resyncing21. Resync in progress: 32 % done22. Pass: 123. Read option: roundrobin (default)24. Write option: parallel (default)25. Size: 2101200 blocks26.27. d21: Submirror of d2028. State: Okay29. Size: 2101200 blocks30. Stripe 0:31. Device Start Block Dbase
State Hot Spare32. c0t0d0s3 0 No
Okay33.34.35. d22: Submirror of d2036. State: Resyncing37. Size: 17470215 blocks38. Stripe 0:39. Device Start Block Dbase
State Hot Spare c2t3d0s7 3591 Yes Okay
40. Verify that the swap file system is mounted on the d20 volume: 41. # swap -l42. swapfile dev swaplo blocks free
/dev/md/dsk/d20 85,20 16 2101184 2101184
43. From the above example, we didn't create a multi-way mirror right away for the swap file system. Rather, we created a one-way mirror with the metainit command then attach the additional submirrors with the metattach command (after rebooting the server). When the metattach command is not used, no resync operations occur and data could become corrupted. Also, do not create a two-mirror for a file system without first editing the /etc/vfstab file to reference the mirror volume and then rebooting the server before attaching the second submirror.
Create a Mirror From root (/)
1. Use the following procedures to mirror the root (/) file system on a SPARC system.
NOTE: The task for using the command-line to mirror root (/) on an x86 system is different from the task used for a SPARC system.
When mirroring root (/), it is essential that you record the secondary root slice name to reboot the system if the primary submirror fails. This information should be written down, not recorded on the system, which may not be available in the event of a disk failure.
2. Use the metainit -f to put the root (/) slice in a single slice (one-way) concat. (submirror1). (This will be submirror1)
The following command creates one stripe that contains one slice. The new volume will be named d21:
# metainit -f d21 1 1 c0t0d0s0d21: Concat/Stripe is setup
3. Create a second concat/stripe. (This will be submirror2) 4. # metainit d22 1 1 c0t2d0s0
d22: Concat/Stripe is setup
5. Use the metainit -m command to create a one-way mirror with submirror1.
6. # metainit d20 -m d21d20: Mirror is setup
7. Run the metaroot command. This will update both the /etc/vfstab and /etc/system files to reflect the new rootslice the system will boot from:
# metaroot d20
8. Run the lockfs command:
# lockfs -fa
9. Reboot the system
# reboot
10. Use the metattach command to attach submirror2 11. # metattach d20 d22
d20: submirror d22 is attached
12. Record/document the alternate boot path in the case of failure. 13. # ls -l /dev/rdsk/c0t2d0s0
lrwxrwxrwx 1 root root 42 Nov 12 09:35 /dev/rdsk/c0t2d0s0 -> ../../devices/pci@1f,0/ide@d/dad@2,0:a,raw
NOTE: The -f option forces the creation of the first concatenation, d21, which contains the mounted file system root (/) on /dev/dsk/c0t0d0s0. The second concatenation, d22, is created from /dev/dsk/c0t2d0s0. (This slice must be the same size or greater than that of d21) The metainit command with the -m option creates the one-way mirror d20 using the concatenation containing root (/). Next, the metaroot command edits the /etc/vfstab and /etc/system files so that the system may be booted with the root file system (/) on a
volume. (It is a good idea to run lockfs -fa before rebooting.) After a reboot, the submirror d22 is attached to the mirror, causing a mirror resync. (The system verifies that the concatenations and the mirror are set up, and that submirror d22 is attached.) The ls -l command is run on the root raw device to determine the path to the alternate root device in case the system needs to be booted from it.
Creating a RAID5 Volume - (RAID 5)
A RAID5 volume uses storage capacity equivalent to one slice in the volume to store redundant information about user data stored on the remainder of the RAID5 volume's slices. The redundant information is distributed across all slices in the volume. Like a mirror, a RAID5 volume increases data availability, but with a minimum of cost in terms of hardware.
The system must contain at least three state database replicas before you can create RAID5 volumes.
A RAID5 volume can only handle a single slice failure.
Follow the 20-percent rule when creating a RAID5 volume: because of the complexity of parity calculations, volumes with greater than about 20 percent writes should probably not be RAID5 volumes. If data redundancy is needed, consider mirroring.
There are drawbacks to a slice-heavy RAID5 volume: the more slices a RAID5 volume contains, the longer read and write operations will take if a slice fails.
A RAID5 volume must consist of at least three slices.
A RAID5 volume can be grown by concatenating additional slices to the volume. The new slices do not store parity information, however they are parity protected. The resulting RAID5 volume continues to handle a single slice failure.
The interlace value is key to RAID5 performance. It is configurable at the time the volume is created; thereafter, the value cannot be modified. The default interlace value is 16 Kbytes. This is reasonable for most applications.
Use the same size disk slices. Creating a RAID5 volume from different size slices results in unused disk space in the volume.
Do not create a RAID5 volume from a slice that contains an existing file system. Doing so will erase the data during the RAID5 initialization process.
RAID5 volumes cannot be striped, concatenated, or mirrored.
1. The following example creates a RAID 5 volume using 3 slices that will be named /dev/md/rdsk/d3 with the metainit command. Of the twelve disks available in the D1000 Disk Array, I will be using slices c1t4d0s7, c2t4d0s7, and c1t5d0s7 as follows:
2. # metainit d3 -r c1t4d0s7 c2t4d0s7 c1t5d0s7d3: RAID is setup
Let's explain the details of the above example. The RAID5 volume d3 is created with the -r option from three slices. Because no interlace is specified, d3 uses the default of 16 Kbytes. The system verifies that the RAID5 volume has been set up, and begins initializing the volume.
3. Use the metastat command to query your new RAID5 volumes. After running the above command, the volume will go through an initialization state. This may take several minutes to complete. When using the metastat command, you will be able to view how far of the initialization is completed. You must wait for the initialization to finish before you can use the new RAID5 volume. The following screenshot shows the RAID5 volume during its initialization phase:
4. # metastat d35. d3: RAID6. State: Initializing7. Initialization in progress: 32.0% done8. Interlace: 32 blocks9. Size: 35331849 blocks (16 GB)10. Original device:11. Size: 35334720 blocks (16 GB)12. Device Start Block Dbase State
Reloc Hot Spare13. c1t4d0s7 11103 Yes Initializing
Yes14. c2t4d0s7 11103 Yes Initializing
Yes15. c1t5d0s7 11103 Yes Initializing
Yes16.17. Device Relocation Information:18. Device Reloc Device ID19. c1t4d0 Yes
id1,sd@SSEAGATE_ST39102LCSUN9.0GLJP248260000194511NU20. c2t4d0 Yes
id1,sd@SSEAGATE_ST39102LCSUN9.0GLJP1841500002945H5FEc1t5d0 Yes id1,sd@SSEAGATE_ST39102LCSUN9.0GLJE34597000029290C8N
When the disks within the RAID5 volume are completed with their initialization phase, this is what it will look like:
# metastat d3d3: RAID State: Okay Interlace: 32 blocks Size: 35331849 blocks (16 GB)Original device: Size: 35334720 blocks (16 GB) Device Start Block Dbase State Reloc Hot Spare c1t4d0s7 11103 Yes Okay Yes c2t4d0s7 11103 Yes Okay Yes c1t5d0s7 11103 Yes Okay Yes
Device Relocation Information:Device Reloc Device IDc1t4d0 Yes id1,sd@SSEAGATE_ST39102LCSUN9.0GLJP248260000194511NUc2t4d0 Yes id1,sd@SSEAGATE_ST39102LCSUN9.0GLJP1841500002945H5FEc1t5d0 Yes id1,sd@SSEAGATE_ST39102LCSUN9.0GLJE34597000029290C8N
21. Now that we have created our RAID5 volume, we can now pretend that the volume is a big partition (slice) on which we can do the usual file system things. Let's now create a UFS file system using the newfs command. I want to create a UFS file system with an 8KB block size:
22. # newfs -i 8192 /dev/md/rdsk/d323. newfs: construct a new file system
/dev/md/rdsk/d3: (y/n)? y24. Warning: 1 sector(s) in last cylinder unallocated25. /dev/md/rdsk/d3: 35331848 sectors in 9839
cylinders of 27 tracks, 133 sectors26. 17251.9MB in 615 cyl groups (16 c/g,
28.05MB/g, 3392 i/g)27. super-block backups (for fsck -F ufs -o b=#) at:28. 32, 57632, 115232, 172832, 230432, 288032,
345632, 403232, 460832, 518432,29. Initializing cylinder groups:30. ............31. super-block backups for last 10 cylinder groups
at:32. 34765088, 34822688, 34880288, 34933280, 34990880,
35048480, 35106080, 35163680, 35221280, 35278880,
33. Finally, we mount the file system on /db3 as follows: 34. # mkdir /db3
# mount -F ufs /dev/md/dsk/d3 /db3
35. To ensure that this new file system is mounted each time the machine is started, insert the following line into you /etc/vfstab file (all on one line with tabs separating the fields):
/dev/md/dsk/d3 /dev/md/rdsk/d3 /db3 ufs 2 yes -