Embed Size (px)
Citation preview
Use safety glasses while operating the drill, jigsaw and hacksaw used to make
the wine barrel wine holder. Use work gloves and latex type gloves where
appropriate.
Step 1
Choose a half barrel with its 2nd ring as close as possible to the bottom ring. Price of the half barrel depends on your
proximity to wineries. In California, you can find a half barrel as low as $15 and if you pay more than $25, you paid too
much.
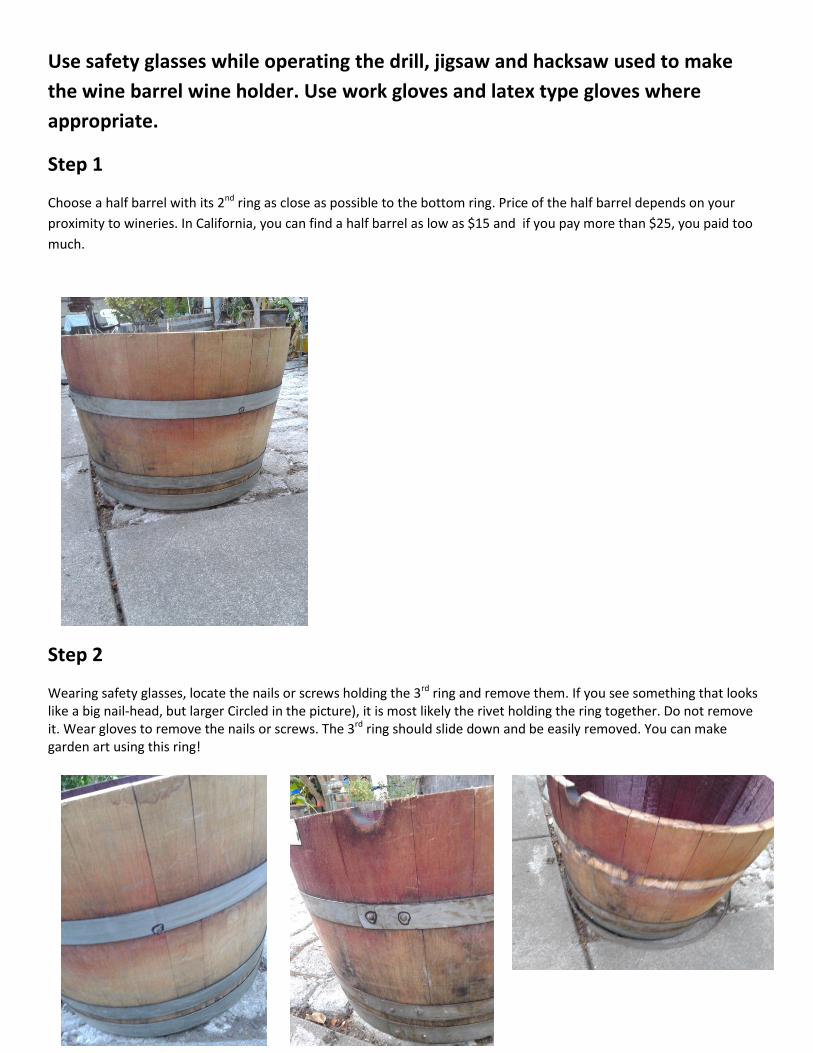
Step 2
Wearing safety glasses, locate the nails or screws holding the 3rd ring and remove them. If you see something that looks like a big nail-head, but larger Circled in the picture), it is most likely the rivet holding the ring together. Do not remove it. Wear gloves to remove the nails or screws. The 3rd ring should slide down and be easily removed. You can make garden art using this ring!
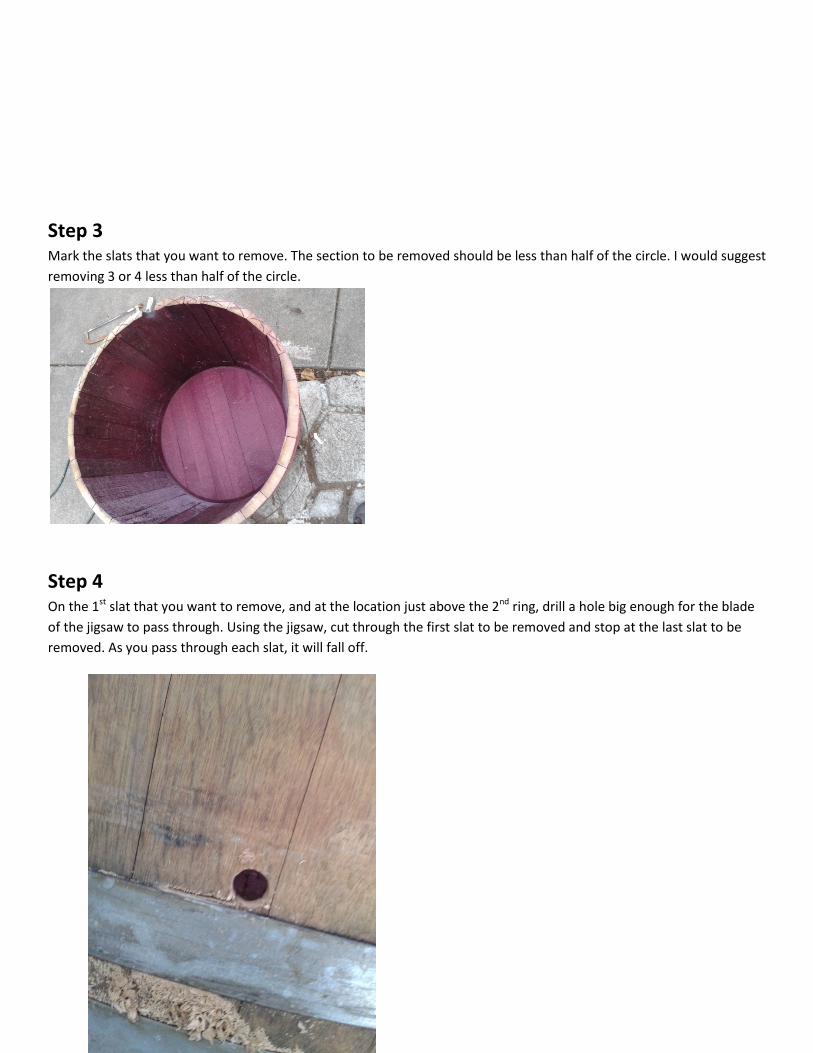
Step 3 Mark the slats that you want to remove. The section to be removed should be less than half of the circle. I would suggest
removing 3 or 4 less than half of the circle.
Step 4 On the 1st slat that you want to remove, and at the location just above the 2nd ring, drill a hole big enough for the blade
of the jigsaw to pass through. Using the jigsaw, cut through the first slat to be removed and stop at the last slat to be
removed. As you pass through each slat, it will fall off.
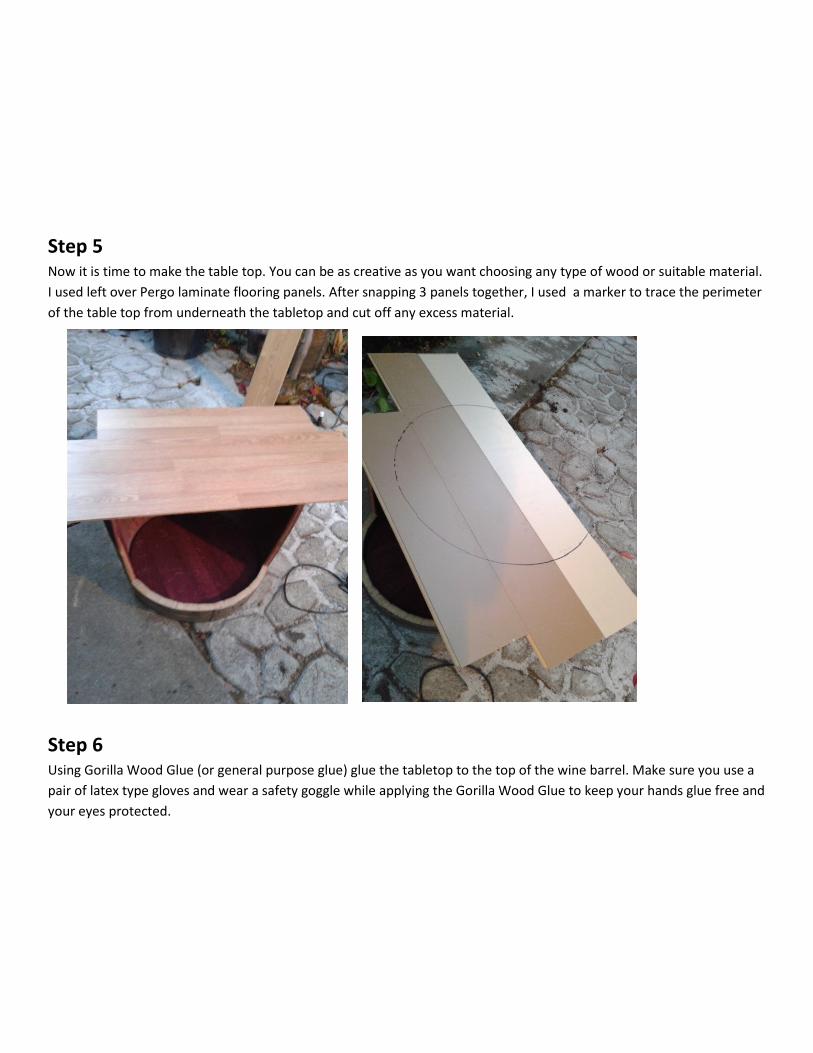
Step 5 Now it is time to make the table top. You can be as creative as you want choosing any type of wood or suitable material.
I used left over Pergo laminate flooring panels. After snapping 3 panels together, I used a marker to trace the perimeter
of the table top from underneath the tabletop and cut off any excess material.
Step 6 Using Gorilla Wood Glue (or general purpose glue) glue the tabletop to the top of the wine barrel. Make sure you use a
pair of latex type gloves and wear a safety goggle while applying the Gorilla Wood Glue to keep your hands glue free and
your eyes protected.
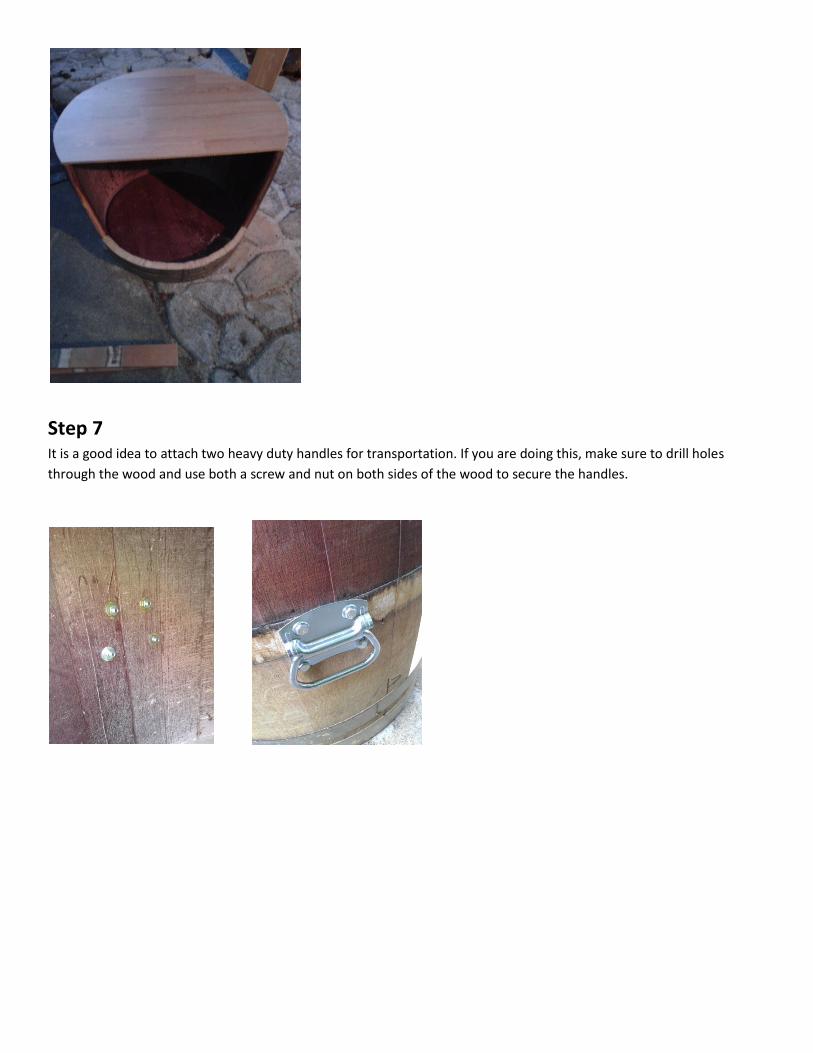
Step 7 It is a good idea to attach two heavy duty handles for transportation. If you are doing this, make sure to drill holes
through the wood and use both a screw and nut on both sides of the wood to secure the handles.
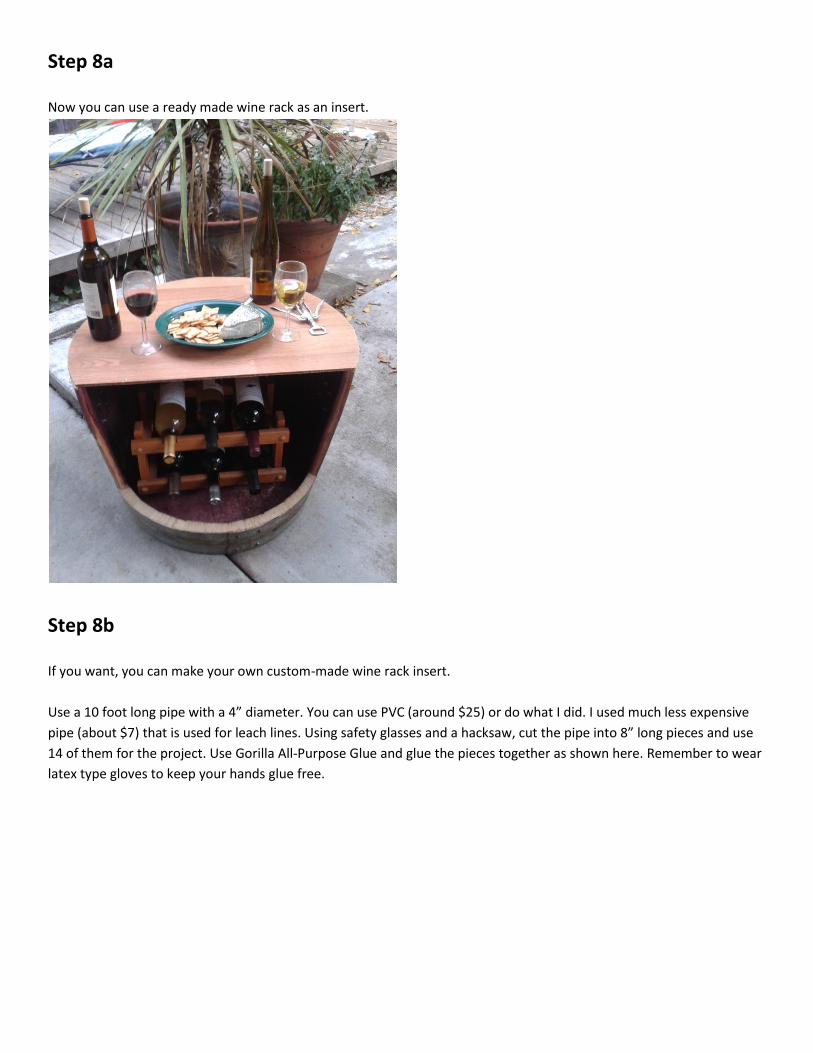
Step 8a
Now you can use a ready made wine rack as an insert.
Step 8b
If you want, you can make your own custom-made wine rack insert.
Use a 10 foot long pipe with a 4” diameter. You can use PVC (around $25) or do what I did. I used much less expensive
pipe (about $7) that is used for leach lines. Using safety glasses and a hacksaw, cut the pipe into 8” long pieces and use
14 of them for the project. Use Gorilla All-Purpose Glue and glue the pieces together as shown here. Remember to wear
latex type gloves to keep your hands glue free.
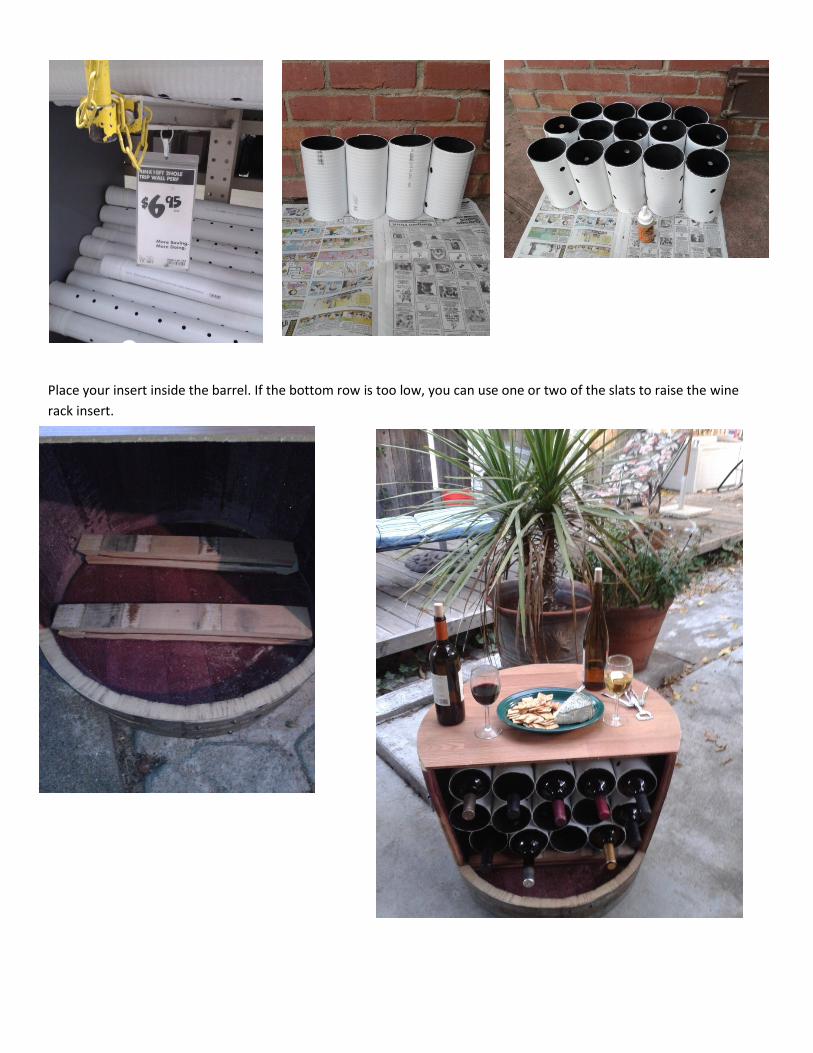
Place your insert inside the barrel. If the bottom row is too low, you can use one or two of the slats to raise the wine
rack insert.

Step 9 If you like the rustic look, leave the wine barrel as is. If you prefer a more polished look, prime and paint your barrel,
paint with several coats of wood varnish, or stain it.