Embed Size (px)
Citation preview

USB/DVI KVM Switch with Cables
2 Port Compact USB/DVI KVM with Cables and Audio
Switching
SV211KDVISV211KDVIGB
Instruction Manual

FCC Compliance Statement
This equipment has been tested and found to comply with the limits for a Class B digital device, pursuant to part 15 of the FCC Rules. These limits are designed to provide rea-sonable protection against harmful interference in a residential installation. This equip-ment generates, uses and can radiate radio frequency energy and, if not installed and used in accordance with the instructions, may cause harmful interference to radio com-munications. However, there is no guarantee that interference will not occur in a particu-lar installation. If this equipment does cause harmful interference to radio or television reception, which can be determined by turning the equipment off and on, the user is encouraged to try to correct the interference by one or more of the following measures:
Reorient or relocate the receiving antenna.•
Increase the separation between the equipment and receiver.•
Connect the equipment into an outlet on a circuit different from that to which the receiver • is connected.
Consult the dealer or an experienced radio/TV technician for help.•
Use of Trademarks, Registered Trademarks, and other Protected Names and Symbols
This manual may make reference to trademarks, registered trademarks, and other protected names and/or symbols of third-party companies not related in any way to StarTech.com. Where they occur these references are for illustrative purposes only and do not represent an endorsement of a product or service by StarTech.com, or an en-dorsement of the product(s) to which this manual applies by the third-party company in question. Regardless of any direct acknowledgement elsewhere in the body of this doc-ument, StarTech.com hereby acknowledges that all trademarks, registered trademarks, service marks, and other protected names and/or symbols contained in this manual and related documents are the property of their respective holders.
i
Table of ContentsIntroduction ..................................................................... 1
Packaging Contents.....................................................................1
System Requirements .................................................................1
Installation ....................................................................... 2Software Installation ....................................................................3
Configuration Diagram .................................................................4
Operation ......................................................................... 5Front Panel Pushbuttons .............................................................5
Keyboard Hotkeys .......................................................................5
KVM Switcher Software ...............................................................6
Specifications .................................................................. 9
Technical Support ........................................................... 10
Warranty Information ...................................................... 10
1
IntroductionPackaging Contents
1 x SV211KDVI / GB KVM switch•
2 x 4’ DVI, Audio and Mic combo cables•
1 x Power Adapter•
2 x 4’ USB cables•
System RequirementsTwo PC or Mac-based computers with DVI Video out and USB •control capability
USB capable operating system installed on each computer•
USB peripheral control set (Mouse, Keyboard)•
DVI monitor•
2
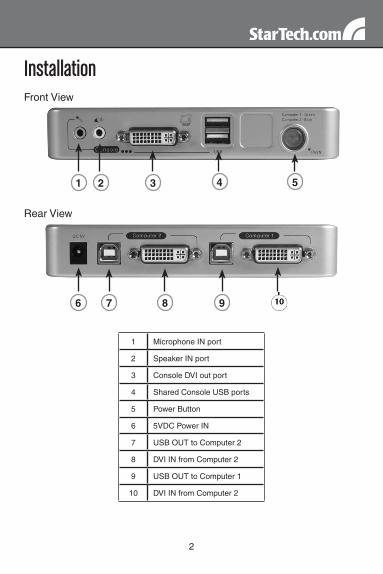
InstallationFront View
Rear View
1 Microphone IN port
2 Speaker IN port
3 Console DVI out port
4 Shared Console USB ports
5 Power Button
6 5VDC Power IN
7 USB OUT to Computer 2
8 DVI IN from Computer 2
9 USB OUT to Computer 1
10 DVI IN from Computer 2
1 2 3 4 5
6 7 8 9
3
Software InstallationThis section details how to install the optional software, as well as how to make the necessary physical connections between your peripherals and the KVM switch. For best results, ensure that all of the computers to be controlled are located as close as possible to the KVM switch and console peripherals (monitor, keyboard, mouse), as this will reduce the length of cabling required and reduces the chance of interference.
KVM Switcher Software
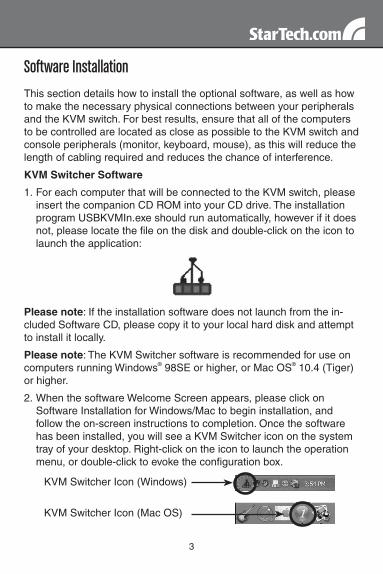
For each computer that will be connected to the KVM switch, please 1. insert the companion CD ROM into your CD drive. The installation program USBKVMIn.exe should run automatically, however if it does not, please locate the file on the disk and double-click on the icon to launch the application:
Please note: If the installation software does not launch from the in-cluded Software CD, please copy it to your local hard disk and attempt to install it locally.
Please note: The KVM Switcher software is recommended for use on computers running Windows® 98SE or higher, or Mac OS® 10.4 (Tiger) or higher.
When the software Welcome Screen appears, please click on 2. Software Installation for Windows/Mac to begin installation, and follow the on-screen instructions to completion. Once the software has been installed, you will see a KVM Switcher icon on the system tray of your desktop. Right-click on the icon to launch the operation menu, or double-click to evoke the configuration box.
KVM Switcher Icon (Windows)
KVM Switcher Icon (Mac OS)
4
Please note that the KVM Switcher Software supports both Windows and Mac OS operating system; for other operating systems such as Linux, the hotkey combination Scroll Lock + Scroll Lock can still be used as long as the computer is PC-based.
Connect the shared USB keyboard, mouse, monitor, speaker/head-3. phone and microphone to the corresponding port on the front panel of the KVM Switch.
Connect each of the Computer connections (USB and DVI) to the 4. computers you wish to control, using the included 3-in-1 KVM combo cables.
Optional: Connect the shared speaker and microphone to the ap-5. propriate ports on the front panel of the KVM Switch.
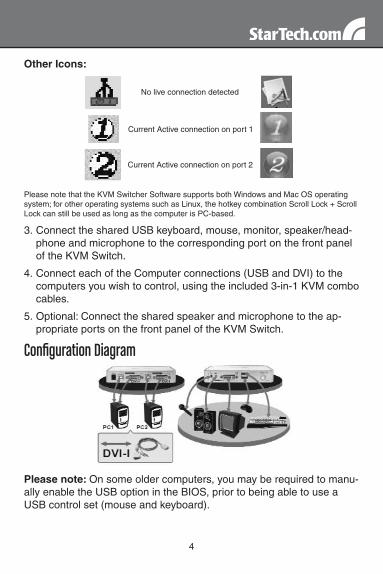
Configuration Diagram
Please note: On some older computers, you may be required to manu-ally enable the USB option in the BIOS, prior to being able to use a USB control set (mouse and keyboard).
Other Icons:
No live connection detected
Current Active connection on port 1
Current Active connection on port 2

5
OperationThere are three methods to control your KVM Switch for PC and Audio/Mic channel selection: front panel pushbuttons, hotkey sequences or the KVM Switcher Software.
Front Panel PushbuttonsThe front panel pushbuttons provide direct control over KVM switch-ing operation. Simply press the button to switch to the corresponding PC port (as well as the audio/mic channel ports if binding is enabled). By default, PC port switching and audio/mic port switching are bound together, unless you bind the audio to a specific port.
Please note: You can use the front panel pushbuttons to switch to an empty port (not connected to a slave computer), but the keyboard hotkeys or KVM Switcher Software cannot perform the same function.
Keyboard HotkeysPlease note: Each keystroke within a hotkey sequence should be pressed within two seconds. Otherwise, the hotkey sequence will not be validated.
Please note: After switching ports, you must wait until the KVM Switcher icon updates accurately in the taskbar, before switching again.
Please note: Hotkeys are only functional while the computer is operat-ing system is running. If you wish to switch computer control during the boot phase, please use the front panel pushbuttons as necessary.
User Definable Hotkeys: Ctrl + Alt + [command key]. Please note that these three keys must be pressed simultaneously. Upon the release of the keys, the switching action will be executed.
Universal Hotkeys Sequence: Scroll Lock + Scroll Lock switches to the next port.

6
KVM Switcher SoftwareRight-click on the KVM Switcher icon in the taskbar to evoke the opera-tion menu, then select whichever PC is available for switching. Once you select a PC channel, it will immediately switch to the selected channel. Please note that the unconnected ports or the active port will be grayed out (non-selectable).
Windows:
Operating Menu Configuration Dialog Box
Mac OS:
Operating Menu Configuration Dialog Box
7
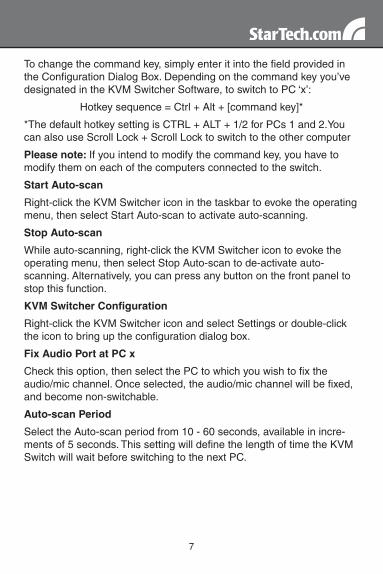
To change the command key, simply enter it into the field provided in the Configuration Dialog Box. Depending on the command key you’ve designated in the KVM Switcher Software, to switch to PC ‘x’:
Hotkey sequence = Ctrl + Alt + [command key]*
*The default hotkey setting is CTRL + ALT + 1/2 for PCs 1 and 2.You can also use Scroll Lock + Scroll Lock to switch to the other computer
Please note: If you intend to modify the command key, you have to modify them on each of the computers connected to the switch.
Start Auto-scan
Right-click the KVM Switcher icon in the taskbar to evoke the operating menu, then select Start Auto-scan to activate auto-scanning.
Stop Auto-scan
While auto-scanning, right-click the KVM Switcher icon to evoke the operating menu, then select Stop Auto-scan to de-activate auto-scanning. Alternatively, you can press any button on the front panel to stop this function.
KVM Switcher Configuration
Right-click the KVM Switcher icon and select Settings or double-click the icon to bring up the configuration dialog box.
Fix Audio Port at PC x
Check this option, then select the PC to which you wish to fix the audio/mic channel. Once selected, the audio/mic channel will be fixed, and become non-switchable.
Auto-scan Period
Select the Auto-scan period from 10 - 60 seconds, available in incre-ments of 5 seconds. This setting will define the length of time the KVM Switch will wait before switching to the next PC.
8
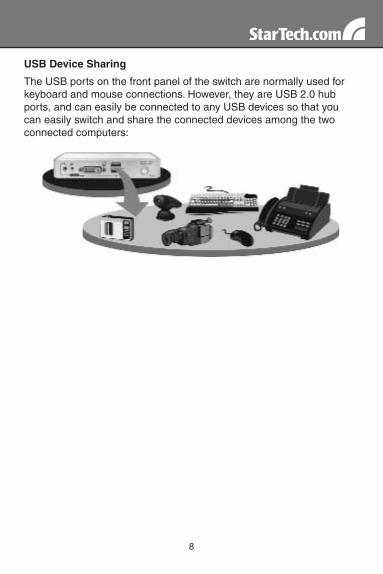
USB Device Sharing
The USB ports on the front panel of the switch are normally used for keyboard and mouse connections. However, they are USB 2.0 hub ports, and can easily be connected to any USB devices so that you can easily switch and share the connected devices among the two connected computers:
9
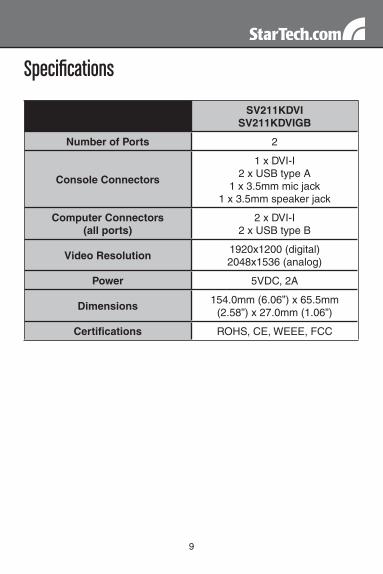
Specifications
SV211KDVISV211KDVIGB
Number of Ports 2
Console Connectors
1 x DVI-I2 x USB type A
1 x 3.5mm mic jack1 x 3.5mm speaker jack
Computer Connectors (all ports)
2 x DVI-I2 x USB type B
Video Resolution 1920x1200 (digital)2048x1536 (analog)
Power 5VDC, 2A
Dimensions154.0mm (6.06”) x 65.5mm
(2.58”) x 27.0mm (1.06”)
Certifications ROHS, CE, WEEE, FCC

10
Technical SupportStarTech.com’s lifetime technical support is an integral part of our com-mit-ment to provide industry-leading solutions. If you ever need help with your product, visit www.startech.com/support and access our com-prehensive selection of online tools, documentation, and downloads.
Warranty InformationThis product is backed by a one year warranty.
In addition, StarTech.com warrants its products against defects in materials and workmanship for the periods noted, following the initial date of purchase. During this period, the products may be returned for repair, or replacement with equivalent products at our discretion. The warranty covers parts and labor costs only. StarTech.com does not war-rant its products from defects or damages arising from misuse, abuse, alteration, or normal wear and tear.
Limitation of Liability
In no event shall the liability of StarTech.com Ltd. and StarTech.com USA LLP (or their officers, directors, employees or agents) for any dam-ages (whether direct or indirect, special, punitive, incidental, consequen-tial, or otherwise), loss of profits, loss of business, or any pecuniary loss, arising out of or related to the use of the product exceed the actual price paid for the product. Some states do not allow the exclusion or limitation of incidental or consequential damages. If such laws apply, the limita-tions or exclusions contained in this statement may not apply to you.

StarTech.com has been making “hard-to-find easy” since 1985, providing high quality solutions to a diverse IT and A/V customer base that spans many channels, including government, education and industrial facilities to name just a few. We offer an unmatched selection of computer parts, cables, A/V products, KVM and Serv-er Management solutions, serving a worldwide market through our locations in the United States, Canada, the United Kingdom and Taiwan.
Visit www.startech.com today for complete information about all our products and to access exclusive interactive tools such as the Cable Finder, Parts Finder and the KVM Reference Guide.