Embed Size (px)
Citation preview
Uploading Documents to OnBase
Purpose: This job aid details the process of scanning or uploading documents into OnBase. Use the table
below to jump to the step-by-step process guide for a specific method of upload.
Process Guides SCANNING DOCUMENTS INTO THE DMS VIA AN MPF SCANNER ............................................................................ 2
UPLOAD DOCUMENTS FROM COMPUTER........................................................................................................... 7
DRAG & DROP FROM COMPUTER ..................................................................................................................... 9
UPLOADING DOCUMENTS WITH OUTLOOK INTEGRATION ................................................................................... 11
Upload email only: ....................................................................................................................... 11
Upload email attachment(s) only: ................................................................................................ 13
Upload email & multiple attachments: ........................................................................................ 16
Go to Step 2: Indexing Documents in OnBase Job Aid

SCANNING DOCUMENTS INTO THE DMS VIA AN MPF SCANNER
1. Ensure your Multifunction Printer (MFP) has been setup to scan to the DMS.
Note: Some Agencies MFPs’ are defaulted to scan documents in with a PDF format, however they
all have the ability to change this setting to a TIFF format. When scanning in batches of
documents into OnBase, it is recommended that the documents be separated with a Patch sheet
and scanned into OnBase in the black and white TIFF format. When following this process, the
separator sheets will automatically be removed and the documents will be ingested into OnBase
as separate documents where they can be indexed and retrieved.
2. To separate documents in a batch, place a Patch T patch code sheet at the start of each new
document.
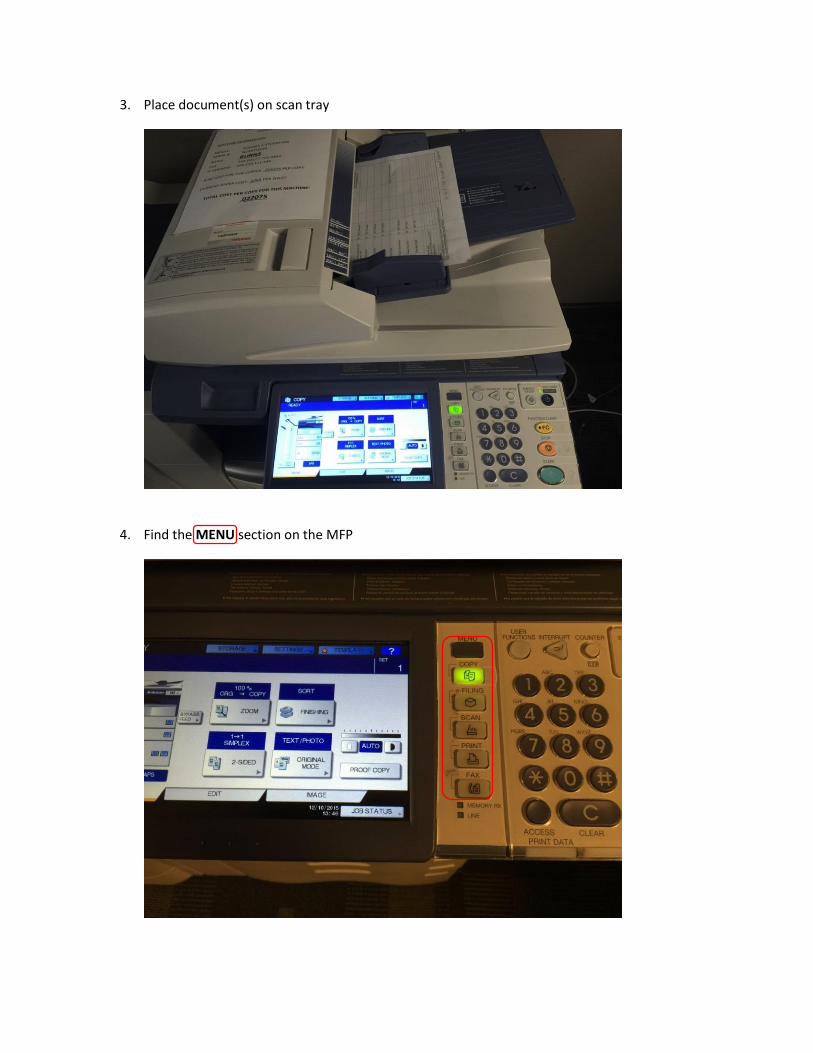
3. Place document(s) on scan tray
4. Find the MENU section on the MFP

5. Select the SCAN option and select FILE
6. The FILE Menu will appear on the screen.
a. Select the Remote location setup for the DMS ( Remote 1 in example)
i. If Remote 1 is not an option contact your IT support
b. Select OK
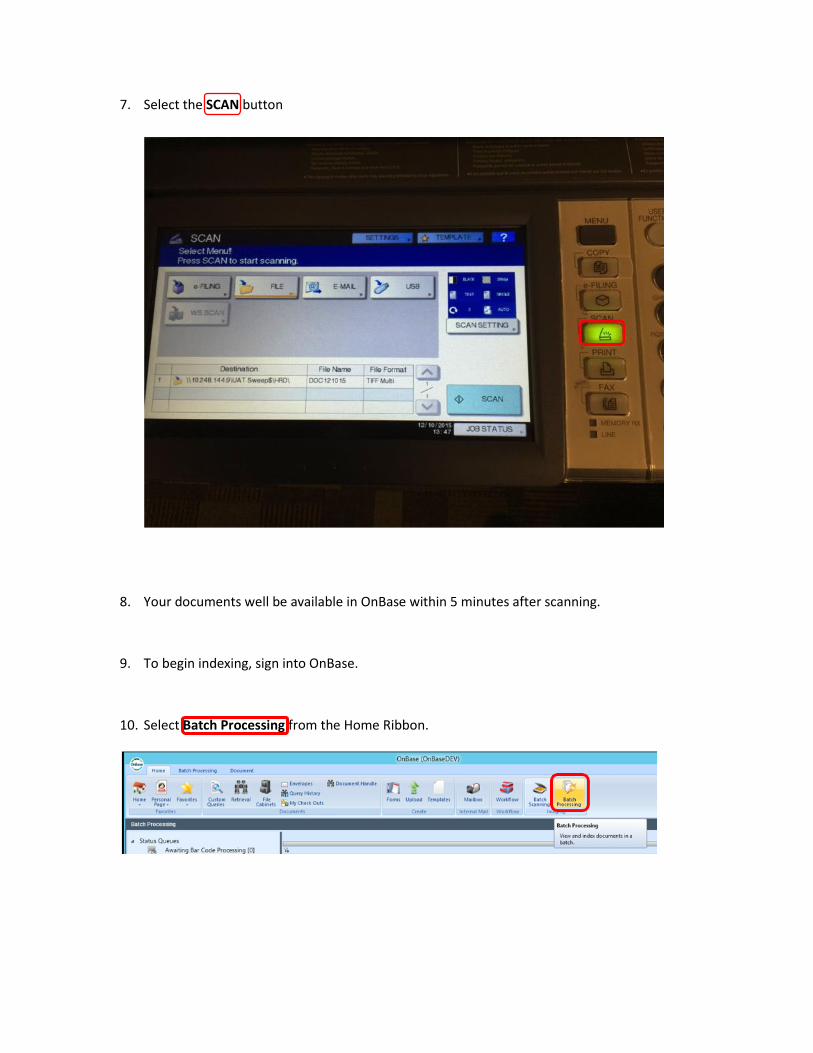
7. Select the SCAN button
8. Your documents well be available in OnBase within 5 minutes after scanning.
9. To begin indexing, sign into OnBase.
10. Select Batch Processing from the Home Ribbon.

11. Documents that have been scanned into DMS’s will reside in the Awaiting Index queue in
batches. To index the batch, right click on a batch and select Index Documents.

UPLOAD DOCUMENTS FROM COMPUTER
Note: The only file format that has the functionality to rotate, remove or move documents is a TIF file. You can merge multiple TIF files to become 1 document.
1. Open the OnBase Unity Client on your Desktop and select Upload
2. Select
Browse

3. Select document and click Open
4. Index the document & select Upload. You will receive Document Upload Complete message.
DRAG & DROP FROM COMPUTER
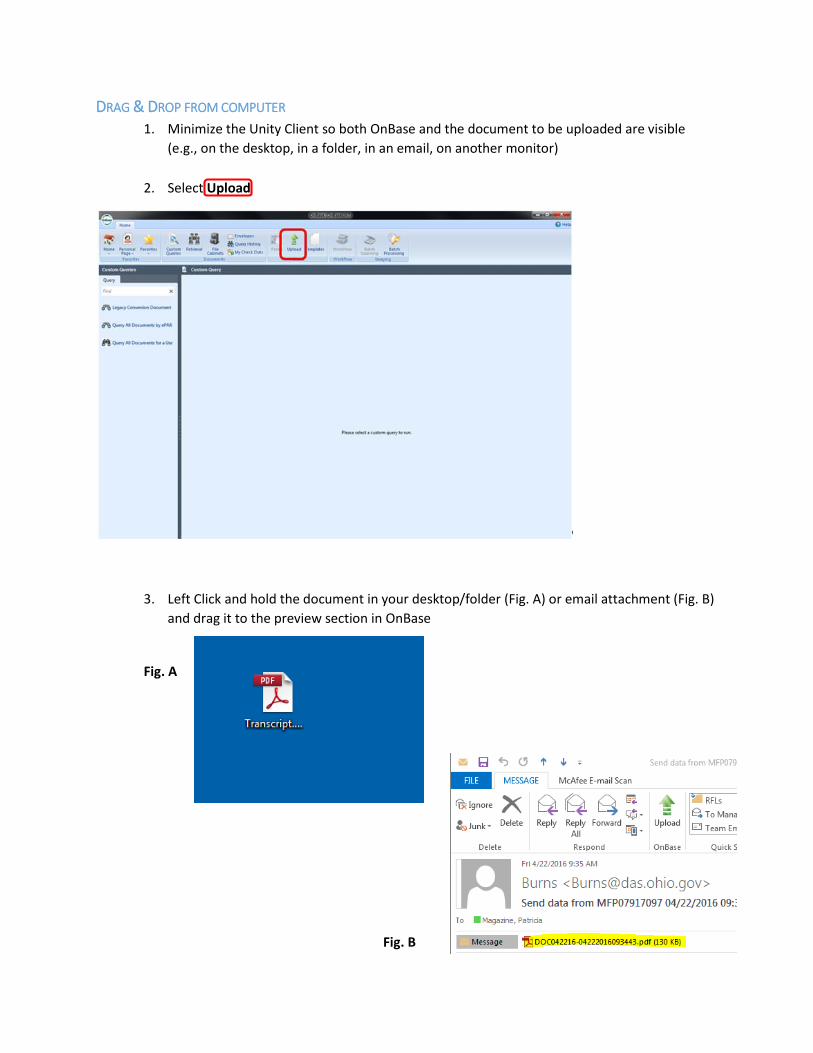
1. Minimize the Unity Client so both OnBase and the document to be uploaded are visible
(e.g., on the desktop, in a folder, in an email, on another monitor)
2. Select Upload
3. Left Click and hold the document in your desktop/folder (Fig. A) or email attachment (Fig. B)
and drag it to the preview section in OnBase
Fig. A
Fig. B
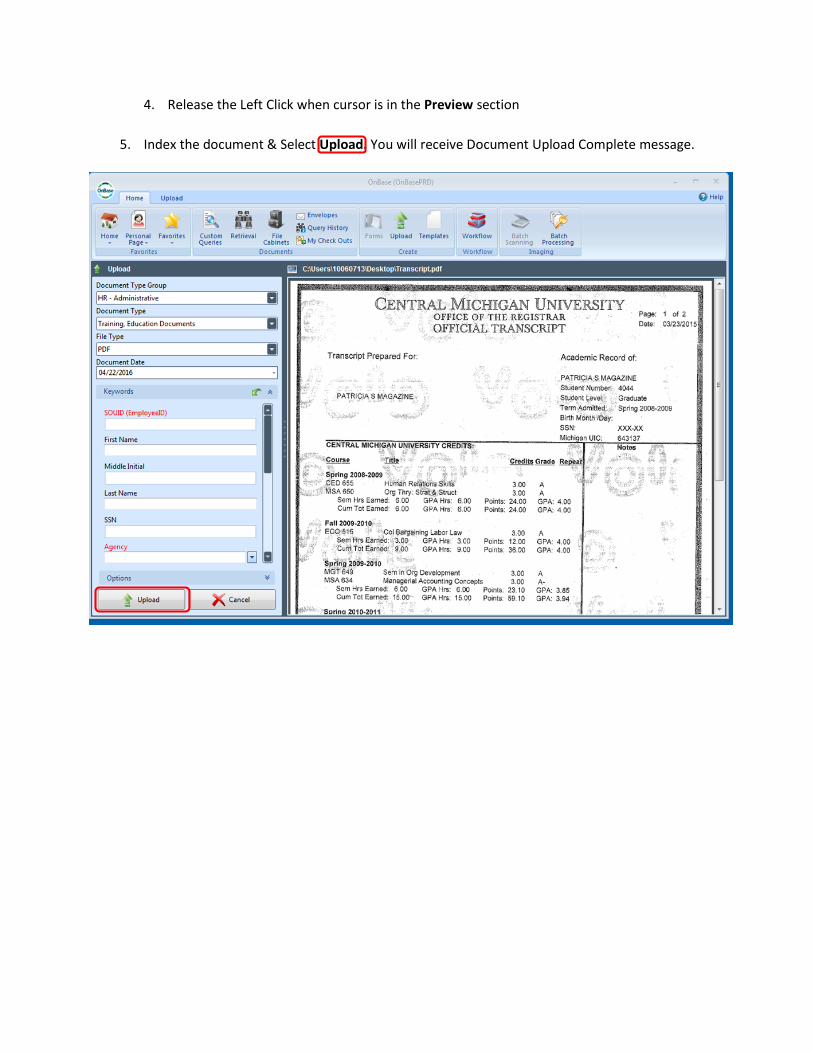
4. Release the Left Click when cursor is in the Preview section
5. Index the document & Select Upload. You will receive Document Upload Complete message.
UPLOADING DOCUMENTS WITH OUTLOOK INTEGRATION
NOTE: This function is not available in Outlook web client. You do not have functionality to rotate,
remove or move documents from Outlook Integration.
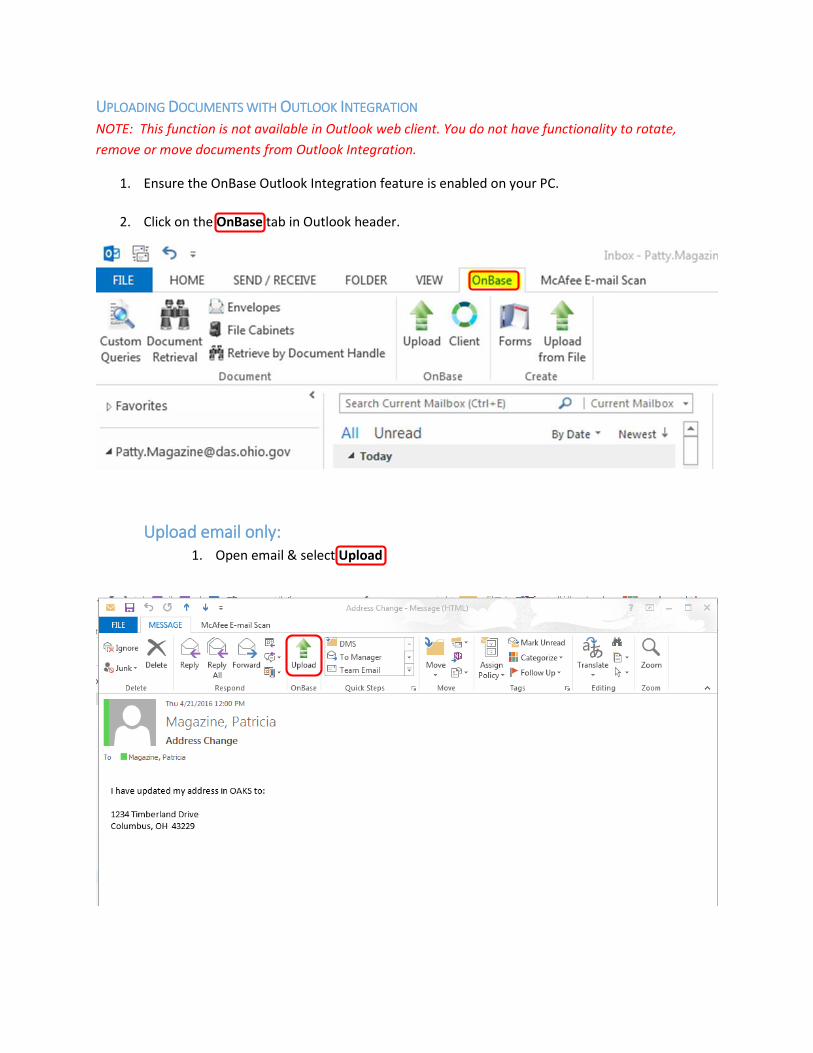
1. Ensure the OnBase Outlook Integration feature is enabled on your PC.
2. Click on the OnBase tab in Outlook header.
Upload email only: 1. Open email & select Upload
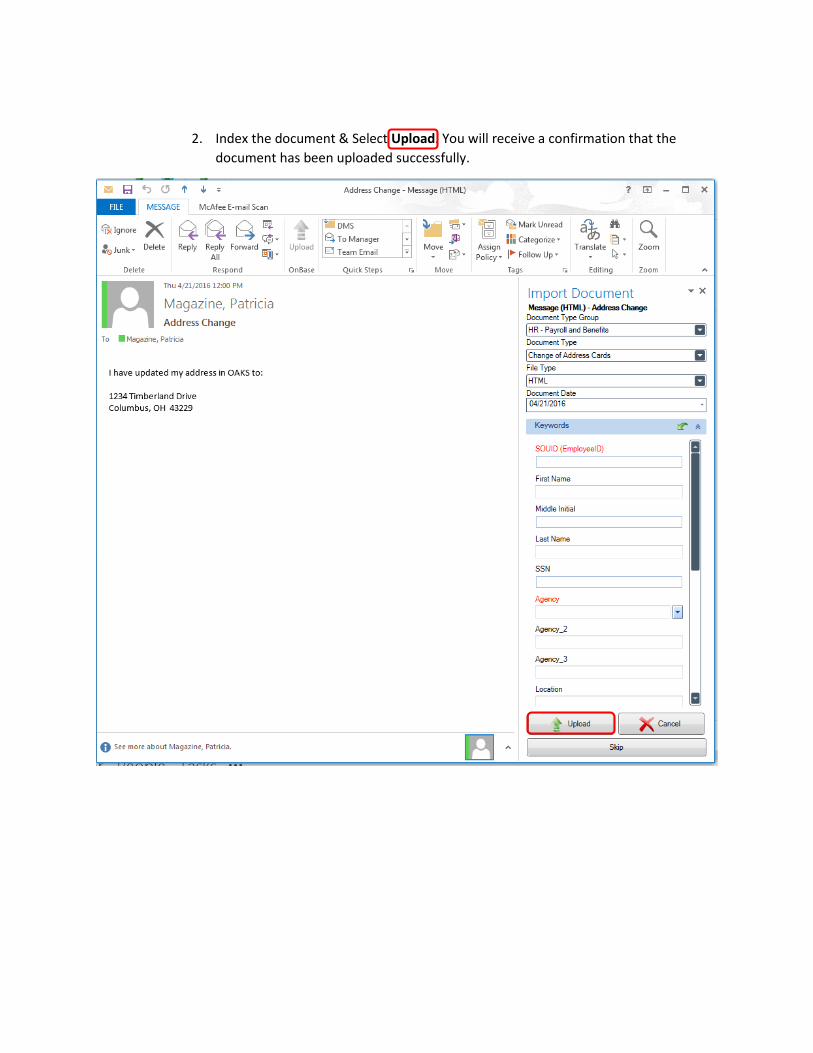
2. Index the document & Select Upload. You will receive a confirmation that the
document has been uploaded successfully.
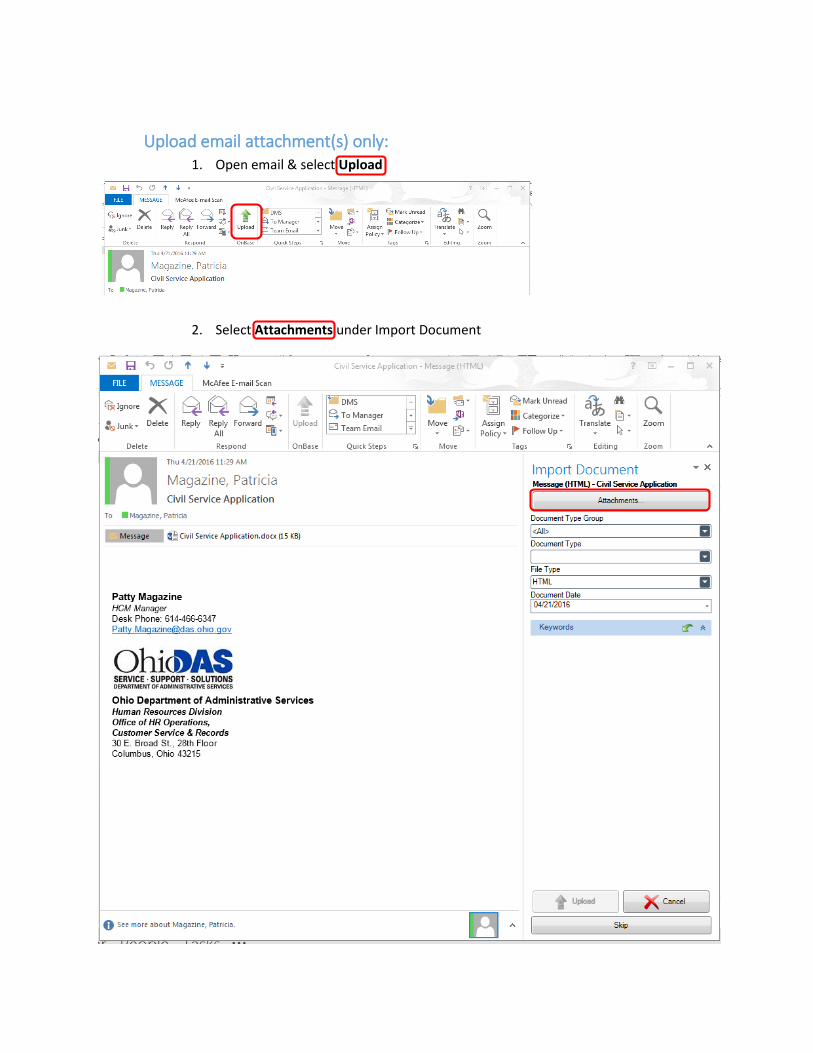
Upload email attachment(s) only: 1. Open email & select Upload
2. Select Attachments under Import Document
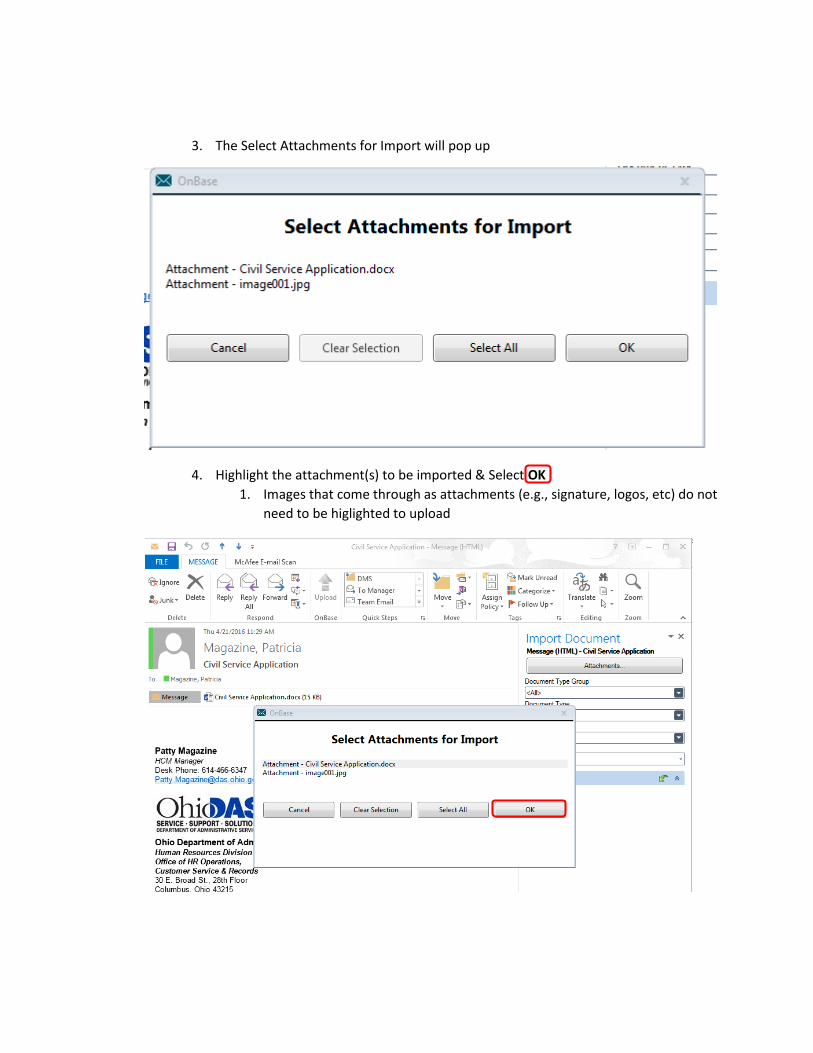
3. The Select Attachments for Import will pop up
4. Highlight the attachment(s) to be imported & Select OK
1. Images that come through as attachments (e.g., signature, logos, etc) do not
need to be higlighted to upload
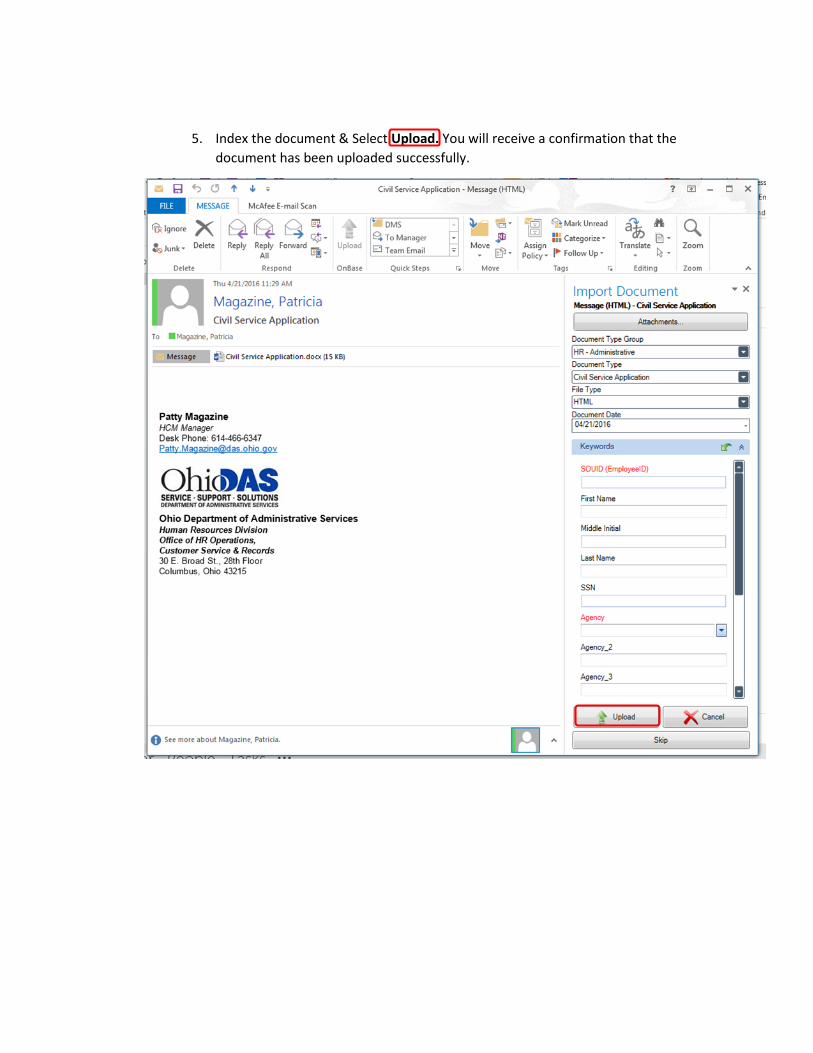
5. Index the document & Select Upload. You will receive a confirmation that the
document has been uploaded successfully.

Upload email & multiple attachments: NOTE: Multiple attachments that are PDF, Word & Excel Documents cannot be saved as
1 document. They will be saved as separate documents with the same doc type name.
Multiple TIF files can be saved into 1 document using the Drop & Drag functionality, see
Uploading Electronic Documents Job Aid for Instruction.
1. Open email & select Upload
2. Select Attachments under Import Document
3. The Select Attachments for Import will pop up
4. Choose Select All & click OK
5. Index the document & Select Upload
6. Document Upload Complete
7. Check Apply to all attachments (lower right corner)
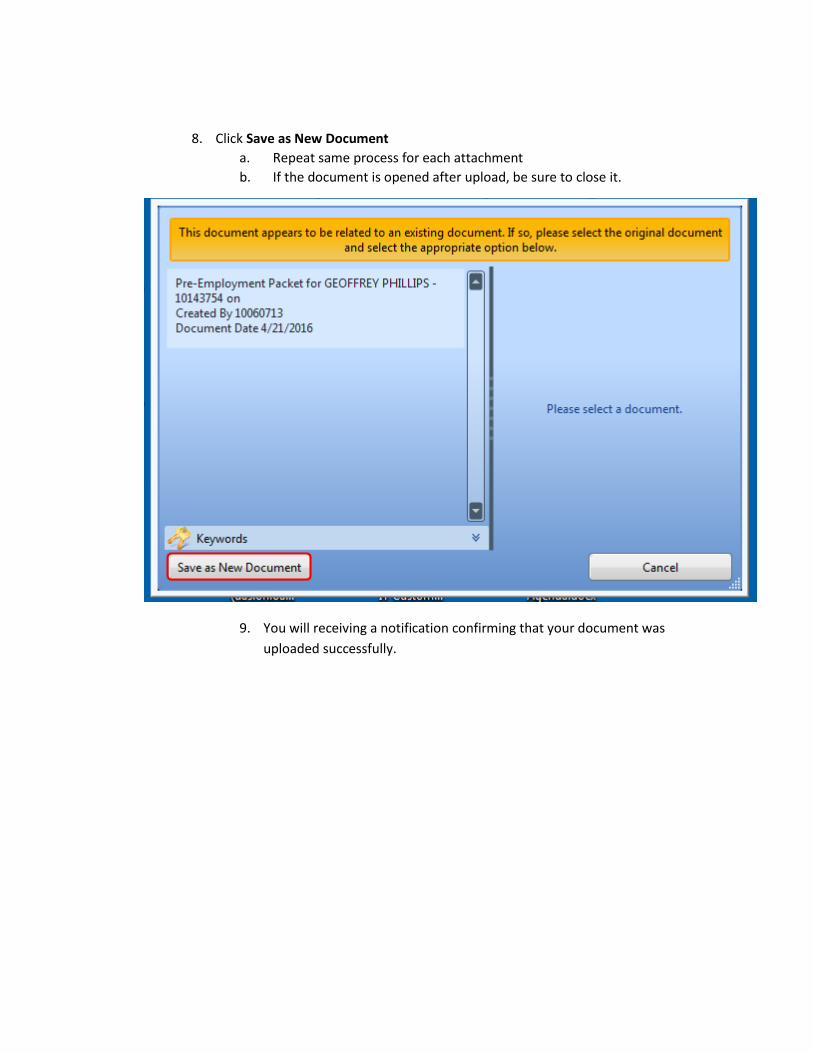
8. Click Save as New Document
a. Repeat same process for each attachment
b. If the document is opened after upload, be sure to close it.
9. You will receiving a notification confirming that your document was
uploaded successfully.