Embed Size (px)
Citation preview

Upgradable PRI Card Installation Guide
www.allo.com Version 2.0 2
Copyright
Copyright © 2015 Allo. All rights reserved.
No part of this publication may be copied, distributed, transmitted, transcribed, stored in a
retrieval system, or translated into any human or computer language without the prior written
permission of Allo.com. This document has been prepared for use by professional and properly
trained personnel, and the customer assumes full responsibility when using it.
Proprietary Rights
The information in this document is Confidential to Allo and is legally privileged. The information
and this document are intended solely for the addressee. Use of this document by anyone else for
any other purpose is unauthorized. If you are not the intended recipient, any disclosure, copying,
or distribution of this information is prohibited and unlawful.
Disclaimer
Information in this document is subject to change without notice and should not be construed as a
commitment on the part of allo.com. And does not assume any responsibility or make any
warranty against errors. It may appear in this document and disclaims any implied warranty of
merchantability or fitness for a particular purpose.
Upgradable PRI Card Installation Guide
www.allo.com Version 2.0 3
About this manual
This manual describes the Allo product application and explains how to work and use it major
features. It serves as a means to describe the user interface and how to use it to accomplish
common tasks. This manual also describes the underlying assumptions and users make the
underlying data model.
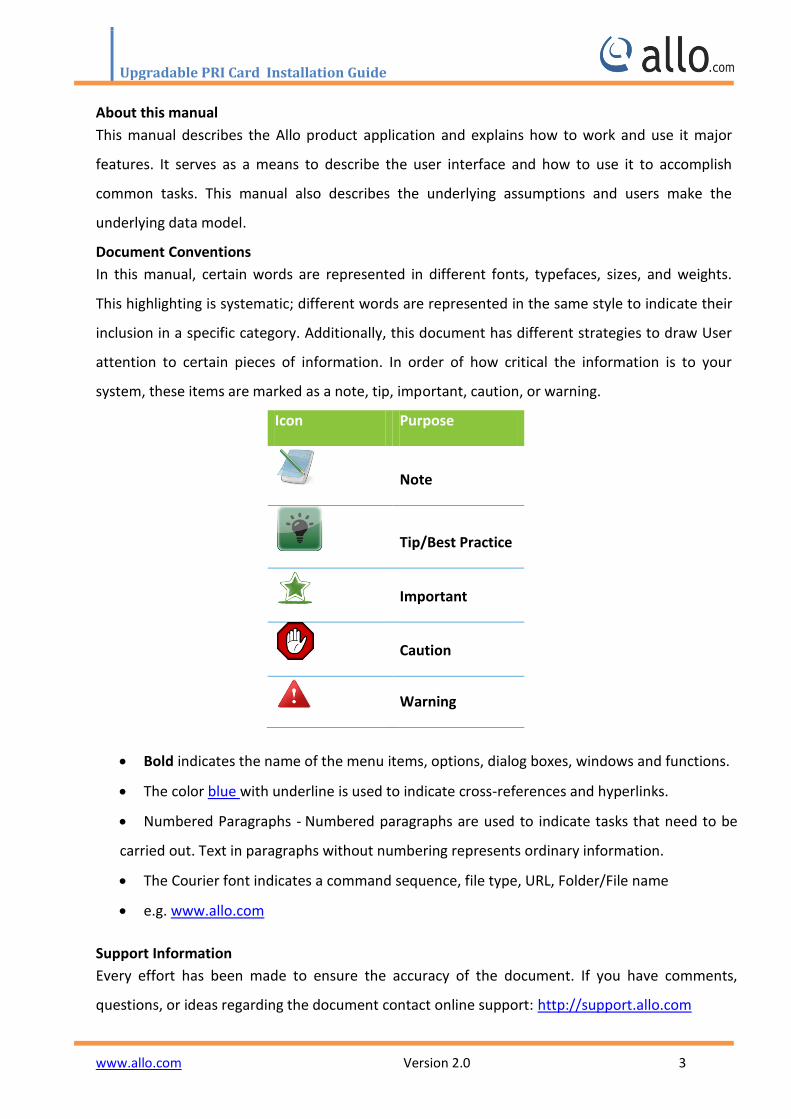
Document Conventions
In this manual, certain words are represented in different fonts, typefaces, sizes, and weights.
This highlighting is systematic; different words are represented in the same style to indicate their
inclusion in a specific category. Additionally, this document has different strategies to draw User
attention to certain pieces of information. In order of how critical the information is to your
system, these items are marked as a note, tip, important, caution, or warning.
Icon Purpose
Note
Tip/Best Practice
Important
Caution
Warning
Bold indicates the name of the menu items, options, dialog boxes, windows and functions.
The color blue with underline is used to indicate cross-references and hyperlinks.
Numbered Paragraphs - Numbered paragraphs are used to indicate tasks that need to be
carried out. Text in paragraphs without numbering represents ordinary information.
The Courier font indicates a command sequence, file type, URL, Folder/File name
e.g. www.allo.com
Support Information
Every effort has been made to ensure the accuracy of the document. If you have comments,
questions, or ideas regarding the document contact online support: http://support.allo.com

Upgradable PRI Card Installation Guide
www.allo.com Version 2.0 4
Table of Contents About this manual .............................................................................................................. 3
Document Conventions ...................................................................................................... 3
Support Information ........................................................................................................... 3
1. Introduction ........................................................................................................................... 6
1.1 Overview ....................................................................................................................... 6
1.2 Y- Splitter ...................................................................................................................... 7
1.3 Splitter End ................................................................................................................... 8
1.4 Connection Diagram ..................................................................................................... 8
1.5 Slot Compatibility ......................................................................................................... 9
2. ALLO Card Licensing ............................................................................................................... 9
3. Hardware Setup ................................................................................................................... 10
4. Software Installation Steps ................................................................................................. 11
4.1 Installation of LibPRI package ..................................................................................... 11
4.2 Installation of Dahdi Driver ......................................................................................... 12
4.3 Installation of Asterisk ................................................................................................ 13
5. Software Configurations ................................................................................................... 13
5.1 T1 mode settings ........................................................................................................ 13
5.2 Dahdi Configuration .................................................................................................... 13
6. Digital E1/T1 card Installation through GUI ...................................................................... 15
6.1 Installation of GUI software ........................................................................................ 15
6.1.1 Manual Configuration for Webserver .............................................................. 16
Upgradable PRI Card Installation Guide
www.allo.com Version 2.0 5
6.2 Installation & Configuration of Digital card through GUI ........................................... 17
6.3 Dashboard ................................................................................................................... 20
6.4 AMI Configuration (Asterisk Manager Interface) ....................................................... 21
6.5 E1/T1 Settings ............................................................................................................. 21
6.6 Module Options .......................................................................................................... 23
6.7 E1/T1 Span Status ....................................................................................................... 24
6.8 Re-Install Card ............................................................................................................. 25
7. Welcome Administrator ....................................................................................................... 25

Upgradable PRI Card Installation Guide
www.allo.com Version 2.0 6
1. Introduction
In an industry that is ever changing, Allo has introduced a new series of license based digital cards
that are field upgradable to more number of ports (Max 4 ports). Allo PRI cards are high-
performance and cost effective digital telephony interface cards which support T1/E1 interfaces.
Allo cards have an optional hardware base OctassicTM DSP Line Echo Cancellation that can help
you achieve the highest voice quality with today’s technology.
This is a card with an affordable price tag proven to handle very high density of calls in hardcore
call center/Telco environments. Allo cards (DAHDI) are compatible with Asterisk®, FreeSWITCH®,
YateTM, Elastix, Trixbox, as well as other open source and proprietary PBX, Switch, IVR, or VoIP
gateway applications.
Model No Product Description
3aCP1e/3aCP2e/3aCP4e 1/2/4 Port PRI PCIe card
3aCP1eL/3aCP2eL/3aCP4eL 1/2/4 Port PRI PCIe card with Line Echo Cancellation
1.1 Overview
Allo license based digital cards allow users to upgrade the firmware as well as ports based on
their requirements. These cards are available with two RJ45 ports which provide two E1/T1
interfaces and can be extended to four E1/T1 interfaces by using a splitter.
Since these are license based cards the user can purchase a 1/2 port card and can later
upgrade to a maximum of four ports by purchasing the license from Allo.

Upgradable PRI Card Installation Guide
www.allo.com Version 2.0 7
License Based Allo Digital Card
1.2 Y- Splitter
The Y-splitter is provided for accessing all four ports on the Allo License based digital series cards.
The following figure helps to identify a splitter and its end ports.
Y-Splitter
Upgradable PRI Card Installation Guide
www.allo.com Version 2.0 8
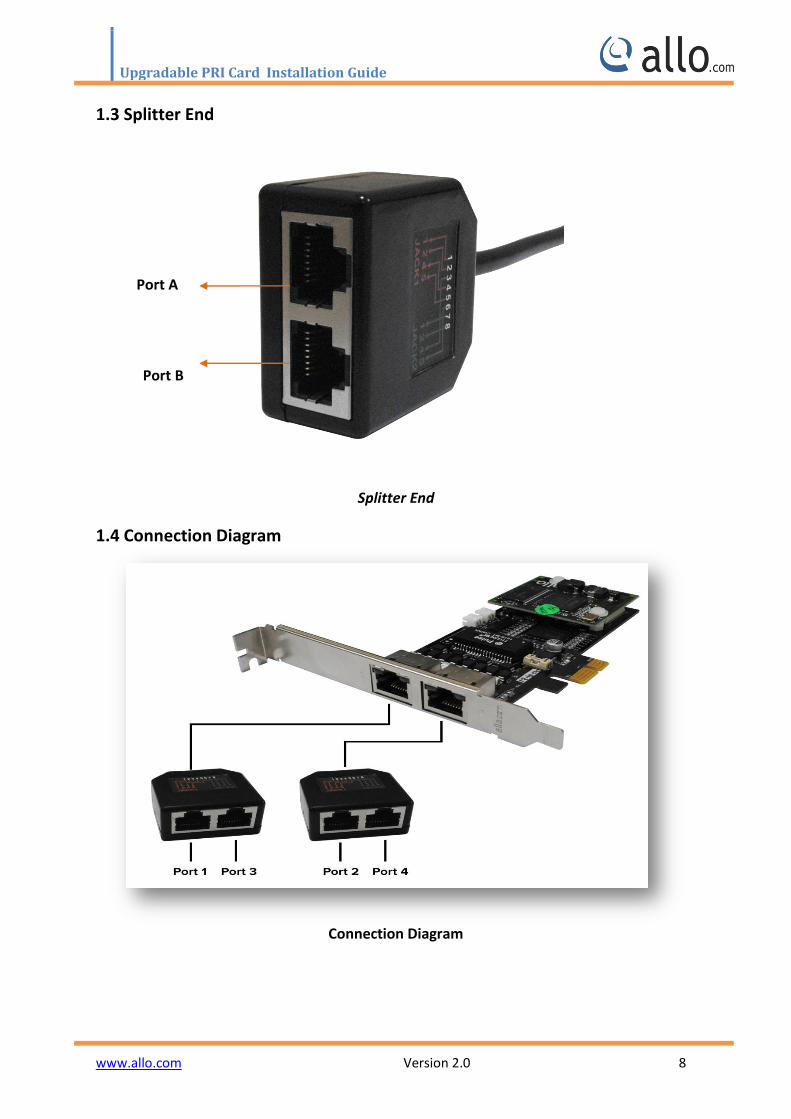
1.3 Splitter End
Port A
Port B
Splitter End
1.4 Connection Diagram
Connection Diagram
Upgradable PRI Card Installation Guide
www.allo.com Version 2.0 9
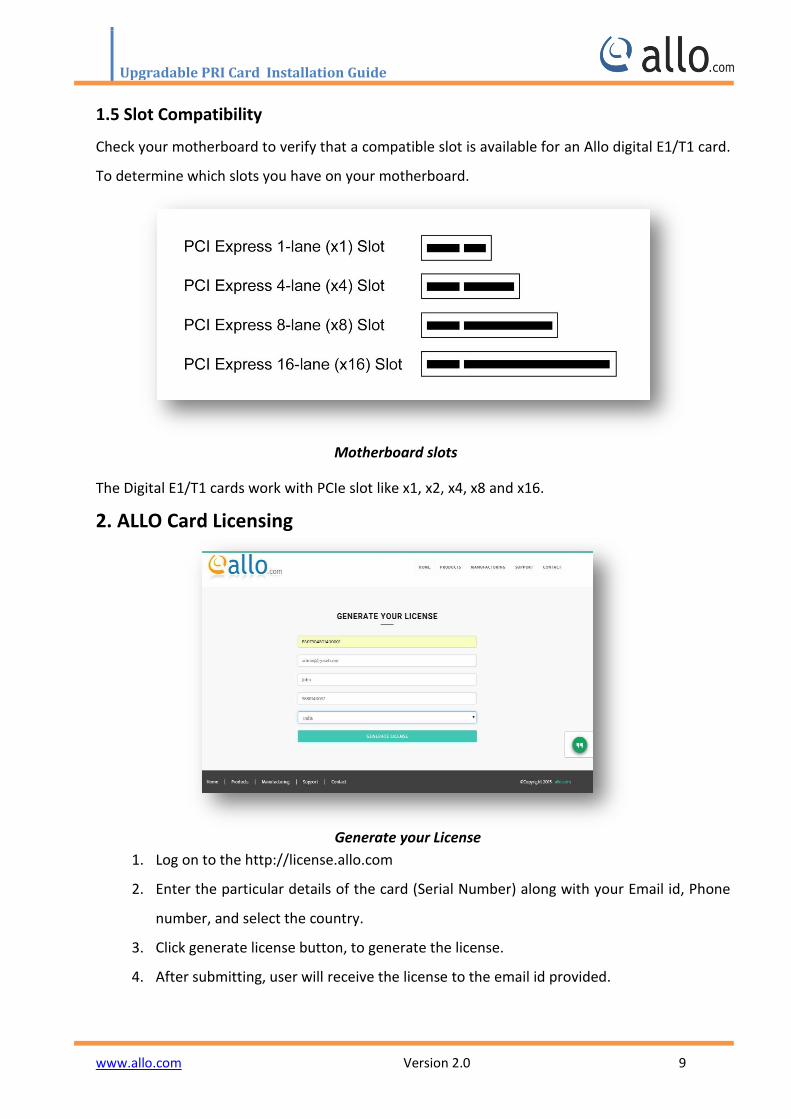
1.5 Slot Compatibility
Check your motherboard to verify that a compatible slot is available for an Allo digital E1/T1 card.
To determine which slots you have on your motherboard.
Motherboard slots
The Digital E1/T1 cards work with PCIe slot like x1, x2, x4, x8 and x16.
2. ALLO Card Licensing
Generate your License
1. Log on to the http://license.allo.com
2. Enter the particular details of the card (Serial Number) along with your Email id, Phone
number, and select the country.
3. Click generate license button, to generate the license.
4. After submitting, user will receive the license to the email id provided.

Upgradable PRI Card Installation Guide
www.allo.com Version 2.0 10
5. Download and copy the License file to the machine where the card is being installed in
the following directory “lib/firmware”.
In case the license email is not received please check in spam or contact Allo support.
3. Hardware Setup
License Based Digital Card
1. Insert the Digital E1/T1 card in the PCIe slot of the Server.
2. Check if the installed PRI card is detected using the “lspci” command.
3. If the card is recognized, the following output will be displayed. Please search for
Allo ID (1d21).
# lspci
Upgradable PRI Card Installation Guide
www.allo.com Version 2.0 11
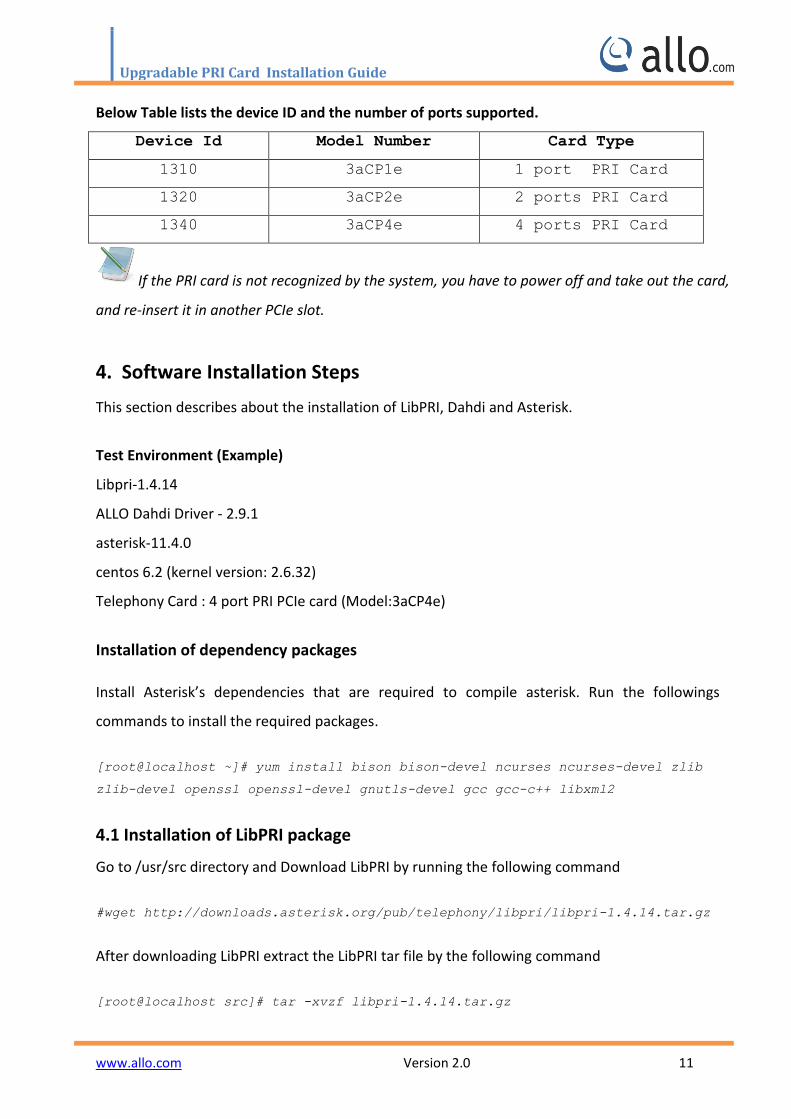
Below Table lists the device ID and the number of ports supported.
Device Id Model Number Card Type
1310 3aCP1e 1 port PRI Card
1320 3aCP2e 2 ports PRI Card
1340 3aCP4e 4 ports PRI Card
If the PRI card is not recognized by the system, you have to power off and take out the card,
and re-insert it in another PCIe slot.
4. Software Installation Steps
This section describes about the installation of LibPRI, Dahdi and Asterisk.
Test Environment (Example)
Libpri-1.4.14
ALLO Dahdi Driver - 2.9.1
asterisk-11.4.0
centos 6.2 (kernel version: 2.6.32)
Telephony Card : 4 port PRI PCIe card (Model:3aCP4e)
Installation of dependency packages
Install Asterisk’s dependencies that are required to compile asterisk. Run the followings
commands to install the required packages.
[root@localhost ~]# yum install bison bison-devel ncurses ncurses-devel zlib
zlib-devel openssl openssl-devel gnutls-devel gcc gcc-c++ libxml2
4.1 Installation of LibPRI package
Go to /usr/src directory and Download LibPRI by running the following command
#wget http://downloads.asterisk.org/pub/telephony/libpri/libpri-1.4.14.tar.gz
After downloading LibPRI extract the LibPRI tar file by the following command
[root@localhost src]# tar -xvzf libpri-1.4.14.tar.gz

Upgradable PRI Card Installation Guide
www.allo.com Version 2.0 12
Install the LibPRI by the following commands
[root@localhost src]# cd libpri-1.4.14
# make clean
# make
# make install
4.2 Installation of Dahdi Driver
Download latest ALLO Dahdi Drivers from Allo web site and install the Dahdi version as per your
requirement. Please find the link here for download http://allo.com/pri-upgradable-
card.html.The link is also available in the “Guides & Drivers” section on www.Allo.com
Extract the downloaded file by executing the below command.
#tar -xvzf dahdi-linux-complete-2.9.1.1+2.9.1.tar.gz
Use the following commands to install DAHDI drivers
#cd dahdi-linux-complete-2.9.1.1+2.9.1
#make
#make install
#make config
Successful Dahdi Driver installation shows the similar output & lists the detected Dahdi devices
Dahdi driver Installation output log
Upgradable PRI Card Installation Guide
www.allo.com Version 2.0 13
4.3 Installation of Asterisk
Download the latest version of asterisk. Asterisk is available for download from:
http://downloads.asterisk.org/pub/telephony/asterisk/ after downloading asterisk, extract the
asterisk tar file by giving following command.
#wget http://downloads.asterisk.org/pub/telephony/asterisk/asterisk-11-
current.tar.gz
Go to asterisk folder and compile the packages as following
To install asterisk give the following commands:
[root@pbx1 asterisk-11.4.0]#./configure
# make
# make install
# make config
If this is your first Asterisk Install, you should install the sample configuration files, to do this run:
# make samples
5. Software Configurations
Add “alloPL4xxp” at the end of /etc/dahdi/modules file, so that while starting dahdi driver Allo
card modules will load automatically.
Add the line <include “dahdi-channels.conf”> in /etc/asterisk/chan_dahdi.conf
file.
By default the card is ready to use in E1 mode
5.1 T1 mode settings
To configure the card in T1 signaling mode, please add the following,
(i) Add “options alloPL4xxp default_linemode=t1”at the end of
/etc/modprobe.d/dahdi.conf
5.2 Dahdi Configuration
After Dahdi driver installation to list out the Dahdi hardware devices run the command
“dahdi_hardware” from the command prompt a sample output is shown below.
Upgradable PRI Card Installation Guide
www.allo.com Version 2.0 14
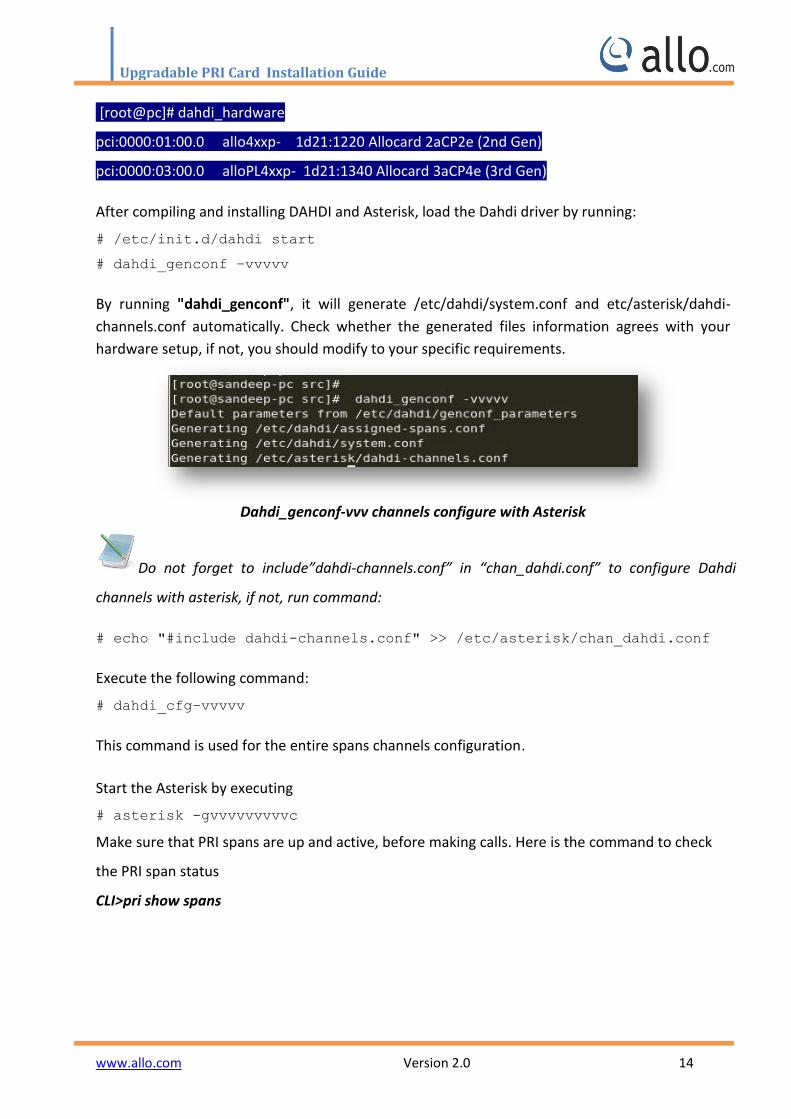
[root@pc]# dahdi_hardware
pci:0000:01:00.0 allo4xxp- 1d21:1220 Allocard 2aCP2e (2nd Gen)
pci:0000:03:00.0 alloPL4xxp- 1d21:1340 Allocard 3aCP4e (3rd Gen)
After compiling and installing DAHDI and Asterisk, load the Dahdi driver by running:
# /etc/init.d/dahdi start
# dahdi_genconf –vvvvv
By running "dahdi_genconf", it will generate /etc/dahdi/system.conf and etc/asterisk/dahdi-
channels.conf automatically. Check whether the generated files information agrees with your
hardware setup, if not, you should modify to your specific requirements.
Dahdi_genconf-vvv channels configure with Asterisk
Do not forget to include”dahdi-channels.conf” in “chan_dahdi.conf” to configure Dahdi
channels with asterisk, if not, run command:
# echo "#include dahdi-channels.conf" >> /etc/asterisk/chan_dahdi.conf
Execute the following command:
# dahdi_cfg–vvvvv
This command is used for the entire spans channels configuration.
Start the Asterisk by executing
# asterisk -gvvvvvvvvvc
Make sure that PRI spans are up and active, before making calls. Here is the command to check
the PRI span status
CLI>pri show spans

Upgradable PRI Card Installation Guide
www.allo.com Version 2.0 15
PRI Span Status (4 Ports PRI Card)
6. Digital E1/T1 card Installation through GUI
6.1 Installation of GUI software
Download latest ALLO PRI card GUI/ Free Conference Server software available from
http://allo.com/pri-upgradable-card.html under “Free Conference Software”.
1. The file downloaded will need to be extracted before compiling. Use the GNU tar
application to extract the source code from compressed archive. This is a simple process
that can be achieved through the following command:
$tar xvfz conferenceserver_<version>.tar.gz
2. Go to PCS folder executes.
$cd PCS
3. Run Install Script
$./install_gui.sh
If user have own web server they can configure it by using the steps given below. Other wise
choose installation script to install the packages and configure it.
While installing webserver, using the installation script choose the type of OS in use.
I. Select the installer script to install the webserver (lighttpd-1.4.35)
II. Select the installer script to install sqlite3 (v3080702)
III. Select the installer script to install php5 (v5.5.16)
IV. php- sqlite3 binding: success
V. Enter the path to copy the GUI related files in webserver ("/var/www"[default])

Upgradable PRI Card Installation Guide
www.allo.com Version 2.0 16
VI. Enter the webserver user name ("www-data"[default])
VII. Copied GUI files to /var/www/GUI
If everything goes fine “success” will be printed.
4. Configure AMI (Asterisk Manager Interface) in manager.conf .You can use the previous
settings if any.
Eg:-
[general]
enabled = yes
webenabled = yes
port = 5038
bindaddr = 0.0.0.0
[admin]
secret = admin
read = system,call,log,verbose,agent,user,config,dtmf,reporting,cdr,dialplan
write = system,call,agent,user,config,command,reporting,originate,message
6.1.1 Manual Configuration for Webserver
Add root permission for the web server user.
Edit the file Vi /etc/sudoers.
1. Add the following line to the end of the file.
<http-server-username> ALL= NOPASSWD: ALL
Ex. www-data ALL= NOPASSWD: ALL
The web server user may vary for different web server.
2. If line present defaults requiretty comment it out.
Ex. #Defaults requiretty
3. Add default secure path
Upgradable PRI Card Installation Guide
www.allo.com Version 2.0 17
Ex. Defaults
secure_path="/usr/local/sbin:/usr/local/bin:/usr/sbin:/usr/bin:
/sbin:/bin"
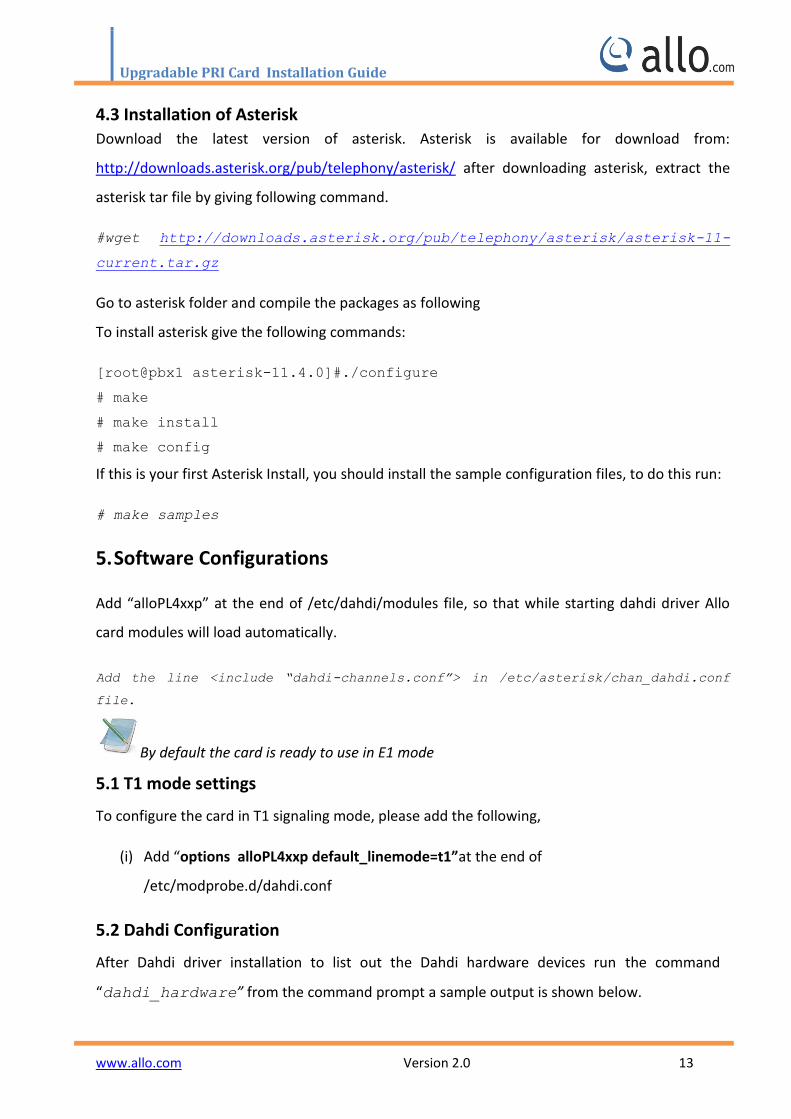
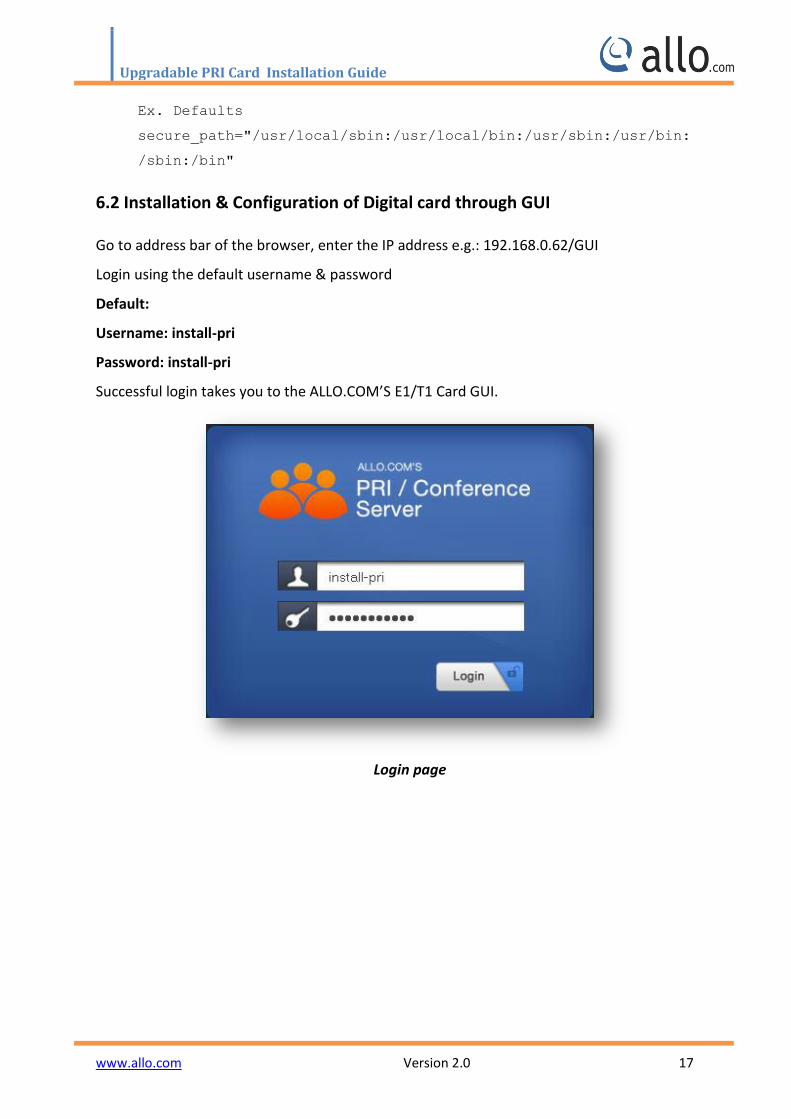
6.2 Installation & Configuration of Digital card through GUI
Go to address bar of the browser, enter the IP address e.g.: 192.168.0.62/GUI
Login using the default username & password
Default:
Username: install-pri
Password: install-pri
Successful login takes you to the ALLO.COM’S E1/T1 Card GUI.
Login page
Upgradable PRI Card Installation Guide
www.allo.com Version 2.0 18
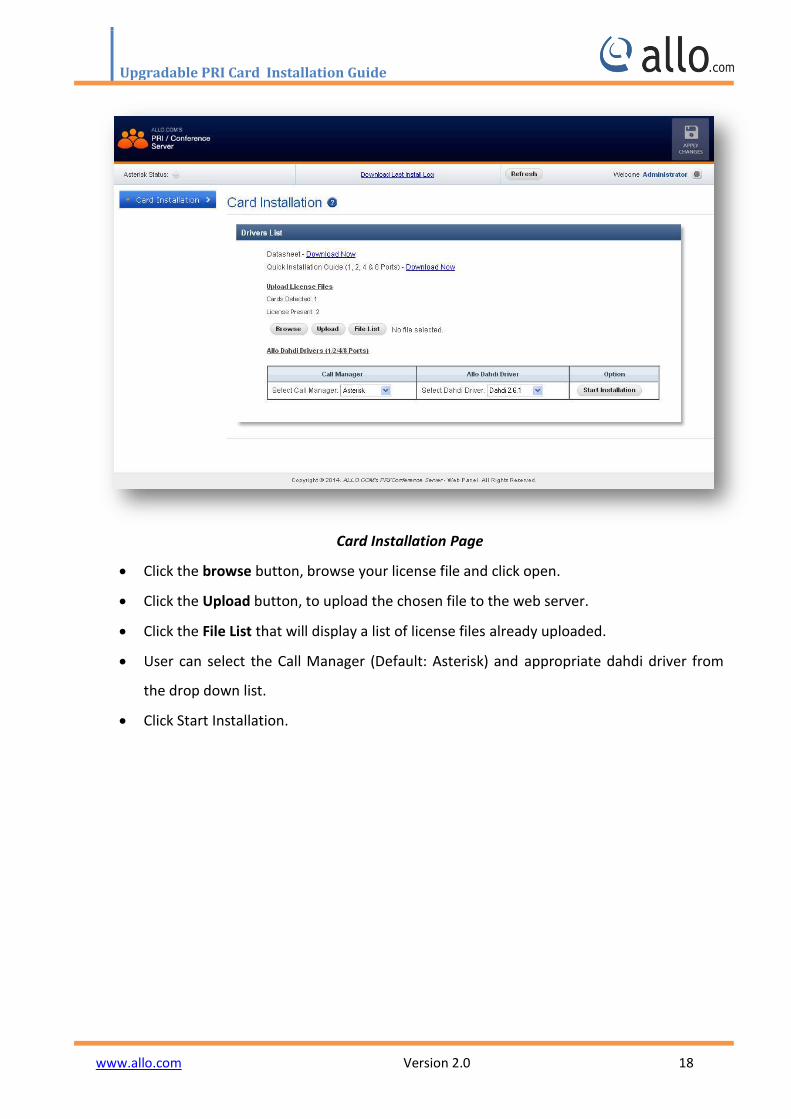
Card Installation Page
Click the browse button, browse your license file and click open.
Click the Upload button, to upload the chosen file to the web server.
Click the File List that will display a list of license files already uploaded.
User can select the Call Manager (Default: Asterisk) and appropriate dahdi driver from
the drop down list.
Click Start Installation.
Upgradable PRI Card Installation Guide
www.allo.com Version 2.0 19
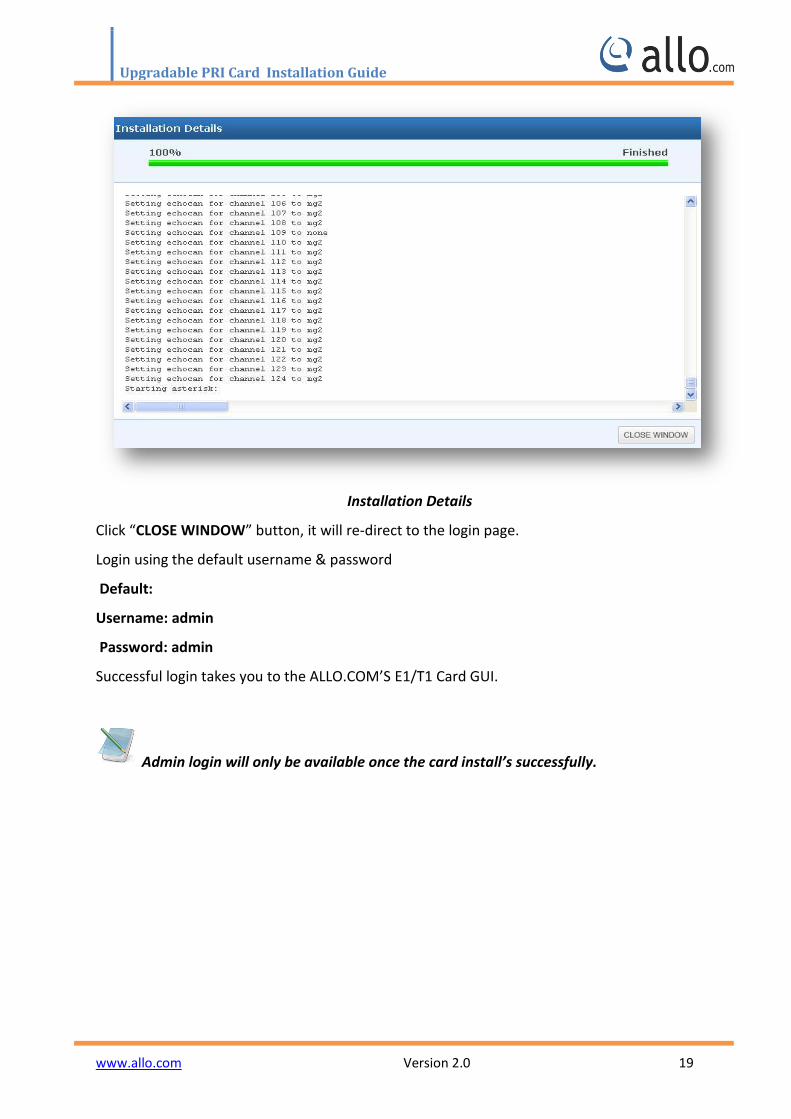
Installation Details
Click “CLOSE WINDOW” button, it will re-direct to the login page.
Login using the default username & password
Default:
Username: admin
Password: admin
Successful login takes you to the ALLO.COM’S E1/T1 Card GUI.
Admin login will only be available once the card install’s successfully.
Upgradable PRI Card Installation Guide
www.allo.com Version 2.0 20
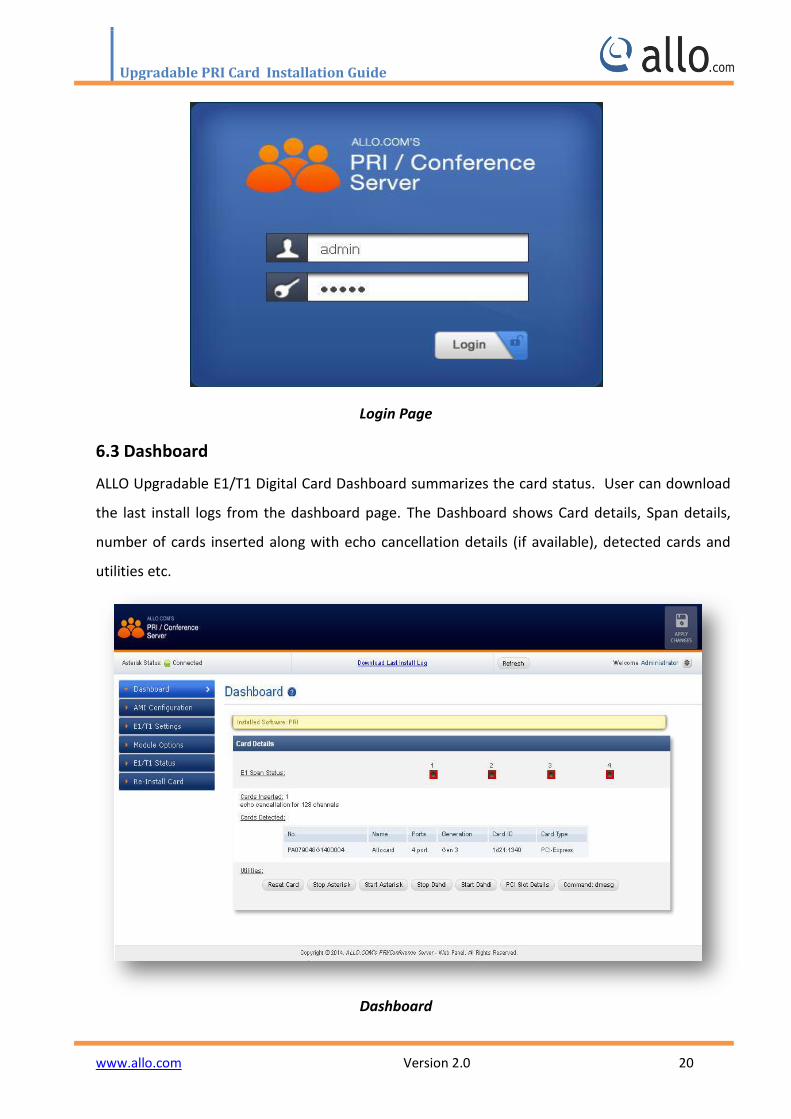
Login Page
6.3 Dashboard
ALLO Upgradable E1/T1 Digital Card Dashboard summarizes the card status. User can download
the last install logs from the dashboard page. The Dashboard shows Card details, Span details,
number of cards inserted along with echo cancellation details (if available), detected cards and
utilities etc.
Dashboard
Upgradable PRI Card Installation Guide
www.allo.com Version 2.0 21
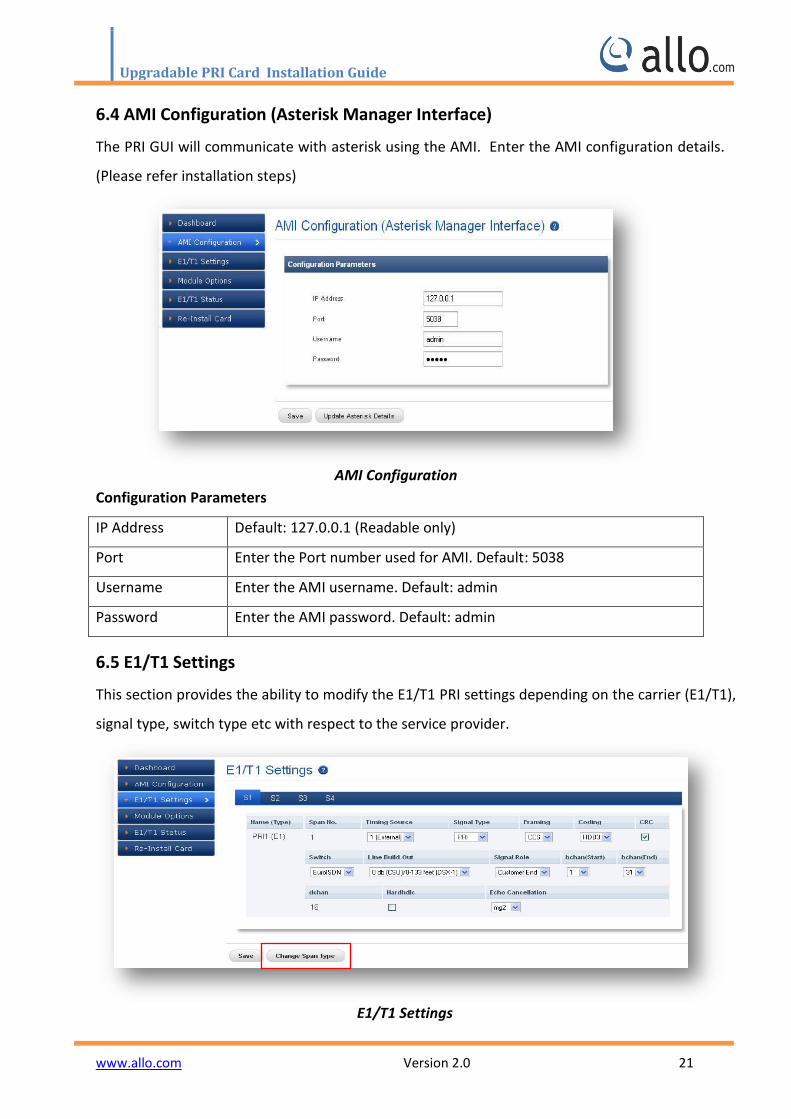
6.4 AMI Configuration (Asterisk Manager Interface)
The PRI GUI will communicate with asterisk using the AMI. Enter the AMI configuration details.
(Please refer installation steps)
AMI Configuration
Configuration Parameters
IP Address Default: 127.0.0.1 (Readable only)
Port Enter the Port number used for AMI. Default: 5038
Username Enter the AMI username. Default: admin
Password Enter the AMI password. Default: admin
6.5 E1/T1 Settings
This section provides the ability to modify the E1/T1 PRI settings depending on the carrier (E1/T1),
signal type, switch type etc with respect to the service provider.
E1/T1 Settings

Upgradable PRI Card Installation Guide
www.allo.com Version 2.0 22
Click Change Span Type button, to set the span type either E1 or T1.
Change Span Type
Select the carrier type, E-carrier (E1) or T-carrier (T1) depending upon lines provided in your
country. Default: E1.
Name (Type) It shows the name of the PRI card with type.
Span No It shows the span number of E1/T1 PRI card.
Timing Source It specifies the Timing Source: 0(internal), 1...n (External)
Signal Type Select the signaling type from the drop down menu.
Options for E1 : PRI, E1-R2
Options for T1: PRI, E & M, and E&M Wink
Framing/Coding Select Proper Framing & Coding by checking with your service
Provider. If CRC is enabled from Telco side, Please select checkbox
on CRC4 to enable CCS/HDB3/CRC4. If not select CCS/HDB3.
Default for E1: CCS/HDB3
Default for T1: ESF/B8ZF
Default for MFCR2:CAS/HDB3
CRC User can either enable or disable this option.
Switch Select the switch type as indicated by the ISDN service provider.
Default: E1- Euro ISDN & Q.SIG.
Line-Build-Out It depends on the line length for which attenuation is defined.
Default: 0 db. Check with your service provider for appropriate Line
build out settings if you face any issue.

Upgradable PRI Card Installation Guide
www.allo.com Version 2.0 23
Signal Role User can select either Customer End or Network End from the
dropdown menu.
bchan Start/End B-channel carries data, voice and other services.
Echo Cancellation User can select the different echo cancellation channels from the
drop down menu.
6.6 Module Options
User can set the module options if it’s required. Default settings will work automatically.
The modules can be used in T1 or E1 networks, selectable by software configuration. The
integrated channel service unit/data service unit (CSU/DSU) function allows customers to
consolidate customer premises equipment (CPE). The modules support balanced and unbalanced
E1 connectivity and conform to the G.703 and G.704 standards for unframed and framed E1
modes.
The Channelized T1/E1 modules work with the digital module in the Allo PRI Card series.
Module Options
Upgradable PRI Card Installation Guide
www.allo.com Version 2.0 24
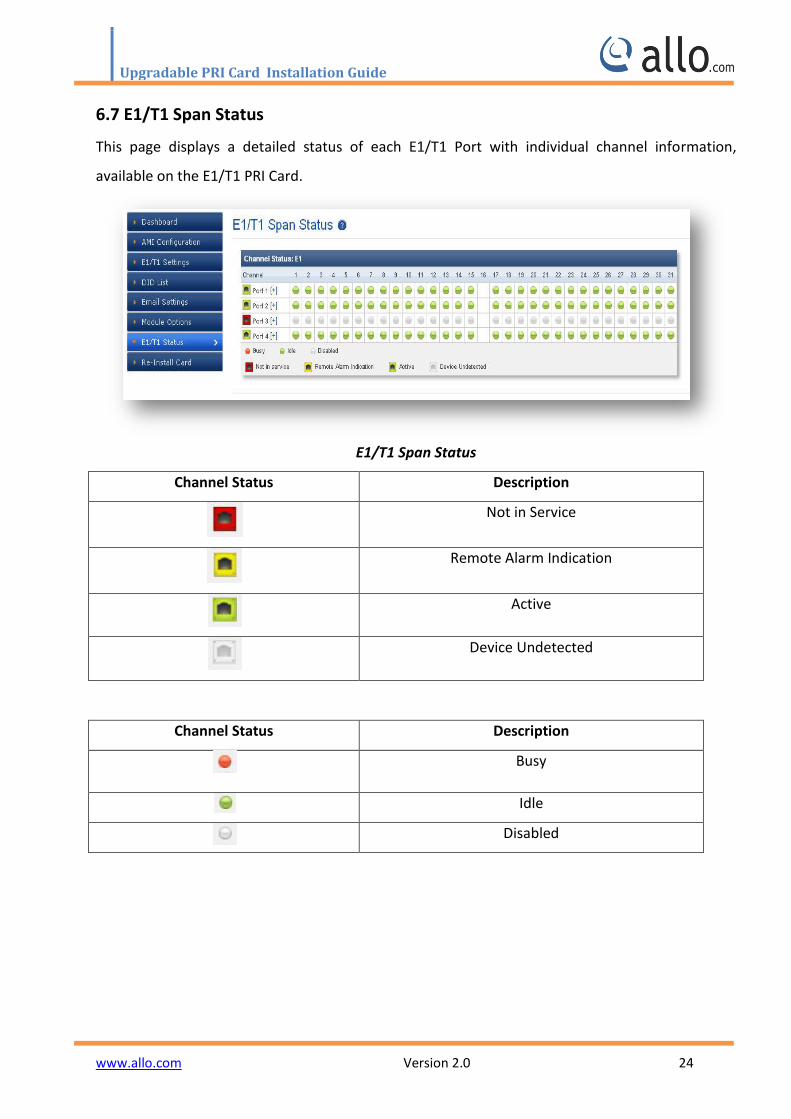
6.7 E1/T1 Span Status
This page displays a detailed status of each E1/T1 Port with individual channel information,
available on the E1/T1 PRI Card.
E1/T1 Span Status
Channel Status Description
Not in Service
Remote Alarm Indication
Active
Device Undetected
Channel Status Description
Busy
Idle
Disabled
Upgradable PRI Card Installation Guide
www.allo.com Version 2.0 25
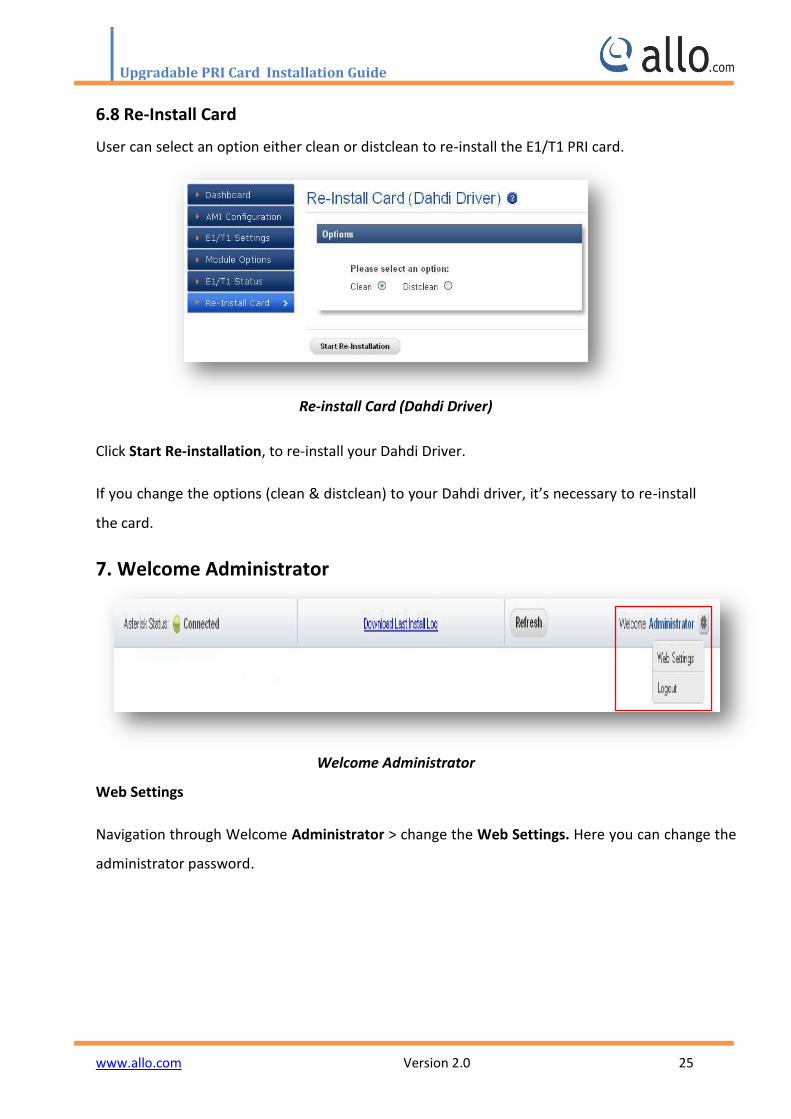
6.8 Re-Install Card
User can select an option either clean or distclean to re-install the E1/T1 PRI card.
Re-install Card (Dahdi Driver)
Click Start Re-installation, to re-install your Dahdi Driver.
If you change the options (clean & distclean) to your Dahdi driver, it’s necessary to re-install
the card.
7. Welcome Administrator
Welcome Administrator
Web Settings
Navigation through Welcome Administrator > change the Web Settings. Here you can change the
administrator password.
Upgradable PRI Card Installation Guide
www.allo.com Version 2.0 26
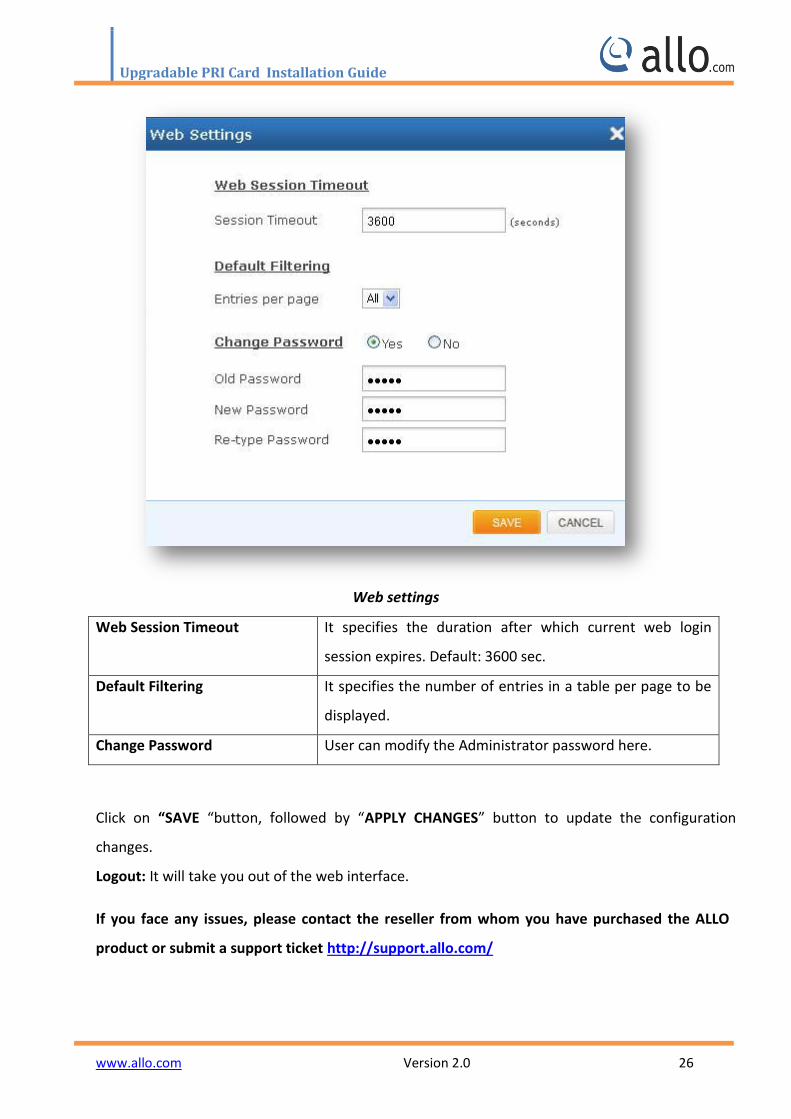
Web settings
Web Session Timeout It specifies the duration after which current web login
session expires. Default: 3600 sec.
Default Filtering It specifies the number of entries in a table per page to be
displayed.
Change Password User can modify the Administrator password here.
Click on “SAVE “button, followed by “APPLY CHANGES” button to update the configuration
changes.
Logout: It will take you out of the web interface.
If you face any issues, please contact the reseller from whom you have purchased the ALLO
product or submit a support ticket http://support.allo.com/