Embed Size (px)
Citation preview
CLAAS LEXION 780 - 670
Information on Grass Seed Harvesting
NOTE: Service Information Bulletins Do Not Constitute warranty
authorization to update units. This Service Information is for
informational purposes only.
MACHINES
AFFECTED:
CLAAS LEXION Types C79, C78, C77, C69, C68
INFORMATION: On CLAAS LEXION combines when harvesting grass seed, CLAAS
offers a few improvements to reduce wear on components.
● Sketch 1: Replacing the Cross Augers in the grain tank will
reduce the unloading speed from 3.7 bushels per second down
to 3.1 bushels per second which is recommended to reduce
wear on the grain tank unloading auger tubes.
● Sketch 2: Adding a stripper plate on the upper sprocket on the
clean grain elevator chain to reduce material buildup in the
area.
Please refer to the enclosed Installation instructions for further details
and parts list.
The parts listed in the install instructions can be ordered through
CLAAS Parts Department in Columbus, Indiana.
CLAAS Omaha Technical Support,
MB Version 1
Type of info: GeneralGroup: 61CLAAS No.: 13586

- 2 -
For planning purpses only, the Installation time for Improving the grain
tank cross augers is approx. 4.75 hours, and for installing the stripper
is appox. 2.00 hours.
NOTE: This is for informational purposes only.
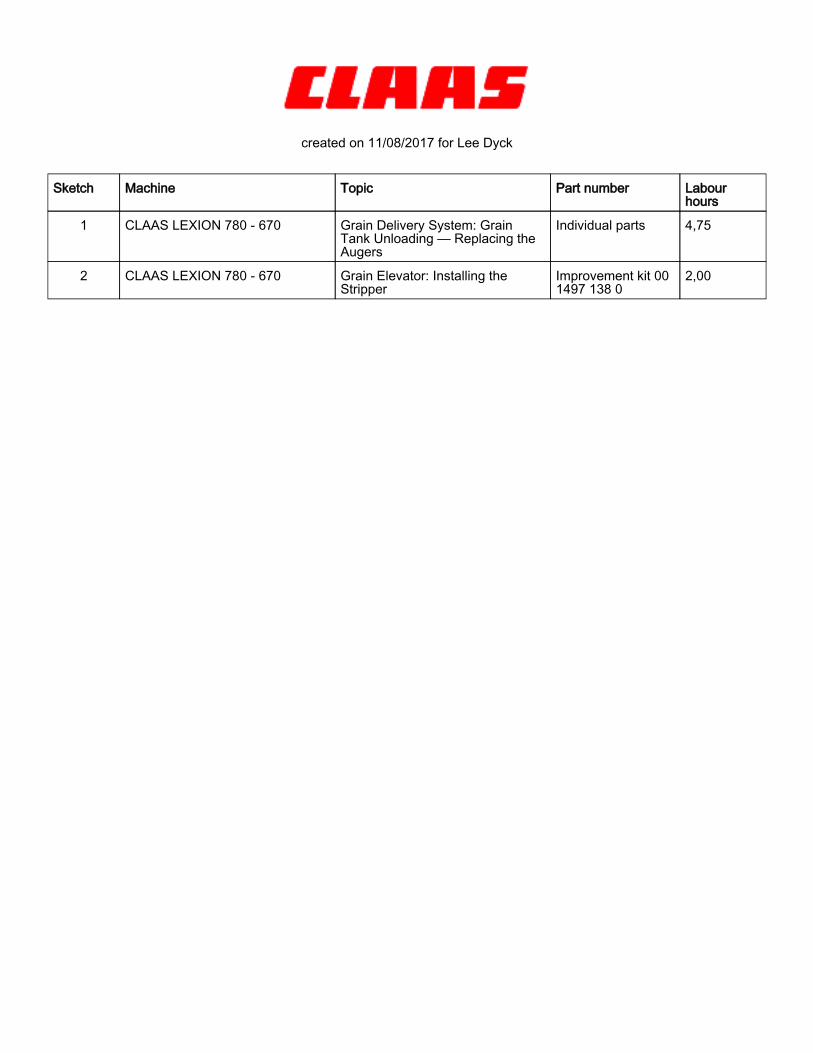
created on 11/08/2017 for Lee Dyck
Sketch Machine Topic Part number Labour
hours
1 CLAAS LEXION 780 - 670 Grain Delivery System: GrainTank Unloading — Replacing theAugers
Individual parts 4,75
2 CLAAS LEXION 780 - 670 Grain Elevator: Installing theStripper
Improvement kit 001497 138 0
2,00
CLAAS LEXION 780 - 670Installation Instructions
Grain Delivery System: Grain Tank Unloading —Replacing the Augers
Sketch 1 a
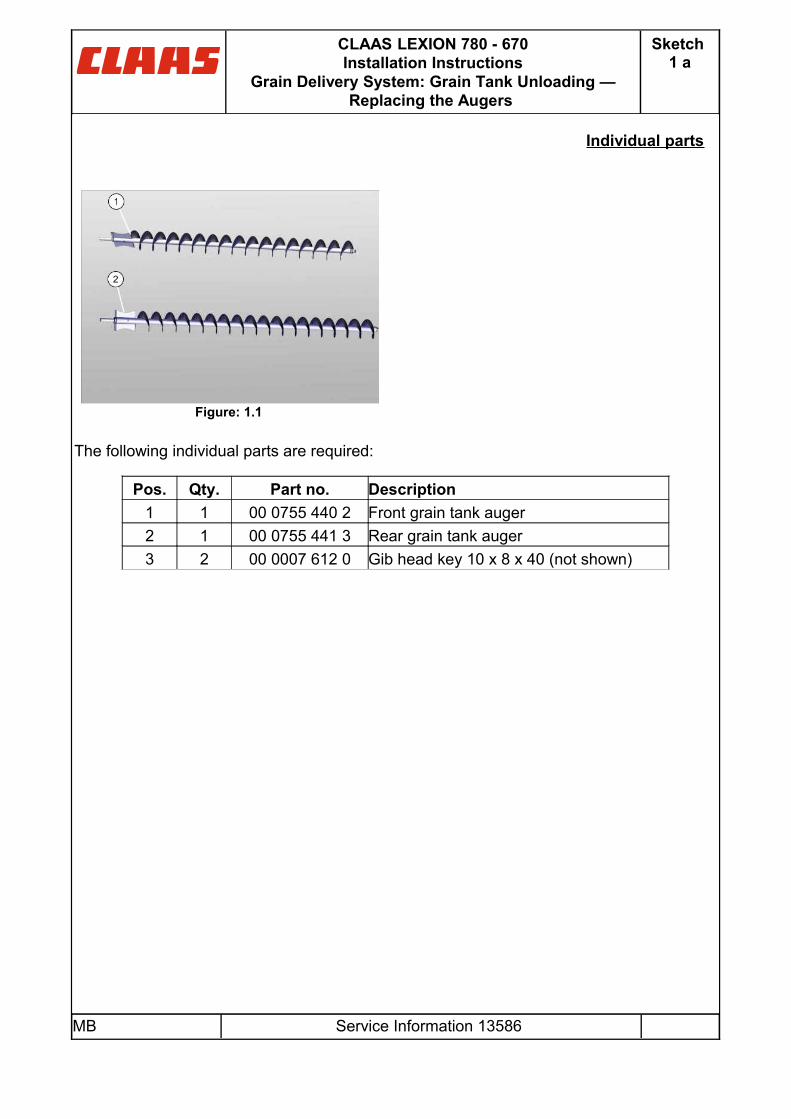
Individual parts
Figure: 1.1
The following individual parts are required:
Pos. Qty. Part no. Description
1 1 00 0755 440 2 Front grain tank auger
2 1 00 0755 441 3 Rear grain tank auger
3 2 00 0007 612 0 Gib head key 10 x 8 x 40 (not shown)
MB Service Information 13586
CLAAS LEXION 780 - 670Installation Instructions
Grain Delivery System: Grain Tank Unloading —Replacing the Augers
Sketch 1 b
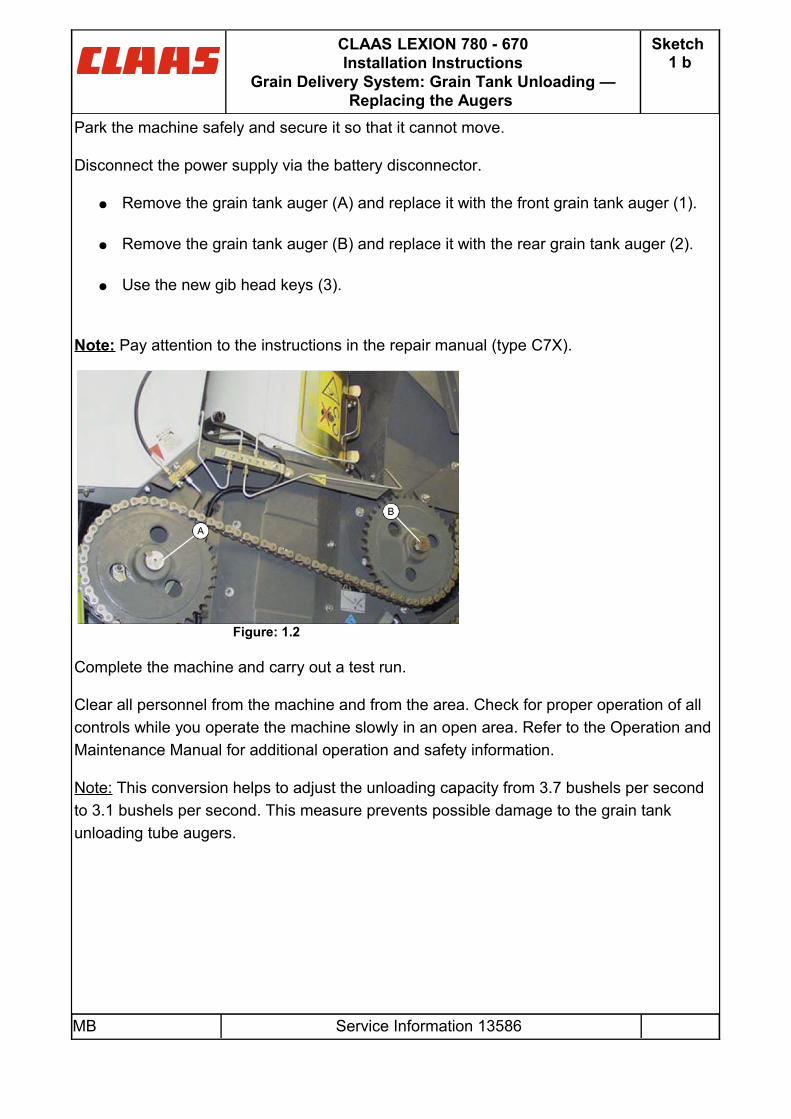
Park the machine safely and secure it so that it cannot move.
Disconnect the power supply via the battery disconnector.
● Remove the grain tank auger (A) and replace it with the front grain tank auger (1).
● Remove the grain tank auger (B) and replace it with the rear grain tank auger (2).
● Use the new gib head keys (3).
Note: Pay attention to the instructions in the repair manual (type C7X).
Figure: 1.2
Complete the machine and carry out a test run.
Clear all personnel from the machine and from the area. Check for proper operation of all
controls while you operate the machine slowly in an open area. Refer to the Operation and
Maintenance Manual for additional operation and safety information.
Note: This conversion helps to adjust the unloading capacity from 3.7 bushels per second
to 3.1 bushels per second. This measure prevents possible damage to the grain tank
unloading tube augers.
MB Service Information 13586
CLAAS LEXION 780 - 670Installation Instructions
Grain Elevator: Installing the Stripper
Sketch 2 a
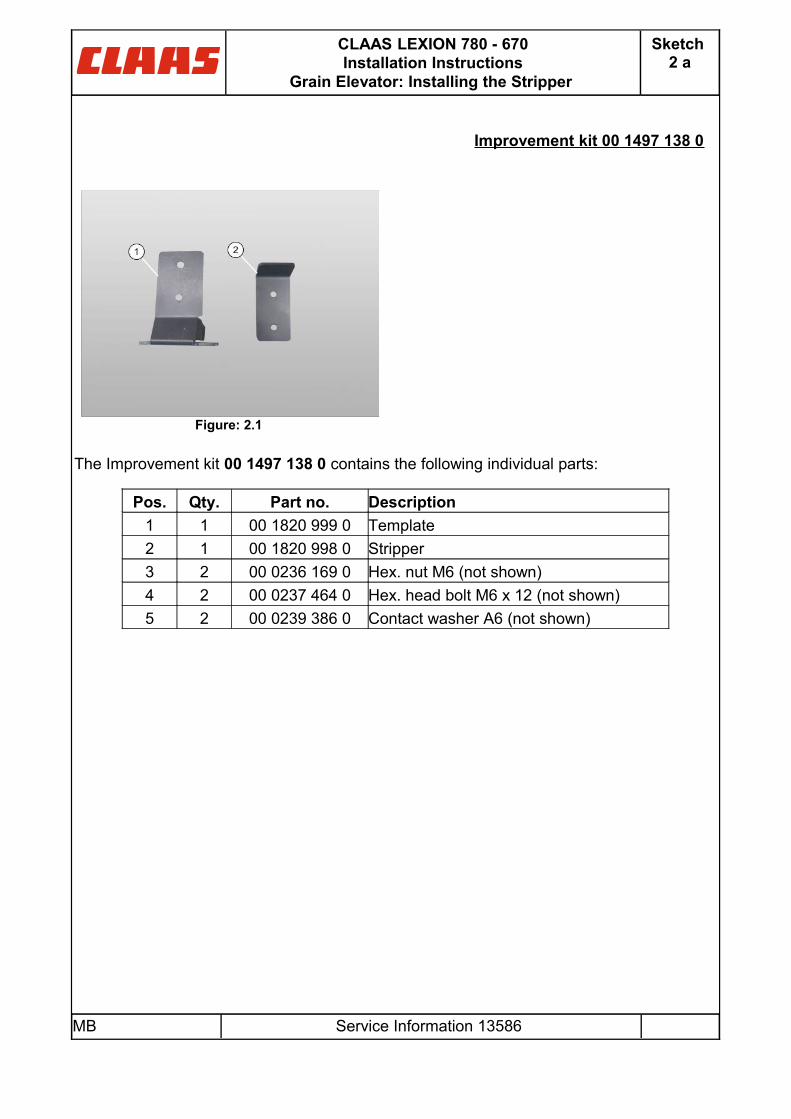
Improvement kit 00 1497 138 0
Figure: 2.1
The Improvement kit 00 1497 138 0 contains the following individual parts:
Pos. Qty. Part no. Description
1 1 00 1820 999 0 Template
2 1 00 1820 998 0 Stripper
3 2 00 0236 169 0 Hex. nut M6 (not shown)
4 2 00 0237 464 0 Hex. head bolt M6 x 12 (not shown)
5 2 00 0239 386 0 Contact washer A6 (not shown)
MB Service Information 13586
CLAAS LEXION 780 - 670Installation Instructions
Grain Elevator: Installing the Stripper
Sketch 2 b
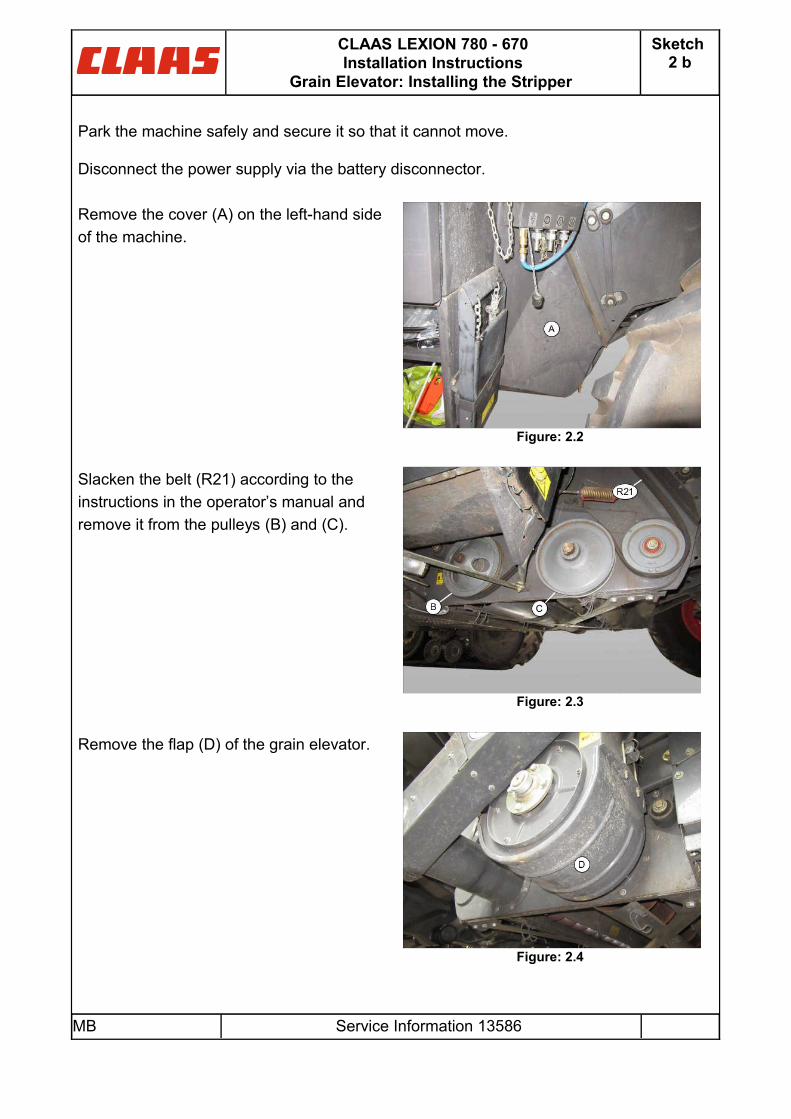
Park the machine safely and secure it so that it cannot move.
Disconnect the power supply via the battery disconnector.
Remove the cover (A) on the left-hand side
of the machine.
Figure: 2.2
Slacken the belt (R21) according to the
instructions in the operator’s manual and
remove it from the pulleys (B) and (C).
Figure: 2.3
Remove the flap (D) of the grain elevator.
Figure: 2.4
MB Service Information 13586
CLAAS LEXION 780 - 670Installation Instructions
Grain Elevator: Installing the Stripper
Sketch 2 c
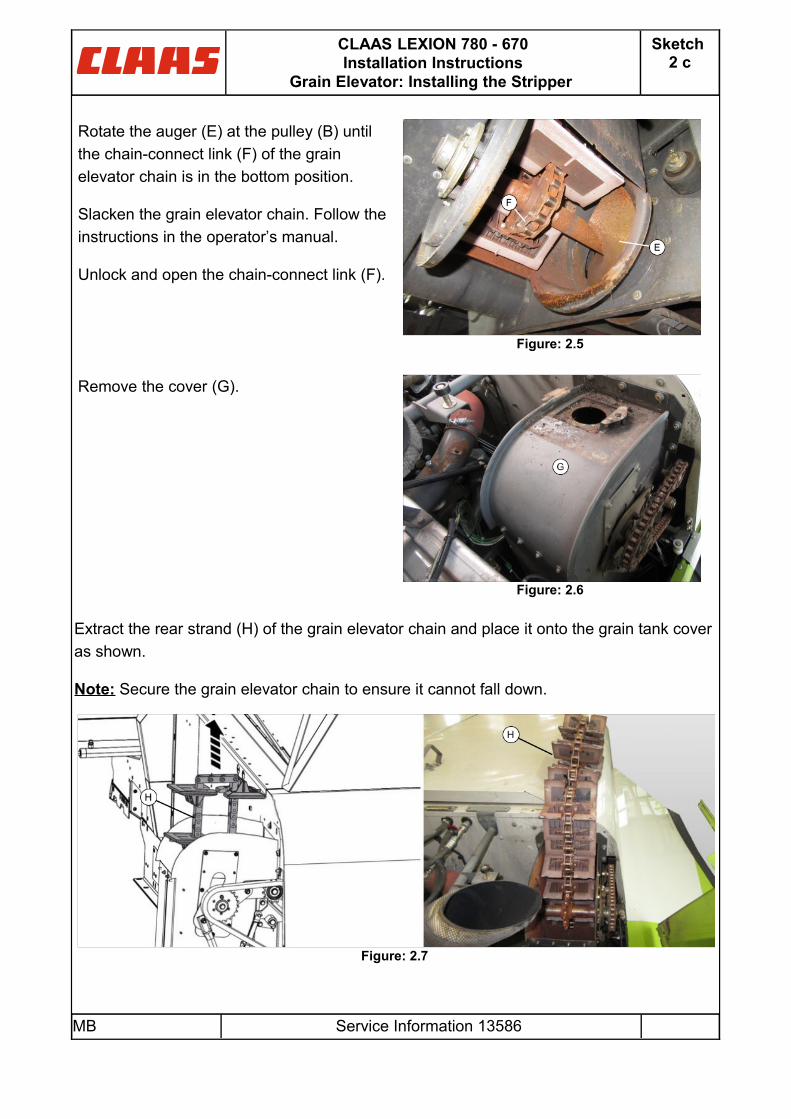
Rotate the auger (E) at the pulley (B) until
the chain-connect link (F) of the grain
elevator chain is in the bottom position.
Slacken the grain elevator chain. Follow the
instructions in the operator’s manual.
Unlock and open the chain-connect link (F).
Figure: 2.5
Remove the cover (G).
Figure: 2.6
Extract the rear strand (H) of the grain elevator chain and place it onto the grain tank cover
as shown.
Note: Secure the grain elevator chain to ensure it cannot fall down.
Figure: 2.7
MB Service Information 13586
CLAAS LEXION 780 - 670Installation Instructions
Grain Elevator: Installing the Stripper
Sketch 2 d
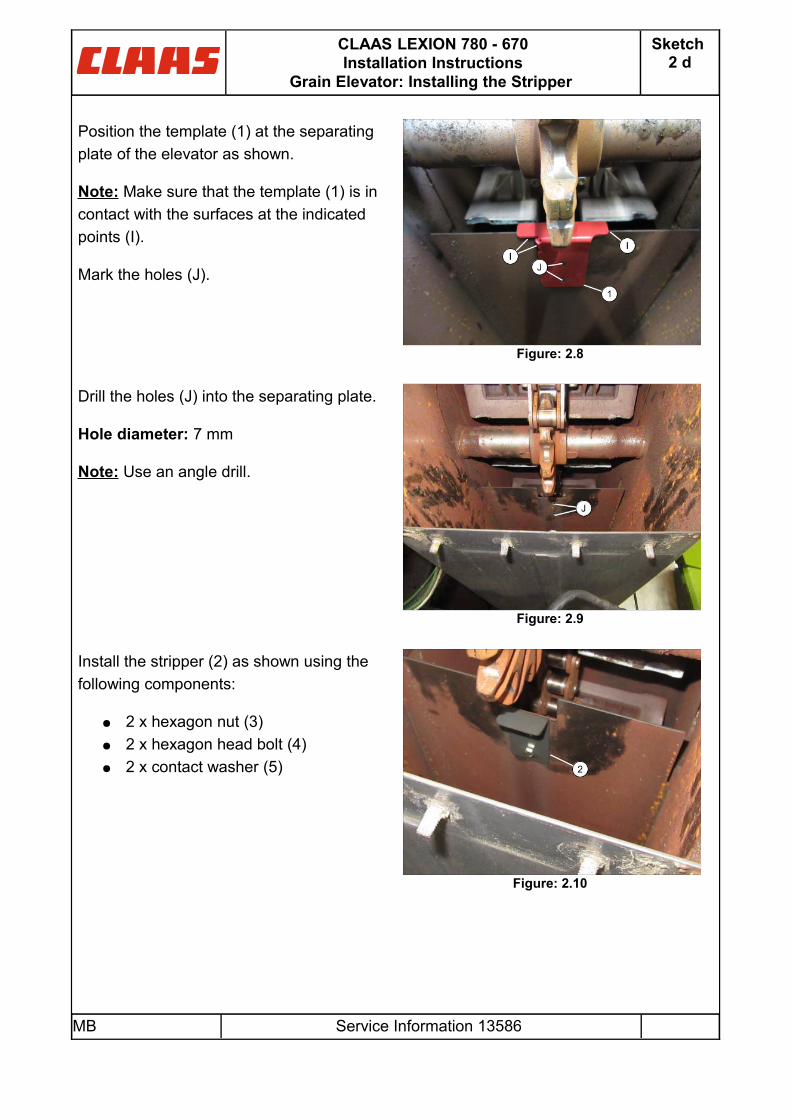
Position the template (1) at the separating
plate of the elevator as shown.
Note: Make sure that the template (1) is in
contact with the surfaces at the indicated
points (I).
Mark the holes (J).
Figure: 2.8
Drill the holes (J) into the separating plate.
Hole diameter: 7 mm
Note: Use an angle drill.
Figure: 2.9
Install the stripper (2) as shown using the
following components:
● 2 x hexagon nut (3)
● 2 x hexagon head bolt (4)
● 2 x contact washer (5)
Figure: 2.10
MB Service Information 13586
CLAAS LEXION 780 - 670Installation Instructions
Grain Elevator: Installing the Stripper
Sketch 2 e
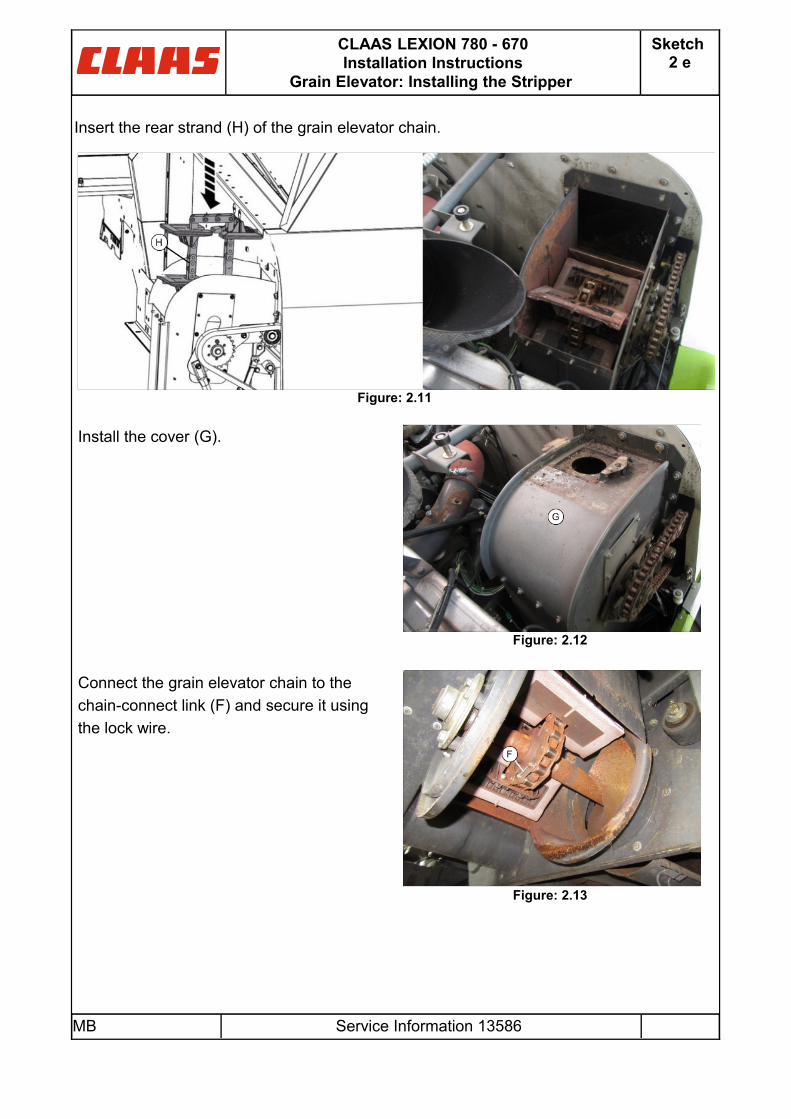
Insert the rear strand (H) of the grain elevator chain.
Figure: 2.11
Install the cover (G).
Figure: 2.12
Connect the grain elevator chain to the
chain-connect link (F) and secure it using
the lock wire.
Figure: 2.13
MB Service Information 13586
CLAAS LEXION 780 - 670Installation Instructions
Grain Elevator: Installing the Stripper
Sketch 2 f
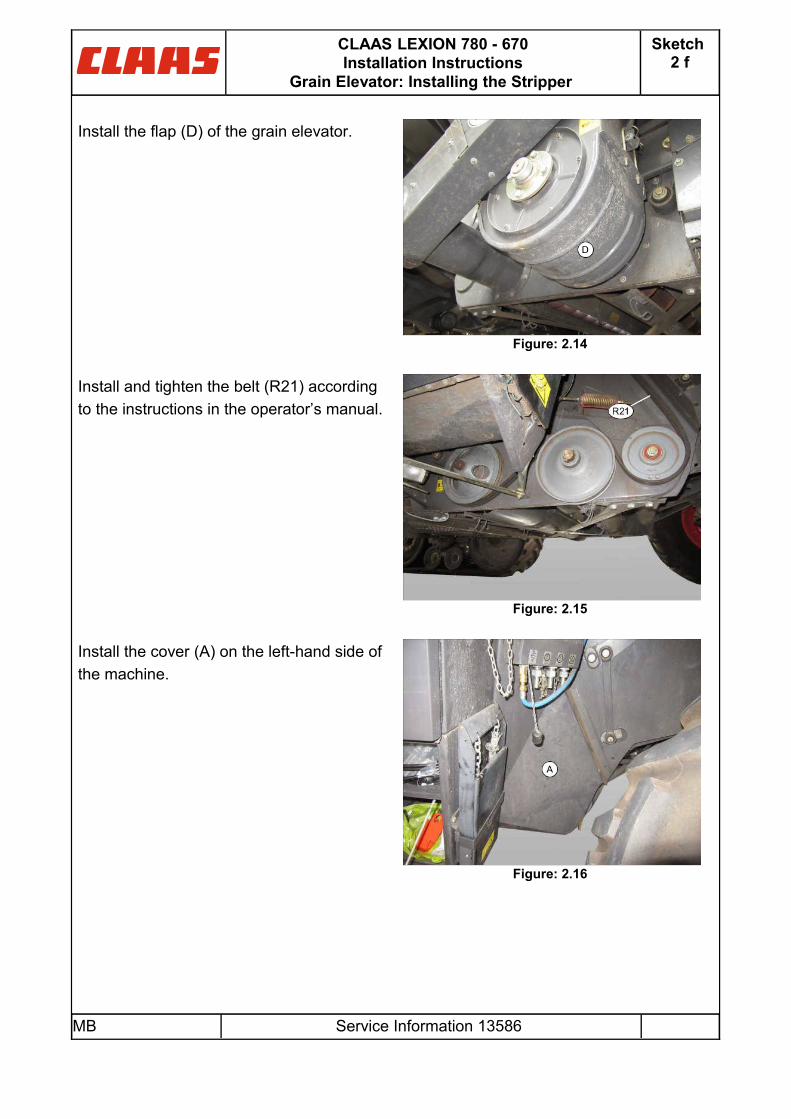
Install the flap (D) of the grain elevator.
Figure: 2.14
Install and tighten the belt (R21) according
to the instructions in the operator’s manual.
Figure: 2.15
Install the cover (A) on the left-hand side of
the machine.
Figure: 2.16
MB Service Information 13586
CLAAS LEXION 780 - 670Installation Instructions
Grain Elevator: Installing the Stripper
Sketch 2 g
Complete the machine and carry out a test run.
Clear all personnel from the machine and from the area. Check for proper operation of all
controls while you operate the machine slowly in an open area. Refer to the Operation and
Maintenance Manual for additional operation and safety information.
Note: This conversion helps to prevent material residue accumulating in the area of the
upper chain sprocket.
MB Service Information 13586