Embed Size (px)
Citation preview

txGradebook for
Teachers
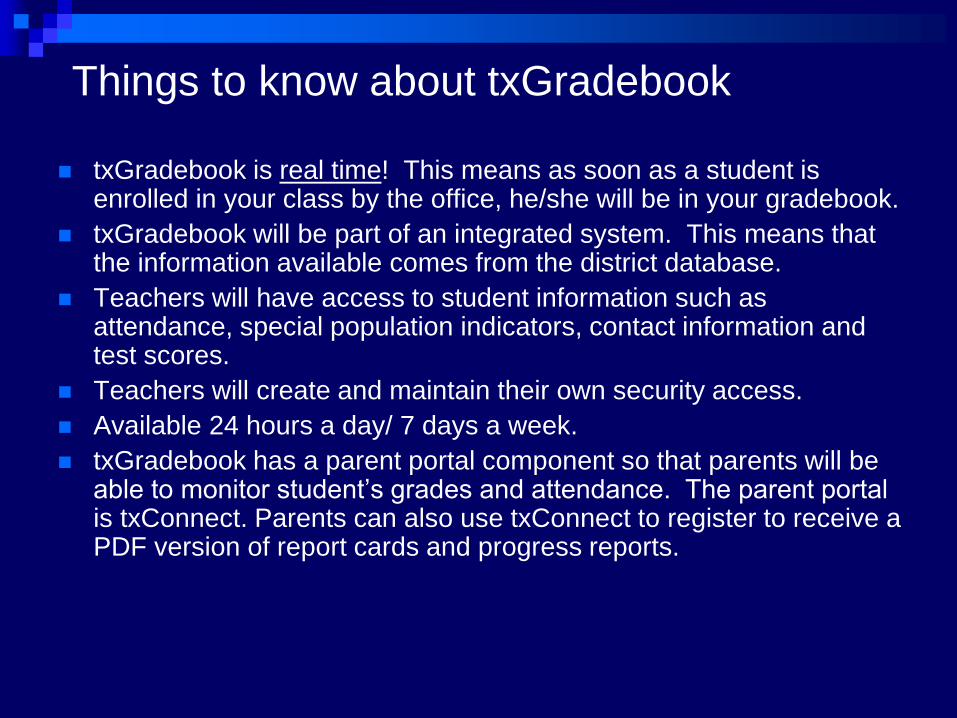
Things to know about txGradebook
txGradebook is real time! This means as soon as a student is enrolled in your class by the office, he/she will be in your gradebook.
txGradebook will be part of an integrated system. This means that the information available comes from the district database.
Teachers will have access to student information such as attendance, special population indicators, contact information and test scores.
Teachers will create and maintain their own security access.
Available 24 hours a day/ 7 days a week.
txGradebook has a parent portal component so that parents will be able to monitor student’s grades and attendance. The parent portal is txConnect. Parents can also use txConnect to register to receive a PDF version of report cards and progress reports.

Accessing the txGradebook At the ECISD website under For Staff, click on txGradebook.
On your first login, click on link under New User.
All teachers must sign in as a new user the first time of the new school year.

Create User ID
Enter 9-digit Employee ID number. Use leading zeros. (Example: 000001234).
Enter Last Name and First Initial. This should be your legal name.
Click Next.

Type User ID.
6-8 characters
retain all year
Type Password
6-9 characters
Must contain one of
the three: upper
case, lower
case, number &
punctuation
Type Password
again to confirm.
Type PIN
number.
Create User ID

Create User ID
Select and
answer 3 hint
questions from
the dropdown
box. One of
these questions
will appear if you
forget your
password.
Answers are
case sensitive.

Home Page District and campus
announcements
Options are:
Attendance
Grades
Reports
Settings
Notes
PGP (secondary)
Teacher name and
campus name are
displayed in top right
corner.
If you teach students at
multiple campuses,
there will be a drop
down option at campus
name.

Reset Password
If your sign-on becomes inactive, contact campus data clerk to reset you.
After the clerk as reset your user id, select the link under Forgot your Password on the login screen to assign yourself a new password.

Reset Password
At the first screen, enter
Staff ID (9 digit employee
ID number) and User ID.
The next screen will ask a
hint question. The hint
answers are case
sensitive.
If this question is
answered correctly, the
next screen will prompt
you to change the
password. The password
cannot be the same
password previously used.

Update profile allows the teacher to change the password or hint questions at any time.
Teacher can also enter a phone number, email or notes which will be viewable on the parent access website.
Settings - Update Profile

Settings - Update Profile Combine courses in
attendance. Elementary
teachers must have this
setting unchecked.
Default Due Date
Current date or Current
date plus up to 5 days in
the future.
Scroll bars on
Assignment Grade
screen.
Determine student order
for screens and reports.
alpha (default)
new students on top
new students on bottom

Settings - Arrange Student Order Click and drag
students into the
order you want.
The order will be
displayed on
student screens
and reports.
Based on the
selection from the
User Profile, new
students will be
added at either
the top or bottom
of the list.
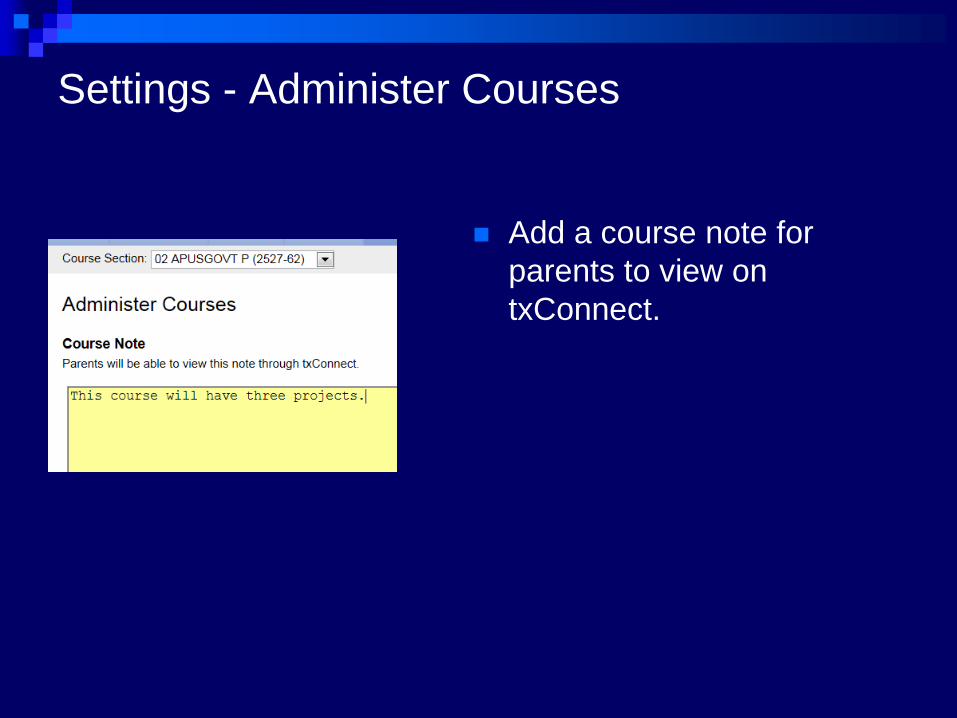
Settings - Administer Courses
Add a course note for
parents to view on
txConnect.

Settings - Course Grouping
Before setting up categories & assignments, teachers
can group courses by semester. Teachers can enter
grades, administer categories & assignments, copy for
multiple sections at the same time.
Create a group name. Then add from the list of
assigned courses.

Settings - Seating Chart Setup
If setting up before the first day of school, select August 25th. The date will
default to the current date. If you are going to Combine Courses in
Attendance, it is recommended you flag before setting up seating charts.
Select the Semester and Period.
Under Layout Options, select from the dropdown box your preferred layout.
If you select Blank, students will be listed to the right of the seating chart
and you can drag/drop students to the desired seat.
Enter the number of Rows and Columns.
Click Preview Layout to display seating chart.
You can move around student boxes to change the seat location. Student
boxes are color-coded by gender. Click on the student id for demographic
information. Click Show Pictures to view pictures instead.
Enter PIN number and SAVE when completed.
To print the seating chart, select Reports – Seating Charts

Settings - Seating Chart Setup

Settings - Student Group Manager
Allows you to create and maintain groups of students for reporting
purposes. Groups can be created campus wide with administrator
authorization. Create as many groups as you want.
You can monitor those students with the following reports:
Attendance Summary
Student Grades
UIL report

Settings - Student Group Manager
1) Click Add Group and give your group a name.
2) Click the Edit button (spyglass) for a list of available students.
3) Select students by clicking under Add column and use the Add
arrow to move to your group. Use Search options to minimize your
list.

Posting Attendance
Go to Attendance.
Date will default to current date. Posting to prior dates is not allowed.
According to TEA, teachers are responsible for the accuracy of their
attendance.
All tardies and absences are posted to the online system.
Secondary: A student will be counted absent for any class period to which
he/she is 15 or more minutes late. The student shall be counted tardy
when he/she is less than 15 minutes late to any class period.
Elementary: Attendance is posted once a day to the Attendance Posting
period at 9:30 a.m. PK Afternoon must be posted at 1:00 p.m.

Posting Attendance Student attendance will default to Present. Teacher will mark student absent or tardy as applicable.
After all students have been marked correctly, enter PIN and click Post Attendance.
You must post attendance even if all students are present.
After posting, changes must be sent to the office clerk.
Pre-posted attendance will display on the screen and cannot be changed by teacher.
New students will be indicated with NEW beside name. New students cannot be posted absent.

Posting Attendance – Printing reports
Columns can be sorted and rearranged.
Report can be printed after posting attendance by clicking on PRINT.
Reports can be printed for future days – they will include blank lines next to each attendance option.

Posting Attendance on the First Day
The Last day for mass activation 8/25/2014 displays above the
grid.
Rather than having the option to mark students Absent, Tardy or
Present, teachers only have the option to Activate any student that
is present in the classroom.

Elementary Attendance
Elementary teachers will post to Attn Posting period. This is listed
as 2nd period along with Reading course. In order to only post to the
designated posting period, teachers will need to de-select Combine
Courses in Attendance in the User Profile.
Teachers will only post attendance to courses:
0090 Attendance PK-K
0091 Attendance 1-6
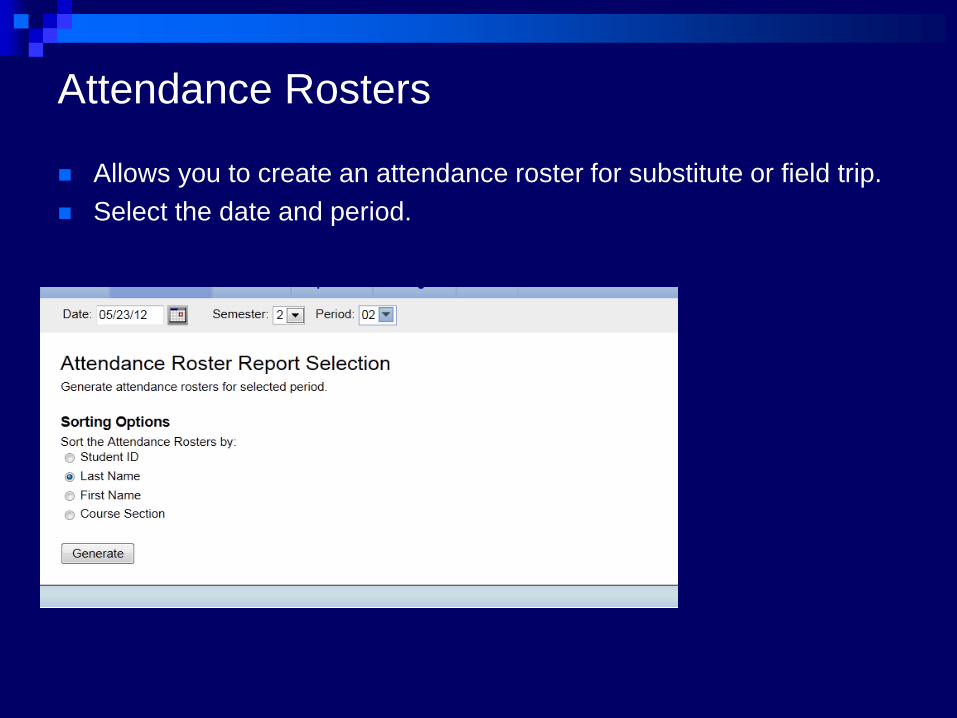
Attendance Rosters
Allows you to create an attendance roster for substitute or field trip.
Select the date and period.

Attendance Verification Reports
At the end of each 6-weeks, teachers will sign-off on attendance.
Under Reports, select Attendance Verification.
Select the 6-weeks dates. Calendar will indicate first and last date
of attendance cycle.
Secondary – print for only 2nd period. Elementary – print for only the
Attn Posting period.
Teachers will sign and return to the office attendance clerk.

Attendance Verification Reports Select
Include
Withdrawn
Students.
Print & sign

Student Information Screens
For each screen with students, the student id is hyperlinked. Click on the student id to view student information.
Student information screens available are demographic information including special programs, attendance, schedule, and TAKS scores.
Demographic information shows in bold contacts that live with student and Right to Transport.

Student Information Screens - Attendance
Teacher can select From and To Date when printing attendance reports.
Totals of Unexcused absences, Excused absences and Tardies for the specified date range will display.

Student Information Screens - Schedule

Student Information Screens – TAKS
Objectives

Student Information Screens – TAKS Scores

Student Information Screens – EOC Scores

Student Information Screens – STAAR 3-8
Scores
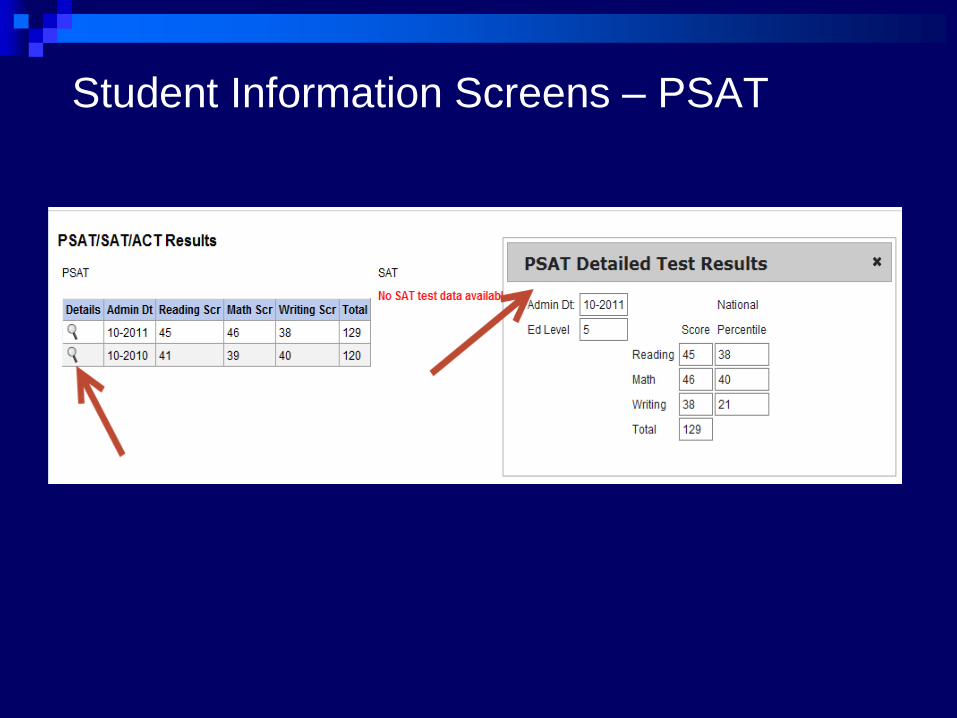
Student Information Screens – PSAT

Student Information Screens – Restrictions
Screen includes student’s
chosen mailing
restrictions.

Categories
Go to Settings > Administrator
Categories

Categories – select course/assign weight
type
Percentage - If you select percent-based weighting, you will assign percentages to each category.
Point - If you select point-based weighting, a point value for each category will be updated automatically with each assignment entered. The average for the category will be calculated based on the total possible points. See formula example located in the HELP screen.
Multiplier - If you select multiplier-based weighting, you will provide a multiplier number (between 1-9) for each category. For multipliers greater than one, the individual assignment grades are counted multiple times.
Select a course-section
from the dropdown box.
If the course is part of a
group, you will receive
a message that
maintenance will be
done to all courses.
Select a Weighting
Type. For examples of
formulas, use the help
screen.
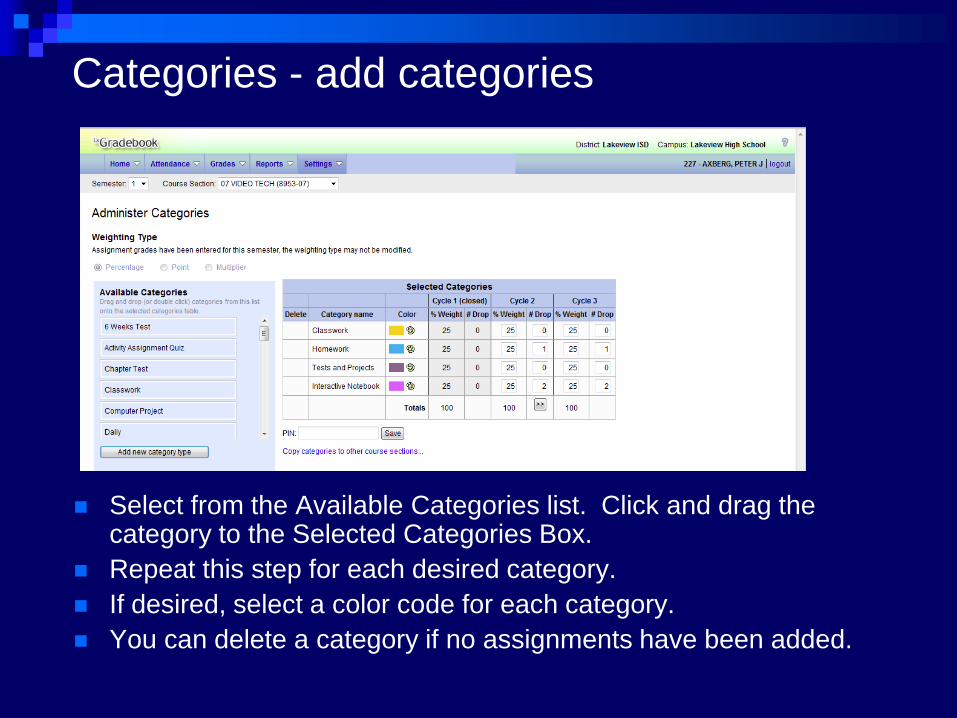
Categories - add categories
Select from the Available Categories list. Click and drag the category to the Selected Categories Box.
Repeat this step for each desired category.
If desired, select a color code for each category.
You can delete a category if no assignments have been added.
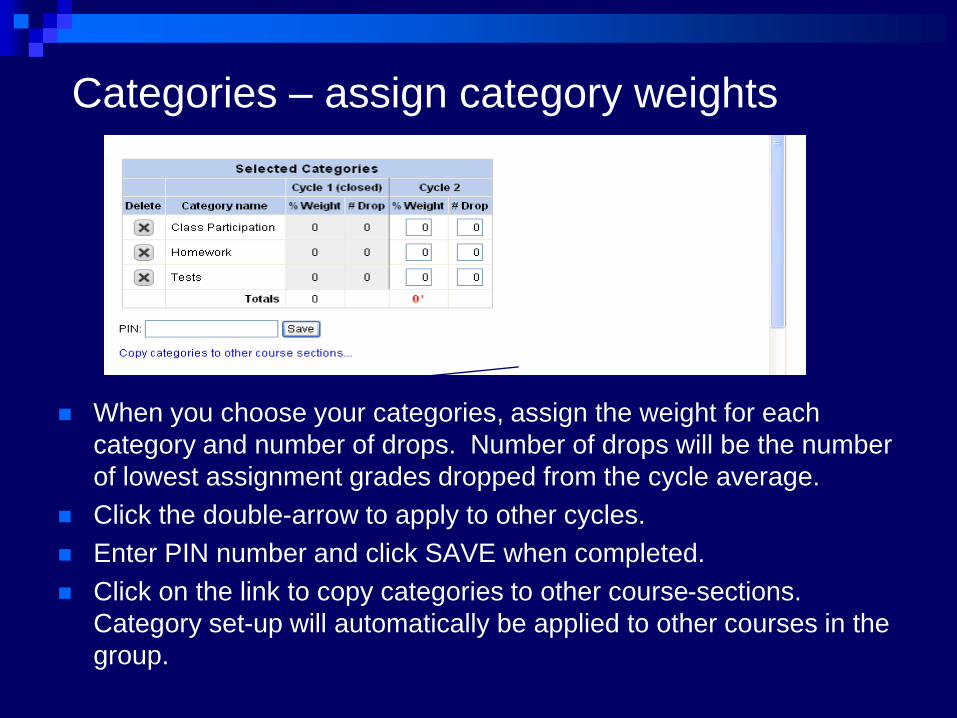
Categories – assign category weights
When you choose your categories, assign the weight for each
category and number of drops. Number of drops will be the number
of lowest assignment grades dropped from the cycle average.
Click the double-arrow to apply to other cycles.
Enter PIN number and click SAVE when completed.
Click on the link to copy categories to other course-sections.
Category set-up will automatically be applied to other courses in the
group.

Categories – copy to other course sections
To copy the existing category set up, click on the copy box for each applicable course section for the current semester.
Enter PIN and click COPY.
The existing categories will now be applied to the selected course sections.
Click Back to Categories when finished.

Categories - Reminders
Since categories can only be deleted if they have no assignments, it
is easier for you to have categories set correctly before you begin to
add assignments.
Categories are campus defined.
Percentage weights for categories must equal 100%.
Category settings affect the calculation of the cycle average.
If you need multiple categories to count equally, use the multiplier
and assign all categories a value of 1.
Weighting types may not be changed after categories have been set
up.
The same weighting type must be used for all semesters/cycles of a
course.
Campus principals can designate a “locked” weight for a category.

Assignments
Go to Settings > Administer Assignments

Assignments – add assignments
Select the course from the dropdown box. If the course is part of a group, you will receive a message that maintenance will be done to all courses.
Type the assignment name. Give each assignment a unique name.
Select the appropriate category from the dropdown box.
Enter Date Assigned and/or Date Due. Click on the calendars provided, if needed. These date fields are optional and if no date is entered, the field will remain blank. Sort options are available if dates are present.

Assignments – add assignments
Enter Total Points allowed. Default is 100.
Check box if assignment is for extra credit.
Add notes to the assignment.
Click Add New Assignments button to continue adding assignments.
When finished, enter PIN and click SAVE.
Click on link to copy assignments to other course sections. Assignment set-up will automatically be applied to other courses in the group.

Assignments – copy to other course
sections
Check the boxes for the assignments to copy.
Check the cycles for each course section that apply or check the box under cycle for all courses.
Enter your PIN.
Click Copy.
Click the link Back to Assignments to return.

Assignments – Reminders
Once assignment grades have been added, the assignment cannot be deleted unless assignment grades are deleted.
If assignment has a Date Due, grades will not be calculated for students that enroll after that date.
A teacher may enter as many or as few assignments as they want during a session. They do not have to be entered for an entire cycle or semester.
There has to be at least one category created before assignments can be added.
If a category has a specified number of drops, all assignments in that category should have the same total point value or the cycle average may be different than expected. For example, for best functionality all assignments in that category would have a total point value of 100.
Notes added to an individual assignment will be viewed on txConnect.
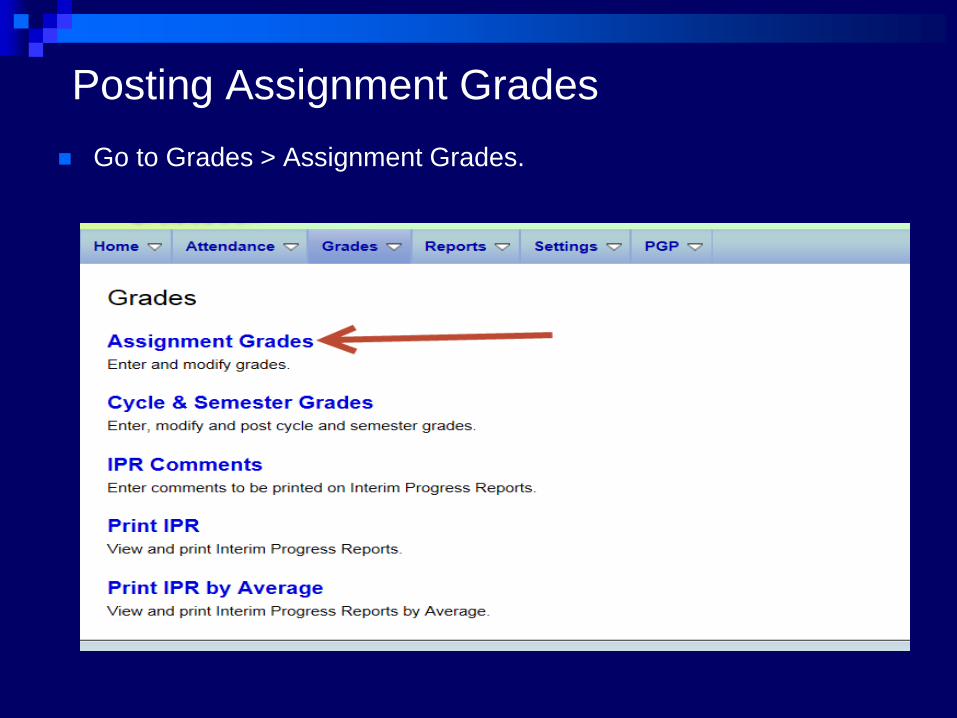
Posting Assignment Grades
Go to Grades > Assignment Grades.

Posting Assignment Grades – Entering
Grades Select the course
section or course group. The current semester cycle will default. Click Retrieve Data.
Design the screen to display individual or all for fields: category, assignment, specific due date or student.
Elect to display withdrawn students.
When keying grades by assignment, press ENTER or up/down arrow keys. To enter grades by student, press TAB.
Enter PIN and click SAVE to update.

Posting Assignment Grades – Features Calculate Average
button shows cycle averages before updating.
At the bottom, select to sort the page by due date.
Button to fill in grade.
Option to Exclude all students from the assignment.
Assignment average at the bottom.
Select the number of assignments to display. Use the Next/Previous links to move between screens.
Select to Hide the Menu.
Cycle grades below 70 will be in red.

Posting Assignment Grades – Comments
The note icon beside each grade allows the teacher to post a comment and/or indicate if the assignment is exempt, accommodated, late or a redo.
The comment box has an option to include comments on a progress report and will be viewable on the parent access website.

Posting Assignment Grades – Transfer
Students
For transfer students, click on the T icon to display the Transfer Walk In Average screen. If the student is transferring from the same course, the current cycle average will be displayed. Teachers can elect to accept the transfer grade and also choose the cycle weight to assign to the grade.
If student was not previously in that course, teachers can enter a transfer grade and assign cycle weight.
This transfer grade will be averaged into the student’s cycle grade based on the designated weight.
Transfer students will automatically be exempt from any assignments due before the entry date. Exemption is denoted by an “X” by the assignment grade. If no due date was entered, exemptions can be added by clicking on the Note Icon and selecting Exclude.

Posting Assignment Grades – Student
Course Notes
Teachers can add course
specific notes about a student.
Select categories: Attendance,
Discipline, General, Health,
Supplies.
Note will turn yellow when
saved.

Posting Assignment Grades – Import
Assignment Grades
Capability to import
assignment grades from
other sources. Example:
Eduphoria.
Under assignment column,
click on import icon.
Dialog box will step you
through the process.

Posting Assignment Grades – Import
Assignment Grades
Import file will require
student id, assignment
grade, first name and last
name.
Map fields in correct
order.
Review data
Click Import now.

Posting Assignment Grades – Reminders
To update grades, you must enter PIN and click SAVE.
Cycle averages will be updated each time a grade change is made.
Students will be shaded until posted.
If an assignment is for extra credit, enter only the amount of points to be added to the average of the category. Extra credit points will be added to the students overall category grade total but will not be counted in the number of assignments when averaging.
Extra credit points can be added to a regular assignment.
Option to mass exclude grades.
Option to mass delete grades.
Option to mass enter grades using the Fill option.

Posting Assignment Grades – Reminders
Grades should be posted weekly.
Numeric or alpha grades can be entered. The cycle average will still be calculated numerically based on the value of the alpha character. Alpha grades are calculated into the average based on the district value assigned.
“M” (Missing) entered as an assignment grade will be calculated as a zero, “I” (Incomplete) entered as an assignment grade will result in an “I” as the cycle average, “X” (Excluded) will not be calculated and blank assignment grades will not be calculated at all in the cycle average.
Lowest grades “dropped” will be italicized.
Working cycle average will print on the system generated withdrawal form.
Use Print button in top right corner.

Posting Cycle Averages
Go to Grades > Cycle & Semester Averages.

Posting Cycle Averages – Posting Grades
The screen will default to the current semester/cycle.
Select the course section from the drop down box and click RETRIEVE.
Previous cycle grades and current semester average will be displayed.
The current cycle average will be the student’s working cycle average to date. To override the cycle grade, enter in the new grade in the override field.
Citizenship will be keyed on this screen. It will default to “S”.
Enter PIN and click SAVE to update any changes to the screen.

Posting Cycle Averages – More Features
Click on Calculate Semester Average to view the semester average
before saving any changes.
Working Final Grade also displays based on current and previous
semester grades.
Click on Show Comment Legend for a list of valid comment codes.
Click on the PRINT button to print the screen.

Posting Cycle Averages – Mark Grades as
Ready
When it is time to post, click on Select courses to mark grades
Ready to Post. It will only appear when cycle has been opened to
post.
Select from available course list those that you are ready to post.
Enter Pin and Continue

Posting Cycle Averages – Mark Grades as
Ready
After successfully posting, dropdown list will have Ready beside the
course number.
You can post multiple times until the campus deadline. After the
deadline, changes will have to be submitted to office data clerk.
Exam grade column will be available for posting when the cycle is at
the end of the semester for secondary campuses.

Posting Cycle Averages – Reminders
Pre-posted cycle grades may not be changed.
Even if there are no changes, teachers must still go to this screen
and click ready to post!!
Teachers must click Ready to Post for all courses.
Pre-posted exam grades will be displayed and cannot be changed
by the teacher.
Option to Exempt All exam grades. For exempt exams, enter “E”.

Interim Progress Reports
Go to Grades > IPR Comments

Interim Progress Reports – Comments
Select course section.
Working cycle average is displayed.
Enter comment codes. Click on the Comment Code Legend tab for descriptions.
Click on icon under NOTE for an additional comment box.
To update comment codes, enter PIN and click SAVE.
To clear all comments and notes, click on the link Clear All Comments and Notes.

Interim Progress Reports
Go to Grades > Print IPR or Print IPR by Average.
Print IPR Average will allow to select students in all course sections with a working cycle average below the amount entered.

Interim Progress Reports - Printing To select only students in the
course by grade average, enter a grade in the Select Students Below…” field.
Option to Show withdrawn students.
Option to show blank grades.
Select the appropriate box for the type of IPR desired.
This Class prints a detailed IPR of the selected course section.
All My Classes will print an IPR with cycle averages for each of the student’s courses taught by the teacher. If selecting all classes, the box for detailed view becomes available. This will print a detailed IPR for all classes.
A CHECK ALL box is available at the column heading for each selection.

Interim Progress Reports - Printing
Wide note option that will
appear on each IPR
selected.
Select to print a parent
signature line.
Click PRINT SELECTED
IPRs to print.

Printed IPR Any comments entered for
individual assignments that were elected to be displayed will print on the IPR.
If the assignment was marked as Late or Redo an X will appear in the column.
If the assignment was marked exclude, it will have “excluded” in the grade column.
“Dropped” will appear beside dropped grades.
Click PRINT button to print IPRs.
Printed copy will include campus heading, To the Parents of mailing address and parent signature line.
Campus heading includes the date/time IPR was produced.

Print IPR by Average
Allows you to print IPR for students in all your courses with a
working cycle average selected.
Options to show blank grades, add IPR wide note and print Parent
Signature Line

Personal Graduation Program The PGP is a required for students grades 7-12 that either did not
pass the state assessment for the previous year or will not graduation 5 years after entering the 9th grade. This screen will allow the teacher to inquire or maintain information in the PGP.

Personal Graduation Program

Reports
Teacher can generate their own reports.
To access reports, click on Reports. Select the desired report.

Reports – Assignment Grade Reports

Reports – Attendance Verification
This report must be run for 2nd period each 6 weeks, signed and
turned in to attendance clerk. This is an audit document.

Reports – Attendance Verification

Reports –Blank/Missing Reports

Reports –Cycle Grade Range Reports

Reports –Class Roster
Produces a blank class roster. You can select number of blank
columns.
Report can also be
exported into a
CSV file.

Reports – Missing Exam Grades

Reports – Percent Failing
Produces a report of the percentage of failing working cycle
average. You can select a course or all courses. There is a pie
chart or grid format.

Reports – Seating Charts Fixed seat
recommended
for smaller
classes.
Auto-adjusted
is
recommended
for larger
classes.

Reports – Special Programs

Reports – Student Group Reports
If you have created student groups, you can run the following
reports selecting only those grouped students.

Reports – Group Admin Student Group
Select students from the group. Report
prints grade inquiry for all courses.

Reports – Group Attendance Summary

Reports – Group UIL
Produces a list of all courses working cycle averages. You can
select student group or special program. There is an option to
export to excel.
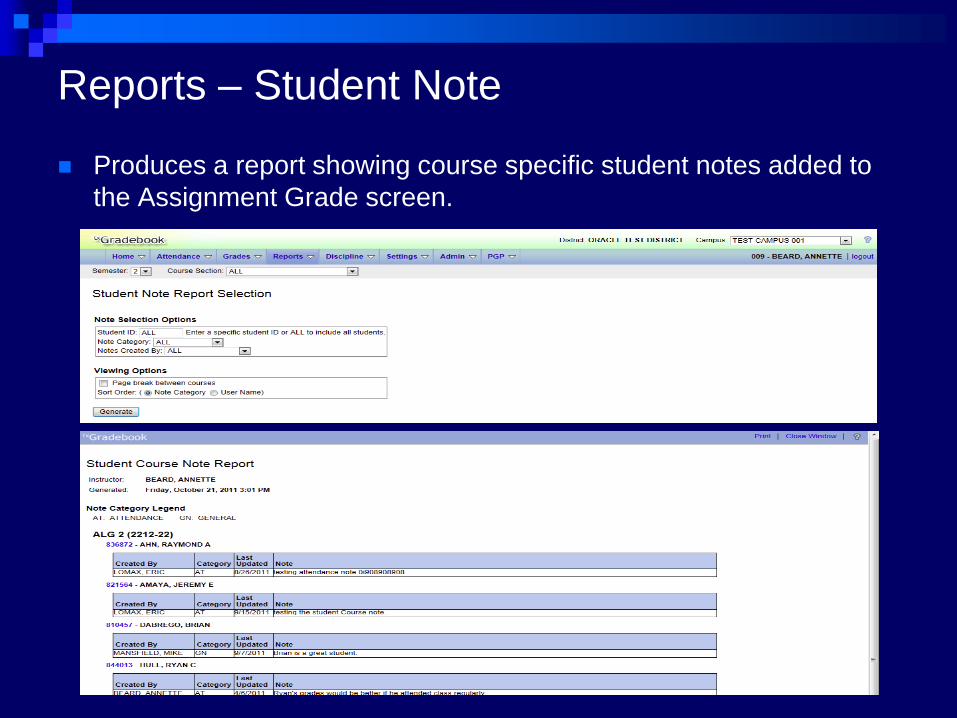
Reports – Student Note
Produces a report showing course specific student notes added to
the Assignment Grade screen.
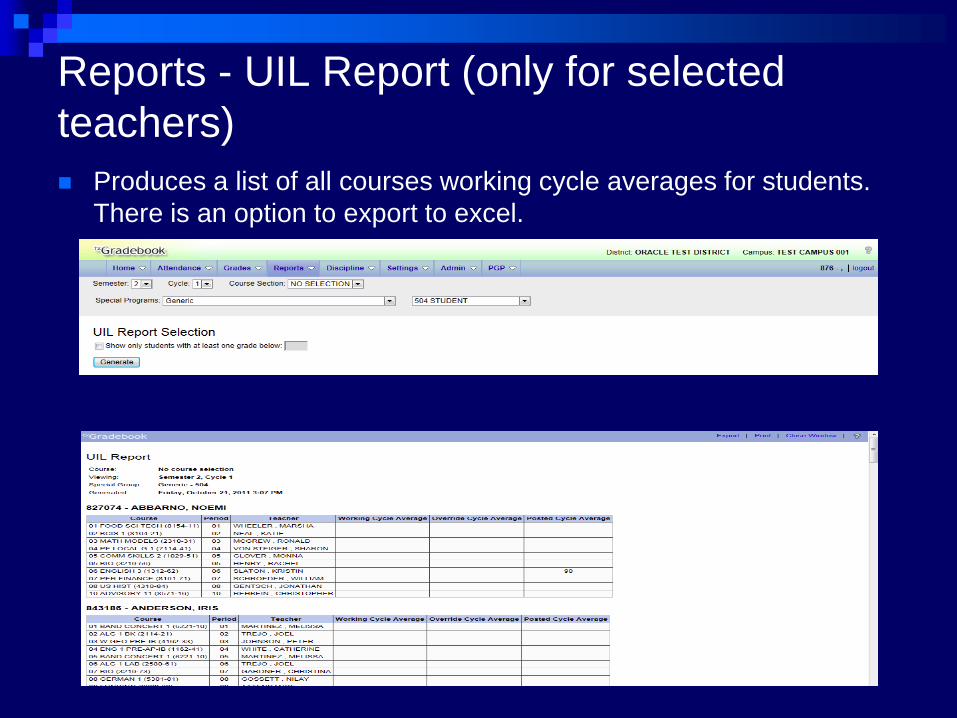
Reports - UIL Report (only for selected
teachers)
Produces a list of all courses working cycle averages for students.
There is an option to export to excel.

Help Screens
Help Screens are available at any screen in txgradebook.
Click on ? on the top right-hand corner.

Moodles
District Moodle training is also available.
Click the Moodle link under Staff Development.
Login with Network password.
Select District Trainings. Click on link for iTCCS txGradebook
Procedures and Updates

Conclusion
If you need additional help involving categories, assignments or
assignment grades in txgradebook, contact your campus
Instructional Services specialist.
If you have questions regarding the posting of attendance or cycle
grades, speak to your office data clerk. If need be, they will
contact Information Systems.
URL for home access is https://itccsgb.esc20.net/EC. Check
System Requirement under the HELP screen. NOTE: Information
Systems and Instructional Technology will not be able to provide
support for access from home.
txGradebook is compatible with Apple Ipad products.