Embed Size (px)
Citation preview
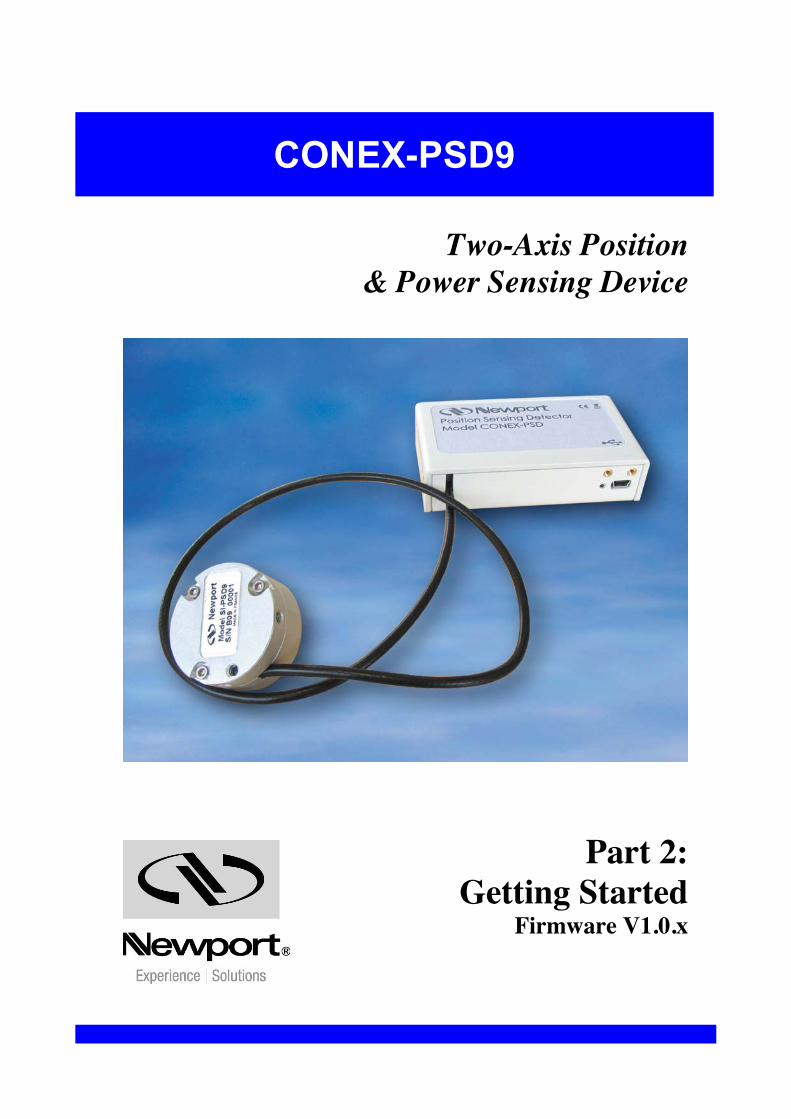
Two-Axis Position & Power Sensing Device
Part 2: Getting Started
Firmware V1.0.x
CONEX-PSD9

CONEX-PSD9 Two-Axis Position & Power Sensing Device
EDH0251En1010 — 03/10 Part 2 – Page ii
CONEX-PSD9 Two-Axis Position & Power Sensing Device
Part 2 – Page iii EDH0251En1010 — 03/10
Table of Contents
1.0 Overview and Setup .................................................................................. 1 1.1 CONEX-PSD9 Controller Module...............................................................................................1 1.2 USB Cable .....................................................................................................................................1 1.3 CD-ROM........................................................................................................................................2 1.4 Mechanical Installation .................................................................................................................2
1.4.1 Mounting CONEX-PSD9 Controller ............................................................................2 1.5 Electrical Installation.....................................................................................................................2
1.5.1 USB Cable to CONEX-PSD9 Module..........................................................................2 1.5.2 USB Cable to PC ............................................................................................................3
2.0 Initial Setup ............................................................................................... 3 2.1 CONEX Suite Installation.............................................................................................................3
2.1.1 PC Computer Requirements ..........................................................................................4 2.1.2 Software Installation.......................................................................................................5
3.0 CONEX-PSD9 Component Installation ................................................... 6 3.1 CONEX-PSD USB Driver ............................................................................................................6
3.1.1 First Step: USB Virtual Serial Converter Installation .................................................6 3.1.2 Second step: USB Serial Port Driver installation ........................................................8
4.0 CONEX-PSD9 Installation Verification................................................. 10
5.0 Disconnecting CONEX-PSD9 ................................................................. 10 5.1 Disconnecting CONEX-PSD9 Module......................................................................................10 5.2 Closing Newport Communication Interface ..............................................................................10
6.0 Troubleshooting ...................................................................................... 11 6.1 Device Not Found........................................................................................................................11 6.2 Device Not Communicating .......................................................................................................12
6.2.1 Launching Windows HyperTerminal..........................................................................12 6.2.2 Using Windows HyperTerminal..................................................................................14 6.2.3 Closing Windows HyperTerminal...............................................................................14
Service Form .................................................................................................... 15

CONEX-PSD9 Two-Axis Position & Power Sensing Device
EDH0251En1010 — 03/10 Part 2 – Page iv
CONEX-PSD9 Two-Axis Position & Power Sensing Device
EDH0251En1010 — 03/10 Part 2 – Page 1
CONEX-PSD9 Single-Axis DC Motion with Controller/Driver
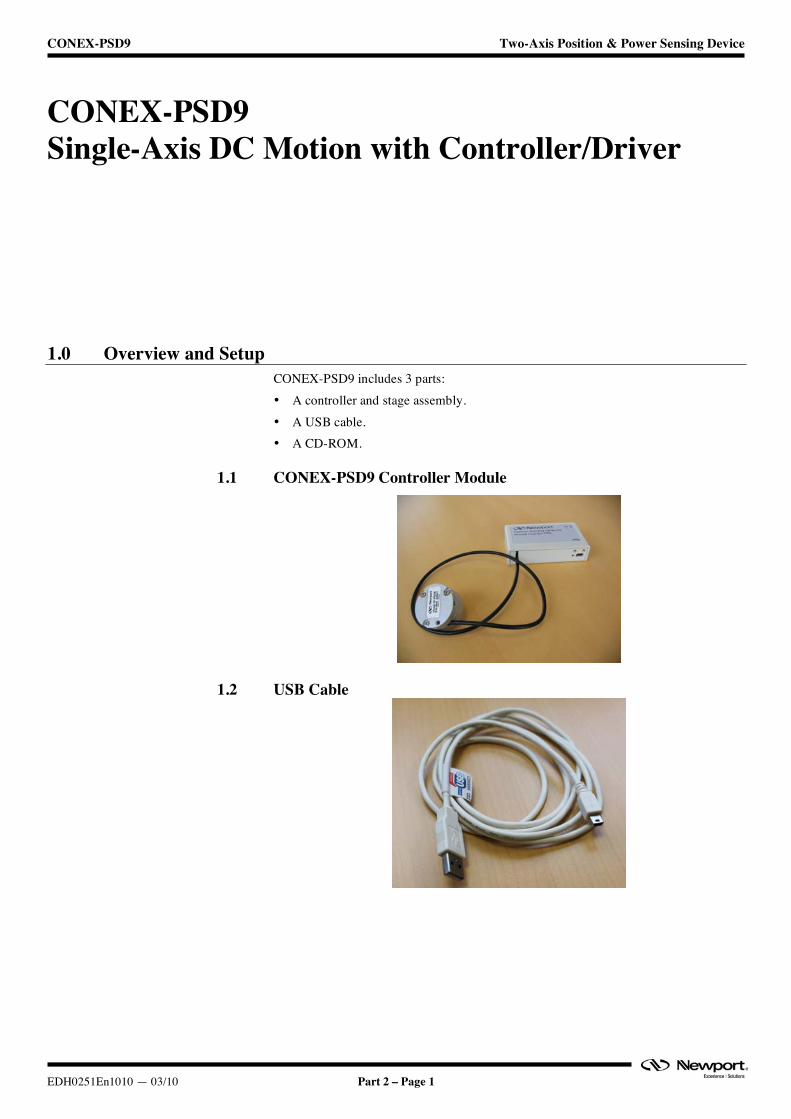
1.0 Overview and Setup CONEX-PSD9 includes 3 parts: • A controller and stage assembly. • A USB cable. • A CD-ROM.
1.1 CONEX-PSD9 Controller Module
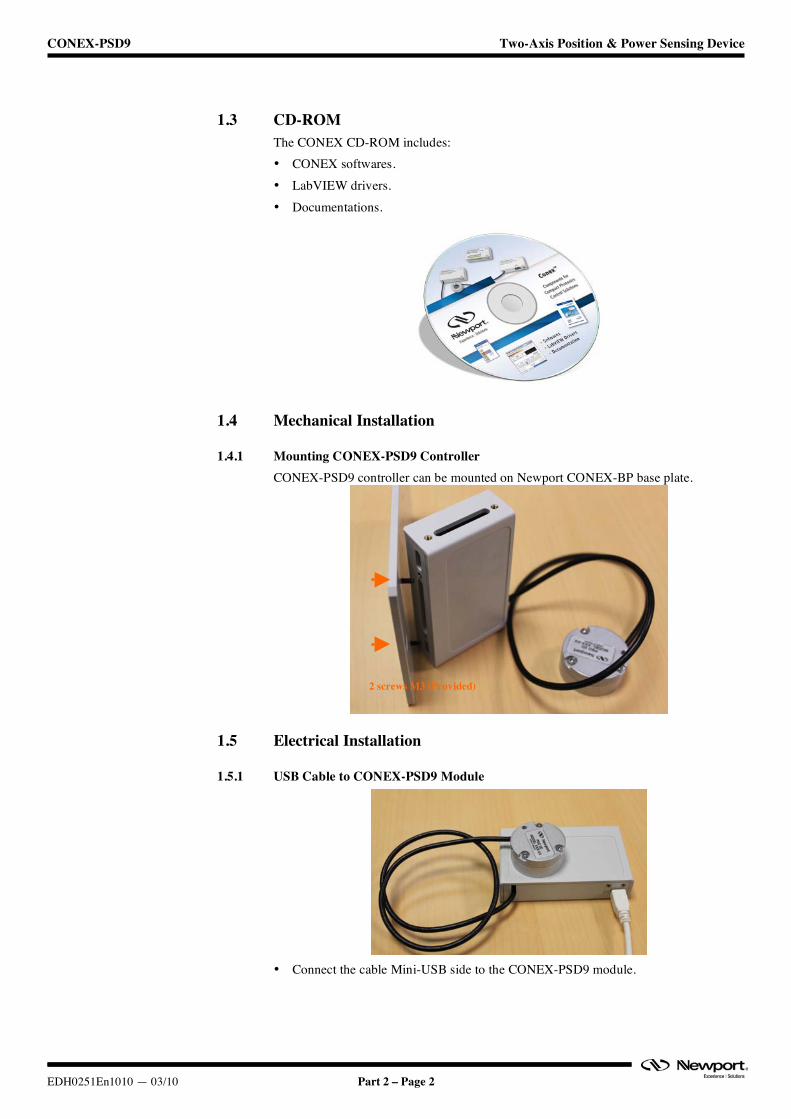
1.2 USB Cable
CONEX-PSD9 Two-Axis Position & Power Sensing Device
EDH0251En1010 — 03/10 Part 2 – Page 2
1.3 CD-ROM The CONEX CD-ROM includes: • CONEX softwares. • LabVIEW drivers. • Documentations.
1.4 Mechanical Installation
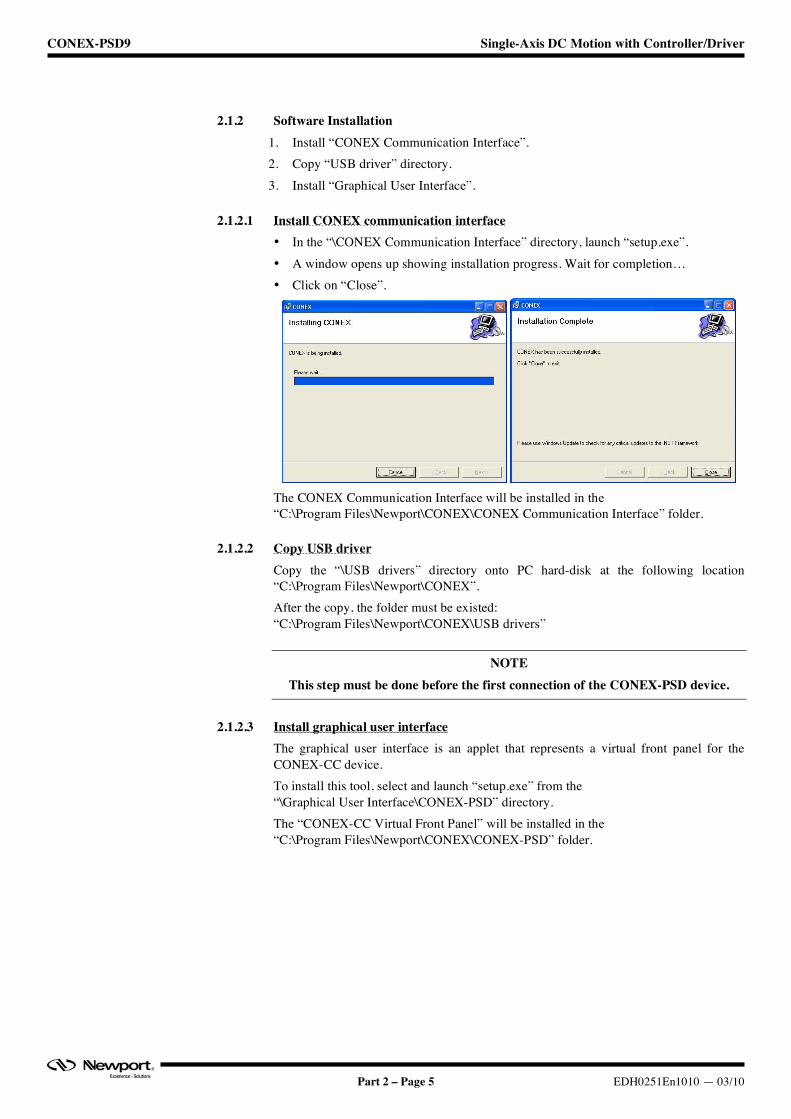
1.4.1 Mounting CONEX-PSD9 Controller CONEX-PSD9 controller can be mounted on Newport CONEX-BP base plate.
1.5 Electrical Installation
1.5.1 USB Cable to CONEX-PSD9 Module
• Connect the cable Mini-USB side to the CONEX-PSD9 module.
2 screws M3 (Provided)

CONEX-PSD9 Single-Axis DC Motion with Controller/Driver
Part 2 – Page 3 EDH0251En1010 — 03/10
1.5.2 USB Cable to PC • Connect the cable standard USB side to an available port of the PC.
2.0 Initial Setup This chapter describes the necessary steps to be performed prior to use any Newport CONEX component for the first time.
2.1 CONEX Suite Installation
CAUTION Before any software installation, contact your I.T. manager to verify if you have the appropriate rights.
CONEX software suite is provided in a CD-ROM and includes:
Component Description USB Driver Composed of two parts:
USB Bus
Requires by Windows to allow USB communication with any CONEX component. USB VCP (Virtual COM Port) Requires by Windows to allow serial port communication with any CONEX component.
CONEX Communication Interface
Allows several applications to communicate with one or several CONEX components.
Graphical User Interface
This user’s interface allowing full control of CONEX-PSD9. It’s a virtual front panel.
LabVIEW Library CONEX-PSD9 commands library to be used by user application developed with LabVIEW 8.2 (or later).
User’s Manuals User’s manuals for CONEX-PSD9 device.

CONEX-PSD9 Two-Axis Position & Power Sensing Device
EDH0251En1010 — 03/10 Part 2 – Page 4
2.1.1 PC Computer Requirements
2.1.1.1 Hardware • CD-ROM drive. • At least one USB 2.0 port
(Full speed, Full power, CONEX-CC consumption < 0.5A).
2.1.1.2 Software • Windows operating system. • “.NET Framework 2.00”. • LabVIEW 8.2 Runtime (or later).
CONEX-PSD9 Single-Axis DC Motion with Controller/Driver
Part 2 – Page 5 EDH0251En1010 — 03/10
2.1.2 Software Installation 1. Install “CONEX Communication Interface”. 2. Copy “USB driver” directory. 3. Install “Graphical User Interface”.
2.1.2.1 Install CONEX communication interface • In the “\CONEX Communication Interface” directory, launch “setup.exe”. • A window opens up showing installation progress. Wait for completion… • Click on “Close”.
The CONEX Communication Interface will be installed in the “C:\Program Files\Newport\CONEX\CONEX Communication Interface” folder.
2.1.2.2 Copy USB driver Copy the “\USB drivers” directory onto PC hard-disk at the following location “C:\Program Files\Newport\CONEX”. After the copy, the folder must be existed: “C:\Program Files\Newport\CONEX\USB drivers”
NOTE This step must be done before the first connection of the CONEX-PSD device.
2.1.2.3 Install graphical user interface The graphical user interface is an applet that represents a virtual front panel for the CONEX-CC device. To install this tool, select and launch “setup.exe” from the “\Graphical User Interface\CONEX-PSD” directory. The “CONEX-CC Virtual Front Panel” will be installed in the “C:\Program Files\Newport\CONEX\CONEX-PSD” folder.
CONEX-PSD9 Two-Axis Position & Power Sensing Device
EDH0251En1010 — 03/10 Part 2 – Page 6
3.0 CONEX-PSD9 Component Installation This chapter describes the necessary steps to be performed when connecting a Newport CONEX-PSD to a PC computer for the first time.
3.1 CONEX-PSD USB Driver 1. The “\USB drivers” directory must be copied onto PC hard-disk at the following
location “C:\Program Files\Newport\CONEX\USB Drivers”. 2. Connect the CONEX-PSD to a USB port with the provided USB cable.
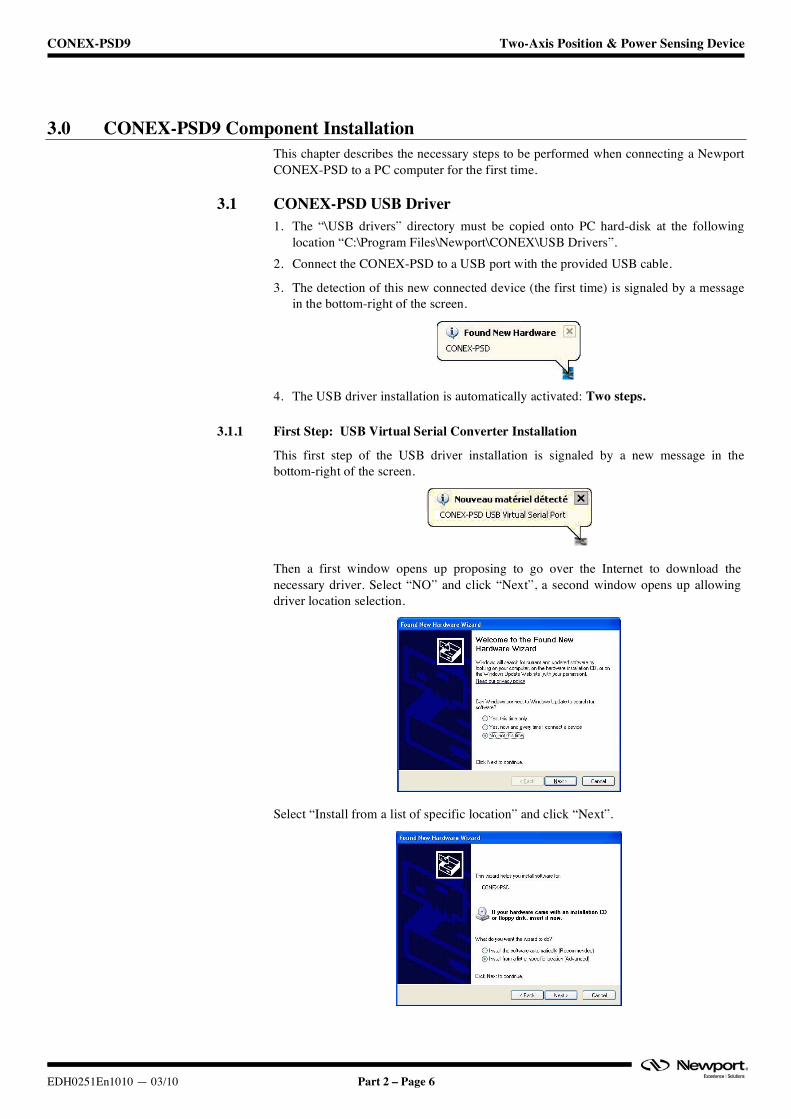
3. The detection of this new connected device (the first time) is signaled by a message in the bottom-right of the screen.
4. The USB driver installation is automatically activated: Two steps.
3.1.1 First Step: USB Virtual Serial Converter Installation
This first step of the USB driver installation is signaled by a new message in the bottom-right of the screen.
Then a first window opens up proposing to go over the Internet to download the necessary driver. Select “NO” and click “Next”, a second window opens up allowing driver location selection.
Select “Install from a list of specific location” and click “Next”.
CONEX-PSD9 Single-Axis DC Motion with Controller/Driver
Part 2 – Page 7 EDH0251En1010 — 03/10
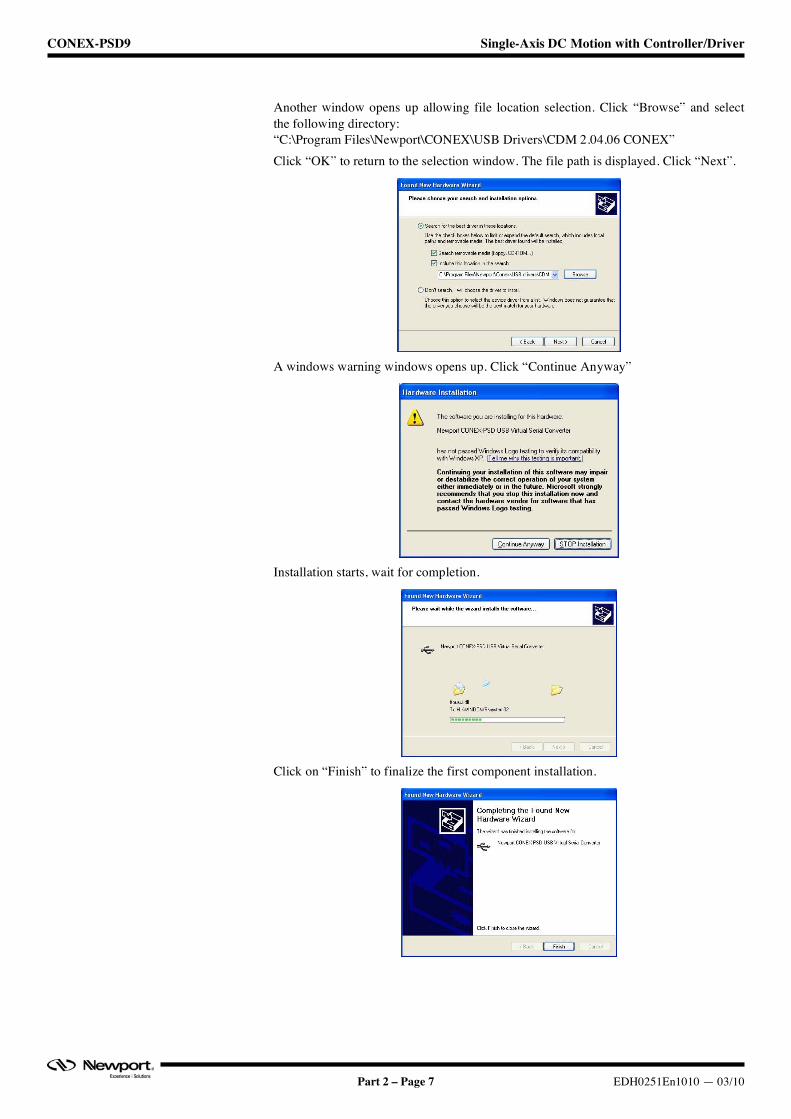
Another window opens up allowing file location selection. Click “Browse” and select the following directory: “C:\Program Files\Newport\CONEX\USB Drivers\CDM 2.04.06 CONEX” Click “OK” to return to the selection window. The file path is displayed. Click “Next”.
A windows warning windows opens up. Click “Continue Anyway”
Installation starts, wait for completion.
Click on “Finish” to finalize the first component installation.
CONEX-PSD9 Two-Axis Position & Power Sensing Device
EDH0251En1010 — 03/10 Part 2 – Page 8
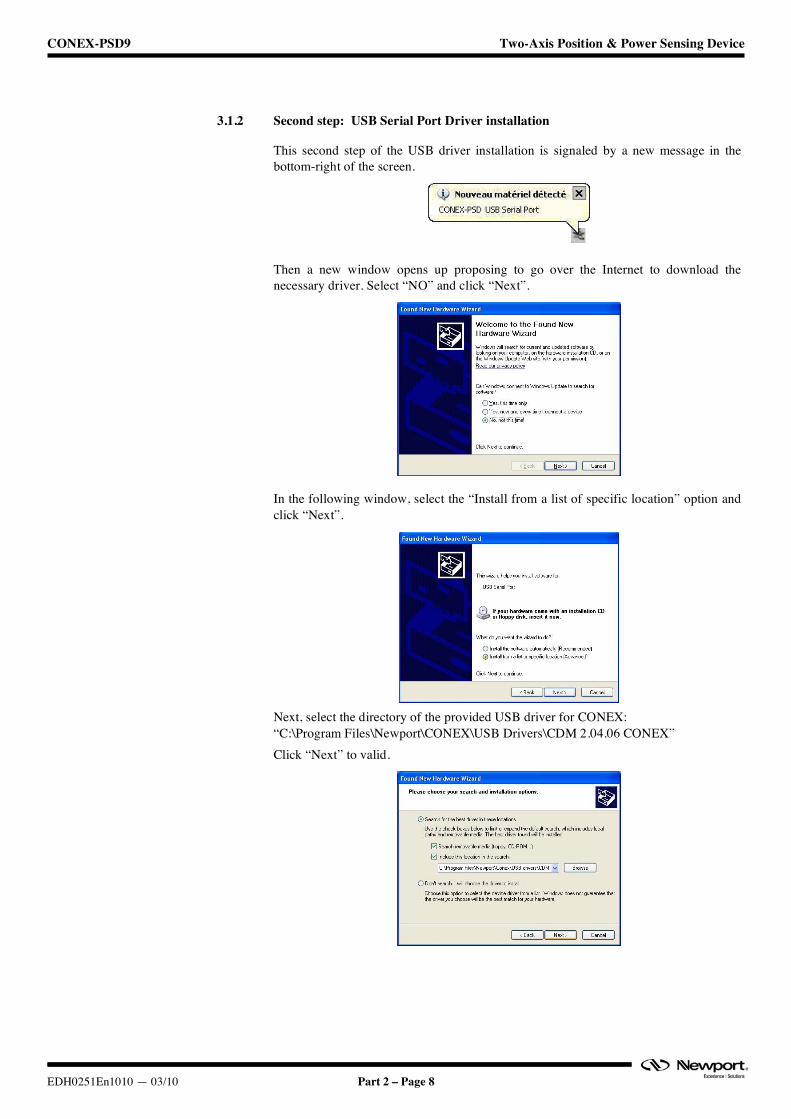
3.1.2 Second step: USB Serial Port Driver installation
This second step of the USB driver installation is signaled by a new message in the bottom-right of the screen.
Then a new window opens up proposing to go over the Internet to download the necessary driver. Select “NO” and click “Next”.
In the following window, select the “Install from a list of specific location” option and click “Next”.
Next, select the directory of the provided USB driver for CONEX: “C:\Program Files\Newport\CONEX\USB Drivers\CDM 2.04.06 CONEX” Click “Next” to valid.
CONEX-PSD9 Single-Axis DC Motion with Controller/Driver
Part 2 – Page 9 EDH0251En1010 — 03/10
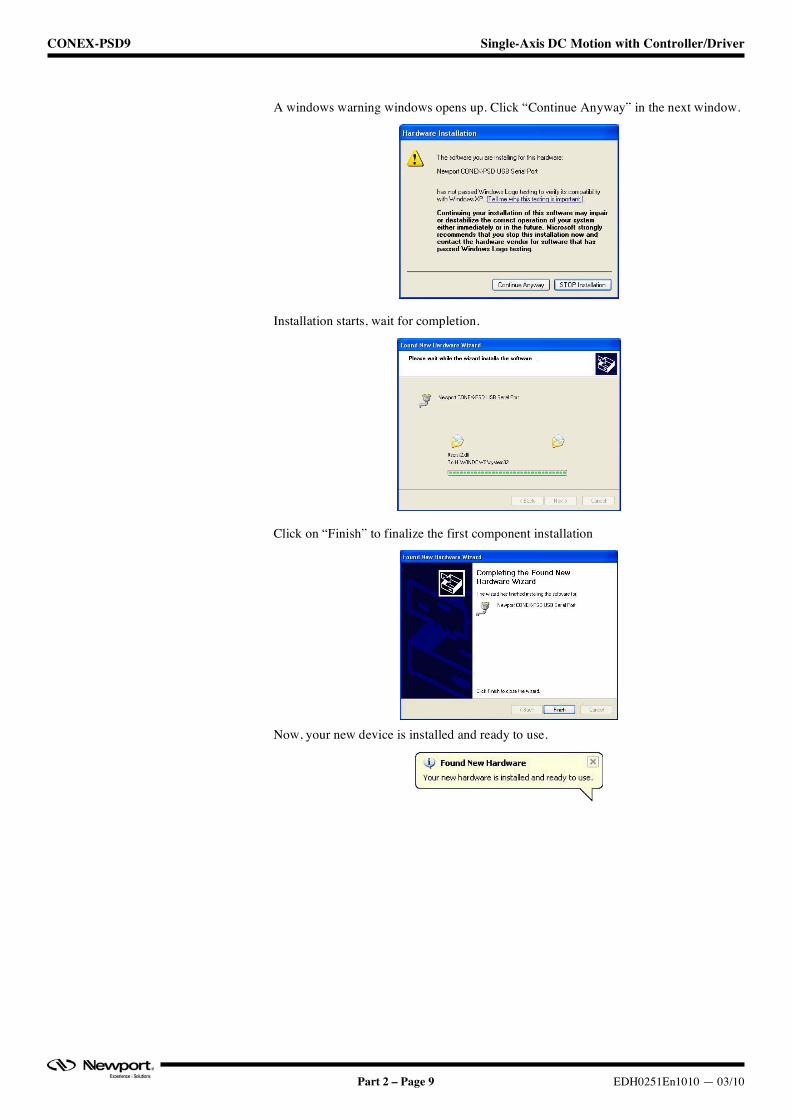
A windows warning windows opens up. Click “Continue Anyway” in the next window.
Installation starts, wait for completion.
Click on “Finish” to finalize the first component installation
Now, your new device is installed and ready to use.
CONEX-PSD9 Two-Axis Position & Power Sensing Device
EDH0251En1010 — 03/10 Part 2 – Page 10
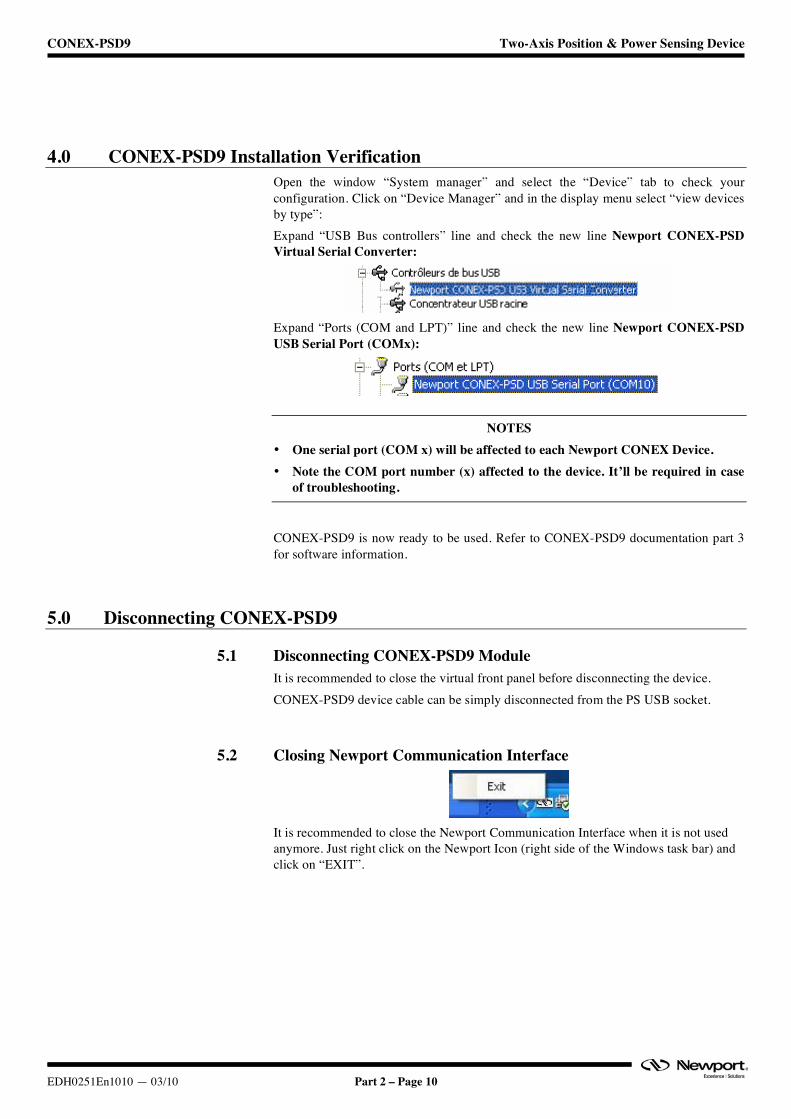
4.0 CONEX-PSD9 Installation Verification Open the window “System manager” and select the “Device” tab to check your configuration. Click on “Device Manager” and in the display menu select “view devices by type”: Expand “USB Bus controllers” line and check the new line Newport CONEX-PSD Virtual Serial Converter:
Expand “Ports (COM and LPT)” line and check the new line Newport CONEX-PSD USB Serial Port (COMx):
NOTES • One serial port (COM x) will be affected to each Newport CONEX Device. • Note the COM port number (x) affected to the device. It’ll be required in case
of troubleshooting.
CONEX-PSD9 is now ready to be used. Refer to CONEX-PSD9 documentation part 3 for software information.
5.0 Disconnecting CONEX-PSD9
5.1 Disconnecting CONEX-PSD9 Module It is recommended to close the virtual front panel before disconnecting the device. CONEX-PSD9 device cable can be simply disconnected from the PS USB socket.
5.2 Closing Newport Communication Interface
It is recommended to close the Newport Communication Interface when it is not used anymore. Just right click on the Newport Icon (right side of the Windows task bar) and click on “EXIT”.
CONEX-PSD9 Single-Axis DC Motion with Controller/Driver
Part 2 – Page 11 EDH0251En1010 — 03/10
6.0 Troubleshooting This section provides help on troubleshooting CONEX-PSD9 device malfunction. Problems can be classified in 2 types: • Device is not found. • Device does not communicate properly. Whenever having any problem controlling CONEX-PSD9 device, close the current application and launch the Newport “CONEX-PSD9 Virtual Front panel” (see CONEX-PSD9 Manual Part 3: Software manual).
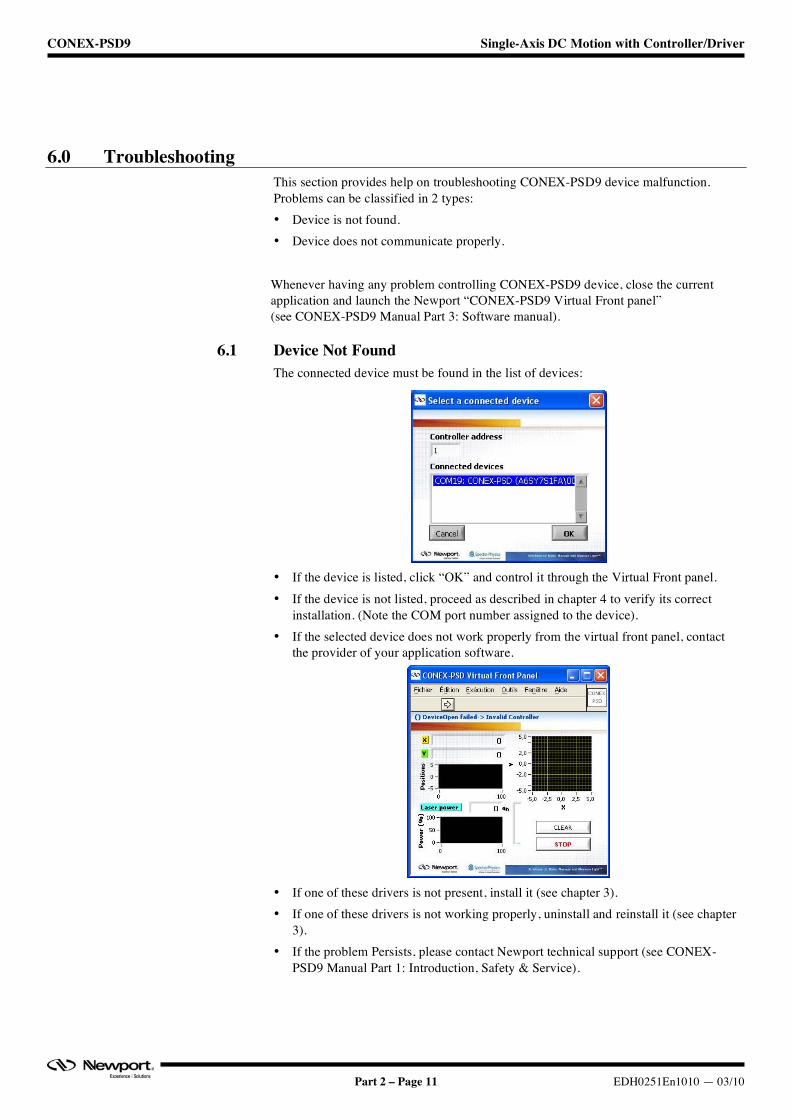
6.1 Device Not Found The connected device must be found in the list of devices:
• If the device is listed, click “OK” and control it through the Virtual Front panel. • If the device is not listed, proceed as described in chapter 4 to verify its correct
installation. (Note the COM port number assigned to the device). • If the selected device does not work properly from the virtual front panel, contact
the provider of your application software.
• If one of these drivers is not present, install it (see chapter 3). • If one of these drivers is not working properly, uninstall and reinstall it (see chapter
3). • If the problem Persists, please contact Newport technical support (see CONEX-
PSD9 Manual Part 1: Introduction, Safety & Service).
CONEX-PSD9 Two-Axis Position & Power Sensing Device
EDH0251En1010 — 03/10 Part 2 – Page 12
6.2 Device Not Communicating If the device is listed, but still not communicating properly, proceed as follow: • Close the Virtual Front Panel. • Close the Newport Communication Interface (see chapter 5.3). • Use Windows “HyperTerminal” as describe below.
6.2.1 Launching Windows HyperTerminal
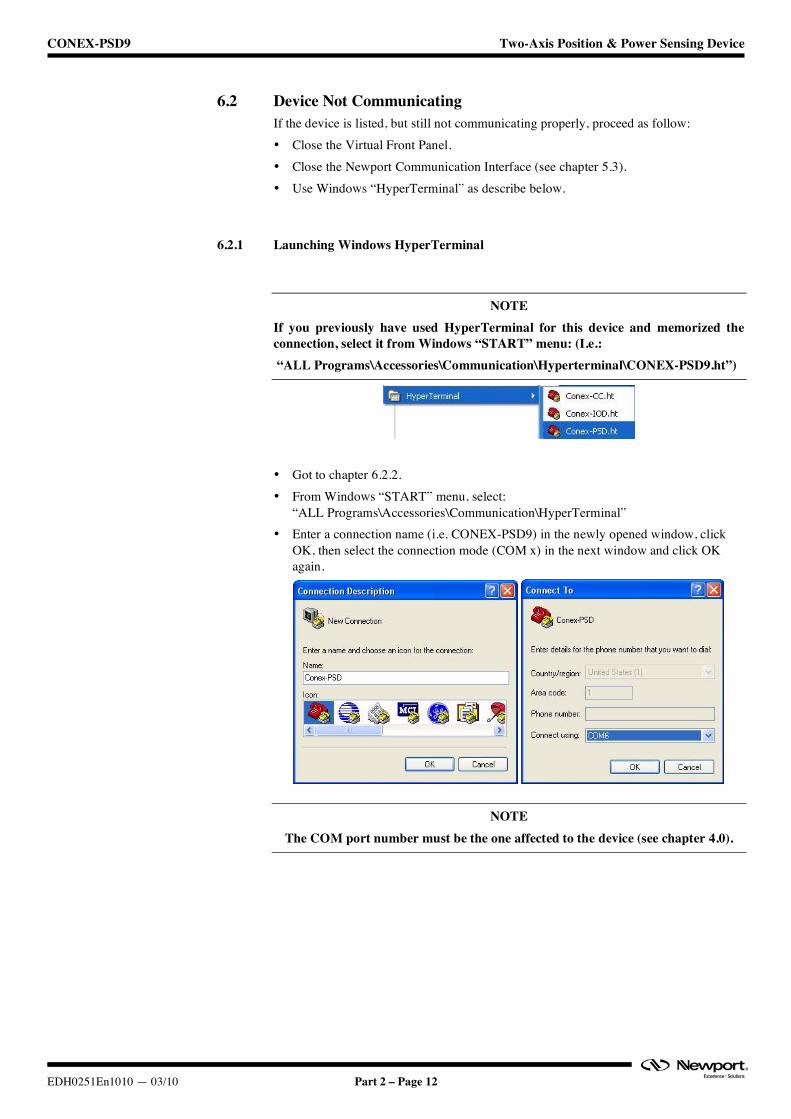
NOTE If you previously have used HyperTerminal for this device and memorized the connection, select it from Windows “START” menu: (I.e.: “ALL Programs\Accessories\Communication\Hyperterminal\CONEX-PSD9.ht”)
• Got to chapter 6.2.2. • From Windows “START” menu, select:
“ALL Programs\Accessories\Communication\HyperTerminal” • Enter a connection name (i.e. CONEX-PSD9) in the newly opened window, click
OK, then select the connection mode (COM x) in the next window and click OK again.
NOTE The COM port number must be the one affected to the device (see chapter 4.0).
CONEX-PSD9 Single-Axis DC Motion with Controller/Driver
Part 2 – Page 13 EDH0251En1010 — 03/10
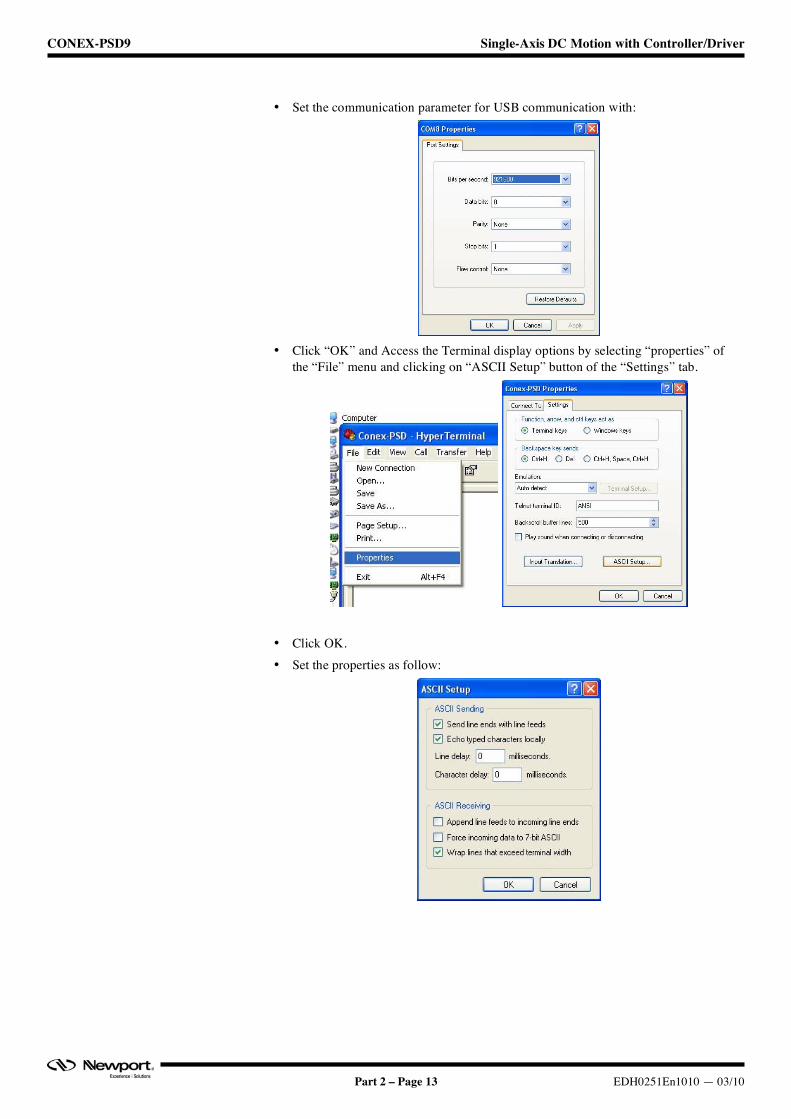
• Set the communication parameter for USB communication with:
• Click “OK” and Access the Terminal display options by selecting “properties” of
the “File” menu and clicking on “ASCII Setup” button of the “Settings” tab.
• Click OK. • Set the properties as follow:
CONEX-PSD9 Two-Axis Position & Power Sensing Device
EDH0251En1010 — 03/10 Part 2 – Page 14
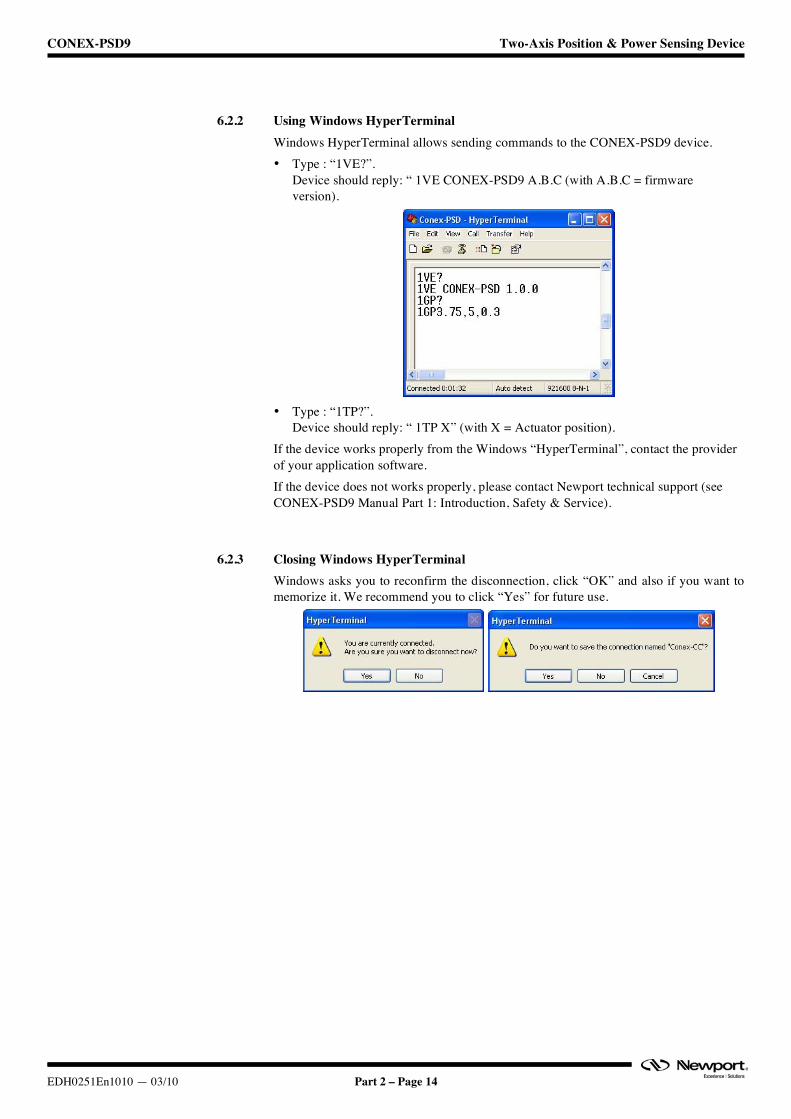
6.2.2 Using Windows HyperTerminal Windows HyperTerminal allows sending commands to the CONEX-PSD9 device. • Type : “1VE?”.
Device should reply: “ 1VE CONEX-PSD9 A.B.C (with A.B.C = firmware version).
• Type : “1TP?”.
Device should reply: “ 1TP X” (with X = Actuator position). If the device works properly from the Windows “HyperTerminal”, contact the provider of your application software. If the device does not works properly, please contact Newport technical support (see CONEX-PSD9 Manual Part 1: Introduction, Safety & Service).
6.2.3 Closing Windows HyperTerminal Windows asks you to reconfirm the disconnection, click “OK” and also if you want to memorize it. We recommend you to click “Yes” for future use.

CONEX-PSD9 Two-Axis Position & Power Sensing Device
EDH0251En1010 — 03/10 Part 2 – Page 15
Service Form Your Local Representative
Tel.: __________________
Fax:___________________
Name: _________________________________________________ Return authorization #: ____________________________________
Company:_______________________________________________ (Please obtain prior to return of item)
Address: ________________________________________________ Date: __________________________________________________
Country:________________________________________________ Phone Number: __________________________________________
P.O. Number: ____________________________________________ Fax Number: ____________________________________________
Item(s) Being Returned:____________________________________
Model#: ________________________________________________ Serial #: ________________________________________________
Description: ________________________________________________________________________________________________________
Reasons of return of goods (please list any specific problems): ________________________________________________________________
__________________________________________________________________________________________________________________
__________________________________________________________________________________________________________________
__________________________________________________________________________________________________________________
__________________________________________________________________________________________________________________
__________________________________________________________________________________________________________________
__________________________________________________________________________________________________________________
__________________________________________________________________________________________________________________
__________________________________________________________________________________________________________________
__________________________________________________________________________________________________________________
__________________________________________________________________________________________________________________
__________________________________________________________________________________________________________________
__________________________________________________________________________________________________________________
__________________________________________________________________________________________________________________
__________________________________________________________________________________________________________________
__________________________________________________________________________________________________________________
__________________________________________________________________________________________________________________
__________________________________________________________________________________________________________________
__________________________________________________________________________________________________________________
__________________________________________________________________________________________________________________
__________________________________________________________________________________________________________________
__________________________________________________________________________________________________________________
__________________________________________________________________________________________________________________
__________________________________________________________________________________________________________________
__________________________________________________________________________________________________________________
__________________________________________________________________________________________________________________
__________________________________________________________________________________________________________________
__________________________________________________________________________________________________________________
__________________________________________________________________________________________________________________

North America & Asia Newport Corporation 1791 Deere Ave. Irvine, CA 92606, USA Sales Tel.: (949) 253-1461 or (800) 222-6440 x31461 e-mail: [email protected] Technical Support Tel.: (949) 253-1406 or (800) 222-6440 x31406 e-mail: [email protected] Service, RMAs & Returns Tel.: (949) 253-1694 or (800) 222-6440 x31694 e-mail: [email protected]
Europe MICRO-CONTROLE Spectra-Physics S.A.S 1, rue Jules Guesde – Bât. B ZI Bois de l’Épine – BP189 91006 Evry Cedex France Sales Tel.: +33 (0)1.60.91.68.68 e-mail: [email protected] Technical Support e-mail: [email protected] Service & Returns Tel.: +33 (0)2.38.40.51.55
Visit Newport Online at: www.newport.com