Embed Size (px)
Citation preview
OPERATING SYSTEMS AND MIDDLEWARE GROUP, HASSO PLATTNER INSITUTE
Tutorial – Solaris Zones Administration
Exercise for Server Operating Systems
Fahad Khalid
7/18/2011
Disclaimer: Instructions provided in this tutorial have been validated on the Solaris 10 5/08 release. Changes may be required to replicate the provided scenarios on Solaris releases other than 10 5/08.
1
Contents Introduction ................................................................................................................................................... 2
The Global Zone ............................................................................................................................................. 2
Setting up a File System for the Zone ............................................................................................................ 2
Zone Configuration ........................................................................................................................................ 3
Zone Installation ............................................................................................................................................ 5
Booting the Zone ........................................................................................................................................... 6
DNS configuration for the zone ................................................................................................................... 16
Halting a zone .............................................................................................................................................. 16
Uninstalling a non-global zone .................................................................................................................... 16
Deleting a non-global zone .......................................................................................................................... 17
Deleting the zone specific file system ......................................................................................................... 17
Further Reading ........................................................................................................................................... 18
Official Documentation from Oracle ....................................................................................................... 18
Documentation regarding commands .................................................................................................... 18
Appendix - Useful commands...................................................................................................................... 19
Processor Information ............................................................................................................................. 19
Memory Information ............................................................................................................................... 19
Operating System Information ................................................................................................................ 19
Process Information ................................................................................................................................ 19
Adjusting resources for a running zone .................................................................................................. 19

2
Introduction In this tutorial, we will create a non-global zone called my-zone, with the following
allocated resources:
1 dedicated CPU
A limit of maximum 1000 Light-weight Processes (LWPs)
100MB of main memory
512MB of swap memory
Fair Share Scheduler
2GB of hard disk space
Network with a dedicated IP address
The following sections will illustrate how to configure and boot the zone, and also
certain post-boot DNS configurations. We will also go over the steps to uninstall and
delete a non-global zone.
The Global Zone A non-global zone can only be configured from the global zone by a privileged user
(root in this case). Therefore, before we embark on the journey to create a new
non-global zone, we should verify that we are in fact in the global zone. The
following command is used to display the name of the zone:
root@tb3:~# zonename
global
Setting up a File System for the Zone Since we would like to limit the available disk space (to 2GB) for the zone, it is
necessary to have a dedicated file system for the zone. Following steps illustrate
how this can be achieved:
First, we will create a file called myzone_disk of size 2GB in /export/home:
root@tb3:~# mkfile 2g /export/home/myzone_disk
This newly created file can be considered as a virtual disk dedicated for the zone to
be created.
Now, we can associate the file with a block device:
root@tb3:~# lofiadm -a /export/home/myzone_disk
/dev/lofi/1
The next step is to create a UFS file system on this block device:
3
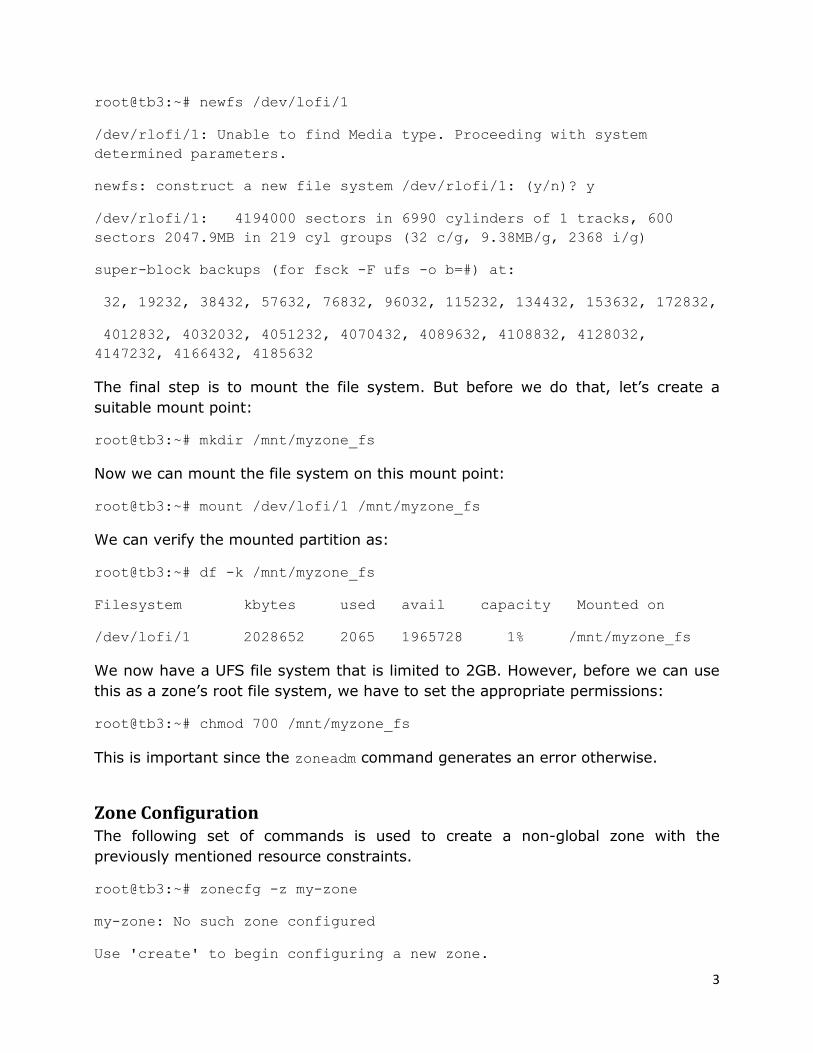
root@tb3:~# newfs /dev/lofi/1
/dev/rlofi/1: Unable to find Media type. Proceeding with system
determined parameters.
newfs: construct a new file system /dev/rlofi/1: (y/n)? y
/dev/rlofi/1: 4194000 sectors in 6990 cylinders of 1 tracks, 600
sectors 2047.9MB in 219 cyl groups (32 c/g, 9.38MB/g, 2368 i/g)
super-block backups (for fsck -F ufs -o b=#) at:
32, 19232, 38432, 57632, 76832, 96032, 115232, 134432, 153632, 172832,
4012832, 4032032, 4051232, 4070432, 4089632, 4108832, 4128032,
4147232, 4166432, 4185632
The final step is to mount the file system. But before we do that, let’s create a
suitable mount point:
root@tb3:~# mkdir /mnt/myzone_fs
Now we can mount the file system on this mount point:
root@tb3:~# mount /dev/lofi/1 /mnt/myzone_fs
We can verify the mounted partition as:
root@tb3:~# df -k /mnt/myzone_fs
Filesystem kbytes used avail capacity Mounted on
/dev/lofi/1 2028652 2065 1965728 1% /mnt/myzone_fs
We now have a UFS file system that is limited to 2GB. However, before we can use
this as a zone’s root file system, we have to set the appropriate permissions:
root@tb3:~# chmod 700 /mnt/myzone_fs
This is important since the zoneadm command generates an error otherwise.
Zone Configuration The following set of commands is used to create a non-global zone with the
previously mentioned resource constraints.
root@tb3:~# zonecfg -z my-zone
my-zone: No such zone configured
Use 'create' to begin configuring a new zone.
4
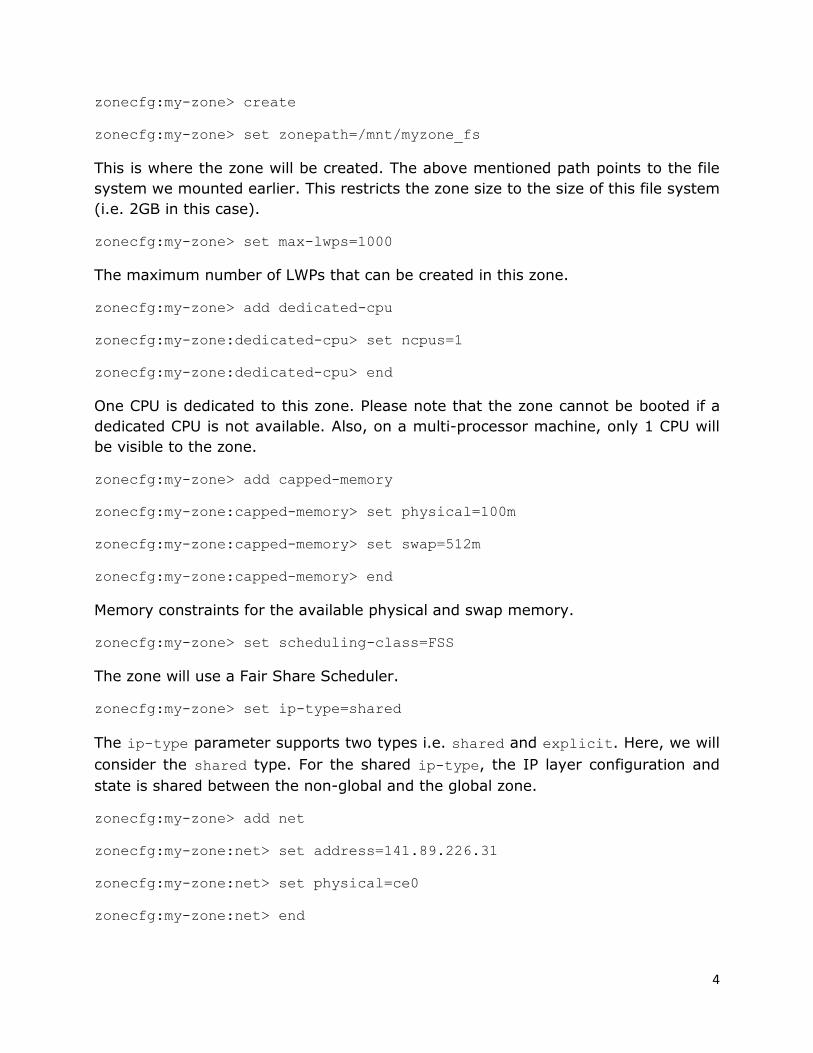
zonecfg:my-zone> create
zonecfg:my-zone> set zonepath=/mnt/myzone_fs
This is where the zone will be created. The above mentioned path points to the file
system we mounted earlier. This restricts the zone size to the size of this file system
(i.e. 2GB in this case).
zonecfg:my-zone> set max-lwps=1000
The maximum number of LWPs that can be created in this zone.
zonecfg:my-zone> add dedicated-cpu
zonecfg:my-zone:dedicated-cpu> set ncpus=1
zonecfg:my-zone:dedicated-cpu> end
One CPU is dedicated to this zone. Please note that the zone cannot be booted if a
dedicated CPU is not available. Also, on a multi-processor machine, only 1 CPU will
be visible to the zone.
zonecfg:my-zone> add capped-memory
zonecfg:my-zone:capped-memory> set physical=100m
zonecfg:my-zone:capped-memory> set swap=512m
zonecfg:my-zone:capped-memory> end
Memory constraints for the available physical and swap memory.
zonecfg:my-zone> set scheduling-class=FSS
The zone will use a Fair Share Scheduler.
zonecfg:my-zone> set ip-type=shared
The ip-type parameter supports two types i.e. shared and explicit. Here, we will
consider the shared type. For the shared ip-type, the IP layer configuration and
state is shared between the non-global and the global zone.
zonecfg:my-zone> add net
zonecfg:my-zone:net> set address=141.89.226.31
zonecfg:my-zone:net> set physical=ce0
zonecfg:my-zone:net> end

5
By adding a network resource, we have provided the zone with a unique IP address,
so that the zone can be uniquely identified from the outside world. That is, even
though the IP layer state and configuration are shared with the global zone, traffic
can still be routed explicitly to the non-global zone.
zonecfg:my-zone> add attr
zonecfg:my-zone:attr> set name=comment
zonecfg:my-zone:attr> set type=string
zonecfg:my-zone:attr> set value="Server OS - Demo zone"
zonecfg:my-zone:attr> end
This is just a comment.
zonecfg:my-zone> verify
The verify command is used to ensure correctness of the configuration. However,
certain aspects (e.g. path to the file system) can only be verified during zone
installation. Please note that these paths must have been created prior to installing
the zone.
zonecfg:my-zone> commit
zonecfg:my-zone> exit
Zone Installation Once the zone has been configured, the next step is to install the zone:
root@tb3:~# zoneadm -z my-zone install
Preparing to install zone <my-zone>.
Creating list of files to copy from the global zone.
Copying <14339> files to the zone.
Initializing zone product registry.
Determining zone package initialization order.
Preparing to initialize <1203> packages on the zone.
Initialized <1203> packages on zone.
Zone <my-zone> is initialized.
Installation of <1> packages was skipped.
6
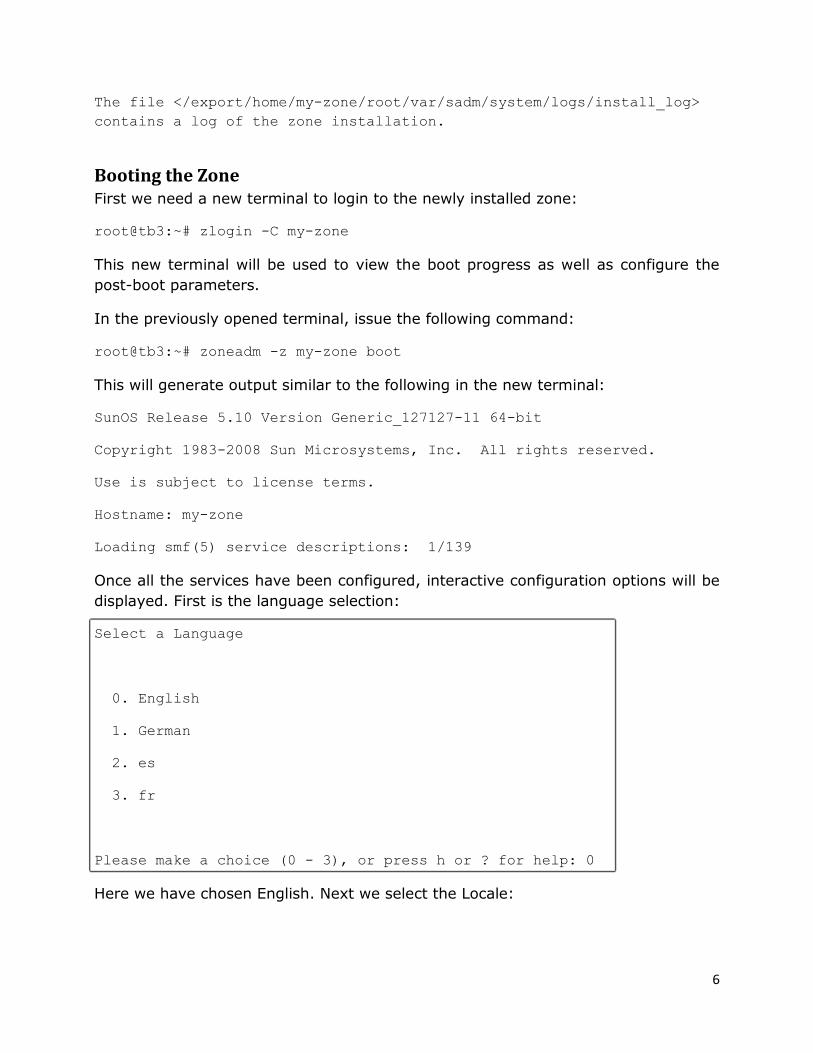
The file </export/home/my-zone/root/var/sadm/system/logs/install_log>
contains a log of the zone installation.
Booting the Zone First we need a new terminal to login to the newly installed zone:
root@tb3:~# zlogin -C my-zone
This new terminal will be used to view the boot progress as well as configure the
post-boot parameters.
In the previously opened terminal, issue the following command:
root@tb3:~# zoneadm -z my-zone boot
This will generate output similar to the following in the new terminal:
SunOS Release 5.10 Version Generic_127127-11 64-bit
Copyright 1983-2008 Sun Microsystems, Inc. All rights reserved.
Use is subject to license terms.
Hostname: my-zone
Loading smf(5) service descriptions: 1/139
Once all the services have been configured, interactive configuration options will be
displayed. First is the language selection:
Select a Language
0. English
1. German
2. es
3. fr
Please make a choice (0 - 3), or press h or ? for help: 0
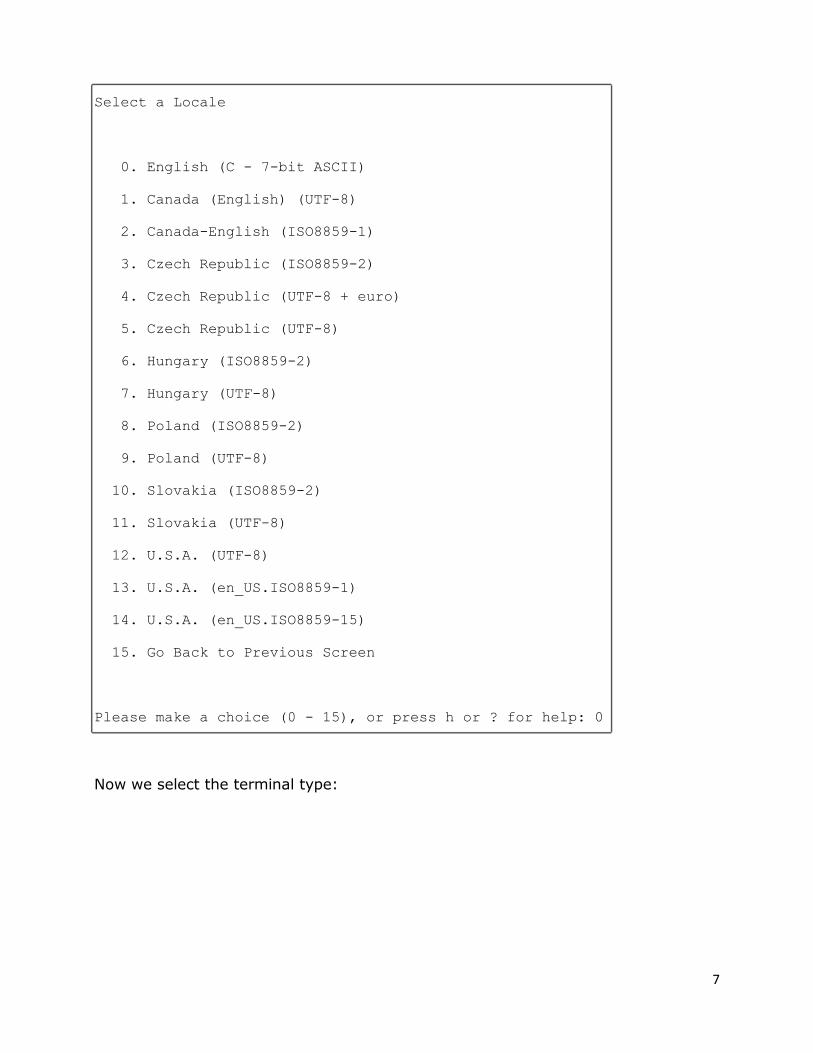
Here we have chosen English. Next we select the Locale:
7
Select a Locale
0. English (C - 7-bit ASCII)
1. Canada (English) (UTF-8)
2. Canada-English (ISO8859-1)
3. Czech Republic (ISO8859-2)
4. Czech Republic (UTF-8 + euro)
5. Czech Republic (UTF-8)
6. Hungary (ISO8859-2)
7. Hungary (UTF-8)
8. Poland (ISO8859-2)
9. Poland (UTF-8)
10. Slovakia (ISO8859-2)
11. Slovakia (UTF-8)
12. U.S.A. (UTF-8)
13. U.S.A. (en_US.ISO8859-1)
14. U.S.A. (en_US.ISO8859-15)
15. Go Back to Previous Screen
Please make a choice (0 - 15), or press h or ? for help: 0
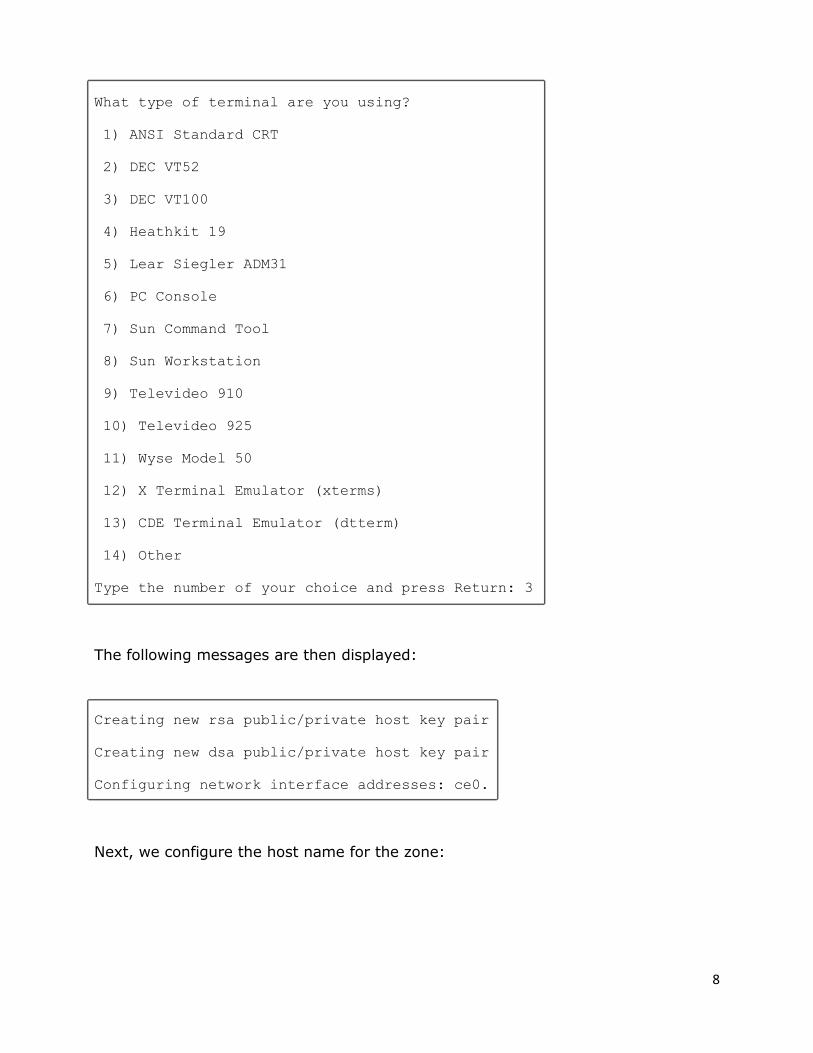
Now we select the terminal type:
8
What type of terminal are you using?
1) ANSI Standard CRT
2) DEC VT52
3) DEC VT100
4) Heathkit 19
5) Lear Siegler ADM31
6) PC Console
7) Sun Command Tool
8) Sun Workstation
9) Televideo 910
10) Televideo 925
11) Wyse Model 50
12) X Terminal Emulator (xterms)
13) CDE Terminal Emulator (dtterm)
14) Other
Type the number of your choice and press Return: 3
The following messages are then displayed:
Creating new rsa public/private host key pair
Creating new dsa public/private host key pair
Configuring network interface addresses: ce0.
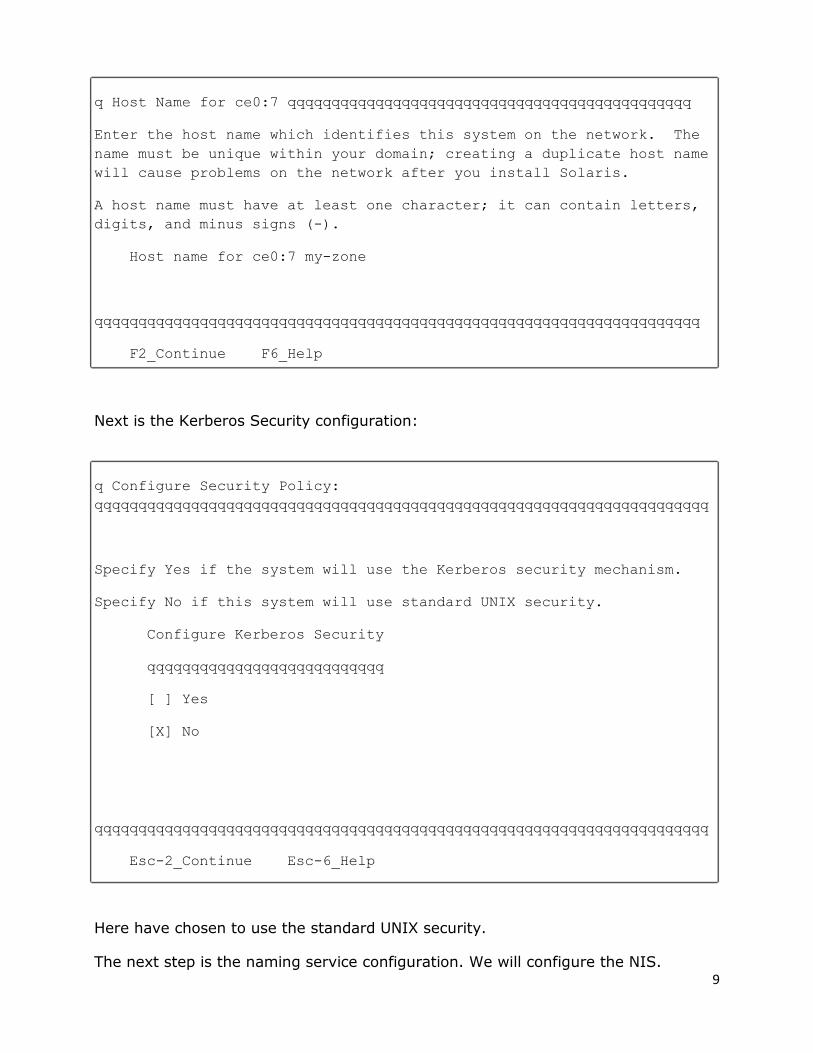
Next, we configure the host name for the zone:
9
q Host Name for ce0:7 qqqqqqqqqqqqqqqqqqqqqqqqqqqqqqqqqqqqqqqqqqqqqq
Enter the host name which identifies this system on the network. The
name must be unique within your domain; creating a duplicate host name
will cause problems on the network after you install Solaris.
A host name must have at least one character; it can contain letters,
digits, and minus signs (-).
Host name for ce0:7 my-zone
qqqqqqqqqqqqqqqqqqqqqqqqqqqqqqqqqqqqqqqqqqqqqqqqqqqqqqqqqqqqqqqqqqqqq
F2_Continue F6_Help
Next is the Kerberos Security configuration:
q Configure Security Policy:
qqqqqqqqqqqqqqqqqqqqqqqqqqqqqqqqqqqqqqqqqqqqqqqqqqqqqqqqqqqqqqqqqqqqqq
Specify Yes if the system will use the Kerberos security mechanism.
Specify No if this system will use standard UNIX security.
Configure Kerberos Security
qqqqqqqqqqqqqqqqqqqqqqqqqqq
[ ] Yes
[X] No
qqqqqqqqqqqqqqqqqqqqqqqqqqqqqqqqqqqqqqqqqqqqqqqqqqqqqqqqqqqqqqqqqqqqqq
Esc-2_Continue Esc-6_Help
Here have chosen to use the standard UNIX security.
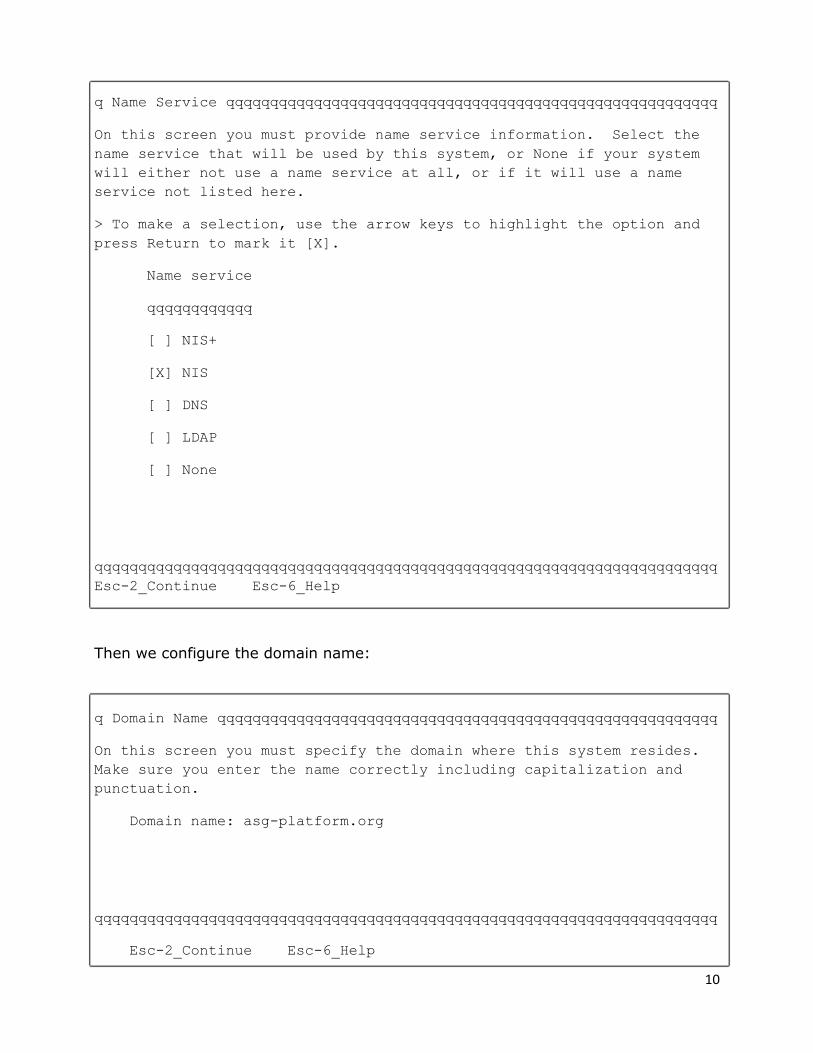
The next step is the naming service configuration. We will configure the NIS.
10
q Name Service qqqqqqqqqqqqqqqqqqqqqqqqqqqqqqqqqqqqqqqqqqqqqqqqqqqqqqqq
On this screen you must provide name service information. Select the
name service that will be used by this system, or None if your system
will either not use a name service at all, or if it will use a name
service not listed here.
> To make a selection, use the arrow keys to highlight the option and
press Return to mark it [X].
Name service
qqqqqqqqqqqq
[ ] NIS+
[X] NIS
[ ] DNS
[ ] LDAP
[ ] None
qqqqqqqqqqqqqqqqqqqqqqqqqqqqqqqqqqqqqqqqqqqqqqqqqqqqqqqqqqqqqqqqqqqqqqq
Esc-2_Continue Esc-6_Help
Then we configure the domain name:
q Domain Name qqqqqqqqqqqqqqqqqqqqqqqqqqqqqqqqqqqqqqqqqqqqqqqqqqqqqqqqq
On this screen you must specify the domain where this system resides.
Make sure you enter the name correctly including capitalization and
punctuation.
Domain name: asg-platform.org
qqqqqqqqqqqqqqqqqqqqqqqqqqqqqqqqqqqqqqqqqqqqqqqqqqqqqqqqqqqqqqqqqqqqqqq
Esc-2_Continue Esc-6_Help

11
Specify whether the name server should be configured automatically or manually:
q Name Server qqqqqqqqqqqqqqqqqqqqqqqqqqqqqqqqqqqqqqqqqqqqqqqqqqqqqqqq
On this screen you must specify how to find a name server for this
system. You can let the software try to find one, or you can specify
one. The software can find a name server only if it is on your local
subnet.
> To make a selection, use the arrow keys to highlight the option and
press Return to mark it [X].
Name server
qqqqqqqqqqqqqqq
[ ] Find one
[X] Specify one
qqqqqqqqqqqqqqqqqqqqqqqqqqqqqqqqqqqqqqqqqqqqqqqqqqqqqqqqqqqqqqqqqqqqqq
Esc-2_Continue Esc-6_Help
Configure the name server:
q Name Server Information qqqqqqqqqqqqqqqqqqqqqqqqqqqqqqqqqqqqqqqqqqqq
On this screen you must enter the host name and IP address of your name
server. Host names must be at least two characters, and may contain
letters, digits, and minus signs (-). IP addresses must contain four
sets of numbers separated by periods (for example 129.200.9.1).
Server's host name: tb0
Server's IP address: 141.89.226.2
qqqqqqqqqqqqqqqqqqqqqqqqqqqqqqqqqqqqqqqqqqqqqqqqqqqqqqqqqqqqqqqqqqqqqq
Esc-2_Continue Esc-6_Help

12
Next:
q NFSv4 Domain Name qqqqqqqqqqqqqqqqqqqqqqqqqqqqqqqqqqqqqqqqqqqqqqqqqqq
NFS version 4 uses a domain name that is automatically derived from the
system's naming services. The derived domain name is sufficient for
most configurations. In a few cases, mounts that cross domain
boundaries might cause files to appear to be owned by "nobody" due to
the lack of a common domain name.
The current NFSv4 default domain is: "org"
NFSv4 Domain Configuration
qqqqqqqqqqqqqqqqqqqqqqqqqqqqqqqqqqqqqqqqqqqqqq
[X] Use the NFSv4 domain derived by the system
[ ] Specify a different NFSv4 domain
qqqqqqqqqqqqqqqqqqqqqqqqqqqqqqqqqqqqqqqqqqqqqqqqqqqqqqqqqqqqqqqqqqqqqqq
Esc-2_Continue Esc-6_Help
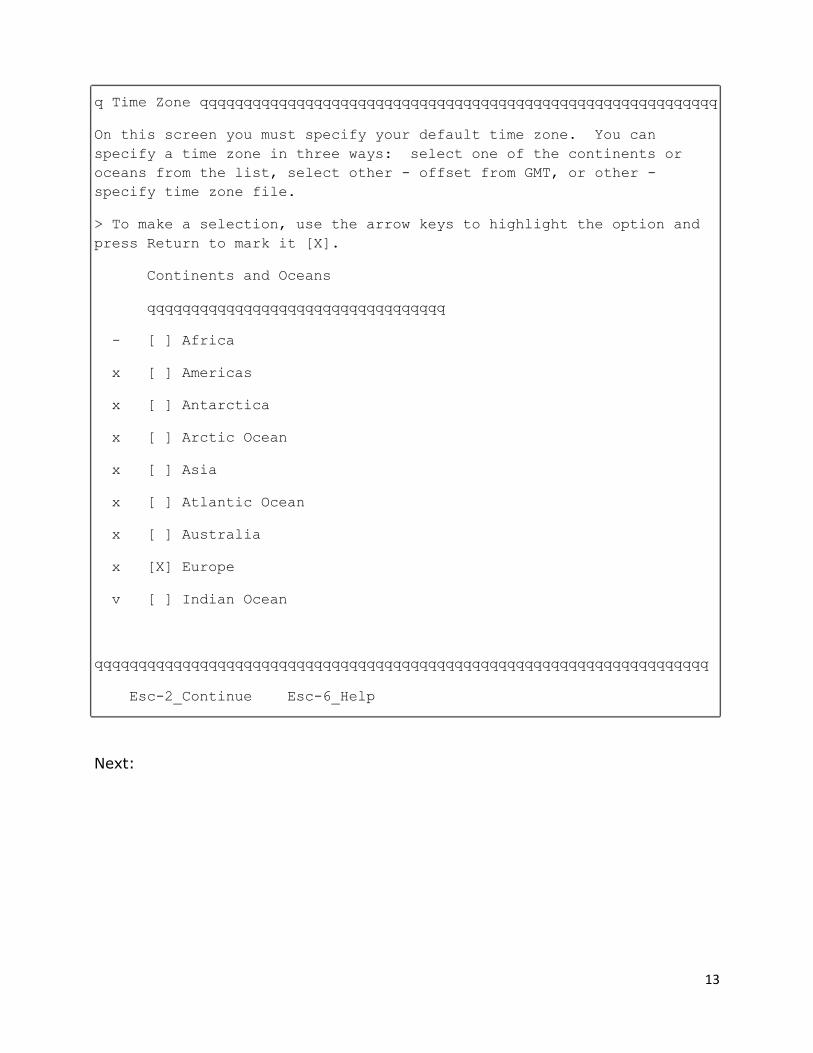
Configure the time zone:
13
q Time Zone qqqqqqqqqqqqqqqqqqqqqqqqqqqqqqqqqqqqqqqqqqqqqqqqqqqqqqqqqqq
On this screen you must specify your default time zone. You can
specify a time zone in three ways: select one of the continents or
oceans from the list, select other - offset from GMT, or other -
specify time zone file.
> To make a selection, use the arrow keys to highlight the option and
press Return to mark it [X].
Continents and Oceans
qqqqqqqqqqqqqqqqqqqqqqqqqqqqqqqqqq
- [ ] Africa
x [ ] Americas
x [ ] Antarctica
x [ ] Arctic Ocean
x [ ] Asia
x [ ] Atlantic Ocean
x [ ] Australia
x [X] Europe
v [ ] Indian Ocean
qqqqqqqqqqqqqqqqqqqqqqqqqqqqqqqqqqqqqqqqqqqqqqqqqqqqqqqqqqqqqqqqqqqqqq
Esc-2_Continue Esc-6_Help
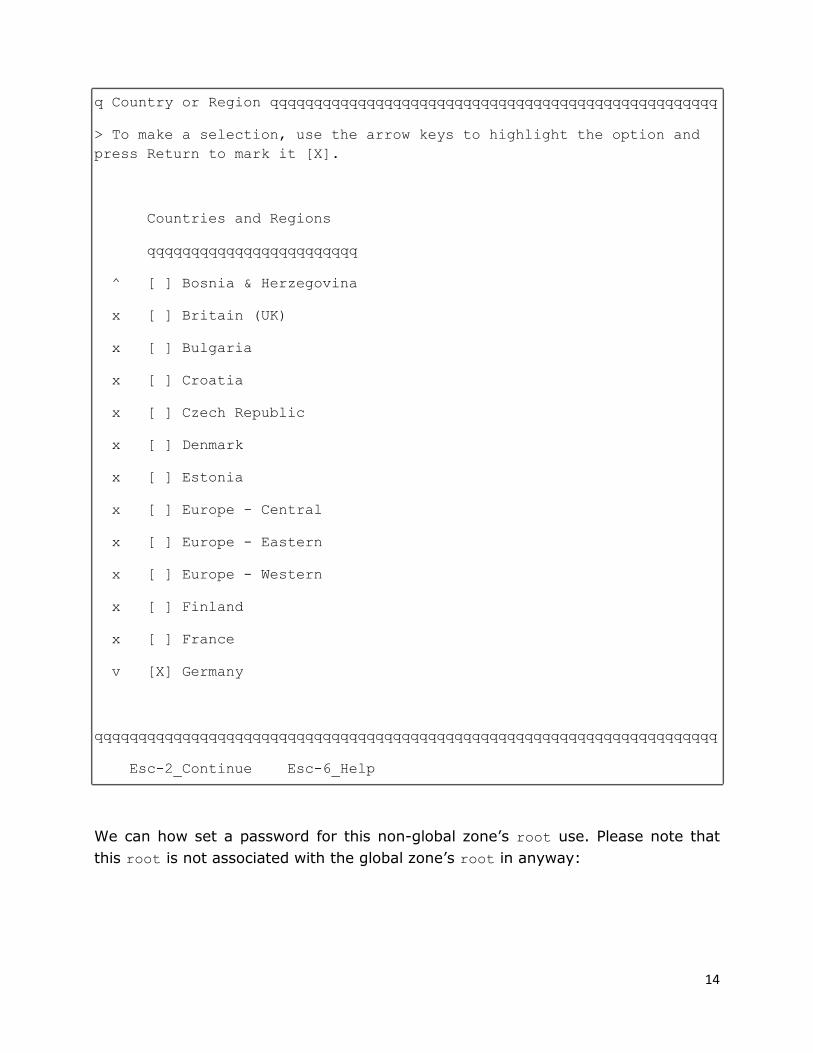
Next:
14
q Country or Region qqqqqqqqqqqqqqqqqqqqqqqqqqqqqqqqqqqqqqqqqqqqqqqqqqq
> To make a selection, use the arrow keys to highlight the option and
press Return to mark it [X].
Countries and Regions
qqqqqqqqqqqqqqqqqqqqqqqq
^ [ ] Bosnia & Herzegovina
x [ ] Britain (UK)
x [ ] Bulgaria
x [ ] Croatia
x [ ] Czech Republic
x [ ] Denmark
x [ ] Estonia
x [ ] Europe - Central
x [ ] Europe - Eastern
x [ ] Europe - Western
x [ ] Finland
x [ ] France
v [X] Germany
qqqqqqqqqqqqqqqqqqqqqqqqqqqqqqqqqqqqqqqqqqqqqqqqqqqqqqqqqqqqqqqqqqqqqqq
Esc-2_Continue Esc-6_Help
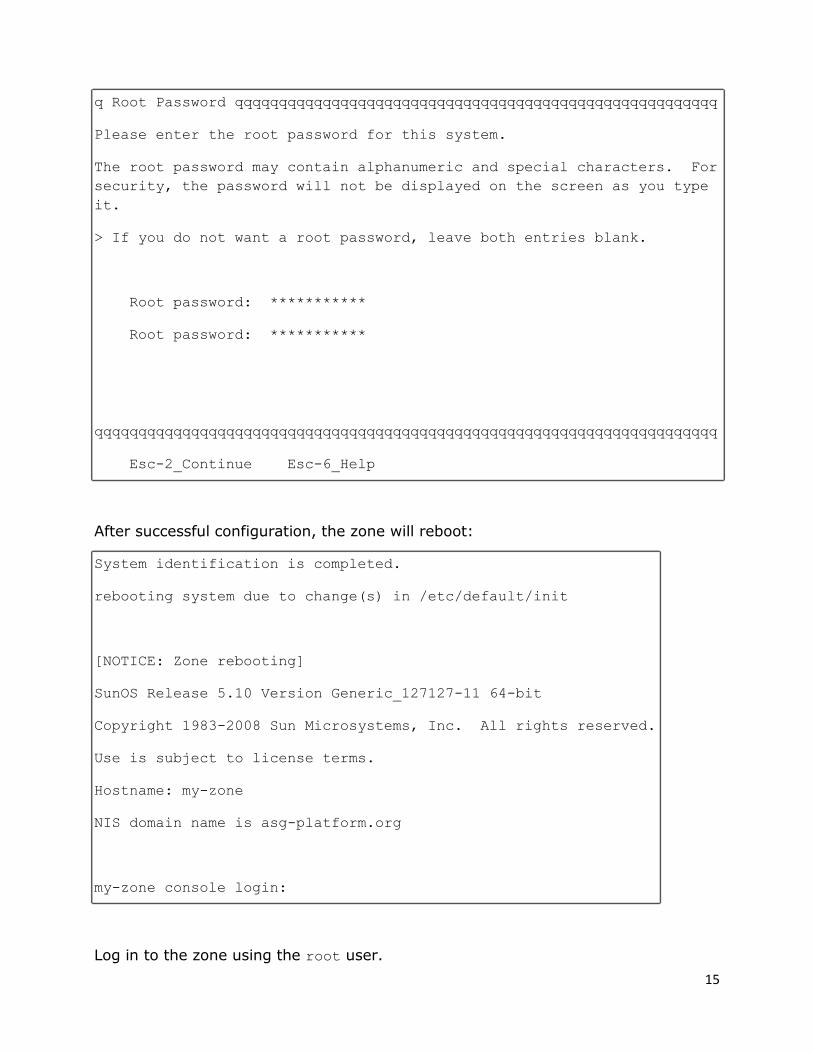
We can how set a password for this non-global zone’s root use. Please note that
this root is not associated with the global zone’s root in anyway:
15
q Root Password qqqqqqqqqqqqqqqqqqqqqqqqqqqqqqqqqqqqqqqqqqqqqqqqqqqqqqq
Please enter the root password for this system.
The root password may contain alphanumeric and special characters. For
security, the password will not be displayed on the screen as you type
it.
> If you do not want a root password, leave both entries blank.
Root password: ***********
Root password: ***********
qqqqqqqqqqqqqqqqqqqqqqqqqqqqqqqqqqqqqqqqqqqqqqqqqqqqqqqqqqqqqqqqqqqqqqq
Esc-2_Continue Esc-6_Help
After successful configuration, the zone will reboot:
System identification is completed.
rebooting system due to change(s) in /etc/default/init
[NOTICE: Zone rebooting]
SunOS Release 5.10 Version Generic_127127-11 64-bit
Copyright 1983-2008 Sun Microsystems, Inc. All rights reserved.
Use is subject to license terms.
Hostname: my-zone
NIS domain name is asg-platform.org
my-zone console login:
Log in to the zone using the root user.

16
DNS configuration for the zone The following steps are required to configure the DNS:
1. Create /etc/resolve.conf with the following information:
nameserver 141.89.266.2
domain asg-platform.org
2. Edit /etc/nsswitch.conf and update the following parameters with the
given values:
hosts: files dns
ipnodes: files dns
Verify the DNS configuration:
bash-3.00# ping www.uni-potsdam.de
www.uni-potsdam.de is alive
Halting a zone The following command can be used to safely shut down a running non-global zone
from the global zone:
root@tb3:~# zlogin my-zone shutdown -y g0 -i 0
Shutdown started. Fri Jul 15 18:51:42 CEST 2011
The following command can be used to forcefully halt the zone:
root@tb3:~# zoneadm -z my-zone halt
The non-global zone should now be in the installed state. The following command
can be used to verify the zone’s state:
root@tb3:~# zoneadm list -iv
ID NAME STATUS PATH BRAND IP
0 global running / native shared
- my-zone installed /export/home/my-zone native shared
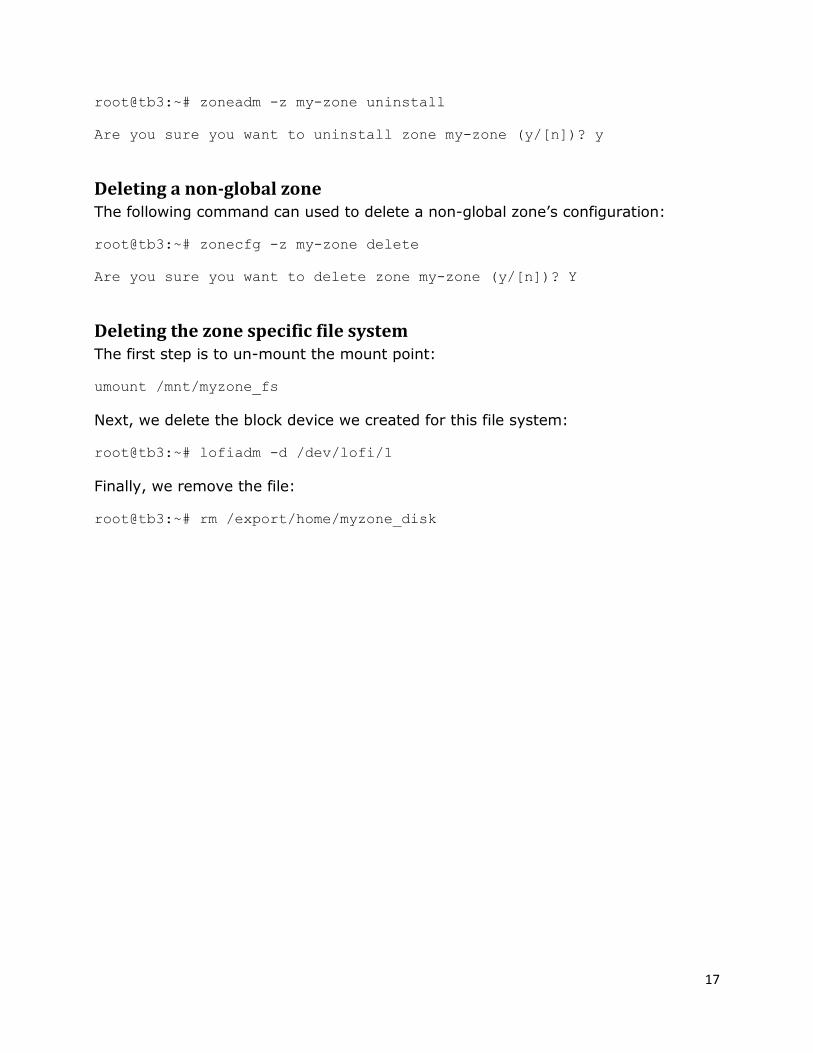
Uninstalling a non-global zone The following command can be used to uninstall a non-global zone:
17
root@tb3:~# zoneadm -z my-zone uninstall
Are you sure you want to uninstall zone my-zone (y/[n])? y
Deleting a non-global zone The following command can used to delete a non-global zone’s configuration:
root@tb3:~# zonecfg -z my-zone delete
Are you sure you want to delete zone my-zone (y/[n])? Y
Deleting the zone specific file system The first step is to un-mount the mount point:
umount /mnt/myzone_fs
Next, we delete the block device we created for this file system:
root@tb3:~# lofiadm -d /dev/lofi/1
Finally, we remove the file:
root@tb3:~# rm /export/home/myzone_disk

18
Further Reading
Official Documentation from Oracle The most significant resource is the System Administration Guide: Oracle
Solaris Containers-Resource Management and Oracle Solaris Zones:
http://download.oracle.com/docs/cd/E19455-01/817-1592/index.html
Part II of the guide is a detailed administration guide for Zones.
“Consolidating Applications with Oracle Solaris Containers”
http://www.oracle.com/us/products/servers-storage/solaris/consolid-solaris-containers-wp-
075578.pdf
“Fair Share Scheduler (Overview)”: http://download.oracle.com/docs/cd/E19963-
01/html/821-1460/rmfss-1.html
Documentation regarding commands Solaris Man pages are available for every command used in this tutorial. For
detailed information regarding the command, please refer to the
corresponding man page. E.g. man zonecfg
19
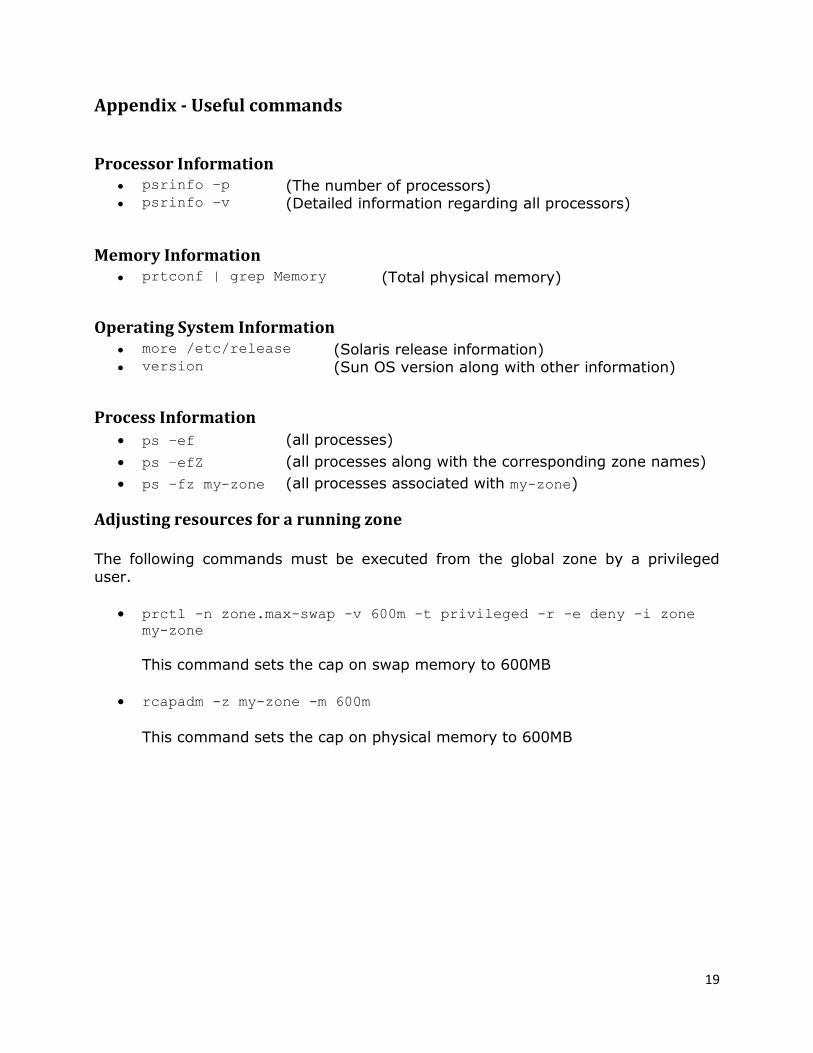
Appendix - Useful commands
Processor Information psrinfo –p (The number of processors) psrinfo –v (Detailed information regarding all processors)
Memory Information prtconf | grep Memory (Total physical memory)
Operating System Information more /etc/release (Solaris release information) version (Sun OS version along with other information)
Process Information
ps –ef (all processes)
ps –efZ (all processes along with the corresponding zone names)
ps –fz my-zone (all processes associated with my-zone)
Adjusting resources for a running zone The following commands must be executed from the global zone by a privileged
user.
prctl -n zone.max-swap -v 600m -t privileged -r -e deny -i zone
my-zone
This command sets the cap on swap memory to 600MB
rcapadm -z my-zone -m 600m
This command sets the cap on physical memory to 600MB


![Virtualization Monitoring in Solaris Zones - · PDF filealso possible to set caps for swap and locked memory. ... 2G )) [swap: 3G]) ... Virtualization Monitoring in Solaris Zones](https://img.pdfslide.us/doc/110x75/5aaf3d697f8b9a25088d48cb/virtualization-monitoring-in-solaris-zones-possible-to-set-caps-for-swap-and-locked.jpg)