Embed Size (px)
Citation preview
Tutorial 2 1
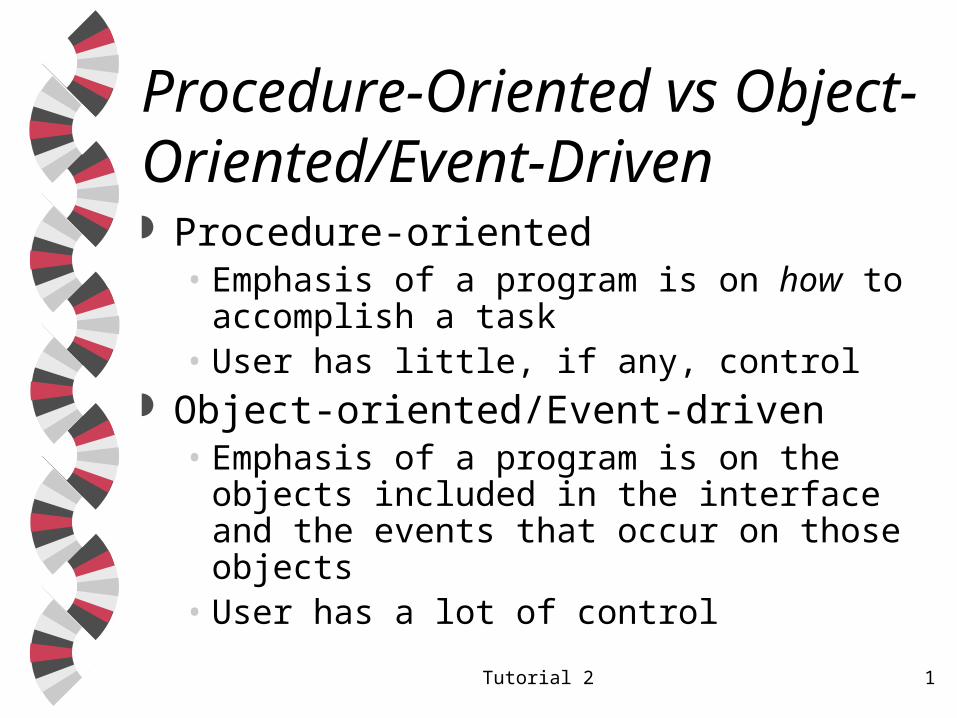
Procedure-Oriented vs Object-Oriented/Event-Driven Procedure-oriented
• Emphasis of a program is on how to accomplish a task
• User has little, if any, control Object-oriented/Event-driven
• Emphasis of a program is on the objects included in the interface and the events that occur on those objects
• User has a lot of control
Tutorial 2 2
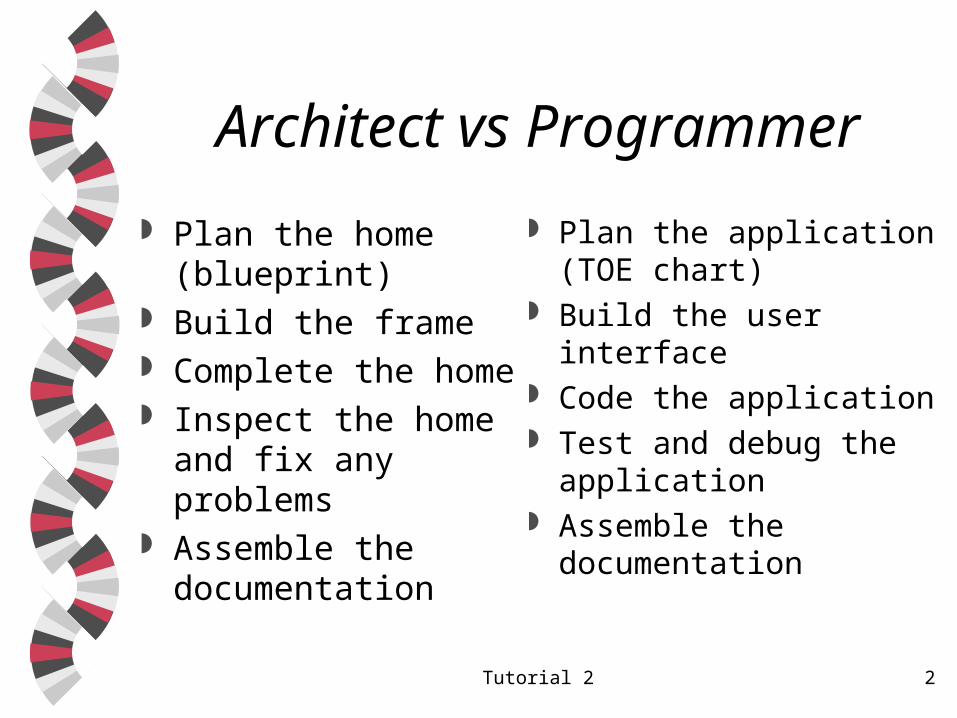
Architect vs Programmer
Plan the home (blueprint)
Build the frame Complete the home Inspect the home and
fix any problems Assemble the
documentation
Plan the application (TOE chart)
Build the user interface Code the application Test and debug the
application Assemble the
documentation
Tutorial 2 3
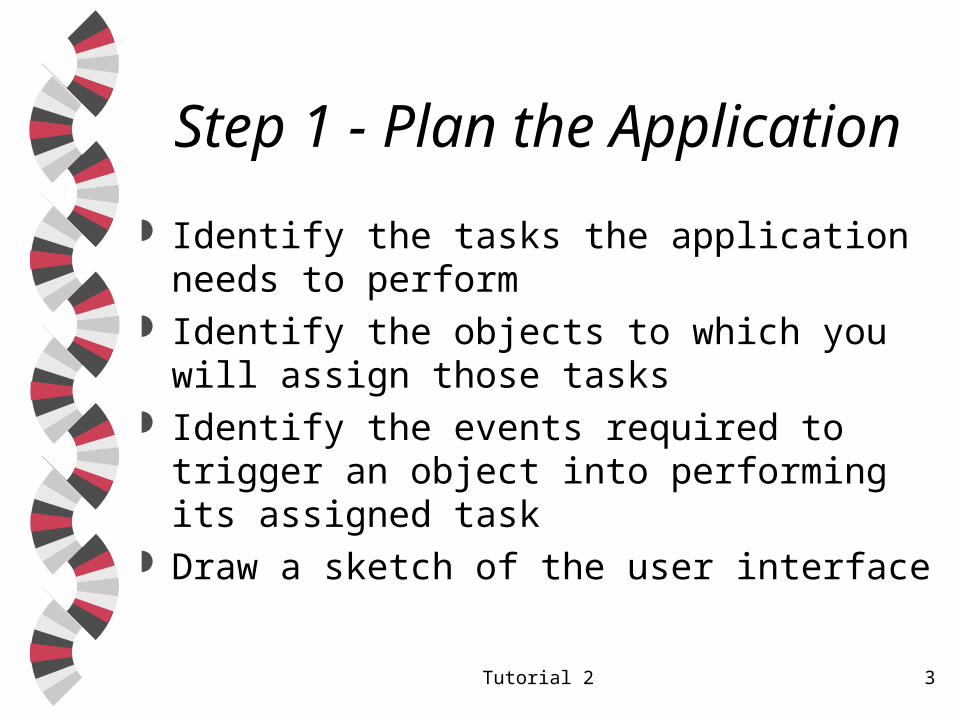
Step 1 - Plan the Application
Identify the tasks the application needs to perform
Identify the objects to which you will assign those tasks
Identify the events required to trigger an object into performing its assigned task
Draw a sketch of the user interface
Tutorial 2 4
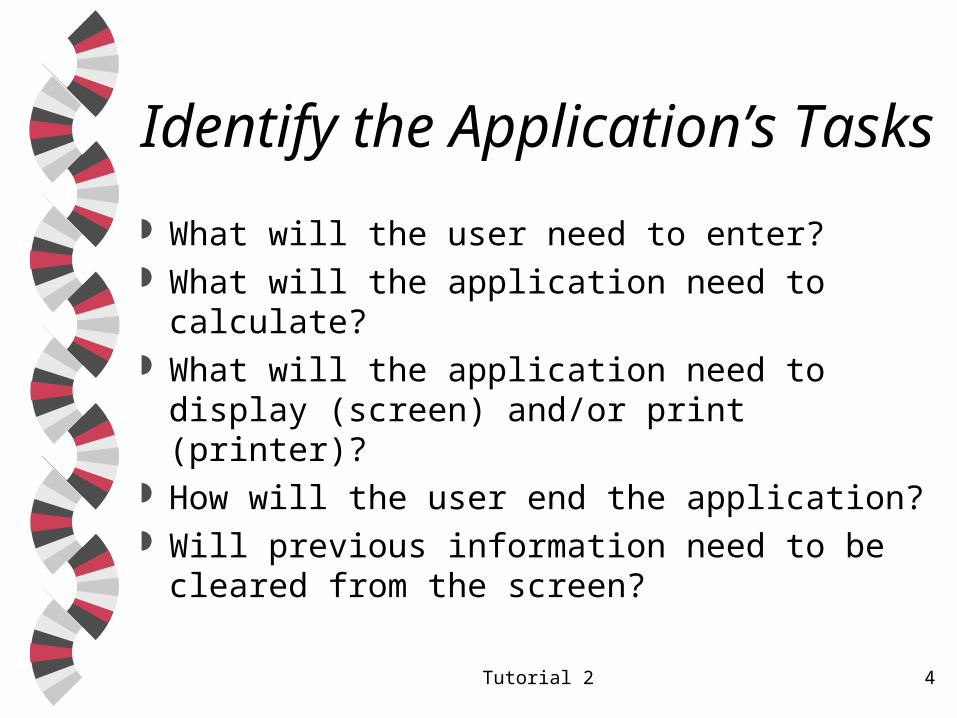
Identify the Application’s Tasks
What will the user need to enter? What will the application need to calculate? What will the application need to display
(screen) and/or print (printer)? How will the user end the application? Will previous information need to be
cleared from the screen?
Tutorial 2 5
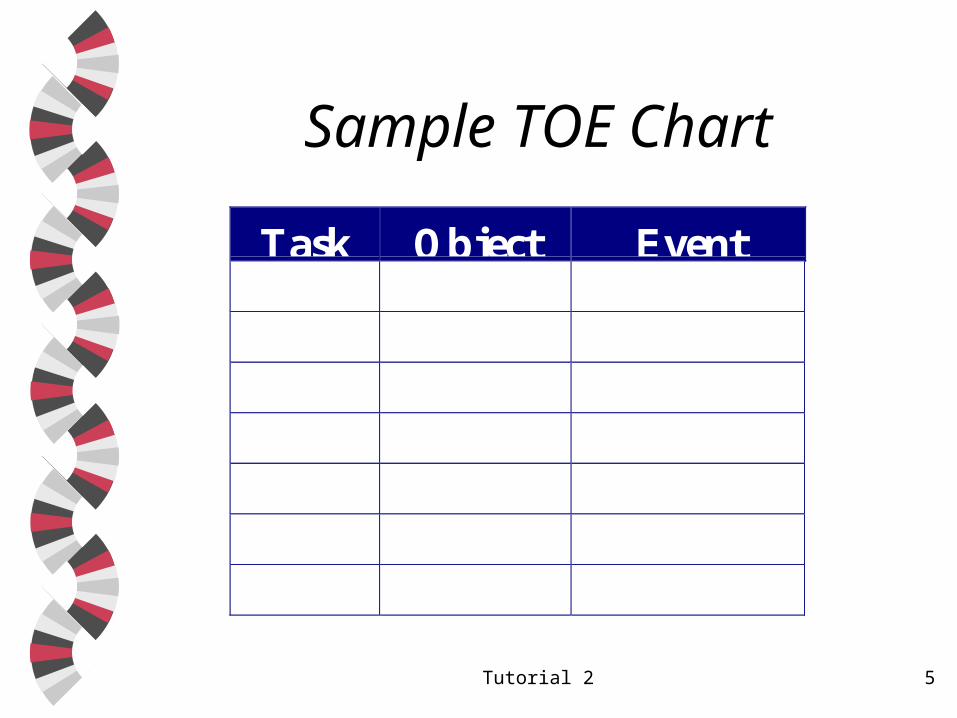
Sample TOE Chart
Task Object Event
Tutorial 2 6
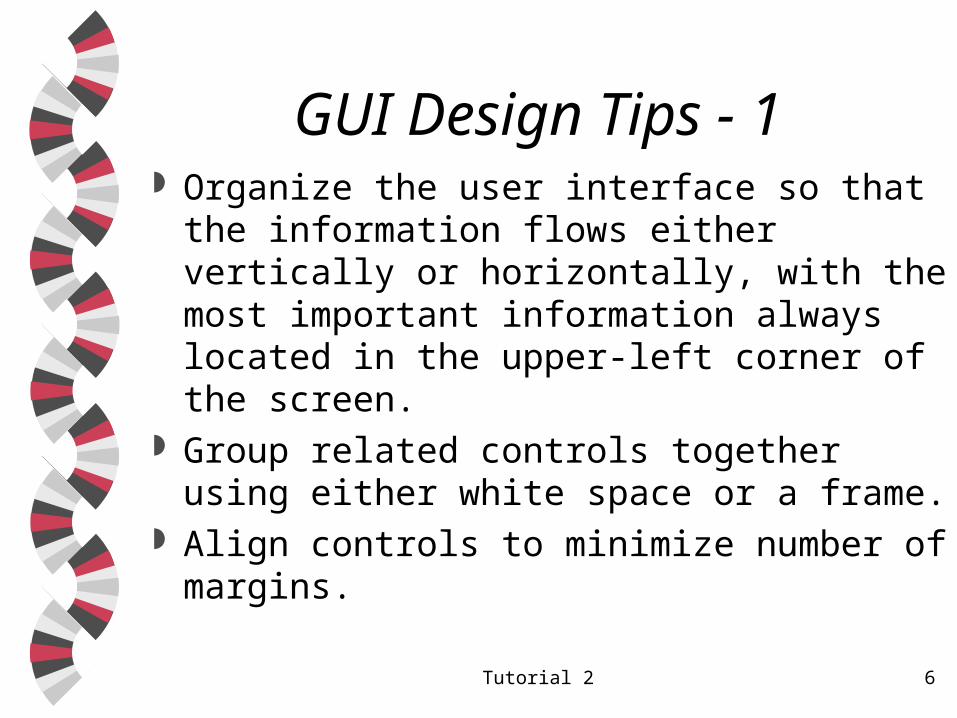
GUI Design Tips - 1 Organize the user interface so that the
information flows either vertically or horizontally, with the most important information always located in the upper-left corner of the screen.
Group related controls together using either white space or a frame.
Align controls to minimize number of margins.
Tutorial 2 7
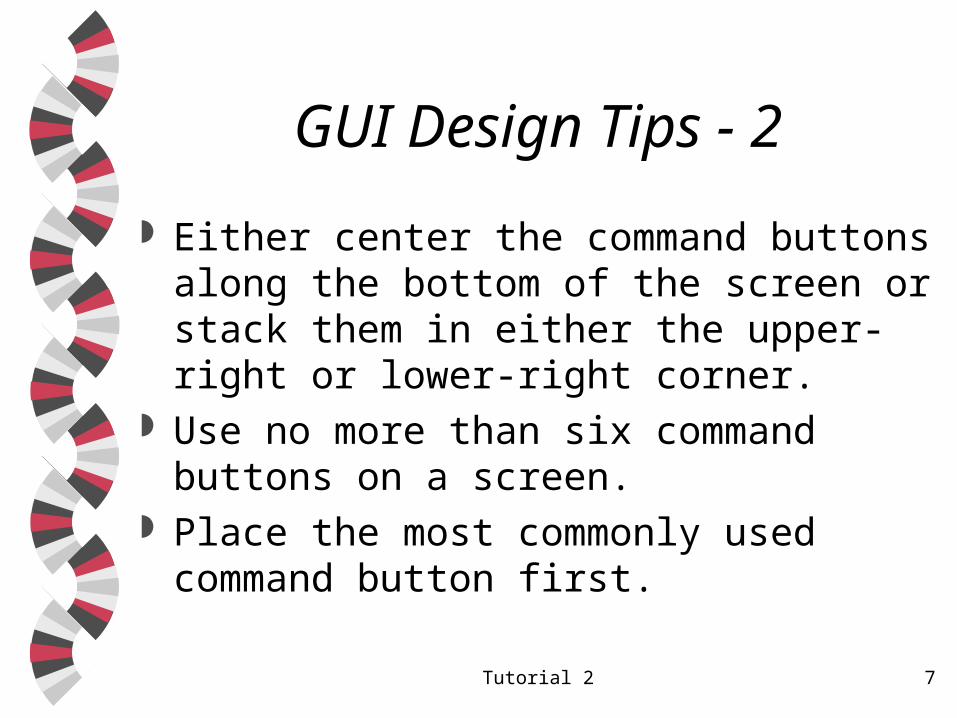
GUI Design Tips - 2
Either center the command buttons along the bottom of the screen or stack them in either the upper-right or lower-right corner.
Use no more than six command buttons on a screen.
Place the most commonly used command button first.
Tutorial 2 8
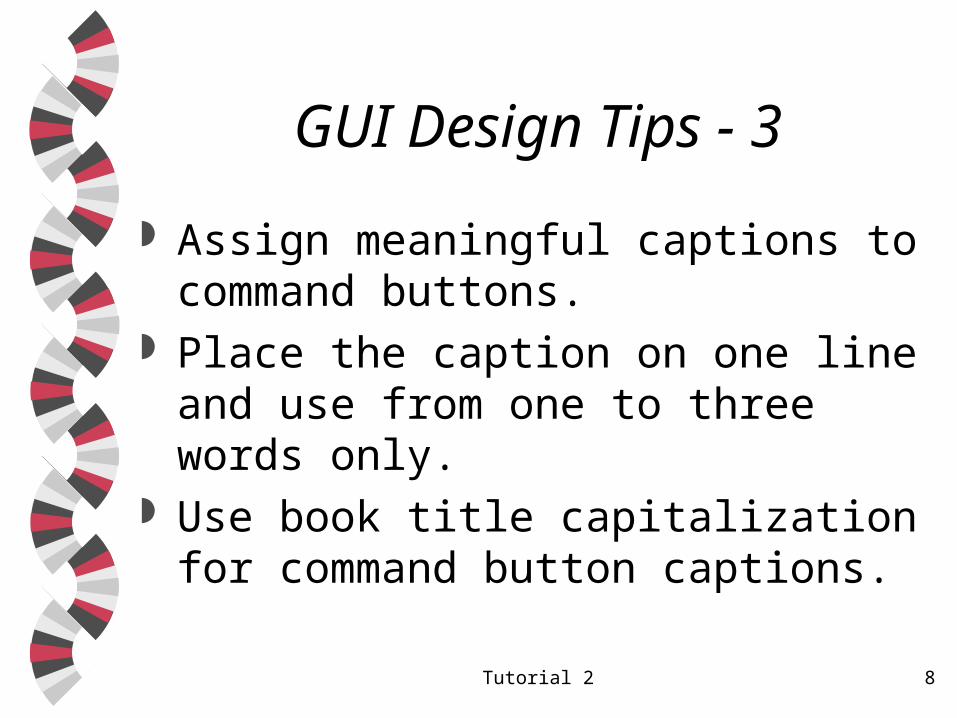
GUI Design Tips - 3
Assign meaningful captions to command buttons.
Place the caption on one line and use from one to three words only.
Use book title capitalization for command button captions.
Tutorial 2 9
GUI Design Tips - 4 Label each control in the interface. The
label should be from one to three words only, and it should be entered on one line.
Align each label on the left, and position each either above or to the left of the control it identifies.
Follow the label with a colon (:) and use sentence capitalization.
Tutorial 2 10
Step 2 - Build the User Interface
Use the sketch you drew during the Planning step.
Follow the GUI design guidelines.
Tutorial 2 11
More GUI Design Tips - 1 Maintain a consistent margin of two or
three dots from the edge of the window. Position related controls on succeeding
dots. Controls that are not part of any logical grouping may be positioned from two to four dots away from other controls.
Try to create an interface that no one notices.
Tutorial 2 12
More GUI Design Tips - 2 Command buttons in the interface should be
sized relative to each other. • If the command buttons are centered on the
bottom of the screen, then each button should be the same height; there widths, however, may vary.
• If the command buttons are stacked in a corner, then each should be the same height and the same width.

Tutorial 2 13
More GUI Design Tips - 3 The human eye is attracted to pictures
before text, so include a graphic only if it is necessary to do so.
If you are including the graphic for aesthetics only, use a small graphic and place it in a location that will not distract the user.
Tutorial 2 14
More GUI Design Tips - 4 Use 8, 10, or 12 point fonts for the elements
in the user interface. Use only one or two font sizes. Use a sans serif font for the text. Use only one font type for all of the text. Avoid italics and underlining.
Tutorial 2 15
More GUI Design Tips - 5 The human eye is attracted to color before
black and white. Build the interface using black, white, and
gray first, then add color only if you have a good reason to do so.
Use either white, off-white, light gray, pale blue, or pale yellow for an application’s background, and use black for the text.

Tutorial 2 16
More GUI Design Tips - 6 Always use dark text on a light background
because it is the easiest to read. Never use a dark color for the background or
a light color for the text. Limit the number of colors (other than white,
black, and gray) to three. Never use color as the only means of
identification for an interface element.
Tutorial 2 17
More Properties
BackStyle—determines whether the label is transparent or opaque
BorderStyle—determines the style of the object’s border
Appearance—determines if the control appears flat or three-dimensional
Tutorial 2 18
Caption vs Text
Text box controls have a Text property.
Forms and label controls have a Caption
property.
Tutorial 2 19
TabIndex Property
Determines the order in which a control receives the focus when the user is using the Tab key to tab through the controls in the interface.
The value of the TabIndex property for the first control placed on a form is 0.
Tutorial 2 20
Access Keys
Allows the user to select an object using the Alt key in combination with a letter or number.
Assign an access key to each of the essential elements in the interface.• mouse may be inoperative• accommodate fast typists• accommodate people with disabilities
Tutorial 2 21
More on Access Keys Each access key must be unique. You can assign an access key to any control
that has a Caption property. Place an & to the left of the desired letter in
the Caption property. To give keyboard access to a text box,
assign an access key to its identifying label, then set the label’s TabIndex value to one less than the text box’s TabIndex value.
Tutorial 2 22
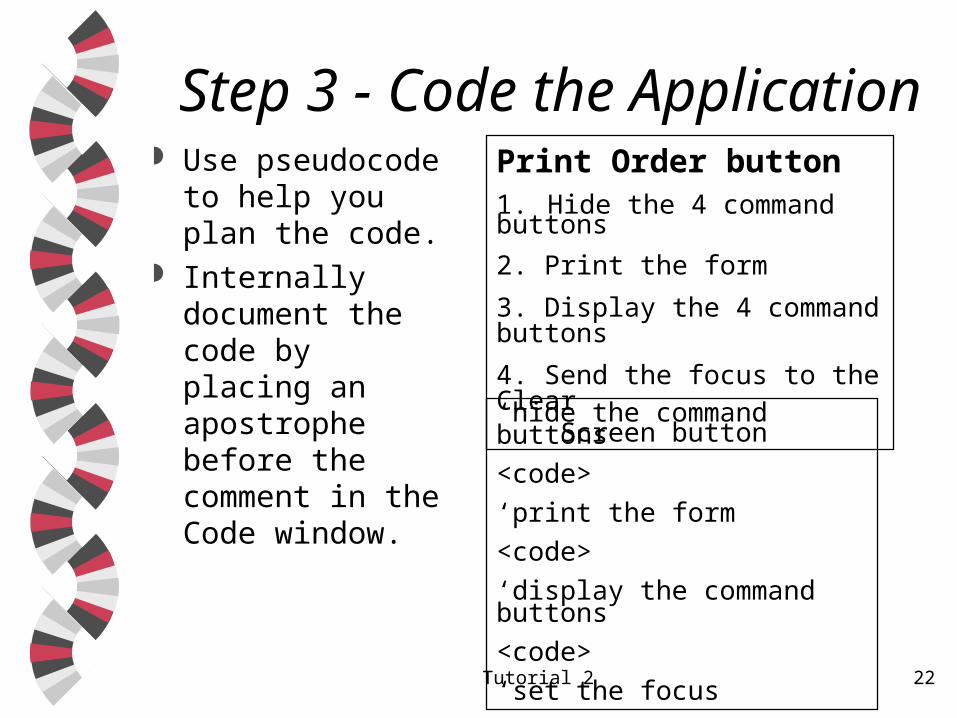
Step 3 - Code the Application Use pseudocode
to help you plan the code.
Internally document the code by placing an apostrophe before the comment in the Code window.
Print Order button1. Hide the 4 command buttons
2. Print the form
3. Display the 4 command buttons
4. Send the focus to the Clear Screen button
‘hide the command buttons
<code>
‘print the form
<code>
‘display the command buttons
<code>
‘set the focus
Tutorial 2 23
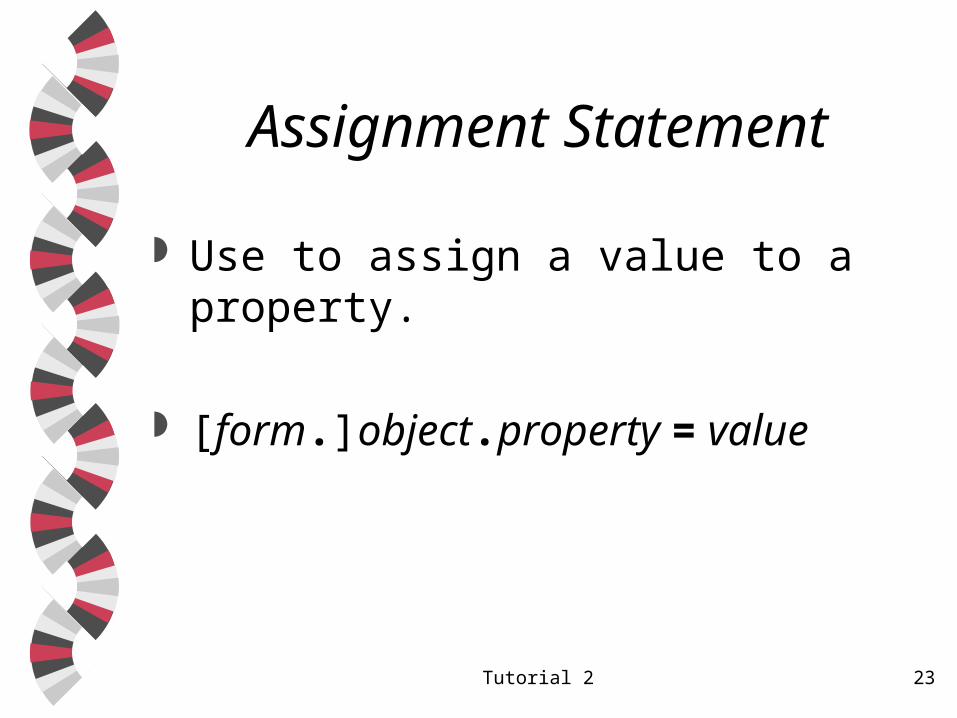
Assignment Statement
Use to assign a value to a property.
[form.]object.property = value
Tutorial 2 24
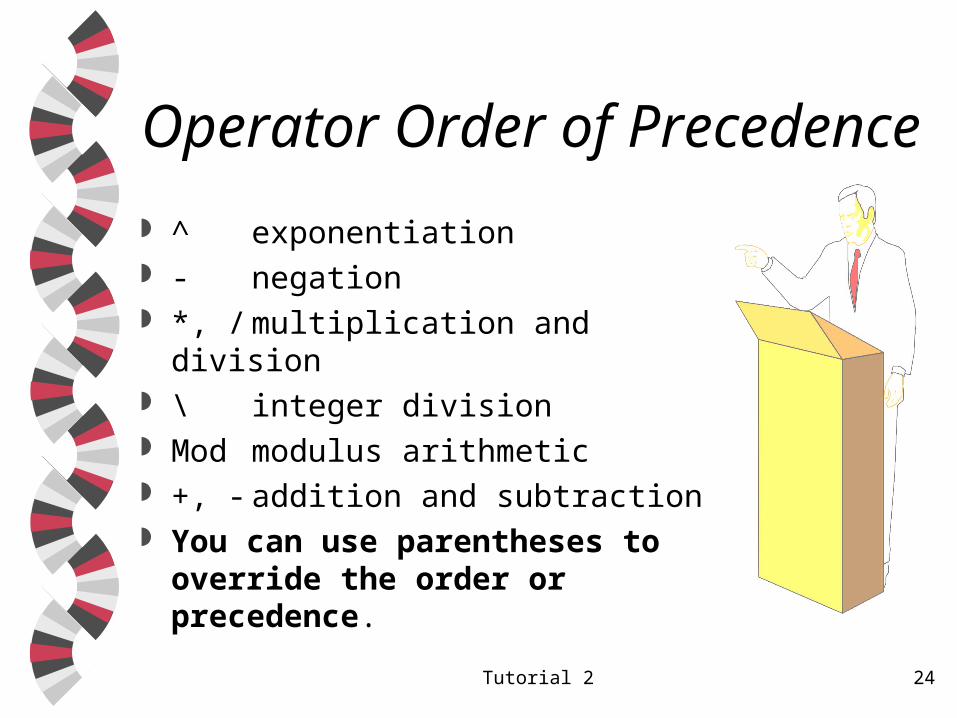
Operator Order of Precedence
^ exponentiation - negation *, / multiplication and division \ integer division Mod modulus arithmetic +, - addition and subtraction You can use parentheses to override
the order or precedence.
Tutorial 2 25
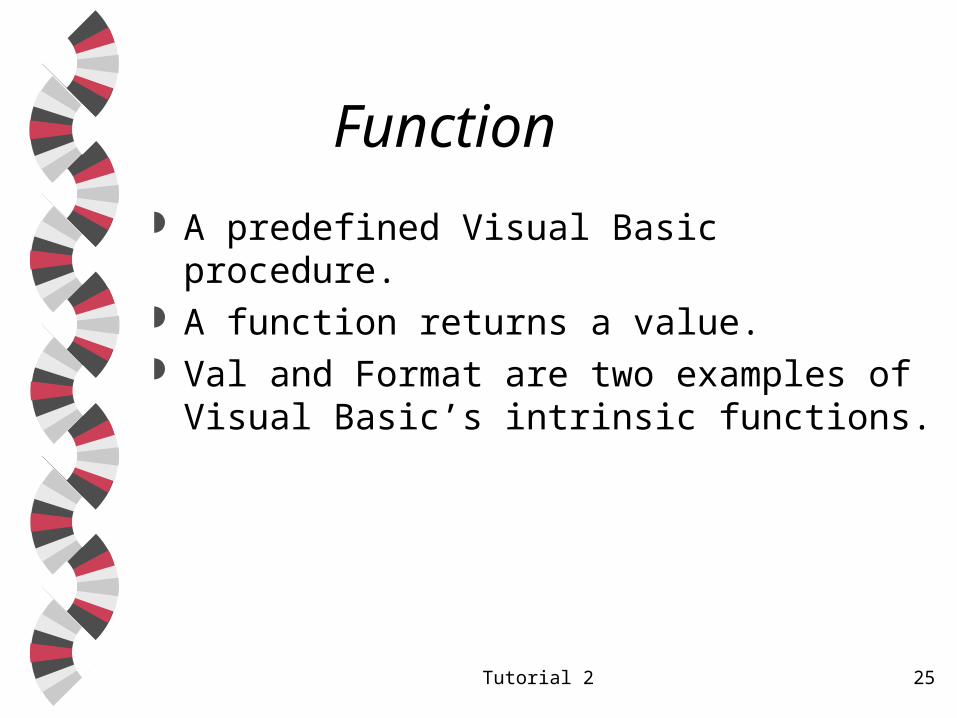
Function
A predefined Visual Basic procedure. A function returns a value. Val and Format are two examples of Visual
Basic’s intrinsic functions.
Tutorial 2 26
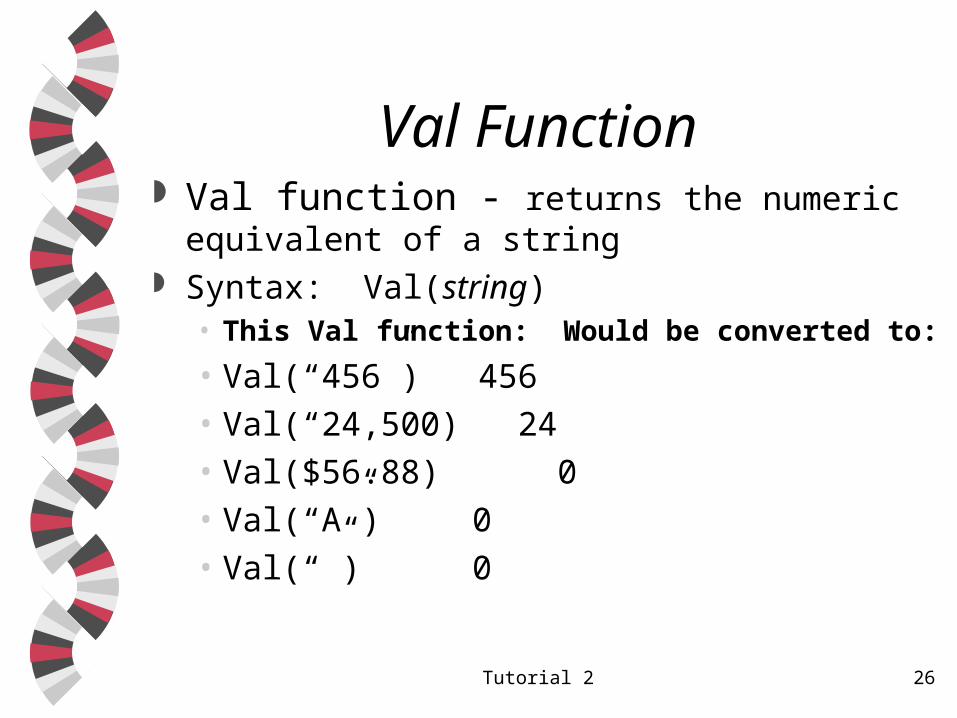
Val Function Val function - returns the numeric equivalent of a
string Syntax: Val(string)
• This Val function: Would be converted to:
• Val(“456”) 456• Val(“24,500) 24• Val($56.88) 0• Val(“A”) 0• Val(“”) 0
Tutorial 2 27
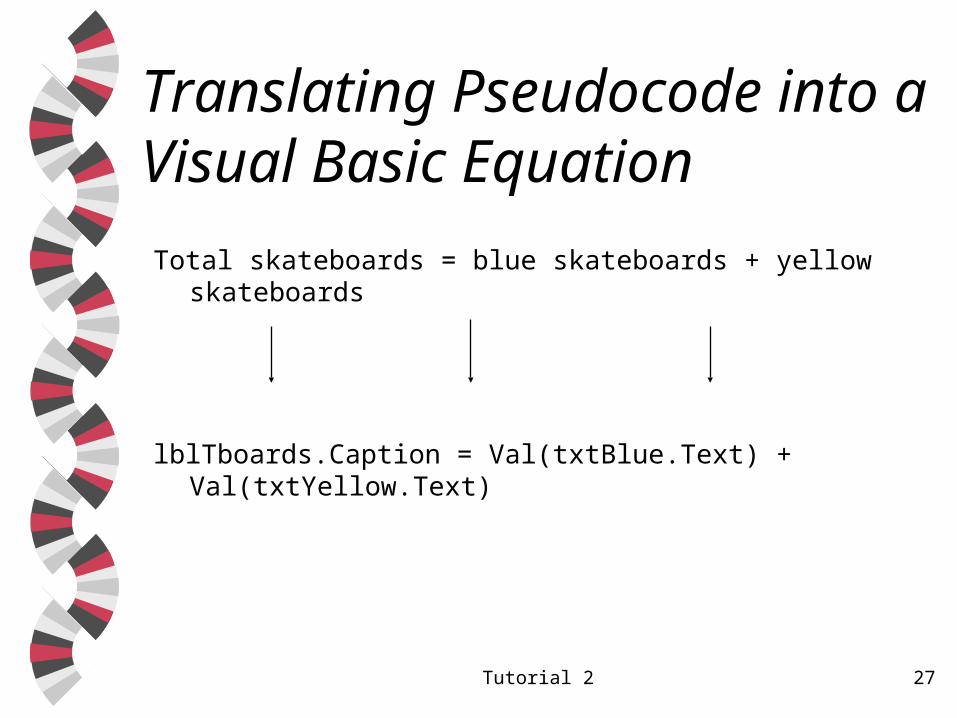
Translating Pseudocode into a Visual Basic Equation
Total skateboards = blue skateboards + yellow skateboards
lblTboards.Caption = Val(txtBlue.Text) + Val(txtYellow.Text)
Tutorial 2 28
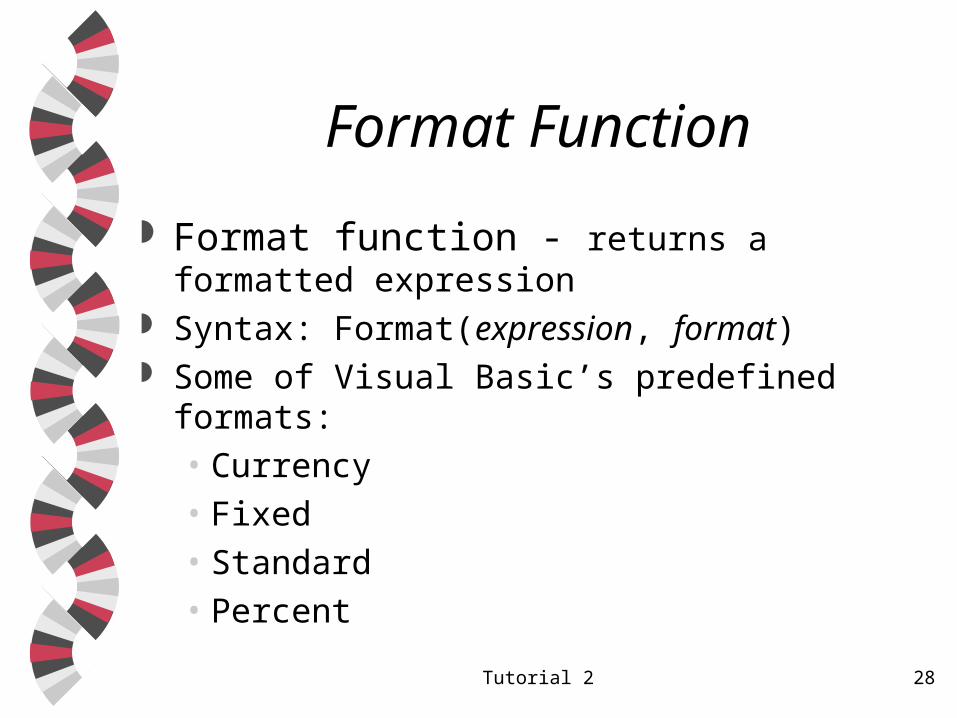
Format Function
Format function - returns a formatted expression
Syntax: Format(expression, format) Some of Visual Basic’s predefined formats:
• Currency• Fixed• Standard• Percent
Tutorial 2 29
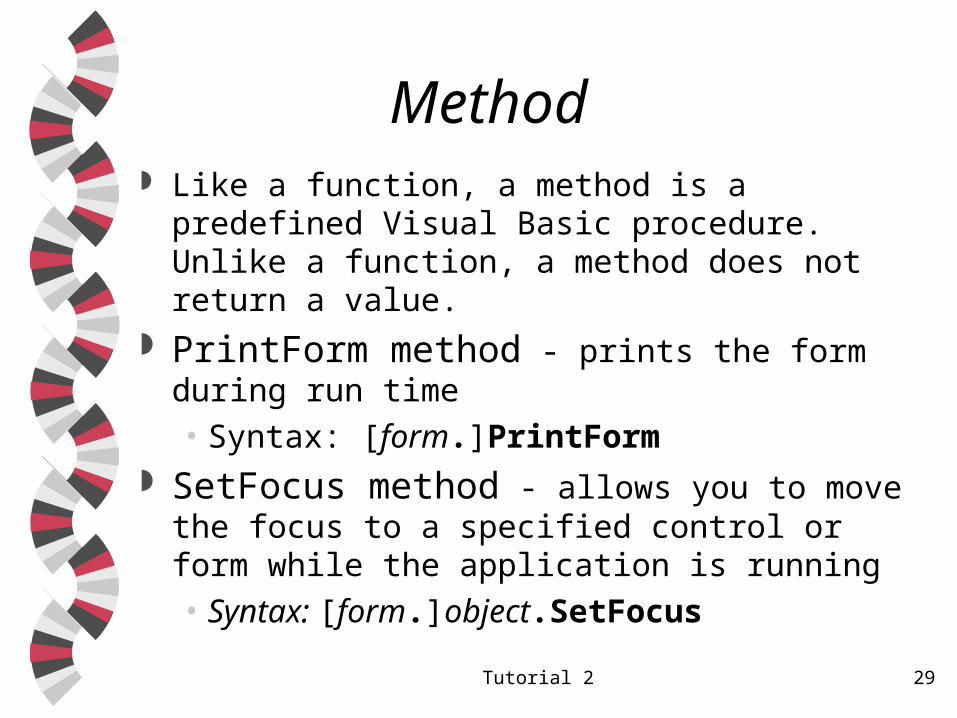
Method Like a function, a method is a predefined Visual
Basic procedure. Unlike a function, a method does not return a value.
PrintForm method - prints the form during run time• Syntax: [form.]PrintForm
SetFocus method - allows you to move the focus to a specified control or form while the application is running• Syntax: [form.]object.SetFocus
Tutorial 2 30
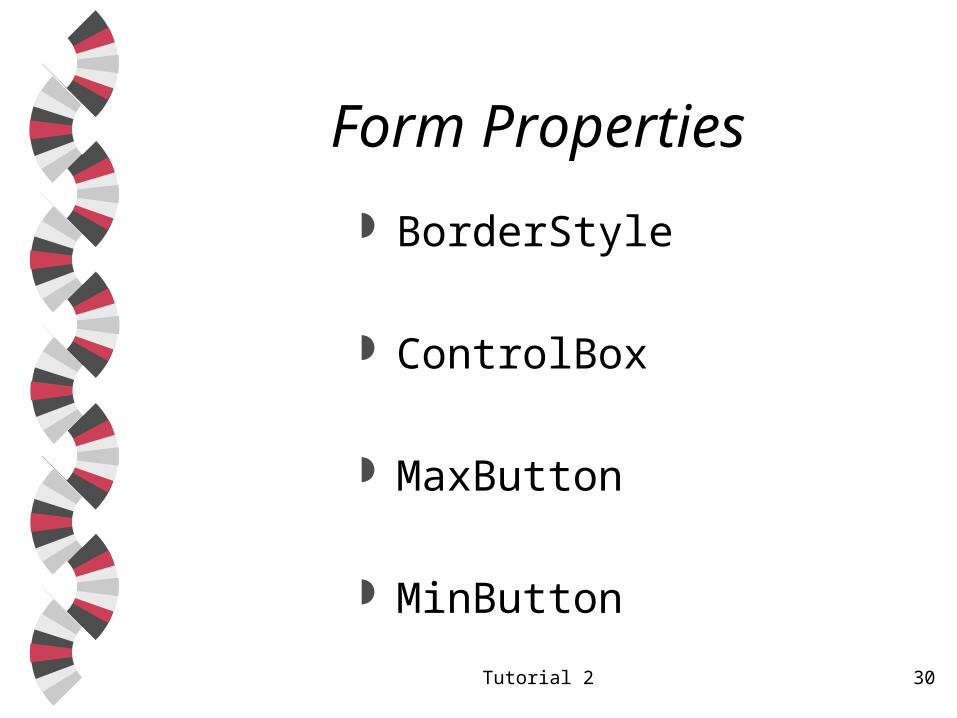
Form Properties
BorderStyle
ControlBox
MaxButton
MinButton

Tutorial 2 31
Step 4 - Testing and Debugging
Test with both valid and invalid data. Debugging refers to the process of locating
errors in the program.• Syntax error
• typing PrntForm rather than PrintForm
• Logic error • calculating the net pay before calculating the state
income tax
Tutorial 2 32
Step 5 - Assemble the Documentation
Place your planning tools and a printout of the application in a safe place.
Your planning tools include the TOE chart, sketch of the interface, and either the flowcharts or pseudocode.
Tutorial 2 33
Debugging Technique
Always use the Val function in equations that include either the Text property or the Caption property. The Val function tells Visual Basic to treat these properties as numbers rather than as strings.