Embed Size (px)
Citation preview

Turnitin
Student Manual
Login
1. Create a New Profile
2. The first time you access you have to modify your
password
3. Access to the “class” and upload the file
4. File inspection
5. Correct upload notification

Instructions on how to use the anti plagiarism software Turnitin is a subscription service that you can access through the web-site and it does not require any “sw” installation. The system compares the words in your file with the words present in the Turnitin database. In order to utilize Turnitin is necessary to enable cookies and pop-up on your computer. Login If you receive an e-mail from Turnitin with a temporary password, it means that your Professor has created a profile for you. In order to start, you have to login with your e-mail and temporary password, and follow the step two indicated in this guide.
1. Create a New Profile In order to create a profile you have to use your Class ID and Password provided by your Professor. Go to www.turnitin.com and select Create Account on the homepage.
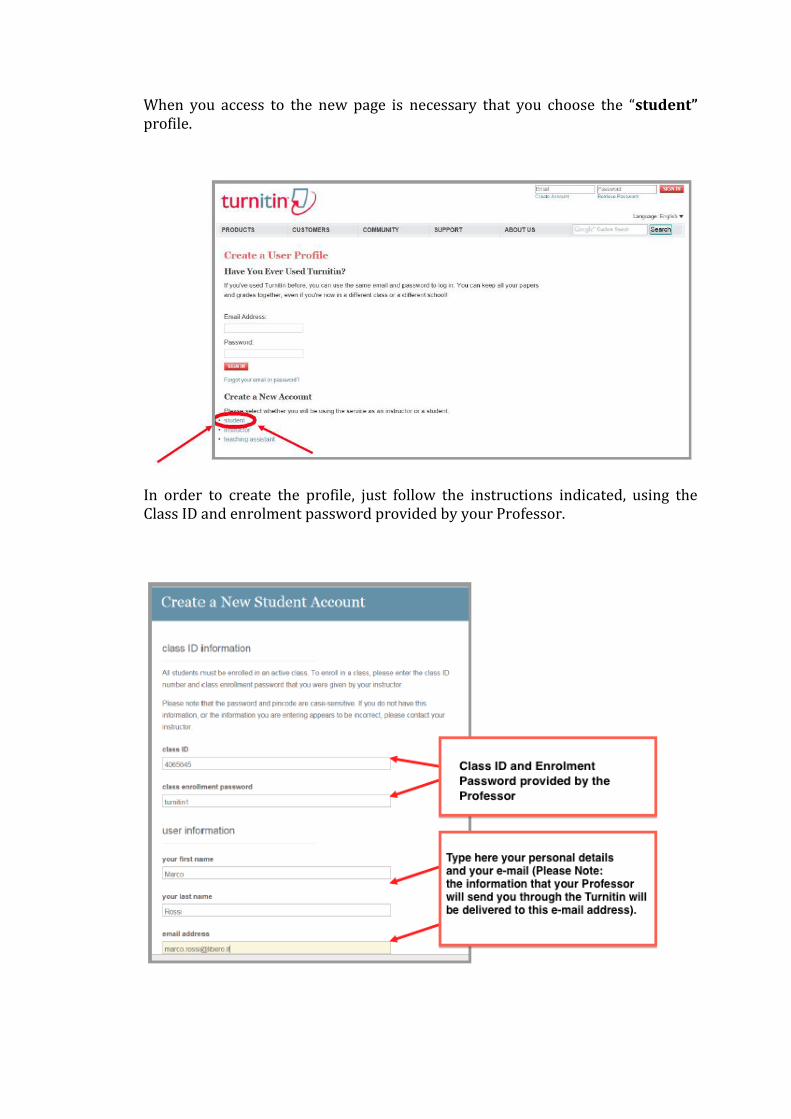
When you access to the new page is necessary that you choose the “student” profile.
In order to create the profile, just follow the instructions indicated, using the Class ID and enrolment password provided by your Professor.

2. First access and password modification When you’ll use Turnitin for the first time, using www.turnitin.com, you have to modify the password, creating a new one with at least one numeric character.
At the first access only, it will be shown the service conditions; in order to go ahead you have to tick the required box.

3. Access to the “class” and file upload On the homepage will be shown the name of the class created by your Professor to upload the file. To upload the file, you have to click on the class name.
The new page will show you the list of the assignment that you have to transmit (i.e. the first chapter of the thesis). For each assignment is possible to see the date of delivery and the deadline. In order to upload the file you have to click on Submit, close to the assignment.
A new window will appear on the screen, and you will be able to upload your file. You can choose if you want to upload the file or to cut & paste, choosing the specific option.
3.1 Upload the File Type a title for your file. To upload the file you have to click on browse and select the file from your computer. It is possible to upload the file in the following versions and dimensions:
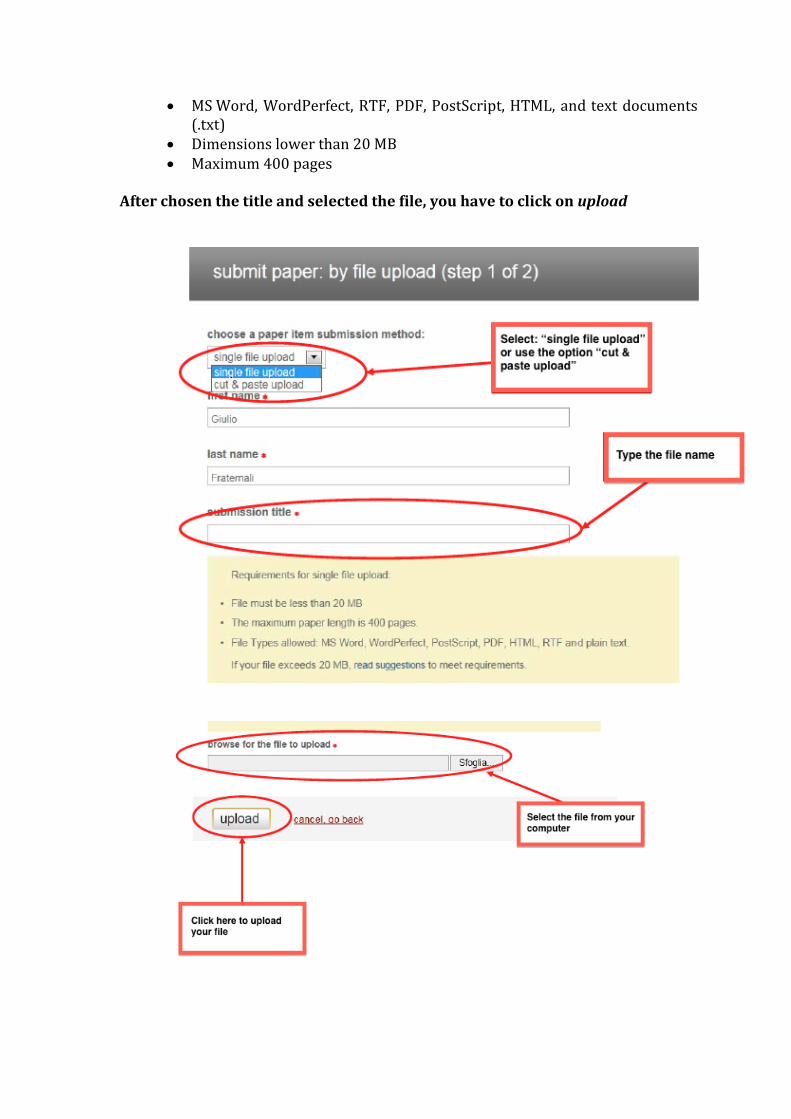
MS Word, WordPerfect, RTF, PDF, PostScript, HTML, and text documents (.txt)
Dimensions lower than 20 MB Maximum 400 pages
After chosen the title and selected the file, you have to click on upload

If your file is in a format that is not indicated or accepted by Turnitin as standard, it is still possible to insert your file using the function “cut & paste” displayed in the top of the page. Otherwise try to convert the file in an accepted format.
3.2 Uploading “Cut & Paste”
If you submit the file using the cut & paste option, you can skip the next step, because it will be displayed in the text box yet.
4. Control and file submission The file that you have uploaded will be highlighted in the following page, in order to be sure check the information displayed. In order to confirm the submission click on submit.

5. Correct upload notification
After the uploading of the file, it will be shown an online notification of the correct upload. A copy of the notification will be send to your e-mail. To go back to the home page click on go to portfolio.
Once you are back on the Home page, if you click on show details you’ll be able to see the icon “Originality Report” of your file, but only if it has been enabled by your Professor. A grey icon indicates that the file has not been generated.

P.N. As default, students are not enable to inspect their Originality Report. If it is written “file not available” instead of the icon “Originality Report”, it means that the Professor does not enable students to inspect the Originality Report.
For further information or assistance please contact: Helpdesk Anti-plagiarism E-mail: [email protected] Telephone: 051 2087007 (From Monday to Friday 09:30-13:00, and 14:30-17:00)