Embed Size (px)
Citation preview

1
TSM Studio Server – User Guide 2.9.0.0

2
Table of Contents Disclaimer ........................................................................................................... 4
What is TSM Studio Server? .................................................................................. 5
System Requirements ........................................................................................... 6
Database Requirements .................................................................................... 6
Installing TSM Studio Server ................................................................................. 7
TSM Studio Server Configuration ......................................................................... 11
MySQL Server Settings ....................................................................................... 13
Microsoft SQL Server .......................................................................................... 14
TSM Studio Server Security ................................................................................. 19
Starting TSM Studio Server ................................................................................. 20
Adding a TSM Studio Server to TSM Studio .......................................................... 22
Connecting to a TSM Studio Server ..................................................................... 24
Importing TSM Server definitions from TSM Studio into TSM Studio Server ............ 25
Adding TSM Servers in TSM Studio Server ........................................................... 26
Licensing TSM Studio Server ............................................................................... 28
To view and choose which TSM Servers are licensed ............................................ 30
Scheduling Parameter Collection ......................................................................... 31
Viewing the TSM Studio Server Charts and Dataviews .......................................... 34
Setting up SMTP ................................................................................................ 37
Alerts: Activity Log Monitor ................................................................................. 38
Activity Log Alert Filters ...................................................................................... 39
Setting up Activity Log Notification ...................................................................... 40
Activity Log Monitor Settings ........................................................................... 41
Using TSM Alerts ................................................................................................ 42
Using the TSM Studio Alerts Console ................................................................... 43
Advanced Alerting .............................................................................................. 45
Operational Reporting ........................................................................................ 47
Advanced Reporting ........................................................................................... 50
TSM SQL Queries ............................................................................................ 51
Report Templates ........................................................................................... 52
Report Scheduler ............................................................................................... 54

3
Event Triggers ................................................................................................... 56
Client Node Activity Event Trigger .................................................................... 57
Server Activity Ended Event Trigger ................................................................. 59

4
Disclaimer
Direct, incidental, consequential, indirect, or punitive damages arising out of your access to, or use of, the site
and articles within. Without limiting the foregoing, everything on the site is provided to you 'AS IS' WITHOUT
WARRANTY OF ANY KIND, EITHER EXPRESSED OR IMPLIED, INCLUDING, BUT NOT LIMITED TO, THE
IMPLIED WARRANTIES OF MERCHANTABILITY, FITNESS FOR A PARTICULAR PURPOSE, OR NON
INFRINGEMENT.
"Please note that some jurisdictions may not allow the exclusion of implied warranties, so some of the above
exclusions may not apply to you. Check your local laws for any restrictions or limitations regarding the exclusion
of implied warranties."
5
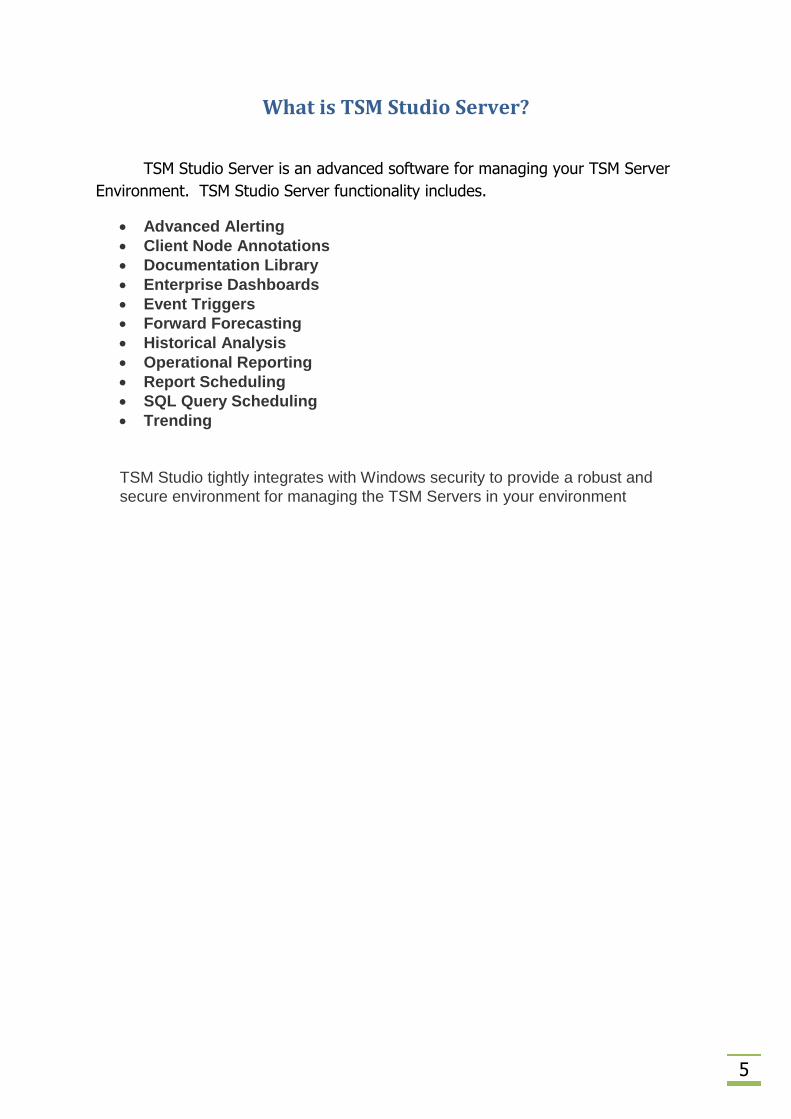
What is TSM Studio Server?
TSM Studio Server is an advanced software for managing your TSM Server
Environment. TSM Studio Server functionality includes.
Advanced Alerting
Client Node Annotations
Documentation Library
Enterprise Dashboards
Event Triggers
Forward Forecasting
Historical Analysis
Operational Reporting
Report Scheduling
SQL Query Scheduling
Trending
TSM Studio tightly integrates with Windows security to provide a robust and
secure environment for managing the TSM Servers in your environment
6
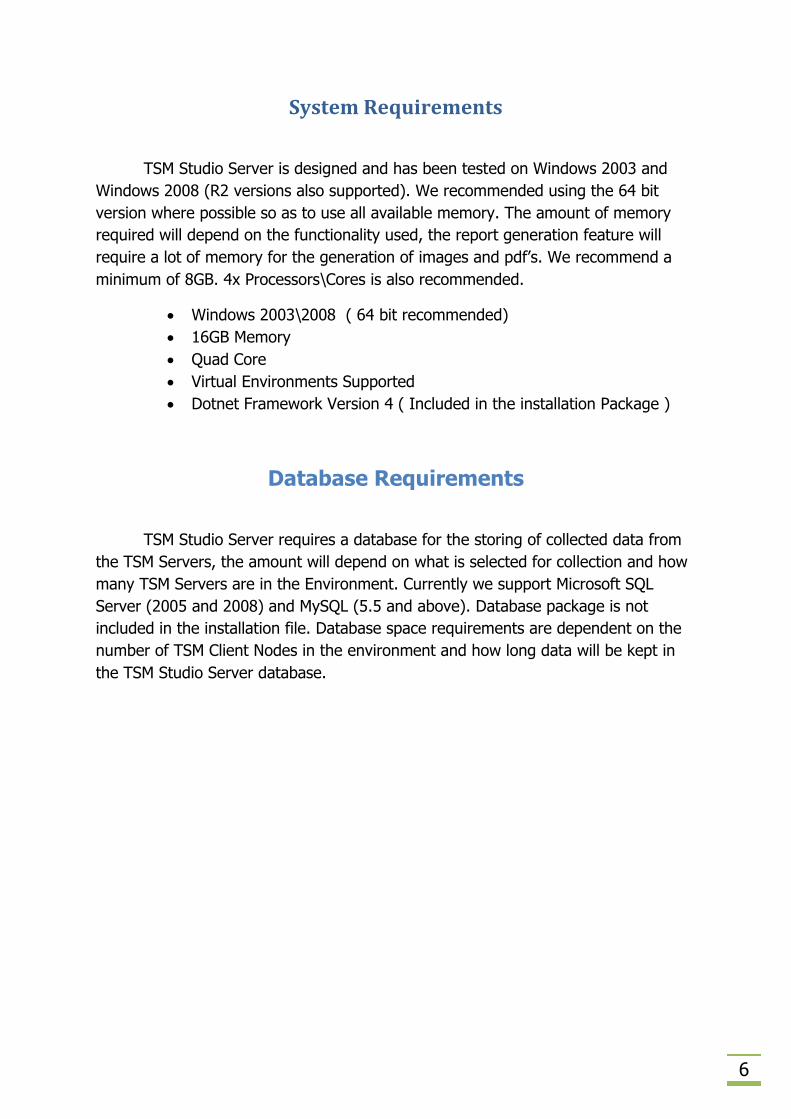
System Requirements
TSM Studio Server is designed and has been tested on Windows 2003 and
Windows 2008 (R2 versions also supported). We recommended using the 64 bit
version where possible so as to use all available memory. The amount of memory
required will depend on the functionality used, the report generation feature will
require a lot of memory for the generation of images and pdf’s. We recommend a
minimum of 8GB. 4x Processors\Cores is also recommended.
Windows 2003\2008 ( 64 bit recommended)
16GB Memory
Quad Core
Virtual Environments Supported
Dotnet Framework Version 4 ( Included in the installation Package )
Database Requirements
TSM Studio Server requires a database for the storing of collected data from
the TSM Servers, the amount will depend on what is selected for collection and how
many TSM Servers are in the Environment. Currently we support Microsoft SQL
Server (2005 and 2008) and MySQL (5.5 and above). Database package is not
included in the installation file. Database space requirements are dependent on the
number of TSM Client Nodes in the environment and how long data will be kept in
the TSM Studio Server database.

7
Installing TSM Studio Server
1. Download the installation package from http://www.spiritsoftware.biz. There
are two versions depending on the hardware and operating system being
used, a 32 bit version and a 64 bit version. If possible we recommend using
the 64 bit version.
2. Run the Installation Package
May require a restart if the framework is not already installed

8
Select Next
Accept the agreement and select Next

9
Choose the Program Folder and Select Next
Select Next

10
Select Finish.
Before Starting the TSM Studio Service Use the following section to first configure
the database connection information. The first time TSM Studio connects it will build
the database schema.

11
TSM Studio Server Configuration
After running the TSM Studio Server installation package and before starting
the TSM Studio Server service, configuration of the database server, port and
logging is required. From the StartAll ProgramsSpirit Software SolutionsTSM
Studio Server run the TSM Studio Server Configuration
Port: This is the port that TSM Studio will use to connect to TSM Studio Server
Database Provider: Currently MySQL and Microsoft SQL Server are supported.
Database system can be installed locally or on a remote server.
Logging: During this beta period we ask that you select Error
Log File Name: The name of the file to log errors to
Enable Console Logging: Used by Spirit Software support staff for debugging
12
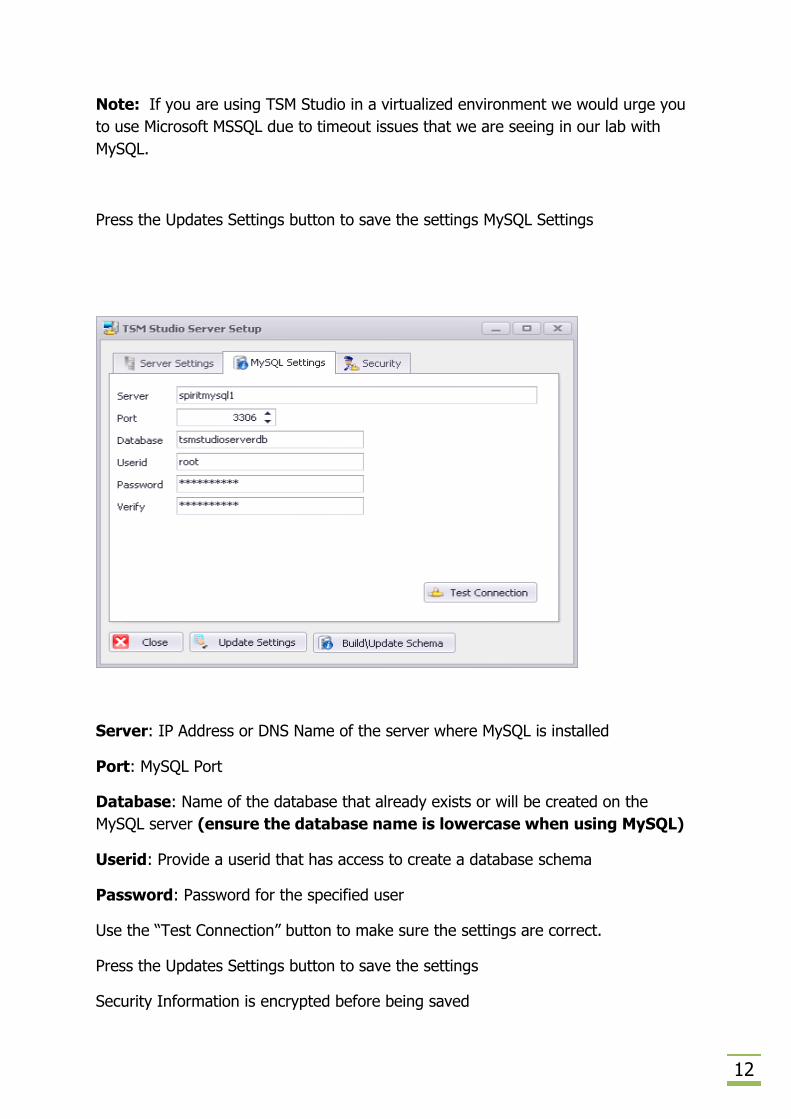
Note: If you are using TSM Studio in a virtualized environment we would urge you
to use Microsoft MSSQL due to timeout issues that we are seeing in our lab with
MySQL.
Press the Updates Settings button to save the settings MySQL Settings
Server: IP Address or DNS Name of the server where MySQL is installed
Port: MySQL Port
Database: Name of the database that already exists or will be created on the
MySQL server (ensure the database name is lowercase when using MySQL)
Userid: Provide a userid that has access to create a database schema
Password: Password for the specified user
Use the “Test Connection” button to make sure the settings are correct.
Press the Updates Settings button to save the settings
Security Information is encrypted before being saved

13
MySQL Server Settings
Some of the report templates use large bitmaps. For the transmission of these large
objects the “Max. Packet Size” needs to be modified as shown here

14
Microsoft SQL Server
TSM Studio Server connects to SQL Server using a TCPIP connection. To ensure that
SQL Server is setup to use TCP start up SQL Server Configuration Manager and
check the Network Configuration which should have TCP/IP Enabled.
Then double click on the TCP/IP Protocol Name
This will display the TCPIP Properties dialog. Select the IP Addresses tab and sure
that TCP/IP is enabled for the IP addresses that will be used to connect to the SQL
Server instance.

15
If SQL Server is running on the same Server as the TSM Studio Server service then we
recommend 12GB of memory as a minimum to ensure the healthy running on TSM Studio
Server.
By default SQL Server will be configured to use all available memory this will need to be
changed so that there is enough free memory for TSM Studio Server to function. It is
recommended that SQL Server be given 4GB of memory and the other 8GB is left available
for TSM Studio Server.
To change the default memory settings in SQL Server. Start up SQL Server Management
Server right click on the server and select properties

16
Select Memory and then enter 4096 into the Maximum server memory field

17
Next setup TSM Studio Server to communicate with SQL Server
Datasource: Enter the IP Address or DNS name of the database server
Database: Name of the database that already exists or will be created on the
MySQL server
Integrated Security: Check this option to all TSM Studio Server to connect to the
database using the same userid as is being used to start the TSM Studio Sever
service. Userid and password fields will be disabled if this option is checked
Userid: Enter the a userid to connect to the database
Password: Enter the password for the specified userid
The userid needs to have access to create the database if it does not exist and to
create the schema.
Press the Updates Settings button to save the settings

18
Use the Test Connection button to verify connectivity to MSSQL Server

19
TSM Studio Server Security
Add the windows groups that will have access to TSM Studio Server. These
groups can be local windows groups or domain groups

20
Starting TSM Studio Server
After configuring TSM Studio Server start the service
To verify that TSM Studio Server has started correctly firstly check for errors in the
event log
If using MySQL check that the Database Schema has been created

21
If using Microsoft SQL Server check using SQL studio

22
Adding a TSM Studio Server to TSM Studio
Change to the TSM Studio Server tab on TSM Studio
Right Click to bring up the TSM Studio Server context menu
Select TSM Studio Server Add
23
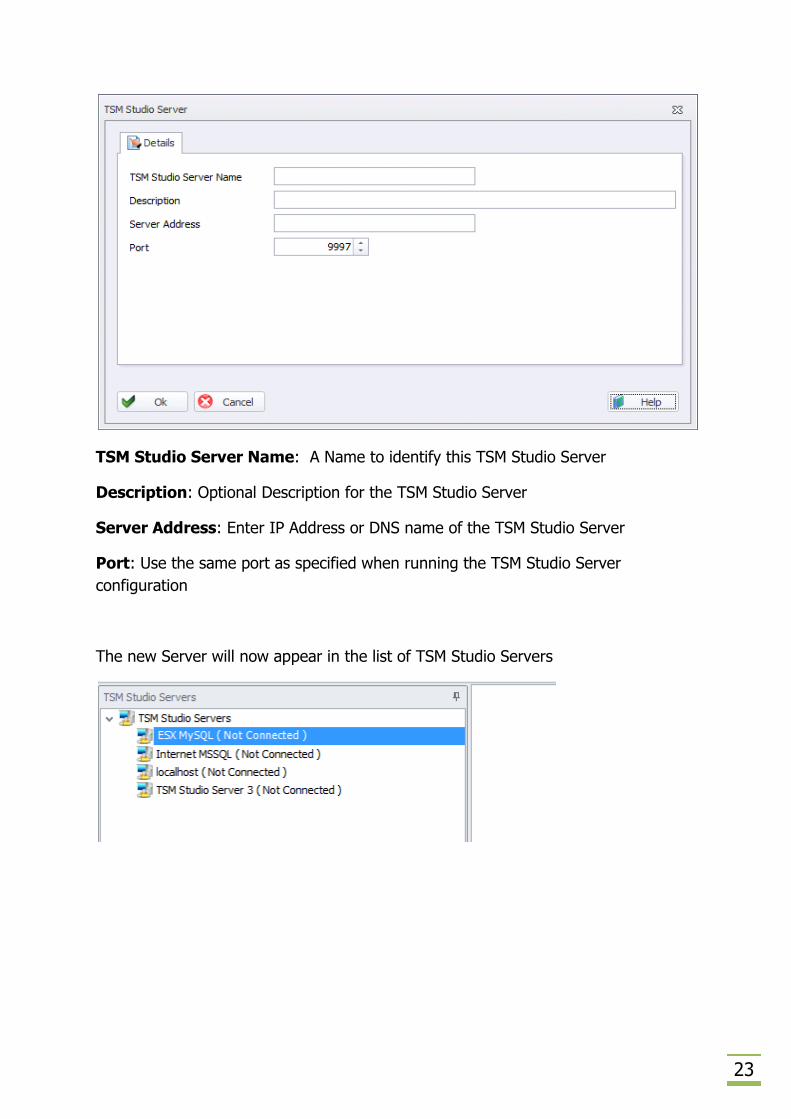
TSM Studio Server Name: A Name to identify this TSM Studio Server
Description: Optional Description for the TSM Studio Server
Server Address: Enter IP Address or DNS name of the TSM Studio Server
Port: Use the same port as specified when running the TSM Studio Server
configuration
The new Server will now appear in the list of TSM Studio Servers

24
Connecting to a TSM Studio Server
There are two methods to connect to a TSM Studio Server, either double click on the
TSM Studio Server or right click to access to access the TSM Studio Server context
Menu and select TSM Studio ServerConnect
Once connected the TSM Studio Server status will change to connected
Also the version of TSM Studio Server is displayed, always ensure that the
versions of TSM Studio and TSM Studio Server are the same.
25
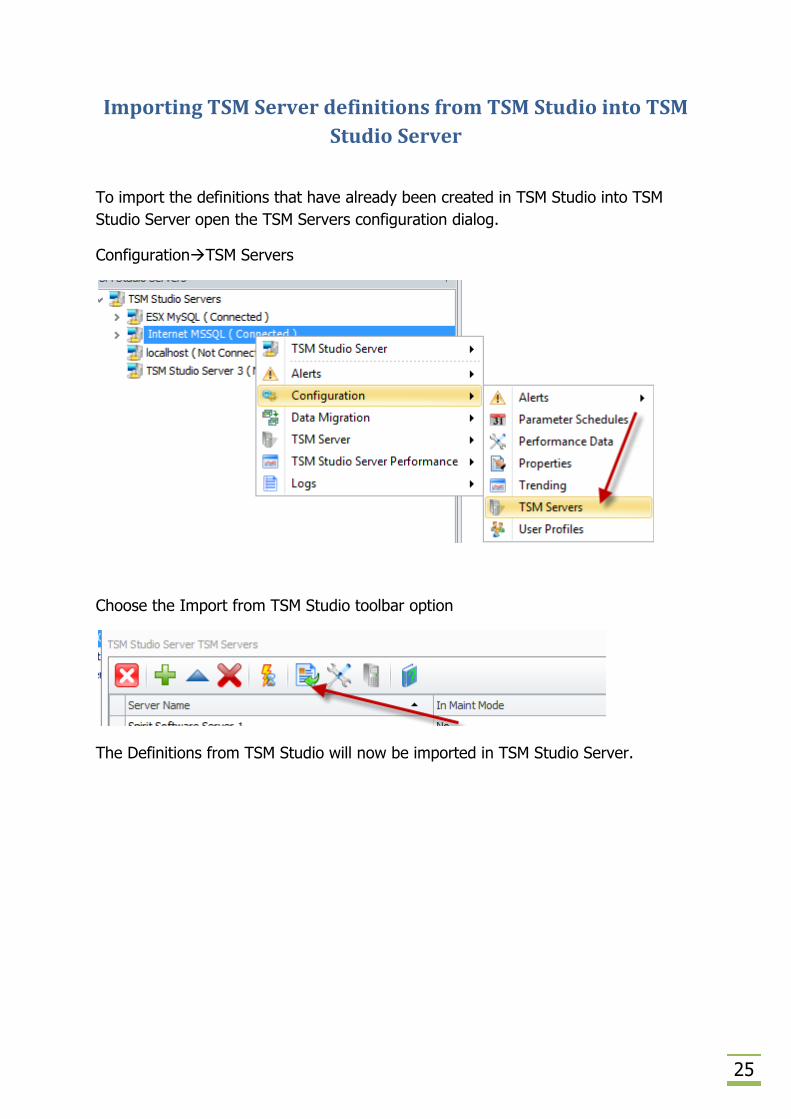
Importing TSM Server definitions from TSM Studio into TSM
Studio Server
To import the definitions that have already been created in TSM Studio into TSM
Studio Server open the TSM Servers configuration dialog.
ConfigurationTSM Servers
Choose the Import from TSM Studio toolbar option
The Definitions from TSM Studio will now be imported in TSM Studio Server.

26
Adding TSM Servers in TSM Studio Server
There are two ways to add new TSM Servers to TSM Studio Server. The first option
is to start the TSM Servers configuration dialog
Press the add TSM Server toolbar icon
This will start the TSM Server Administration dialog. Just add the definitions like in
TSM Studio

27
The second way to add a TSM Server to TSM Studio Server is to select TSM
ServersAdd TSM Server menu option
This will start the TSM Server Administration dialog.

28
Licensing TSM Studio Server
Each Tivoli Storage Manager Server that is to be defined to TSM Studio Server
must be licensed. Licenses can be purchased from one any of the Spirit Software
product resellers or from the Spirit Software website (http://www.spiritsoftware.biz).
TSM Studio Server requires a licensed version of TSM Studio to function
After licensing has been applied, any TSM Server that is not licensed in TSM
Studio Server will not collect data and will not be available in any reports, alerting or
analysis.
To add new licenses to TSM Studio Server use the following steps.
1. Log on to TSM Studio Server using TSM Studio
2. Choose ConfigurationLicenses

29
3. Choose Add Licenses from the toolbar
4. Enter the license codes that have been purchased

30
To view and choose which TSM Servers are licensed
Choose ConfigurationTSM Servers

31
Scheduling Parameter Collection
To start collecting data from the TSM Servers in the environment the first
step is to schedule the collection of the different TSM objects. This is accomplished
from the parameters schedule dialog. By default all parameters are enabled for
collection.
Right click on the TSM Studio Server and select ConfigurationCollection
Schedules
This will open the parameters schedule dialog

32
Parameter Name: The TSM Data being Collected
Sub Name: Some of the TSM data can be further processed for instance client node
statistics can be gathered from the Activity log so whenever the Activity Log
Parameter runs it will also gather Node Statistics Data.
Interval and Interval type define how often the collections will run
Start Time indicates when the collection will run
Last Run Date is the time of the last collection
Enabled: A collection will only run if enabled
Retention: How long to retain the data in the database, a value of 0 indicates to
use the default of 90 days

33
To modify any of the Schedule click on the Edit button in the toolbar
Parameter Name: Choose the parameter to collect
Interval & Interval Type: The interval at which to collect the data
Initial Start Date Time: The start time for the first collection
Start Time: The time to start the collection
Data Retention: How long to keep the data in the database
Enabled: Check this to enable this schedule
34
Viewing the TSM Studio Server Charts and Dataviews
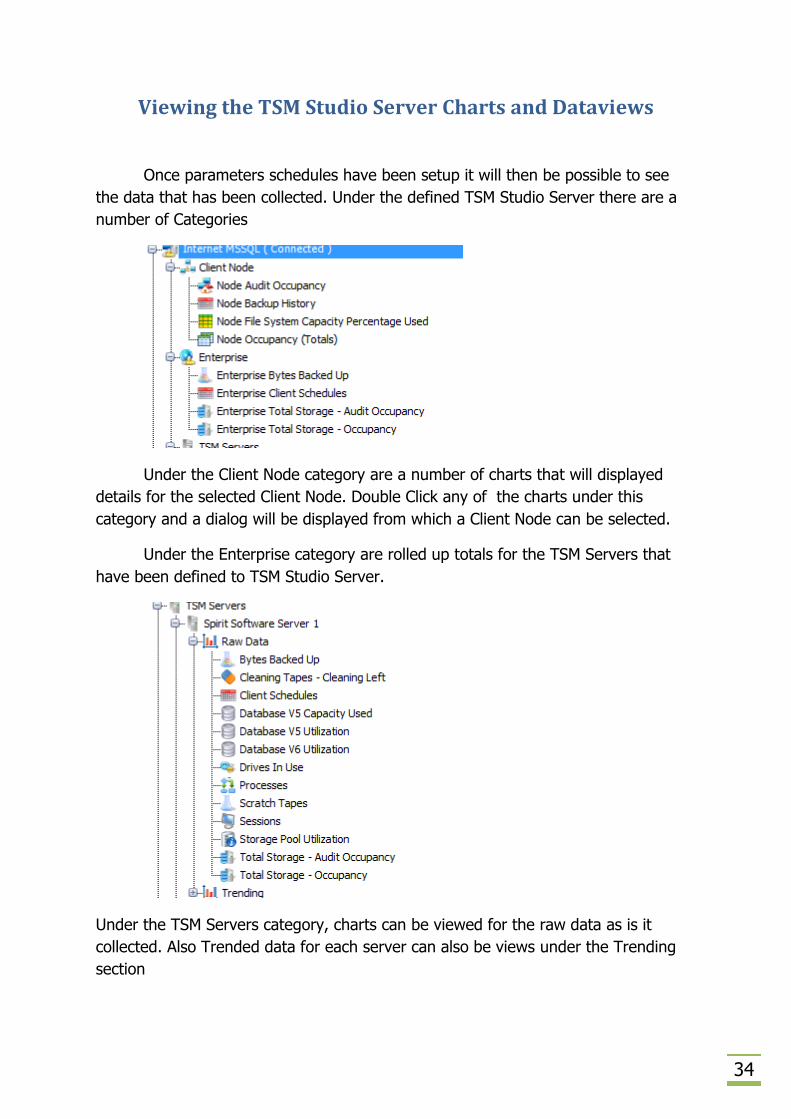
Once parameters schedules have been setup it will then be possible to see
the data that has been collected. Under the defined TSM Studio Server there are a
number of Categories
Under the Client Node category are a number of charts that will displayed
details for the selected Client Node. Double Click any of the charts under this
category and a dialog will be displayed from which a Client Node can be selected.
Under the Enterprise category are rolled up totals for the TSM Servers that
have been defined to TSM Studio Server.
Under the TSM Servers category, charts can be viewed for the raw data as is it
collected. Also Trended data for each server can also be views under the Trending
section

35
Using Charts
When a chart is doubled clicked a Chart view is opened as above ( this example is
also showing the context menu that can be opened by right clicking on the chart )
Print: Print the chart ( also offers a number of export to different image types )
Refresh: Refresh the data on the chart
Timer: Automatically refresh the data on the chart
Select Dates: Change the date range of data shown on the chart
Label Points: Displays labels on each point in the chart
Series: Filter the data that is shown on the chart
TSM Servers: (Only available on charts opened from the TSM Server section.) Add
data from another TSM Server to the chart
Forward Forecast: Estimate the values for some future date
Chart Type: Choose the type of chart for display data (There are a number of 2D
and 3D charts)
Colour Theme: Choose a colour them for the points in the chart

36
Also for a number of the charts it is possible to double click on a point or bar
to open a Dataview displaying the data making up totals and points in the chart.

37
Setting up SMTP
Goto ConfigurationEmail\SMTP
SMTP Host Address: Enter the address of the SMTP gateway
Port: Enter the port of the SMTP gateway ( 25 is default )
From Address: The email address that will appear the from field
If authentication is required to access the SMTP gateway then enter the
authentication details

38
Alerts: Activity Log Monitor
When Activity Log Monitor Alerts are enabled it is possible to consolidate all
the console messages from all TSM Servers defined to TSM Studio Server into a
single view. These messages can be filtered to just show messages that are
significant to your environment; additionally these messages can be published via a
number of methods including email to selected recipients.
To enable Activity Log Monitor Alerts select ConfigurationAlertsActivity
Log Monitor
Enable Alerts (Heading will displayed that Activity Log Monitor Alerts are
Enabled)
Disable Alerts (Heading will displayed that Activity Log Monitor are Disabled)
Alert Settings
Alert Notification Settings
Clear Alerts Database

39
Activity Log Alert Filters
Activity Log Filers can be added to choose which messages will be searched
for in the activity log. The Exclude Filter overrides any filter set in the Include Filter.
Use the Toolbar located in each section of the Filters to
add\edit\delete\enable\disable filters. Only enabled filters will be applied to Activity
Log messages
To Add Alerts to be included use the button in the Include Tab
Type: Filter by Message Number of Message Text
Search Type: How the Message Number or Message Text will be filtered
String: The string to filter on
Alarm State: If the filtered string is found this is the Alarm State that will be
displayed

40
Setting up Activity Log Notification
There are four notification methods available in TSM Studio Server. Sending of the
Alert via Email, Logging the Alert to the Windows Application Event Log, running of a
script when the alert occurs and sending the alert via SNMP to a SNMP destination.
To define Email Alerts select the Email Enabled checkbox
Setup the Email Details for the different Alarm States ( Warning, Alarm and Critical ).
The Message can be left blank and will be auto filled by TSM Studio

41
Note: Make sure you have configured your Console Alerts Filter correctly or you
could receive hundreds of emails
A Number of substitution string are available in the subject and body of the email.
See the online help for more details
Activity Log Monitor Settings
Activity Log Alerts are stored in the TSM Studio Server database and will remain
there until either cleared from the Alerts console or for the time period specified in
the Activity Log Settings dialog.

42
Using TSM Alerts
TSM Alerts provides alerts specifically targeted for known TSM issues. There is
currently over 50 targeted alerts. Configuration of these alerts is accomplished from
ConfigurationAlertsTSM Alerts
This displays the list of available alerts
By default all alerts are disabled. Each alert can be individually enabled and a
polling interval set to determine how often to check if the alert has been triggered.
For more information on these types of Alerts see the TSM Studio Server
Alerts documentation on our website.

43
Using the TSM Studio Alerts Console
To access the Console Alerts view select AlertsAlerts Detail
This will display the Console Alert View
The Console Alert View will show all the alerts that have been defined in the
Include Filter. Using the toolbar options, the colours of the alerts and fonts can be
changed. Using the timer option from the toolbar, the frequency that the Console
Alert View is updated. The last update time is shown at the bottom of the Console.

44
Right click on the context menu to quickly exclude and clear messages from the
console.
Clear: Clears the selected messages from the console
Exclude Console Message Number: Add the selected Message Number to the
exclude list
Exclude the Console Message: Add the selected Message Text to the exclude list

45
Advanced Alerting
Advanced alerting provides alerting for TSM specific conditions. Each
individual alert can be enabled\disabled and setup for email.
The Advanced Alerting configuration is accessed via the configuration menu
The list of available alerts is presented.
There are two types of alerts.
Value based alerts (such as storage pool utilization) can be setup to trigger a
condition ( Warn, Alarm, Critical ) when the value hits a given threshold.
Alerts that have only one value (such as Clients Nodes not in a collocation
group) can be trigger a condition after a given time period.

46
Email recipients are setup using the Email button ( ), each individual alert
can be setup to email when a trigger is fired.
A value of -1 in the Alarm, Warning and Alert field will cause that level to be
ignored
47
Operational Reporting
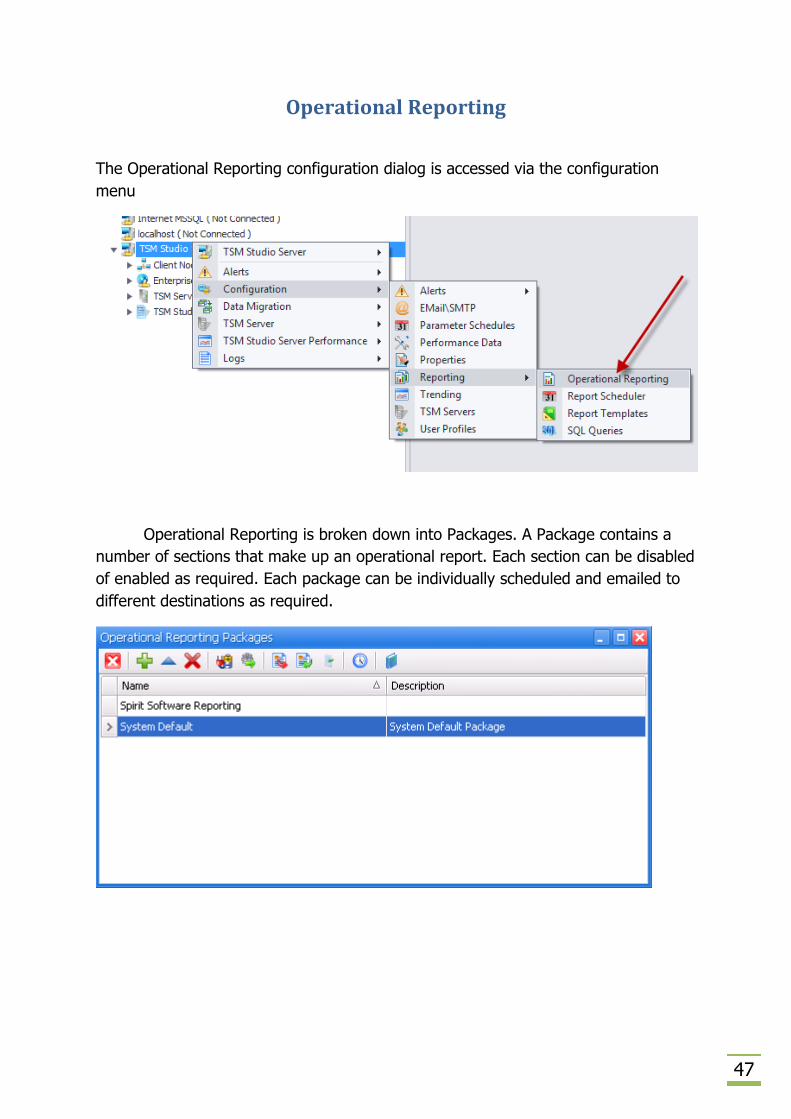
The Operational Reporting configuration dialog is accessed via the configuration
menu
Operational Reporting is broken down into Packages. A Package contains a
number of sections that make up an operational report. Each section can be disabled
of enabled as required. Each package can be individually scheduled and emailed to
different destinations as required.

48
To create a new package click the add button in the toolbar. A dialog will then be
opened for the details of the new package.
Name: The Name of the new Package
Description: A description for this package
Copy Operational Report Items From: Select a package that will used as the
template for the new package.
To edit the package, select the package and choose edit
Each section of the Operational Report can be edited in the Report Designer
allowing for full modification of the layout of the section. In addition the custom
summary section can be further customized to include\exclude items from displaying
in the Operational Report. Editing of each section can be done with sample data
using the edit button ( ) or without data using the ( ). Each section can be
either enabled\disabled or have its position changed using the up and down arrow
keys.

49
The Operational Reporting Scheduler is accessed using the ( ) button, a
default schedule can be setup to run against all defined TSM Servers or alternatively
individual schedules can be setup for each defined TSM Server. Edit the Schedule to
define the Days of the week to run on and the recipients to receive the report.

50
Advanced Reporting
The advanced reporting features of TSM Studio Server are broken into a
number of parts.
The Datasource Scheduler is used to schedule data directly from TSM
Studio Server’s internal datasource’s to a number of different formats as required.
The Report Scheduler is used to schedule Report Templates to run. The
output from these objects (usually in PDF or Excel format) can be emailed to
recipients.
A Report Template is a report design based on one or more data sources,
these data sources can either be TSM Studio Server internal data schemas or pre
defined TSM SQL Queries. Report Templates can be manually created using the in-
built report designer or you can download one of the Templates that has been
created by Spirit Software Solutions.
A TSM SQL Query can be created manually or “Spirit Software” created
Queries can be downloaded from the Spirit Software Repository. Additional
The TSM SQL Scheduler is used to schedule SQL Queries. The output from
these objects in csv format can be emailed to recipients.

51
TSM SQL Queries
TSM SQL Queries are accessed via the configuration menu
This will start the SQL Queries dialog from which SQL Queries can be created,
modified or deleted. Additionally SQL Queries can be download from the Spirit
Software Repository using the download button ( ).
The Clone button can be used to make copies of existing SQL Queries.

52
Report Templates
Report Templates are access from the TSM Studio Server reporting menu
A Report Template is a report design that can be run against one or more data
sources to provide a pdf formatted report that can be emailed to selected
individuals.
After clicking the Add Template button from the Report Templates dialog the
following dialog will appear
The data sources drop down contains the list of available data source ( internal TSM
Studio Schemas ) and all available SQL Queries. After pressing the okay button the

53
Use the Category field to define this template to a category. For a new category just
enter its name in this field.
Use the Parameter Tab to define variables that can be used with the scheduler when
running this template.
Use the Sample Data Tab to select the parameters for the sample data that will be
used when creating the report template.
Use the Filter Data Tab to filter the data at the Database before being passed back
to the report.
Report Designer will load with appropriate data for testing. If any of the data
sources are an SQL Query then a reference TSM Server will need to be selected to
provide sample data to the Report Designer.

54
Report Scheduler
The Report Scheduler is used to define when SQL Queries or Report
Templates are run, against which TSM Servers they are run and which recipients
receive the output.
The Report Scheduler is accessed via the configuration menu
This brings up the Report Scheduler dialog which displays the list of schedules
that are already defined. Use the Add button to add a new schedule which
displays the following dialog
55
The Schedule Type selects whether this schedule is for a Report Template or a
SQL Query. The Schedule Type Name will list all the available Report Templates or
SQL Queries available depending on the option selected for the Schedule Type.
Use the General Tab to define the details for this report and the output type.
If the Report is run against TSM Servers there is an option on this dialog to select all
TSM Servers or use the TSM Servers tab to report against individual TSM Servers.
Use the Templates Tab to define which Report Templates will make up the
report for this schedule, multiple templates can be added to create one large report.
Use the Parameters Tab to define values for any parameters in the templates.
Use the Schedule Tab to define when the Report is run
Use the Email Tab to select destinations for the report
Use the Repository Tab to store the report to disk or in the Spirit Software
Reporting Warehouse.

56
Event Triggers
An Event Trigger in TSM Studio Server is used to send an email or start a
report schedule when one of the following types of events finishes.
Client Event ( Archive, Backup, Retrieve or Restore )
Server Administrative Task ( Database Backup, Migration, etc. )
Currently running TSM Server Process
The Event Triggers can be access from the TSM Studio Server menu as shown here
The following dialog is displayed

57
Client Node Activity Event Trigger
Click the Add button from the Event Triggers dialog.
Select Client_Activity_Ended as the Event Trigger type and press Ok.
The Client Node Event Trigger definition dialog is displayed
58
There are four tabs displayed,
1. The Trigger tab is used to define how the event is triggered and what event
to trigger
2. The Client Nodes tab is used to define the Client Nodes that this trigger are
applied to
3. The Email tab defines the email that will be sent when this event is fired
4. The Report tab defines which report schedules will be run when this trigger is
fired
Notes:
Client Node Activity can be sourced either directly from the TSM Server or from TSM
Studio Server collections.
The email and reporting fields will be disabled unless the ‘On Trigger Fired’ check
box has been checked.
Client Node names are sourced from the TSM Studio Server database so at least one
Client Node collection must be run to populate the required tables in TSM Studio
Server
See the online help for the definition of each field.

59
Server Activity Ended Event Trigger