Embed Size (px)
Citation preview
EX
CLUSIVE
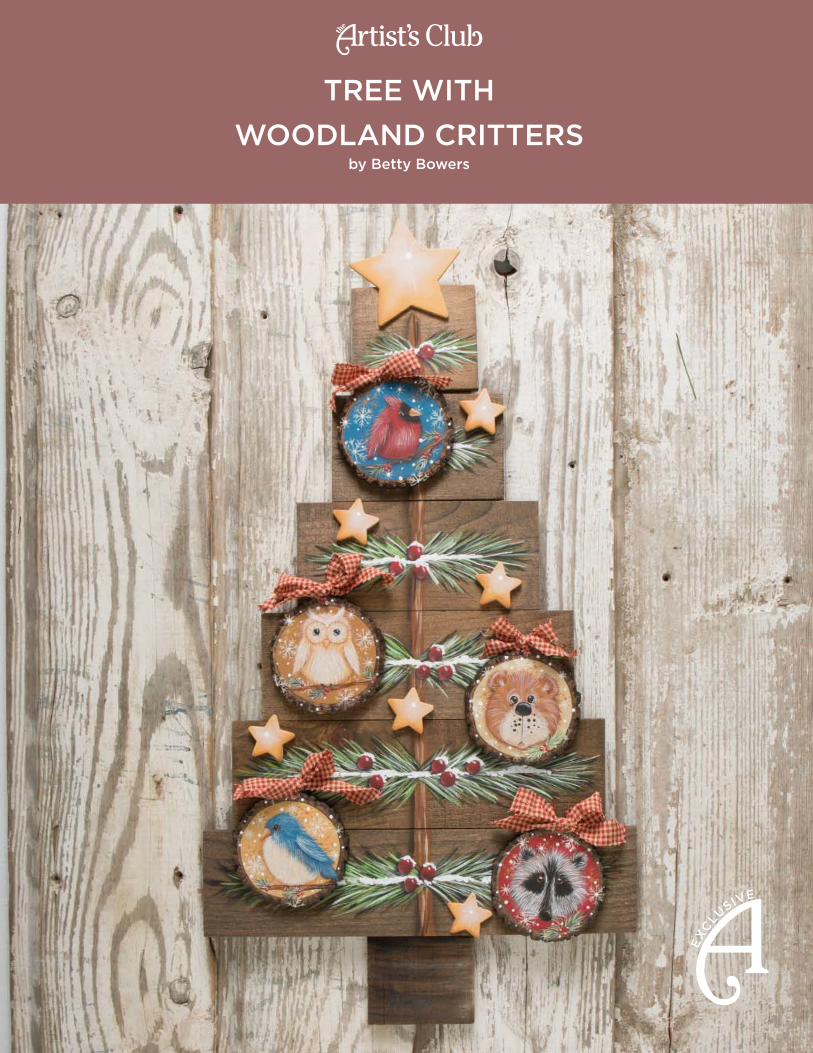
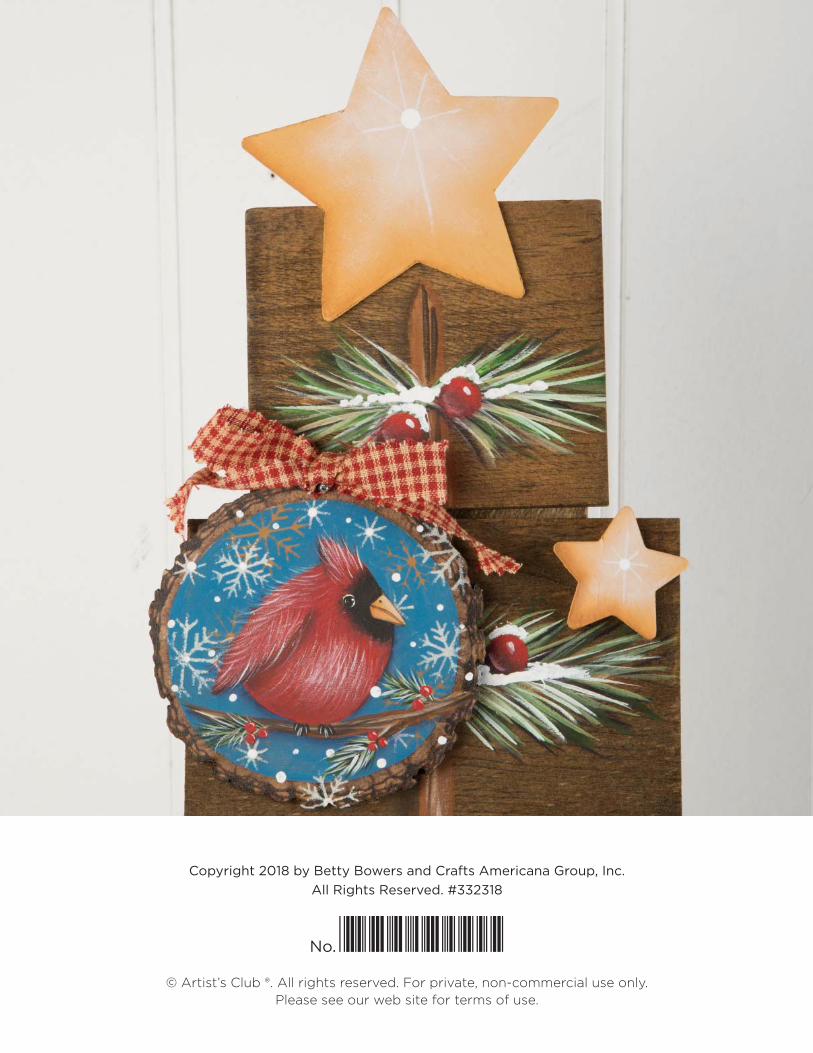
TREE WITHWOODLAND CRITTERS
by Betty Bowers
2 | artistsclub.com
PALETTE: DecoArt Americana AcrylicAntique White #13058Bittersweet Chocolate #13195Black Plum #13172Bleached Sand #13251Burnt Sienna #13063Camel #13191Country Red #13018Foliage Green #13259Honey Brown #13163Lamp (Ebony) Black #13067Neons—Thermal Green #18016Payne’s Grey #13167Plantation Pine #13113Snow White (Titanium White) #13001Victorian Blue #13039
SURFACE:Pallet Tree #63061Barky Ornaments #63159Assorted Wood Stars #63102
BRUSHES: Papillon by The Artist’s ClubShader 6 Piece set #20135Shader 5 Piece set #20128Shader Angular size 1/4" #20109Shader Angular size 1/2" #20111Script Liner size 6/0 #201381/4" royal crafters Choice Grip 9003 (stippler, stencil brush) with round top (Creative Arts Lifestyles) Patri-cia Rawlingson
MISC. SUPPLIES:1/2" brads (nails)Acrylic Sealer Finisher Matte Spray #70836E6000 glueGrey Graphite Paper 18 x 36 #70141HammerMulti Purpose Sealer #87392Paper towelsPro Art Tracing Paper #83175Provincial wood stain rag or old t-shirt (use for staining)Rag stripsSand paperSoft Grip Embossing & Stylus set of 3 #70125Tack Cloth—18 x 36 #70104
WOOD PREP:Sand and remove dust from the Pallet Tree with tack cloth. Then put on a pair of gloves. This is to protect your hands from the wood stain. Next, tear off a small piece of an old t-shirt or rag. Open the wood stain and stir it. Now use the rag or t-shirt to dip into the stain and apply it to the tree, front and back. Use a clean piece of the t-shirt or rag to wipe off excess stain. Let dry.
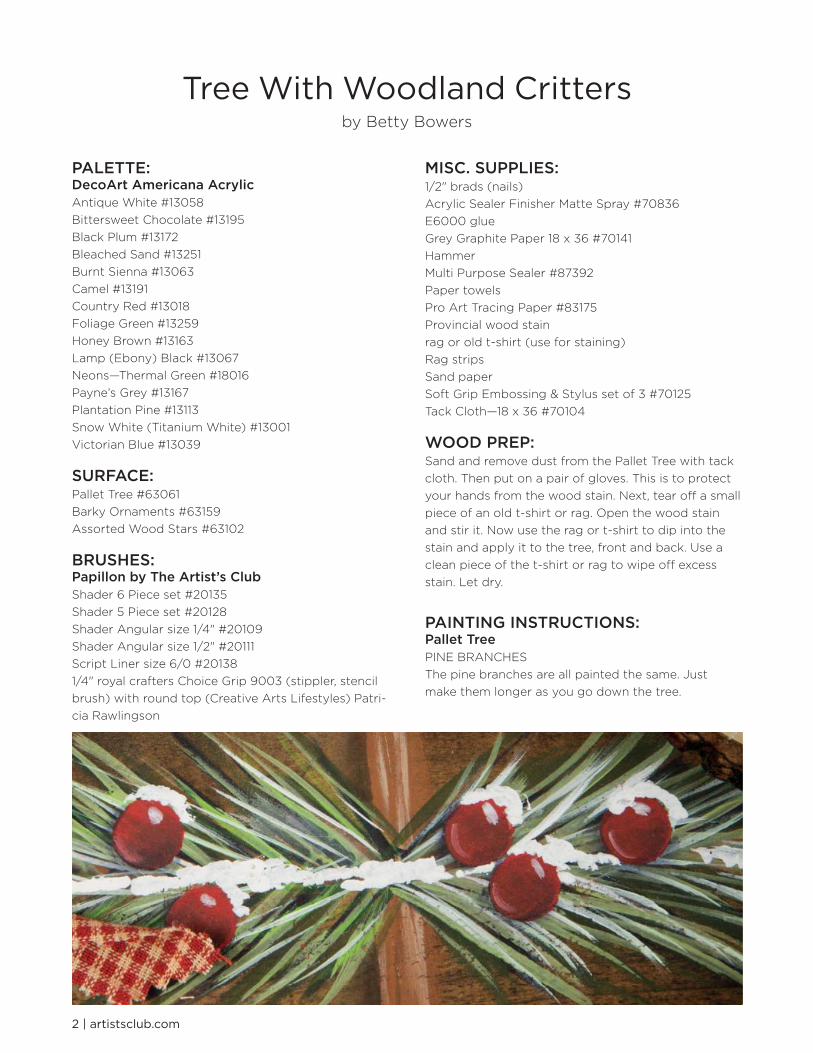
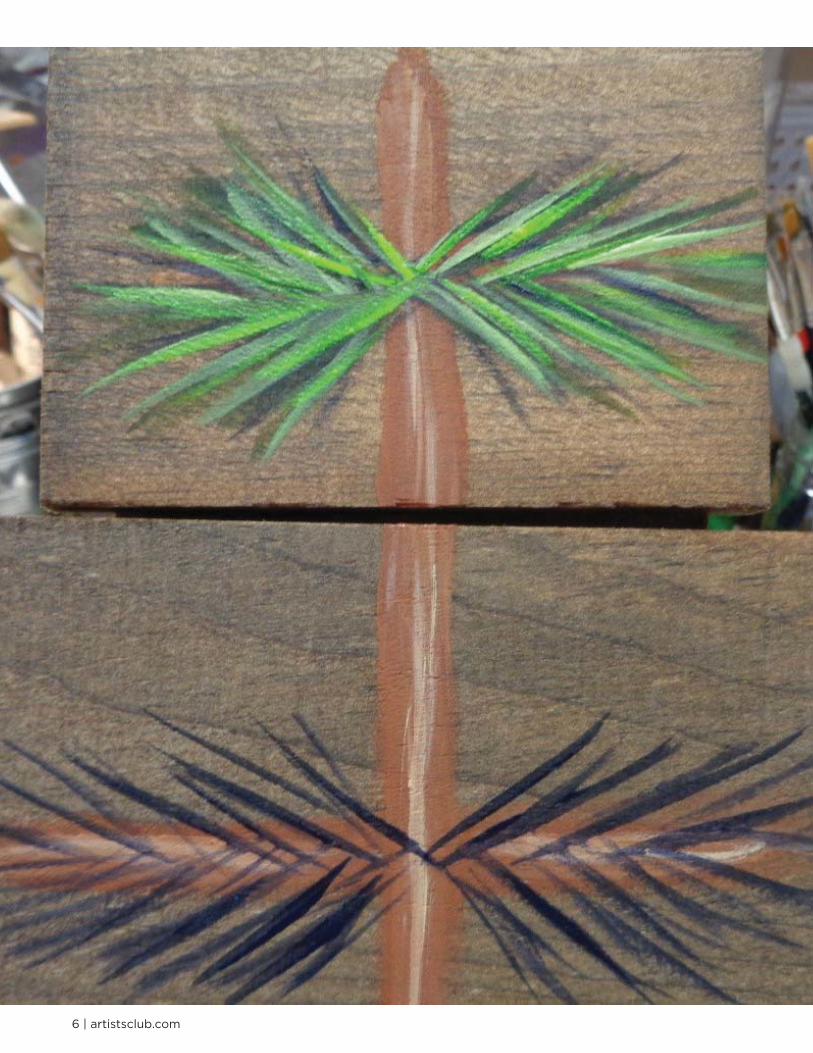
PAINTING INSTRUCTIONS:Pallet TreePINE BRANCHESThe pine branches are all painted the same. Just make them longer as you go down the tree.
Tree With Woodland Crittersby Betty Bowers
artistsclub.com | 3
TRUNKUse a brush to fi t the area being painted. Repeat the branches on the two bird ornaments. I used the 1 /2" angular brush, but you can use whatever brush you are comfortable with. Dip brush into water and blot off on paper towel. Load with Burnt Sienna. Paint the trunk and the branches. Using the same dirty brush, wipe out excess paint and load with Antique White. Pull down some light lines for grain and on the branches.
Now load the same dirty brush with Bittersweet Chocolate and add some dark grain lines. Using a clean brush, load with Bittersweet Chocolate again in the toe of the brush. Blend back and forth on palette. Shade down the left of the trunk. When you reach the base of the tree brush some of the same colors across. Let dry.
PINE NEEDLESThe pine needles will be painted in layers. Mix a little water with each of the following paint colors so that it will fl ow nicely. I used a 6 /0 liner brush to pull out long strokes.1. Payne’s Grey2. Plantation Pine3. Foliage Green4. Thermal Green (just on the tree).5. White to highlight
TREE BERRIESPaint the berries with Country Red and let dry. Next, shade under the bottom of the berries with a little Black Plum and on the base (do this just on the tree berries, not the ornaments). Now highlight the top of the berries with White.
SNOWDabble White on the Pallet Tree branches for snow. Then Let dry.
Barky OrnamentsAfter you basecoat the background of each ornaments paint the snowfl akes. I used the 1 /4" royal crafters Choice Grip 9003. All snowfl akes (except those on the owl ornament) are painted in layers. First with Honey Brown, second with Bleached Sand.
Paint the branches on the Barky Ornaments the same way as on the main Pallet Tree. Paint in layers using the same order of colors and mix each color with water to help the paint fl ow.
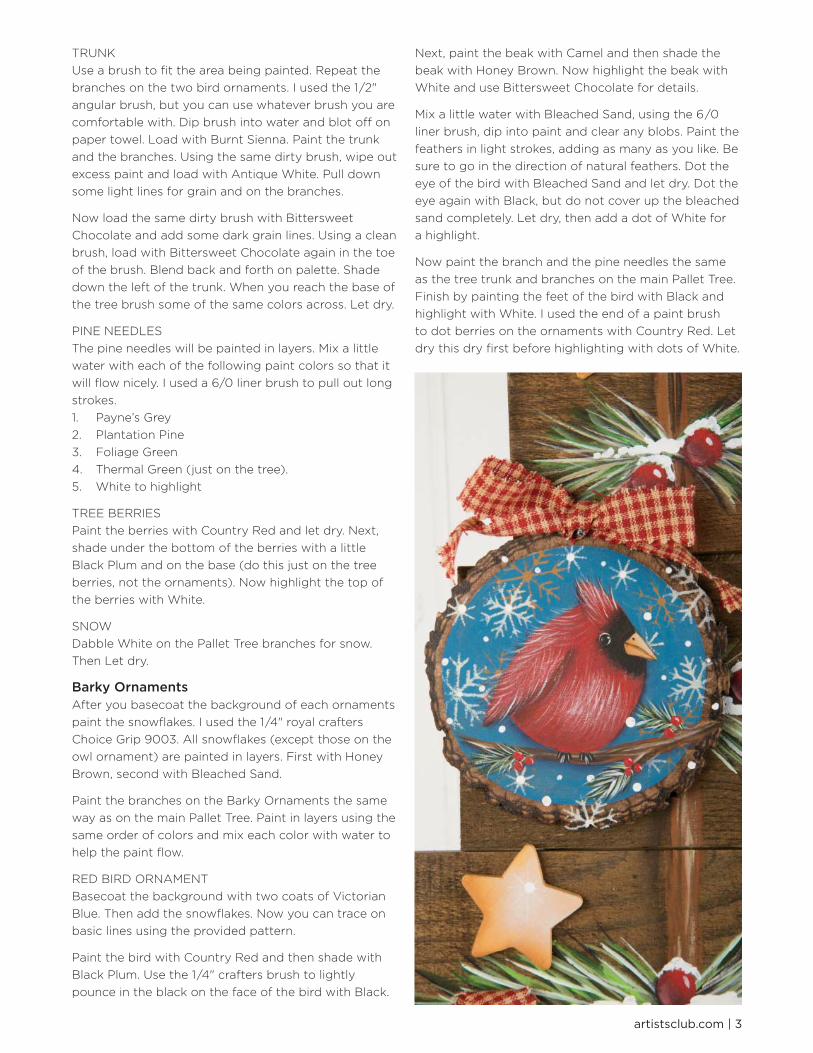
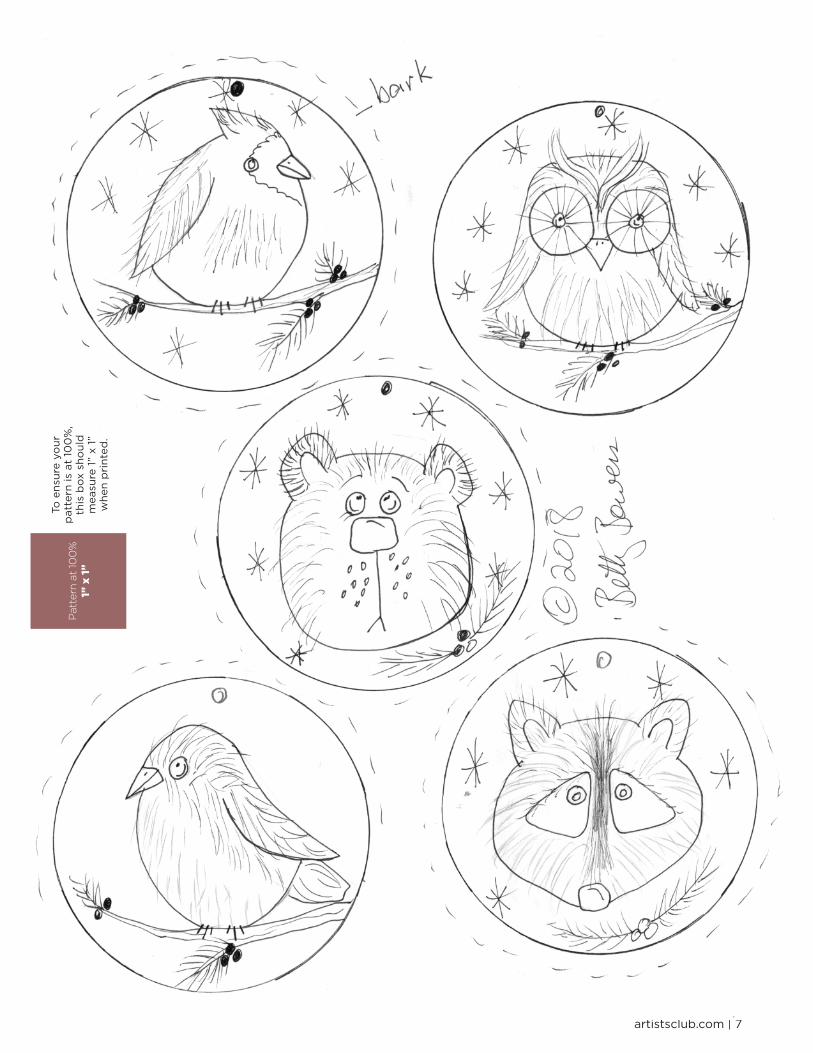
RED BIRD ORNAMENTBasecoat the background with two coats of Victorian Blue. Then add the snowfl akes. Now you can trace on basic lines using the provided pattern.
Paint the bird with Country Red and then shade with Black Plum. Use the 1 /4" crafters brush to lightly pounce in the black on the face of the bird with Black.
Next, paint the beak with Camel and then shade the beak with Honey Brown. Now highlight the beak with White and use Bittersweet Chocolate for details.
Mix a little water with Bleached Sand, using the 6 /0 liner brush, dip into paint and clear any blobs. Paint the feathers in light strokes, adding as many as you like. Be sure to go in the direction of natural feathers. Dot the eye of the bird with Bleached Sand and let dry. Dot the eye again with Black, but do not cover up the bleached sand completely. Let dry, then add a dot of White for a highlight.
Now paint the branch and the pine needles the same as the tree trunk and branches on the main Pallet Tree. Finish by painting the feet of the bird with Black and highlight with White. I used the end of a paint brush to dot berries on the ornaments with Country Red. Let dry this dry fi rst before highlighting with dots of White.

4 | artistsclub.com
OWL ORNAMENTBasecoat the background of the Owl ornament with Honey Brown, then let dry. Repeat snowfl akes as above, except use Camel and Bleached Sand. Now you can trace on basic lines using the provided pattern.
Paint the owl with Antique White and shade with Burnt Sienna. Then deepen shading with Bittersweet Choco-late. Next, paint the beak with Camel and shade with Honey Brown. Follow by highlighting with White.
Mix a little water with Bleached Sand, using the 6 /0 liner brush, dip into paint and clear any blobs. Paint the feathers in light strokes following directions (see photo). Load your brush often.
Paint the eye area with Antique White and shade around each eye with Burnt Sienna, deepen with Bit-tersweet Chocolate. Stipple the center with Bittersweet Chocolate. Then repeat the lines as the feathers from the center out. Dot the eyes with Black over the bit-tersweet chocolate, but do not cover the brown. Now highlight with White.
Now paint the branch and the pine needles the same as the tree trunk and branches on the main Pallet Tree, and the berries the same as above.
BEARBasecoat with Camel and Bleached Sand. Paint the bear with Honey Brown and shade with Burnt Sienna. Next, paint in the ears and shade around the outside of the face and deepen this shading with Bittersweet Chocolate.
See photo for fur. Mix a little water with Burnt Sienna. Using the 6 /0 brush, stroke in the fur with Burnt Si-enna, then repeat with Bleached Sand. Pull up more fur inside the ears, letting the fur go over the edge. Stipple the muzzle area and eye areas with Bleached Sand. Paint the eyes and nose with Black and highlight with White. Then add the dots and the line under the nose with Bittersweet Chocolate. Finish by shading under the mouth with Burnt Sienna and paint the pine needles the same as the tree trunk and branches on the main Pallet Tree, and the berries the same as above.
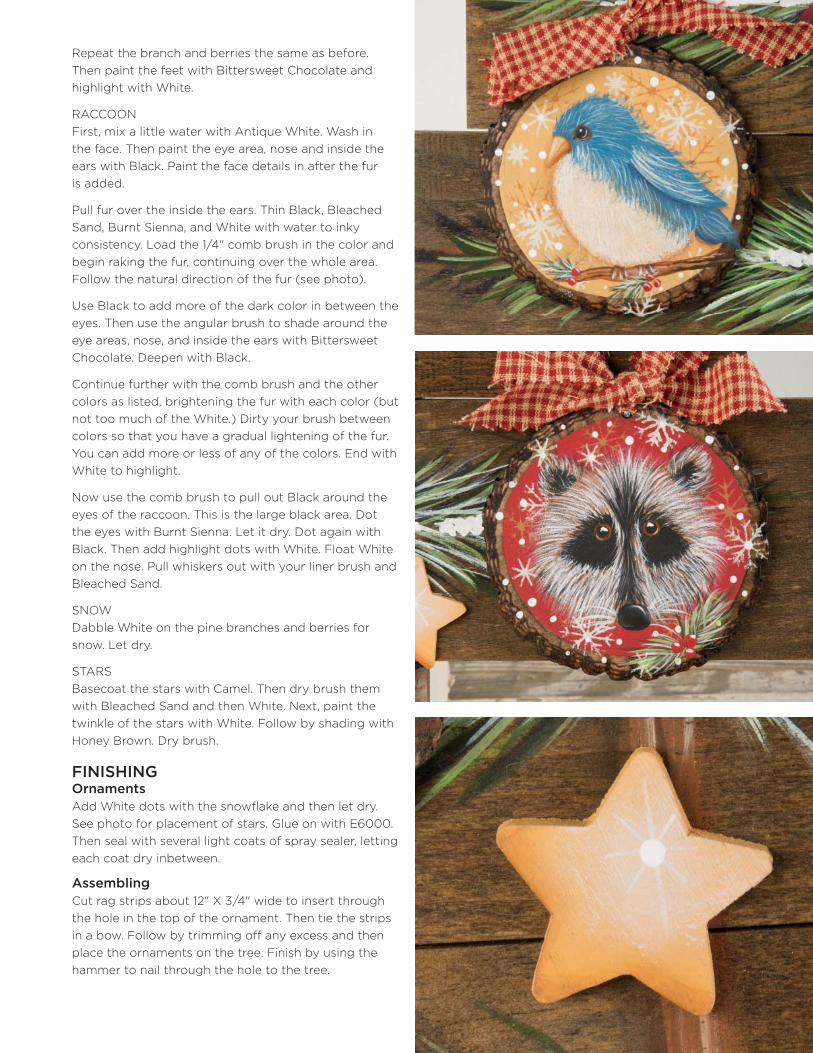
BLUE BIRDBasecoat the bird ornament with Camel. Paint the tum-my of the blue bird with bleached Sand. Paint the rest of the bird with Victorian Blue. Now shade under the wing and tail with Payne’s Grey and then shade around the outer edge of the bird with Burnt Sienna.
Lightly stipple the tummy with White. Repeat the feathers as the fur above with White. Then add some feathers to the tummy. Next, dot the eye with Burnt Sienna and then dot with Black. Use White to highlight and then paint the beak the same as the red bird.
artistsclub.com | 5
Repeat the branch and berries the same as before. Then paint the feet with Bittersweet Chocolate and highlight with White.
RACCOONFirst, mix a little water with Antique White. Wash in the face. Then paint the eye area, nose and inside the ears with Black. Paint the face details in after the fur is added.
Pull fur over the inside the ears. Thin Black, Bleached Sand, Burnt Sienna, and White with water to inky consistency. Load the 1/4" comb brush in the color and begin raking the fur, continuing over the whole area. Follow the natural direction of the fur (see photo).
Use Black to add more of the dark color in between the eyes. Then use the angular brush to shade around the eye areas, nose, and inside the ears with Bittersweet Chocolate. Deepen with Black.
Continue further with the comb brush and the other colors as listed, brightening the fur with each color (but not too much of the White.) Dirty your brush between colors so that you have a gradual lightening of the fur. You can add more or less of any of the colors. End with White to highlight.
Now use the comb brush to pull out Black around the eyes of the raccoon. This is the large black area. Dot the eyes with Burnt Sienna. Let it dry. Dot again with Black. Then add highlight dots with White. Float White on the nose. Pull whiskers out with your liner brush and Bleached Sand.
SNOWDabble White on the pine branches and berries for snow. Let dry.
STARSBasecoat the stars with Camel. Then dry brush them with Bleached Sand and then White. Next, paint the twinkle of the stars with White. Follow by shading with Honey Brown. Dry brush.
FINISHING OrnamentsAdd White dots with the snowfl ake and then let dry. See photo for placement of stars. Glue on with E6000. Then seal with several light coats of spray sealer, letting each coat dry inbetween.
AssemblingCut rag strips about 12" X 3 /4" wide to insert through the hole in the top of the ornament. Then tie the strips in a bow. Follow by trimming off any excess and then place the ornaments on the tree. Finish by using the hammer to nail through the hole to the tree.
6 | artistsclub.com
artistsclub.com | 7
Pat
tern
at
100
%1”
x 1
”
To e
nsur
e yo
urp
atte
rn is
at
100
%,
this
box
sho
uld
m
easu
re 1
” x
1”
whe
n p
rint
ed.
Copyright 2018 by Betty Bowers and Crafts Americana Group, Inc.All Rights Reserved. #332318
No. *A332318*© Artist’s Club ®. All rights reserved. For private, non-commercial use only.
Please see our web site for terms of use.