Embed Size (px)
Citation preview
Slovak University of Technology in Bratislava
Faculty of Informatics and Information Technologies
Pol Monforte Batiste
Universitat Politècnica de Catalunya
Facultat d’Informàtica de Barcelona
TranSign
Android Sign Translator
Place of work: Institute of Applied Informatics, FIIT STU in
Bratislava
Supervisor: Ing. Juraj Stefanovic, PhD.
May 2013

1
Contents
1. Introduction ........................................................................... 3
2. List of Topics .......................................................................... 4
2.1. Computer Vision ................................................................ 4
2.2. Image Segmentation ......................................................... 4
2.3. Optical Character Recognition ............................................. 5
2.4. Android ............................................................................ 5
2.5. OpenCV ............................................................................ 5
2.6. Tesseract ......................................................................... 5
2.7. Microsoft Translator ........................................................... 5
3. Similar Solutions .................................................................... 6
3.1. Mobile OCR ....................................................................... 6
3.2. Google Googles ................................................................. 6
4. Implementation Tools .............................................................. 7
4.1. Operating System .............................................................. 7
4.2. Developing Environment .................................................... 7
4.3. Libraries ........................................................................... 8
4.4. Android Device .................................................................. 9
5. Image Segmentation Algorithm .............................................. 10
5.1. Loading the image ........................................................... 11
5.2. Conversion from BGR to grayscale ..................................... 12
5.3. Blurring .......................................................................... 13
5.4. Sobel filter ...................................................................... 14
5.5. Binary threshold and Otsu’s method .................................. 15
5.6. Morphological closing ....................................................... 16
5.7. Contour detection ............................................................ 18
5.8. Contours on borders ........................................................ 20
5.9. Contours with correct area ............................................... 21
5.10. Contours with correct aspect ratio ................................... 22
5.11. Contours with correct histogram pattern ........................... 23
6. Image Pre-processing Algorithm ............................................. 26
2
7. Solution Proposal .................................................................. 28
7.1. Explanation .................................................................... 28
7.2. Scheme .......................................................................... 29
8. Experimentation and Evaluation ............................................. 34
9. Conclusions .......................................................................... 39
10. Literature ........................................................................... 40
11. User Guide ......................................................................... 41
12. Contents of the CD .............................................................. 42
3
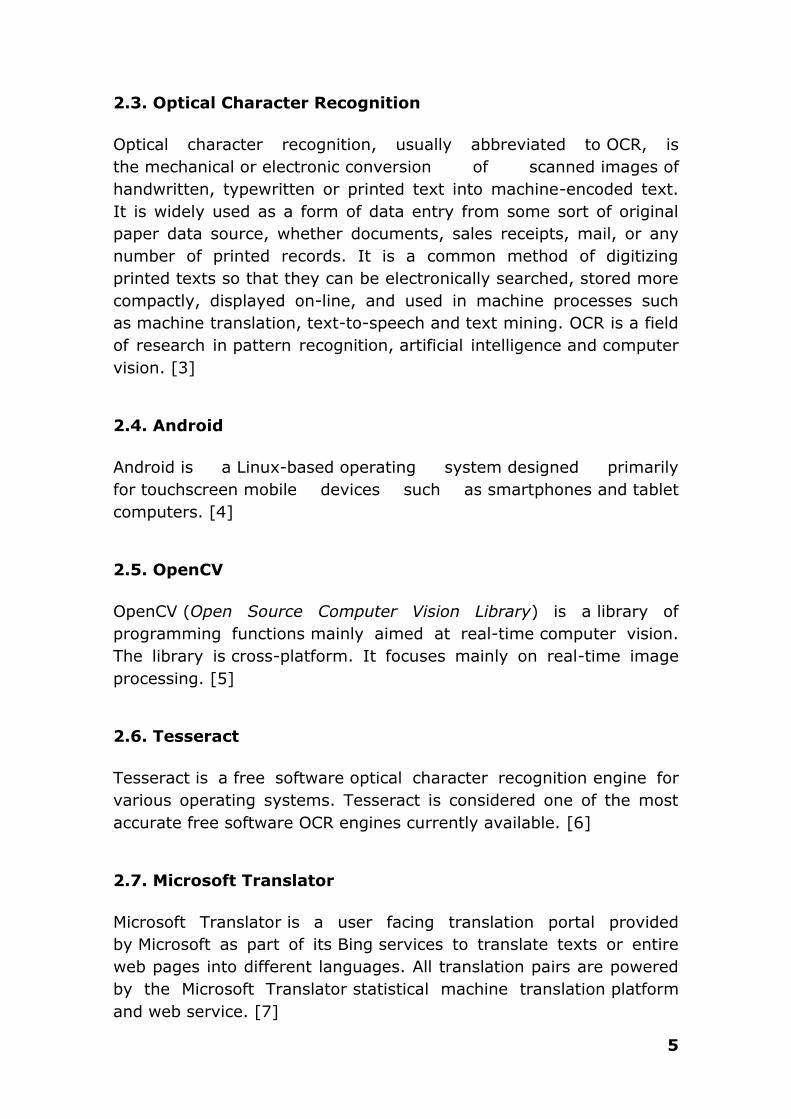
1. Introduction
This project explains how “TranSign” android application is
implemented.
TranSign goal is to translate words from signs (with black letters and
white background) from one language to another.
This is done by using the camera of the android device to take a
picture of a sign. After that, the application chooses the correct area
of interest (where the words of the sign are) and extracts them.
When all the words have been saved, the OCR Library Tesseract
extracts the words from the image. Once this is completed, the user
chooses a language to translate to, and then the application
translates the words using Microsoft Translation API.
The project also contains some experiments using TranSign in
different environments. For example with pictures of signs taken from
different distances, signs with bigger or smaller font size, signs with
more separation between the letters, etc.
These experiments are evaluated to see which ones are correct and
which ones are not with a series of characteristics. This is fully
explained in the experimentation section of the project.

4
2. List of Topics
In this section, an explanation of every keyword that is used in the
project is shown:
2.1. Computer Vision
Computer vision is a field that includes methods for
acquiring, processing, analyzing, and understanding images and, in
general, high-dimensional data from the real world in order to
produce numerical or symbolic information, e.g., in the forms of
decisions. A theme in the development of this field has been to
duplicate the abilities of human vision by electronically perceiving and
understanding an image. This image understanding can be seen as
the disentangling of symbolic information from image data using
models constructed with the aid of geometry, physics, statistics, and
learning theory. Computer vision has also been described as the
enterprise of automating and integrating a wide range of processes
and representations for vision perception. [1]
2.2. Image Segmentation
In computer vision, image segmentation is the process of partitioning
a digital image into multiple segments (sets of pixels, also known as
superpixels). The goal of segmentation is to simplify and/or change
the representation of an image into something that is more
meaningful and easier to analyze.
Image segmentation is typically used to locate objects and
boundaries (lines, curves, etc.) in images. More precisely, image
segmentation is the process of assigning a label to every pixel in an
image such that pixels with the same label share certain visual
characteristics. [2]
5
2.3. Optical Character Recognition
Optical character recognition, usually abbreviated to OCR, is
the mechanical or electronic conversion of scanned images of
handwritten, typewritten or printed text into machine-encoded text.
It is widely used as a form of data entry from some sort of original
paper data source, whether documents, sales receipts, mail, or any
number of printed records. It is a common method of digitizing
printed texts so that they can be electronically searched, stored more
compactly, displayed on-line, and used in machine processes such
as machine translation, text-to-speech and text mining. OCR is a field
of research in pattern recognition, artificial intelligence and computer
vision. [3]
2.4. Android
Android is a Linux-based operating system designed primarily
for touchscreen mobile devices such as smartphones and tablet
computers. [4]
2.5. OpenCV
OpenCV (Open Source Computer Vision Library) is a library of
programming functions mainly aimed at real-time computer vision.
The library is cross-platform. It focuses mainly on real-time image
processing. [5]
2.6. Tesseract
Tesseract is a free software optical character recognition engine for
various operating systems. Tesseract is considered one of the most
accurate free software OCR engines currently available. [6]
2.7. Microsoft Translator
Microsoft Translator is a user facing translation portal provided
by Microsoft as part of its Bing services to translate texts or entire
web pages into different languages. All translation pairs are powered
by the Microsoft Translator statistical machine translation platform
and web service. [7]

6
3. Similar Solutions
The topic of label recognition has been discussed for long time now,
so it is normal that some solution already existed before the
implementation of this application.
In this section two of them will be analyzed.
3.1. Mobile OCR
Google Play Store: https://play.google.com/store/apps/details?id=com.smartmobilesoftw
are.mobileocrfree
This application is very similar to TranSign. It gives the user the option to take a picture or choose an image from the smartphone
memory.
Testing with the same images, this application is slower than TranSign, because the text extraction from the image takes about 20
seconds, when in TranSign takes about 10 seconds. The accuracy is better in TranSign in terms of distance to the sign, because in images
from far distance Mobile OCR does not work, and TranSign works in
some cases. But both of them fail sometimes to extract the words precisely (some characters wrong).
3.2. Google Googles
Google Play Store: https://play.google.com/store/apps/details?id=com.google.android.a
pps.unveil
Google has a very good application that has more features than TranSign. Google Googles has a very fast recognition, between 1 and
2 seconds, so it is much faster than TranSign. The accuracy is almost perfect, it reads almost every character that it scans, from any
distance.
As an application developed by a company like Google, it is expected
to be very efficient and fast.

7
4. Implementation Tools
The tools used to develop TranSign are open source and totally free
of charge, and they give excellent results.
4.1. Operating System
Android is the best operating system for the implementation of this
application, because it is open source and most of the smartphones
on the market right now use it.
To develop the application, the Android API 15 has been used, since
the smartphone where the application was tested had Android 4.0.3
(Ice Cream Sandwich) installed.
4.2. Developing Environment
Eclipse is the best tool IDE to develop in Java (Android applications
are written in Java).
The version used for this project is Eclipse IDE for Java Developers,
Juno Service Release 2, build 20130225-0426. Combined with some plugins like Android Development Tools and SDK.

8
4.3. Libraries
OpenCV
For the image segmentation part, OpenCV (Open Computer Vision
Library) is a good choice because it is also open source and fulfills the
needs of the image segmentation algorithm.
The version used is OpenCV 2.4.4.0.
Tesseract
Tesseract has been selected because it more adaptable than Ocrad
engine, as seen in the paper [8] and in the application in [11].
The version used is 3.02.
Microsoft Translator API
For the translation part, Microsoft Translation API offers a free service
that translates the words correctly in most of the cases.
The version used is 0.6.2.

9
4.4. Android Device
The Sony Ericsson Xperia Arc S is the main target for the
application. With its powerful camera, the pictures of signs can have
enough quality to make the work of the image segmentation and
character recognition easier.
Smartphone specifications:
Chipset Qualcomm MSM8255T Snapdragon
CPU 1.4 GHz Scorpion
GPU Adreno 205
Internal Memory 1 GB
RAM 512 MB
Display Size 4.2 inches (~233 ppi pixel density)
Resolution 480 x 854 pixels
Camera 8 MP, 3264x2448 pixels, autofocus,
LED flash

10
5. Image Segmentation Algorithm
In this section, the image segmentation algorithm will be fully
explained, with parts of Java code and images of the current state of
the segmentation at each step of the algorithm. The steps are similar
than in the chapter 5 of the book [9].
The portions of code will not contain the entire code, but the
important parts. The comments should give the proper information to
understand each part.
The images represent each state of the OpenCV transformation to
obtain the final result.
The next photo taken with the android device will be used to do this
explanation:
Original photo, taken with Sony Ericsson Arc S camera
The image is stored in the application folder inside the SD card of the
smartphone after taking the picture.
The path to the image is /sdcard/TranSign/transign.png

11
In all the steps updating the image in the ImageView will be needed,
so the next function will save some time and code repetition:
public void refreshImage() { Utils.matToBitmap(img, bm); ImageView img = (ImageView)findViewById(R.id.opencvseg); img.setImageBitmap(bm); } //The Bitmap is set to the resource opencvseg, that is the
//ImageView that holds the image in the application
5.1. Loading the image
The first step is to load the image with OpenCV in the application:
String imageDir = Environment.getExternalStorageDirectory()+"/TranSign/transign.png";
File f = new File(imageDir);
Mat img = Highgui.imread(imageDir);
Bitmap bm = BitmapFactory.decodeFile(imageDir);
//The Mat and the Bitmap load the image to have the same size refreshImage();
Result after executing the code:
Image loaded in the application with OpenCV

12
5.2. Conversion from BGR to grayscale
The next step is to transform the image to grayscale so the loss of
color is not a problem for the algorithm since colors are not needed to
detect where words are.
Imgproc.cvtColor(img, img, Imgproc.COLOR_BGR2GRAY); refreshImage();
Result after executing the code:
Image after converting from BGR to grayscale
13
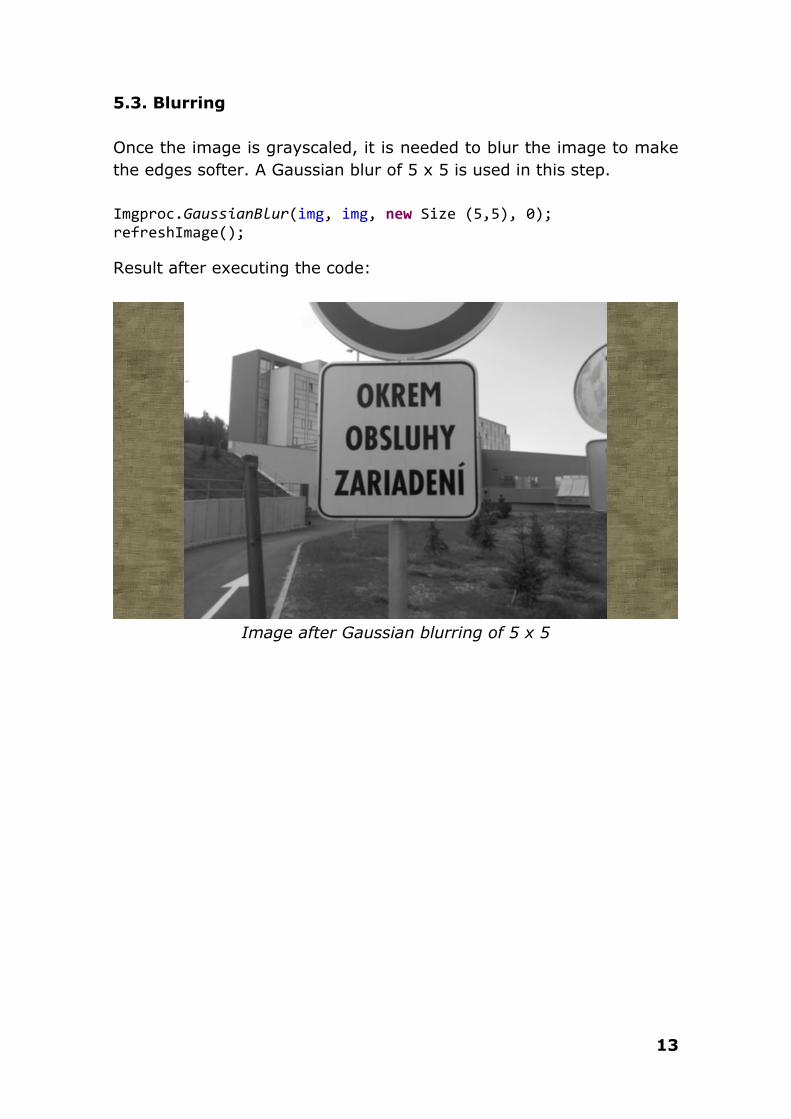
5.3. Blurring
Once the image is grayscaled, it is needed to blur the image to make
the edges softer. A Gaussian blur of 5 x 5 is used in this step.
Imgproc.GaussianBlur(img, img, new Size (5,5), 0); refreshImage();
Result after executing the code:
Image after Gaussian blurring of 5 x 5

14
5.4. Sobel filter
After blurring, the Sobel filter is applied with the dx = 1 (first derivate
of x = 1) to detect the vertical lines of the image, since the letters
have a great chance to have them.
Imgproc.Sobel(img, img, CvType.CV_8U, 1, 0, 3, 1, 0); //CV_8U is the depth of the destination image //1 is the result of the first derivate of x, dx = 1 //0 is the result of the first derivate of y, dy = 0 //3 is the size of the kernel //next are default values refreshImage();
Result after executing the code:
Image after Sobel filter with dx = 1
15
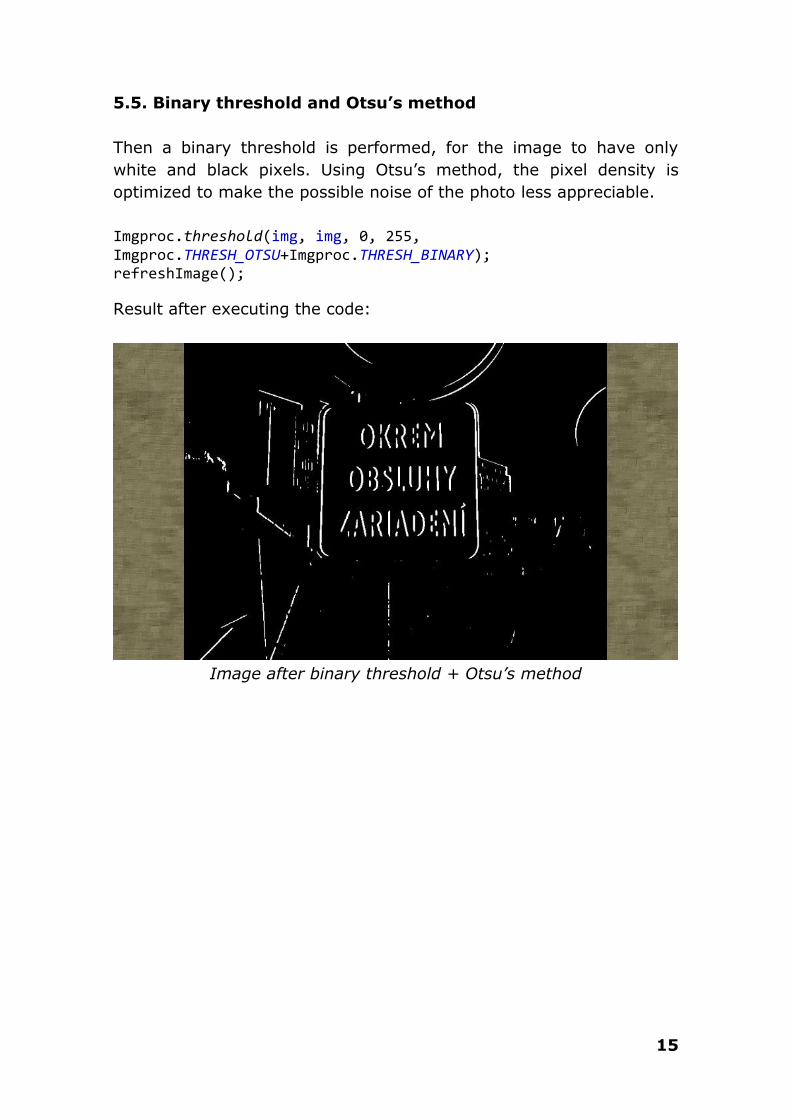
5.5. Binary threshold and Otsu’s method
Then a binary threshold is performed, for the image to have only
white and black pixels. Using Otsu’s method, the pixel density is
optimized to make the possible noise of the photo less appreciable.
Imgproc.threshold(img, img, 0, 255, Imgproc.THRESH_OTSU+Imgproc.THRESH_BINARY); refreshImage();
Result after executing the code:
Image after binary threshold + Otsu’s method

16
5.6. Morphological closing
After that, the morphological operation of closing is applied with a
structuring element of determinate characteristics, depending on the
size of the sign in the image (distance to the sign when taking the
picture). In this example, the sign is at medium distance, so the
structuring element size is 15 x 10.
A morphological closing implies that a dilation and then an erosion
are applied with the same structuring element to the image, in that
order.
if (dist == 0) { elemWidth = 15; elemHeight = 10; } else if (dist == 1) { elemWidth = 7.5; elemHeight = 5; } else { elemWidth = 28; elemHeight = 12; } element = Imgproc.getStructuringElement(Imgproc.MORPH_RECT, new
Size(elemWidth, elemHeight));
17
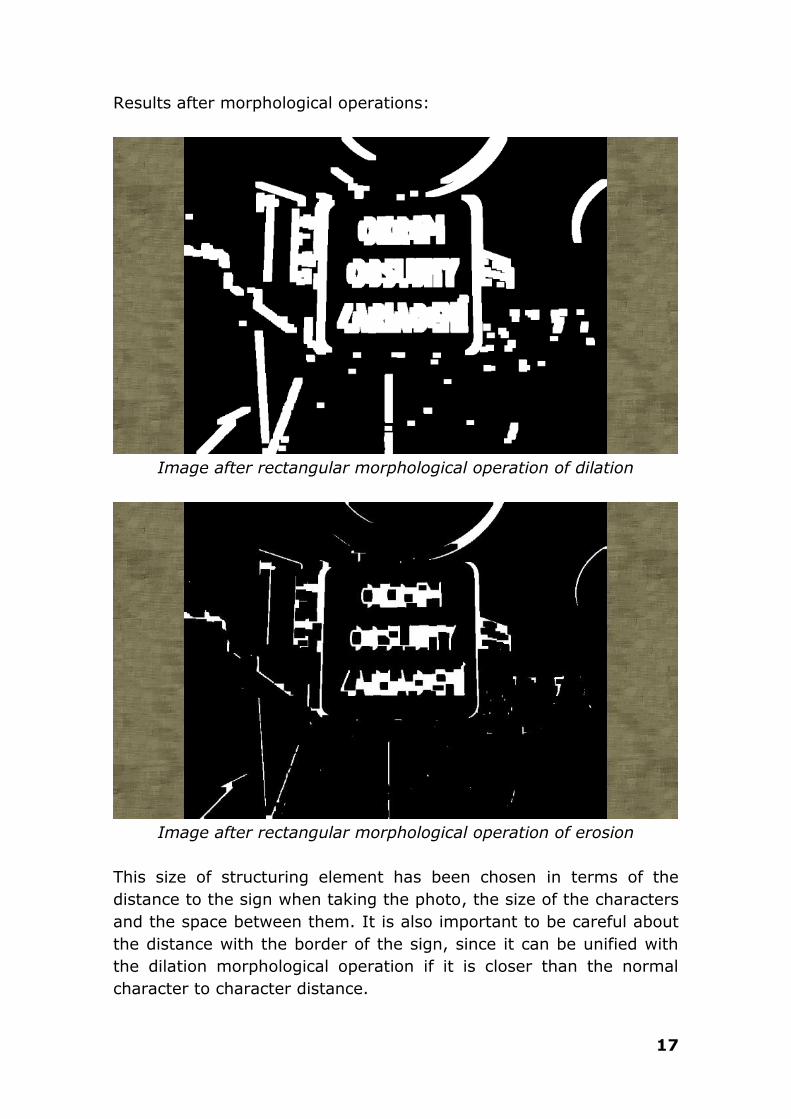
Results after morphological operations:
Image after rectangular morphological operation of dilation
Image after rectangular morphological operation of erosion
This size of structuring element has been chosen in terms of the
distance to the sign when taking the photo, the size of the characters
and the space between them. It is also important to be careful about
the distance with the border of the sign, since it can be unified with
the dilation morphological operation if it is closer than the normal
character to character distance.

18
5.7. Contour detection
Now the image is ready for the application to be able find the
contours:
List<MatOfPoint> contours; contours = new ArrayList<MatOfPoint>(100); Imgproc.findContours(img, contours, new Mat(), Imgproc.RETR_EXTERNAL, Imgproc.CHAIN_APPROX_NONE); //No mask needed, that is why new Mat() appears, //also only the external contours are needed, //and that is why RETR_EXTERNAL is used //CHAIN_APPROX_NONE means that all the points of the contours
//are stored
To see the contours found more clearly, one bounding rectangle is
drawn for each one in the initial image. Each rectangle is resized in
the following way to contain all the characters (due the loss produced
by the sobel filter):
List<Rect> validRectangles; validRectangles = new ArrayList<Rect>(100); for (int i = 0; i < contours.size(); ++i) {
Rect r = Imgproc.boundingRect(contours.get(i)); r.x -= 15;
r.width += 15;
r.y -= 5;
r.height += 5;
validRectangles.add(r);
}
Now validRectangles contains all the bounding rectangles ready to be
drawn, and this will be done a lot of times, so a new method is
created to fulfill this need:
public void drawRectangles() {
for (int i = 0; i < validRectangles.size(); ++i) {
Rect r = validRectangles.get(i);
Core.rectangle(img, new Point(r.x,r.y),
new Point((r.x + r.width),(r.y + r.height)),
new Scalar(255, 0, 0));
} refreshImage();
}

19
Result after using drawRectangles method:
Image after drawing all rectangles
As it is shown in the last image, the number of contours is very high,
and it is needed to apply some restrictions to obtain only the ones
that contain words.

20
5.8. Contours on borders
The first that can be done is to delete the contours that are in the
border of the image, because the user has to center the sign in the
middle of the picture, so it doesn’t make sense that the words are in
the borders.
The method that controls that is the following:
private boolean notOnEdges(Rect r) {
if (r.x < 2 || r.y < 2 || r.x + r.width == img.width()-1 || r.y + r.height == img.height()-1) return false;
return true;
}
Every rectangle of validRectangles that does not achieve this is
removed. After drawing all the remaining ones, the next image is
obtained:
Image after drawing the remaining rectangles
21
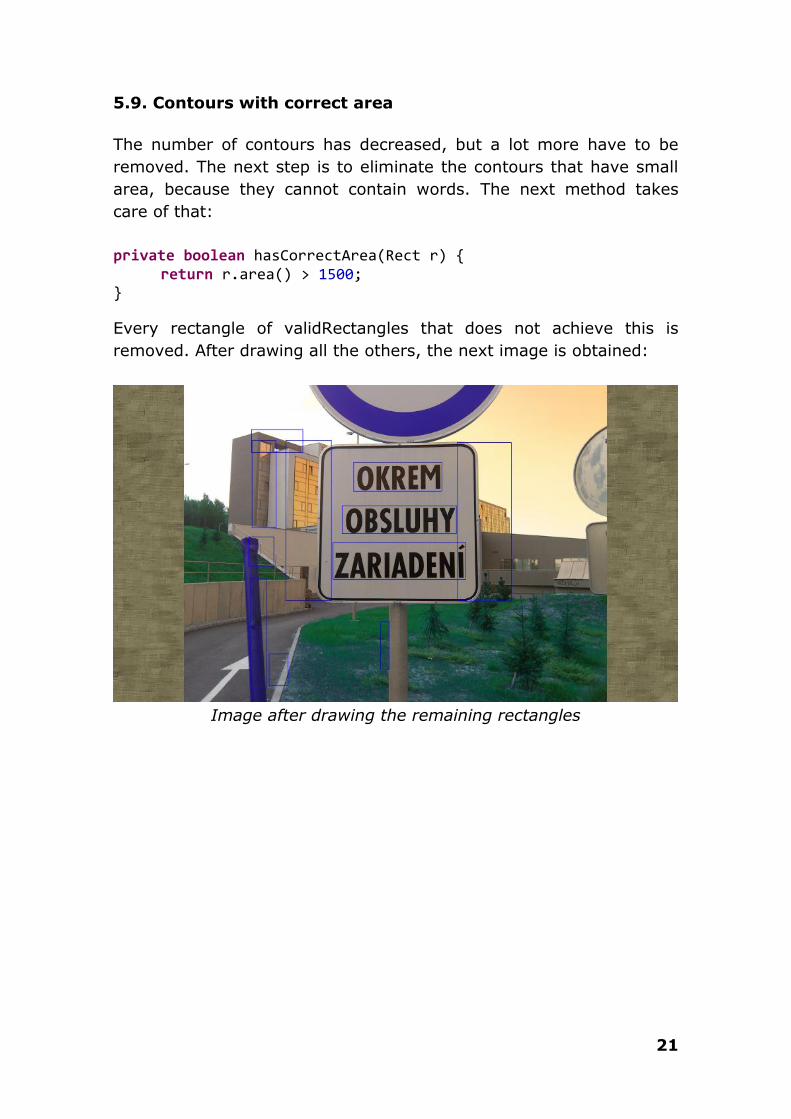
5.9. Contours with correct area
The number of contours has decreased, but a lot more have to be
removed. The next step is to eliminate the contours that have small
area, because they cannot contain words. The next method takes
care of that:
private boolean hasCorrectArea(Rect r) {
return r.area() > 1500;
}
Every rectangle of validRectangles that does not achieve this is
removed. After drawing all the others, the next image is obtained:
Image after drawing the remaining rectangles

22
5.10. Contours with correct aspect ratio
The next thing to look for is the aspect ratio. Words usually have
more width than height, so if the aspect ratio is less than 1, it makes
sense that those contours have to be discarded. But sometimes a
single character can become a word, so the number of aspect ratio is
lowered to 0.5, for those cases.
private boolean hasCorrectRatio(Rect r) { double num = (double) r.width / (double) r.height; return num > 0.5; }
Every rectangle of validRectangles that does not achieve this is
removed. After drawing all the others, the next image is obtained:
Image after drawing the remaining rectangles

23
5.11. Contours with correct histogram pattern
And the last and more complicated step is to extract each rectangle
image and look for some determinate pattern in its histogram.
Words have a determinate histogram, with its own characteristics. An
example of a word histogram can be seen in the left, while the one in
the right is an example of a random area that has the size and ratio
of a word but it is not:
Correct histogram Wrong histogram
Finally, after discarding the contours that do not have a correct
histogram, the final result is obtained.
24
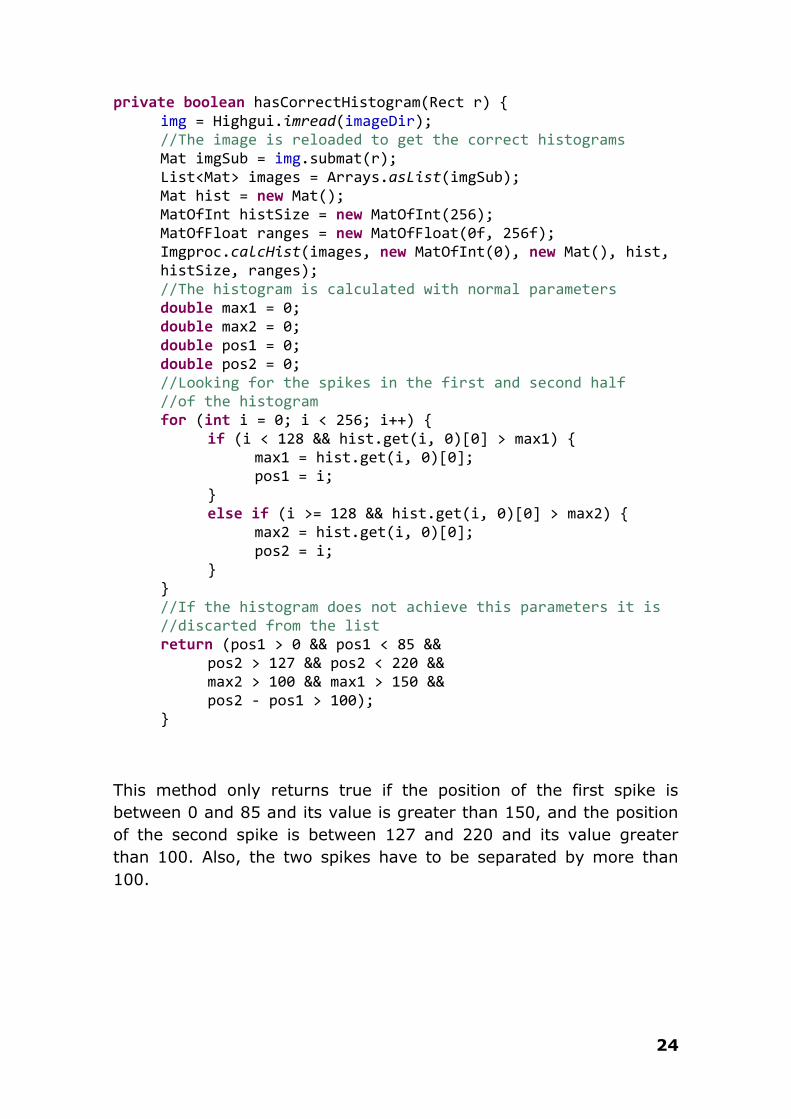
private boolean hasCorrectHistogram(Rect r) {
img = Highgui.imread(imageDir);
//The image is reloaded to get the correct histograms
Mat imgSub = img.submat(r);
List<Mat> images = Arrays.asList(imgSub);
Mat hist = new Mat();
MatOfInt histSize = new MatOfInt(256);
MatOfFloat ranges = new MatOfFloat(0f, 256f);
Imgproc.calcHist(images, new MatOfInt(0), new Mat(), hist, histSize, ranges);
//The histogram is calculated with normal parameters
double max1 = 0;
double max2 = 0;
double pos1 = 0;
double pos2 = 0;
//Looking for the spikes in the first and second half
//of the histogram
for (int i = 0; i < 256; i++) {
if (i < 128 && hist.get(i, 0)[0] > max1) {
max1 = hist.get(i, 0)[0];
pos1 = i;
}
else if (i >= 128 && hist.get(i, 0)[0] > max2) {
max2 = hist.get(i, 0)[0];
pos2 = i;
}
} //If the histogram does not achieve this parameters it is
//discarted from the list
return (pos1 > 0 && pos1 < 85 &&
pos2 > 127 && pos2 < 220 && max2 > 100 && max1 > 150 && pos2 - pos1 > 100);
}
This method only returns true if the position of the first spike is
between 0 and 85 and its value is greater than 150, and the position
of the second spike is between 127 and 220 and its value greater
than 100. Also, the two spikes have to be separated by more than
100.
25
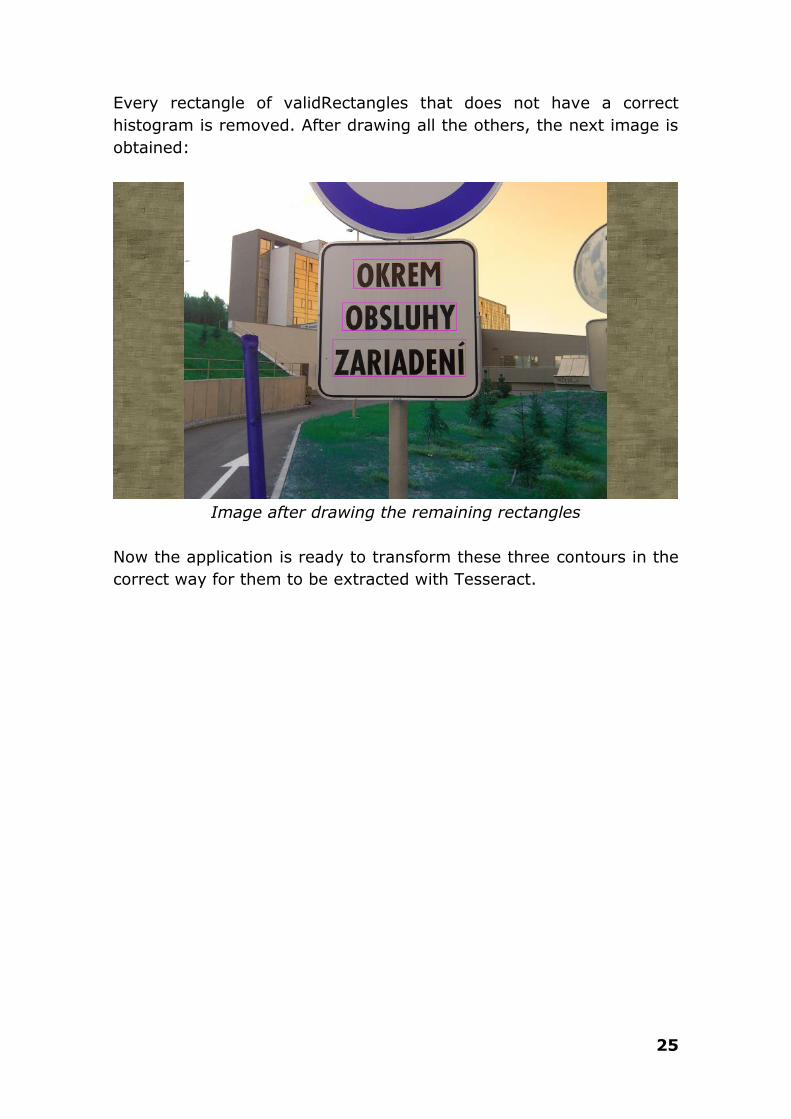
Every rectangle of validRectangles that does not have a correct
histogram is removed. After drawing all the others, the next image is
obtained:
Image after drawing the remaining rectangles
Now the application is ready to transform these three contours in the
correct way for them to be extracted with Tesseract.

26
6. Image Pre-processing Algorithm
After extracting each word, some transformation will be needed to
prepare the images for the Tesseract extraction.
Creating the Tesseract object:
TessBaseAPI baseApi = new TessBaseAPI(); baseApi.init(TESSBASE_PATH, DEFAULT_LANGUAGE);
The first step is the same that in the image segmentation, but applied
to each rectangle of the validRectangles array:
img = Highgui.imread(imageDir); for (int i = 0; i < validRectangles.size(); ++i) { Rect r = validRectangles.get(i);
Mat imgSub = img.submat(r); Imgproc.cvtColor(imgSub, imgSub, Imgproc.COLOR_BGR2GRAY);
After that we apply a blur of 3 x 3 size, we convert the image to the
correct type to be received for the binary threshold (with Otsu’s
method like in the segmentation part)
Imgproc.blur(imgSub, imgSub, new Size(3, 3)); imgSub.convertTo(imgSub, CvType.CV_8U); Imgproc.threshold(imgSub, imgSub, 0, 255, Imgproc.THRESH_OTSU+Imgproc.THRESH_BINARY);
Then the image has to be stored to be loaded into a bitmap, since
there’s no efficient way to convert from Mat to Bitmap in Java.
Highgui.imwrite(wordsDir + "/word" + i + ".png", imgSub); Bitmap bm = BitmapFactory.decodeFile(wordsDir + "/word" + i + ".png"); bm = bm.copy(Bitmap.Config.ARGB_8888, true);
And finally the bitmap is set to the Tesseract object to do the
extraction and all the images are deleted to free disk space:

27
baseApi.setImage(bm);
String resultParcial = baseApi.getUTF8Text();
result = result +" "+ resultParcial;
}
result = result.trim();
baseApi.end();
deleteImages(true);
28
7. Solution Proposal
7.1. Explanation
The solution to the translation of signs is obtained in the following
way:
First the user chooses to load an image from the drive or to take a
picture himself with the camera of the android device.
Then the user will choose the distance from the sign, between near,
medium and far. This characterizes the structuring element of the
morphological closing on the image extraction.
After that, the application stores the photo and starts the image
segmentation process with the OpenCV Library, as explained in the
previous chapter.
When the image segmentation is finished, the application stores each
area that contains a word or words and does some image
preprocessing before sending it to the Tesseract OCR.
Tesseract extracts the words and the user is asked about the
language to translate the extracted text (between English, Spanish,
Catalan and Slovak).
After that, the application sends a String with all the words to the
Microsoft Translation API (using internet connection) and obtains the
final result that is shown to the user.
TranSign cannot have control over the translator accuracy, as we can
see in this case, but the goal of the application is to give the person
at least an idea of what the sign says.
The extraction of text is very accurate in English, but in Slovak
sometimes it can be less precise (this is because of the signs over the
letters, that English does not have).
29
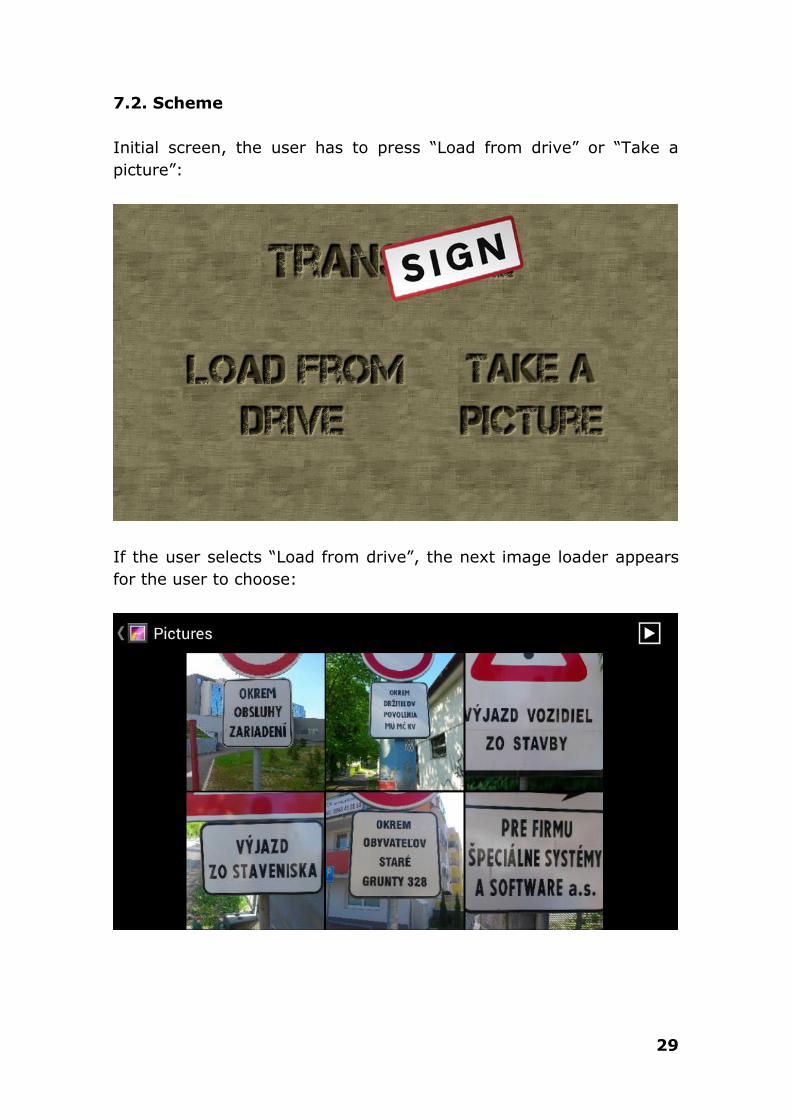
7.2. Scheme
Initial screen, the user has to press “Load from drive” or “Take a
picture”:
If the user selects “Load from drive”, the next image loader appears
for the user to choose:
30
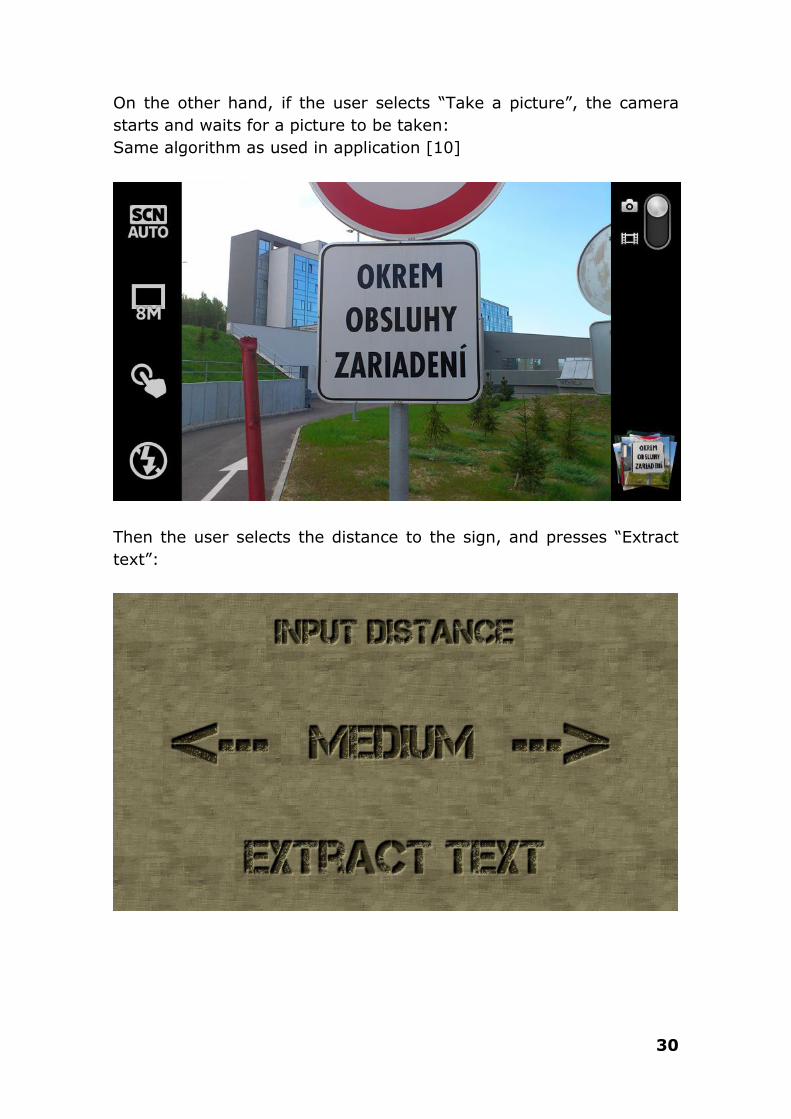
On the other hand, if the user selects “Take a picture”, the camera
starts and waits for a picture to be taken:
Same algorithm as used in application [10]
Then the user selects the distance to the sign, and presses “Extract
text”:
31
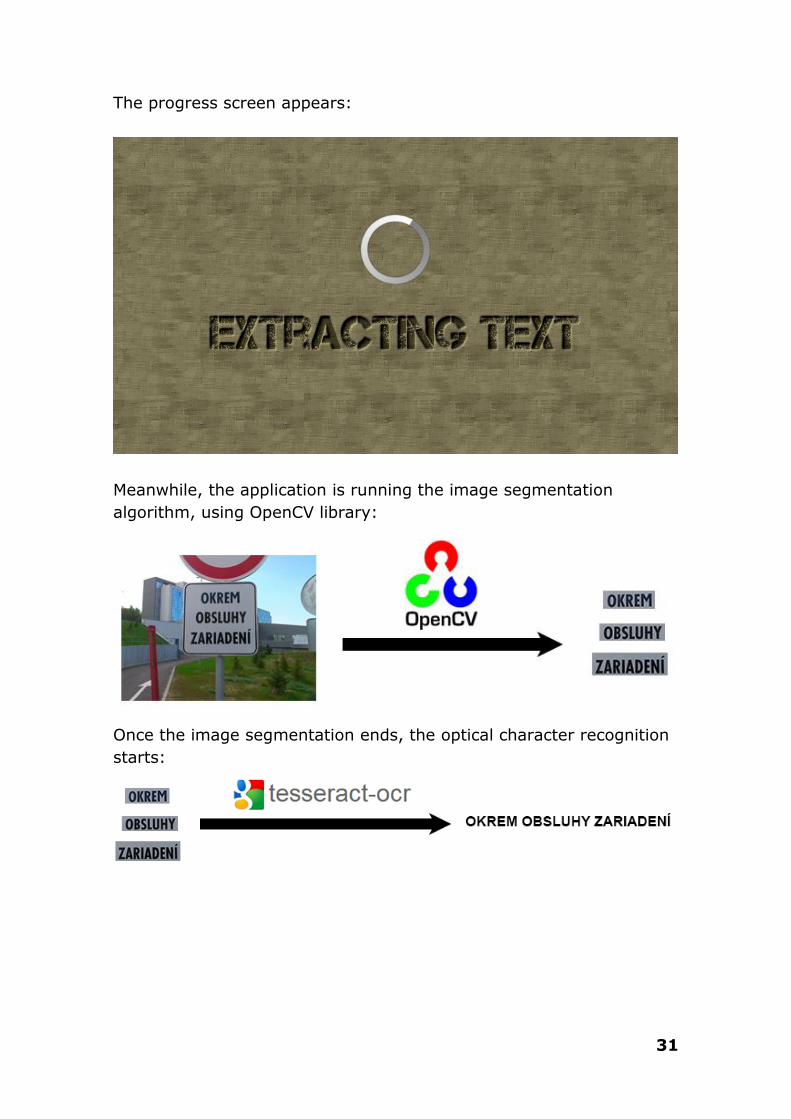
The progress screen appears:
Meanwhile, the application is running the image segmentation
algorithm, using OpenCV library:
Once the image segmentation ends, the optical character recognition
starts:
32
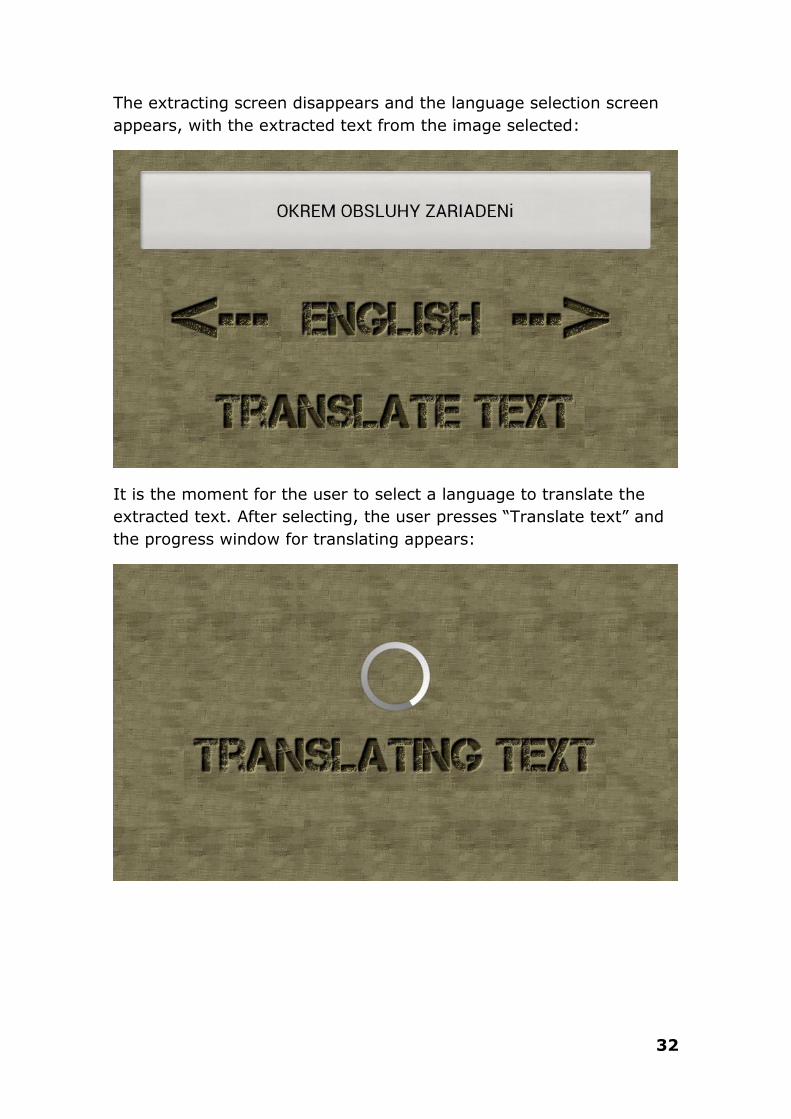
The extracting screen disappears and the language selection screen
appears, with the extracted text from the image selected:
It is the moment for the user to select a language to translate the
extracted text. After selecting, the user presses “Translate text” and
the progress window for translating appears:

33
Meanwhile the text is being sent over the internet to the Microsoft
Translator:
And finally, the user receives the translation, and he can also
translate a new image or exit:
34
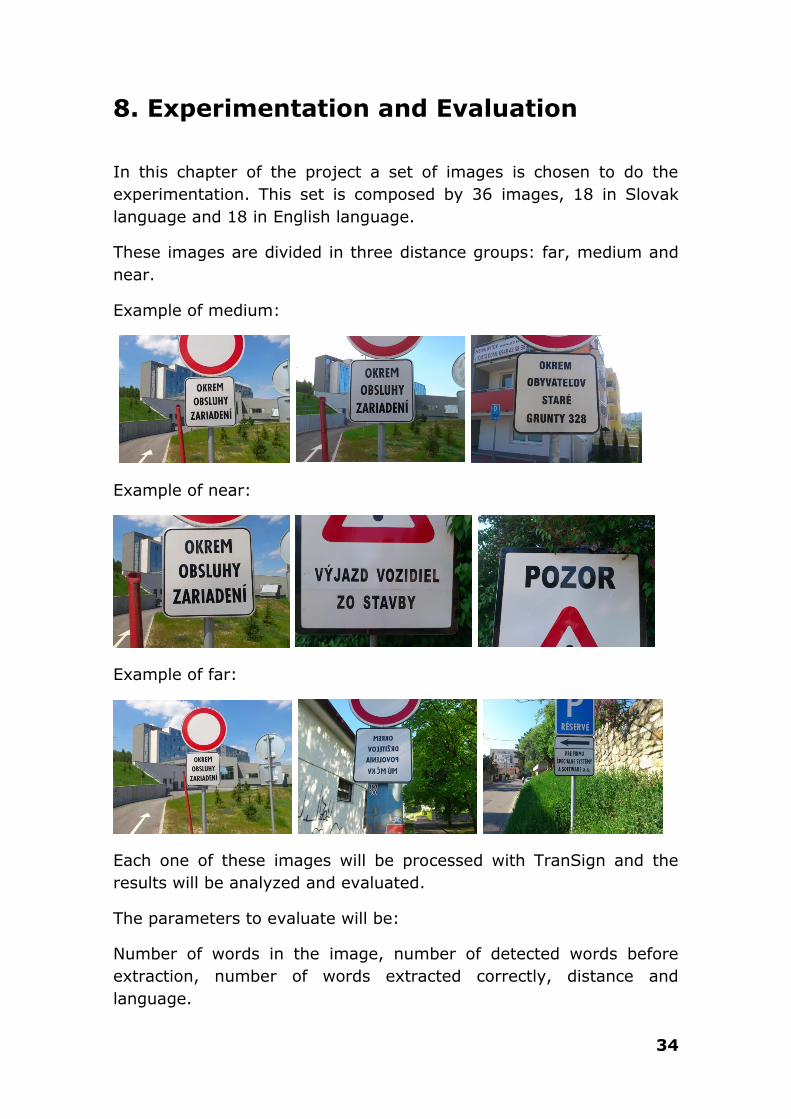
8. Experimentation and Evaluation
In this chapter of the project a set of images is chosen to do the
experimentation. This set is composed by 36 images, 18 in Slovak
language and 18 in English language.
These images are divided in three distance groups: far, medium and
near.
Example of medium:
Example of near:
Example of far:
Each one of these images will be processed with TranSign and the
results will be analyzed and evaluated.
The parameters to evaluate will be:
Number of words in the image, number of detected words before
extraction, number of words extracted correctly, distance and
language.

35
In the next table and graphic of the Slovak language, we can see the
results for the 18 images:
Language Distance Number of words in
the image
Number of words detected
Number of words
correctly extracted
Result
Picture 1 SLK Medium 3 3 3 100%
Picture 2 SLK Medium 6 6 3 75%
Picture 3 SLK Medium 3 3 2 83%
Picture 4 SLK Medium 4 4 3 88%
Picture 5 SLK Medium 5 5 3 80%
Picture 6 SLK Medium 2 2 2 100%
Picture 7 SLK Near 1 1 1 100%
Picture 8 SLK Near 3 2 2 67%
Picture 9 SLK Near 4 4 3 88%
Picture 10 SLK Near 5 4 2 60%
Picture 11 SLK Near 3 3 3 100%
Picture 12 SLK Near 6 5 5 83%
Picture 13 SLK Far 3 3 2 83%
Picture 14 SLK Far 4 3 3 75%
Picture 15 SLK Far 7 4 3 50%
Picture 16 SLK Far 9 6 2 44%
Picture 17 SLK Far 3 3 2 83%
Picture 18 SLK Far 4 2 2 50%
0%10%20%30%40%50%60%70%80%90%
100%
Result

36
The criteria for this results is the next:
result = ((Number of words detected / Number of words in the
image)*0,5
+( Number of words correctly extracted / Number of words in the
image)*0,5)
If we look at the results we can notice that, on average, medium has
more images well extracted than near or far, but we can also notice
that far has worst results than near.
The main problem of the number of words detected is that in some
cases, the distance from the last letter of a word to the border of a
sign is very near, like in picture 8 of the table:
The structuring element of dilation makes the “Í” character unite with
the border of the sign. Then, only two words are detected.
The feature of the user selecting the distance helps in this part, but it
is not perfect, as there are no established parameters for the user to
take the picture from the perfect distance.

37
The main problem in the extraction part is that Tesseract does not
have very good accuracy for the symbols over letters that appear in
Slovak, Catalan and Spanish.
In the next experiment, the English sign table and graphic are shown,
and Tesseract does a pretty good work, with almost perfect accuracy:
Language Distance Number of words in
the image
Number of words detected
Number of words
correctly extracted
Result
Picture 1 ENG Medium 4 4 4 100%
Picture 2 ENG Medium 3 3 3 100%
Picture 3 ENG Medium 5 4 4 80%
Picture 4 ENG Medium 3 3 3 100%
Picture 5 ENG Medium 1 1 1 100%
Picture 6 ENG Medium 7 6 6 86%
Picture 7 ENG Near 6 5 5 83%
Picture 8 ENG Near 5 4 4 80%
Picture 9 ENG Near 2 2 2 100%
Picture 10 ENG Near 2 2 2 100%
Picture 11 ENG Near 4 3 3 75%
Picture 12 ENG Near 1 1 1 100%
Picture 13 ENG Far 6 6 6 100%
Picture 14 ENG Far 5 3 3 60%
Picture 15 ENG Far 2 2 2 100%
Picture 16 ENG Far 4 3 3 75%
Picture 17 ENG Far 8 6 6 75%
Picture 18 ENG Far 7 7 7 100%
0%10%20%30%40%50%60%70%80%90%
100%
Result

38
As it can be seen in the table and graphic for the English language, all
the errors are given by the image segmentation and not because of
Tesseract.
Finally, comparing the two languages between them, we can see the
that in English language TranSign is more accurate than in Slovak
language.
Slovak signs mean: 76%
English signs mean: 89%
39
9. Conclusions
Developing this application and writing this project has been very
interesting in matters of learning things about image segmentation,
character recognition, and Android programming.
OpenCV is a very useful tool that I did not know and I am sure I will
use a lot in the future for my next projects.
With more time, the accuracy of the application would have been
better, looking for more parameters to compare, or even different
approaches to the extraction part, such as creating my own OCR.
The limitation of the application to only detect black letters on white
backgrounds does limit it a lot since in different countries the signs of
the street are not written in that configuration of colors.

40
10. Literature
[1] Wikipedia. Computer Vision.
http://en.wikipedia.org/wiki/Computer_vision
[2] Wikipedia. Image Segmentation.
http://en.wikipedia.org/wiki/Image_segmentation
[3] Wikipedia. Optical Character Recognition.
http://en.wikipedia.org/wiki/Optical_character_recognition
[4] Wikipedia. Android.
http://en.wikipedia.org/wiki/Android_(operating_system)
[5] Wikipedia. OpenCV.
http://en.wikipedia.org/wiki/OpenCV
[6] Wikipedia. Tesseract.
http://en.wikipedia.org/wiki/Tesseract_(software)
[7] Wikipedia. Microsoft Translator.
http://en.wikipedia.org/wiki/Microsoft_Translator
[8] A. B. Cambra, A. C. Murillo: Towards robust and efficient text sign
reading from a mobile phone. IEEE International Conference on Computer
Vision Workshops, ICCV 2011 Workshops, Barcelona, Spain, November 6-
13,
2011, pp.64-71, ISBN 978-1-4673-0062-9
http://ieeexplore.ieee.org/xpls/abs_all.jsp?arnumber=6130223
[9] Daniel Lélis Baggio, Shervin Emami, David Millán Escrivá, Khvedchenia Ievgen, Naureen Mahmood, Jason Saragih, Roy Shilkrot: Mastering OpenCV with Practical Computer Vision Projects. ISBN 978-1-84951-782-9
http://www.amazon.com/Mastering-OpenCV-Practical-Computer-Projects/dp/1849517827
Code: https://github.com/MasteringOpenCV
[10] Jeremy Neal Brown . Simple Android Photo Capture.
http://labs.makemachine.net/2010/03/simple-android-photo-capture/
[11] Gautam Gupta . Making a Simple OCR Android App using Tesseract.
http://gaut.am/making-an-ocr-android-app-using-tesseract/

41
11. User Guide
To run this application it is needed an Android device or an emulator.
In the first case, the user only needs to configure the device to
receive .apk files from outside of the Google Play store, and then
install the .apk file manually:
This application needs OpenCV Manager to run, so in the first start it
will ask for it. You can download it from Google Play.
In the second case, the user needs to install eclipse and to configure
the Android Virtual Device:
http://developer.android.com/tools/devices/index.html
After that, the project must be imported to the workspace and the
user has to run it on the Android Virtual Device.
In the chapter of solution proposal the user can see how to use the
application.

42
12. Contents of the CD
The CD has two folders:
Document:
This document in PDF format.
Source code:
The code of TranSign.


![[Twin Storm Events] - UPCommonsupcommons.upc.edu/bitstream/handle/2099.1/12292/Thesis Ana.pdf · [Twin Storm Events] A probability analysis and risk evaluation of twin storm occurrences](https://img.pdfslide.us/doc/110x75/5f0d1adc7e708231d438b3c6/twin-storm-events-anapdf-twin-storm-events-a-probability-analysis-and-risk.jpg)
![Tesi de Màster - UPCommonsupcommons.upc.edu/bitstream/handle/2099.1/7192/MasterThesis Ameller.pdfSistemes Informàtics (LSI) [2] department of the Universitat Politècnica de Catalunya](https://img.pdfslide.us/doc/110x75/5f897b284562d7792a71504e/tesi-de-mster-amellerpdf-sistemes-informtics-lsi-2-department-of-the.jpg)


![CAN Ethernet Gateway - UPCommonsupcommons.upc.edu/.../26516/CAN_Ethernet_Gateway_Report.pdfFigure 4: Example of gateway sold by esd [1] Figure 5: Example of gateway sold by SYS TEC](https://img.pdfslide.us/doc/110x75/60a25061600fac242b0d03b8/can-ethernet-gateway-figure-4-example-of-gateway-sold-by-esd-1-figure-5-example.jpg)

![POLITECNICO DI BARI - UPCommonsupcommons.upc.edu/bitstream/handle/2099.1/14223/THESIS3[1].pdfpolitecnico di bari engineering faculty department of mechanical engineering mechanical](https://img.pdfslide.us/doc/110x75/6067ad8579b64462e77c5e1f/politecnico-di-bari-1pdf-politecnico-di-bari-engineering-faculty-department.jpg)
