Embed Size (px)
Citation preview

TRANSMISSION AND CONVERTER
PLEASE NOTE!READ BEFORE INSTALLATION OF UNITS! EXTREME CARE MUST BE EXERCISED BEFORE AND DURING
INSTALLATION FOR MAXIMUM BENEFITS AND LONGEVITY OF ATI PRECISION UNITS.
BEFORE INSTALLATION OF CONVERTER TO TRANSMISSION1. If transmission is not fresh, drain all old oil, clean the pan and replace the filter or clean screen.
2. Thoroughly flush oil cooler lines and cooler with clean varsol or other suitable solvent. Repeat process alternately in both lines until clean then blow air through the system. If any restriction is noticed in the lines or cooler, they must be replaced. If there are any twists or kinks in the lines restricting oil flow, the lines must be replaced.
3. The cooler in the radiator must be clean and in good condition. If you had previous transmission failure which deposited metal particles in the lines and cooler - replace it. Your local radiator shop can install it. It could be the best investment you make. ATI highly recommends the addition of a heavy duty external oil cooler. This will greatly increase the life of your transmission. When installing, route oil flow from the transmission through the radiator, then through the air cooler and back to the transmission. The line closest to the lower radiator hose is the return line to the transmission and should route through the air cooler. Use only steel line. The use of braided line is prohibited unless it is Teflon lined. Never use steel braided line for cooler lines unless it is Teflon lined! A blockage in steel braided line may impair fluid flow while not being externally visible. This condition may lead to inconsistent performance or transmission failure.
4. If an external oil cooler is not used, a jumper line must be connected to the “in and out” lines of the transmission. ATI transmissions are NOT guaranteed against overheating.
5. Check the bolt size (supplied with your converter) used in securing the converter to the flywheel for proper fit. If necessary, drill the flywheel to the proper size. Drill holes in the flexplate .010" bigger than the bolts being used!
6. Be certain that the mating surface of the engine block and the transmission case are clean and free from nicks, paint, dirt, etc. Use a file to clean and smooth the surface.
7. Inspect the mating surface of the engine block for dowel pins. The dowel pins must be firmly in the block, in good condition, and long enough to protrude into the transmission bell housing at least 3/16 of the full diameter not counting the chamfer.
8. Before final installation, put the converter up to the flywheel and make sure the mounting pads fit flush to the flywheel and are in correct alignment to the bolt pattern. With the pads flush to the flywheel, the converter pilot should be a good fit into the crankshaft with approximately 1/8" minimum extending into the crank below the chamfer.
9. Inspect the condition of the old converter hub for wear, scoring or other damage. Abnormal wear may indicate that the bushing that supports the hub is defective and should be replaced before installation of the new converter. The front pump seal and bushing should be replaced by a competent transmission shop.
10. On all Ford and Chrysler transmissions, the factory bronze front pump bushing must be replaced with a babbitt-type bushing. Bushings are available from most transmission shops or directly from ATI. All ATI transmissions come standard with this bushing installed and are packaged with the ATI converter.
INST. # 199990-I 7/2007
6747 Whitestone Road • Baltimore, MD 21207 • (410) 298-4343 • FAX: (410) 298-3579www.atiracing.com
Installation Instructions
CAUTION!WHEN USING A MOTORPLATE BETWEEN THE ENGINE AND THE TRANSMISSION, DOWEL PINS MUST BE
LENGTHENED AT LEAST THE THICKNESS OF THE MOTORPLATE TO INSURE PROPER ENGINE - TRANSMISSION ALIGNMENT
BEFORE INSTALLING THE UNIT IN THE CAR
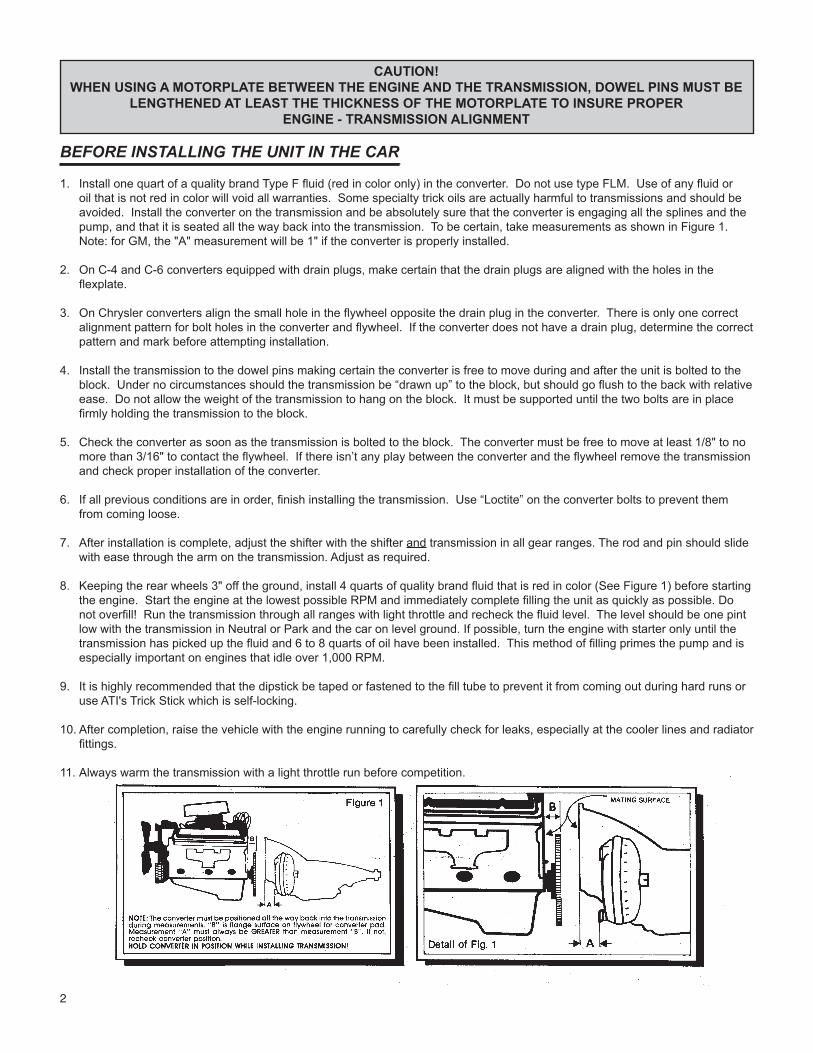
1. Install one quart of a quality brand Type F fluid (red in color only) in the converter. Do not use type FLM. Use of any fluid or oil that is not red in color will void all warranties. Some specialty trick oils are actually harmful to transmissions and should be avoided. Install the converter on the transmission and be absolutely sure that the converter is engaging all the splines and the pump, and that it is seated all the way back into the transmission. To be certain, take measurements as shown in Figure 1. Note: for GM, the "A" measurement will be 1" if the converter is properly installed.
2. On C-4 and C-6 converters equipped with drain plugs, make certain that the drain plugs are aligned with the holes in the flexplate.
3. On Chrysler converters align the small hole in the flywheel opposite the drain plug in the converter. There is only one correct alignment pattern for bolt holes in the converter and flywheel. If the converter does not have a drain plug, determine the correct pattern and mark before attempting installation.
4. Install the transmission to the dowel pins making certain the converter is free to move during and after the unit is bolted to the block. Under no circumstances should the transmission be “drawn up” to the block, but should go flush to the back with relative ease. Do not allow the weight of the transmission to hang on the block. It must be supported until the two bolts are in place firmly holding the transmission to the block.
5. Check the converter as soon as the transmission is bolted to the block. The converter must be free to move at least 1/8" to no more than 3/16" to contact the flywheel. If there isn’t any play between the converter and the flywheel remove the transmission and check proper installation of the converter.
6. If all previous conditions are in order, finish installing the transmission. Use “Loctite” on the converter bolts to prevent them from coming loose.
7. After installation is complete, adjust the shifter with the shifter and transmission in all gear ranges. The rod and pin should slide with ease through the arm on the transmission. Adjust as required.
8. Keeping the rear wheels 3" off the ground, install 4 quarts of quality brand fluid that is red in color (See Figure 1) before starting the engine. Start the engine at the lowest possible RPM and immediately complete filling the unit as quickly as possible. Do not overfill! Run the transmission through all ranges with light throttle and recheck the fluid level. The level should be one pint low with the transmission in Neutral or Park and the car on level ground. If possible, turn the engine with starter only until the transmission has picked up the fluid and 6 to 8 quarts of oil have been installed. This method of filling primes the pump and is especially important on engines that idle over 1,000 RPM.
9. It is highly recommended that the dipstick be taped or fastened to the fill tube to prevent it from coming out during hard runs or use ATI's Trick Stick which is self-locking.
10. After completion, raise the vehicle with the engine running to carefully check for leaks, especially at the cooler lines and radiator fittings.
11. Always warm the transmission with a light throttle run before competition.
2
IF YOU HAVE ANY DIFFICULTIES OR PROBLEMS IN INSTALLING ANY ATI UNITS, PLEASE FEEL FREE TO CALL US FOR INFORMATION AND ADVICE. YOU HAVE AN INVESTMENT TO PROTECT, SO DON'T TAKE ANY
CHANCES IF YOU ARE IN DOUBT.
DO NOT DO STALL TESTS!Don’t do stall tests! Stall tests break parts, and not just converter and transmission parts! Remember you are at Wide Open Throttle (full power) and maximum load. The pistons, pins, rods, and crank will really take a beating. Many racers ask why it’s OK to leave the line at Wide Open Throttle but not OK to do stall tests. The difference is this. When at the starting line at Wide Open Throttle, you release the brake and the RPMs accelerate from that point. In the converter, the stator is locked via the clutch assembly (sprag) and goes from maximum load in a controlled constant reduction in force to zero load (free wheel) as the car accelerates. The hydraulic forces in the converter are directed in a smooth and efficient manner for maximum torque multiplication and flow for adequate cool-ing. When performing a stall test at Wide Open Throttle (or even with a rev limiter such as the MSD Two-Step), you lift off the throttle and the RPMs, now at 5000 or 6000, get jerked down to idle. The stator and clutch assembly goes from maximum load and torque multiplication to zero load in an instant. The clutch is unloaded rapidly and the hydraulic forces are instantly disrupted into unknown flow paths due to the rapid reduction in torque. We have seen many converters damaged by this rapid unloading when a ring and pinion, planetary gear set, or input shaft fail. The rampant hydraulic pressure actually breaks the pump blades (fins) completely off the converter pump. It is for this reason that converter manufacturers have for years warned against “snagging” the slicks coming out of the water as RPMs can go from 5000 or 6000 to an idle as the tires catch. Once again, damage can be done to the sprag assembly.
Also remember that the converter builds up a tremendous amount of heat in a short period of time. By not running an engine after a stall test, all that heated fluid lays in the converter without having a chance to go through the cooler. Excessive heat eventually “fatigues” the metals in the converter. So just say no to stall tests. They hurt parts. Use the transbrake on the STARTING LINE ONLY...NOT in the pits, NOT in the driveway, NOT for your burnouts...STARTlNG LINE ONLY! Your cost per run will diminish significantly.
ATI RECOMMENDS THE FOLLOWING PROCEDURE FOR HEATING TIRES:1. Spin tires slowly in water to get them wet while avoiding soaking the wheel wells.
2. Pull to the front edge of the water using Low to High for Powerglide, Low to 2nd to High for Turbo 400, Ford C-4 and C-6, and 2nd to High only for Torqueflite and Turbo 350.
3. When the tires are hot enough, release the line lock and power the car out of the water 5 to 10 feet and lift. Avoid hook up that will scuff the tires.
4. Stage immediately Dry burn outs reduce traction and consistency. If you don’t believe this, pay attention to your first dry leave behind the line. It will hook solid every time. Small amounts of water left on the tires will dry completely from the tire heat long before the green comes on.
NOTE! There is no warranty for an broken transmission case!
FOR ALL POWERGLIDE, TORQUEFLITE AND FORD C-4 OR C-6 TRANSMISSIONS:After filling with oil: • Road test, shifting through all forward gears with light to medium throttle at least 20 times. • Band adjustments: Unlock and hold the lock nut. Turn in tight with short Allen wrench (75 in/lbs). Adjust out to specified turns PG Steel Drum = 4 turns Ford C-4, course thread = 1 turn PG Aluminum Drum = 5 turns Ford C-4, fine thread = 3 turns Ford C-6 = 1 turn Torqueflite 727/904 = 1 3/4 turns Hold adjuster in position while locking the lock nut.
• On Torqueflites without manual shift valve bodies, the stock throttle pressure rod from the carburetor to the transmission must be retained and adjusted properly.
NOTE! There is no warranty for an broken transmission case!
FOR ALL MANUAL SHIFT TORQUEFLITE COMPETITION TRANSMISSIONS:If you let off the throttle in Low Gear, you must shift to second! • DO NOT downshift to Low unless completely stopped. • DO NOT downshift to 2nd with the throttle closed.
Always move the drivetrain forward slightly before applying full throttle in Low Gear. If you shift to Neutral, then back to Low, the car must move forward slightly again to engage drive components. Failure to follow this procedure could result in personal injury and damage to the unit!
3
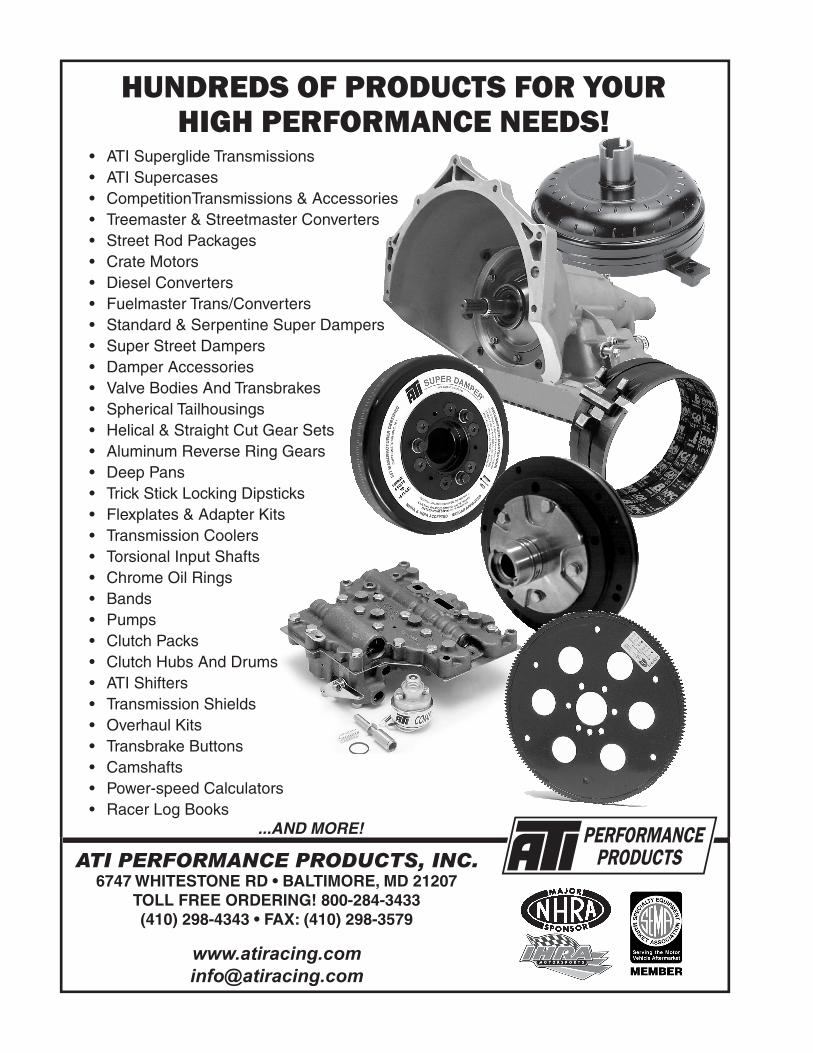
• ATI Superglide Transmissions• ATI Supercases• CompetitionTransmissions & Accessories• Treemaster & Streetmaster Converters• Street Rod Packages• Crate Motors• Diesel Converters• Fuelmaster Trans/Converters• Standard & Serpentine Super Dampers• Super Street Dampers• Damper Accessories• Valve Bodies And Transbrakes• Spherical Tailhousings• Helical & Straight Cut Gear Sets• Aluminum Reverse Ring Gears• Deep Pans• Trick Stick Locking Dipsticks• Flexplates & Adapter Kits• Transmission Coolers• Torsional Input Shafts• Chrome Oil Rings• Bands• Pumps• Clutch Packs• Clutch Hubs And Drums• ATI Shifters• Transmission Shields• Overhaul Kits• Transbrake Buttons• Camshafts• Power-speed Calculators• Racer Log Books ...AND MORE!
HUNDREDS OF PRODUCTS FOR YOURHIGH PERFORMANCE NEEDS!
ATI PERFORMANCE PRODUCTS, INC.6747 WHITESTONE RD • BALTIMORE, MD 21207
TOLL FREE ORDERING! 800-284-3433(410) 298-4343 • FAX: (410) 298-3579