Embed Size (px)
Citation preview

TC 21-305-6
TRAINING PROGRAM FOR THE TRACTOR AND SEMITRAILER
(M915, M931, AND M932)
DISTRIBUTION RESTRICTION: Approved for public release; distribution is unlimited
HEADQUARTERS, DEPARTMENT OF THE ARMY

TC 21-305-6
i
Training Circular 21-305-6 Headquarters, Department of the Army
Washington, DC, 31 December 1991
TRAINING PROGRAM FOR THE TRACTOR AND SEMITRAILER (M915, M931, AND M932)
TABLE OF CONTENTS
PREFACE
CHAPTER 1 RISK MANAGEMENT
CHAPTER 2 INSTRUCTIONAL AIDS
CHAPTER 3 SAMPLE TRAINING SCHEDULE
CHAPTER 4 SAMPLE TRAINING AREAS
CHAPTER 5 TRAINING AND TESTING WITH THE M915/M915A1 TRACTOR.
Section I. Lesson Outlines Use Technical Manuals (TMs) and Make Entries on DA Form 2404. Perform Operator Preventive Maintenance Checks and Services
(PMCS)
Perform Operator Preventive Maintenance Checks and Services (PMCS) on a Semitrailer
Know Safety Rules and Procedures for Driving Under Adverse Road Conditions
Identify Instruments, Controls, and Indicators Drive Vehicle with Automatic Transmission Drive Vehicle with Semiautomatic Transmission Back Vehicle with Semitrailer Couple Semitrailer Uncouple Semitrailer Drive Vehicle with Semitrailer on Side Roads and Unimproved Roads Drive Vehicle with Semitrailer on Improved (Primary) Roads Drive Vehicle with Semitrailer at Night
Section II. End of Course Comprehensive Test (EOCCT)) DISTRIBUTION RESTRICTION: Approved for public release; distribution is unlimited.

TC 21-305-6
ii
Page
CHAPTER 6 TRAINING AND TESTING WITH THE M931/M932 TRACTOR..
6-1
Section I. Lesson Outlines 6-1 Use Technical Manuals (TMs) and Make Entries on DA Form 2404. 6-1 Perform Operator Preventive Maintenance Checks and Services
(PMCS)…… 6-9
Perform Operator Preventive Maintenance Checks and Services (PMCS) on a Semitrailer…………………….………………………
6-11
Know Safety Rules and Procedures for Driving Under Adverse Road Conditions………………..………
6-13
Identify Instruments, Controls, and Indicators………….…………... 6-19 Drive Vehicle with Automatic Transmission……………….………. 6-23 Back Vehicle with Semitrailer…………. 6-27 Couple Semitrailer………...….………... 6-29 Uncouple Semitrailer………...…………………….………………... 6-33 Drive Vehicle with Semitrailer on Side Roads and Unimproved
Roads……………………..…………..... 6-36
Drive Vehicle with Semitrailer on Improved (Primary) Road...…..... 6-39 Drive Vehicle with Semitrailer at Night………….………………..... 6-42
Section II. End of Course Comprehensive Test (EOCCT))…………..…...…….. 6-45
CHAPTER 7 ADDITIONAL SUBJECTS – LESSON OUTLINES…………… 7-1
Drive Vehicle in a Convoy………...…... 7-1 Drive Vehicle with Semitrailer in a Convoy Under Blackout
Conditions……………………….……... 7-5
Drive Vehicle with Semitrailer Off Road Over Rough or Unusual Terrain………..………………………...
7-9
Transport Dangerous and Hazardous Cargo in Vehicle and Semitrailer………
7-14
Operate the Central Tire Inflation System (CTIS) On an M931A2/M932A2 Tractor………………………..…………………
7-18
Ground and Bond Fuel Tankers………………..…………………… 7-21 Drive Vehicle Loaded with a Semitrailer Mounted Fabric Tank
(SMFT)…… 7-25
GLOSSARY
REFERENCES

TC 21-305-6
iii
PREFACE This training circular (TC) provides a distributed training package for the 5-ton (M931/M932) and 14-ton (M915/M915A1) tractor/semitrailer operator according to AR 600-55. To safeguard human resources and equipment, commanders must ensure that an individual is licensed to operate a 2 1/2-ton or larger truck before receiving tractor/semitrailer training. This TC provides standardized training and testing to operators in the operation, maintenance, and safety of the tractor semitrailer combination. It stresses hands-on training with minimal classroom instruction. It does not include any theater unique requirements. To effectively execute this TC, each instructor should ensure his tractor operators are trained and tested to the standards contained in this TC. This TC was specifically designed for the tractor semitrailer combination to include PMCS and vehicle operations. Any deviation from the successful completion of these basic standards will only lessen the soldiers' overall driving effectiveness. This training program offers some alternatives for the commander. Chapter 7 includes additional subjects to allow the flexibility to add subjects based on the mission of the unit. Graduates (licensed drivers) of this training program should be supervised until they have gained the experience to operate safely. They should not be placed in situations that may be above their skill level. Periodically, the supervisor should ride with each driver to observe safe operating procedures and to determine the need for additional training. The proponent of this publication is the US Army Transportation School. Submit changes for improving this publication on DA Form 2028 (Recommended Changes to Publications and Blank Forms) and forward it to Commandant, US Army Transportation School, ATTN: ATSP-TDX, Fort Eustis, Virginia 23604-5001. Unless this publication states otherwise, masculine nouns and pronouns do not refer exclusively to men.

TC 21-305-6
1-1
CHAPTER 1
RISK MANAGEMENT
1-1. BACKGROUND. Leaders at all levels must develop techniques that will save resources. Because the Army must be prepared to operate worldwide, the training mission has become increasingly demanding, and so have the risks inherent in that mission. This increase in risks requires that leaders minimize or balance risks with essential mission needs. 1-2. DEFINITION. Risk can be defined as the possibility of a loss. The loss can be death, injury, property damage, or mission failure. Risk management is the identification of risks associated with a particular operation and the requirement to weigh these risks against the overall training value to be gained. There are three risk management basics:
a. Accept no unnecessary risk. b. Accept necessary risks that produce a net Army benefit. c. Make risk decisions at the proper command level.
1-3. RISK MANAGEMENT PROCESS. The risk management process uses the following approach:
a. Detect hazards and associated risks. Look for risks in each phase of the training or operation. b. Assess the risk. Ask these questions:
• What is the likelihood of a mishap?
• What degree of injury or equipment damage is possible?
NOTE A low likelihood of happening and a high probability of minor injury equals low
risk. A low likelihood of happening and a high probability of a fatality equals high risk.
c. Develop risk control alternates and make risk decisions. If the risk cannot be eliminated, then it must be controlled without sacrificing essential mission requirements. Some risks can be controlled by modifying task standards, operational procedures, training requirements, maintenance standards, and so forth. Decisions take several forms:
• Selecting from available controls.
• Trading off mission elements against risk controls.

TC 21-305-6
1-2
• Determining if controls reduce the risk to an acceptable level considering the
mission benefits.
d. Implement the risk control measures. Procedures for controlling risks must be integrated into plans, orders, SOPs, and training. They must also be integrated into other means to ensure that the risk reduction measures will be used during actual operations. e. Supervise the operations. Leaders use the same supervision techniques such as on-the-scene, spot-checks, and performance indicators to monitor risk controls that they use to monitor overall operations. f. Evaluate the results. Include the effectiveness of risk management controls in the assessment of operational results.
1-4. RISK ASSESSMENT ELEMENTS. There are no hard and fast rules for assessing risks. Different training tasks involve different elements that can affect training safety. However, seven elements are central to the safe completion of most driver training tasks: SOLDIER QUALIFICATION, VEHICLE TYPE, WEATHER, TERRAIN, SUPERVISION, EQUIPMENT, AND TIME OF DAY. Using matrices that assign a numerical value to each of the elements is one way to quickly gain an appreciation of the overall risks. The following matrices offer examples of risk assessments for each of the seven elements common to driver training missions.
NOTE These are arbitrarily weighted factors; modify them based on your particular mission and unit.
a. Soldier qualification is measured by comparing the level of task difficulty to the soldier's military driving experience.
SOLDIER QUALIFICATION RISK VALUE
DRIVING EXPERIENCE
TASK
LICENSED OVER 1 YEAR
LICENSED UNDER 1 YEAR
UNLICENSED
COMPLEX ROUTINE SIMPLE
3 2 1
4 3 2
5 4 3
EXAMPLE: Unlicensed drivers learning downhill braking techniques in an M915 or M915A1 would receive a risk value of 5.

TC 21-305-6
1-3
b. Vehicle type is measured by comparing the vehicle configuration to the location of the training tasks.
VEHICLE TYPE RISK VALUE
VEHICLE CONFIGURATION LOCATION OF
TRAINING LIGHT
TRUCKS MEDIUM TRUCKS TRACTOR/
SEMITRAILERS ROAD
TRAINING AREA MOTOR POOL
3 2 1
4 3 1
5 4 1
EXAMPLE: Driving an M915 tractor and semitrailer over the road would have a risk value of 5.
c. Weather is measured by comparing temperature with moisture/ visibility conditions.
WEATHER RISK VALUE
VISIBILITY/MOISTURE TEMPERATURE
FAHRENHEIT CLEAR
DRY FOG/HUMID
DRIZZLE DUST/RAIN SNOW/ICE
0-31˚ OR 90˚+ 32˚-59˚ 60˚-89˚
3 2 1
4 3 3
5 5 5
EXAMPLE: A task conducted outdoors at a temperature of 20˚F with snow or ice would receive a risk value of 5.
d. Terrain is measured by comparing the physical features of the land with the road network that exists in the area.
TERRAIN RISK VALUE
TRAFFICABILITY TYPE OF TERRAIN
STREETS/ HIGHWAYS
CONGESTED STREETS/HIGHWAYS
TRAILS CROSS-COUNTRY
JUNGLE/MOUNTAINS/ DESERTS
HILLS FLAT/ROLLING
3 2 1
4 4 3
5 4 3
EXAMPLE: Driver training conducted at Fort Bragg over trails would be assessed a value of 3.

TC 21-305-6
1-4
e. Supervision is measured by comparing the instructor to student ratio to the location of the training tasks.
SUPERVISION RISK VALUE
INSTRUCTOR TO STUDENT RATIO
CLASSROOM TRAINING AREA/ MOTOR POOL
ON/OFF ROAD
NOT OBSERVING OBSERVING IN VEHICLE
3 2 1
4 3 2
5 4 3
EXAMPLE: An instructor to student ratio of 1:8 for on-road driving would be assessed a value of 5.
f. Equipment is measured by comparing the age of the equipment to the maintenance level.
EQUIPMENT RISK VALUE
EQUIPMENT AGE C-1 C-2 C-3 OLD 3 4 5
AVERAGE 2 3 4 NEW 1 2 3
EXAMPLE: A six-year-old M915, maintained as C-2, would be assessed a value of 3.
g. Time of day is measured by comparing the level of light to familiarity with the route.
TIME OF DAY RISK VALUE
ROUTE FAMILIARITY DAY DAWN/DUSK NIGHT NEVER DRIVEN ROUTE 3 4 5
DRIVEN ROUTE 1-3 TIMES 2 3 4 FAMILIAR ROUTE 1 2 3
EXAMPLE: A driving task over a familiar route that starts during the day but ends at dusk would have a risk value of 2.
h. After assessing all the risks, total the value and apply it to a quick-reference gauge.
QUICK REFERENCE GAUGE
RISK LEVEL LOW RISK CAUTION HIGH RISK VALUES 7-12 13-18 19-35
When two or more elements are assigned a risk value of 5, consider the overall rating as high risk. (A risk value of 5 signifies hazards inherent in that task and should be analyzed for ways to reduce or eliminate the danger.)

TC 21-305-6
1-5
1-5. DECISION AID. The level of the decision-maker should correspond to the level of the risk. The greater the risk, the more senior the final decision-maker should be. This matrix is a proposed decision aid to assist in determining the leadership decision-making level.
DECISION AID
RISK POINTS DECISION LEVEL LOW 7-12 SENIOR INSTRUCTOR
CAUTION 13-18 COMPANY COMMANDER HIGH 19-35 BATTALION COMMANDER
a. Operations with a value of 7 to 12 are low risk, and normal standing operating procedures (SOPs) apply.
b. A value of 13 to 18 is a caution area. Complete unit command involvement is warranted. Give a caution rating special consideration if one or two elements have significantly raised the overall risk level. For example, a risk value of 4 in the weather element category indicates the soldiers are more susceptible to cold injuries and require closer supervision. If the risk level cannot be reduced, the company commander must approve the training mission.
c. Operations with a value of 19 to 35 or with two or more areas assigned a risk value of 5 are high risk. Procedures in b above apply. If the risk level cannot be lowered, the battalion commander must approve the mission.
1-6. RISK CONTROL ALTERNATIVES. The following options can help control risk:
a. Eliminate the hazard. Eliminate the hazard totally, if possible, or substitute a less hazardous alternative. b. Control the hazard. Reduce the magnitude of the hazard or provide barriers. c. Change operational procedures. Modify operational procedures to minimize risk exposure consistent with mission needs. d. Educate. Train personnel to use effective hazard avoidance actions. e. Motivate. Motivate personnel to use effective hazard avoidance actions.
1-7. RISK CONTROL MEASURES. Leaders must monitor the training to ensure that risk control measures are followed. Never underestimate the ability of subordinates to sidetrack a decision they do not understand or support. You will also need to monitor the impact of risk reduction procedures when they are implemented to verify that they really are a good idea. This is especially true of new and untested procedures.

TC 21-305-6
1-6
1-8. PAYOFFS. Risk management permits realistic training scenarios to be performed without a high potential cost in accidents. It also minimizes personnel and materiel losses in day-to-day training activities.

TC 21-305-6
1-7
SAMPLE RISK ASSESSMENT WORK SHEET TRAINING TASK: _________________________________________________________ POINTS: __________1. SOLDIER QUALIFICATION
SOLDIER QUALIFICATION RISK VALUE
DRIVING EXPERIENCE TASK LICENSED OVER 1
YEAR LICENSED UNDER 1
YEAR UNLICENSED
COMPLEX 3 4 5 ROUTINE 2 3 4 SIMPLE 1 2 3
__________2. VEHICLE TYPE
VEHICLE TYPE RISK VALUE
VEHICLE CONFIGURATION LOCATION OF
TRAINING LIGHT
TRUCKS MEDIUM TRUCKS TRACTOR/
SEMITRAILERS ROAD 3 4 5
TRAINING AREA 2 3 4 MOTOR POOL 1 1 1
__________3. WEATHER
WEATHER RISK VALUE
VISIBILITY/MOISTURE TEMPERATURE
FAHRENHEIT CLEAR
DRY FOG/HUMID
DRIZZLE DUST/RAIN SNOW/ICE
0-31˚ OR 90˚+ 3 4 5 32˚-59˚ 2 3 5 60˚-89˚ 1 3 5

TC 21-305-6
1-8
__________4. TERRAIN
TERRAIN RISK VALUE
TRAFFICABILITY TYPE OF TERRAIN
STREETS/ HIGHWAYS
CONGESTED STREETS/HIGHWAYS
TRAILS CROSS-COUNTRY
JUNGLE/MOUNTAINS/ DESERTS
3 4 5
HILLS 2 4 4 FLAT/ROLLING 1 3 3
__________5. SUPERVISION
SUPERVISION RISK VALUE
INSTRUCTOR TO STUDENT RATIO
CLASSROOM TRAINING AREA/ MOTOR POOL
ON/OFF ROAD
NOT OBSERVING 3 4 5 OBSERVING 2 3 4 IN VEHICLE 1 2 3
__________6. EQUIPMENT
EQUIPMENT RISK VALUE
EQUIPMENT AGE C-1 C-2 C-3 OLD 3 4 5
AVERAGE 2 3 4 NEW 1 2 3
__________7. TIME OF DAY
TIME OF DAY RISK VALUE
ROUTE FAMILIARITY DAY DAWN/DUSK NIGHT NEVER DRIVEN ROUTE 3 4 5
DRIVEN ROUTE 1-3 TIMES 2 3 4 FAMILIAR ROUTE 1 2 3
__________ TOTAL POINTS
QUICK REFERENCE GAUGE
RISK LEVEL LOW RISK CAUTION HIGH RISK VALUES 7-12 13-18 19-35

TC 21-305-6
1-9
DECISION AID
RISK POINTS DECISION LEVEL LOW 7-12 SENIOR INSTRUCTOR
CAUTION 13-18 COMPANY COMMANDER HIGH 19-35 BATTALION COMMANDER
APPROVED BY: ______________________________________ DATE: ______________

TC 21-305-6
2-1
CHAPTER 2
INSTRUCTIONAL AIDS
1. Student Requirements.
a. Vehicles per student: One M915/M915A1 14-ton tractor with semitrailer, or one M931/M932 5-ton tactical tractor with semitrailer for every two students. b. Forms per student:
DD Form 626. DD Form 836. DD Form 1970. DA Form 2404. DA Form 2408-14.
c. Publications per student:
TM 9-2320-272-10 and LO 9-2320-272-12 for the M931/M932 tractor. TM 9-2320-273-10 and LO 9-2320-273-12 for the M915 tractor. TM 9-2320-283-10 and LO 9-2320-283-12 for the M915A1 tractor.
d. Nonstandard items: 40 empty POL drums, traffic cones, or locally fabricated standards.
2. Instructor Requirements.
One each of the above forms. One each of the above publications. AR 55-355. AR 600-55. DA Pamphlet 738-750. FM 21-305. FM 55-30. FM 55-312. Code of Federal Regulations (CFR) 49 (Part 172). All host-nation or local directives and regulations.
3. Training Facilities:
Classroom. Motor pool. Training area(s). Suitable roadnet for driver training and convoys.
4. Training Aids and Devices.

TC 21-305-6
2-2
Television monitor. Videocassette player. Overhead projector. Projection screen. Videotape TVT 55-17, PIN: 709234DA, "Driving Techniques of the M939 Series Tractors." Videotape TVT 55-18, PIN: 709235DA, "M915A1 Line Haul Tractors."

TC 21-305-6
3-1
CHAPTER 3
SAMPLE TRAINING SCHEDULE
WHEN
WHAT
WHERE
TASK NUMBER
DAY 1 0730-0830 Use Technical Manuals and
Lubrication Orders, and Make Entries on DA Form 2404
Classroom 551-721-1352 551-721-1353
0830-0930 Know Safety Rules and Procedures for Driving Under Adverse Road Conditions
Classroom 551-721-1369 551-721-1370
0930-1030 Identify Instruments, Controls, and Indicators
Classroom 551-721-1352
1030-1130 Perform Operator PMCS Motor Pool 551-721-1352 1130-1230 Lunch 1230-1330 Perform PMCS on Semitrailer Motor Pool 551-721-1353 1330-1400 Drive Vehicle with Automatic or
Semiautomatic Transmission Classroom 551-721-1364
551-721-1366 1400-1600 Drive Vehicle with Automatic or
Semiautomatic Transmission Motor pool/ Training Area
551-721-1364 551-721-1366
1600-1630 Perform After-Operation PMCS Motor Pool 551-721-1352 551-721-1353
DAY 2 0730-0800 Perform Before-Operation PMCS Motor Pool 551-721-1352
551-721-1353 0800-1130 Drive Vehicle with Automatic or
Semiautomatic Transmission Training Area 551-721-1364
551-721-1366 1130-1230 Lunch 1230-1600 Drive Vehicle with Automatic or
Semiautomatic Transmission Training Area 551-721-1364
551-721-1366 1600-1630 Perform After-Operation PMCS Motor Pool 551-721-1352
551-721-1353

TC 21-305-6
3-2
WHEN
WHAT
WHERE
TASK NUMBER
DAY 3 0730-0800 Perform Before-Operation PMCS Motor Pool 551-721-1352
551-721-1353 0800-1130 Back Vehicle with Semitrailer Training Area 551-721-1367 1130-1230 Lunch 1230-1600 Back Vehicle with Semitrailer Training Area 551-721-1367 1600-1630 Perform After-Operation PMCS Motor Pool 551-721-1352
551-721-1353 DAY 4 0730-0800 Perform Before-Operation PMCS Motor Pool 551-721-1352
551-721-1353 0800-1130 Couple/Uncouple Semitrailer Training Area 551-721-1314
551-721-1315 1130-1230 Lunch 1230-1600 Couple/Uncouple Semitrailer Training Area 551-721-1314
551-721-1315 1600-1630 Perform After-Operation PMCS Motor Pool 551-721-1352
551-721-1353 DAY 5 0730-0800 Drive Vehicle with Semitrailer on
Side Roads and Unimproved Roads Classroom 551-721-1368
0800-0830 Perform Before-Operation PMCS Motor Pool 551-721-1352 551-721-1353
0830-1130 Drive Vehicle with Semitrailer on Side Roads and Unimproved Roads
Training Area 551-721-1368
1130-1230 Lunch 1230-1600 Drive Vehicle with Semitrailer on
Side Roads and Unimproved Roads Training Area 551-721-1368
1600-1630 Perform After-Operation PMCS Motor Pool 551-721-1352 551-721-1353

TC 21-305-6
3-3
WHEN
WHAT
WHERE
TASK NUMBER
DAY 6 0730-0800 Drive Vehicle with a Semitrailer on
Improved (Primary) Roads Motor Pool 551-721-1364
551-721-1366 0800-0830 Perform Before-Operation PMCS Motor Pool 551-721-1352
551-721-1353 0830-1130 Drive Vehicle with a Semitrailer on
Improved (Primary) Roads Designated Driving Route
551-721-1364 551-721-1366
1130-1230 Lunch 1230-1600 Drive Vehicle with a Semitrailer on
Improved (Primary) Roads Designated Driving Route
551-721-1364 551-721-1366
1600-1630 Perform After-Operation PMCS Motor Pool 551-721-1352 551-721-1353
DAY 7 0730-0800 Perform Before-Operation PMCS Motor Pool 551-721-1352
551-721-1353 0800-1130 Drive Vehicle with a Semitrailer on
Improved (Primary) Roads Designated Driving Route
551-721-1364 551-721-1366
1130-1230 Lunch 2000-2030 Perform Before-Operation PMCS Motor Pool 551-721-1352
551-721-1353 2030-2330 Drive Vehicle with Semitrailer at
Night Designated Driving Route
551-721-1364 551-721-1366
2330-2400 Perform After-Operation PMCS Motor Pool 551-721-1352 551-721-1353
DAY 8 0730-0800 Perform Before-Operation PMCS Motor Pool 551-721-1352
551-721-1353 0800-1130 Drive Vehicle with a Semitrailer on
Improved (Primary) Roads Designated Driving Route
551-721-1364 551-721-1366
1130-1230 Lunch 2000-2030 Perform Before-Operation PMCS Motor Pool 551-721-1352
551-721-1353 2030-2330 Drive Vehicle with Semitrailer at
Night Designated Driving Route
551-721-1364 551-721-1366
2330-2400 Perform After-Operation PMCS Motor Pool 551-721-1352 551-721-1353

TC 21-305-6
3-4
WHEN
WHAT
WHERE
TASK NUMBER
DAY 9 0730-0800 Perform Before-Operation PMCS Motor Pool 551-721-1352
551-721-1353 0800-1130 Back Vehicle with Semitrailer Training Area 551-721-1367 1130-1230 Lunch 1230-1600 Back Vehicle with Semitrailer Training Area 551-721-1367 1600-1630 Perform After-Operation PMCS Motor Pool 551-721-1352
551-721-1353 DAY 10 0730-1130 End of Course Comprehensive Test Classroom/ Motor
Pool/ Test Route All Tasks
1130-1230 Lunch 1230-1630 Perform After-Operation PMCS Motor Pool 551-721-1352
551-721-1353

TC 21-305-6
4-1
CHAPTER 4
SAMPLE TRAINING AREAS
This chapter shows the sample training areas for the tractor/semitrailer. The figures in this chapter depict the tractor/semitrailer as follows:
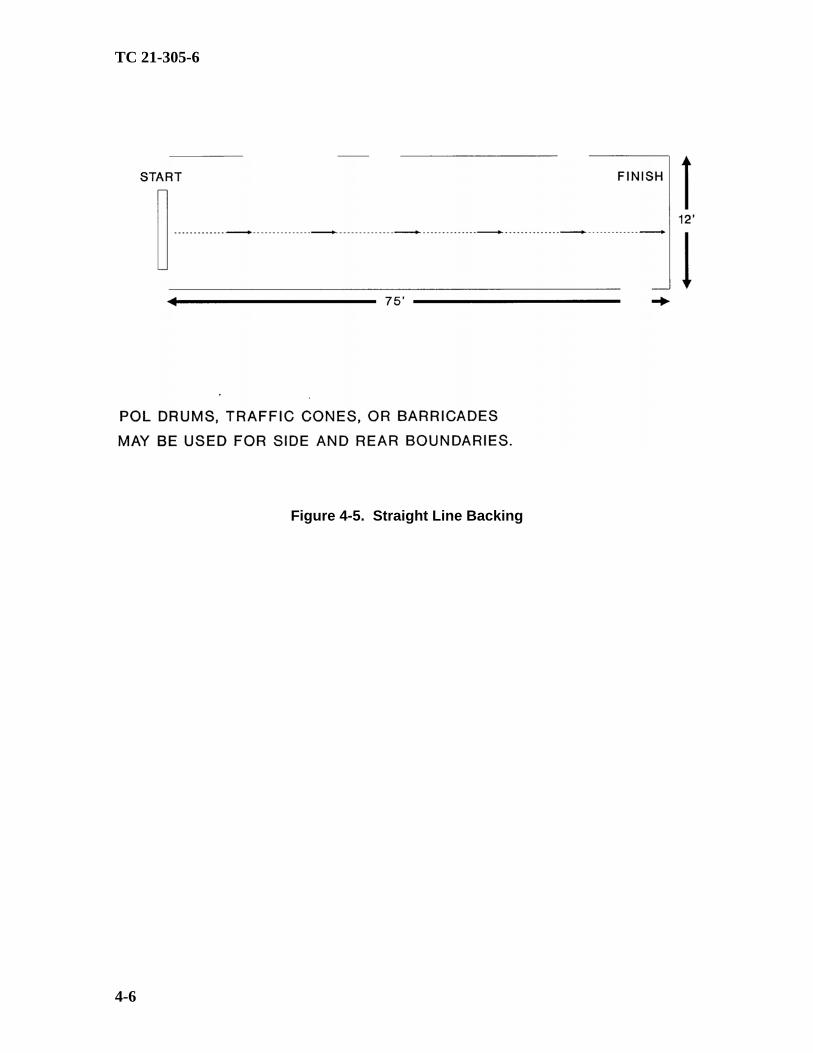
• Figure 4-1, stopping within the prescribed limits. • Figure 4-2, diminishing clearance. • Figure 4-3, offset alley. • Figure 4-4 right/left turns • Figure 4-5, straight line backing • Figure 4-6, serpentine course.

TC 21-305-6
4-2
Figure 4-1. Stopping Within Prescribed Limits

TC 21-305-6
4-3
Figure 4-2. Diminishing Clearance

TC 21-305-6
4-4
Figure 4-3. Offset Alley

TC 21-305-6
4-5
Figure 4-4. Right/Left Turns
TC 21-305-6
4-6
Figure 4-5. Straight Line Backing

TC 21-305-6
4-7
Figure 4-6. Serpentine Course

TC 21-305-6
5-1
CHAPTER 5
TRAINING AND TESTING WITH THE M915/M915A1 TRACTOR
Section I - Lesson Outlines
LESSON TITLE: USE TECHNICAL MANUALS (TMs) AND MAKE ENTRIES ON DA FORM 2404 (EQUIPMENT INSPECTION AND MAINTENANCE WORKSHEET)
TASK NUMBER: 551-721-1352 (Perform Vehicle Preventive Maintenance Checks and
Services [PMCS]), 551-721-1353 (Perform Preventive Maintenance Checks and Services [PMCS] on Trailers)
A. TRAINING OBJECTIVE. TASK: Use the M915 or M915A1 technical manual/lubrication order and
make operator entries on DA Form 2404 (Equipment Inspection and Maintenance Work Sheet.)
CONDITIONS Given instruction, TM 9-2320-273-10 or TM 9-2320-283-10, LO
9-2320-273-12 or LO 9-2320-283-12, DA Form 2404, and a practical exercise.
STANDARD: Locate information in the TM/LO and make the required operator
entries on DA Form 2404 in correct sequence according to DA Pamphlet 738-750. Each student has 15 minutes to complete the practical exercise without error and will be graded on a Go/No-Go basis.
B. INTERMEDIATE TRAINING. Intermediate Training Objective 1 TASK: Use the M915 or M915A1 TM and LO. CONDITIONS: Given instruction, TM 9-2320-273-10 or TM 9-2320-283-10, LO
9-2320-273-12 or LO 9-2320-283-12, and a practical exercise in a classroom environment.
STANDARD: Answer the questions correctly in the practical exercise by
locating information in the TM/LO. Each student will be graded on a Go/No-Go basis.
Intermediate Training Objective 2

TC 21-305-6
5-2
TASK: Document a no-fault situation on DA Form 2404. CONDITIONS: Given instruction, TM 9-2320-273-10 or TM 9-2320-283-10, a
practical exercise, and DA Form 2404 in a classroom environment.
STANDARD: You must fill out a no-fault situation on DA Form 2404 in the
correct sequence according to pamphlet 738-750. Each student will be graded on a Go/No-Go basis.
Intermediate Training Objective 3 TASK: Document a fault situation on DA Form 2404. CONDITIONS: Given instruction, TM 9-2320-273-10 or TM 9-2320-283-10, a
practical exercise, and DA Form 2404 in a classroom environment.
STANDARD: You must fill out a fault situation on DA Form 2404 in the correct
sequence according to DA Pamphlet 738-750. Each student will be graded on a Go/No-Go basis.
C. ADMINISTRATIVE INSTRUCTIONS.
1. When training will be given: As scheduled. 2. Training location: Classroom as scheduled. 3. Training type: Conference and practical exercise. 4. Who will be trained: Personnel as scheduled. 5. Principal and assistant instructors required: One primary instructor for the conference
and one assistant instructor for every 20 students for the practical exercise. 6. Training aids and equipment: Overhead projector, screen, transparency, TM 9-2320-
273-10 or TM 9-2320-283-10, (1 per student), LO 9-2320-273-12 or LO 9-2320-283-12 (1 per student), DA Form 2404 (4 per student), and a practical exercise situation sheet (1 per student).
7. References: TM 9-2320-273-10 or TM 9-2320-283-10, LO 9-2320-273-12 or LO 9-2320-283-12, and DA Pamphlet 738-750. D. SEQUENCE OF ACTIVITY. NOTE: Prior to class arrival, ensure each student desk or table has a TM 9-2320-273-10 or TM
9-2320-283-10, LO 9-2320-273-12 or LO 9-2320-283-12, and two DA Forms 2404.

TC 21-305-6
5-3
1. Introduction:
a. Interest device. b. Tie-in. c. Lesson objective (paragraph A). d. Procedures:
(1) Explanation. (2) Practical exercise. (3) Summary.
2. Explanation and Demonstration:
a. Proper technique for using the M915 or M915A1 –10 series TM.
(1) Front cover, table of contents, and thumb tab subject index. (2) Cautions and warnings. (3) PMCS tables. (4) Alphabetical index.
b. Use of the M915 or M915A1 -12 LO.
(1) Tables and notes. (2) Level of maintenance codes. (3) Lubrication after fording and high-pressure washing. (4) Lubricant abbreviations and intervals.
c. DA Form 2404 no-fault situation:
(1) Organization. (2) Nomenclature and model. (3) Registration/serial number/NSN.

TC 21-305-6
5-4
(4) Type of inspection (PMCS). (5) TM number and TM date. (6) Date of inspection (column c). (7) Type of inspection (entered in column d when used for concurrent inspections). (8) Disposition of DA Form 2404.
d. DA Form 2404 fault situation.
NOTE: Explain to the students that when a DA Form 2404 has previous no fault daily
annotations, a new form does not have to be initiated when a fault is found. Tell them to use the same form and that some of the steps listed below would already be completed. Also, check the DA Form 2408-14 in the equipment records folder for all deferred maintenance and any uncorrected faults.
(1) Organization. (2) Nomenclature and model. (3) Registration/serial number/NSN. (4) Miles. (5) Hours. (6) Date. (7) Type of inspection (PMCS). (8) TM number and TM date. (9) Signature and rank in block 8a. (10) TM item number entered in column a. Circle item number if fault makes equipment not mission capable (NMC). (11) Status symbol entered in column b. (12) Deficiencies or shortcomings entered in column c. (13) Disposition of DA Form 2404.

TC 21-305-6
5-5
3. Practical exercise: Hand out one practical exercise and two DA Forms 2404 to each
student. Students will complete the practical exercise as outlined in paragraph 2 above within 15 minutes.
4. Evaluate: Check each student's practical exercise. 5. Summary:
a. Recap main points. b. Allow for questions. c. Clarify questions. d. Give closing statement.
6. Retraining: Retrain and retest No-Gos after normal duty hours.
E. SAFETY RESTRICTIONS. None. F. ADDITIONAL COMMENTS AND INFORMATION. Recommended instructional time is 1 hour (.5 conference and .5 practical exercise).

TC 21-305-6
5-6
NOTE: This is a sample DA Form 2404 used for operator/crew PMCS when no faults are
found. All entries are to be completed in pencil. This sample can be used to make a transparency for use with an overhead projection system.

TC 21-305-6
5-7
NOTE: This is a sample DA Form 2404 used for operator/crew PMCS when faults are found.
All entries are to be completed in pencil. This sample can be used to make a transparency for use with an overhead projection system.

TC 21-305-6
5-8
PRACTICAL EXERCISE
LESSON TITLE: USE TECHNICAL MANUALS AND MAKE ENTRIES ON DA FORM
2404 NAME___________________________________RANK___________DATE_______________ To complete this practical exercise, you will need appropriate vehicle operator's manual (TM), LO, two blank DA Form 2404, and a pencil. You have 15 minutes to complete this practical exercise. FIRST REQUIREMENT Using the appropriate vehicle TM and LO, answer the following questions by writing your answer in the space provided after each question. 1. At what interval does the operator check the transmission for proper operation? 2. Where would you find the definition for the different classes of leaks? 3. In what section of the operator's TM would you find the basic issue items (BII) authorized for your appropriate vehicle? 4. In what paragraph of the operator's TM would you find instructions for correct braking procedures? 5. What type of oil is used for the engine? 6. In what publication did you find the answer to question 5 above?

TC 21-305-6
5-9
SECOND REQUIREMENT From the following information, make the required operator entries on DA Form 2404. You are assigned to the 223d Transportation Company as the operator of an M915/M915A1 vehicle with a registration number of 23G9J111.
a. On 17 June 1991, you perform a daily PMCS and find no faults. b. On 18 June 1991, you perform a daily PMCS and again find no faults. c. On 19 June 1991, you perform a daily PMCS and your vehicle voltmeter is registering in the red on an M915 or your vehicle voltmeter is registering below 11 volts on an M915A1. Your odometer reading is 2845 miles. d. On 20 June 1991, you perform a daily PMCS and you find your voltmeter has been repaired. No other faults are discovered. e. On 21 June 1991, you perform a weekly PMCS and find no faults.

TC 21-305-6
5-10
CHAPTER 4
LESSON OUTLINES FOR TRUCK OPERATIONS
LESSON TITLE: PERFORM OPERATOR PREVENTIVE MAINTENANCE CHECKS AND SERVICES (PMCS)
TASK NUMBER: 551-721-1352 (Perform Vehicle Preventive Maintenance Checks and
Services [PMCS]) A. TRAINING OBJECTIVE. TASK: Perform operator preventive maintenance checks and services on
an M915 or M915A1 tractor. CONDITIONS Given instruction, DA Form 2404, pencil, TM 9-2320-273-10 or
TM 9-2320-283-10, equipment records folder, rags, lubricants, coolant, and an M915 or M915A1 tractor with BII.
STANDARD: Inspect the tractor according to the PMCS tables listed in TM 9-
2320-273-10 or TM 9-2320-283-10, correct all faults within the operator's level of maintenance, and legibly record all others on DA Form 2404. If no faults are found, make necessary entries on DA Form 2404.
B. INTERMEDIATE TRAINING. None. C. ADMINISTRATIVE INSTRUCTIONS.
1. When training will be given: As scheduled. 2. Training location: Motor pool. 3. Training type: Demonstration and practical exercise. 4. Who will be trained: Personnel as scheduled. 5. Principal and assistant instructors required: One primary instructor for the class and
one assistant instructor for every six students for the demonstration and practical exercise. 6. Training aids and equipment: Hearing protection, rags, lubricants, and coolant. DA
Form 2404, pencil, TM 9-2320-273-10 or TM 9-2320-283-10, equipment records folder, and an M915 or M915A1 tractor with BII for every two students.
7. References: TM 9-2320-273-10 or TM 9-2320-283-10 and DA Pamphlet 738-750.

TC 21-305-6
5-11
D. SEQUENCE OF ACTIVITY.
1. Introduction: a. Interest device. b. Tie-in. c. Lesson objective (paragraph A). d. Procedures:
(1) Explanation. (2) Practical exercise. (3) Summary.
2. Explanation and Demonstration: Demonstrate before-, during-, and after-operation
PMCS to students. 3. Practical exercise:
a. Assign students to vehicles and issue TM 9-2320-273-10 or TM 9-2320-283-10, pencils, DA Form 2404, and equipment records folder. b. Tell students where rags, lubricants, and coolant are located.
4. Evaluate: Check each student's PMCS performance. 5. Summary:
a. Recap main points. b. Allow for questions. c. Clarify questions. d. Give closing statement.
6. Retraining: Students perform PMCS daily and are tested on the end of course
comprehensive test (EOCCT). E. SAFETY RESTRICTIONS.

TC 21-305-6
5-12
1. Ensure that all chocks blocks are in place when the vehicle is parked. 2. Always place the transmission in neutral, set the parking brake, and shut off the
engine before leaving the vehicle. 3. Ensure that students remove all jewelry and identification tags before performing
PMCS. 4. Ensure that all personnel wear hearing protection when the engine is running. 5. Ensure that students pay particular attention to the cautions and warnings listed in the
operator's manual. 6. Ensure that personnel wear seat belts (if equipped) when the vehicle is in motion.
F. ADDITIONAL COMMENTS AND INFORMATION. Recommended instructional time is 1 hour (.5 demonstration and .5 practical exercise ). The remaining PMCS is performed throughout the course in conjunction with driving tasks.

TC 21-305-6
5-13
LESSON TITLE: LESSON TITLE: PERFORM PREVENTIVE MAINTENANCE
CHECKS AND SERVICES (PMCS) ON A SEMITRAILER TASK NUMBER: TASK NUMBER: 551-721-1353 (Perform Preventive Maintenance
Checks and Services [PMCS] On a Semitrailer) A. TRAINING OBJECTIVE. TASK: Perform PMCS on a semitrailer. CONDITIONS Given instruction, DA Form 2404, pencil, appropriate TM,
equipment records folder, rags, lubricants, and a semitrailer. STANDARD: Inspect the semitrailer according to the PMCS tables listed in the
appropriate TM, correct all faults within the operator's level of maintenance, and legibly record all others on DA Form 2404. If no faults are found, make necessary entries on DA Form 2404.
B. INTERMEDIATE TRAINING. None. C. ADMINISTRATIVE INSTRUCTIONS.
1. When training will be given: As scheduled. 2. Training location: Motor pool. 3. Training type: Demonstration and practical exercise. 4. Who will be trained: Personnel as scheduled. 5. Principal and assistant instructors required: One primary instructor for the class and
one assistant instructor for every six students for the demonstration and practical exercise. 6. Training aids and equipment: Hearing protection, rags, and lubricants. DA Form
2404, pencil, appropriate TM, equipment records folder, and a semitrailer for every two students. 7. References: Appropriate TM and DA Pamphlet 738-750.
D. SEQUENCE OF ACTIVITY.
1. Introduction: a. Interest device. b. Tie-in.

TC 21-305-6
5-14
c. Lesson objective (paragraph A). d. Procedures:
(1) Explanation. (2) Practical exercise. (3) Summary.
2. Explanation and Demonstration: Demonstrate before-, during-, and after-operation
PMCS to students. 3. Practical exercise:
a. Assign students to semitrailer and issue appropriate TM, pencils, DA Form 2404, and equipment records folder. b. Tell students where rags and lubricants are located.
4. Evaluate: Check each student's PMCS performance. 5. Summary:
a. Recap main points. b. Allow for questions. c. Clarify questions. d. Give closing statement.
6. Retraining: Students perform PMCS daily and reinforced throughout the course.
PMCS is tested on the end of course comprehensive test (EOCCT). E. SAFETY RESTRICTIONS.
1. Ensure that all chocks blocks are in place when the tractor and semitrailer are parked. 2. Always place the transmission in neutral, set the parking brake, and shut off the
engine before leaving the vehicle. 3. Ensure that students remove all jewelry and identification tags before performing
PMCS.

TC 21-305-6
5-15
4. Ensure that all personnel wear hearing protection when the engine is running. 5. Ensure that students pay particular attention to the cautions and warnings listed in the
operator's TM. 6. Ensure that personnel wear seat belts (if equipped) when the vehicle is in motion.
F. ADDITIONAL COMMENTS AND INFORMATION. Recommended instructional time is 1 hour (.5 demonstration and .5 practical exercise). The remaining PMCS is performed throughout the course in conjunction with driving tasks.

TC 21-305-6
5-16
LESSON TITLE: KNOW SAFETY RULES AND PROCEDURES FOR DRIVING
UNDER ADVERSE ROAD CONDITIONS TASK NUMBER: 551-721-1369 (Drive Vehicle with Semitrailer on Snow/Ice) and 551-
721-1370 (Drive Vehicle with Semitrailer in Sand) A. TRAINING OBJECTIVE. TASK: Demonstrate knowledge of procedures for driving under adverse
conditions (snow, ice, mud, and sand). CONDITIONS Given classroom instruction and a practical exercise. STANDARD: Answer 7 of 10 questions correctly on the practical exercise
within 10 minutes. B. INTERMEDIATE TRAINING. None. C. ADMINISTRATIVE INSTRUCTIONS.
1. When training will be given: As scheduled. 2. Training location: Classroom as scheduled. 3. Training type: Conference and practical exercise. 4. Who will be trained: Personnel as scheduled. 5. Principal and assistant instructors required: One primary instructor for the conference
and one assistant instructor for every 20 students for the practical exercise. Training aids and equipment: Overhead projector, screen, transparency, and a practical
exercise sheet (1 per student). 7. References: TM 9-2320-273-10 or TM 9-2320-283-10.
D. SEQUENCE OF ACTIVITY.
1. Introduction:
a. Interest device. b. Tie-in. c. Lesson objective (paragraph A).

TC 21-305-6
5-17
d. Procedures:
(1) Explanation. (2) Practical exercise. (3) Summary.
2. Explanation:
a. Driving in snow and on ice and slippery surfaces.
(1) Install tire chains, if needed, for snow or ice. (2) Accelerate slowly to avoid spinning the tires. (3) Drive at the lowest possible speed. (4) Keep the accelerator pedal steady after the vehicle reaches the desired speed. (5) Turn the vehicle slowly when on slippery surfaces. (6) Steer the vehicle away from ruts and large snow banks. (7) Steer the vehicle straight up and down hills if possible. (8) Give signals sooner. (9) Press the service brake pedal lightly to give early warning that the vehicle will slow or stop. Pressing the service brake pedal lightly will help keep the vehicle from skidding. Do not press the service brake pedal hard three or four times in a row. Air supply will be used up and service brakes will not work until the air pressure is built up again.
WARNING Do not use engine retarder on ice or snow. Applying the engine retarder on ice or snow can cause the vehicle to skid and result in injury or death.
(10) Do not apply the engine brake when the vehicle is on a slick surface. Applying the engine brake on slick surface can cause the vehicle to skid and can result in injury or death.

TC 21-305-6
5-18
(11) Maintain double the normal distance from the vehicle ahead. (12) Keep windshields, windows, mirrors, headlights, stoplights, and body lights clean and free of snow and ice. Use the defroster to help keep glass free of snow and ice. (13) Descend moderate grade in the gear you would normally use to ascend the same grade. On steep or very slippery grades, lock differential and use at least one gear lower. (14) Drive slowly and test the brakes after driving through slush or water. If brakes slip, do the following:
(a) Continue to drive slowly. (b) Apply moderate pressure on the service brake to cause slight brake drag. (c) When brakes are dry and no longer slip, let up on the service brake pedal. (d) Resume normal driving speed.
(15) If the rear of the vehicle skids, do the following:
(a) Let up on the accelerator pedal. (b) Steer in the same direction in which the rear of the vehicle is skidding. (c) When the vehicle is under control, press the service brake pedal lightly. (d) Steer the vehicle on a straight course and slowly press the accelerator pedal.
(16) If the vehicle starts to slide while climbing a hill, do the following:
(a) Let up on the accelerator pedal. (b) Steer the vehicle in the direction of the slide until the vehicle stops. (c) Slowly press the accelerator pedal and steer the vehicle on a straight course.

TC 21-305-6
5-19
(17) If the vehicle becomes stuck, do the following: (a) Shovel a clear path ahead of each wheel. Put boards, bush, or similar material in cleared paths to get better traction. (b) If the vehicle remains stuck, use another vehicle to winch or tow the stuck vehicle.
(18) Park the vehicle as follows:
(a) Park the vehicle in a sheltered area out of the wind if possible. If no shelter is available, park so the vehicle does not face into the wind. (b) Park the vehicle on high, dry ground if possible. If high, dry ground is not available, spread out planks or brush to make a raised and dry area so tires will not freeze in the snow, water, ice, or mud. (c) Park the vehicle on level ground so the body does not twist. (d) Clean snow, ice, and mud off the vehicle as soon possible. (e) Make sure the axle breather vent caps move freely on the breather body.
b. Driving in sand. The best time to drive in sand is at night or early morning when the sand is damp and gives better traction. To drive in sand,--
(1) Adjust tire pressure. (2) Make sure each tire has a valve cap. (3) Set the DIFFERENTIAL LOCK/UNLOCK CONTROL to LOCK for added traction. (4) Maintain steady, even movement with the transmission in lower gear ranges. (5) Start slowly; do not spin wheels when starting to move the vehicle. (6) Do not straddle sand mounds or drive on the sides of two sand mounds. Loose sand will not support the vehicle on steep slopes. (7) Keep the accelerator pedal steady after the vehicle reaches the desired speed.

TC 21-305-6
5-20
(8) Turn the vehicle slowly when driving in sand. (9) Steer the vehicle straight up and down hills if possible. (10) To move the vehicle when stuck, do the following:
(a) Adjust tire pressure to gain additional traction. Reduce pressure in the front tires to 50 psi and reduce pressure in rear tires to 45 psi. After you have the truck out, inflate all tires to normal pressure. (b) Set the transmission range selector to REVERSE ("R1" for the M915 and "R" for the M915A1). (c) Press the accelerator pedal and move the vehicle straight back about 20 feet. (d) Release the accelerator pedal and press the service brake pedal. (e) Set the transmission range selector to "1." (f) Release the service brake pedal and press the accelerator pedal to move the vehicle forward. (g) Turn the vehicle gradually. (h) Move the transmission range selector (to "2" for the M915 and "1-2" for the M915A1) when the vehicle picks up speed and is moving forward smoothly.
(11) If the vehicle starts to skid, do the following:
(a) Release the accelerator pedal. (b) Steer in the direction of the skid until the vehicle stops skidding. (c) Press the accelerator pedal slowly and steer the vehicle on a straight course.
(12) Check the air filter restriction indicator often.
3. Practical exercise: Hand out one practical exercise to each student. Students will
complete the practical exercise within 10 minutes.

TC 21-305-6
5-21
4. Evaluate: Check each student's practical exercise. 5. Summary:
a. Recap main points. b. Allow for questions. c. Clarify questions. d. Give closing statement.
6. Retraining: Retrain and retest No-Gos after normal duty hours.
E. SAFETY RESTRICTIONS. None. F. ADDITIONAL COMMENTS AND INFORMATION. Recommended instructional time is 1 hour (.5 conference and .5 practical exercise). 2

TC 21-305-6
5-22
PRACTICAL EXERCISE LESSON TITLE: KNOW SAFETY RULES AND PROCEDURES FOR DRIVING
UNDER ADVERSE ROAD CONDITIONS NAME___________________________________RANK___________DATE_______________ To complete this practical exercise, you will need a pen or pencil. You have 10 minutes to complete this practical exercise. To pass this practical exercise, you must correctly answer 7 of the 10 questions. SECTION I. True/false questions: Read each question carefully and place a T or F on the blank line to the left of each question. _______ 1. Your air supply may be used up if you press the service brake pedal hard 3 or 4
times in a row. _______ 2. You only apply the engine retarder (Jacobs brake) when the vehicle tires have good
traction. _______ 3. The inter-axle differential control can be shifted to lock while the vehicle is moving
without damage to the vehicle. _______ 4. Damp sand gives better traction than dry sand. _______ 5. You should never use tire chains for snow and ice. SECTION II. Multiple choice: Read each question carefully and write the answer which is MOST correct on the blank line to the left of each question. _______ 6. When driving in a dusty area, you should check the air filter restriction indicator
a. Monthly. b. Weekly. c. When you have time. d. Often.

TC 21-305-6
5-23
_______ 7. How should you dry wet brake linings?
a. Continue to drive at slow speed with enough pressure on the service brake pedal to cause a drag on the brakes.
b. Pump the service brake pedal. c. Pull over and wait 25 to 30 minutes to allow the brakes to dry out. d. Increase speed to allow air to flow through brakes.
_______ 8. When parking your vehicle in extreme cold or a desert environment, in what direction should the vehicle be parked?
a. Facing into the wind. b. Sideways. c. Facing away from the wind. d. No specific way.
_______ 9. For maximum traction when driving in sand or mud, you should-- a. Set transfer case shift lever to LOW. b. Set the inter-axle control lever to LOCK. c. Set traction control lever to 6X4 drive. d. Set transfer case shift lever to HIGH.
_______ 10. If your vehicle starts to skid, you should--
a. Step on the service brakes and hold the steering wheel straight. b. Do nothing. c. Release the accelerator pedal and steer in the direction of the skid. d. Release the accelerator pedal and steer in the opposite direction of the skid.

TC 21-305-6
5-24
LESSON TITLE: IDENTIFY INSTRUMENTS, CONTROLS, AND INDICATORS TASK NUMBER: 551-721-1352 (Perform Vehicle Preventive Maintenance Checks and
Services [PMCS]) A. TRAINING OBJECTIVE. TASK: Identify instruments, controls, and indicators. CONDITIONS Given instruction on the M915/M915A1 tractor. STANDARD: Correctly identify and explain the function of the instruments,
controls, and indicators. B. INTERMEDIATE TRAINING. None. C. ADMINISTRATIVE INSTRUCTIONS.
1. When training will be given: As scheduled. 2. Training location: Motor pool as scheduled. 3. Training type: Conference. 4. Who will be trained: Personnel as scheduled. 5. Principal and assistant instructors required: One primary instructor and one assistant instructor for every three students. 6. Training aids and equipment: One M915 or M915A1 tractor for every three students. If the class is large, a PA system may be needed for the primary
instructor. 7. References: TM 9-2320-273-10 or TM 9-2320-283-10.
D. SEQUENCE OF ACTIVITY.
1. Introduction: a. Interest device. b. Tie-in. c. Lesson objective (paragraph A).

TC 21-305-6
5-25
d. Procedures: (1) Explanation. (2) Practical exercise. (3) Summary.
NOTE: At this time, separate the class into groups of three and assign each group to a vehicle.
Ensure that each group has an assistant instructor. The assistant instructor will identify and demonstrate the use of each item to his group of students as the instructor explains each item.
2. Explanation and Demonstration: Location, description, and use of the instruments,
controls, and indicators.
a. Instrument Cluster: (1) Fuel Supply Gauge. This is the first gauge located at the top left of the instrument cluster and indicates the amount of fuel when the engine run switch is turned on. (2) Voltmeter. It indicates the rate of battery charge or discharge in volts. It is located to the right of the fuel supply gauge. 12 to 15 volts (green area), indicates the normal operating range. (3) Transmission Oil Temperature Gauge. This gauge is next in line and registers the transmission oil temperature in degrees Fahrenheit. The normal operating temperature for the M915 is 40˚ to 220˚F, for the M915A1 is below 300˚F (yellow or green band). (4) Engine Oil Pressure Gauge. It is next and registers the engine oil pressure in pounds per square inch (psi). The range at idle for the M915 is 5-20 psi and 10-psi minimum for the M915A1. At 1700-2100 rpm, the minimum oil pressure for safe operation is 30 psi. (5) Air Pressure Gauge (Front). This registers air pressure (in psi) in the front brake system. The normal operating range is 105 to 120 psi for the M915 and 105 to 140 psi for the M915A1. Pressure below the normal operating range indicates a loss of air supply. This will result in a limited number of times the brakes can be applied before losing the front wheel brakes. At the first sign of pressure loss, STOP THE TRUCK AND INVESTIGATE THE CAUSE. It is located to the right of the oil pressure gauge.

TC 21-305-6
5-26
(6) Low Air Pressure Warning Light. This gauge is located between the two air pressure gages. The red light will remain on and the buzzer will sound when the air system pressure in either section of the dual system is between 64 and 76 psi. If this light comes on or the buzzer sounds while driving, stop immediately and investigate the cause. (7) Air Pressure Gauge (Rear). This gauge registers air pressure (in psi) in the rear brake system. The normal operating range is 105 to 120 psi for the M915 and 105 to 140 psi for the M915A1. Pressure below the normal operating range indicates a loss of air supply. This will result in a limited number of times the brakes can be applied before the emergency brakes are automatically activated. At the first sign of pressure loss, STOP THE TRUCK AND INVESTIGATE THE CAUSE. It is located below the low air pressure warning light. (8) Cigar Lighter. It is located to the left of the rear air pressure gauge. Press to engage heating element. The lighter will disengage automatically when hot. (9) Engine Start Button. This button is located to the left of the cigar lighter. Press the button to energize the starter solenoid. The ENG TEMP light will come on while the button is depressed. Release the button when the engine starts. Do not press the button for more than 15 seconds at any one time. Allow 2 minutes interval between starting attempts. Do not press the button while the engine is running. (10) Engine Run Switch. This switch is located to the left of the engine start button. Rotate the key to the right to turn this switch to the ON position (low oil pressure warning light, park brake light, and low air warning buzzer and light will come on if air pressure is below 60 psi). After the engine is started and the systems become operational, the warning light and buzzer will go off. The park brake light will stay on until the park brake is released. Turn the key to the center (vertical) position to turn all systems OFF. (11) Engine Water Temperature Gauge. It is located below the fuel supply gauge and registers the engine coolant temperature in degrees Fahrenheit. The normal range for the M915 is 165˚-195˚F and 180˚ to 200˚F for the M915A1. If this gauge shows temperatures above normal, shut off the engine immediately and refer to the troubleshooting procedures. Do not restart the engine until the coolant temperature is within the normal operating limits.
b. Tachograph Section:

TC 21-305-6
5-27
(1) Tachograph. This is located in the center of the tachograph section. The tachograph registers the truck ground speed (rpm/kph hand), engine speed (rpm hand), and the distance traveled (odometer). The other two hands are clock hands. The tachograph records data on a 7-day graph for a permanent record. Do not operate the vehicle without a tachograph disc installed. (2) Clearance Light Push-Button. This button is located to the right and below the tachograph. Press this button to flash the truck and semitrailer clearance and marker lights on and off. The CLEARANCE LAMP indicator will come on when these lights are on. (3) Clearance Light Indicator. It is located below the clearance light push-button. This light will illuminate when the headlamp switch is pulled out to either the first or second position and the clearance light push-button is pressed. Rotating the headlamp switch knob may vary intensity of the light. (4) Ether Quick Start Push-Button. This button is located below and to the left of the tachograph. Press and release this button to inject ether for cold weather starting. Do not use this button without thoroughly reading the cold weather starting procedures in the operator's TM.
c. Control Panel:
(1) Engine Oil Warning Light. It is the first indicator warning light in the control panel. The red light comes on when the engine oil pressure is below operating limits. The light comes on when the oil pressure drops below 5 psi on the M915 and below 10 psi on the M915A1. (2) Engine Temperature Warning Light. This light is next to the engine oil warning light. This red light comes on when the engine cooling system temperature is above operating limits. The light comes on when the engine temperature exceeds 225˚F on the M915 and 220˚F on the M915A1. (3) Differential Lockout Indicator Light. It is below the engine temperature warning light. The red light indicates when the inter-axle differential lockout switch is in the LOCK position and the driveline locking system is engaged. (4) Park Brake Indicator Light. The red park brake indicator comes on when the park brake control is engaged. (5) High Beam Indicator Light. This blue light comes on when the dimmer switch is set for high beam service lights.

TC 21-305-6
5-28
(6) Headlight Switch Knob. This knob is located to the right and slightly below the engine oil warning light. Pull the knob halfway out to turn on the marker lights, taillights, and instrument panel lights, or all the way out to operate the headlights, taillights, marker lights, and instrument panel lights. The switch also turns on the clearance lights in either position. (7) Wiper Indicator Light. This light is located to the right of the headlight switch knob and the engine retarder selection switch. The wiper indicator comes on when the headlight switch is pulled out to either the first or second position. The indicator light is white when lighted and can be dimmed by rotating the headlight switch knob. Its purpose is to aid in locating the wiper control at night. (8) Wiper Control Knob. This knob is located below the wiper indicator light. Pull the knob out to turn the wipers on. Rotate the switch knob for HI and LOW operation. Push the knob in to turn the wipers off. (9) Washer Indicator Light. This light is located to the right of the wiper indicator light. The washer indicator light comes on when the headlight switch is pulled out to either the first or second position. The indicator is white when lighted and can be dimmed by rotating the headlight switch knob. Its purpose is to aid in locating the washer control knob at night. (10) Washer Control Knob. This knob is located below the washer indicator light. Press the knob to spray cleaning solvent on the windshield. Release the button to stop spraying. (11) Differential Lock/Unlock Control. It is located to the right of the washer indicator light and the washer control knob. It controls inter-axle differential lockup. In poor traction conditions (ice, snow, off road), stop the truck and place the switch in the LOCK position to lockup the drive line. When traction is back to normal, place switch in the UNLOCK position while the truck is moving. Use the UNLOCK position for all normal driving conditions.
CAUTION
Do not place the switch in the LOCK position while the truck is moving or the tires are spinning.
NOTE: The differential lockout indicator light will come on when the control is in the LOCK
position.

TC 21-305-6
5-29
WARNING
Never use the parking brake for normal braking.
(12) Parking Brake Control. This control is located below and to the left of the differential lock/unlock control. Pull out to apply the parking brakes; push in to release the parking brakes. (13) Trailer Air Supply Control. It is located to the left of the parking brake control and supplies air to the trailer air reservoirs. Push in to supply air to (charge) trailer reservoirs; pull out to shut off air to the trailer. If the tractor air system pressure drops to 60 psi, the trailer air supply protection valve will trip, fully applying the trailer spring brakes. (14) Engine Retarder Selection Switch. This switch is located to the right of the headlights switch knob. Select the number of engine cylinders desired for the braking action. HIGH position provides the maximum engine braking (6 cylinders), MED position provides braking on 4 cylinders, and LOW position provides braking on 2 cylinders. (15) Operation Switch. This switch is located below the headlight switch knob. Pull out and place the switch in the up (BLACKOUT) position and pull out the headlight switch to the 1st position to turn on the front and rear blackout marker lights. Pull the headlight switch to the 2d position to turn on the blackout drive light. The blackout brake lights will operate with the headlight switch in either position. With the blackout light switch in the up position, the switch automatically locks out all regular service lights, the electric horn, and the backup lights. Return the blackout light switch to the down (NORMAL) position to turn off the blackout lights and restore the regular lights.
NOTE: Pull the switch lever toward the seat to move it to either position. This prevents
engagement or disengagement of the service lights.
CAUTION Do not leave the operation switch in the blackout position for extended periods without the engine running. The batteries can run down and cause starting problems.
d. Lower Control Panel:
(1) Heat Control Knob. This is the first control mounted to the extreme left in the control panel. Pull out to increase the heater output temperature; push in to decrease output temperature.

TC 21-305-6
5-30
(2) Heater Fan Speed Switch. This switch is located to the right of the heat control knob. Rotate to the right for LOW, MED, and HIGH fan speed. Turn full left to turn off. (3) Heater Air Control (driver). Pull out to divert heater air to the driver's side of the cab. Push in to close the vent. (4) Heater Air Control (passenger). Pull out to divert heater air to the passenger side of the cab. Push in to close the vent. (5) Fresh Air Vent. Pull out to receive fresh air in the passenger's side of the cab. Push in to close the fresh air vent. (6) Recirculation Vent. This vent is located to the right of the fresh air vent. Pull out to circulate cab air through the heater. Push in to close the vent. (7) Air Filter Restriction Indicator. It is mounted to the right of the lower control panel. When the air cleaner air flow is adequate, the window on the indicator will show clear on the M915 and green on the M915A1. If the air flow is restricted, the window will show red. After the air filter has been cleaned, push the reset button to reset the air filter indicator.
NOTE: Air cleaner maintenance is required when red shows in the window. Notify organizational maintenance.
e. Floor Mounted Foot Controls:
(1) Headlight Dimmer Switch. This switch is located on the floor to the left of the engine retarder foot switch. Push all the way down with the left foot and release to switch headlights to high beam. Push all the way down and release again to dim headlights.
NOTE: The high beam indicator light will come on when the headlights are working in the high
beam position. (2) Engine Retarder Foot Switch. This switch is to the left of the service brake pedal. The hand throttle control must be completely in. Depress the foot pedal, which activates the switch to engage the engine brake. Release the foot pedal to disengage the engine brake. The accelerator pedal must be fully released before the foot switch will operate. Select the desired braking range using the retarder selection switch. (3) Service Brake Pedal. This pedal is located between the engine retarder foot switch and the accelerator pedal. Push down with your foot to apply the service brakes. If your truck is properly coupled, the trailer

TC 21-305-6
5-31
service brakes will also be applied when you use your truck's service brake pedal. (4) Accelerator Pedal. It is located to the right of the service brake pedal. Push down gradually with your foot to increase engine speed or to start the truck moving.
f. Transmission Controls:
(1) Transmission Ratio Selector--M915. This selector is located in a panel to the right of the driver's seat. Move the selector lever forward or rearward to select the desired gear ratio position. The transmission has 16 forward gears and 2 reverses. For complete operating instructions, see lesson outline "Drive Vehicle with Semiautomatic Transmission" in this TC. (2) Transmission Range Selector--M915A1. This selector is located in a panel to the right of the driver's seat. Move the selector lever forward or rearward to select the desired gear ratio position. The transmission has five forward ranges and one reverse. For complete operating instructions see lesson outline, "Drive Vehicle with Automatic Transmission" in this TC. (3) Sliding Fifth Wheel Control--M915A1 Only. This control is located in the cab on a bracket fastened to the rear of the transmission range selector. The sliding feature allows adjustment of the trailer and cargo weight.
g. Steering Column Controls: (1) Emergency Flasher and Turn Signal Control. This control is mounted on the left side of the steering column. Pull out to turn on the emergency flashers. To turn off emergency flashers, push the lever in. The turn signal lever is part of the emergency flashers. Push the lever up to turn on the right turn signal. Pull the lever down to turn on the left turn signal. Return to the center position when the turn is completed. (2) Horn Button. This button is in the center of the steering wheel. Push on the button to sound the horn. The truck is also equipped with an air horn located overhead to the driver's left front. To sound the horn, pull down on the chain. (3) Trailer Hand Brake Control. This control is mounted opposite of the turn signal control. Pull down to apply trailer brakes only. (Should only be used to test the semitrailer brakes.) Using it when driving will cause the semitrailer to skid. To park, use the parking brake or chock the

TC 21-305-6
5-32
wheels. Using the semitrailer hand control to park can cause all the air to leak out. Be sure to return the control to its off position (all the way up). (4) Steering Wheel. Rotate right to turn the front wheels to the right. Rotate left to turn the front wheels to the left.
CAUTION
Do not hold the steering wheel in full steer position for more than 10 seconds as the pump fluid will overheat and could cause damage to the equipment. 3. Practical exercise: None. 4. Evaluate: Students are evaluated daily during driving tasks are tested during the EOCCT. 5. Summary:
a. Recap main points. b. Allow for questions. c. Clarify questions. d. Give closing statement.
6. Retraining: Training is reinforced during daily driving tasks.
E. SAFETY RESTRICTIONS. None. F. ADDITIONAL COMMENTS AND INFORMATION. Recommended instructional time is 1 hour conference.
TC 21-305-6
5-33
LESSON TITLE: DRIVE VEHICLE WITH AUTOMATIC TRANSMISSION TASK NUMBER: 551-721-1366 (Drive Vehicle with Automatic Transmission) A. TRAINING OBJECTIVE. TASK: Drive an M915A1 tractor with automatic transmission. CONDITIONS Given instruction, a DD Form 1970, DA Form 2404, pencil, TM
9 2320-283-10, equipment records folder, rags, lubricants, coolant, a suitable driver training area, an M915A1 tractor with BII, and a semitrailer.
STANDARD: Operate the automatic transmission on the M915A1 vehicle;
upshift and downshift through all gears and perform basic driving maneuvers to include correct braking procedures.
B. INTERMEDIATE TRAINING. None. C. ADMINISTRATIVE INSTRUCTIONS.
1. When training will be given: As scheduled. 2. Training location: Classroom, motor pool, and training area as scheduled. 3. Training type: Conference, demonstration, and practical exercise. 4. Who will be trained: Personnel as scheduled. 5. Principal and assistant instructors required: One primary instructor for the conference
and one assistant instructor for every two students for the demonstration and practical exercise. 6. Training aids and equipment: Television, videocassette recorder, tape TVT 55-18
(PIN: 709235DA) "M915A1 Line Haul Tractor," hearing protection, rags, lubricants, coolant, and 40 traffic cones or empty POL drums. DA Form 2404, DD Form 1970, pencil, TM 9-2320-283-10, equipment records folder, an M915A1 tractor with BII, and semitrailer for every two students.
7. References: TM 9-2320-283-10 and FM 21-305.
D. SEQUENCE OF ACTIVITY.
1. Introduction:
a. Interest device.

TC 21-305-6
5-34
b. Tie-in. c. Lesson objective (paragraph A). d. Procedures:
(1) Explanation. (2) Practical exercise. (3) Summary.
2. Explanation and Demonstration:
a. Show videotape TVT 55-18. b. Transmission range selector lever:
NOTE: The automatic transmission is equipped with a lockup clutch, which automatically engages after the load is rolling and torque demand is low. This provides increased fuel economy at highway cruising speeds. It automatically releases at lower vehicle speeds. Lockup engagement, like range shifts, may be felt under some conditions and you may hear a slight change in engine sound as rpm drop. A little driving experience will enable you to tell the difference between gear range changes and lockup engagement/disengagement.
CAUTION
Never let your truck coast in neutral. Severe transmission damage can result and engine braking action is not available during a neutral coast.
NOTE: In the lower gear ranges (1, 1-2, 1-3, 1-4), the transmission will not upshift above the
highest gear selected unless engine governed speed is exceeded. (1) Neutral (N): Use this position for parking and starting the engine. If the engine starts in another position, the neutral safety switch is malfunctioning. (2) Reverse (R): Use this position to back the vehicle. Completely stop before shifting from a forward gear to reverse or from reverse to forward. (3) Forward gear ranges are "1" through "1-5" with "1" being the lowest gear ratio and "1-5" the highest. "1-5" position is used for all normal driving conditions. When the transmission gear range selector in is "1-5," the vehicle will start off in 1st gear and as the accelerator pedal is depressed, the transmission will upshift to 2d gear, 3d gear, 4th gear, and

TC 21-305-6
5-35
5th gear automatically. As the vehicle slows down, the transmission will downshift to the correct gear automatically.
(4) Occasionally the road, load, or traffic conditions will make it desirable to select a lower gear range; use gear 1-4, 1-3, or 1-2. When conditions return to normal, move the range selector back to gear 1-5.
CAUTION
Under a full load, the governed speed is 2,100 rpm. If the engine is allowed to exceed governed speed, serious engine damage can result. Never allow the engine to exceed this rpm.
c. Recommended rpm:
(1) The highway cruising range is 1,800 to 1,900 rpm. (2) In cities and other congested areas, select a gear that permits operation of not less than 1,500 rpm.
d. Pulling out:
(1) Check gauges and instruments. (2) Turn on lights as appropriate. (3) Return the trailer brake hand control to its off position (all the way up).
CAUTION
If the semitrailer brake hand control is not returned to the off position (all the way up), the semitrailer brakes will burn up.
(4) Select the starting gear ratio. (5) Release the parking brake by pushing in on the parking brake control. (6) Gradually depress the accelerator pedal.
CAUTION
With the transmission engaged, do not operate this vehicle with the engine speed below 1,500 rpm or above 2,100 rpm. Serious transmission damage will result.
(7) Upshifting--there is no speed limitation. (8) Downshifting should be avoided when the vehicle is above the maximum speed attainable in the next lower gear.

TC 21-305-6
5-36
e. Hauling up a Hill:
(1) The engine works hardest when moving a loaded truck up a grade. Proper use of gear ranges will shorten the time on hills. (2) Unless the hill is extreme, begin in gear range 1-5, and depress the accelerator pedal all the way downward. Keep it there as the truck moves up the grade. If there is enough power to maintain a satisfactory road speed, remain in this gear range and allow the transmission to upshift automatically. (3) If the hill causes a steady decrease in speed and rpm approaches 1,700, manually downshift the range selector lever to the next lower range (1-4). Continue to downshift in this manner (1-3, 1-2, 1) to match the power demands of the grade. Once the hill has been topped, return the gear range selector to the 1-5 position. (4) For starting on maximum grades with maximum load, start in gear range 1, depress accelerator pedal to the floor, and manually upshift the lever one range at a time, shifting when engine speed approaches 2,000 rpm.
f. Descending grades. Your vehicle is equipped with an engine retarder system, which enables the engine to act as a brake. The engine retarder should be used for descending grades, in city traffic, or in any situation where slowing is required but excessive use of the service brakes is not desirable. The following procedures should be applied when appropriate:
CAUTION
The engine brake loses effectiveness over controlling engine rpm and vehicle speed when being pushed by a loaded vehicle down a grade. Use service brakes and manually downshift range selector as necessary on long grades to keep the vehicle speed under control and engine rpm at 1,500 to 1,800.
(1) Preset the ENGINE RETARDER switch on the instrument panel to low. Then remove your foot completely from the accelerator pedal and press the engine retarder foot switch pedal. Always place the engine retarder switch to LOW first. If you need more engine braking, set the engine retarder switch to MEDIUM; if more engine braking is needed, set the engine retarder switch to HIGH. (2) Keep the truck in a gear range that gives you the rated rpm. The engine retarder provides the most braking this way. (3) When starting downgrade, select the gear range you would most likely use if you were climbing that same grade. If too much braking occurs,

TC 21-305-6
5-37
select a lower setting with the ENGINE RETARDER switch or shift to a higher gear range. If not enough braking, select a higher setting with the ENGINE RETARDER switch or shift to a lower gear range.
g. Differential lock/unlock control:
(1) Inter-axle differential lockup provides additional traction by applying full torque to both rear axles. This feature should be used any time traction conditions are poor, such as rain or snow.
CAUTION
Do not place the switch in the LOCK position while the truck is moving or any wheel is spinning. Do not operate the truck on hard surfaces any longer than necessary with the differential lockup engaged. Driveline windup can occur which will damage the differentials.
NOTE: The differential lockout indicator will come on when the control is in the LOCK
position. If the differential lockup indicator lamp does not go off, it may be necessary to stop, back up slowly, go forward again, and repeat until the lamp goes off.
(2) The differential lock/unlock control is located on the instrument panel to the right of the driver. Use the following instructions to engage and disengage the system:
(a) Engage: Pull to the side of the road and stop the truck, but leave the engine running. Place the differential lock/unlock control in the LOCK position. Observe that the differential lockout indicator lamp comes on. The truck is now ready for operation. (b) Disengage: Remove your foot from the accelerator pedal. Place the differential lock/unlock control in the UNLOCK position. Observe that the differential lockup indicator lamp goes off. The system is now disengaged.
h. Demonstrate hand and arm signals required for this exercise. i. Demonstrate driving within the training area.
3. Practical exercise:
a. Assign students to vehicles and issue TM 9-2320-283-10, pencil, DA Form 2404, DD Form 1970, and equipment records folder. Tell students where rags, lubricants, and coolant are located. b. Students perform before-operation PMCS.

TC 21-305-6
5-38
c. Students practice maneuvering the M915A1 with a semitrailer through the training area (see Figures 4-1 through 4-4). During-operation PMCS is also conducted at this time.
NOTE: As each student practices driving, an assistant instructor rides in the right seat. The
success of this driver training program is the ability of the instructor to get in the cab of the truck with the student driver and pass on valuable experience and proper driving techniques. Now is the time to correct any bad driving habits.
d. After the students have mastered driving the vehicle in the training area, the students will then practice driving on the road.
4. Evaluate: Check each student's performance of PMCS and driving. 5. Summary:
a. Recap main points. b. Allow for questions. c. Clarify questions. d. Give closing statement.
6. Retraining: Retrain No-Gos and slow learners. This can be accomplished using the
videotape TVT 55-18, "M915A1 Line Haul Tractor." Students perform driving tasks daily and are tested on the EOCCT. E. SAFETY RESTRICTIONS.
1. Ensure that all chocks blocks are in place when the vehicle is parked. 2. Always place the transmission in neutral, set the parking brake, and shut off the
engine before leaving the vehicle. 3. Ensure that students remove all jewelry and identification tags before performing
PMCS. 4. Ensure that students pay particular attention to the cautions and warnings listed in the
operator's manual. 5. Maintain a safe following distance and speed limit when driving in the training area
(as determined by the local command). 6. Always wear hearing protection when working in or around a running vehicle.

TC 21-305-6
5-39
7. Do not shift the differential lock/unlock lever to the lock position while the vehicle is moving.
8. Ensure that personnel wear seat belts (if equipped) when the vehicle is in motion.
F. ADDITIONAL COMMENTS AND INFORMATION. Recommended instructional time is 10.5 hours (.5 conference, .5 demonstration, and 9.5 practical exercise including 1.5 PMCS).

TC 21-305-6
5-40
ENGINE RETARDER (JACOBS BRAKE) INFORMATION SHEET 1. The M915A1 tractors are equipped with a retarder system that enables the engine to act as a brake. The engine retarder should be used for descending grades, in city traffic, or in any situation where slowing is required but not on slippery road surfaces (such as rain, snow, sleet, or ice). Using the engine brake on slippery surfaces can cause the vehicle to skid. The engine retarder is most effective between 1,500 to 1,800 rpm. 2. Never allow the engine speed to drop below 1,500 rpm with the engine retarder applied. This will cause serious transmission damage.
CAUTION The engine brake loses effectiveness over controlling engine rpm and vehicle speed when being pushed by a loaded semitrailer down a grade. Use service brakes and manually downshift range selector as necessary on long grades to keep vehicle speed under control and engine rpm at 1,500 to 1,800.
3. The following procedures should be followed when the towing vehicle tires have good traction:
a. Select a gear that will allow the engine with the engine retarder applied to control the truck speed with the engine at or below 1,800 rpm and service brakes not applied. This means as you approach a downgrade, progressively select a gear when combined with the engine retarder will allow you to maintain an engine speed of 1,500 to 1,800 rpm.
b. As engine speed exceeds 1,800 rpm, apply the service brakes one time to slow the
engine speed, release the engine retarder, downshift one gear (if you are in 1-5 gear, you would downshift to 1-4 gear) and reapply the engine retarder. Repeat this procedure until the engine speed can be maintained between 1,500 to 1,800 rpm.
c. If the engine over speeds (above 1,800 rpm), apply the service brakes one time to slow
the vehicle speed and regain control.
WARNING FAILURE TO FOLLOW THE DOWNHILL DRIVING PROCEDURES MAY CAUSE YOU TO LOSE VEHICLE CONTROL AND RESULT IN SEVERE INJURY OR DEATH TO PERSONNEL.
CAUTION EXCESSIVE USE OF THE SERVICE BRAKE TO CONTROL DOWNHILL SPEED WILL RESULT IN THE LOSS OF BRAKING POWER BECAUSE OF HEAT BUILDUP.

TC 21-305-6
5-41
4. The instructors must emphasize and reemphasize the importance of the proper downhill braking procedures and the use of the engine retarder especially on slippery surfaces as outlined above. He must instill in the drivers that if these procedures are not followed, death or serious injury can result. 5. Also, the instructors must explain to the students that braking ability and braking techniques are different when loaded and the driver must think and plan ahead. The driver must increase his following distance and reduce his speed consistent with road and traffic conditions.

TC 21-305-6
5-42
LESSON TITLE: DRIVE VEHICLE WITH SEMIAUTOMATIC TRANSMISSION TASK NUMBER: 551-721-1364 (Drive Vehicle with Semiautomatic Transmission) A. TRAINING OBJECTIVE. TASK: Drive an M915 tractor with semiautomatic transmission. CONDITIONS Given instruction, a DD Form 1970, DA Form 2404, pencil, TM
9 2320-273-10, equipment records folder, rags, lubricants, coolant, a suitable driver training area, an M915 tractor with BII, and semitrailer.
STANDARD: Operate the semiautomatic transmission on the M915 vehicle;
upshift and downshift through all gears and perform basic driving maneuvers to include correct braking.
B. INTERMEDIATE TRAINING. None. C. ADMINISTRATIVE INSTRUCTIONS.
1. When training will be given: As scheduled. 2. Training location: Classroom, motor pool, and training area as scheduled. 3. Training type: Conference, demonstration, and practical exercise . 4. Who will be trained: Personnel as scheduled. 5. Principal and assistant instructors required: One primary instructor for the conference
and one assistant instructor for every two students for the demonstration and practical exercise. 6. Training aids and equipment: Hearing protection, rags, lubricants, coolant, and 40
traffic cones or empty POL drums. DA Form 2404, DD Form 1970, pencil, TM 9-2320-273-10, equipment records folder, an M915 tractor with BII, and semitrailer for every two students.
7. References: TM 9-2320-273-10 and FM 21-305.
D. SEQUENCE OF ACTIVITY.
1. Introduction: a. Interest device. b. Tie-in.

TC 21-305-6
5-43
c. Lesson objective (paragraph A). d. Procedures:
(1) Explanation. (2) Practical exercise. (3) Summary.
2. Explanation and Demonstration:
a. Transmission air control valve:
(1) Located on the left side of the transmission range selector control. (2) When the vehicle air supply is 80 psi or greater, push in on this valve to provide the transmission with operating air from vehicle air supply. (3) Pull out this valve to remove air supply. This will automatically neutralize the transmission. (4) The transmission will automatically go into neutral when air pressure drops below 80 psi.
b. Transmission range selector lever:
(1) Located in a panel slightly forward and to the right of the driver's seat. It is used to select the proper transmission gear range for a particular driving condition. (2) Neutral "N" is used for parking and starting the engine. The engine will not start with the selector lever in any other position. (3) Reverse ranges are used for backing. The M915 tractor must be completely stopped before shifting from a forward gear range to reverse or from reverse to a forward gear range. "R1" should be used for heavy loads or where a slower reverse speed is required due to congestion or other hazards. "R2" is the normal reverse range. (4) Forward gear ranges are "1" through "16" with "1" being the lowest gear ratio and "16" the highest. Move the selector lever forward or rearward to select the desired gear ratio position. The transmission will remain in the previously selected position until the selector lever is moved into the notch adjacent to the newly selected gear ratio. Progression

TC 21-305-6
5-44
through the full range of 16 forward gear ratios may be done two steps at a time up to 11th gear or one step advance from 11th to 16th gears. (5) A built in inhibitor prevents more than a two step advance (or one step advance from 11th to 16thpositions). An inhibitor override is provided to allow selection of the proper gear ratio for pulling out. This is done by pulling upward on the transmission selector lever and may only be used when the truck is at a standstill.
CAUTION
Do not use the inhibitor override while the truck is in motion. (6) Engine governed speed is 2,100 rpm. The transmission will totally disengage above 2,300 rpm and under 1,100 rpm, resulting in--
(a) Freewheeling. (b) Loss of engine braking.
c. Recommended rpm: (1) The highway cruising range is 1,800 to 1,900 rpm. (2) In cities and other congested areas, select a gear that permits operation of not less than 1,500 rpm.
d. Pulling out:
(1) Check gauges and instruments. (2) Turn on lights as appropriate. (3) Depress the transmission air control button. It may be necessary to shift through all the gears at idle speed several times to eliminate transmission air leaks, particularly in cold weather. (4) Pull up on the selector lever to override the inhibitor. Select the starting gear ratio:
(a) Empty to 75,000 lb GCWR, 6th gear. (b) 75,000 to 105,000 lb GCWR, 4th gear. (c) 105,000 to 130,000 lb GCWR, 3d gear.
(5) Release the parking brake by pushing in on the parking brake control.
TC 21-305-6
5-45
(6) Gradually depress the accelerator pedal.
CAUTION With the transmission engaged, do not operate this vehicle with the engine speed below 1,200 rpm or above 2,100 rpm. Serious transmission damage will result.
CAUTION When starting with a load, engine speed must accelerate through 1,200 rpm in three seconds or less to prevent damage to the front clutch. If rpm does not increase above 1,200 rpm in three seconds, let up off the accelerator and shift to a lower gear.
CAUTION Do not start this truck in gears one, two, or three with fast acceleration. Serious driveline damage will result. If it is necessary to start in these lower gears, gradually accelerate when starting as you shift through these gears.
(7) Upshifts can be made at any engine speed above 1,750 rpm. Ease up on the accelerator when the shift selector is placed into the detent. This will provide a smooth shift. (8) Downshifts must always be made when the engine speed is at or below 1,650 rpm. Accelerate when the shift selector is placed into the detent.
e. Hauling up hill.
(1) The engine works hardest when moving a loaded truck up a grade. The proper use of gears will shorten time on hills and minimize the amount of shifting. (2) As you start uphill, depress the accelerator pedal all the way down and keep it there as the truck moves up the grade. If there is enough power to maintain a satisfactory rpm, remain in that gear for the entire grade. (3) If the hill causes a steady decline in engine rpm, downshift when engine rpm is at or below 1,650. Continue to downshift in this manner until engine rpm can be maintained. (4) By remaining in each gear until arriving at the next lower shift point, the truck will top the hill in the best possible time on less fuel and fewer shifts.

TC 21-305-6
5-46
f. Descending grades. (1) Do not over speed the engine. Never allow the engine to be pushed above governed rpm when rolling down a grade. (2) Progressive downshifting and the use of the engine retarder, when starting down a grade from the top of a hill, will provide better control around curves and turns and save brakes. (3) For detailed instructions on using the engine retarder (Jacobs brake), see the attached information sheet.
g. Differential lock/unlock control. (1) Inter-axle differential lockup provides additional traction by applying full torque to both rear axles. This feature should be used any time traction conditions are poor such as on rainy or snowy pavement. (2) The differential lock/unlock control is located on the instrument panel to the right of the driver. Use the following instructions to engage and disengage the system.
(a) Engage: Pull to the side of the road and stop the truck. Place the differential lock/unlock control in the LOCK position. Observe that the differential lockout indicator light comes on. The truck is now ready for operation. (b) Disengage: Remove your foot from the accelerator pedal. Place the differential lock/unlock control in the UNLOCK position. Observe that differential lockup indicator light goes off. The system is now disengaged.
h. Demonstrate hand and arm signals required for this exercise. i. Demonstrate driving within the training area.
3. Practical exercise:
a. Assign students to vehicles and issue TM 9-2320-273-10, pencil, DA Form 2404, DD Form 1970, and equipment records folder. Tell students where rags, lubricants, and coolant are located. b. Students perform before-operation PMCS.

TC 21-305-6
5-47
c. Students practice maneuvering the M915 with a semitrailer through the training area (see Figures 4-1 through 4-4). During-operation PMCS is also conducted at this time.
NOTE: As each student practices driving, an assistant instructor rides in the right seat. The
success of this driver training program is the ability of the instructor to get in the cab of the truck with the student driver and pass on valuable experience and proper driving techniques. Now is the time to correct any bad driving habits.
d. After the students have mastered driving the vehicle in the training area, the students will then practice driving on the road.
4. Evaluate: Check each student's performance of PMCS and driving. 5. Summary:
a. Recap main points. b. Allow for questions. c. Clarify questions. d. Give closing statement.
6. Retraining: Retrain No-Gos and slow learners. Students perform driving tasks daily
and are tested on the EOCCT. E. SAFETY RESTRICTIONS.
1. Ensure that all chocks blocks are in place when the vehicle is parked. 2. Always place the transmission in neutral, set the parking brake, and shut off the
engine before leaving the vehicle. 3. Ensure that students remove all jewelry and identification tags before performing
PMCS. 4. Ensure that students pay particular attention to the cautions and warnings listed in the
operator's manual. 5. Maintain a safe following distance and speed limit when driving in the training area
(as determined by the local command). 6. Always wear hearing protection when working in or around a running vehicle.

TC 21-305-6
5-48
7. Do not shift the differential lock/unlock lever to the lock position while the vehicle is moving.
8. Ensure that personnel wear seat belts (if equipped) when the vehicle is in motion.
F. ADDITIONAL COMMENTS AND INFORMATION. Recommended instructional time is 10.5 hours (.5 conference, .5 demonstration, and 9.5 practical exercise including 1.5 PMCS).

TC 21-305-6
5-49
ENGINE RETARDER (JACOBS BRAKE) INFORMATION SHEET
1. The M915 tractors are equipped with a retarder system that enables the engine to act as a brake. Use the engine retarder for descending grades, in city traffic, or in any situation where slowing is required but not on slippery road surfaces (such as rain, snow, sleet, or ice). Using the engine brake on slippery surfaces can cause the vehicle to skid. The engine retarder is most effective between 1,750 to 2,000 rpm. 2. Do not use the engine retarder in first, second, or third gears, except when descending steep grades. Never allow the engine speed to drop below 1,200 rpm with the engine retarder applied. This will cause serious transmission damage. Do not engage the engine retarder when shifting or when the transmission is in neutral. 3. The following procedures should be followed when the towing vehicle tires have good traction:
a. Select a gear that will allow the engine with the engine retarder applied to control the truck speed with the engine at or below 2,000 rpm and service brakes not applied. This means as you approach a downgrade, progressively select a gear when combined with the engine retarder that will allow you to maintain an engine speed of 1,750 to 2,000 rpm.
b. As engine speed exceeds 2,000 rpm, apply the service brakes one time to slow the
engine speed to 1,650 rpm, release the engine retarder, downshift one gear (if you are in 10th gear, you would downshift to 9th gear) and reapply the engine retarder. Repeat this procedure until the engine speed can be maintained between 1,750 to 2,000 rpm.
c. If the engine over speeds (above 2,100 rpm), apply the service brakes one time to slow the vehicle speed and regain control.
WARNING Failure to follow the downhill driving procedures may cause you to lose vehicle control and result in severe injury or death to personnel.
CAUTION Excessive use of the service brake to control downhill speed will result in the loss of braking power because of heat buildup.
d. If the transmission over speeds (above 2,300 rpm) and the transmission totally
disengages, perform the following:
(1) Release the engine retarder. (2) Upshift the transmission to the next higher gear (if you are in 10th gear, you would upshift to 11th gear).

TC 21-305-6
5-50
(3) Apply the service brakes one time to slow the vehicle speed and help regain control of the vehicle.
e. If the transmission totally disengages from the engine due to a shift being made with
engine retarder applied and engine speed has returned to low idle free wheeling, accelerate the engine to reengage the transmission.
f. If you experience a total loss of braking due to heat buildup,--
(1) Apply the engine retarder (place switch in high mode). (2) Upshift as engine speed approaches 2,100 rpm. Before each upshift, release the engine retarder. (3) In 16th gear, continue to apply engine retarder, and maintain directional control of the vehicle.
4. The instructors must emphasize and reemphasize the importance of the proper downhill braking procedures and the use of the engine retarder especially on slippery surfaces as outlined above. He must instill in the drivers that if these procedures are not followed, death or serious injury can result. 5. Also, the instructors must explain to the students that braking ability and braking techniques are different when loaded and the driver must think and plan ahead. The driver must increase his following distance and reduce his speed consistent with road and traffic conditions.

TC 21-305-6
5-51
LESSON TITLE: BACK VEHICLE WITH SEMITRAILER TASK NUMBER: 551-721-1367 (Back Vehicle with Semitrailer) A. TRAINING OBJECTIVE. TASK: Back vehicle with semitrailer. CONDITIONS Given instruction, a DD Form 1970, a DA Form 2404, a pen or
pencil, TM 9-2320-273-10 or TM 9-2320-283-10, equipment records folder, rags, lubricants, coolant, a suitable training area, an M915 or M915A1 with BII and semitrailer.
STANDARD: Back the M915 or M915A1 14-ton tractor with semitrailer using
ground guides without causing damage to the vehicle and semitrailer or physical surrounding and without causing injury to personnel.
B. INTERMEDIATE TRAINING. None. C. ADMINISTRATIVE INSTRUCTIONS.
1. When training will be given: As scheduled. 2. Training location: Motor pool and training area as scheduled. 3. Training type: Demonstration and practical exercise. 4. Who will be trained: Personnel as scheduled. 5. Principal and assistant instructors required: One primary instructor and one assistant
instructor for every two students for the demonstration and one assistant instructor for every two students for the practical exercise.
6. Training aids and equipment: Rags, lubricants, coolant, and 40 traffic cones or empty POL drums. DA Form 2404, DD Form 1970, pencil, TM 9-2320-273-10 or TM 9-2320-283-10, equipment records folder, an M915 or M915A1 14-ton tractor with BII, and semitrailer for every two students.
7. References: TM 9-2320-273-10 or TM 9-2320-283-10 and FM 21-305.
D. SEQUENCE OF ACTIVITY.
1. Introduction:

TC 21-305-6
5-52
a. Interest device. b. Tie-in. c. Lesson objective (paragraph A). d. Procedures:
(1) Explanation. (2) Practical exercise. (3) Summary.
2. Explanation and Demonstration:
a. Demonstrate hand and arm signals required for this exercise. b. Explain ground guide safety precautions for backing the 14-ton tractor with semitrailer. c. Demonstrate backing.
3. Practical exercise: a. Assign students to vehicles and issue TM 9-2320-273-10, or TM 9-2320-283-10, pencil, DA Form 2404, DD Form 1970, and equipment records folder. Instruct students on the location of rags, lubricants, and coolant. b. Students perform before-operation PMCS. c. Students practice backing the 14-ton tractor with semitrailer laid out in the training area (see Figures 4-5 and 4-6). During-operation PMCS is also conducted at this time.
NOTE: The success of the driver training program is the ability of the instructors to get in the cab of the truck with the student driver and pass on valuable experience and techniques. Now is the time to correct any bad driving habits.
d. Students perform after-operation PMCS and ensure that all operator entries required on DA Form 2404 and DD Form 1970 are accurate, complete, and legible.
4. Evaluate: Check each student's performance of PMCS and backing. 5. Summary:

TC 21-305-6
5-53
a. Recap main points. b. Allow for questions. c. Clarify questions. d. Give closing statement.
6. Retraining: Retrain slow learners. This can be accomplished by using the videotape "M915A1 Line Haul Tractor" and reinforced throughout the course. Students perform backing tasks daily and are tested on the EOCCT. E. SAFETY RESTRICTIONS.
1. Ensure that all chock blocks are in place when the vehicles are parked. 2. Always place the transmission in neutral, set the parking brake, and shut off the
engine before leaving the vehicle. 3. Ensure that students remove all jewelry and identification tags before performing
PMCS. 4. Ensure that students pay particular attention to the cautions and warnings listed in the
operator's manual. 5. Always use ground guides when backing. 6. Maintain a safe following distance and speed limit when driving in the training area
(as determined by the local command).
7. Always wear hearing protection when working in or around a running 14-ton tractor. 8. Ensure that all occupants wear seat belts while the vehicle is in operation.
F. ADDITIONAL COMMENTS AND INFORMATION. Recommended instructional time is 16 hours (.5 demonstration and 15.5 hours practical exercise including 2.0 PMCS).

TC 21-305-6
5-54
LESSON TITLE: COUPLE SEMITRAILER TASK NUMBER: 551-721-1314 (Couple Semitrailer) A. TRAINING OBJECTIVE. TASK: Couple a M915 or M915A1 tractor to semitrailer. CONDITIONS Given instruction, a DA Form 2404, DD Form 1970, pen or
pencil, TM 9-2320-273-10 or TM 9-2320-283-10, equipment records folder, rags, lubricants, coolant, an M915 or M915A1 tractor with BII, and a semitrailer.
STANDARD: Couple an M915 or M915A1 tractor to a semitrailer in the correct
sequence without damage to equipment or injury to personnel. B. INTERMEDIATE TRAINING. None. C. ADMINISTRATIVE INSTRUCTIONS.
1. When training will be given: As scheduled. 2. Training location: Training area as scheduled. 3. Training type: Demonstration and practical exercise. 4. Who will be trained: Personnel as scheduled. 5. Principal and assistant instructors required: One primary instructor and one assistant
instructor for every two students for the demonstration and one assistant instructor for every two students for the practical exercise.
6. Training aids and equipment: Rags, lubricants, and coolant. DA Form 2404, DD
Form 1970, pencil, TM 9-2320-273-10 or TM 9-2320-283-10, equipment records folder, an M915 or M915A1 tractor with BII, and a semitrailer for every two students.
7. References: TM 9-2320-273-10 or TM 9-2320-283-10 and FM 21-305. D. SEQUENCE OF ACTIVITY.
1. Introduction: a. Interest device. b. Tie-in.

TC 21-305-6
5-55
c. Lesson objective (paragraph A). d. Procedures:
(1) Explanation. (2) Practical exercise. (3) Summary.
2. Explanation and Demonstration: Demonstrate coupling procedures.
a. Check all coupling devices on the tractor and semitrailer for condition and working order. b. Check that chock blocks are properly in place at semitrailer wheels. If chock blocks are not in place, place them in their proper position. c. Check that all moving parts and top of fifth wheel are properly lubricated. d. Check the lock guard for proper operation. Have it replaced if it is damaged or missing. Make sure both primary lock release pull ring and secondary lock release handle are pulled out and lock guard is open to accept the trailer kingpin. e. After checks are completed, start tractor and line the tractor up with the semitrailer. Use ground guides when backing.
f. The tractor and semitrailer should be aligned in a straight line. g. Slowly back and maneuver the tractor so that the kingpin of the semitrailer is in line with the coupling jaws of the tractor's fifth wheel. h. About 6 inches before the fifth wheel of the tractor touches the front of the semitrailer skid plate, STOP! i. Shift the transmission range selector into neutral, and set the tractor's parking brakes. j. Adjust the height of the semitrailer to the height of the tractor's fifth wheel. Use the crank handle on the semitrailer to raise or lower the landing legs so that the semitrailer will ride onto the approach ramps on the tractor. k. Remove dummy couplings from the air connections on the semitrailer. l. Connect air line hoses from the tractor to the semitrailer in this manner:

TC 21-305-6
5-56
(1) Take the hose tagged EMERGENCY on the tractor (color coded RED) and attach this hose to the EMERGENCY COUPLING on the semitrailer. (2) Now take the hose tagged SERVICE (color coded YELLOW or BLUE) and attach it to the SERVICE COUPLING on the semitrailer.
CAUTION
Be sure that the SERVICE air hose from the tractor is connected to the SERVICE COUPLING and that the EMERGENCY air hose is connected to the EMERGENCY COUPLING on the semitrailer.
m. Then enter the cab and push in on the trailer air supply control knob and set the trailer brake hand control.
(1) To test for leaks in the SERVICE hose, push in on the trailer air supply control knob and pull down on the semitrailer brake handle control. (2) If the hoses leak at the coupling, pull out on the trailer air supply control knob, disconnect the air hose, and apply some grease to the grommets, and reconnect.
n. Be sure that the fifth wheel air slide control is set to the LOCK position (M915A1 ONLY). o. Back up slowly until the semitrailer kingpin locks into the tractor's fifth wheel coupling jaws. p. To check if coupling is secure, try to pull forward with semitrailer brakes applied. The semitrailer brakes should stop the tractor from moving forward. If coupling is secure, stop the tractor and set the tractor's parking brakes.
NOTE: If the coupling is not secure, STOP! Remember, the air line hoses are still connected.
CAUTION Make a visual check of the coupling. Do not take for granted that you have a secure coupling.
q. Connect the electrical cable--either the 12 volt or 24 volt.
NOTE: One 12-volt light cable and one 24-volt cable are stored in the tool box under the
passenger seat.
(1) Open the receptacle cover and align the slot on the plug with the aligning key of the receptacle.

TC 21-305-6
5-57
(2) Press the plug into place. (3) Check all lights and emergency flashers after turning on the light switch.
r. Raise the landing legs. s. Stow the float pads. t. Stow the chock blocks. u. Check the operation of the semitrailer brakes using the trailer brake hand control in the cab.
3. Practical exercise: a. Students practice coupling in the training area(s). During-operation PMCS is also conducted at this time. b. Students perform after-operation PMCS and ensure that all operator entries required on DA Form 2404 and DD Form 1970 are accurate, complete, and legible.
4. Evaluate: Check each student's performance on coupling and PMCS. 5. Summary:
a. Recap main points. b. Allow for questions. c. Clarify questions. d. Give closing statement.
6. Retraining: Retrain slow learners. This can be accomplished using the videotape
TVT 55-18, "M915A1 Line Haul Tractor" and reinforced throughout the course. Students are tested on the EOCCT.
E. SAFETY RESTRICTIONS.
1. Ensure that all chock blocks are in place when the vehicles are parked. 2. Always place the transmission in neutral, set the parking brake, and shut off the
engine before leaving the vehicle.

TC 21-305-6
5-58
3. Ensure that students remove all jewelry and identification tags before performing
PMCS. 4. Ensure that students pay particular attention to the cautions and warnings listed in the
operator's manual. 5. Always use ground guides when backing. 6. Always wear hearing protection when working in or around a running 14-ton tractor. 7. Ensure that all occupants wear seat belts while the vehicle is in operation. 8. Ensure that the driver and ground guides know and understand the hand and arm
signals as outlined in FM 21-305.
9. Never back at a speed over 5 mph. F. ADDITIONAL COMMENTS AND INFORMATION. Recommended instructional time is 4.0 hours (.5 demonstration and 3.5 practical exercise including .5 PMCS).

TC 21-305-6
5-59
LESSON TITLE: UNCOUPLE SEMITRAILER TASK NUMBER: 551-721-1315 (Uncouple Semitrailer) A. TRAINING OBJECTIVE. TASK: Uncouple a tractor from a semitrailer. CONDITIONS Given instruction, a DA Form 2404, DD Form 1970, pencil, TM
9-2320-273-10 or TM 9-2320-283-10, equipment records folder, rags, lubricants, coolant, an M915 or M915A1 tractor with BII, a semitrailer, and ground guides.
STANDARD: Uncouple an M915 or M915A1 tractor from a semitrailer in the
correct sequence without damage to equipment or injury to personnel.
B. INTERMEDIATE TRAINING. None. C. ADMINISTRATIVE INSTRUCTIONS.
1. When training will be given: As scheduled. 2. Training location: Training area as scheduled. 3. Training type: Demonstration and practical exercise. 4. Who will be trained: Personnel as scheduled. 5. Principal and assistant instructors required: One primary instructor, one assistant
instructor for every two students for the demonstration, and one assistant instructor for every two students for the practical exercise.
6. Training aids and equipment: Rags, lubricants, and coolant. DA Form 2404, DD
Form 1970, pencil, TM 9-2320-273-10 or TM 9-2320-283-10, equipment records folder, an M915 or M915A1 tractor with BII, and a semitrailer for every two students.
7. References: TM 9-2320-273-10 or TM 9-2320-283-10 and FM 21-305.
D. SEQUENCE OF ACTIVITY.
1. Introduction:
a. Interest device.

TC 21-305-6
5-60
b. Tie-in. c. Lesson objective (paragraph A). d. Procedures:
(1) Explanation. (2) Practical exercise. (3) Summary.
2. Explanation and Demonstration: Demonstrate uncoupling procedures.
a. Shift transmission range selector into neutral, and apply parking brakes. This will keep your tractor from running out from under the semitrailer when you unlock the fifth wheel. Verify that the parking brake indicator lamp comes on. b. Pull out the trailer air supply valve. c. Place a chock block firmly in front of the first set of rear dual wheels on the driver's side and place the other chock block firmly behind the second set of dual wheels on the assistant driver's side. d. Center the float pads under the landing legs. e. Use the crank handle on the semitrailer to lower the landing legs until the landing legs rest on the float pads. f. Disconnect and secure the trailer air hoses. g. Couple the dummy couplings to the air line couplings on the semitrailer. h. Disconnect the electrical cable and stow away on tractor (tool box under passenger seat). i. To unlock the fifth wheel:
(1) First pull the primary release handle out and lift up to engage the catch. (2) Then, pull the secondary lock release handle out.
j. Enter the cab and slowly pull the truck forward until the trailer kingpin is free from the lock guard and the landing gear is supporting the trailer weight. Then, stop and pause for a moment. Do not pull all the way out from under the trailer

TC 21-305-6
5-61
yet to ensure the landing gear will support the trailer. If it collapses, the rear frame area of your truck will be able to catch the front of the trailer before equipment damage occurs. k. Have a crew member observe the semitrailer kingpin to make sure it clears properly during separation of the vehicles. Make sure the kingpin will clear the rear frame cross member when you pull the tractor out from under the trailer. l. Pull slowly forward allowing the semitrailer gooseneck and kingpin to totally clear the rear frame area of your tractor.
3. Practical exercise: a. Assign students to vehicles and issue TM 9-2320-273-10 or TM 9-2320-283-10, pencil, DA Form 2404, DD Form 1970, and equipment records folder. Instruct students on the location of rags, lubricants, and coolant. b. Students perform before-operation PMCS. c. Students practice uncoupling in the training area(s). During-operation PMCS is also conducted at this time.
4. Evaluate: Check each student's performance on uncoupling and PMCS. 5. Summary:
a. Recap main points. b. Allow for questions. c. Clarify questions. d. Give closing statement.
6. Retraining: Retrain slow learners. This can be accomplished using the videotape TVT 55-18 "M915A1 Line Haul Tractor" and reinforced throughout the course. Students are tested on the EOCCT.
E. SAFETY RESTRICTIONS.
1. Ensure that all chock blocks are in place when vehicles are parked. 2. Always place the transmission in neutral, set the parking brake, and shut off the
engine before leaving the vehicle.

TC 21-305-6
5-62
3. Ensure that students remove all jewelry and identification tags before performing PMCS.
4. Ensure that students pay particular attention to the cautions and warnings listed in the operator's manual.
5. Always use ground guides when backing. 6. Always wear hearing protection when working in or around a running 14-ton tractor. 7. Ensure that all occupants wear seat belts while the vehicle is in operation. 8. Ensure that the driver and ground guides know and understand the hand and arm
signals as outlined in FM 21-305. 9. Never back at a speed over 5 mph.
F. ADDITIONAL COMMENTS AND INFORMATION. Recommended instructional time is 4.0 hours (.5 demonstration and 3.5 practical exercise including .5 PMCS).

TC 21-305-6
5-63
LESSON TITLE: DRIVE VEHICLE WITH SEMITRAILER ON SIDE ROADS AND
UNIMPROVED ROADS TASK NUMBER: 551-721-1368 (Drive Vehicle with Semitrailer on Side Roads and
Unimproved Roads) A. TRAINING OBJECTIVE. TASK: Drive a tractor with semitrailer on side roads and unimproved
roads. CONDITIONS Given instruction, a DD Form 1970, a DA Form 2404, a pencil,
TM 9-2320-273-10 or TM 9-2320-283-10, equipment records folder, rags, lubricants, coolant, a suitable training/driving area, an M915 or M915A1 tractor with BII, and a semitrailer.
STANDARD: Drive the designated route using defensive driving (accident
avoidance) methods, make right and left hand turns, make gradual steering corrections, signal intentions in advance, pass oncoming vehicles, maintain vehicle interval, obey highway warning and regulatory signs, operate the light switch, monitor gauges and indicator lights, use proper braking procedures to include the use of the engine retarder (Jacobs brake), and upshift/downshift the transmission through all gears without damage to equipment or injury to personnel.
B. INTERMEDIATE TRAINING. None. C. ADMINISTRATIVE INSTRUCTIONS.
1. When training will be given: As scheduled. 2. Training location: Classroom, motor park, and designated route. 3. Training type: Conference and practical exercise. 4. Who will be trained: Personnel as scheduled. 5. Principal and assistant instructors required: One primary instructor for the conference
and one assistant instructor for every two students for the practical exercise. 6. Training aids and equipment: Hearing protection, rags, lubricants, and coolant. DA
Form 2404, DD Form 1970, pencil, TM 9-2320-273-10 or TM 9-2320-283-10, equipment records folder, route strip map, an M915 or M915A1 with BII, and a semitrailer for every two students.

TC 21-305-6
5-64
7. References: TM 9-2320-273-10 or TM 9-2320-283-10 and FM 21-305.
D. SEQUENCE OF ACTIVITY.
1. Introduction: a. Interest device. b. Tie-in. c. Lesson objective (paragraph A). d. Procedures:
(1) Explanation. (2) Practical exercise. (3) Summary.
2. Explanation and Demonstration: NOTE: Instruments, controls, indicators, and basic driving techniques have been covered in
previous instruction. The instructor may need to reinforce these subjects.
a. Explain putting the vehicle in motion: (1) On flat roadways. (2) On Upgrades. (3) On downgrades. (4) In sand and snow, and on ice.
b. Explain the procedures for using the braking system-- (1) With the engine retarder (Jacobs brake). (2) With the service brakes (foot brake).
WARNING
The trailer hand brake control is only used for testing the semitrailer brakes. Using it when driving will cause the semitrailer to skid. Using the semitrailer hand control to park can cause all the air to leak out of the brake system.

TC 21-305-6
5-65
(3) On level roadways. (4) When going downhill. (5) On sand, snow, ice, and wet surfaces. (6) With emergency braking procedures.
c. Explain maneuvering the vehicle-- (1) On curves. (2) At intersections. (3) On roadways:
(a) Steering the vehicle. (b) Making gradual steering corrections. (c) Avoiding abrupt steering movements.
d. Explain the differential lockup mechanism.
CAUTION Do not move the drive line locking system lock to the LOCK position while the truck is turning a corner or if tires are slipping. It is recommended that the truck be stopped before locking the differentials.
e. Explain the following:
(1) Steering the vehicle through a constant curve. (2) Maneuvering through a U-turn. (3) Passing stationary and moving oncoming vehicles (on narrow roads).
f. Give safety briefing.
3. Practical exercise:
a. Assign students to vehicles and issue TM 9-2320-273-10 or TM 9-2320-283-10, pencils, DA Form 2404, DD Form 1970, and equipment records folder. Instruct students on the location of rags, lubricants, and coolant.

TC 21-305-6
5-66
b. Students perform before-operation PMCS. c. Students practice driving. During-operation PMCS is conducted at this time.
NOTE: As each student practices driving, an assistant instructor rides in the cab and explains driving techniques, ensures the driver is aware of driving situations, and conducts after-action reviews with each driver.
d. Students perform after-operation PMCS and ensure all operator entries required on DA Form 2404 and DD Form 1970 are accurate, complete, and legible.
4. Evaluate: Check each student's performance of PMCS and driving. 5. Summary:
a. Recap main points. b. Allow for questions. c. Clarify questions. d. Give closing statement.
6. Retraining: Retrain slow learners. Students perform driving tasks daily and are tested
on the EOCCT. E. SAFETY RESTRICTIONS.
1. Ensure that all chock blocks are in place when the vehicles are parked. 2. Always place the transmission in neutral, set the parking brake, and shut off the
engine before leaving the vehicle. 3. Ensure that students remove all jewelry and identification tags before performing
PMCS. 4. Ensure that students pay particular attention to the cautions and warnings listed in the
operator's manual. 5. Always use ground guides when backing.
6. Maintain a safe following distance and speed limit when driving (as determined by the
local command).

TC 21-305-6
5-67
7. Always wear hearing protection when working in or around a running vehicle. 8. Ensure that personnel wear seat belts (if equipped) when the vehicle is in motion.
F. ADDITIONAL COMMENTS AND INFORMATION. Recommended instructional time is 8 hours (.5 conference and 7.5 practical exercise including 1 hour PMCS).

TC 21-305-6
5-68
LESSON TITLE: DRIVE VEHICLE WITH SEMITRAILER ON IMPROVED
(PRIMARY) ROADS TASK NUMBER: 551-721-1364 (Drive Vehicle with Semiautomatic Transmission) and
551-721-1366 (Drive Vehicle with Automatic Transmission) A. TRAINING OBJECTIVE. TASK: Drive a tractor with semitrailer on improved (primary) roads. CONDITIONS Given instruction, a DD Form 1970, a DA Form 2404, a pencil,
TM 9 2320-273-10 or TM 9-2320-283-10, equipment records folder, rags, lubricants, coolant, a suitable driving/training area, designated driving route, an M915 or M915A1 tractor with BII, and a semitrailer.
STANDARD: Drive the designated route using defensive driving (accident
avoidance) methods, make right and left turns, make gradual steering corrections, signal intentions in advance, pass oncoming vehicles, maintain vehicle interval, obey highway warning and regulatory signs, operate the light switch, monitor gauges and indicator lights; upshift/downshift the transmission through all gear ranges; manipulate the controls; and perform basic driving maneuvers to include downhill braking (using the engine retarder) and backing using ground guides without damage to equipment or injury to personnel.
B. INTERMEDIATE TRAINING. None. C. ADMINISTRATIVE INSTRUCTIONS.
1. When training will be given: As scheduled. 2. Training location: Motor pool, driver training area, and designated driving routes as
scheduled. 3. Training type: Conference and practical exercise. 4. Who will be trained: Personnel as scheduled. 5. Principal and assistant instructors required: One primary instructor for the conference
and one assistant instructor for every two students for the practical exercise.
6. Training aids and equipment: Hearing protection, rags, lubricants, and coolant. DA Form 2404, DD Form 1970, pencil, TM 9-2320-273-10 or TM 9-2320-283-10, equipment

TC 21-305-6
5-69
records folder, designated route strip map, an M915 or M915A1 tractor with BII, and a semitrailer for every two students.
7. References: TM 9-2320-273-10 or TM 9-2320-283-10 and FM 21-305. D. SEQUENCE OF ACTIVITY.
1. Introduction: a. Interest device. b. Tie-in. c. Lesson objective (paragraph A). d. Procedures:
(1) Explanation. (2) Practical exercise. (3) Summary.
2. Explanation and Demonstration:
a. Explain putting the vehicle in motion-- (1) On flat roadways. (2) On upgrades. (3) On downgrades. (4) In sand and snow, and on ice. (5) When signaling intentions. (6) With transmission gear ranges.
b. Explain the procedures for braking--
(1) Using the engine retarder (Jacobs brake). (2) Using the service brakes (foot brake).

TC 21-305-6
5-70
WARNING
The trailer hand brake control is only used for testing the semitrailer brakes. Using it when driving will cause the semitrailer to skid. Using the semitrailer hand control to park can cause all the air to leak out of the brake system.
(3) Driving on flat roadways. (4) Going downhill. (5) Driving on sand, snow, ice, and wet surfaces. (6) Using emergency braking procedures. (7) Downshifting the transmission.
c. Explain maneuvering the vehicle-- (1) On curves. (2) At intersections. (3) At turns. (4) When steering the vehicle. (5) When making gradual steering corrections. (6) To avoid abrupt steering movements.
d. Explain changing lanes. (1) Signal intentions. (2) Check mirrors.
e. Explain the following: (1) Steering the vehicle through a constant curve. (2) Maneuvering through a U-turn. (3) Passing stationary and moving vehicles.
f. Give safety briefing.

TC 21-305-6
5-71
g. Explain ground guide safety precautions for backing the tractor semitrailer combination.
3. Practical exercise:
a. Assign students to vehicles and issue TM 9-2320-273-10 or TM 9-2320-283-10, pencils, DA Form 2404, DD Form 1970, and equipment records folder. Instruct students on the location of rags, lubricants, and coolant. b. Students perform before-operation PMCS. c. Students practice maneuvering the vehicle through the courses laid out in the training area (see Figures 4-1 through 4-6). d. After students demonstrate proficiency maneuvering the vehicle, they should practice downhill braking and driving the vehicle on the road. During-operation PMCS is also conducted at this time.
NOTE: The success of this driver training program is the ability of the instructors to get in the cab of the truck with the student driver and pass on valuable experience and proper driving techniques. Now is the time to correct any bad driving habits.
e. Students perform after-operation PMCS and ensure all operator entries required on DA Form 2404 and DD Form 1970 are accurate, complete, and legible.
4. Evaluate: Check each student's performance of PMCS and driving. 5. Summary:
a. Recap main points. b. Allow for questions. c. Clarify questions. d. Give closing statement.
6. Retraining: Retrain No-Gos and slow learners. Students perform driving tasks daily and are tested on the EOCCT. E. SAFETY RESTRICTIONS.
1. Ensure that all chock blocks are in place when the vehicles are parked.

TC 21-305-6
5-72
2. Always place the transmission in neutral, set the parking brake, and shut off the engine before leaving the vehicle.
3. Ensure that students remove all jewelry and identification tags before performing
PMCS. 4. Ensure that students pay particular attention to the cautions and warnings listed in the
operator's manual. 5. Always use ground guides when backing the vehicle. 6. Maintain a safe following distance and speed limit when driving in the training area
(as determined by the local command). 7. Always wear hearing protection when working in or around a running vehicle. 8. Ensure that personnel wear seat belts (if equipped) when the vehicle is in motion.
F. ADDITIONAL COMMENTS AND INFORMATION. Recommended instructional time is 16 hours (.5 conference and 15.5 practical exercise including 2.0 hours PMCS).

TC 21-305-6
5-73
LESSON TITLE: DRIVE VEHICLE WITH SEMITRAILER AT NIGHT TASK NUMBER: 551-721-1364 (Drive Vehicle with Semiautomatic Transmission) and
551-721-1366 (Drive Vehicle with Automatic Transmission) A. TRAINING OBJECTIVE. TASK: Operate an M915 or M915A1 tractor with semitrailer at night. CONDITIONS Given instruction, a DA Form 2404, DD Form 1970, pencil, TM
9-2320-273-10 or TM 9-2320-283-10, equipment records folder, rags, lubricants, coolant, improved road surfaces, an M915 or M915A1 tractor with BII, and a semitrailer.
STANDARD: Without accident or injury, drive the designated route at night
with headlights; use defensive driving (accident avoidance) methods, operate the tactical light switch, read gauges, upshift and downshift the transmission, manipulate the controls, use correct braking procedures, and perform basic driving maneuvers.
B. INTERMEDIATE TRAINING. None. C. ADMINISTRATIVE INSTRUCTIONS.
1. When training will be given: As scheduled. 2. Training location: Motor pool and driver training route (built-up and rural areas) as
scheduled. 3. Training type: Conference and practical exercise. 4. Who will be trained: Personnel as scheduled. 5. Principal and assistant instructors required: One primary instructor for the conference
and one assistant instructor for every two students for the practical exercise. 6. Training aids and equipment: Rags, lubricants, and coolant. DA Form 2404, DD
Form 1970, pen or pencil, TM 9-2320-273-10 or TM 9-2320-283-10, equipment records folder, an M915 or M915A1 tractor with BII, and a semitrailer for every two students.
7. References: TM 9-2320-273-10 or TM 9-2320-283-10 and FM 21-305.
D. SEQUENCE OF ACTIVITY.
1. Introduction.

TC 21-305-6
5-74
a. Interest device. b. Tie-in. c. Lesson objective (paragraph A). d. Procedures:
(1) Explanation. (2) Practical exercise. (3) Summary.
2. Explanation and Demonstration:
a. Night driving factors.
(1) Driver factors: (a) Vision. (b) Glare. (c) Fatigue. (d) Driver inexperience.
(2) Roadway factors:
(a) Low illumination. (b) Variation in illumination. (c) Familiarity with roads. (d) Other road users. (e) Drinking drivers.
(3) Vehicle factors: (a) Headlights. (b) Auxiliary lights.

TC 21-305-6
5-75
(c) Turn signals. (d) Windshields. (e) Mirrors.
b. Night driving procedures.
(1) Preparing to drive at night. (a) Getting yourself ready. (b) Planning your route. (c) Getting the vehicle ready.
(2) Driving at night. (a) Avoid blinding others. (b) Avoid glare. (c) Maximize visibility. (d) Adjust basic driving techniques.
3. Practical exercise: a. Assign students to vehicle and issue TM 9-2320-273-10 or TM 9-2320-283-10, pencil, DA Form 2404, DD Form 1970, and equipment records folder. Instruct students on the location of rags, lubricants, and coolant. b. Students perform before-operation PMCS to include the operation and cleanliness of all lights. c. Students drive the designated route. During operation PMCS is conducted at this time.
NOTE: The success of this driver training program is the ability of the assistant instructors to get in the cab of the truck with the student driver and pass on valuable experience and techniques. Now is the time to correct any bad driving habits.
d. Students perform after-operation PMCS and ensure all operator entries required on DA Form 2404 and DD Form 1970 are accurate, complete, and legible.
TC 21-305-6
5-76
4. Evaluate: Check each student's performance of PMCS and night driving. 5. Summary:
a. Recap main points. b. Allow for questions. c. Clarify questions. d. Give closing statement.
6. Retraining: Retrain No-Gos and slow learners. E. SAFETY RESTRICTIONS.
1. Ensure that all chock blocks are in place when the vehicles are parked. 2. Always place the transmission in neutral, set the parking brake, and shut off the
engine before leaving the vehicle. 3. Ensure that students remove all jewelry and identification tags before performing
PMCS. 4. Ensure that students pay particular attention to the cautions and warnings listed in the
operator's manual. 5. Always use ground guides when backing. 6. Maintain a safe following distance and speed limit when driving on the designated
route (as determined by the local command).
7. Always wear hearing protection when working in or around a running 14-ton tractor. 8. Ensure that all occupants wear seat belts while the vehicle is in operation.
F. ADDITIONAL COMMENTS AND INFORMATION. Recommended instructional time is 8 hours (.5 conference and 7.5 practical exercise including 2 hours PMCS).

TC 21-305-6
5-77
Section II - End of Course Comprehensive Test (EOCCT)
LESSON TITLE: END OF COURSE COMPREHENSIVE TEST (EOCCT) TASK NUMBER: All previously taught tasks. A. TRAINING OBJECTIVE. TASK: Pass the end of course comprehensive test (EOCCT). CONDITIONS Given an examination booklet, DD Form 1970, DA Form 2404,
pencil, TM 9-2320-273-10, or TM 9-2320-283-10, equipment records folder, rags, lubricants, coolant, suitable training area, an M915 or M915A1 tractor with BII, and a semitrailer.
STANDARD: Answer correctly 21 of 30 questions on the written examination
and pass the driver's road test with a score of 70 or higher B. INTERMEDIATE TRAINING. Intermediate Training Objective 1 TASK: Pass a written examination. CONDITIONS: Given an examination booklet and a pencil. STANDARD: Answer correctly 21 of 30 questions within 30 minutes. Use
either the primary written test or the alternate written test. Intermediate Training Objective 2 TASK: Pass the driver's road test. CONDITIONS: Given a DD Form 1970, a DA Form 2404, a pencil, TM 9-2320-
273-10, or TM 9-2320-283-10, equipment records folder, rags, lubricants, coolant, road test route, an M915 or M915A1 tractor with BII, and a semitrailer.
STANDARD: Achieve a score of 70 or higher. Use the driver's performance test
(road test) instructions and the driver's road test checklist. C. ADMINISTRATIVE INSTRUCTIONS.
1. When training will be given: As scheduled.

TC 21-305-6
5-78
2. Training location: Classroom, motor pool, road test route, and training area as scheduled.
3. Training type: Performance evaluation. 4. Students: Personnel as scheduled. 5. Principal and assistant instructors required: One primary instructor for the class for
the written test, and one assistant instructor for every student for the performance test. 6. Training aids and equipment: Examination booklet, DD Form 1970, DA Form 2404,
pencil, TM 9-2320-273-10, or TM 9-2320-283-10, equipment records folder, rags, lubricants, coolant, an M915 or M915A1 tractor with BII, and a semitrailer.
7. References: TM 9-2320-273-10 or TM 9-2320-283-10, DA Pamphlet 738-750, and FM 21-305. D. SEQUENCE OF ACTIVITY.
1. Introduction: a. Interest device. b. Tie-in. c. Lesson objective (paragraph A). d. Procedures:
(1) Explanation. (2) Practical exercise. (3) Summary.
2. Explanation and Demonstration: a. Administer written examination. b. Administer driver's road tests.
3. Evaluate: Check performance checklists and written test results. 4. Summary:
a. Recap main points.

TC 21-305-6
5-79
b. Allow for questions. c. Clarify questions. d. Give closing statement.
5. Retraining: Retrain and retest No-Gos. E. SAFETY RESTRICTIONS.
1. Ensure that all chock blocks are in place when the vehicles are parked. 2. Always place the transmission in neutral, set the parking brake, and shut off the
engine before leaving the vehicle. 3. Ensure that students remove all jewelry and identification tags before performing
PMCS. 4. Ensure that students pay particular attention to the cautions and warnings listed in the
operator's manual. 5. Always use ground guides when backing the 14-ton tractor. 6. Maintain a safe following distance and speed limit when driving on the road test route
(as determined by the local command and traffic control devices). 7. Always wear hearing protection when working in or around a running vehicle. 8. Ensure that all occupants wear seat belts while the vehicle is in operation.
F. ADDITIONAL COMMENTS AND INFORMATION. Recommended testing time is 4.0 hours (.5 for the written test, 3.5 for the road test).

TC 21-305-6
5-80
INTERMEDIATE TRAINING OBJECTIVE 1
WRITTEN TEST (PRIMARY)
NAME RANK DATE
UNIT
Section I. True/false questions: Read each question carefully and place a T or F on the blank line to the left.
______ 1. You may shift the differential lock/unlock control to the LOCK position while the vehicle is moving.
______ 2. Damage to the tachograph stylus will result if you operate the vehicle without a disc in the tachograph.
______ 3. It is all right to idle the engine for long periods of time.
______ 4. The engine retarder should not be engaged when shifting the transmission or when the transmission is in neutral.
______ 5. Road, load, and traffic conditions are factors in determining the transmission gear selection.
______ 6. The neutral safety switch will allow the engine to start while the transmission is in any gear.
______ 7. It is all right to park the vehicle on a steep grade.
______ 8. To unlock the fifth wheel, first pull the secondary lock release handle out. Then pull the primary lock release handle out.
Section II. Multiple choice: Read each question carefully and write the answer which is MOST correct on the blank line to the left.
______ 9. The parking brake control is-- a. Pulled out to apply the parking brakes. b. Pushed in to release the parking brakes. c. Charges front and rear brake systems on the tractor. d. All the above.

TC 21-305-6
5-81
______ 10. The normal operating air pressure as indicated by both the air pressure gauges is-- a. At least 50 psi. b. At least 60 psi. c. At least 105 psi. d. At least 80 psi.
______ 11. The red warning light (low air pressure warning light) will remain on and the buzzer will sound until-- a. The break pedal is applied. b. The air system pressure in each section of the dual system is below 90 psi. c. The air system pressure in each section of the dual systems is between 64 and 76 psi. d. None of the above.
______ 12. What happens when the differential lock/unlock control is moved to the LOCK position? a. It applies full torque to both rear axles. b. It engages the front driving axle. c. It gives the tractor six-wheel drive. d. It gives the tractor all wheel drive.
______ 13. The engine retarder selection switch has how many settings? a. Two. b. Three. c. Four. d. Six.
______ 14. The engine retarder (Jacobs brake)-- a. Provides the maximum engine braking (6 cylinders) in the HIGH position. b. Should be used when descending grades and in city traffic. c. Is most effective in the gear range that gives you the rated rpm. d. Should not be used on slippery surfaces or if the tires do not have good traction. e. All the above.

TC 21-305-6
5-82
______ 15. The trailer brake hand control is-- a. Pulled down to apply trailer brakes only. b. Used for testing the semitrailer brakes. c. Not used as a parking brake. d. All the above.
______ 16. After using the trailer brake hand control, return it to the off position-- a. Or leave it in any position. b. To prevent the trailer brakes from burning. c. To prevent the transmission from over heating. d. All the above.
______ 17. After starting the vehicle, what is the recommended idle rpm? a. 580-650 rpm. b. 800 to 950 rpm. c. 1,000 to 1,500 rpm. d. 1,700 to 2,100 rpm.
______ 18. The differential lock/unlock control may be moved to the LOCK position-- a. While the truck is moving. b. If the tires are spinning. c. At any time. d. Only when the truck is stopped.
______ 19. Coasting in neutral-- a. Can severely damage the transmission and results in the loss of engine braking. b. Is all right on rural roads. c. Is all right for short hills. d. Is all right anytime.
______ 20. Run the engine at __________ to __________ rpm at no load for 3 minutes before shutting the engine down to allow the turbocharger to cool down. a. 400 to 450 rpm. b. 475 to 800 rpm. c. 500 to 900 rpm. d. 550 to 650 rpm.
TC 21-305-6
5-83
______ 21. When coupled to the semitrailer, there must be no between the upper fifth wheel plate of the semitrailer and the fifth wheel of the tractor. a. More than four inches of daylight. b. More than six inches of daylight. c. Daylight. d. None of the above.
______ 22. There is a __________ and __________ light cable stored in the tool box under the passenger seat. a. 12 volt, 12 volt. b. 12 volt, 18 volt. c. 12 volt, 24 volt. d. 24 volt, 24 volt.
______ 23. The tachograph registers truck ground speed (mph/kph hand), engine speed (rpm hand), and distance traveled (odometer). It also has two other hands; these two hands are-- a. Day and month hands. b. Engine water temperature hands. c. Transmission oil temperature hands. d. Clock hands.
______ 24. How should you dry wet brake linings? a. Pull over and wait 25 to 30 minutes to allow the brakes to dry out. b. Pump the brake pedal. c. Continue to drive at a slow speed with enough pressure on the brake pedal to cause a drag on the brakes. d. Continue to drive at a slow speed with the trailer hand brake control applied.
______ 25. While driving on an expressway, you have a tire blow out. What is the first thing you should do? a. Keep the vehicle moving straight ahead by accelerating. b. Hit the brakes. c. Downshift. d. Apply the trailer hand brake control.

TC 21-305-6
5-84
______ 26. With the transmission in 1st position you get-- a. The most pulling power. b. The most engine braking. c. The most engine retarder (Jacobs brake). d. All the above.
______ 27. When stopping the vehicle with a load, you should to assist you. a. Use the engine (Jacobs brake) brake. b. Downshift the transmission. c. Use the service brakes. d. All the above.
______ 28. In what gear do you start the engine? a. 1st. b. 5th. c. "P." d. "N."
______ 29. The first step in coupling the tractor to the semitrailer is to-- a. Check the lights. b. Ensure the semitrailer is chocked. c. Disconnect the electrical cable. d. Test the coupling.
______ 30. The steering wheel should not be held at full steer for more than 10 seconds; to do so can cause-- a. Oil overheating. b. Loss of oil from the power steering reservoir. c. Power steering pump gear damage. d. All the above.

TC 21-305-6
5-85
INTERMEDIATE TRAINING OBJECTIVE 1
WRITTEN TEST ANSWER SHEET (PRIMARY)
1. F 11. C 21. C 2. T 12. A 22. C 3. F 13. B 23. D 4. T 14. E 24. C 5. T 15. D 25. A 6. F 16. B 26. D 7. F 17. A 27. D 8. T 18. D 28. D 9 D 19. A 29. B 10. C 20. D 30. D

TC 21-305-6
5-86
INTERMEDIATE TRAINING OBJECTIVE 1
WRITTEN TEST (ALTERNATE)
NAME RANK DATE
UNIT
Section I. True/false questions: Read each question carefully and place a T or F on the blank line to the left.
______ 1. To unlock the fifth wheel, first pull the secondary lock release handle out. Then pull the primary lock release handle out.
______ 2. You may shift the differential lock/unlock control to the LOCK position while the vehicle is moving.
______ 3. The neutral safety switch will allow the engine to start while the transmission is in any gear.
______ 4. It is all right to idle the engine for long periods of time. ______ 5. The engine retarder should not be engaged when shifting the transmission or
when the transmission is in neutral. ______ 6. Damage to the tachograph stylus will result if you operate the vehicle without a
disc in the tachograph. ______ 7. Perform weekly PMCS as well as before-operation PMCS if you are operating
the vehicle for the first time. ______ 8. It is all right to park the vehicle on a steep grade.
Section II. Multiple choice: Read each question carefully and write the answer which is MOST correct on the blank line to the left.
______ 9. With the transmission in 1st position you get-- a. The most pulling power. b. The most engine braking. c. The most engine retarder (Jacobs brake). d. All the above.
______ 10. What is the determining factor(s) in selecting the transmission gear range? a. Roads, loads, and traffic conditions. b. Nothing specific. c. Traffic conditions only. d. None of the above.

TC 21-305-6
5-87
______ 11. When stopping the vehicle with a load, you should to assist you. a. Use the engine (Jacobs brake) brake. b. Downshift the transmission. c. Use the service brakes. d. All the above.
______ 12. In what gear do you start the engine? a. 1st. b. 5th. c. "P." d. "N."
______ 13. The first step in coupling the tractor to the semitrailer is to-- a. Check the lights. b. Ensure the semitrailer is chocked. c. Disconnect the electrical cable. d. Test the coupling.
______ 14. Progressive downshifting, when starting downgrade from the top of a hill, will-- a. Provide better control around curves and turns. b. Do nothing. c. Cause lack of engine braking. d. Cause the brakes to overheat.
______ 15. The parking brake control-- a. Is pulled out to apply the parking brakes. b. Is pushed in to release the parking brakes. c. Charges front and rear brake systems on the tractor. d. All the above.
______ 16. The normal operating air pressure as indicated by both the air pressure gauges is-- a. At least 50 psi. b. At least 60 psi. c. At least 105 psi. d. At least 80 psi.

TC 21-305-6
5-88
______ 17. How should you dry wet brake linings? a. Pull over and wait 25 to 30 minutes to allow the brakes to dry out. b. Pump the brake pedal. c. Continue to drive at a slow speed with enough pressure on the brake pedal to cause a drag on the brakes. d. Continue to drive at a slow speed with the trailer hand brake control applied.
______ 18. The tire hoist is used to-- a. Check the tire pressure. b. Assist in lifting a flat tire from the hub. c. Lower and raise the spare tire. d. Tighten lug nuts.
______ 19. While driving on an expressway, you have a tire blow out. What is the first thing you should do? a. Keep the vehicle moving straight ahead by accelerating. b. Hit the brakes. c. Downshift. d. Apply the trailer hand brake control.
______ 20. What happens when the differential lock/unlock control is moved to the LOCK position? a. It applies full torque to both rear axles. b. It engages the front driving axle. c. It gives the tractor six-wheel drive. d. It gives the tractor all-wheel drive.
______ 21. The engine retarder selection switch has how many settings? a. Two. b. Three. c. Four. d. Six.
______ 22. The trailer brake hand control is-- a. Pulled down to apply trailer brakes only. b. Used for testing the semitrailer brakes. c. Not used as a parking brake. d. All the above.

TC 21-305-6
5-89
______ 23. Run the engine at __________ to __________ at no load for 3 minutes before shutting the engine down to allow the turbocharger to cool down. a. 400 to 450 rpm. b. 475 to 800 rpm. c. 500 to 900 rpm. d. 550 to 650 rpm.
______ 24. There is a __________ and __________ light cable stored in the tool box under the passenger seat. a. 12 volt, 12 volt. b. 12 volt, 18 volt. c. 12 volt, 24 volt. d. 24 volt, 24 volt.
______ 25. The tachograph registers truck ground speed (mph/kph hand), engine speed (rpm hand), and distance traveled (odometer). It also has two other hands; these two hands are-- a. Day and month hands. b. Engine water temperature hands. c. Transmission oil temperature hands. d. Clock hands.
______ 26. When coupled to the semitrailer, there must be no between the upper fifth wheel plate of the semitrailer and the fifth wheel of the tractor. a. More than four inches of daylight. b. More than six inches of daylight. c. Daylight. d. None of the above.
______ 27. The engine retarder (Jacobs brake)-- a. Helps slow the truck on downgrades or city traffic. b. Has the greatest effect in the lowest transmission gear range. c. Enables the engine to act as a brake. d. Is used only when the throttle is closed. e. All the above.
TC 21-305-6
5-90
______ 28. If your tractor starts to jackknife, which should you do? a. Release the gas pedal and steer in the opposite direction of the skid. b. Release the accelerator pedal and steer in the direction of the skid. c. Step on the brakes and hold the steering wheel straight. d. Apply the trailer hand brake control.
______ 29. The differential lock/unlock control may be moved to the LOCK position-- a. While the truck is moving. b. If the tires are spinning. c. At any time. d. Only when the truck is stopped.
______ 30. Coasting in neutral-- a. Can severely damage the transmission and results in the loss of engine braking. b. Is all right on rural roads. c. Is all right for short hills. d. Is all right anytime.

TC 21-305-6
5-91
INTERMEDIATE TRAINING OBJECTIVE 1
WRITTEN TEST ANSWER SHEET (ALTERNATE)
1. T 11. D 21. B 2. F 12. D 22. D 3. F 13. B 23. D 4. F 14. A 24. C 5. T 15. D 25. D 6. T 16. C 26. C 7. T 17. C 27. E 8. F 18. C 28. B 9 D 19. A 29. D 10. A 20. A 30. A

TC 21-305-6
5-92
INTERMEDIATE TRAINING OBJECTIVE 2
DRIVER'S PERFORMANCE TEST (ROAD TEST) INSTRUCTIONS 1. GENERAL
a. The driver's performance test determines whether an individual can operate a motor vehicle properly and safely under conditions of traffic and terrain where he is expected to drive. It serves as a basis for issuing an operator's permit. Furthermore, the test provides a means for instructional reinforcement and counseling. Driving weaknesses that may show up as the result of the test can be called to the examinee's attention and specific steps can be taken to eliminate them.
b. Final evaluations are recorded on DA Form 348 or on an equivalent official form. c. The examiner will be a qualified M915 or M915A1 tractor and semitrailer operator.
He will be familiar with the road test route and the testing procedures. Before administering the test to any examinees, he must practice administering the test to a regular licensed driver qualified on that type of vehicle. This practice will help him become acquainted with the test route and testing procedures. 2. TESTING METHOD
a. The specific directions for this test are to be followed without deviation. No omissions or changes in the wording of these directions are permitted.
b. The instructions, which are indented and printed in large type, are read or spoken
aloud to the examinees. When giving instructions aloud, give the instructions slowly and distinctly, making sure the examinees understand. The directions in regular type, including those in parentheses, are for the information of the examiner only and are not given aloud. 3. DIRECTIONS FOR ADMINISTERING THE ROAD TEST
a. Setting Standards. The standard road test is five miles long with traffic and terrain representing those areas in which the examinee is expected to drive. Approximately two miles of this route is in a more congested traffic area. Approximately one mile of the test route will be devoted to secondary road driving. Once a route is established (in a given locality), use it for all examinees that are to be tested. Should it prove necessary to vary the route, take care that the different kinds of route requirements, as well as the number of requirements, remains the same. Every road test will meet the following requirements (to the extent possible):
(1) Five right turns. (2) Five left turns. (3) Two intersections.

TC 21-305-6
5-93
(4) Two traffic lights or stop signs. (5) Two slow zones. (6) One railroad crossing. (7) Two steep upgrades. (8) Two steep downgrades. (9) One backing area of 50 feet with a clearly marked line extending for the whole length of the 50 feet.
b. Giving Road Tests. The road test consists of a series of operations, which the examinee must perform. These operations are listed on the Driver's Road Test Checklist, which must be used in giving this test. Typical operations are starting the motor, pulling out, and parking.
c. Giving Instructions. Give instructions to perform an operation well in advance of that
operation to allow the driver sufficient time to conform. In giving instructions, first tell the examinee where to perform the operation and then tell him what to do. For example, "At the corner two blocks from here, turn right." Notice that the location was given in terms of landmarks. This must always be done.
CAUTION The driver must never be urged to do something which is unsafe or which he does not want to do. Such urging may lead to an accident.
d. Preventing Accidents
(1) Road tests should NOT normally be given if road conditions present a hazard such as ice or rain. The exception is when testing is specifically for driving under such conditions. (2) You must be prepared to take control of the vehicle at a moment's notice. You must always watch traffic conditions and warn the examinee of dangers, which you think he does not see. If the driver becomes involved in a dangerous or unlawful moving traffic incident or an accident, the test is to be terminated immediately and the examiner will drive the vehicle back to the start point (once on-scene responsibilities are fulfilled).
e. Beginning the Road Test
(1) On the Driver's Road Test Checklist, enter the date in the appropriate place. Then say to the examinee--

TC 21-305-6
5-94
WHAT IS YOUR NAME, LAST NAME FIRST, SPELL IT? (2) Fill in the examinee's name after the word NAME, then say-- WHAT IS YOUR RANK? (3) Enter the individual's RANK after the word RANK, then say-- WHAT IS YOUR ORGANIZATION? (4) Enter the name of the organization after the word ORGANIZATION. Enter your name after the word EXAMINER (last name first). After the word VEHICLE, enter the model of vehicle used in the road test. Then say to the examinee-- THERE WILL BE NO "TRICK" ORDERS. YOU WILL NOT BE ASKED TO DO ANYTHING IN VIOLATION OF THE LAW OR OF GOOD DRIVING PRACTICES. YOUR SCORED TEST BEGINS WITH BEFORE-OPERATIONS PMCS. (The examiner may stop the PMCS process when he is sure the examinee is knowledgeable in the PMCS procedures.) FOLLOW MY INSTRUCTIONS. DRIVE PROPERLY AND SAFELY. ARE THERE ANY QUESTIONS? (5) Answer all questions except those pertaining to the scoring procedures; then say-- DURING THE TEST, I WILL MAKE SOME OBSERVATIONS AND KEEP NOTES; DO NOT BE CONCERNED. YOUR SCORED ROAD TEST STARTS NOW. ALL RIGHT, START YOUR MOTOR. (6) Directions for each operations, such as "next block, turn left," are to be given one at a time in their proper sequence, as set up by the test route according to paragraph 3a, above.
4. SCORING THE ROAD TEST
a. Within each of the operations, which the examinee will be required to perform, there is a list of errors on the Driver's Road Test Checklist. Every time the examinee makes one of these errors under the specific operation, place a tally mark next to the error under that operation. For example, if the examinee fails to signal when leaving the curb, place a tally mark next to
TC 21-305-6
5-95
"fails to give proper signal" under the operation "Pulling Out" and nowhere else. The tally mark will be placed in the space to the left of the specific error. Since an individual will be required to repeat some of the operations, such as right turns, a number of times, more than one tally mark can be placed next to the same error under a given operation. Some test routes do not lend themselves to all operations indicated on the checklist. In these cases, score only the operations that apply.
b. At the completion of the test, count the number of tally marks and subtract this number from 100 to obtain the examinee's score. Record the score in the space provided on the checklist.
c. The lowest passing score is 70. If the examinee does not achieve 70 or above, the
reason for failure will be indicated in the space provided under REMARKS; for example, "Examinee did not obtain minimum passing score" or "Examinee exhibited undue nervousness."
d. Automatic Failures
(1) Any unsafe driving act. (2) Failure to properly perform PMCS. (3) Not knowing location and function of gauges and controls. (4) Undue nervousness. (5) Failure to achieve minimum passing score. (6) If an individual scores 70 or higher on the road test and, in the opinion/judgment of the test examiner the examinee needs additional training, he has the right not to issue a license.
5. AFTER-ACTION REVIEW (AAR). Weakness exhibited by the examinee in the test will be brought to his attention, and he will be advised in what areas he needs further practice or training. The counseling will be accomplished whether the examinee passes or fails the road test. After the examinee has received additional training, he will be retested. An examinee that fails the road test must retake the entire road test.

TC 21-305-6
5-96
INTERMEDIATE TRAINING OBJECTIVE 2
DRIVER'S ROAD TEST CHECKLIST
NAME___________________ RANK_______ DATE_________ VEHICLE__________
ORGANIZATION________________________ EXAMINER________________________
BEFORE STARTING ENGINE
FAILS TO --
_______ Ensure vehicle is properly dispatched _______ Sign DD Form 1970 and/or other forms as required. _______ Perform before-operations maintenance checks and services (PMCS) using
appropriate -10 manual. _______ Unchock wheels and stow chock blocks (as required). _______ Adjust all mirrors. _______ Adjust seat. _______ Fasten seat belt/safety restraint.
STARTING ENGINE
FAILS TO --
_______ Ensure proper gear selection such as neutral.. _______ Warm engine properly. _______ Check to ensure all gauges are functioning properly. _______ Ensure there is adequate air pressure (as required).
PULLING OUT
FAILS TO --
_______ Select proper gear. _______ Release parking brakes. _______ Look back and check traffic (use mirrors and windows). _______ Give proper signal. _______ Allow traffic to pass. _______ Make a smooth start. _______ Check all gauges periodically. _______ Maintain adequate air pressure (as required). _______ Check mirrors periodically. _______ Keep both hands on steering wheel (except as required by driving needs). _______ Engage inhibitor override (M915 only).

TC 21-305-6
5-97
DRIVING IN TRAFFIC (SPEED)
FAILS TO --
_______ Stay within the speed limits. _______ Reduce speed when required by road conditions. _______ Maintain adequate speed (drives too slow). _______ Maintain constant speed as much as possible (feeds gas erratically). _______ Maintain proper speed for gear selection. _______ Reduce speed when required by traffic conditions. _______ Check all gauges periodically. _______ Maintain adequate air pressure (as required). _______ Check mirrors periodically. _______ Keep both hands on steering wheel (except as required by driving needs).
DRIVING IN TRAFFIC (ATTENTION, ATTITUDE)
FAILS TO --
_______ Stay in proper lane. _______ Maintain proper following distance from vehicle ahead in traffic (twice the
speedometer reading in feet). _______ Maintain proper following distance at high speeds (40 mph or over) from vehicle
ahead on open highways (two times the speedometer reading in yards). _______ Anticipate action of other drivers and pedestrians. _______ Observe and obey signs, signals, and/or police officers. _______ Give necessary warning (sound horn). _______ Yield right-of-way to other vehicles. _______ Yield right-of-way to pedestrians. _______ Be courteous toward other drivers. _______ Slow down when approaching railroad grade crossings. _______ Stop, look, and listen both ways before entering railroad grade crossings
(HAZMAT only). _______ Prevent creeping or drifting when stopped. _______ Perform during-operations maintenance. _______ Check all gauges periodically. _______ Check mirrors periodically. _______ Maintain adequate air pressure (as required). _______ Keep both hands on steering wheel (except as required by driving needs).

TC 21-305-6
5-98
LEFT TURN
FAILS TO --
_______ Give proper signal in advance. _______ Turn from proper lane (usually adjacent to centerline). _______ Turn into proper lane (usually immediately to the right of the centerline). _______ Avoid cutting corners. _______ Maintain safe speed. _______ Straighten out properly. _______ Check mirrors periodically (for traffic and trailer off tracking). _______ Maintain adequate air pressure (as required). _______ Keep both hands on steering wheel (except as required by driving needs).
RIGHT TURN
FAILS TO --
_______ Give proper signal in advance. _______ Turn from proper lane (usually the right lane). _______ Turn into proper lane (usually the right lane). _______ Avoid swinging too wide. _______ Maintain safe speed. _______ Avoid cutting corners. _______ Straighten out properly. _______ Check mirrors periodically (for traffic and trailer off tracking). _______ Maintain adequate air pressure (as required). _______ Keep both hands on steering wheel (except as required by driving needs).
USE OF CONTROLS
FAILS TO --
_______ Use proper shifting patterns (upshifting and downshifting). _______ Avoid racing engine. _______ Start on hill without rolling back. _______ Keep both hands on steering wheel (except as required by driving needs). _______ Check all gauges periodically. _______ Maintain engine speed of not less than 1500 rpm (city) and 1800 to 1900 rpm
(highway). _______ While the vehicle is in motion, does not use the inhibitor override (M915 only).

TC 21-305-6
5-99
SLOWING OR STOPPING
FAILS TO --
_______ Signal intent in advance. _______ Check mirrors and windows. _______ Brake smoothly. _______ Use engine as a brake by downshifting the transmission. _______ Use engine retarder (Jacobs brake). _______ Use brakes in proper sequence (engine and wheel). _______ Observe traffic to the rear (use mirrors and windows). _______ Maintain adequate air pressure (as required). _______ Keep both hands on steering wheel (except as required by driving needs).
OVERTAKING AND PASSING
FAILS TO --
_______ Check for other traffic (use mirrors and windows). _______ Signal in advance. _______ Maintain proper following distance before passing. _______ Pass in proper lane. _______ Change lane gradually in passing. _______ Return to proper lane only after signaling intent and ensuring that lane is clear. _______ Obey "no passing" signs, rules, or regulations (such as hills, curves, and
intersections). _______ Check mirrors periodically. _______ Maintain adequate air pressure (as required). _______ Check all gauges periodically. _______ Keep both hands on steering wheel (except as required by driving needs).
BACKING
FAILS TO --
_______ Look behind vehicle before backing. _______ Sound horn. _______ Back slowly. _______ Back smoothly. _______ Back in a straight line using mirrors and ground guide (50 feet within six inches of
line laterally). _______ Maintain adequate air pressure (as required). _______ Keep both hands on steering wheel (except as required by driving needs).

TC 21-305-6
5-100
PARKING
FAILS TO --
_______ Check for other traffic. _______ Give proper signal for traffic to pass. _______ Park within two attempts. _______ Park without bumping or scraping curb. _______ Park in space three feet wider than test vehicle (angle parking). _______ Set parking brakes. _______ Chock wheels. _______ Maintain adequate air pressure (as required). _______ Perform after-operation PMCS. _______ Keep both hands on steering wheel (except as required by driving needs). ROAD TEST SCORE 100 NUMBER OF TALLY MARKS (SUBTRACT) _____ ROAD TEST SCORE _____ REMARKS:

TC 21-305-6
6-1
CHAPTER 6
TRAINING AND TESTING WITH THE M931/M932 TRACTOR
Section I - Lesson Outlines LESSON TITLE: USE TECHNICAL MANUALS (TMs) AND MAKE ENTRIES ON DA
FORM 2404 (EQUIPMENT INSPECTION AND MAINTENANCE WORKSHEET)
TASK NUMBER: 551-721-1352 (Perform Vehicle Preventive Maintenance Checks and
Services [PMCS]), 551-721-1353 (Perform Preventive Maintenance Checks and Services [PMCS] on Trailers)
A. TRAINING OBJECTIVE. TASK: Use the M939 Series TM/LO and make operator entries on DA Form
2404 (Equipment Inspection and Maintenance Worksheet). CONDITIONS: Given instruction, TM 9-2320-272-10, LO 9-2320-272-12, DA Form
2404, and a practical exercise. STANDARD: Locate information in the TM/LO and make the required operator
entries on DA Form 2404 in the correct sequence according to DA Pamphlet 738-750. Each student has 15 minutes to complete the practical exercise without error and will be graded on a Go/No-Go basis.
B. INTERMEDIATE TRAINING. Intermediate Training Objective 1 TASK: Use the M939 Series TM and LO. CONDITIONS: Given instruction, TM 9-2320-272-10, LO 9-2320-272-12, and a
practical exercise in a classroom environment. STANDARD: Answer the questions correctly in the practical exercise by locating
information in the TM/LO. Each student will be graded on a Go/No-Go basis.
Intermediate Training Objective 2 TASK: Document a no-fault situation on DA Form 2404. CONDITIONS: Given instruction, TM 9-2320-272-10, a practical exercise, and a DA

TC 21-305-6
6-2
Form 2404 in a classroom environment. STANDARD: You must fill out a no-fault situation on DA Form 2404 in the correct
sequence according to DA Pamphlet 738-750. Each student will be graded on a Go/No-Go basis.
Intermediate Training Objective 3 TASK: Document a fault situation on DA Form 2404. CONDITIONS: Given instruction, TM 9-2320-272-10, a practical exercise, and a DA
Form 2404 in a classroom environment. STANDARD: You must fill out a fault situation on DA Form 2404 in the correct
sequence according to DA Pamphlet 738-750. Each student will be graded on a Go/No-Go basis.
C. ADMINISTRATIVE INSTRUCTIONS.
1. When training will be given: As scheduled. 2. Training location: Classroom as scheduled. 3. Training type: Conference and practical exercise. 4. Who will be trained: Personnel as scheduled. 5. Principal and assistant instructors required: One primary instructor for the conference
and one assistant instructor for every 20 students for the practical exercise. 6. Training aids and equipment: Overhead projector, screen, transparency, TM 9-2320-
272-10, (1 per student), LO 9-2320-272-12 (1 per student), DA Form 2404 (4 per student), and a practical exercise situation sheet (1 per student).
7. References: TM 9-2320-272-10, LO 9-2320-272-12, and DA Pamphlet 738-750. D. SEQUENCE OF ACTIVITY. NOTE Before class arrival, ensure that each student desk or table has a TM 9-2320-272-10,
LO 9-2320-272-12, and two DA Forms 2404.
1. Introduction: a. Interest device. b. Tie-in.

TC 21-305-6
6-3
c. Lesson objective (paragraph A). d. Procedures:
(1) Explanation. (2) Practical exercise. (3) Summary.
2. Explanation and Demonstration: a. Proper technique for using the M939 Series -10 series TM.
(1) Table of contents and index. (2) Cautions and warnings. (3) PMCS tables. (4) Alphabetical index.
b. Use of the M939 series LO 9-2320-272-12.
(1) Tables and notes. (2) Level of maintenance codes. (3) Lubrication after fording and high-pressure washing. (4) Lubricant abbreviations and intervals.
c. DA Form 2404 no-fault situation: (1) Organization. (2) Nomenclature and model. (3) Registration/serial number/NSN. (4) Type of inspection (PMCS). (5) TM number and TM date. (6) Date of inspection (column c).

TC 21-305-6
6-4
(7) Type of inspection (entered in column d when used for concurrent inspections). (8) Disposition of DA Form 2404.
d. DA Form 2404 fault situation. NOTE: Explain to the students that when a DA Form 2404 has previously no fault daily
annotations, a new form does not have to be initiated when a fault is found. Tell them to use the same form and some of the steps listed below would already be completed. Also, students must check DA Form 2408-14 for any uncorrected faults or deferred maintenance.
(1) Organization. (2) Nomenclature and model. (3) Registration/serial number/NSN. (4) Miles. (5) Hours. (6) Date. (7) Type of inspection (PMCS). (8) TM number and TM date. (9) Signature and rank in block 8a. (10) TM item number entered in column a. Circle item number if the fault makes the equipment not mission capable (NMC). (11) Status symbol entered in column b. (12) Deficiencies or shortcomings entered in column c. (13) Disposition of DA Form 2404.
3. Practical exercise: Hand out one practical exercise and two DA Forms 2404 to each student. Students will complete the practical exercise as outlined in paragraph 2 above within 15 minutes.
4. Evaluate: Check each student's practical exercise.

TC 21-305-6
6-5
5. Summary:
a. Recap main points. b. Allow for questions. c. Clarify questions. d. Give closing statement.
6. Retraining: Retrain and retest No-Gos after normal duty hours. E. SAFETY RESTRICTIONS. None. F. ADDITIONAL COMMENTS AND INFORMATION. Recommended instructional time is 1.0 hours (.5 conference and .5 practical exercise).

TC 21-305-6
6-6
NOTE: This is a sample DA Form 2404 used for operator/crew PMCS when no faults are found. All entries are to be completed in pencil. This sample can be used to make a transparency for use with an overhead projection system.

TC 21-305-6
6-7
NOTE: This is a sample DA Form 2404 used for operator/crew PMCS when faults are found.
All entries are to be completed in pencil. This sample can be used to make a transparency for use with an overhead projection system.

TC 21-305-6
6-8
PRACTICAL EXERCISE
LESSON TITLE: USE TECHNICAL MANUALS AND MAKE ENTRIES ON DA FORM
2404 NAME___________________________________RANK___________DATE_______________ To complete this practical exercise, you will need appropriate vehicle operator's manual (TM), LO, two blank DA Form 2404, and a pencil. You have 15 minutes to complete this practical exercise. FIRST REQUIREMENT Using the appropriate vehicle TM and LO, answer the following questions by writing your answer in the space provided after each question. 1. At what interval does the operator check the transmission for proper operation? 2. Where would you find the definition for the different classes of leaks? 3. In what section of the operator's TM would you find the BII authorized for the M931/M932 tractor? 4. In what paragraph of the operator's TM would you find instructions for correct braking procedures? 5. What type of gear oil is used for the transfer case? 6. In what publication did you find the answer to question 5 above?

TC 21-305-6
6-9
SECOND REQUIREMENT From the following information, make the required operator entries on DA Form 2404. From the following information, make the required operator entries on DA Form 2404: You are assigned to the 223d Transportation Company as the operator of an M931 tractor with registration number 23G9J111.
a. On 24 June 1991, you perform a daily PMCS and find no faults.
b. On 25 June 1991, you perform a daily PMCS and again find no faults.
c. On 26 June 1991, you perform a daily PMCS and your vehicle voltmeter is registering in the red. Your odometer reading is 2845 miles and your hour meter reads 245 hours.
d. On 27 June 1991, you perform a daily PMCS and find your voltmeter has been repaired. No other faults are discovered.
e. On 28 June 1991, you perform a weekly PMCS and find no faults.

TC 21-305-6
6-10
LESSON TITLE: PERFORM OPERATOR PREVENTIVE MAINTENANCE CHECKS
AND SERVICES (PMCS) TASK NUMBER: 551-721-1352 (Perform Vehicle Preventive Maintenance Checks and
Services [PMCS]) A. TRAINING OBJECTIVE. TASK: Perform operator PMCS on an M931/M932 tractor. CONDITIONS: Given instruction, a DA Form 2404, a pencil, TM 9-2320-272-10,
equipment records folder, rags, lubricants, coolant, and an M931/M932 tractor with BII.
STANDARD: Inspect the tractor according to the PMCS tables listed in TM 9-2320-
272-10, correct all faults within the operator's level of maintenance, and legibly record all others on DA Form 2404. If no faults are found, make necessary entries on DA Form 2404.
B. INTERMEDIATE TRAINING. None. C. ADMINISTRATIVE INSTRUCTIONS.
1. When training will be given: As scheduled. 2. Training location: Motor pool. 3. Training type: Demonstration and practical exercise. 4. Who will be trained: Personnel as scheduled. 5. Principal and assistant instructors required: One primary instructor and one assistant
instructor for every six students for the demonstration and practical exercise. 6. Training aids and equipment: Hearing protection, rags, lubricants, and coolant. DA
Form 2404, pencil, TM 9-2320-272-10, equipment records folder, and an M931/M932 tractor with BII for every two students.
7. References: TM 9-2320-272-10 and DA Pamphlet 738-750.
D. SEQUENCE OF ACTIVITY
1. Introduction:
a. Interest device.

TC 21-305-6
6-11
b. Tie-in. c. Lesson objective (paragraph A). d. Procedures:
(1) Explanation. (2) Practical exercise. (3) Summary.
2. Explanation and Demonstration: Demonstrate before-, during-, and after-operation
PMCS to students. 3. Practical exercise:
a. Assign students to vehicles and issue TM 9-2320-272-10, pencils, DA Form 2404, and equipment records folder. b. Tell students where rags, lubricants, and coolant are located.
4. Evaluate: Check each student's PMCS performance. 5. Summary:
a. Recap main points. b. Allow for questions. c. Clarify questions. d. Give closing statement.
6. Retraining: Students perform PMCS daily and have it reinforced throughout the
course. PMCS is tested on the EOCCT. E. SAFETY RESTRICTIONS.
1. Ensure that all chocks blocks are in place when the vehicle is parked. 2. Always place the transmission in neutral, set the parking brake, and shut off the
engine before leaving the vehicle.

TC 21-305-6
6-12
3. Ensure that students remove all jewelry and identification tags before performing PMCS.
4. Ensure that all personnel wear hearing protection when the engine is running. 5. Ensure that students pay particular attention to the cautions and warnings listed in the
operator's manual. 6. Ensure that personnel wear seat belts (if equipped) when the vehicle is in motion.
F. ADDITIONAL COMMENTS AND INFORMATION. Recommended instructional time is 1 hour (.5 demonstration and .5 practical exercise). The remaining PMCS is performed throughout the course in conjunction with driving tasks.

TC 21-305-6
6-13
LESSON TITLE: PERFORM PREVENTIVE MAINTENANCE CHECKS AND
SERVICES (PMCS) ON A SEMITRAILER TASK NUMBER: 551-721-1353 (Perform Preventive Maintenance Checks and Services
[PMCS] On a Semitrailer) A. TRAINING OBJECTIVE. TASK: Perform PMCS on a semitrailer. CONDITIONS: Given instruction, a DA Form 2404, a pencil, appropriate TM, equipment
records folder, rags, lubricants, and a semitrailer. STANDARD: Inspect the semitrailer according to the PMCS tables listed in the
appropriate TM, correct all faults within the operator's level of maintenance, and legibly record all others on DA Form 2404. If no faults are found, make necessary entries on DA Form 2404.
B. INTERMEDIATE TRAINING. None. C. ADMINISTRATIVE INSTRUCTIONS.
1. When training will be given: As scheduled. 2. Training location: Motor pool. 3. Training type: Demonstration and practical exercise. 4. Who will be trained: Personnel as scheduled. 5. Principal and assistant instructors required: One primary instructor and one assistant
instructor for every six students for the demonstration and practical exercise. 6. Training aids and equipment: Hearing protection, rags, and lubricants. DA Form
2404, pencil, appropriate TM, equipment records folder, and a semitrailer for every two students.
7. References: Appropriate TM and DA Pamphlet 738-750. D. SEQUENCE OF ACTIVITY
1. Introduction: a. Interest device. b. Tie-in.
TC 21-305-6
6-14
c. Lesson objective (paragraph A). d. Procedures:
(1) Explanation. (2) Practical exercise. (3) Summary.
2. Explanation and Demonstration: Demonstrate before-, during-, and after-operation PMCS to the students.
3. Practical exercise. Assign students to semitrailer and issue appropriate TM, pencils,
DA Form 2404, and equipment records folder. Tell students where rags and lubricants are located.
4. Evaluate: Check each student's PMCS performance. 5. Summary:
a. Recap main points. b. Allow for questions. c. Clarify questions. d. Give closing statement.
6. Retraining: Students perform PMCS daily and have it reinforced throughout the
course. PMCS is tested on the EOCCT. E. SAFETY RESTRICTIONS.
1. Ensure that all chocks blocks are in place when the tractor and semitrailer are parked. 2. Always place the transmission in neutral, set the parking brake, and shut off the
engine before leaving the vehicle. 3. Ensure that students remove all jewelry and identification tags before performing
PMCS. 4. Ensure that all personnel wear hearing protection when the engine is running.

TC 21-305-6
6-15
5. Ensure that students pay particular attention to the cautions and warnings listed in the operator's manual.
6. Ensure that personnel wear seat belts (if equipped) when the vehicle is in motion.
F. ADDITIONAL COMMENTS AND INFORMATION. Recommended instructional time is 1 hour (.5 demonstration and .5 practical exercise). The remaining PMCS is performed throughout the course in conjunction with driving tasks.

TC 21-305-6
6-16
LESSON TITLE: KNOW SAFETY RULES AND PROCEDURES FOR DRIVING
UNDER ADVERSE ROAD CONDITIONS TASK NUMBER: 551-721-1369 (Drive Vehicle with Semitrailer on Snow/Ice) and
551-721-1370 (Drive Vehicle with Semitrailer in Sand) A. TRAINING OBJECTIVE. TASK: Demonstrate knowledge of procedures for driving under adverse
conditions (snow, ice, mud, and sand). CONDITIONS Given instruction in a classroom and a practical exercise.
STANDARD: Students must know the safety rules and procedures for driving under
adverse conditions. Students will be graded on a Go/No-Go basis. Answer 7 of the 10 practical exercise questions correctly within 10 minutes.
B. INTERMEDIATE TRAINING. None. C. ADMINISTRATIVE INSTRUCTIONS.
1. When training will be given: As scheduled. 2. Training location: Classroom as scheduled. 3. Training type: Conference and practical exercise. 4. Who will be trained: Personnel as scheduled. 5. Principal and assistant instructors required: One primary instructor for the conference
and one assistant instructor for every 20 students for the practical exercise. 6. Training aids and equipment: Overhead projector, screen, transparency, and a
practical exercise (1 per student).
7. References: TM 9-2320-272-10. D. SEQUENCE OF ACTIVITY.
1. Introduction:
a. Interest device.

TC 21-305-6
6-17
b. Tie-in. c. Lesson objective (Paragraph A). d. Procedures:
(1) Explanation. (2) Practical exercise. (3) Summary.
2. Explanation and Demonstration: a. Driving in sand.
(1) Adjust tire pressure. (2) Set the transfer case shift lever to low range (this automatically engages 6X6 drive). (3) Set the transmission range selector to "1" or "1-2" as needed for added traction. (4) Start slowly; do not spin the wheels when starting to move the vehicle. (5) Do not straddle sand mounds or drive on the sides of two sand mounds. Loose sand will not support the vehicle on steep slopes. (6) Keep the accelerator pedal steady after the vehicle reaches the desired speed.
CAUTION
Do not exceed 5 mph when operating vehicle with transfer case in low range and transmission in "1."
(7) Turn the vehicle slowly when on loose sand. (8) Steer the vehicle straight up and down hills if possible. (9) To move the vehicle forward and turn after the vehicle is stopped in loose sand--

TC 21-305-6
6-18
(a) Set the transmission range selector to "R" (do not back the vehicle with the transfer case shift lever in low range).
(b) Press the accelerator pedal and move the vehicle straight back about 20 feet. (c) Release the accelerator pedal and press the brake pedal. (d) Set the transmission range selector to position "1" or "1-2." (e) Release the brake pedal and press the accelerator pedal to move the vehicle forward. (f) Turn the vehicle gradually. (g) Move the transmission range selector to position "1-5" when the vehicle picks up speed and is moving forward smoothly.
(10) If the vehicle starts to slide-- (a) Release the accelerator pedal. (b) Steer in the direction of the slide until the vehicle stops sliding. (c) Press the accelerator pedal slowly and steer the vehicle on a straight course.
(11) Check the air filter restriction indicator often.
b. Driving on ice or slippery surfaces and in mud or snow. (1) Install tire chains if needed for snow or ice (all driving wheels must be equipped with tire chains or the vehicle may be damaged). (2) Set the transfer case shift lever to low range for added traction (this automatically engages 6X6 drive). (3) Drive the vehicle at the lowest possible speed in gear range 1 and the transfer case in low range(for about 100 yards) to warm the driveline components and tires. (4) Press the accelerator pedal slowly when changing speed. (5) Keep the accelerator pedal steady after vehicle reaches desired speed (shift transfer case lever to high range when the vehicle is underway).

TC 21-305-6
6-19
(6) Turn the vehicle slowly when on slippery surfaces.
(7) Steer the vehicle away from ruts and large snow banks. (8) Steer the vehicle straight up and down hills if possible. (9) Use "1-3" gear to go down moderate grades. (10) Use "1-2" gear to go down steep or very slippery grades. (11) Drive at slower speeds and stay twice the normal distance from the vehicle ahead. (12) Use the turn signals sooner than normal. (13) Apply the brakes sooner than normal using a gradual pumping motion to give early warning that the vehicle will slow or stop. The gradual pumping motion will help keep the vehicle from skidding. Sudden stops will cause the vehicle wheels to lock, engine to stall, and power steering to fail.
WARNING Failure to pump brakes gradually will result in injury or death.
(14) Downshift, if necessary, when slowing or stopping the vehicle on slick surfaces. (15) Keep the windshield, windows, mirrors, headlights, stoplights, and body lights clean and free of snow and ice. (16) Drive slowly and test the brakes after driving through slush or water. If the brakes slip--
(a) Continue to drive slowly. (b) Apply moderate pressure on the brake pedal to cause slight brake drag. (c) When the brakes are dry and no longer slip, let up on the brake pedal. (d) Resume normal driving speed.

TC 21-305-6
6-20
(17) If the rear of the vehicle skids-- (a) Let up on the accelerator pedal. (b) Steer in the same direction in which the rear of the vehicle is skidding. When the vehicle is under control, press the brake pedal lightly.
(c) Steer the vehicle on straight course and slowly press the accelerator pedal.
(18) If the vehicle starts to slide while climbing a hill--
(a) Let up on the accelerator pedal. (b) Steer the vehicle in the direction of the slide until the vehicle stops. (c) Slowly press the accelerator pedal and steer the vehicle on a straight course.
(19) If absolutely necessary for better tire traction, lower the tire air pressure to the emergency air pressure. Drive at a low speed when tire air pressures are reduced.
(20) If the vehicle becomes stuck--
(a) Shovel a clear path ahead of each wheel. Put boards, brush, or similar material in the cleared paths to get better traction. (b) If the vehicle remains stuck, use another vehicle to winch or tow it.
(21) When parking the vehicle-- (a) Park it in a sheltered area out of the wind if possible. If no shelter is available, park so the vehicle does not face into the wind. (b) Park it on high, dry ground if possible. If high, dry ground is not available, spread out planks or brush to make a raised and dry area so the tires will not freeze in snow, water, ice, or mud. (c) Do not apply the parking brake. Brake shoes may freeze to the drum. Place the transmission selector lever in "N." Place chock blocks in front of and behind the wheels.

TC 21-305-6
6-21
(d) Clean snow, ice, and mud off the vehicle as soon as possible.
3. Practical exercise: Hand out one practical exercise to every student. Students will complete the practical exercise within 10 minutes.
4. Evaluate: Check each student's practical exercise. 5. Summary:
a. Recap main points. b. Allow for questions. c. Clarify questions. d. Give closing statement.
6. Retraining: Retrain and retest No-Gos after normal duty hours. E. SAFETY RESTRICTIONS. None. F. ADDITIONAL COMMENTS AND INFORMATION. Recommended instructional time is 1 hour (.5 conference and .5 practical exercise).

TC 21-305-6
6-22
PRACTICAL EXERCISE
LESSON TITLE: KNOW SAFETY RULES AND PROCEDURES FOR DRIVING UNDER
ADVERSE ROAD CONDITIONS NAME___________________________________RANK___________DATE_______________
To complete this practical exercise, you will need a pen or pencil. You have 10 minutes to complete this practical exercise. To pass this practical exercise, you must correctly answer 7 of the 10 questions.
Section I. True/false questions: Read each question carefully and place a T or F on the blank line to the left of each question.
1. _________ When operating in sand, you should keep the accelerator pedal steady after the
vehicle reaches the desired speed.
2. _________ The transfer control lever can be shifted while the vehicle is moving without any damage to the vehicle (if the transmission is in "N").
3. _________ You apply the brakes on slippery surfaces by pumping the brake pedal gradually.
4. _________ You should never use tire chains for snow or ice.
5. _________ Damp sand gives better traction than dry sand.
Section II. Multiple choice: Read each question carefully and write the answer which is MOST correct on the blank line to the left of each question.
6. _________ The air cleaner indicator will be _______ when the engine air filter needs servicing? a. Blue. b. Green. c. Yellow. d. Red.
7. _________ How should you dry wet brake linings?

TC 21-305-6
6-23
a. Continue to drive at a slow speed with enough pressure on the brake pedal to cause a drag on the brakes. b. Pump the brake pedal. c. Pull over and wait 25 to 30 minutes to allow the brakes to dry out. d. Increase speed to allow more air to flow through the brakes.
8. _________ When parking your vehicle in extreme cold or a desert environment, in which direction should the vehicle be parked? a. Facing into the wind. b. Sideways. c. Facing away from the wind. d. No specific way.
9. _________ To keep the wheels from spinning and digging into the sand, you accelerate-- a. Quickly. b. Any way you want. c. Slowly. d. None of the above.
10. ________ If your vehicle starts to skid, you should-- a. Step on the brake pedal and hold the steering wheel straight. b. Do nothing. c. Release the accelerator pedal and steer in the direction of the skid. d. Release the accelerator pedal and steer in the opposite direction of the skid.

TC 21-305-6
6-24
LESSON TITLE: IDENTIFY INSTRUMENTS, CONTROLS, AND INDICATORS TASK NUMBER: 551-721-1352 (Perform Vehicle Preventive Maintenance Checks and
Services [PMCS]) A. TRAINING OBJECTIVE. TASK: Identify instruments, controls, and indicators. CONDITIONS: Given instruction on the M931/M932 tractor. STANDARD: Correctly identify and explain the function of the instruments, controls,
and indicators. B. INTERMEDIATE TRAINING. None. C. ADMINISTRATIVE INSTRUCTIONS.
1. When training will be given: As scheduled. 2. Training location: Motor pool as scheduled. 3. Training type: Conference. 4. Who will be trained: Personnel as scheduled. 5. Principal and assistant instructors required: One primary instructor and one assistant
instructor for every three students. 6. Training aids and equipment: One M931/M932 tractor for each three students. If the
class is large, a PA system may be needed for the primary instructor.
7. References: TM 9-2320-272-10. D. SEQUENCE OF ACTIVITY
1. Introduction: a. Interest device. b. Tie-in. c. Lesson objective (paragraph A). d. Procedures:

TC 21-305-6
6-25
(1) Explanation. (2) Practical exercise. (3) Summary.
NOTE: At this time, separate the class into groups of three and assign each group to a
vehicle. Ensure each group has an assistant instructor. The assistant instructor will identify and demonstrate the use of each item to his group of students as the instructor explains each item.
2. Explanation and Demonstration: Location, description, and use of the instruments,
controls, and indicators.
a. Air cleaner indicator shows red when engine air filter needs servicing. b. Parking brake warning light illuminates when parking brakes are engaged. c. Low air pressure warning light illuminates when air brake system pressure drops below 50-60 psi. d. Spring brake warning light illuminates when spring brakes are applied. e. Engine hot warning light illuminates when engine coolant temperature exceeds 200ºF. f. Axle lock-in light illuminates when front-wheel drive lock-in switch is engaged. g. High beam indicator illuminates when front headlights are on high beam. h. Hand throttle control sets engine speed at desired rpm without maintaining pressure on the accelerator pedal. The throttle control locks in the desired position when pulled out. Rotating the control handle clockwise or counterclockwise unlocks it. The hand throttle is used for engine warm up and so forth. It is NOT to be used as a cruise control. i. Battery switch activates and deactivates all electrical circuits on or off except arctic heaters. j. Ignition switch has off, run, and start positions. Switch automatically returns from start to run when hand pressure is relieved. k. Tachometer indicates engine speed in rpm and operating hours in tenths.
TC 21-305-6
6-26
l. Speedometer/odometer indicates vehicle speed and total mileage. m. Engine coolant temperature gauge indicates engine coolant temperature. The normal engine coolant operating temperature is 175-195ºF. n. Primary air pressure gauge indicates air pressure in the primary brake system. The normal pressure is 90-130 psi. o. Defroster control opens vents to direct heated air to the windshield. p. Heat vent control controls the amount of heat blown into the cab by adjusting the opening of the heat ventilation doors. q. Fresh air vent control pulls out to open ventilation doors, allowing outside air to circulate in the cab. r. Spring brake release control is pushed in to release spring brakes independently of the mechanical parking brake. The control is used to release spring brakes in order to test and adjust mechanical brakes. s. Windshield washer control is pushed in to spray cleaning solution on the windshield. t. Turn signal control lever is moved down to operate the vehicle left turn signals, up to operate the right turn signals, and automatically returns to the off position after the turn is completed. The turn signal control is also equipped with a hazard control (four-way flashers). u. Horn button is pressed to operate the vehicle horn. v. Trailer air brake hand control lever is mounted opposite of the turn signals control. Pull down to apply trailer brakes only. Should only be used to test the semitrailer brakes. Using it when driving will cause the semitrailer to skid. To park, use the parking brake or chock the wheels. Using the semitrailer hand control to park can cause all the air to leak out. Be sure to return control to its off position (all the way up). w. Voltmeter indicates the charging condition of the battery. x. Secondary air pressure gauge indicates air pressure in the secondary brake system. The normal operating pressure is 90-130 psi. y. Transmission oil temperature gauge indicates the temperature of the transmission oil. The normal operating temperature is 120-220ºF.

TC 21-305-6
6-27
z. Engine oil pressure gauge indicates oil pressure when the engine is running. The normal operating pressure at idle is 15 psi.
aa. Fuel gauge indicates the fuel level in the fuel tanks. bb. Trailer air supply valve is pushed in to supply air to the brake system of the towed trailer or semitrailer. cc. Emergency engine stop control is pulled out to cut off fuel to the engine. It is used only in an emergency. dd. Heater blower motor switch activates the heater blower. ee. Wiper motor switch activates wipers and controls windshield wiper speed. ff. Fuel level gauge switch permits reading the fuel level on the fuel gauge for each fuel tank when turned to L (left) or R (right). gg. Front wheel drive lock-in switch allows operator to engage front wheel drive and is used only when the vehicle's transfer case is in high range. In low range, the vehicle's front-wheel drive engages automatically. The vehicle may be in motion or stopped to engage the front-wheel drive lock-in switch. hh. Ether start switch injects ether into the engine for cold weather starting. ii. Light switch controls the operation of the vehicle's lights. jj. Instrument panel lights illuminate instrument panel gauges. kk. Automatic transmission selector lever is used to select the vehicle driving gear. ll. Transmission power take-off (PTO) control lever (M932 only) engages the transmission PTO to provide power for the winch. mm. Front winch control lever (M932 only) is pulled back to wind the front winch and forward to unwind for lowering loads during A-frame operation. nn. Transfer case shift lever is pushed down to high range for light load operations, up to low range for heavy road operations. Six-wheel drive is achieved automatically when the transfer case shift lever is placed in low range. oo. Mechanical parking brake control lever is pulled up to engage the parking brakes and down to disengage the brakes. The knob on top of the handle is turned clockwise to increase parking brake tension, counterclockwise to decrease

TC 21-305-6
6-28
parking brake tension. Applying the parking brake lever also trips a valve to release air pressure from the spring brakes. This engages the spring brakes. pp. Accelerator pedal controls speed. qq. Brake pedal is depressed to brake the vehicle. rr. Dimmer switch is depressed to raise or lower the headlight beam. ss. Warning alarm buzzer is located above the left cowl vent. The alarm sounds when the air brake system pressure drops below 50-60 psi or when the parking brake is engaged.
3. Practical exercise: None. 4. Evaluate: Students are evaluated daily during driving tasks and are tested during the
EOCCT. 5. Summary:
a. Recap main points. b. Allow for questions. c. Clarify questions. d. Give closing statement.
6. Retraining: Training is reinforced during daily driving tasks. E. SAFETY RESTRICTIONS. None. F. ADDITIONAL COMMENTS AND INFORMATION. Recommended instructional time is 1 hour conference.

TC 21-305-6
6-29
LESSON TITLE: DRIVE VEHICLE WITH AUTOMATIC TRANSMISSION TASK NUMBER: 551-721-1366 (Drive Vehicle with Automatic Transmission) A. TRAINING OBJECTIVE. TASK: Drive an M931/M932 tractor with automatic transmission. CONDITIONS: Given instruction, a DD Form 1970, DA Form 2404, pencil, TM 9
2320-272-10, equipment records folder, rags, lubricants, coolant, a suitable driver training area, an M931/M932 tractor with BII, and a semitrailer.
STANDARD: Operate the automatic transmission on the tractor; upshift and
downshift through all gears and perform basic driving maneuvers to include correct braking procedures.
B. INTERMEDIATE TRAINING. None. C. ADMINISTRATIVE INSTRUCTIONS.
1. When training will be given: As scheduled. 2. Training location: Classroom, motor pool, and training area as scheduled. 3. Training type: Conference, demonstration, and practical exercise. 4. Who will be trained: Personnel as scheduled. 5. Principal and assistant instructors required: One primary instructor for the conference
and one assistant instructor for every two students for the demonstration and practical exercise. 6. Training aids and equipment: Television, videocassette recorder, tape TVT 55-17
(PIN: 709234DA) "Driving Techniques of the M939 Series Tractor," hearing protection, rags, lubricants, coolant, and 40 traffic cones or empty POL drums. DA Form 2404, DD Form 1970, pencil, TM 9-2320-272-10, equipment records folder, an M931/M932 tractor with BII, and a semitrailer for every two students.
7. References: TM 9-2320-272-10 and FM 21-305.
D. SEQUENCE OF ACTIVITY. 1. Introduction:
a. Interest device.

TC 21-305-6
6-30
b. Tie-in. c. Lesson objective (paragraph A). d. Procedures:
(1) Explanation. (2) Practical exercise. (3) Summary.
2. Explanation and Demonstration: a. Show videotape TVT 55-17. b. Transmission range selector lever.
(1) Neutral "N" is used for parking and starting the engine. The engine will not start with the selector lever in any other position. (2) Reverse "R" is used for backing. The tractor must be completely stopped before shifting from a forward gear range to reverse or from reverse to a forward gear range. (3) Forward gear ranges are "1" through "1-5" with "1" being the lowest gear ratio and "1-5" the highest. This position (1-5) is used for all normal driving conditions. The vehicle will start off in first gear and as the accelerator is depressed, the transmission will upshift automatically through all the gear ranges to fifth gear. As the vehicle slows down, the transmission will downshift automatically to the correct gear. (4) Select "1-5" (drive) when operation is on good roads and/or minimal grades. (5) Select "1-4" (fourth) when operation is over moderately hilly road grades and/or restricted road speeds. (6) Select "1-3" (third) if speed limits are low. (7) Select "1-2" (second) if operation is over steep grades and/or rough terrain. (8) Select "1" (first) if operating with heavy loads, on extreme grades, and/or rough terrain.

TC 21-305-6
6-31
c. Placing vehicle in motion:
(1) Start the engine and allow it to warm up. (2) Check gauges and instruments. (3) Turn on lights as appropriate.
CAUTION
Do not shift the transfer case shift lever from HIGH range to LOW range or LOW range to HIGH range unless the transmission selector lever is in "N" (neutral).
(4) With the transmission selector lever in "N" (neutral), select the transfer case driving range.
(a) Depress the lockout switch and shift the transfer case shift lever down to HIGH range for normal driving conditions. (b) Depress the lockout switch and shift the transfer case shift lever up to LOW range if vehicle is heavily loaded, facing a steep grade, and/or operating off road.
(5) Apply the service brake pedal. (6) Return the trailer brake hand control to its off position (all the way up).
CAUTION
If the semitrailer brake hand control is not returned to its off position, the semitrailer brakes will burn up.
(7) Release the parking lever by pushing it forward to the floor. (8) Select the transmission gear ratio. (9) Release the service brake pedal and gradually depress the accelerator pedal. (10) Accelerate at a safe, steady speed.

TC 21-305-6
6-32
CAUTION Do not allow the engine speed to exceed 2,100 rpm in any transmission gear ratio.
CAUTION Do not accelerate at full power when downshifting or upshifting to and from the forward driving range "1" (first).
(11) Upshift and downshift the transmission selector lever as necessary whenever driving conditions change.
d. Stopping the vehicle and engine.
(1) Release the accelerator pedal.
WARNING
Apply brakes gradually when stopping. A panic stop will cause the vehicle wheels to lock, engine to stall, and power steering failure. Failure to do this will result in injury or death.
(2) Apply the brake pedal to bring the vehicle to a gradual stop. (3) Move the transmission range selector to the "N" (neutral) position. (4) Apply the parking brake by pulling up on the parking brake lever. (5) Let the engine idle for 5 minutes if engine coolant temperature gauge reads above 195 degrees. On M931A2 and M932A2 engines, run at idle 3 to 5 minutes to allow the turbocharger to cool. (6) Turn the vehicle light switch to the off position. (7) Turn the ignition switch and battery switch to the off position. (8) Perform after-operation PMCS.
e. Demonstrate hand and arm signals required for this exercise. f. Demonstrate driving within the training area.

TC 21-305-6
6-33
3. Practical exercise:
a. Assign students to vehicles and issue TM 9-2320-272-10, pencil, DA Form 2404, DD Form 1970, and equipment records folder. Tell students where rags, lubricants, and coolant are located. b. Students perform before-operation PMCS. c. Students practice driving the M931/M932 tractor with a semitrailer through the training area (see Figures 4-1 through 4-4). During-operation PMCS is also conducted at this time.
NOTE: As each student practices driving, an assistant instructor rides in the right seat. The success of this driver training program is the ability of the instructor to get in the cab of the truck with the student driver and pass on valuable experience and proper driving techniques. Now is the time to correct any bad driving habits.
d. After the students have mastered driving the vehicle in the training area, the students will then practice driving on the road.
4. Evaluate: Check each student's performance of PMCS and driving. 5. Summary:
a. Recap main points. b. Allow for questions. c. Clarify questions. d. Give closing statement.
6. Retraining: Retrain No-Gos and slow learners. This can be accomplished using the videotape TVT 55-17, "Driving Techniques of the M939 Series Tractor." Students perform driving tasks daily and are tested on the EOCCT. E. SAFETY RESTRICTIONS.
1. Ensure that all chocks blocks are in place when the vehicle is parked. 2. Always place the transmission in neutral, set the parking brake, and shut off the
engine before leaving the vehicle. 3. Ensure that students remove all jewelry and identification tags before performing
PMCS.

TC 21-305-6
6-34
4. Ensure that students pay particular attention to the cautions and warnings listed in the
operator's manual. 5. Maintain a safe following distance and speed limit when driving in the training area
(as determined by the local command). 6. Always wear hearing protection when working in or around a running vehicle. 7. Ensure that personnel wear seat belts (if equipped) when the vehicle is in motion. F. ADDITIONAL COMMENTS AND INFORMATION. Recommended instructional time is 10.5 hours (.5 conference, .5 demonstration, and 9.5 practical exercise including 1.5 PMCS).

TC 21-305-6
6-35
LESSON TITLE: BACK VEHICLE WITH SEMITRAILER TASK NUMBER: 551-721-1367 (Back Vehicle with Semitrailer) A. TRAINING OBJECTIVE. TASK: Back vehicle with semitrailer. CONDITIONS: Given instruction, a DD Form 1970, a DA Form 2404, a pen or pencil,
TM 9-2320-272-10, equipment records folder, rags, lubricants, coolant, a suitable training area, an M931/M932 tractor with BII, and a semitrailer.
STANDARD: Back the tractor with semitrailer using ground guides without causing
damage to the vehicle and semitrailer or physical surrounding and without injury to personnel.
B. INTERMEDIATE TRAINING. None. C. ADMINISTRATIVE INSTRUCTIONS.
1. When training will be given: As scheduled. 2. Training location: Motor pool and training area as scheduled. 3. Training type: Demonstration and practical exercise. 4. Who will be trained: Personnel as scheduled. 5. Principal and assistant instructors required: One primary instructor, one assistant
instructor for every two students for the demonstration and one assistant instructor for every two students for the practical exercise.
6. Training aids and equipment: Rags, lubricants, coolant, and 40 traffic cones or empty POL drums. DA Form 2404, DD Form 1970, pencil, TM 9-2320-272-10, equipment records folder, an M931/M932 tractor with BII, and a semitrailer for every two students.
7. References: TM 9-2320-272-10 and FM 21-305.
D. SEQUENCE OF ACTIVITY.
1. Introduction:
a. Interest device.
b. Tie-in.

TC 21-305-6
6-36
c. Lesson objective (paragraph A). d. Procedures:
(1) Explanation. (2) Practical exercise. (3) Summary.
2. Explanation and Demonstration: a. Demonstrate hand and arm signals required for this exercise. b. Explain ground guide safety precautions for backing. c. Demonstrate backing.
3. Practical exercise:
a. Assign students to vehicles and issue TM 9-2320-272-10, pencil, DA Form 2404, DD Form 1970, and equipment records folder. Instruct students on the location of rags, lubricants, and coolant. b. Students perform before-operation PMCS. c. Students practice backing the tractor with semitrailer laid out in the training area (see Figures 4-5 and 4-6). During-operation PMCS is also conducted at this time.
NOTE: The success of the driver training program is the ability of the instructors to get in the cab of the truck with the student driver and pass on valuable experience and techniques. Now is the time to correct any bad driving habits.
d. Students perform after-operation PMCS and ensure all operator entries required on DA Form 2404 and DD Form 1970 are accurate, complete, and legible.
4. Evaluate: Check each student's performance of PMCS and backing. 5. Summary:
a. Recap main points.
b. Allow for questions.

TC 21-305-6
6-37
c. Clarify questions. d. Give closing statement.
6. Retraining: Retrain slow learners. This can be accomplished by using the videotape
"Driving Techniques of the M939 Series Tractor" and reinforced throughout the course. Students perform backing tasks daily and are tested on the EOCCT. E. SAFETY RESTRICTIONS.
1. Ensure that all chock blocks are in place when the vehicles are parked. 2. Always place the transmission in neutral, set the parking brake, and shut off the
engine before leaving vehicle. 3. Ensure that students remove all jewelry and identification tags before performing
PMCS. 4. Ensure that students pay particular attention to the cautions and warnings listed in the
operator's manual. 5. Always use ground guides when backing. 6. Maintain a safe following distance and speed limit when driving in the training area
(as determined by the local command). 7. Always wear hearing protection when working in or around a running tractor. 8. Ensure that all occupants wear seat belts while the vehicle is in operation.
F. ADDITIONAL COMMENTS AND INFORMATION. Recommended instructional time is 16 hours (.5 demonstration and 15.5 hours practical exercise including 2.0 PMCS).

TC 21-305-6
6-38
LESSON TITLE: COUPLE SEMITRAILER TASK NUMBER: 551-721-1314 (Couple Semitrailer) A. TRAINING OBJECTIVE. TASK: Couple an M931/M932 tractor to a semitrailer. CONDITIONS: Given instruction, DA Form 2404, DD Form 1970, pencil, TM 9-2320-
272-10, equipment records folder, rags, lubricants, coolant, an M931/M932 tractor with BII, and a semitrailer.
STANDARD: Couple a tractor to a semitrailer in the correct sequence without damage
to equipment or injury to personnel. B. INTERMEDIATE TRAINING. None. C. ADMINISTRATIVE INSTRUCTIONS.
1. When training will be given: As scheduled. 2. Training location: Training area as scheduled. 3. Training type: Demonstration and practical exercise. 4. Who will be trained: Personnel as scheduled. 5. Principal and assistant instructors required: One primary instructor, one assistant
instructor for every two students for the demonstration and practical exercise. 6. Training aids and equipment: Rags, lubricants, and coolant. DA Form 2404, DD
Form 1970, pencil, TM 9-2320-272-10, equipment records folder, an M931/M932 tractor with BII, and a semitrailer for every two students.
7. References: TM 9-2320-272-10 and FM 21-305. D. SEQUENCE OF ACTIVITY.
1. Introduction: a. Interest device. b. Tie-in. c. Lesson objective (paragraph A).

TC 21-305-6
6-39
d. Procedures:
(1) Explanation. (2) Practical exercise. (3) Summary.
2. Explanation and Demonstration: Demonstrate coupling procedures.
a. Check all coupling devices on tractor and semitrailer for condition and working order. b. Check fifth wheel wedge adjustment for type of terrain.
(1) Wedges are positioned fully below the walking beam for highway operations. (2) Wedges are positioned back and away from the walking beam for cross-country operations. (3) To position wedges-- (a) Remove the two cap screws from each wedge. (b) Remove the wedges and reverse the position. (c) Using the same holes, reinstall and tighten the cap screws.
c. Check that chock blocks are properly in place at semitrailer wheels; if chock blocks are not in place, place them in their proper position. d. Check that all moving parts and top of fifth wheel (semitrailer coupler) are properly lubricated. e. After checks are completed, start the tractor and line the tractor up with the semitrailer. Use ground guides when backing. f. Align the tractor and semitrailer in a straight line. g. Back the tractor up slowly and maneuver so that the kingpin of the semitrailer is in line with the coupling jaws of the tractor's fifth wheel. h. Stop the tractor in front of the semitrailer, place the transmission shift lever in "N" (neutral), and apply the tractor's parking brake.

TC 21-305-6
6-40
i. Adjust the height of the semitrailer to the height of the tractor's fifth wheel. Use the crank handle on the semitrailer to raise or lower the landing legs, so the semitrailer the approach ramps are slightly lower than the tractor's fifth wheel. j. Pull the fifth wheel plunger handle forward and then out to open the coupler jaws. k. Remove dummy couplings from the air connections on the semitrailer. l. Connect air line hoses from the tractor to the semitrailer in this manner:
(1) Take the hose tagged EMERGENCY on the tractor (color coded RED) and attach this hose to the EMERGENCY COUPLING on the semitrailer. (2) Now take the hose tagged SERVICE (color coded YELLOW or BLUE) and attach it to the SERVICE COUPLING on the semitrailer.
CAUTION
Be sure that the SERVICE air hose from the tractor is connected to the SERVICE COUPLING and the EMERGENCY air hose is connected to the EMERGENCY COUPLING on the semitrailer.
WARNING Air brake hose shut-off valves must be open at all times during the normal operation of the tractor and the semitrailer, and the semitrailer brakes must be functional. Failure to do this will cause injury or death to personnel.
m. The M931/M932 tractor comes with either the lever type shut-off valves or the handle type shut-off valves. To position the valves--
(1) Open the lever type shut-off valves by placing levers in the down position. Place the lever in the up position to close the shut-off valves. (2) Open the handle type shut-off valves by placing the handles in the vertical (up) position. Place the handles in the horizontal (down) position to close the shut-off valves.
n. Press in the trailer air supply valve and hold it in place for fifteen seconds. Release the valve. The valve should remain in the engaged position indicating the

TC 21-305-6
6-41
semitrailer air brake system has proper air pressure. If the valve does not remain in the engaged position, disconnect the air couplings and notify your supervisor. o. Pull down the trailer air brake hand control lever to engage the semitrailer brakes. p. Release the parking brake lever, place the transmission selector lever in "R" (reverse), and resume backing up. q. Stop the vehicle when the coupling jaws close around the semitrailer kingpin. r. Place the transmission selector lever in "N" (neutral) and apply the parking brake lever. s. Visually check to make sure the jaws have completely closed. t. With the trailer air brake control handle engaged, release the parking brake lever, place the transmission selector lever in "1" (first), and slightly depress the accelerator pedal. The tractor will not move forward if the fifth wheel is properly connected to the semitrailer.
CAUTION
Stop the vehicle immediately if the tractor moves forward and repeat steps o through t.
u. Place the transmission selector lever in "N" (neutral) and apply the parking brake lever. v. Connect the electrical cable to the electric receptacle on the semitrailer. w. Check the semitrailer lights:
(1) Turn the light switch to service drive. (2) Operate the turn signal switch and direct the ground guides to check for the proper operation of the semitrailer signal lights. (3) Depress the brake pedal and direct the ground guides to check for the proper operation of the semitrailer stoplights.
x. Turn the crank to raise the landing gear on the semitrailer. y. Stow the landing gear float pads in the racks; remove and stow the chock blocks.

TC 21-305-6
6-42
z. Check the operation of the semitrailer brakes using the trailer brake hand control in the cab.
3. Practical exercise:
a. Students practice coupling in the training area(s). During-operation PMCS is also conducted at this time. b. Students perform after-operation PMCS and ensure all operator entries required on DA Form 2404 and DD Form 1970 are accurate, complete, and legible.
4. Evaluate: Check each student's performance on coupling and PMCS. 5. Summary:
a. Recap main points. b. Allow for questions. c. Clarify questions. d. Give closing statement.
6. Retraining: Retrain slow learners. This can be accomplished using the video tape
TVT 55-17, "Driving Techniques of the M939 Series Tractors" and reinforced throughout the course. Students are tested on the EOCCT. E. SAFETY RESTRICTIONS.
1. Ensure that all chock blocks are in place when the vehicles are parked. 2. Always place the transmission in neutral, set the parking brake, and shut off the
engine before leaving the vehicle. 3. Ensure that students remove all jewelry and identification tags before performing
PMCS. 4. Ensure that students pay particular attention to the cautions and warnings listed in the
operator's manual. 5. Always use ground guides when backing. 6. Always wear hearing protection when working in or around a running tractor.

TC 21-305-6
6-43
7. Ensure that all occupants wear seat belts while the vehicle is in operation. 8. Ensure that the driver and ground guides know and understand the hand and arm
signals as outlined in FM 21-305.
9. Never back at a speed over 5 mph. F. ADDITIONAL COMMENTS AND INFORMATION. Recommended instructional time is 4.0 hours (.5 demonstration and 3.5 practical exercise including .5 PMCS).

TC 21-305-6
6-44
LESSON TITLE: UNCOUPLE SEMITRAILER TASK NUMBER: 551-721-1315 (Uncouple Semitrailer) A. TRAINING OBJECTIVE. TASK: Uncouple a tractor from a semitrailer. CONDITIONS: Given instruction, a DA Form 2404, DD Form 1970, pencil, TM 9-2320-
272-10, equipment records folder, rags, lubricants, coolant, an M931/M932 tractor with BII, a semitrailer, and ground guides.
STANDARD: Uncouple a tractor from a semitrailer in the correct sequence without
damage to equipment or injury to personnel. B. INTERMEDIATE TRAINING. None. C. ADMINISTRATIVE INSTRUCTIONS.
1. When training will be given: As scheduled. 2. Training location: Training area as scheduled. 3. Training type: Demonstration and practical exercise. 4. Who will be trained: Personnel as scheduled. 5. Principal and assistant instructors required: One primary instructor and one assistant
instructor for every two students for the demonstration and the practical exercise. 6. Training aids and equipment: Rags, lubricants, and coolant. DA Form 2404, DD
Form 1970, pencil, TM 9-2320-272-10, equipment records folder, an M931/M932 tractor with BII, and a semitrailer for every two students.
7. References: TM 9-2320-272-10 and FM 21-305. D. SEQUENCE OF ACTIVITY.
1. Introduction: a. Interest device. b. Tie-in. c. Lesson objective (paragraph A).

TC 21-305-6
6-45
d. Procedures:
(1) Explanation. (2) Practical exercise. (3) Summary.
2. Explanation and Demonstration: Demonstrate uncoupling procedures.
WARNING
Use ground guide(s) when backing up to park the semitrailer. Failure to do this will result in damage to the vehicle or injury or death to personnel.
a. Place the semitrailer in the proper location, place the transmission selector lever in "N" (neutral), engage the air brake hand control lever, and apply the parking brake. b. Place wheel chocks in front of and behind the semitrailer wheels. c. Place the landing gear float pads on the ground under the semitrailer landing gear. d. Turn the crank handle until the landing gear makes firm contact with the float pads. e. Disconnect and remove the electrical cable from the semitrailer and secure the cable on the tractor. f. Turn the air brake hose shut-off valve levers to the closed position.
NOTE: The trailer air supply valve inside the vehicle cab will automatically pop back and
disengage when the air couplings are disconnected. g. Disconnect the air couplings from the semitrailer and secure the air hose on the tractor. h. Install dummy couplings on the semitrailer air couplings. i. To release the semitrailer kingpin, pull plunger handle forward, then out to open the fifth wheel coupling jaws.
TC 21-305-6
6-46
j. Place the transmission selector lever in "1-5" (drive) and release the parking brake. k. Move the tractor forward until the fifth wheel and approach ramps are clear of the semitrailer.
3. Practical exercise:
a. Assign students to vehicles and issue TM 9-2320-272-10, pencil, DA Form 2404, DD Form 1970, and equipment records folder. Instruct students on the location of rags, lubricants, and coolant. b. Students perform before-operation PMCS. c. Students practice uncoupling in the training area(s). During-operation PMCS is also conducted at this time.
4. Evaluate: Check each student's performance on uncoupling and PMCS.
5. Summary: a. Recap main points. b. Allow for questions. c. Clarify questions. d. Give closing statement.
6. Retraining: Retrain slow learners. This can be accomplished using the video tape
TVT 55-17, "Driving Techniques of the M939 Series Tractor" and reinforced throughout the course. Students are tested on the EOCCT. E. SAFETY RESTRICTIONS.
1. Ensure that all chock blocks are in place when the vehicles are parked. 2. Always place the transmission in neutral, set the parking brake, and shut off the
engine before leaving the vehicle. 3. Ensure that students remove all jewelry and identification tags before performing
PMCS. 4. Ensure that students pay particular attention to the cautions and warnings listed in the
operator's manual.
TC 21-305-6
6-47
5. Always use ground guides when backing. 6. Always wear hearing protection when working in or around a running tractor. 7. Ensure that all occupants wear seat belts while the vehicle is in operation. 8. Ensure that the driver and ground guides know and understand the hand and arm
signals as outlined in FM 21-305. 9. Never back at a speed over 5 mph.
F. ADDITIONAL COMMENTS AND INFORMATION. Recommended instructional time is 4.0 hours (.5 demonstration and 3.5 practical exercise including .5 PMCS).

TC 21-305-6
6-48
LESSON TITLE: DRIVE VEHICLE WITH SEMITRAILER ON SIDE ROADS AND
UNIMPROVED ROADS TASK NUMBER: 551-721-1368 (Drive Vehicle with Semitrailer on Side Roads and
Unimproved Roads) A. TRAINING OBJECTIVE. TASK: Drive a tractor with semitrailer on side roads and unimproved roads. CONDITIONS: Given instruction, DD Form 1970, DA Form 2404, pencil, TM 9-2320-
272-10, equipment records folder, rags, lubricants, coolant, a suitable training/driving area, an M931/M932 tractor with BII, and a semitrailer.
STANDARD: Without damage to equipment or injury to personnel, drive the
designated route using defensive driving (accident avoidance) methods; make right and left hand turns, make gradual steering corrections, signal intentions in advance, pass oncoming vehicles, maintain vehicle interval, obey highway warning and regulatory signs, operate the light switch, monitor gauges and indicator lights, use proper braking procedures, and upshift/downshift the transmission through all gears.
B. INTERMEDIATE TRAINING. None. C. ADMINISTRATIVE INSTRUCTIONS.
1. When training will be given: As scheduled. 2. Training location: Classroom, motor pool, and designated route. 3. Training type: Conference and practical exercise. 4. Who will be trained: Personnel as scheduled. 5. Principal and assistant instructors required: One primary instructor for the conference
and one assistant instructor for every two students for the practical exercise. 6. Training aids and equipment: Hearing protection, rags, lubricants, and coolant. DA
Form 2404, DD Form 1970, pencil, TM 9-2320-272-10, equipment records folder, route strip map, an M931/M932 tractor with BII, and a semitrailer for every two students.
7. References: TM 9-2320-272-10 and FM 21-305. D. SEQUENCE OF ACTIVITY.

TC 21-305-6
6-49
1. Introduction: a. Interest device. b. Tie-in. c. Lesson objective (paragraph A). d. Procedures:
(1) Explanation. (2) Practical exercise. (3) Summary.
2. Explanation and Demonstration: NOTE: Instruments, controls, indicators, and basic driving techniques have been covered in
previous instruction. The instructor may need to reinforce these subjects.
a. Explain putting vehicle in motion: (1) On flat roadways. (2) On upgrades. (3) On downgrades. (4) In sand and snow, and on ice.
b. Explain the proper procedures for braking: (1) Using the engine as a brake. (2) Using the service brakes (foot brakes--air pressure is 90 to 130 psi).
WARNING
The trailer hand brake control is only used for testing the semitrailer brakes. Using it when driving will cause the semitrailer to skid. Using the semitrailer hand control to park can cause all the air to leak out of the brake system.

TC 21-305-6
6-50
(3) Driving on level roadways. (4) Going downhill. (5) Driving on sand, snow, ice, and wet surfaces. (6) Using emergency braking procedures.
c. Explain maneuvering the vehicle:
(1) On curves. (2) At intersections. (3) On roadways:
(a) Steering the vehicle. (b) Making gradual steering corrections. (c) Avoiding abrupt steering movements.
d. Explain the front-wheel drive lock-in switch. (Allows the operator to engage the front-wheel drive and is only used when the vehicle transfer case is in HIGH range.) The vehicle may be in motion or stopped to engage/disengage the switch.
e. Explain the following:
(1) Steering the vehicle through a constant curve. (2) Maneuvering through a U-turn. (3) Passing stationary and moving oncoming vehicles (on narrow roads).
f. Give safety briefing.
3. Practical exercise: a. Assign students to vehicles and issue TM 9-2320-272-10, pencils, DA Form 2404, DD Form 1970, and equipment records folder. Instruct students on the location of rags, lubricants, and coolant. b. Students perform before-operation PMCS. c. Students practice driving. During-operation PMCS is conducted at this time.

TC 21-305-6
6-51
NOTE: As each student practices driving, an assistant instructor rides in the cab and explains driving techniques, ensures the driver is aware of driving situations, and conducts after-action reviews with each driver.
d. Students perform after-operation PMCS and ensure all operator entries required on DA Form 2404 and DD Form 1970 are accurate, complete, and legible.
4. Evaluate: Check each student's performance of PMCS and driving. 5. Summary:
a. Recap main points. b. Allow for questions. c. Clarify questions. d. Give closing statement.
6. Retraining: Retrain slow learners. Students perform driving tasks daily and are tested on the EOCCT. E. SAFETY RESTRICTIONS.
1. Ensure that all chock blocks are in place when the vehicles are parked. 2. Always place the transmission in neutral, set the parking brake, and shut off the
engine before leaving the vehicle. 3. Ensure that students remove all jewelry and identification tags before performing
PMCS. 4. Ensure that students pay particular attention to the cautions and warnings listed in the
operator's manual. 5. Always use ground guides when backing. 6. Maintain a safe following distance and speed limit when driving (as determined by the
local command).
7. Always wear hearing protection when working in or around a running vehicle. 8. Ensure that personnel wear seat belts when the vehicle is in motion.

TC 21-305-6
6-52
F. ADDITIONAL COMMENTS AND INFORMATION. Recommended instructional time is 8 hours (.5 conference and 7.5 practical exercise including 1 hour PMCS).

TC 21-305-6
6-53
LESSON TITLE: DRIVE VEHICLE WITH SEMITRAILER ON IMPROVED
(PRIMARY) ROADS TASK NUMBER: 551-721-1366 (Drive Vehicle with Automatic Transmission) A. TRAINING OBJECTIVE. TASK: Drive a tractor with semitrailer on improved primary) roads. CONDITIONS: Given instruction, DD Form 1970, DA Form 2404, pencil, TM 9 2320-
272-10, equipment records folder, rags, lubricants, coolant, a suitable driving/training area, designated driving route, an M931/M932 tractor with BII, and a semitrailer.
STANDARD: Without damage to equipment or injury to personnel, drive the
designated route using defensive driving (accident avoidance) methods; make right and left turns, make gradual steering corrections, signal intentions in advance, pass oncoming vehicles, maintain vehicle interval, obey highway warning and regulatory signs, operate the light switch, monitor gauges and indicator lights; upshift/downshift the transmission through all gear ranges; manipulate the controls; and perform basic driving maneuvers to include downhill braking and backing using ground guides.
B. INTERMEDIATE TRAINING. None. C. ADMINISTRATIVE INSTRUCTIONS.
1. When training will be given: As scheduled. 2. Training location: Motor pool, driver training area, and designated driving routes as
scheduled. 3. Training type: Conference and practical exercise. 4. Who will be trained: Personnel as scheduled. 5. Principal and assistant instructors required: One primary instructor for the conference
and one assistant instructor for every two students for the practical exercise. 6. Training aids and equipment: Hearing protection, rags, lubricants, and coolant. DA
Form 2404, DD Form 1970, pencil, TM 9-2320-272-10, equipment records folder, designated route strip map, an M931/M932 tractor with BII, and a semitrailer for every two students.
7. References: TM 9-2320-272-10 and FM 21-305.
TC 21-305-6
6-54
D. SEQUENCE OF ACTIVITY.
1. Introduction: a. Interest device. b. Tie-in. c. Lesson objective (paragraph A). d. Procedures:
(1) Explanation. (2) Practical exercise. (3) Summary.
2. Explanation and Demonstration:
a. Explain putting vehicle in motion-- (1) On flat roadways. (2) On upgrades. (3) On downgrades. (4) In sand and snow, and on ice. (5) When signaling intentions. (6) With transmission gear ranges.
b. Explain the procedures for braking--
(1) Using the engine as a brake. (2) Using service brakes (foot brake--air pressure is 90 to 130 psi).

TC 21-305-6
6-55
WARNING The trailer hand brake control is only used for testing the semitrailer brakes. Using it when driving will cause the semitrailer to skid. Using the semitrailer hand control to park can cause all the air to leak out of the brake system.
(3) Driving on flat roadways. (4) Going downhill. (5) Driving on sand, snow, ice, and wet surfaces. (6) Using emergency braking procedures. (7) Downshifting the transmission.
c. Explain maneuvering the vehicle--
(1) On curves. (2) At intersections. (3) At turns. (4) When steering the vehicle. (5) When making gradual steering corrections. (6) To avoid abrupt steering movements.
d. Explain changing lanes: (1) Signal intentions. (2) Check mirrors.
e. Explain the following: (1) Steering the vehicle through a constant curve. (2) Maneuvering through a U-turn. (3) Passing stationary and moving vehicles.
f. Give safety briefing.

TC 21-305-6
6-56
g. Explain ground guide safety precautions for backing the tractor semitrailer combination.
3. Practical exercise:
a. Assign students to vehicles and issue TM 9-2320-272-10, pencils, DA Form 2404, DD Form 1970, and equipment records folder. Instruct students on the location of rags, lubricants, and coolant. b. Students perform before-operation PMCS. c. Students practice maneuvering the vehicle through the courses laid out in the training area (see Figures 4-1 through 4-6). d. After students demonstrate proficiency maneuvering the vehicle, they should practice downhill braking and driving the vehicle on the road. During-operation PMCS is also conducted at this time.
NOTE: The success of this driver training program is the ability of the instructors to get in the cab of the truck with the student driver and pass on valuable experience and proper driving techniques. Now is the time to correct any bad driving habits.
e. Students perform after-operation PMCS and ensure all operator entries required on DA Form 2404 and DD Form 1970 are accurate, complete, and legible.
4. Evaluate: Check each student's performance of PMCS and driving.
5. Summary: a. Recap main points. b. Allow for questions. c. Clarify questions. d. Give closing statement.
6. Retraining: Retrain No-Gos and slow learners. Students perform driving tasks daily and are tested on the EOCCT. E. SAFETY RESTRICTIONS.
1. Ensure that all chock blocks are in place when the vehicles are parked.
TC 21-305-6
6-57
2. Always place the transmission in neutral, set the parking brake, and shut off the engine before leaving the vehicle.
3. Ensure that students remove all jewelry and identification tags before performing
PMCS. 4. Ensure that students pay particular attention to the cautions and warnings listed in the
operator's manual. 5. Always use ground guides when backing the vehicle. 6. Maintain a safe following distance and speed limit when driving in the training area
(as determined by the local command). 7. Always wear hearing protection when working in or around a running vehicle. 8. Ensure that personnel wear seat belts (if equipped) when the vehicle is in motion.
F. ADDITIONAL COMMENTS AND INFORMATION. Recommended instructional time is 16 hours (.5 conference and 15.5 practical exercise including 2.0 hours PMCS).

TC 21-305-6
6-58
LESSON TITLE: DRIVE VEHICLE WITH SEMITRAILER AT NIGHT TASK NUMBER: 551-721-1366 (Drive Vehicle with Automatic Transmission) A. TRAINING OBJECTIVE. TASK: Operate an M931/M932 tractor with semitrailer at night. CONDITIONS: Given instruction, DA Form 2404, DD Form 1970, pencil, TM 9-2320-
272-10, equipment records folder, rags, lubricants, coolant, improved road surfaces, an M931/M932 tractor with BII, and a semitrailer.
STANDARD: Without accident or injury, drive the designated route at night with
headlights; use defensive driving (accident avoidance) methods, operate the tactical light switch, read gauges, upshift and downshift the transmission, manipulate the controls, use correct braking procedures, and perform basic driving maneuvers.
B. INTERMEDIATE TRAINING. None. C. ADMINISTRATIVE INSTRUCTIONS.
1. When training will be given: As scheduled. 2. Training location: Motor pool and driver training route (built up and rural areas) as
scheduled. 3. Training type: Conference and practical exercise. 4. Who will be trained: Personnel as scheduled. 5. Principal and assistant instructors required: One primary instructor for the conference
and one assistant instructor for every two students for the practical exercise. 6. Training aids and equipment: Rags, lubricants, and coolant. DA Form 2404, DD
Form 1970, pencil, TM 9-2320-272-10, equipment records folder, an M931/M932 tractor with BII, and a semitrailer for every two students.
7. References: TM 9-2320-272-10 and FM 21-305.
D. SEQUENCE OF ACTIVITY.
1. Introduction:
a. Interest device.

TC 21-305-6
6-59
b. Tie-in. c. Lesson objective (paragraph A). d. Procedures:
(1) Explanation. (2) Practical exercise. (3) Summary.
2. Explanation and Demonstration:
a. Night driving factors.
(1) Driver factors. (a) Vision. (b) Glare. (c) Fatigue. (d) Driver inexperience.
(2) Roadway factors. (a) Low illumination. (b) Variation in illumination. (c) Familiarity with roads. (d) Other road users. (e) Drinking drivers.
(3) Vehicle factors. (a) Headlights. (b) Auxiliary lights. (c) Turn signals.

TC 21-305-6
6-60
(d) Windshields. (e) Mirrors.
b. Night driving procedures.
(1) Preparing to drive at night. (a) Getting yourself ready. (b) Planning your route. (c) Getting the vehicle ready.
(2) Driving at night. (a) Avoid blinding others. (b) Avoid glare. (c) Maximize visibility. (d) Adjust basic driving techniques.
3. Practical exercise: a. Assign students to vehicle and issue TM 9-2320-272-10, pencil, DA Form 2404, DD Form 1970, and equipment records folder. Instruct students on the location of rags, lubricants, and coolant. b. Students perform before-operation PMCS to include the operation and cleanliness of all lights. c. Students drive the designated route. During-operation PMCS is conducted at this time.
NOTE: The success of this driver training program is the ability of the assistant instructors to get in the cab of the truck with the student driver and pass on valuable experience and techniques. Now is the time to correct any bad driving habits.
d. Students perform after-operation PMCS and ensure all operator entries required on DA Form 2404 and DD Form 1970 are accurate, complete, and legible.
4. Evaluate: Check each student's performance of PMCS and night driving.
TC 21-305-6
6-61
5. Summary:
a. Recap main points. b. Allow for questions. c. Clarify questions. d. Give closing statement.
6. Retraining: Retrain No-Gos and slow learners. E. SAFETY RESTRICTIONS.
1. Ensure that all chock blocks are in place when the vehicles are parked. 2. Always place the transmission in neutral, set the parking brake, and shut off the
engine before leaving the vehicle. 3. Ensure that students remove all jewelry and identification tags before performing
PMCS. 4. Ensure that students pay particular attention to the cautions and warnings listed in the
operator's manual. 5. Always use ground guides when backing. 6. Maintain a safe following distance and speed limit when driving on the designated
route (as determined by the local command). 7. Always wear hearing protection when working in or around a running tractor. 8. Ensure that all occupants wear seat belts while the vehicle is in operation.
F. ADDITIONAL COMMENTS AND INFORMATION. Recommended instructional time is 8 hours (.5 conference and 7.5 practical exercise including 2 hours PMCS).

TC 21-305-6
6-62
Section II - End of Course Comprehensive Test (EOCCT)
LESSON TITLE: END OF COURSE COMPREHENSIVE TEST (EOCCT) TASK NUMBER: All previously taught tasks. A. TRAINING OBJECTIVE. TASK: Pass the end of course comprehensive test (EOCCT). CONDITIONS: Given an examination booklet, DD Form 1970, DA Form 2404,
pencil, TM 9-2320-272-10, equipment records folder, rags, lubricants, coolant, suitable training area, an M931/M932 tractor with BII, and a semitrailer.
STANDARD: Answer correctly 21 of 30 questions on the written examination and
pass the driver's road test with a score of 70 or higher. B. INTERMEDIATE TRAINING. Intermediate Training Objective 1 TASK: Pass a written examination. CONDITIONS: Given an examination booklet and a pencil. STANDARD: Answer correctly 21 of 30 questions within 30 minutes. Use either
the primary written test or the alternate written test. Intermediate Training Objective 2 TASK: Pass the driver's road test. CONDITIONS: Given DD Form 1970, DA Form 2404, pencil, TM 9-2320-272-10,
equipment records folder, rags, lubricants, coolant, road test route, an M931/M932 tractor with BII, and a semitrailer.
STANDARD: Achieve a score of 70 or higher. Use the driver's performance test
(road test) instructions and the driver's road test checklist. C. ADMINISTRATIVE INSTRUCTIONS.
1. When training will be given: As scheduled.

TC 21-305-6
6-63
2. Training location: Classroom, motor pool, road test route, and training area as scheduled.
3. Training type: Performance evaluation. 4. Students: Personnel as scheduled. 5. Principal and assistant instructors required: One primary instructor for the class for
the written test and one assistant instructor for every students for the performance test. 6. Training aids and equipment: Examination booklet, DD Form 1970, DA Form 2404,
pencil, TM 9-2320-272-10, equipment records folder, rags, lubricants, coolant, an M931/M932 tractor with BII, and a semitrailer.
7. References: TM 9-2320-272-10, DA Pamphlet 738-750, and FM 21-305.
D. SEQUENCE OF ACTIVITY.
1. Introduction: a. Interest device. b. Tie-in. c. Lesson objective (paragraph A). d. Procedures:
(1) Explanation. (2) Practical exercise. (3) Summary.
2. Explanation and Demonstration:
a. Administer written examination. b. Administer driver's road tests.
3. Evaluate: Check performance checklists and written test results. 4. Summary:
a. Recap main points.

TC 21-305-6
6-64
b. Allow for questions. c. Clarify questions.
d. Give closing statement.
5. Retraining: Retrain and retest No-Gos.
E. SAFETY RESTRICTIONS.
1. Ensure that all chock blocks are in place when the vehicles are parked. 2. Always place the transmission in neutral, set the parking brake, and shut off the
engine before leaving the vehicle. 3. Ensure that students remove all jewelry and identification tags before performing
PMCS. 4. Ensure that students pay particular attention to the cautions and warnings listed in the
operator's manual. 5. Always use ground guide(s) when backing. 6. Maintain a safe following distance and speed limit when driving on the road test route
(as determined by the local command and traffic control devices). 7. Always wear hearing protection when working in or around a running vehicle. 8. Ensure that all occupants wear seat belts while the vehicle is in operation.
F. ADDITIONAL COMMENTS AND INFORMATION. Recommended testing time is 4.0 hours (.5 for the written test, 3.5 for the road test).

TC 21-305-6
6-65
INTERMEDIATE TRAINING OBJECTIVE 1
WRITTEN TEST (PRIMARY)
NAME RANK DATE
UNIT
Section I. True/false questions: Read each question carefully and place a T or F on the blank line to the left.
______ 1. Road, load, and traffic conditions are factors in determining the transmission gear selection.
______ 2. Turning the fuel level gauge switch to the L (left) or R (right) position permits reading the fuel level on the fuel gauge for each fuel tank.
______ 3. The fifth wheel locking plunger is pulled forward then out to unlock the fifth wheel coupling jaws.
______ 4. You may back the vehicle with the transfer case in LOW range.
______ 5. The fifth wheel cannot pivot more than 21 degrees up, 15 degrees down, or 7 degrees sideways. For this reason, semitrailer operations cross-country is limited to easy grades over known terrain.
______ 6. The vehicle is not ready/available if the fifth wheel cap screws are loose.
Section II. Multiple choice: Read each question carefully and write the answer which is MOST correct on the blank line to the left.
______ 7. The normal operating air pressure as indicated by both air pressure gauges is-- a. 50 to 60 psi. b. 60 to 90 psi. c. 130 to 150 psi. d. 90 to 130 psi.
______ 8. The low air pressure warning light will remain on and the buzzer will sound until- a. The break pedal is applied. b. The air system pressure in each section of the dual system is below 90 psi. c. The air system pressure in each section of the dual systems is above 50 to 60 psi.

TC 21-305-6
6-66
d. None of the above.
______ 9. The trailer air brake hand control lever is-- a. Pulled down to apply trailer brakes only. b. Used for testing the semitrailer brakes. c. Not used as a parking brake. d. All the above.
______ 10. After using the trailer air brake hand control lever, return it to the OFF position-- a. Or leave it in any position. b. To prevent the trailer brakes from burning. c. To prevent the transmission from over heating. d. All the above.
______ 11. After starting, what is the recommended idle rpm during warm up? a. 580 to 650 rpm. b. 700 to 800 rpm. c. 800 to 950 rpm. d. 1100 to 1500 rpm.
______ 12. How should you dry wet brake linings? a. Pull over and wait 25 to 30 minutes to allow the brakes to dry out. b. Pump the brake pedal. c. Continue to drive at a slow speed with enough pressure on the brake pedal to cause a drag on the brakes. d. Continue to drive at a slow speed with the trailer hand brake control applied.
______ 13. While driving on an expressway, you have a tire blow out. What is the first thing you should do? a. Keep the vehicle moving straight ahead by accelerating. b. Hit the brakes. c. Downshift. d. Apply the trailer hand brake control.
______ 14. When stopping the vehicle with a load, you should-- a. Use the engine as a brake. b. Downshift the transmission. c. Use the service brakes. d. All the above.

TC 21-305-6
6-67
______ 15. In which gear do you start the engine?
a. 1st. b. 5th. c. "P." d. "N."
______ 16. The first step in coupling the tractor to the semitrailer is to-- a. Check the lights. b. Ensure the semitrailer is chocked. c. Disconnect the electrical cable. d. Test the coupling.
______ 17. Another name for the fifth wheel is the-- a. Semitrailer coupler. b. Kingpin. c. Locking jaws. d. Connector.
______ 18. The fifth wheel wedges are positioned-- a. Any way you want. b. Back and away from the walking beam for cross-country operation. c. Level with the walking beam. d. Under the walking beam for cross-country operation.
______ 19. When connected to a semitrailer, the fifth wheel pivots _____ to allow for changes in road conditions. a. Up. b. Down. c. Sideways. d. All the above.
______ 20. To ensure the semitrailer air brake system has the proper air pressure, press in the trailer air supply valve and hold it in place for _________ seconds. a. 5. b. 10. c. 15. d. 20.
______ 21. When the coupling jaws close around the semitrailer kingpin you should--

TC 21-305-6
6-68
a. Connect hoses and cable. b. Visually check to make sure the jaws have completely closed. c. Continue the mission. d. Do nothing.
______ 22. The trailer air supply valve located inside the vehicle cab will-- a. Automatically pop back and disengage when the air couplings are disconnected. b. Stay engaged. c. Flash a warning light. d. Automatically activate a buzzer.
______ 23. When removing the spare tire, you must use a-- a. Utility chain. b. Chain hoist. c. Davit boom. d. All the above.
______ 24. Hearing protection is required for-- a. The driver. b. The co-driver. c. All personnel working in and around the vehicle when the engine is running. d. All the above.
______ 25. How many personnel are authorized to ride in the cab? a. 1. b. 2. c. 3. d. As many as can get in the cab.
______ 26. What braking procedures are used when stopping on ice or snow? a. There is no specific method for applying the brakes. b. Hit the brake pedal hard. c. Ride the brakes. d. Pump brakes gradually.
______ 27. The spring brake warning light illuminates when-- a. Spring brakes are not engaged. b. There is too much tension on the spring brakes. c. There is not enough tension on the spring brakes.

TC 21-305-6
6-69
d. Spring brakes are engaged.
______ 28. When do you upshift and downshift the transmission selector lever? a. When you want to. b. When you reach the bottom of a grade. c. As necessary whenever driving conditions change. d. Never.
______ 29. What are the two types of air pressure gauges? a. Primary and secondary. b. Primary and backup. c. Secondary and backup. d. None of the above.
______ 30. What is the purpose of the emergency engine stop control? a. Cuts off fuel to the engine in emergency situations only. b. Cuts off fuel to the engine and may be used at anytime. c. Cuts off fuel to the engine if the fuel pump delivers too much fuel to the engine. d. All the above.

TC 21-305-6
6-70
INTERMEDIATE TRAINING OBJECTIVE 1
WRITTEN TEST ANSWER SHEET (PRIMARY)
1. T 11. B 21. B 2. T 12. C 22. A 3. T 13. A 23. D 4. F 14. D 24. D 5. T 15. D 25. C 6. T 16. B 26. D 7. D 17. A 27. D 8. C 18. B 28. C 9 D 19. D 29. A 10. B 20. C 30. A

TC 21-305-6
6-71
INTERMEDIATE TRAINING OBJECTIVE 1
WRITTEN TEST (ALTERNATE)
NAME RANK DATE
UNIT
Section I. True/false questions: Read each question carefully and place a T or F on the blank line to the left.
______ 1. The fifth wheel locking plunger is pulled forward then out to unlock the fifth wheel coupling jaws.
______ 2. During coupling, if the air supply valve does not remain in the engaged position, disconnect air couplings and notify organizational maintenance.
______ 3. You may back the vehicle with the transfer case in LOW range.
______ 4. The front-wheel drive lock-in engages automatically when the transfer case is in HIGH range.
______ 5. Road, load, and traffic conditions are factors in determining the transmission gear selection.
______ 6. Turning the fuel level gauge switch to the L (left) or R (right) position permits reading the fuel level on the fuel gauge for each fuel tank.
Section II. Multiple choice: Read each question carefully and write the answer which is MOST correct on the blank line to the left.
______ 7. The trailer air brake hand control lever is-- a. Pulled down to apply trailer brakes only. b. Used for testing the semitrailer brakes. c. Not used as a parking brake. d. All the above.
______ 8. The normal operating air pressure as indicated by both air pressure gauges is-- a. 50 to 60 psi. b. 60 to 90 psi. c. 130 to 150 psi. d. 90 to 130 psi.
TC 21-305-6
6-72
______ 9. If your tractor starts to jackknife, which should you do? a. Release the gas pedal and steer in the opposite direction of the skid. b. Release the accelerator pedal and steer in the direction of the skid. c. Step on the brakes and hold the steering wheel straight. d. Apply the trailer hand brake control.
______ 10. After using the trailer air brake hand control lever, return it to the OFF position-- a. Or leave it in any position. b. To prevent the trailer brakes from burning. c. To prevent the transmission from over heating. d. All the above.
______ 11. How should you dry wet brake linings? a. Pull over and wait 25 to 30 minutes to allow the brakes to dry out. b. Pump the brake pedal. c. Continue to drive at a slow speed with enough pressure on the brake pedal to cause a drag on the brakes. d. Continue to drive at a slow speed with the trailer hand brake control applied.
______ 12. What are the two types of air pressure gauges? a. Primary and secondary. b. Primary and backup. c. Secondary and backup. d. None of the above.
______ 13. After starting, what is the recommended idle rpm during warm up? a. 580 to 650 rpm. b. 700 to 800 rpm. c. 800 to 950 rpm. d. 1100 to 1500 rpm.
______ 14. What is the purpose of the emergency engine stop control? a. Cuts off fuel to the engine in emergency situations only. b. Cuts off fuel to the engine and may be used at anytime. c. Cuts off fuel to the engine if the fuel pump delivers too much fuel to the engine. d. All the above.

TC 21-305-6
6-73
______ 15. While driving on an expressway, you have a tire blow out. What is the first thing you should do? a. Keep the vehicle moving straight ahead by accelerating. b. Hit the brakes. c. Downshift d. Apply the trailer hand brake control.
______ 16. What is the maximum safe speed for shifting the transfer shift lever from HIGH range to LOW range? a. 42 mph. b. 32 mph. c. 30 mph. d. 22 mph.
______ 17. Another name for the fifth wheel is the-- a. Semitrailer coupler. b. Kingpin. c. Locking jaws. d. Connector.
______ 18. What must the air pressure gauge read before the warning light goes out and the warning buzzer stops? a. 30-40 psi. b. 40-50 psi. c. 50-60 psi. d. 90-150 psi.
______ 19. The fifth wheel wedges are positioned-- a. Any way you want. b. Back and away from the walking beam for cross-country operation. c. Level with the walking beam. d. Under the walking beam for cross-country operation.
______ 20. When stopping the vehicle with a load, you should _______ to assist you. a. Use the engine as a brake. b. Downshift the transmission. c. Use the service brakes. d. All the above.

TC 21-305-6
6-74
______ 21. In which gear do you start the engine? a. 1st. b. 5th. c. "P." d. "N."
______ 22. The first step in coupling the tractor to the semitrailer is to-- a. Check the lights. b. Ensure the semitrailer is chocked. c. Disconnect the electrical cable. d. Test the coupling.
______ 23. When the coupling jaws close around the semitrailer kingpin you should-- a. Connect hoses and cable. b. Visually check to make sure the jaws have completely closed. c. Continue the mission. d. Do nothing.
______ 24. How do you accelerate when operating in a sandy or dusty environment? a. Anyway. b. Rapidly. c. Slowly. d. None of the above.
______ 25. When connected to a semitrailer, the fifth wheel pivots ______ to allow for changes in road conditions. a. Up. b. Down. c. Sideways. d. All the above.
______ 26. To ensure the semitrailer air brake system has the proper air pressure, press in the trailer air supply valve and hold it in place _______ for seconds. a. 5. b. 10. c. 15. d. 20.

TC 21-305-6
6-75
______ 27. The trailer air supply valve located inside the vehicle cab will-- a. Automatically pop back and disengage when the air couplings are disconnected. b. Stay engaged. c. Flash a warning light. d. Automatically activate a buzzer.
______ 28. What braking procedures are used when stopping on ice or snow? a. There is no specific method for applying the brakes. b. Hit the brake pedal hard. c. Ride the brakes. d. Pump brakes gradually.
______ 29. The spring brake warning light illuminates when-- a. Spring brakes are not engaged. b. There is too much tension on the spring brakes. c. There is not enough tension on the spring brakes. d. Spring brakes are engaged.
______ 30. What is the purpose of the tire davit boom? a. To assist the driver in lifting and guiding the spare tire over the side of the truck. b. To hold the spare tire in place. c. To assist in replacing the davits. d. All the above.

TC 21-305-6
6-76
INTERMEDIATE TRAINING OBJECTIVE 1
WRITTEN TEST ANSWER SHEET (ALTERNATE)
1. T 11. C 21. D 2. T 12. A 22. B 3. F 13. B 23. B 4. F 14. A 24. C 5. T 15. A 25. D 6. T 16. D 26. C 7. D 17. A 27. A 8. D 18. C 28. D 9 B 19. B 29. D 10.
B 20. D 30. A

TC 21-305-6
6-77
INTERMEDIATE TRAINING OBJECTIVE 2
DRIVER'S PERFORMANCE TEST (ROAD TEST) INSTRUCTIONS 1. GENERAL
a. The driver's performance test determines whether an individual can operate a motor vehicle properly and safely under conditions of traffic and terrain where he is expected to drive. It serves as a basis for issuing an operator's permit. Furthermore, the test provides a means for instructional reinforcement and counseling. Driving weaknesses that may show up as the result of the test can be called to the examinee's attention and specific steps can be taken to eliminate them.
b. Final evaluations are recorded on DA Form 348 or on an equivalent official form. c. The examiner will be a qualified M931/M932 tractor and semitrailer operator. He will
be familiar with the road test route and the testing procedures. Before administering the test to any examinees, he must practice administering the test to a regular licensed driver qualified on that type of vehicle. This practice administration will help him become acquainted with the test route and testing procedures. 2. TESTING METHOD
a. The specific directions for this test are to be followed without deviation. No omissions or changes in the wording of these directions are permitted.
b. The instructions, which are indented and printed in large type, are read or spoken
aloud to the examinees. When giving instructions aloud, give the instructions slowly and distinctly, making sure the examinees understand. The directions in regular type, including those in parentheses, are for the examiner's information only and are not given aloud.
3. DIRECTIONS FOR ADMINISTERING THE ROAD TEST
a. Setting Standards. The standard road test is five miles long with traffic and terrain
representative of those areas in which the examinee is expected to drive. Approximately two miles of this route is in a more congested traffic area. Approximately one mile of the test route will be devoted to secondary road driving. Once a route is established (in a given locality), use it for all examinees that are to be tested. Should it prove necessary to vary the route, take care that the different kinds of route requirements, as well as the number of requirements, remains the same. Every road test will meet the following requirements (to the extent possible):
(1) Five right turns. (2) Five left turns. (3) Two intersections.

TC 21-305-6
6-78
(4) Two traffic lights or stop signs. (5) Two slow zones. (6) One railroad crossing. (7) Two steep upgrades. (8) Two steep downgrades. (9) One backing area of 50 feet with a clearly marked line extending for the whole length of the 50 feet.
b. Giving Road Tests. The road test consists of a series of operations, which the examinee must performed. These operations are listed on the Driver's Road Test Checklist, which must be used in administering this test. Typical operations are starting the motor, pulling out, and parking.
c. Giving Instructions. Give instructions to perform an operation well in advance of that
operation to allow the driver sufficient time to conform. In giving instructions, first tell the examinee where to perform the operation and then tell him what to do. For example, "At the corner two blocks from here, turn right." Notice that the location was given in terms of landmarks. This must always be done.
CAUTION The driver must never be urged to do something which is unsafe or which he does not want to do. Such urging may lead to an accident.
d. Preventing Accidents (1) Road tests should NOT normally be given if road conditions present a hazard such as ice or rain. The exception is when testing is specifically for driving under such conditions. (2) You must be prepared to take control of the vehicle at a moment's notice. You must always watch traffic conditions and warn the examinee of dangers, which you think he does not see. If the driver becomes involved in a dangerous or unlawful moving traffic incident or an accident, the test is to be terminated immediately and the examiner will drive the vehicle back to the start point (once on-scene responsibilities are fulfilled).
e. Beginning the Road Test

TC 21-305-6
6-79
(1) On the Driver's Road Test Checklist, enter the date in the appropriate place. Then say to the examinee--
WHAT IS YOUR NAME, LAST NAME FIRST, SPELL IT? (2) Fill in the examinee's name after the word NAME, and then say-- WHAT IS YOUR RANK? (3) Enter the individual's RANK after the word RANK, and then say-- WHAT IS YOUR ORGANIZATION? (4) Enter the name of the organization after the word ORGANIZATION. Enter your name after the word EXAMINER (last name first). After the word VEHICLE, enter the model of vehicle used in the road test. Then say to the examinee-- THERE WILL BE NO "TRICK" ORDERS. YOU WILL NOT BE ASKED TO DO ANYTHING IN VIOLATION OF THE LAW OR OF GOOD DRIVING PRACTICES. YOUR SCORED TEST BEGINS WITH BEFORE-OPERATIONS PMCS. (The examiner may stop the PMCS process when he is sure the examinee is knowledgeable in the PMCS procedures.) FOLLOW MY INSTRUCTIONS. DRIVE PROPERLY AND SAFELY. ARE THERE ANY QUESTIONS? (5) Answer all questions except those pertaining to the scoring procedures; then say-- DURING THE TEST, I WILL MAKE SOME OBSERVATIONS AND KEEP NOTES; DO NOT BE CONCERNED. YOUR SCORED ROAD TEST STARTS NOW. ALL RIGHT, START YOUR MOTOR. (6) Directions for each operations, such as "next block, turn left," are to be given one at a time in their proper sequence, as set up by the test route according to paragraph 3a, above.
4. SCORING THE ROAD TEST

TC 21-305-6
6-80
a. Within each of the operations, which the examinee will be required to perform, there is a list of errors on the Driver's Road Test Checklist. Every time the examinee makes one of these errors under the specific operation, place a tally mark next to the error under that operation. For example, if the examinee fails to signal when leaving the curb, place a tally mark next to "fails to give proper signal" under the operation "Pulling Out" and nowhere else. The tally mark will be placed in the space to the left of the specific error. Since an individual will be required to repeat some of the operations, such as right turns, a number of times, more than one tally mark can be placed next to the same error under a given operation. Some test routes do not lend themselves to all operations indicated on the checklist. In these cases, score only the operations that apply.
b. At the completion of the test, count the number of tally marks and subtract this number from 100 to obtain the examinee's score. Record the score in the space provided on the checklist.
c. The lowest passing score is 70. If the examinee does not achieve 70 or above, the
reason for failure will be indicated in the space provided under REMARKS; for example, "Examinee did not obtain minimum passing score" or "Examinee exhibited undue nervousness."
d. Automatic Failures
(1) Any unsafe driving act. (2) Failure to properly perform PMCS. (3) Not knowing location and function of gauges and controls. (4) Undue nervousness. (5) Failure to achieve minimum passing score. (6) If an individual scores 70 or higher on the road test and, in the opinion/judgment of the test examiner the examinee needs additional training, he has the right not to issue a license.
5. AFTER-ACTION REVIEW (AAR). Weakness exhibited by the examinee in the test will be brought to his attention, and he will be advised in what areas he needs further practice or training. The counseling will be accomplished whether the examinee passes or fails the road test. After the examinee has received additional training, he will be retested. An examinee that fails the road test must retake the entire road test.

TC 21-305-6
6-81
INTERMEDIATE TRAINING OBJECTIVE 2
DRIVER'S ROAD TEST CHECKLIST
NAME___________________ RANK_______ DATE________ VEHICLE_________
ORGANIZATION________________________ EXAMINER_______________________
BEFORE STARTING ENGINE
FAILS TO --
_______ Ensure vehicle is properly dispatched _______ Sign DD Form 1970 and/or other forms as required. _______ Perform before-operations maintenance checks and services (PMCS) using
appropriate -10 manual. _______ Unchock wheels and stow chock blocks (as required). _______ Adjust all mirrors. _______ Adjust seat. _______ Fasten seat belt/safety restraint.
STARTING ENGINE
FAILS TO --
_______ Ensure proper gear selection such as neutral. _______ Warm engine properly. _______ Check to ensure all gauges are functioning properly. _______ Ensure there is adequate air pressure (as required).
PULLING OUT
FAILS TO --
_______ Select proper gear. _______ Release parking brakes. _______ Look back and check traffic (use mirrors and windows). _______ Give proper signal. _______ Allow traffic to pass. _______ Make a smooth start. _______ Check all gauges periodically. _______ Maintain adequate air pressure (as required). _______ Check mirrors periodically. _______ Keep both hands on steering wheel (except as required by driving needs).

TC 21-305-6
6-82
DRIVING IN TRAFFIC (SPEED)
FAILS TO --
_______ Stay within the speed limits. _______ Reduce speed when required by road conditions. _______ Maintain adequate speed (drives too slow). _______ Maintain constant speed as much as possible (feeds gas erratically). _______ Maintain proper speed for gear selection. _______ Reduce speed when required by traffic conditions. _______ Check all gauges periodically. _______ Maintain adequate air pressure (as required). _______ Check mirrors periodically. _______ Keep both hands on steering wheel (except as required by driving needs).
DRIVING IN TRAFFIC (ATTENTION, ATTITUDE)
FAILS TO --
_______ Stay in proper lane. _______ Maintain proper following distance from vehicle ahead in traffic (twice the
speedometer reading in feet). _______ Maintain proper following distance at high speeds (40 mph or over) from vehicle
ahead on open highways (two times the speedometer reading in yards). _______ Anticipate action of other drivers and pedestrians. _______ Observe and obey signs, signals, and/or police officers. _______ Give necessary warning (sound horn). _______ Yield right-of-way to other vehicles. _______ Yield right-of-way to pedestrians. _______ Be courteous toward other drivers. _______ Slow down when approaching railroad grade crossings. _______ Stop, look, and listen both ways before entering railroad grade crossings
(HAZMAT only). _______ Prevent creeping or drifting when stopped. _______ Perform during-operations maintenance. _______ Check all gauges periodically. _______ Check mirrors periodically. _______ Maintain adequate air pressure (as required). _______ Keep both hands on steering wheel (except as required by driving needs).

TC 21-305-6
6-83
LEFT TURN
FAILS TO --
_______ Give proper signal in advance. _______ Turn from proper lane (usually adjacent to centerline). _______ Turn into proper lane (usually immediately to the right of the centerline). _______ Avoid cutting corners. _______ Maintain safe speed. _______ Straighten out properly. _______ Check mirrors periodically (for traffic and trailer off tracking). _______ Maintain adequate air pressure (as required). _______ Keep both hands on steering wheel (except as required by driving needs).
RIGHT TURN
FAILS TO --
_______ Give proper signal in advance. _______ Turn from proper lane (usually the right lane). _______ Turn into proper lane (usually the right lane). _______ Avoid swinging too wide. _______ Maintain safe speed. _______ Avoid cutting corners. _______ Straighten out properly. _______ Check mirrors periodically (for traffic and trailer off tracking). _______ Maintain adequate air pressure (as required). _______ Keep both hands on steering wheel (except as required by driving needs).
USE OF CONTROLS
FAILS TO --
_______ Use proper shifting patterns (upshifting and downshifting). _______ Avoid racing engine. _______ Start on hill without rolling back. _______ Keep both hands on steering wheel (except as required by driving needs). _______ Check all gauges periodically. _______ Maintain engine speed of 1500 to 2100 rpm.

TC 21-305-6
6-84
SLOWING OR STOPPING
FAILS TO --
_______ Signal intent in advance. _______ Check mirrors and windows. _______ Brake smoothly. _______ Use engine as a brake by downshifting the transmission. _______ Use brakes in proper sequence (engine and wheel). _______ Observe traffic to the rear (use mirrors and windows). _______ Maintain adequate air pressure (as required). _______ Keep both hands on steering wheel (except as required by driving needs).
OVERTAKING AND PASSING
FAILS TO --
_______ Check for other traffic (use mirrors and windows). _______ Signal in advance. _______ Maintain proper following distance before passing. _______ Pass in proper lane. _______ Change lane gradually in passing. _______ Return to proper lane only after signaling intent and ensuring that lane is clear. _______ Obey "no passing" signs, rules, or regulations (such as hills, curves, and
intersections). _______ Check mirrors periodically. _______ Maintain adequate air pressure (as required). _______ Check all gauges periodically. _______ Keep both hands on steering wheel (except as required by driving needs).
BACKING
FAILS TO --
_______ Look behind vehicle before backing. _______ Sound horn. _______ Back slowly. _______ Back smoothly. _______ Back in a straight line using mirrors and ground guide (50 feet within six inches of
line laterally). _______ Maintain adequate air pressure (as required). _______ Keep both hands on steering wheel (except as required by driving needs).

TC 21-305-6
6-85
PARKING
FAILS TO --
_______ Check for other traffic. _______ Give proper signal for traffic to pass. _______ Park within two attempts. _______ Park without bumping or scraping curb. _______ Park in space three feet wider than test vehicle (angle parking). _______ Set parking brakes. _______ Chock wheels. _______ Maintain adequate air pressure (as required). _______ Perform after-operation PMCS. _______ Keep both hands on steering wheel (except as required by driving needs). ROAD TEST SCORE 100 NUMBER OF TALLY MARKS (SUBTRACT) _____
ROAD TEST SCORE _____ REMARKS:

TC 21-305-6
7-1
CHAPTER 7
ADDITIONAL SUBJECTS - LESSON OUTLINES
LESSON TITLE: DRIVE VEHICLE IN A CONVOY TASK NUMBER: 551-721-1359 (Drive Vehicle in a Convoy) A. TRAINING OBJECTIVE. TASK: Operate a tractor with a semitrailer in a convoy. CONDITIONS Given instruction, suitable convoy route, DA Form 2404, DD Form 1970,
pencil, appropriate vehicle operator's manual, equipment records folder, rags, lubricants, coolant, a tractor with BII, and a semitrailer.
STANDARD: Operate the vehicle according to the specific instructions of the march unit
commander. Without accident or injury, drive the designated convoy route in daylight using defensive driving (accident avoidance) methods, maintain vehicle interval, obey highway warning and regulatory signs, interpret and relay all mechanical/hand signals correctly, operate the tactical light switch including headlights, and use correct braking procedures.
B. INTERMEDIATE TRAINING. None. C. ADMINISTRATIVE INSTRUCTIONS.
1. When training will be given: As scheduled. 2. Training location: Motor pool and convoy route as scheduled. 3. Training type: Conference and practical exercise. 4. Who will be trained: Personnel as scheduled. 5. Principal and assistant instructors required: One primary instructor and one assistant
instructor for every two students for the practical exercise. 6. Training aids and equipment: Rags, lubricants, and coolant. DA Form 2404, DD
Form 1970, pencil, appropriate vehicle operator's manual, equipment records folder, convoy strip map, a tractor with BII, and a semitrailer for every two students. Convoy signs (CONVOY AHEAD and CONVOY FOLLOWS), convoy flags (blue, green, and black/white), and convoy control vehicles (minimum of two vehicles required). A communication system is recommended for control vehicles.

TC 21-305-6
7-2
NOTE If O'CONUS use bilingual convoy signs.
7. References: FM 21-305, FM 55-312, and appropriate vehicle operator's manual. D. SEQUENCE OF ACTIVITY.
1. Introduction: a. Interest device. b. Tie-in. c. Lesson objective (paragraph A). d. Procedures:
(1) Explanation. (2) Practical exercise. (3) Summary.
2. Explanation and Demonstration: a. Demonstrate daylight convoy control signals as listed in FM 21-305. b. Have three tractors with semitrailers positioned to show the students the following distances:
(1) Minimum of 50 yards in urban areas. (2) Minimum of 150 yards in rural areas. (3) Minimum of 200 yards on interstate and other controlled access highways as the tactical situation permits.
c. Give convoy safety briefing (see attached sample convoy commander's briefing).
3. Practical exercise:
a. Assign students to vehicles and issue appropriate vehicle operator's manuals, pencil, DA Form 2404, DD Form 1970, convoy strip map, and equipment records folder. Instruct students on the location of rags, lubricants, and coolant.

TC 21-305-6
7-3
b. Students perform before-operation PMCS to include the operation and cleanliness of all lights. c. Students practice driving tractor with semitrailer on the assigned convoy route. They conduct during- operation PMCS at this time.
NOTE Instructors not assigned to a control vehicle will ride as assistant operators in the
vehicles and rotate during rest halts. Ideally an instructor should be riding with each student.
d. Students perform after-operation PMCS and ensure all operator entries required on DA Form 2404 and DD Form 1970 are accurate, complete, and legible.
4. Evaluate: Check each student's performance on daylight convoy driving. 5. Summary:
a. Recap main points. b. Allow for questions. c. Clarify questions. d. Give closing statement.
6. Retraining: Retrain No-Gos and slow learners. E. SAFETY RESTRICTIONS.
1. Ensure that all chock blocks are in place when the vehicles are parked. 2. Ensure that the transmission is always placed in neutral, the parking brake is set, and
the engine is shut off before leaving the vehicle. 3. Ensure that students remove all jewelry and identification tags before performing
PMCS. 4. Ensure that students pay particular attention to the cautions and warnings listed in the
operator's manual. 5. Ensure that ground guides are used when backing. 6. Ensure that a safe following distance and speed limit are maintained when driving in
the training area (as determined by the local command).

TC 21-305-6
7-4
7. Ensure that hearing protection is used when working in or around a running tractor. 8. Ensure that all occupants wear seat belts while the vehicle is in operation. 9. Ensure that no one walks between vehicles parked in a column.
F. ADDITIONAL COMMENTS AND INFORMATION. Recommended instructional time is 6 hours (.5 conference and 5.5 practical exercise including 1 PMCS).
SAMPLE CONVOY COMMANDER'S BRIEFING 1. Always follow civilian and military police instructions when given.
2. Use only truck parking areas on controlled access highways.
3. Make only emergency halts on the roadside of controlled access highways.
4. Do not stand on the traffic side of a vehicle during halts on conventional highways.
5. Perform vehicle operation maintenance and check cargo security at every halt.
6. Move vehicles off the highway before beginning maintenance.
7. Have reflectors and warning devices in place before beginning maintenance.
8. Use warning lights during periods of darkness or reduced visibility.
9. Begin convoy movement only at convoy commander's signal.
10. Observe vehicle speed restrictions (______ as determined by the local commander).
11. Observe vehicle intervals (minimums):
• Controlled access highways--200 yards.
• Rural conventional highway--150 yards.
• Urban conventional highway--50 yards.
12. Maintain close interval until reaching main convoy route.
13. Use acceleration lane, when available, to reach convoy speed.
14. Gradually attain proper vehicle interval once on the main convoy route.
15. In case of accident, main column does not stop to provide assistance. Next following
vehicle provides immediate assistance to accident vehicle.
16. If an accident occurs to a vehicle ahead, make maximum effort to clear traffic lanes.
17. Operate all vehicles with headlights on at all times.
18. Use warning devices correctly.

TC 21-305-6
7-5
19. When approaching oncoming traffic on a narrow road--
• Signal your intentions.
• Move to the right of the roadway only as far as you safely can and stop.
• Wait until the other vehicles have passed and resume travel on the most solid part of
the road.
20. Have maintenance and recovery support (to be determined by the local commander).
21. Add any additional comments as local conditions warrant.
LESSON TITLE: DRIVE VEHICLE WITH SEMITRAILER IN A CONVOY UNDER
BLACKOUT CONDITIONS TASK NUMBER: 551-721-1356 (Prepare Vehicle for Blackout Operations) and
551-721-1363 (Drive Vehicle with or without Trailer/Semitrailer in Blackout Conditions)
A. TRAINING OBJECTIVE. TASK: Operate a tractor with a semitrailer in a convoy under blackout
conditions. CONDITIONS Given instruction, a suitable training area, DA Form 2404, DD Form
1970, pencil, appropriate vehicle operator's manual, equipment records folder, rags, lubricants, coolant, a tractor with BII, and a semitrailer.
STANDARD: Operate the vehicle according to the specific instructions of the march
unit commander. Without accident or injury, drive the designated convoy route at night using defensive driving (accident avoidance) methods, maintain vehicle interval, and operate the tactical light switch including headlights and blackout drive.
B. INTERMEDIATE TRAINING. None. C. ADMINISTRATIVE INSTRUCTIONS.
1. When training will be given: As scheduled. 2. Training location: Motor pool and training area with convoy route as scheduled. 3. Training type: Conference and practical exercise. 4. Who will be trained: Personnel as scheduled.

TC 21-305-6
7-6
5. Principal and assistant instructors required: One primary instructor and one assistant
instructor for every two students for the practical exercise. 6. Training aids and equipment: Rags, lubricants, and coolant. DA Form 2404, DD
Form 1970, pencil, appropriate vehicle operator's manual, equipment records folder, convoy strip map, a tractor with BII, and a semitrailer for every two students. Convoy signs (CONVOY AHEAD and CONVOY FOLLOWS), convoy flags (blue, green, and black/white), and convoy control vehicles (minimum of two vehicles required). Recommend a communication system for the control vehicles. NOTE If O'CONUS use bilingual convoy signs.
7. References: FM 21-305 and appropriate vehicle operator's manual. D. SEQUENCE OF ACTIVITY.
1. Introduction: a. Interest device. b. Tie-in. c. Lesson objective (paragraph A). d. Procedures:
(1) Explanation. (2) Practical exercise. (3) Summary.
2. Explanation and Demonstration:
a. Demonstrate night convoy control signals as listed in FM 21-305. b. Demonstrate the operation of the tactical light switch for turning on/off headlights, blackout drive light, and blackout marker lights. c. Have three tractors with semitrailers positioned with blackout drive lights on so the students can see the rear blackout markers and stoplight at different distances.
(1) Too far--more than 180 feet.

TC 21-305-6
7-7
(2) Proper distance--between 60 and 180 feet. (3) Too close--less than 60 feet.
d. Have one tractor with semitrailer positioned with blackout drive lights on so the students can see the front blackout drive markers and blackout drive light at different distances for an oncoming vehicle.
(1) Front of vehicle--less than 60 feet. (2) Front of vehicle--more than 60 feet.
e. Give convoy safety briefing (see attached sample convoy commander's briefing).
3. Practical exercise:
a. Assign students to vehicles and issue operator's manuals, pencil, DA Form 2404, DD Form 1970, convoy strip map, and equipment records folder. Instruct students on the location of rags, lubricants, and coolant. b. Students perform before-operation PMCS to include the operation and cleanliness of all lights. c. Students practice driving the tractor with semitrailer--first with headlights on and then under blackout conditions on assigned convoy route. Students conduct during-operation PMCS at this time.
NOTE As each student practices driving, an assistant instructor rides in the cab next to the student. The assistant instructor explains driving techniques, ensures the driver is aware of driving situations, and conducts after-action reviews with each driver.
d. Students perform after-operation PMCS and ensure all operator entries required on DA Form 2404 and DD Form 1970 are accurate, complete, and legible.
4. Evaluate: Check each student's performance on night driving both with headlights and blackout drive.
5. Summary:
a. Recap main points. b. Allow for questions. c. Clarify questions.

TC 21-305-6
7-8
d. Give closing statement.
6. Retraining: Retrain No-Gos and slow learners. E. SAFETY RESTRICTIONS.
1. Ensure that all chock blocks are in place when the vehicles are parked. 2. Ensure that the transmission is always placed in neutral, the parking brake is set, and
the engine is shut off before leaving the vehicle. 3. Ensure that students remove all jewelry and identification tags before performing
PMCS. 4. Ensure that students pay particular attention to the cautions and warnings listed in the
operator's manual. 5. Ensure that ground guides are used when backing. 6. Ensure that a safe following distance and speed limit are maintained when driving in
the training area (as determined by the local command). 7. Ensure that hearing protection is used when working in or around a running tractor. 8. Ensure that all occupants wear seat belts while the vehicle is in operation. 9. Ensure that no one walks between vehicles parked in a column. 10. Ensure that ground guides and road guides wear reflective vests and carry filtered
flashlights at night.
F. ADDITIONAL COMMENTS AND INFORMATION. Recommended instructional time is 8 hours (.5 conference and 7.5 practical exercise including 2.0 PMCS).

TC 21-305-6
7-9
SAMPLE CONVOY COMMANDER'S BRIEFING 1. Always follow civilian and military police instructions when given.
2. Use only truck parking areas on controlled access highways.
3. Make only emergency halts on the roadside of controlled access highways.
4. Do not stand on the traffic side of a vehicle during halts on conventional highways.
5. Perform vehicle operation maintenance and check cargo security at every halt.
6. Move vehicles off the highway before beginning maintenance.
7. Have reflectors and warning devices in place before beginning maintenance.
8. Use warning lights during periods of darkness or reduced visibility.
9. Begin convoy movement only at convoy commander's signal.
10. Observe vehicle speed restrictions (_______ as determined by the local commander).
11. Observe vehicle intervals (minimums):
• Controlled access highways--200 yards.
• Rural conventional highway--150 yards.
• Urban conventional highway--50 yards.
• Blackout conditions--60 to 180 feet.
12. Maintain close interval until reaching main convoy route.
13. Use acceleration lane, when available, to reach convoy speed.
14. Gradually attain proper vehicle interval once on the main convoy route.
15. In case of accident, main column does not stop to provide assistance. Next following
vehicle provides immediate assistance to accident vehicle.
16. If an accident occurs to a vehicle ahead, make maximum effort to clear traffic lanes.
17. Operate all vehicles with headlights on at all times (except during blackout conditions).
18. Use warning devices correctly.
19. When approaching oncoming traffic on a narrow road--
• Signal your intentions.
• Move to the right of the roadway only as far as you safely can and stop.
• Wait until the other vehicles have passed and resume travel on the most solid part of
the road.
20. Have maintenance and recovery support (to be determined by the local commander).
21. Add any additional comments as local conditions warrant.
TC 21-305-6
7-10
LESSON TITLE: DRIVE VEHICLE WITH SEMITRAILER OFF ROAD OVER ROUGH OR UNUSUAL TERRAIN
TASK NUMBER: 551-721-1368 (Drive Vehicle with Semitrailer on Side Roads and
Unimproved Roads) A. TRAINING OBJECTIVE. TASK: Drive a M931/M932 tractor with semitrailer off road over rough or
unusual terrain. CONDITIONS Given instruction, DA Form 2404, DD Form 1970, pencil, TM 9-2320-
272-10, equipment records folder, rags, lubricants, coolant, a M931/M932 tractor with BII, a semitrailer, and a requirement to operate the vehicle off road.
STANDARD: Operate the tractor with semitrailer safely at reduced speeds, taking
caution not to damage the vehicle while driving over rough terrain. B. INTERMEDIATE TRAINING. None. C. ADMINISTRATIVE INSTRUCTIONS
1. When training will be given: As scheduled. 2. Training location: Classroom, motor pool, and off-road training area as scheduled. 3. Training type: Conference and practical exercise. 4. Who will be trained: Personnel as scheduled. 5. Principal and assistant instructors required: One primary instructor for the conference
and one assistant instructor for every two students for the practical exercise. 6. Training aids and equipment: Rags, lubricants, coolant, DA Form 2404, DD Form
1970, pencil, TM 9-2320-272-10, equipment records folder, an M931/M932 tractor with BII, and a semitrailer for every two students.
7. References: TM 9-2320-272-10 and FM 21-305. D. SEQUENCE OF ACTIVITY.
1. Introduction:
a. Interest device.
TC 21-305-6
7-11
b. Tie-in. c. Lesson objective (paragraph A). d. Procedures:
(1) Explanation. (2) Practical exercise. (3) Summary.
2. Explanation and Demonstration:
a. Unusual terrain. (1) The fifth wheel cannot pivot more than 21 degrees up, 15 degrees down, or 7 degrees sideways. For this reason, semitrailer operations cross-country is limited to easy grades over known terrain. (2) Check fifth wheel wedge adjustment for type of terrain.
a. Wedges are positioned fully below the walking beam for highway operations. b. Wedges are positioned back and away from the walking beam for cross-country operations. c. To position wedges-- • Remove the two cap screws from each wedge.
• Remove the wedges and reverse the position.
• Using the same holes, reinstall and tighten the cap screws.
(3) For starting with heavy loads, extreme grades, and in rough terrain, with the transfer case shift lever in high, and the transmission selector lever in "1" (first), limit speed to 12 mph (15 mph for the A1 and A2 models). If the transfer case shift lever is in low and the transmission selector lever is in "1" (first), limit speed to 5 mph (6 mph for the A1 and A2 models). (4) For steep grades, heavy traffic, and rough terrain, with the transfer case shift lever in high and the transmission selector lever in "1-2" (second), limit speed to 25 mph (29 mph for the A1 and A2 models). If the transfer case shift lever is in low and the transmission selector lever is

TC 21-305-6
7-12
in "1-2" (second), limit speed to 10 mph (12 mph for the A1 and A2 models).
b. Shallow ditches.
(1) Stop the vehicle. (2) Check the terrain for obstacles. (3) Place the transfer case shift lever in high. (4) Place the transmission shift lever in "1" or "1-2." (5) Steer the vehicle toward the ditch so that one wheel on the axle will leave the ditch as the other wheel on the same axle enters it.
c. Deep ditches. (1) Stop the vehicle. (2) Check the terrain for obstacles. (3) Cut away sides of the ditch, if necessary. (4) Place the transfer case shift lever in low. (5) Place the transmission shift lever in "1" or "1-2." (6) Approach the ditch at an angle. (7) Accelerate the vehicle enough to keep it rolling as it goes up the other side.
d. Gullies and ravines. (1) Stop the vehicle. (2) Check the terrain for obstacles. (3) Place the transfer case shift lever in low. (4) Place the transmission shift lever in "1" or "1-2." (5) Ease the front wheels over the edge into the ravine.
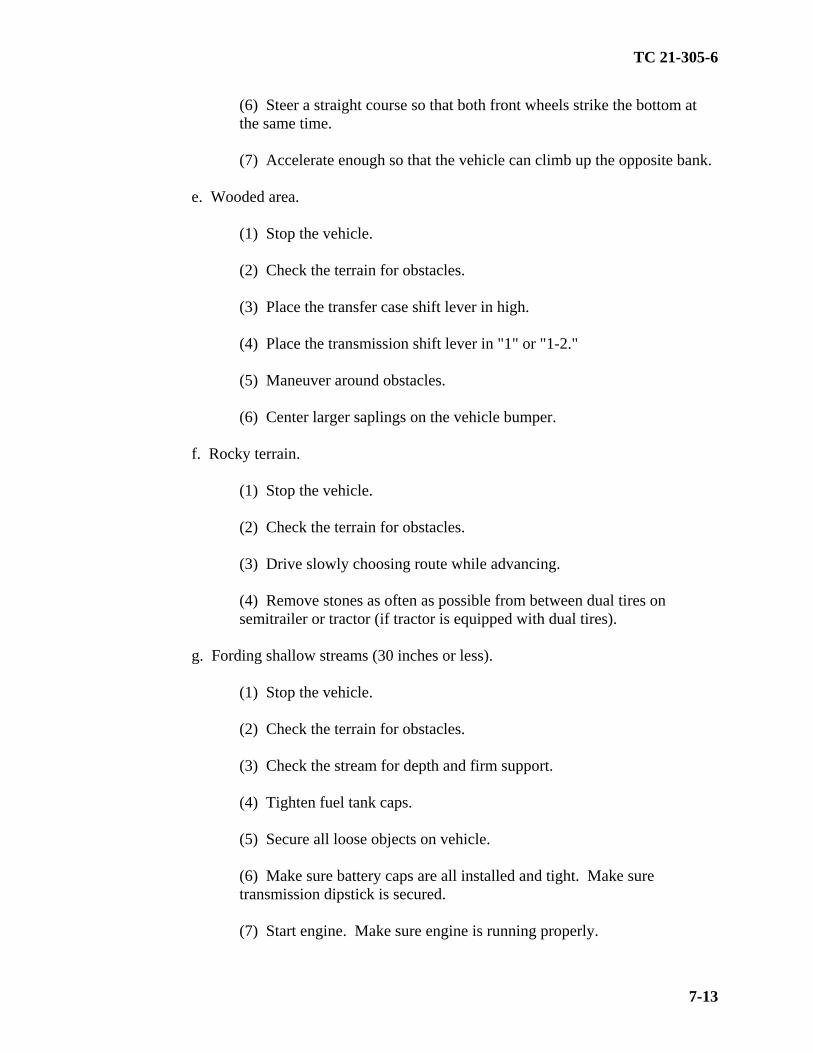
TC 21-305-6
7-13
(6) Steer a straight course so that both front wheels strike the bottom at the same time. (7) Accelerate enough so that the vehicle can climb up the opposite bank.
e. Wooded area. (1) Stop the vehicle. (2) Check the terrain for obstacles. (3) Place the transfer case shift lever in high. (4) Place the transmission shift lever in "1" or "1-2." (5) Maneuver around obstacles. (6) Center larger saplings on the vehicle bumper.
f. Rocky terrain. (1) Stop the vehicle. (2) Check the terrain for obstacles. (3) Drive slowly choosing route while advancing. (4) Remove stones as often as possible from between dual tires on semitrailer or tractor (if tractor is equipped with dual tires).
g. Fording shallow streams (30 inches or less). (1) Stop the vehicle. (2) Check the terrain for obstacles. (3) Check the stream for depth and firm support. (4) Tighten fuel tank caps. (5) Secure all loose objects on vehicle. (6) Make sure battery caps are all installed and tight. Make sure transmission dipstick is secured. (7) Start engine. Make sure engine is running properly.

TC 21-305-6
7-14
(8) Pull the transfer case shift lever up to low range and place the transmission selector lever in "1" (first).
WARNING
Do not attempt to cross water deeper than 30 inches. Limit vehicle speed while fording to 3 or 4 mph. Failure to do this will result in damage to the vehicle or injury or death to personnel.
(9) Enter water slowly at a gentle sloping area. (10) Maintain a constant vehicle speed while fording, and exit water in an area with a gentle slope.
WARNING
Do not rely on service brakes until they dry out. Keep applying brakes until uneven braking ceases. Failure to do this will result in injury or death.
(11) Wash all parts of vehicle with fresh water as soon as possible and have organizational maintenance service it.
3. Practical exercise:
a. Assign students to vehicles and issue TM 9-2320-272-10, pencil, DA Form 2404, DD Form 1970, and equipment records folder. Instruct students on the location of rags, lubricants, and coolant. b. Students perform before-operation PMCS. c. Students practice driving the tractor with the semitrailer off road. They perform during-operation PMCS at this time.
NOTE As each student practices driving, an assistant instructor rides in the cab next to the
student. The assistant instructor explains driving techniques, ensures the driver is aware of driving situations, and conducts after-action reviews with each driver.
d. Students perform after-operation PMCS and ensure all operator entries required on DA Form 2404 and DD Form 1970 are accurate, complete, and legible.
4. Evaluate: Check each student's performance of PMCS and off-road driving.

TC 21-305-6
7-15
5. Summary:
a. Recap main points. b. Allow for questions. c. Clarify questions. d. Give closing statement.
6. Retraining: Retrain No-Gos and slow learners. E. SAFETY RESTRICTIONS.
1. Ensure that all chock blocks are in place when the vehicles are parked. 2. Ensure that the transmission is always placed in neutral, the parking brake is set, and
the engine is shut off before leaving the vehicle. 3. Ensure that students remove all jewelry and identification tags before performing
PMCS. 4. Ensure that students pay particular attention to the cautions and warnings listed in the
operator's manual. 5. Ensure that ground guides are used when backing. 6. Ensure that a safe following distance and speed limit are maintained when driving in
the training area (as determined by the local command). 7. Ensure that hearing protection is used when working in or around a running tractor. 8. Ensure that all occupants wear seat belts while the vehicle is in operation.
F. ADDITIONAL COMMENTS AND INFORMATION. Recommended instructional time is 12 hours (.5 conference and 11.5 practical exercise including 2.0 PMCS).

TC 21-305-6
7-16
LESSON TITLE: TRANSPORT DANGEROUS HAZARDOUS CARGO IN VEHICLE
AND SEMITRAILER TASK NUMBER: 551-721-1383 (Transport Dangerous/Hazardous Cargo in Vehicle and
Semitrailer) A. TRAINING OBJECTIVE. TASK: Demonstrate knowledge of procedures for transporting dangerous and
hazardous cargo. CONDITIONS Given classroom instruction and practical exercise. STANDARD: Answer 7 of the 10 questions correctly on the practical exercise within
10 minutes. B. INTERMEDIATE TRAINING. None. C. ADMINISTRATIVE INSTRUCTIONS.
1. When training will be given: As scheduled. 2. Training location: Classroom as scheduled. 3. Training type: Conference and practical exercise. 4. Who will be trained: Personnel as scheduled. 5. Principal and assistant instructors required: One primary instructor for the conference
and one assistant instructor for every 20 students for the practical exercise.
6. Training aids and equipment: Overhead projector, screen, transparency, and a practical exercise sheet (1 per student).
7. References: AR 55-355, FM 55-30, Code of Federal Regulations (CFR) 49 (Part
172), and all host-nation or local directives and regulations. D. SEQUENCE OF ACTIVITY.
1. Introduction: a. Interest device. b. Tie-in.

TC 21-305-6
7-17
c. Lesson objective (paragraph A). d. Procedures:
(1) Explanation. (2) Practical exercise. (3) Summary.
2. Explanation: a. DD Form 626, Motor vehicle Inspection. b. DD Form 836, Special Instructions for Motor Vehicle Drivers.
(1) In case of fire. (2) In case of accident. (3) In case of breakdown. (4) General precautions. (5) Other specific precautions or instructions. Be sure to discuss actions to take for fuel spillage.
c. Types of cargo. (1) Ammunition. (2) Petroleum products. (3) Oxidizers.
d. Placards, warning plates (orange panels), and labels. (1) Size, color, and types. (2) Identification numbers. (3) Placement.
3. Practical exercise: Hand out one practical exercise to each student. Students will complete practical exercise within 10 minutes.

TC 21-305-6
7-18
4. Evaluate: Check each student's practical exercise. 5. Summary:
a. Recap main points. b. Allow for questions. c. Clarify questions. d. Give closing statement.
6. Retraining: Retrain and retest No-Gos after normal duty hours.
E. SAFETY RESTRICTIONS. None. F. ADDITIONAL COMMENTS AND INFORMATION. Recommended instructional time is 1 hour (.5 conference and .5 practical exercise).
PRACTICAL EXERCISE LESSON TITLE: TRANSPORT DANGEROUS AND HAZARDOUS CARGO IN
VEHICLE AND SEMITRAILER NAME___________________________________RANK___________DATE_______________
To complete this practical exercise, you will need a pen or pencil. You have 10 minutes to complete this practical exercise. To pass this practical exercise, you must correctly answer 7 of the 10 questions.
Section I. True/false questions: Read each question carefully and place a T or F on the blank line to the left of each question.
1. _________ Included in the items on DD Form 626 (Motor Vehicle Inspection) are the number of fire extinguishers required.
2. _________ If a deficiency is found during your DD Form 626 inspection, the vehicle can be loaded before the deficiency is corrected.
3. _________ The DD Form 836 (Special Instructions for Motor Vehicle Driver) tells the driver what to do in case of vehicle breakdown.

TC 21-305-6
7-19
4. _________ The DD Form 836 specifies the number of placards needed for your vehicle.
Section II. Multiple choice: Read each question carefully and write the answer which is MOST correct on the blank line to the left of each question.
5. _________ Where do you position placards on an M931/M932 tractor with semitrailer that is hauling Class A explosives? a. The front of the vehicle. b. The rear of the vehicle. c. On both sides of the vehicle. d. The front of the vehicle and the rear and both sides of the semitrailer.
6. _________ The vehicle must be inspected by the _______ before being loaded with Class A or B ammunition, explosives, and other hazardous material. a. Driver. b. Shipper. c. Person in charge. d. Co-driver.
7. _________ _______ and _______ cargoes will NOT be transported in the same vehicle. a. Water and gasoline. b. Oil and water. c. Ammunition and gasoline. d. Gasoline and diesel.
8. _________ Who must sign DD Form 626? a. Inspector at origin. b. Inspector at destination. c. Driver at origin. d. Driver at destination. e. Driver at origin and destination, and inspectors at origin and destination.
9. _________ Who should have a copy of DD Form 836? a. Driver. b. Shipper. c. Driver and shipper. d. Co-driver.
10. ________ You may not smoke or carry any lighted material when loading or unloading-- a. Flammables.

TC 21-305-6
7-20
b. Explosives. c. Oxidizers. d. All of the above.
LESSON TITLE: OPERATE THE CENTRAL TIRE INFLATION SYSTEM CTIS) ON
AN M931A2/M932A2 TRACTOR TASK NUMBER: 551-721-1391 (Operate a Central Tire Inflation System (CTIS) on the
M939A2 Series Vehicle) A. TRAINING OBJECTIVE. TASK: Operate the CTIS on an M931A2/M932A2 tractor. CONDITIONS Given instruction, DD Form 1970, DA Form 2404, pencil, TM 9-
2320-272-10, equipment records folder, rags, lubricants, coolant, a suitable training area, and an M931A2/M932A2 tractor with BII.
STANDARD: Operate the CTIS on the tractor in all four modes without causing
damage to equipment or injury to personnel. For detailed instructions, see Chapter 5 of TM 9-2320-272-10. Students will be graded on a Go/No-Go basis. See enclosed training evaluation sheet.
B. INTERMEDIATE TRAINING. None. C. ADMINISTRATIVE INSTRUCTIONS.
1. When training will be given: As scheduled. 2. Training location: Classroom, motor pool, and off-road training area as scheduled. 3. Training type: Conference and practical exercise. 4. Who will be trained: Personnel as scheduled. 5. Principal and assistant instructors required: One primary instructor for the conference
and one assistant instructor for every six students for the practical exercise. 6. Training aids and equipment: Hearing protection, rags, lubricants, and coolant. DA
Form 2404, DD Form 1970, pencil, TM 9-2320-272-10, equipment records folder, and an M931A2/M932A2 tractor with BII for every two students.

TC 21-305-6
7-21
7. Reference: TM 9-2320-272-10. D. SEQUENCE OF ACTIVITY.
1. Introduction: a. Interest device. b. Tie-in. c. Lesson objective (paragraph A). d. Procedures:
(1) Explanation. (2) Practical exercise. (3) Summary.
2. Explanation and Demonstration: a. The students will be required to operate the CTIS in all four modes and know the preset tire pressure for each mode, under what conditions each is used, and their capabilities and limitations. For detailed instructions see Chapter 5 of TM 9-2320-272-10. b. Operation of the CTIS should be conducted while driving in an off-road or rough terrain area.
3. Practical exercise: a. Assign students to vehicles and issue TM 9-2320-272-10, pencils, DA Form 2404, DD Form 1970, and equipment records folder. Instruct students on the location of rags, lubricants, and coolant. b. Students will perform before-operation PMCS. c. Students will practice maneuvering the tractor through the off-road training area(s) and engage the four modes of the CTIS. They perform during-operation PMCS at this time. d. Students will perform after-operation PMCS and ensure all operator entries required on DA Form 2404 and DD Form 1970 are accurate, complete, and legible.

TC 21-305-6
7-22
4. Evaluate: Check each student's performance of PMCS, driving, and proper use of the CTIS. See enclosed training evaluation sheet.
5. Summary:
a. Recap main points. b. Allow for questions. c. Clarify questions. d. Give closing statement.
6. Retraining: Retrain and retest No-Gos.
E. SAFETY RESTRICTIONS.
1. Ensure that all chock blocks are in place when the vehicles are parked. 2. Ensure that the transmission is always placed in neutral, the parking brake is set, and
the engine is shut off before leaving the vehicle. 3. Ensure that students remove all jewelry and identification tags before performing
PMCS. 4. Ensure that students pay particular attention to the cautions and warnings listed in the
operator's manual. 5. Ensure that ground guides are used when backing. 6. Ensure that a safe following distance and speed limit are maintained when driving in
the training area (as determined by the local command). 7. Ensure that hearing protection is used when working in or around a running tractor. 8. Ensure that all occupants wear seat belts while the vehicle is in operation. 9. Ensure that no one walks between vehicles parked in a column.
F. ADDITIONAL COMMENTS AND INFORMATION. Recommended instructional time is 2 hours (.5 conference and 1.5 practical exercise including .5 PMCS).
TRAINING/EVALUATION
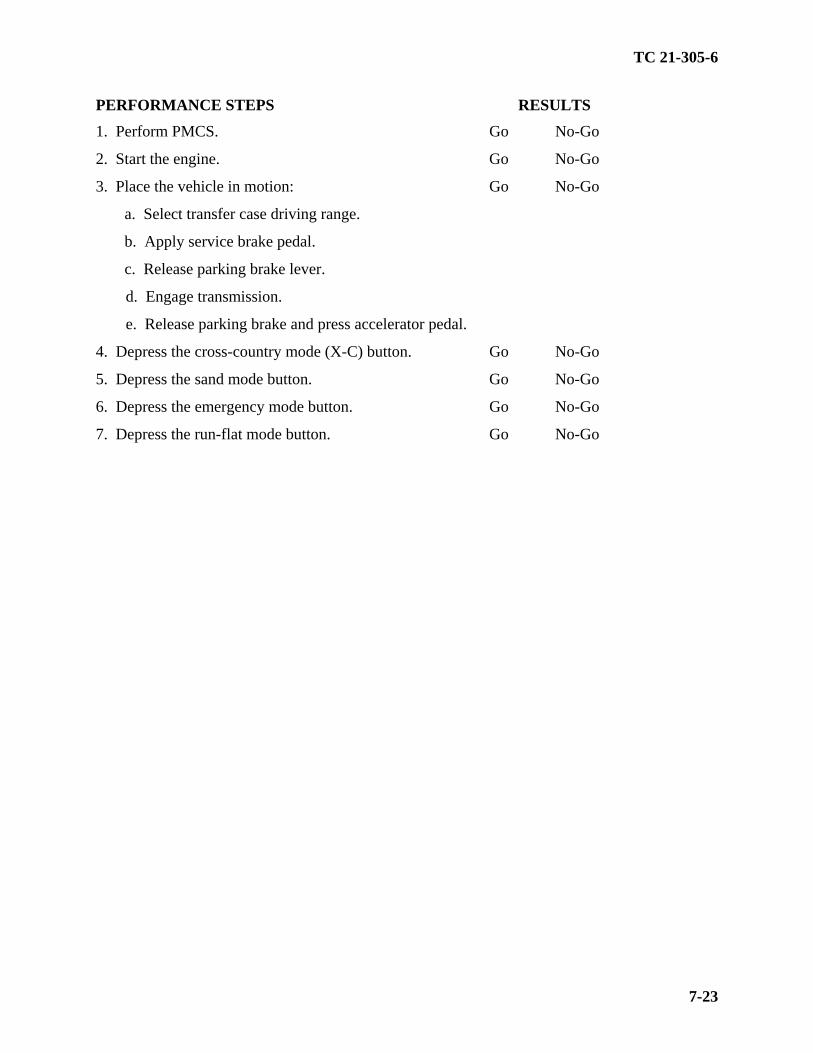
TC 21-305-6
7-23
PERFORMANCE STEPS RESULTS 1. Perform PMCS. Go No-Go
2. Start the engine. Go No-Go
3. Place the vehicle in motion: Go No-Go
a. Select transfer case driving range.
b. Apply service brake pedal.
c. Release parking brake lever.
d. Engage transmission.
e. Release parking brake and press accelerator pedal.
4. Depress the cross-country mode (X-C) button. Go No-Go
5. Depress the sand mode button. Go No-Go
6. Depress the emergency mode button. Go No-Go
7. Depress the run-flat mode button. Go No-Go

TC 21-305-6
7-24
LESSON TITLE: GROUND AND BOND FUEL TANKERS TASK NUMBER: 101-519-1174 (Load/Unload 5,000-Gallon Tanker Semitrailer), 101-519-
2311 (Supervise Operator Loading and Dispensing of Fuel from Assigned Vehicle) and 551-721-1383 (Transport Dangerous/Hazardous Cargo in Vehicle and Semitrailer)
A. TRAINING OBJECTIVE. TASK: Ground and bond a fuel tanker. CONDITIONS Given instruction, a multimeter capable of testing 10,000 ohms, a 68-
inch grounding rod with driving handle, a wheeled vehicle, and a 5,000- or 7,500-gallon fuel tanker with before-operation maintenance performed.
STANDARD: Correctly place grounding rod(s) in all types of soil, test grounding
rod(s) with a multimeter with ohms equal to or less than 10,000 ohms, and properly ground and bond the tanker to a vehicle being refueled. Each soldier has to complete the practical exercise without error and will be graded on a Go/No-Go basis.
B. INTERMEDIATE TRAINING. None. C. ADMINISTRATIVE INSTRUCTIONS.
1. When training will be given: As scheduled. 2. Training location: Classroom and training area as scheduled. 3. Training type: Conference, demonstration, and practical exercise. 4. Who will be trained: Personnel as scheduled. 5. Principal and assistant instructors required: One primary instructor for the conference
and one instructor for every six students for the demonstration and practical exercise. 6. Training aids and equipment: Overhead projector, screen, and transparencies. A
wheeled vehicle, a multimeter capable of testing 10,000 ohms, a 5,000- or 7,500-gallon fuel tanker, and one 68-inch grounding rod with driving handle for every six students.
7. References: FM 10-68, FM 10-69, and FM 10-71. D. SEQUENCE OF ACTIVITY.

TC 21-305-6
7-25
1. Introduction:
a. Interest device. b. Tie-in. c. Lesson objective (paragraph A). d. Procedures:
(1) Explanation. (2) Practical exercise. (3) Summary.
2. Explanation and demonstration:
a. Grounding. Grounding is the process of electrically connecting single or bonded units to ground rods so as to discharge into the earth any static potential that might exist at the beginning of the operation or that might develop during the operation. Rod(s) are driven into the ground to a specific depth depending on the type of soil. There is no quick or easy way to test the adequacy of a ground. The testing procedures are complex, and the equipment used in testing is bulky and expensive. For these reasons, several methods or levels of grounding and bonding are required to meet the various operational needs of the Army.
WARNING
Before beginning any fuel handling operation or performing any maintenance on tanker semitrailer, connect grounding and bonding cables. Maintain grounding and bonding connection until after all fuel handling or maintenance is completed. DO NOT connect the semitrailer grounding cable to the semitrailer grounding stud. Connections must be made to clean, unpainted surfaces. An unbonded and ungrounded or improperly bonded and grounded semitrailer could produce a spark. The resulting explosion will cause serious injury or death to personnel.
(1) Method 1. Equipment is grounded to a rod or rods that have measured resistance to ground equal to or less than 10,000 ohms. The refueling system or the vehicle and aircraft are grounded to this tested ground rod. In addition, the nozzle is bonded to the vehicle or aircraft. Use of method 1 grounding is required unless conditions, as described below, preclude its use. Method 1 is the only standard of grounding acceptable, without specific authorization, at any fixed airfield or refueling point. It is the best and safest method.

TC 21-305-6
7-26
(2) Method 2. In some instances, equipment is not available to test resistance to ground. In such cases, method 2 is used. Method 2 uses an untested ground to grounding system based on the knowledge that damp earth will accept and drain off an electrical charge. Usually, method 2 is used only when the location, tactical situation, or type of operation makes it impossible to test ground rods or to mark them in the manner appropriate for fixed rods. In method 2, equipment is grounded to a rod or rods that are driven a specific depth into the ground depending on the type of soil at the site (see table 7-1). The depth to which the rods must be driven is determined by the normal depth of permanent ground moisture in the various types of soil. The refueler and the vehicle or aircraft are then grounded, and the nozzle is bonded to the vehicle or aircraft. The commander of the operating unit must authorize the use of method 2. This method is less desirable. It should be used only when it is impossible to use method 1.
TABLE 7-1 REQUIRED DEPTHS FOR GROUND RODS
TYPE OF SOIL DEPTH OF GROUND ROD/RODS
Coarse ground, cohesionless sands and gravels 6 feet
Inorganic clay, claying gravels, gravel-sand-clay, claying sands, sandy clay, gravelly clay, and silty clay
4 feet
Silty gravel, gravel-sand-silt, silty sand, sand, silt, peat, muck, and swamp soil
3 feet
(3) Method 3. In situations where the climate, terrain, or tactical condition makes it impossible to secure a satisfactory ground rod, the requirements to ground the aircraft and the fuel dispenser (system or refueler) may be waived. However, the requirement to bond the fuel dispenser to the vehicle or aircraft MAY NOT be waived under any circumstances. Method 3 relies on bonding alone. A bond is made between the vehicle or aircraft and the refueling system or refueler and between the nozzle and the vehicle or aircraft.

TC 21-305-6
7-27
WARNING When method 3 is used, an object that has a different electrical potential (any object that is not part of the bonded system) should not be allowed to come into contact with the bonded equipment when a flammable vapor-air mixture may be present.
WARNING A contact between an unbonded object and the system could produce a spark that could set off an explosion or fire. Method 3 procedures must be authorized by the commander of the unit at one organizational level above the operating unit. This is the least desirable method since it involves solely bonding.
b. Testing and inspecting. Ground rods must be tested and inspected periodically.
(1) The electrical resistance of each grounding system should be as low as possible but not greater than 10,000 ohms. A log must be kept for permanent or semipermanent operations to show the identification of each rod, the date tested, and the reading. If the measured resistance of a rod is greater than 10,000 ohms, the rod must immediately be marked DEFECTIVE DO NOT USE and removed or replaced as soon as possible.
(2) Ground rods are tested with a multimeter. A multimeter that is acceptable for use is TS-352B/U, LIN M81372, NSN 6625-00-553-0142.
NOTE Each ground rod must be inspected when it is installed. Ground wires are inspected
daily. The grounding system must be inspected and tested annually or when there is a possibility of mechanical damage. If any indication of damage is found, it must be repaired immediately.
c. Bonding. Bonding is the process of electrically connecting two units so as to equalize any static potential that might exist between them. Bonding also forms a path for any static potential that might develop while the operation is in progress. Bonding does not dissipate the static electricity. It equalizes the charges on two unlike objects (an aircraft or vehicle and a refueling nozzle) in order to preclude arcing, in the presence of flammable vapors, as the two objects are joined. A nozzle to aircraft or vehicle bond is required. This bond is made before the nozzle dust cap or gas tank cap is removed so that if there is a spark, it will occur before fuel vapor is present. For the same reason, do not disconnect the nozzle bond until refueling is completed and the gas tank cap and nozzle dust cap has been replaced. Then, if a spark occurs, only small amounts of fuel vapor should be present and probably not enough to support combustion.

TC 21-305-6
7-28
3. Practical exercise:
a. Assign students to vehicles and tankers, and issue multimeters and grounding rods. b. Students practice grounding and bonding.
4. Evaluate: Check each student's performance on grounding and bonding. 5. Summary:
a. Recap main points. b. Allow for questions. c. Clarify questions. d. Give closing statement.
6. Retraining: Retrain and retest No-Gos. E. SAFETY RESTRICTIONS.
1. Keep a fire extinguisher manned and ready for use during all petroleum tank vehicle
operations. 2. Ensure that no smoking signs are posted around the area of operation and no smoking
rules are observed. 3. Stop all petroleum operations if there is an electrical storm or fire in the area. 4. Keep all possible sources of vapor ignition away during tank vehicle operations.
F. ADDITIONAL COMMENTS AND INFORMATION. Recommended instructional time is 3 hours (.5 conference, .5 demonstration, and 2.0 practical exercise).

TC 21-305-6
7-29
LESSON TITLE: DRIVE VEHICLE LOADED WITH A SEMITRAILER MOUNTED
FABRIC TANK (SMFT) TASK NUMBER: 551-721-1364 (Drive Vehicle with Semiautomatic Transmission),
551-721-1366 (Drive Vehicle with Automatic Transmission), and 551-721-1380 (Transport General Cargo in Trailer/Semitrailer)
A. TRAINING OBJECTIVE. TASK: Drive a tractor loaded with a semitrailer mounted fabric tank (SMFT). CONDITIONS Given instruction, DD Form 1970, DA Form 2404, pencil, appropriate
vehicle operator's manual, TM 5-5430-212-13&P or TM 5-5430-213-13&P, equipment records folder, rags, lubricants, coolant, designated driving route, a tractor with BII, and a semitrailer loaded with an SMFT.
STANDARD: Drive the designated route using defensive driving (accident avoidance)
methods; make right and left turns, make steering corrections, signal intentions in advance, pass oncoming vehicles, maintain vehicle interval, obey highway warning and regulatory signs, operate the light switch, monitor gauges and indicator lights; upshift/downshift the transmission through all gear ranges; manipulate the controls; and perform basic driving maneuvers to include downhill braking (also includes the engine retarder on M915 models) without damage to equipment or injury to personnel.
B. INTERMEDIATE TRAINING. None. C. ADMINISTRATIVE INSTRUCTIONS.
1. When training will be given: As scheduled. 2. Training location: Motor pool and designated driving routes as scheduled. 3. Training type: Conference and practical exercise. 4. Who will be trained: Personnel as scheduled. 5. Principal and assistant instructors required: One primary instructor for the conference
and one assistant instructor for every two students for the demonstration and practical exercise. 6. Training aids and equipment: Hearing protection, rags, lubricants, and coolant. DA
Form 2404, DD Form 1970, pencil, appropriate vehicle operator's manual, TM 5-5430-212-

TC 21-305-6
7-30
13&P or TM 5-5430-213-13&P, equipment records folder, designated route strip map, a tractor with BII, and a semitrailer loaded with a SMFT for every two students.
7. References: TM 5-5430-212-13&P or TM 5-5430-213-13&P, appropriate vehicle
operator's manual, and FM 21-305. D. SEQUENCE OF ACTIVITY.
1. Introduction: a. Interest device. b. Tie-in. c. Lesson objective (paragraph A). d. Procedures:
(1) Explanation. (2) Practical exercise. (3) Summary.
2. Explanation and Demonstration:
a. Demonstrate to the students the correct procedures to prepare the SMFT for transport. This includes installation, inspection, filling, and tie down. Complete instructions on the SMFT are including in TM 5-5430-213-14&P for the 3,000-gallon tanker and TM 5-5430-212-14&P for the 5,000-gallon tanker.
NOTE The 3,000-gallon SMFT can be mounted on either the M871 or M872 semitrailer.
The 5,000-gallon SMFT can only be mounted on the M872 semitrailer.
WARNING The 3,000-gallon SMFT can be transported over the highway or cross-country. The 5,000-gallon SMFT can only be transported over the highway.
b. Explain surge to the students. Surge is the movement of liquid from front to back and from side to side. When stopping at a traffic light, the momentum of the truck shifts toward the front, causing the surge, or wave, of liquid to travel toward the front of the vehicle.

TC 21-305-6
7-31
WARNING
The 3,000- and 5,000-gallon SMFT can only be transported completely full or completely empty. A partially filled tank, being transported, will result in surge, the reduction of vehicle control, and possible rupture of the tank wall.
c. Explain the procedures for braking and how braking affects surge-- (1) Using the engine retarder (Jacobs brake) (M915). (2) Using the service brakes (foot brake).
WARNING
The trailer hand brake control is only used for testing the semitrailer brakes. Using it when driving will cause the semitrailer to skid. Using the semitrailer hand control to park can cause all the air to leak out of the brake system.
(3) Driving on flat roadways. (4) Driving downhill. (5) Using emergency braking procedures. (6) Downshifting the transmission.
NOTE Periodically check the tie-down belts for tightness. They should be tightened at least every two hours.
d. Explain maneuvering the vehicle and how surge affects vehicle handling--
(1) On curves. (2) At intersections. (3) At turns. (4) When making steering corrections. (5) To avoid abrupt steering movements. (6) When steering the vehicle through constant curves.

TC 21-305-6
7-32
(7) When maneuvering through a U-turn. (8) When passing stationary and moving vehicles.
NOTE When transporting the SMFT empty, fold it and place it in the front of the semitrailer
near the driver's cab.
e. Give safety briefing.
3. Practical exercise: a. Assign students to vehicles and issue manuals, pencils, DA Form 2404, DD Form 1970, and equipment records folder. Instruct students on the location of rags, lubricants, and coolant. b. Students perform before-operation PMCS. c. Students practice downhill braking and driving the vehicle on the road. During-operation PMCS is also conducted at this time.
NOTE The success of this driver training program is the ability of the instructors to get in the cab of the truck with the student driver and pass on valuable experience and proper driving techniques. Now is the time to correct any bad driving habits.
d. Students perform after-operation PMCS and ensure all operator entries required on DA Form 2404 and DD Form 1970 are accurate, complete, and legible.
4. Evaluate: Check each student's performance of PMCS and driving. 5. Summary:
a. Recap main points. b. Allow for questions. c. Clarify questions. d. Give closing statement.
6. Retraining: Retrain No-Gos and slow learners. E. SAFETY RESTRICTIONS.
1. Ensure that all chock blocks are in place when the vehicles are parked.

TC 21-305-6
7-33
2. Always place the transmission in neutral, set the parking brake, and shut off the engine before leaving the vehicle.
3. Ensure that students remove all jewelry and identification tags before performing
PMCS.
4. Ensure that students pay particular attention to the cautions and warnings listed in the operator's manual.
6. Maintain a safe following distance and speed limit when driving on the designated
route (as determined by the local command). 7. Always wear hearing protection when working in or around a running vehicle. 8. Ensure that personnel wear seat belts (if equipped) when the vehicle is in motion.
F. ADDITIONAL COMMENTS AND INFORMATION. Recommended instructional time is 16 hours (.5 conference, .5 demonstration, and 15.0 practical exercise including 2.0 hours PMCS).

TC 21-305-6
Glossary-1
GLOSSARY
AAR after-action review AR Army regulation BII basic issue items CFR Code of Federal Regulations CTIS Central Tire Inflation System DA Department of the Army DD Department of Defense EOCCT end of course comprehensive test F Fahrenheit FM field manual GCWR gross combined weight rating LIN line item number LO lubrication order mph miles per hour N neutral NMC not mission capable NSN national stock number O'CONUS outside continental United States P park PA public address PFC private first class PIN production identification number PMCS preventive maintenance checks and services POL petroleum, oil, and lubricants psi pounds per square inch R reverse gear rpm revolutions per minute SMFT semitrailer mounted fabric tank SPC specialist TC training circular TM technical manual TVT television videotape X-C cross-country

TC 21-305-6
References-1
REFERENCES SOURCES USED
These are the sources quoted or paraphrased in this publication.
AR 55-355. Defense Traffic Management Regulation. 31 July 1986. Code of Federal Regulations (CFR) 49 (Part 172). DA Form 2028. Recommended Changes to Publications and Blank Forms. February 1974. DD Form 626. Motor Vehicle Inspection. April 1978. DD Form 836. Special Instructions for Motor Vehicle Drivers. May 1971. FM 10-68. Aircraft Refueling. 29 May 1987. FM 10-69. Petroleum Supply Point Equipment and Operations. 22 October 1986. FM 10-71. Petroleum Tank Vehicle Operations. 12 May 1978. FM 55-30. Army Motor Transport Units and Operations. 14 March 1980. FM 55-312. Military Convoy Operations in the Continental United States. 3 April 1991. TM 5-5430-212-13&P. Operator, Organizational, and Direct Support Maintenance Manual:
Tank, 5,000 Gallon, Fabric, Collapsible, Potable Water, Semitrailer Mounted. 15 September 1986.
TM 5-5430-213-13&P. Operator and Organizational Maintenance Manual for Tank, 3,000 Gallon, Fabric, Collapsible, Potable Water, Semitrailer Mounted. 27 October 1986.
DOCUMENTS NEEDED
These documents must be available to the intended users of this publication.
AR 600-55. Motor Vehicle Driver and Equipment Operator Selection, Training, Testing, and Licensing. 26 September 1986.
DA Form 348. Equipment Operator's Qualification Record (Except Aircraft). October 1964. DA Form 2404. Equipment Inspection and Maintenance Worksheet. April 1979. DA Form 2408-14. Uncorrected Fault Record. January 1964. *DA Pamphlet 738-750. Functional Users Manual for the Army Maintenance Management
System (TAMMS). 31 October 1989. DD Form 1970. Motor Equipment Utilization Record. April 1981. *FM 21-305. Manual for the Wheeled Vehicle Driver. 24 September 1984. *This source was also used to develop this publication.
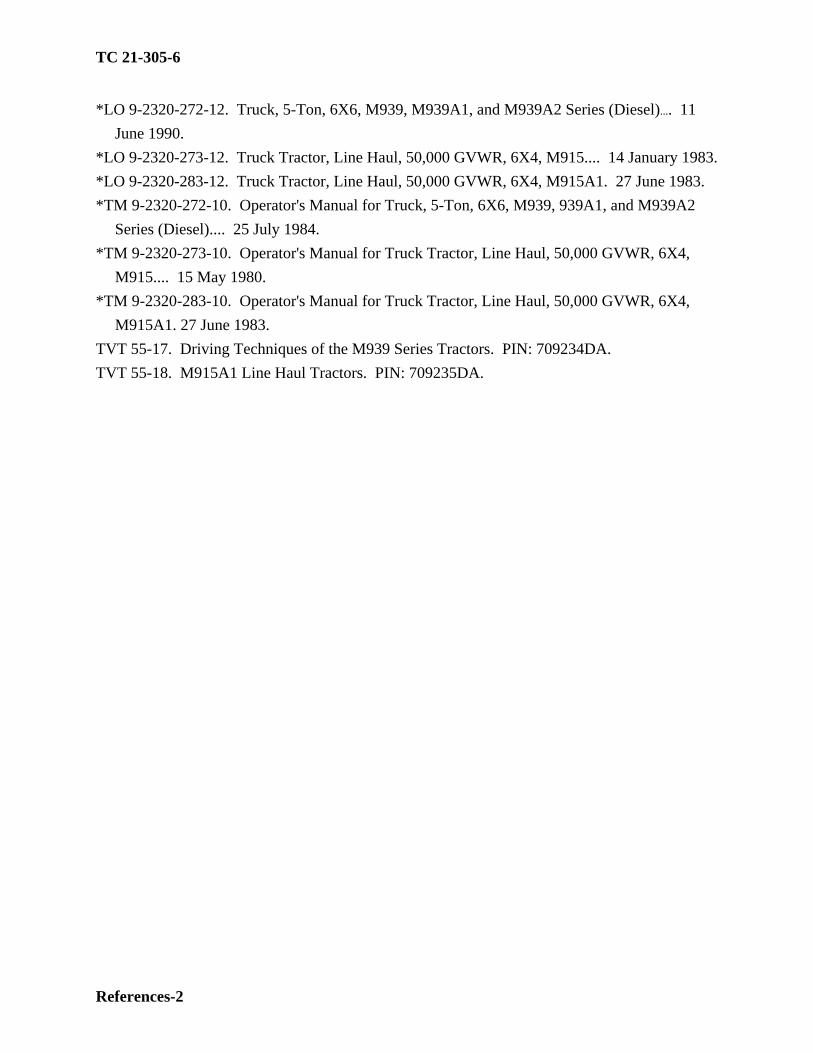
TC 21-305-6
References-2
*LO 9-2320-272-12. Truck, 5-Ton, 6X6, M939, M939A1, and M939A2 Series (Diesel)…. 11 June 1990.
*LO 9-2320-273-12. Truck Tractor, Line Haul, 50,000 GVWR, 6X4, M915.... 14 January 1983. *LO 9-2320-283-12. Truck Tractor, Line Haul, 50,000 GVWR, 6X4, M915A1. 27 June 1983. *TM 9-2320-272-10. Operator's Manual for Truck, 5-Ton, 6X6, M939, 939A1, and M939A2
Series (Diesel).... 25 July 1984. *TM 9-2320-273-10. Operator's Manual for Truck Tractor, Line Haul, 50,000 GVWR, 6X4,
M915.... 15 May 1980. *TM 9-2320-283-10. Operator's Manual for Truck Tractor, Line Haul, 50,000 GVWR, 6X4,
M915A1. 27 June 1983. TVT 55-17. Driving Techniques of the M939 Series Tractors. PIN: 709234DA. TVT 55-18. M915A1 Line Haul Tractors. PIN: 709235DA.


PIN: 069143-000