Embed Size (px)
Citation preview

Navigation Touch Screen Care
16
L
Navigation Introduction
TOUCH SCREEN CARE
Care pointsThe touch screen fitted to your vehicle, allows control of the Infotainment systems from a single point. To ensure that it continues to operate correctly, some basic care points are listed below.
• Clean only with a lightly moistened soft cloth.
• Do not use chemical agents, or domestic cleaners, to clean any part of the touch screen or its surround.
• Only use your finger to operate the touch screen. Ensure that only one finger at a time is in contact with the screen, to prevent incorrect entries.
• A short, light touch is sufficient to operate functions. Do not use excessive pressure.
• Do not allow any sharp, hard, or abrasive objects to come into contact with the screen.
• Where possible avoid exposing the touch screen to direct sunlight for long periods.
Note: None of the functions of the touch screen are operated by dragging icons from one position to another.
ICE2073 ENG

17
System Settings
R
System Settings
SYSTEM SETTINGSThe first time the system is switched on, the home menu will be displayed. Switching the system on subsequently, will display the screen or menu that was in use when the system was switched off.
Personalising the system settingsYour vehicle is delivered with the system settings (language etc.), tailored to the market for which the vehicle is intended.
These settings can be altered to suit your preferences.
To access the system settings screen, press the Driver Information button on the screen surround.
On the Home Menu screen, touch the Settings icon.
Changing the language setting
To change the language used by the system, touch the Language icon on the System Settings menu.
The language choices are displayed as a list. Scroll up or down through the list using the on-screen arrows. The current language will be indicated by an orange icon.
ICE1974 ENG
SettingsNavigation
4x4 Info
Home Menu
ICE1975 ENG
SettingsSystem
LanguageScreen
OffAudible
Feedback
SystemSettings
VoiceSettings
ScreenSettings
ICE1976 ENG
LanguageSystem
EnglishUK
EnglishUS M
EnglishUS F
Italiano
Français
ICE1977 ENG

System Settings
18
L
Touch the icon next to the language you wish to use. A pop-up menu will appear, indicating the current language, the new language and the option to cancel or accept the change.
Once your language choice has been made and you have touched the OK icon, the main settings screen will be displayed.
Note: If the display has been set to a language that you are unable to read, it is possible to set the system to a language of your choice by making a selection using the icon positions as shown. The country of origin for the language is indicated by the country’s flag.
Audible feedback on/off
To change your audible feedback preferences (information messages etc.), touch the Audible Feedback icon on the System Settings menu.
From the Audible Feedback menu touch the All Feedback on, Touch Feedback only or All Feedback off icon as required, followed by the OK icon to confirm your choice.
LanguageSystem
Español
Deutsch
Nederlands
Dansk
Svenska
Español
Change Text Language ?
OK Cancel
EnglishUK
ICE1978 ENG
Audible Feedback
OK
All Feedback on
Touch feedback only
All Feedback off
SettingsSystem
LanguageScreen
OffAudible
Feedback
SystemSettings
VoiceSettings
ScreenSettings
ICE1979 ENG

19
System Settings
R
Screen settings
Occasionally, it may be preferable to turn the touch screen off - when driving at night, for example.
To turn off the touch screen display, touch the Screen Off icon.
To turn the touch screen display on, touch the screen at any point.
Display settings
From the System Settings menu, touch the Screen Settings icon.
Note: If the map screen is not currently available then the preview screen will display Map not available.
Brightness is adjusted by touching the + or - icons, to increase or decrease the brightness. Touching the Reset icon will return the brightness control to the center position.
Two colour sets can be selected by touching either the Set 1 or Set 2 icons. Adjustments can be made to the brightness level for each colour set. This allows a quick change of settings with a single touch, which may be useful for day and night settings, for example.
SettingsSystem
LanguageScreen
OffAudible
Feedback
SystemSettings
VoiceSettings
ScreenSettings
ICE1982 ENG
SettingsSystem
LanguageScreen
OffAudible
Feedback
SystemSettings
VoiceSettings
ScreenSettings
Display Settings
Reset
Set 2
Colour Set
Set 1
ASTON
Brightness
ICE2386 ENG

System Settings
20
L
Voice settings
From the System Settings menu, touch the Voice Settings icon.
Voice language
From the Voice Settings screen, touch the Voice Language icon.
It should be noted that the Voice Language icon is only available with the Extended voice option and not with Basic voice.
Touch the up and down arrows to scroll through the list of available languages.
SettingsVoice
SystemSettings
VoiceSettings
Voice AddName
VoiceLanguage
SettingsSystem
LanguageScreen
OffAudible
Feedback
SystemSettings
VoiceSettings
ScreenSettings
ICE1983 ENG
SettingsVoice
SystemSettings
VoiceSettings
Voice AddName
VoiceLanguage
LanguageVoice
EnglishUK
EnglishUS M
EnglishUS F
Italiano
Français
ICE1984 ENG

21
System Settings
R
Select the required language by touching the relevant icon.
Touch the icon next to the language you wish to use. A pop-up menu will appear, indicating the current language, the new language and the option to cancel or accept the change.
Once your language choice has been made and you have touched the OK icon, the main settings screen will be displayed.
Español
Change Voice Language ?
OK Cancel
EnglishUK
LanguageVoice
Español
Deutsch
Nederlands
Italiano
Svenska
ICE2359 ENG

Satellite Navigation
22
L
Satellite Navigation
HOW THE SYSTEM WORKS
The system uses signals from the Global Positioning System (GPS) satellites, which allow the approximate position of the vehicle to be calculated. This is combined with information from vehicle sensors and data from the navigation Digital Versatile Disc (DVD), to establish the true vehicle position.
The navigation computer then integrates this data with the information stored on the navigation DVD, enabling you to plan and follow a route map to your desired destination. This is particularly useful if you are travelling to or through unfamiliar territory.
Digitised areaThe navigation system can only provide information and guidance for the area covered by the navigation DVD - ensure that you are using the latest version of the correct DVD for your country.
Note: Your Land Rover Retailer will have details of how to order DVD updates.
The navigation DVD provided, contains a digitised street map. Freeways, main and regional roads, as well as district roads are detailed in this street map. Larger cities and boroughs are completely covered. The regional and unclassified roads or access roads and the city center for smaller cities and boroughs are included.
ICE 1526
23
Satellite Navigation
R
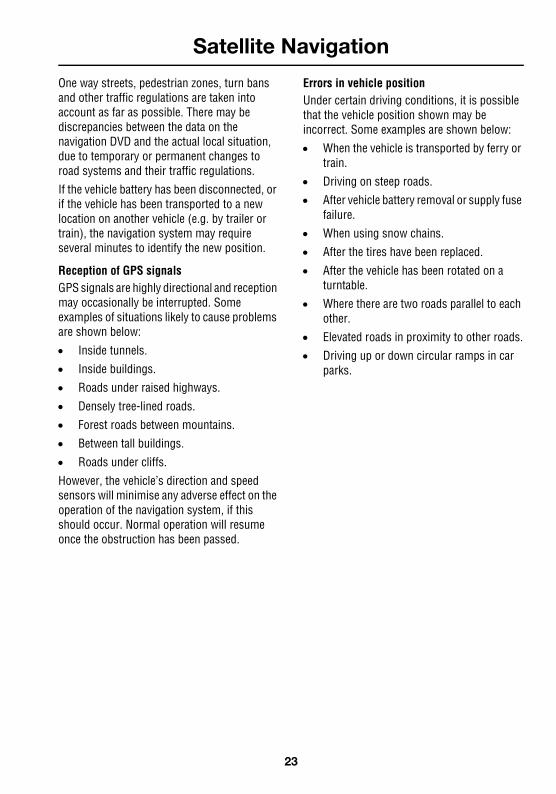
One way streets, pedestrian zones, turn bans and other traffic regulations are taken into account as far as possible. There may be discrepancies between the data on the navigation DVD and the actual local situation, due to temporary or permanent changes to road systems and their traffic regulations.
If the vehicle battery has been disconnected, or if the vehicle has been transported to a new location on another vehicle (e.g. by trailer or train), the navigation system may require several minutes to identify the new position.
Reception of GPS signalsGPS signals are highly directional and reception may occasionally be interrupted. Some examples of situations likely to cause problems are shown below:
• Inside tunnels.
• Inside buildings.
• Roads under raised highways.
• Densely tree-lined roads.
• Forest roads between mountains.
• Between tall buildings.
• Roads under cliffs.
However, the vehicle’s direction and speed sensors will minimise any adverse effect on the operation of the navigation system, if this should occur. Normal operation will resume once the obstruction has been passed.
Errors in vehicle positionUnder certain driving conditions, it is possible that the vehicle position shown may be incorrect. Some examples are shown below:
• When the vehicle is transported by ferry or train.
• Driving on steep roads.
• After vehicle battery removal or supply fuse failure.
• When using snow chains.
• After the tires have been replaced.
• After the vehicle has been rotated on a turntable.
• Where there are two roads parallel to each other.
• Elevated roads in proximity to other roads.
• Driving up or down circular ramps in car parks.

Satellite Navigation
24
L
SAFETY WARNINGSCaution: Do not use the system until you have familiarised yourself with its operation.
Observation of traffic signs and local traffic regulations always takes priority.
Traffic guidance is restricted to passenger vehicles. Special driving recommendations and regulations for other vehicles (e.g. commercial vehicles) are not taken into account. The destination must only be entered when the vehicle is stationary.
WARNING• The navigation Database reflects reality
as existing before you received the Database and it comprises data and information from government and other sources, which may contain errors and omissions. Accordingly, the Database may contain inaccurate or incomplete information due to the passage of time, changing circumstances, and due to the nature of the sources used. The Database does not include or reflect information on – amongst other things – neighbourhood safety; law enforcement; emergency assistance; construction work; road or lane closures; vehicle or speed restrictions; road slope or grade; bridge height, weight or other limits; road or traffic conditions; special events; traffic congestion; or travel time.
• Only operate, adjust or view the system when it is safe to do so.
Safety informationThe caution screen is displayed each time the starter switch is turned on, and the navigation system is selected.
The caution screen gives the following information:
• Most functions are inhibited while the vehicle is in motion.
• Please read the handbook for operating instructions.
• Always obey traffic regulations.
Danger of accident:
• Through operation of the navigation unit when driving, e.g. entering destination;
- the destination must only be entered when the vehicle is stationary.
- use of the navigation unit is only permitted if traffic conditions are suitable and you are absolutely sure that no risk, obstruction or inconvenience will be incurred to you, your passengers or other road users.
• Through non-observance of road traffic regulations;
- the requirements of road traffic regulations retain their validity. It is possible that inaccurate or incorrect instructions are given due to altered traffic routes, e.g. due to road works or deviating data. The actual road signs and traffic regulations must therefore always be observed.
• Through misuse of the unit;
- the navigation system serves solely as an aid to navigation. In particular, the navigation system cannot be used as an aid to orientation when visibility is poor. The volume of the car radio/navigation system must be adjusted so that external noise is still audible.
- switch off the unit immediately if a fault occurs (e.g. emission of smoke or odours).

25
Satellite Navigation
R
GENERAL NOTES• Radio or DVD operation continues during
navigation operation.
• When entering the address, only those letters, digits and symbols which are relevant for the address are displayed. The entries are automatically completed. Spaces (e.g. in Long Lawton) must be entered using the underline symbol. Letters, numbers and symbols can be selected from the screen alpha or numeric keypad.
• The route is recalculated by the system, if deviation from the route is made.
GENERAL INFORMATIONThe navigation system assists the driver by providing a route to a selected destination. Guidance is given by means of audible instructions (voice guidance), complemented by map and turn information which is displayed on the touch-screen. Both On Road and Off Road information is available. Digital map information is held on the navigation DVD, which is loaded into the navigation control unit.
The system has an extremely comprehensive range of features, yet is easy to use. Some time spent reading this handbook will ensure that the best results are obtained.
The touch-screen is used to control the system by means of menus, text screens and map displays.
The area covered by the navigation system depends on which version of the navigation DVD is loaded.
The driver is directed to the destination by voice guidance and/or the on-screen instructions.

Navigation DVD
26
L
Navigation DVD
LOADING THE NAVIGATION DVD
Note: It is necessary to raise the left-hand seat to its highest setting and then power the seat forward to its foremost position, before accessing the navigation DVD unit.
1. Turn the starter switch to position I, then move the lock/unlock button on the front of the DVD unit to the unlock position.
2. If a DVD is already loaded, push the eject button.
3. Load the Navigation DVD with the printed side upwards.
Caution: Do not allow moisture or foreign objects to enter the slot.
4. Move the lock/unlock button to the lock position.
ROM
NAV0295 LHD

27
Screen Displays
R
Screen Displays
SCREEN DISPLAYS
Initial map displayA key to the main features is given below:
1. Navigation button - Press this navigation button on the display surround to start, or return to, the navigation system.
2. Vehicle current position - This shows the road number, street name etc., on which the vehicle is positioned.
3. Repeat nav guidance - Touch this to hear the last navigation voice guidance instruction.
4. Current position cursor - This icon shows the vehicle current position on the road map.
5. Map - A map of the local area.
6. Map inset - A more detailed local area view showing the current vehicle position (4). Use display mode change (12) to select the inset view required.
7. GPS icon - Indicates that insufficient GPS satellite signals are being received for accurate map positioning. This icon is only displayed when a GPS signal is not being received.
8. Compass - Control and indication of the map orientation, with North up or with the vehicle heading up. Touch the icon to toggle between the two views.
1413
h min
mi
GPS
1/4mi
ARLINGTON BLVD
NAV0187 NAS
GPS
4
3
5 67
8
1
9
10
12
11
2

Screen Displays
28
L
9. Zoom - Control and indication of the current map zoom level. The available map scales range from the highest level of zoom of 50 metres (1/32 mile), to the lowest of 256 kilometres (128 miles).
Touching the up or down arrow decreases or increases the zoom level.
10. Distance - While driving under guidance, the estimated distance to the end of the route is displayed either in Imperial or Metric units, depending on your settings. Above this, is the estimated time of travel or the estimated time of arrival.
11. Menu icon - Touch the icon to select the Navigation menu.
12. Display mode change - Touch the icon to access the display mode options. Touch the desired option icon to select.
The more detailed map inset (see item 6 on previous page) will not be shown in single map display.
Map scrollingWhilst the vehicle is stationary, if you touch on the map display for the first few seconds, the cursor will smoothly scroll across the screen towards the point where the screen is being touched. After the first few seconds, the cursor will jump to the position where the screen was being touched.
When the vehicle is being driven and you touch the map display, the cursor will jump immediately to the touched position.
Changing the display languageThe screen text and voice guidance are available in a number of languages. To change the language:
• From the Home Menu see SELECTING NAVIGATION, 34, touch the Settings icon.
• From the User Settings menu, touch the Language icon.
• To select a language touch the flag of the country required and then touch the OK icon to confirm.
This procedure changes the on-screen language for all the touch-screen systems.
29
Glossary
R
GlossaryROUTE GUIDANCEThe touch-screen icons, types of guidance screen and other guidance features are described in the following pages.
Before you start Before the vehicle reaches the start of a highlighted route, and during route recalculation, the straight line distance and direction to the destination are shown.
Breaks in a journeyWhile driving under guidance, the journey can be broken without affecting the stored route. When the journey is continued, the route guidance will resume automatically.
Whole route displayThe map screen showing the entire route can be displayed. This is selected from the Route Options menu. From this screen the display of the remainder of the route and the route turn list can be selected.
Avoiding points and areasAt any time while a route is set, you can select a point to be avoided on the current route. This can be enlarged into an avoid area, if required. When the route is recalculated, the points or areas selected will be avoided (where possible).
Avoid areas can also be set up to be avoided permanently in all route calculations.
TOUCH CONTROLSThe icons displayed on the guidance map screen are as follows:
Nav Menu iconDisplays the Navigation menu.
Audible repeat iconRepeats the last audible instruction. If the manoeuvre point has been passed, the audible instruction for the next manoeuvre point will be heard.
Guidance screen iconDisplays the guidance screen overlay in place of the next turn arrow icon.
Turn arrow iconDisplays the next turn arrow icon in place of the guidance screen overlay.
Map orientation iconsThese icons select the desired map orientation (north or vehicle heading to the top of the screen). The current selection is shown on the map.
Zoom controlSelects the desired map zoom level by touching one of the arrow icons. The currently selected scale is shown.
Glossary
30
L
ADDITIONAL TOUCH ICONSThese icons are displayed after touching the map display.
Chg Route iconSelects the Route Options menu, to make changes to the route preference settings.
Set Dest iconStores a selected map location as a destination (displayed in place of the Chg Route icon, after touching the screen twice within 5 seconds.)
Store iconStores a selected map location as a memory point.
POI iconSelects the Quick POI function to display POI icons on the map.
Home iconSets a route to the home position (only displayed when a home position is set).
Note: If the Set Dest or Home icons are touched, the current route will be cancelled and a new route calculated.
Auto RerouteWhile under guidance, if the vehicle deviates from the route, a new route will be calculated automatically. While the route is being recalculated, the time and distance to destination information is replaced by the straight-line distance and direction to the destination.
Note: If the vehicle is within 400 metres (1/4 mile) of the destination or next way point, the route recalculation will not occur.
WAY POINTSWhen the vehicle arrives at a way point, the navigation system will say “You have arrived at your Way Point” and Guidance will now begin for the next stage of your route is displayed on-screen.
When the journey is resumed, route guidance continues automatically, either to the next way point or to the final destination.
After way points have been visited (or the route cancelled), they will be deleted from the way points list.
For information on programming way points, see WAY POINTS, 42.
Note: As way points are entered, they are automatically added to the list of previous destinations.
UNMARKED ROADSWhilst driving under On Road Navigation guidance, if you enter an unfinished or unmapped road there will be a voice guidance warning stating that you are entering this area and turn by turn guidance will not be given. When you first calculate the route, a small triangle appears on-screen to show that there is an unfinished or unmapped road on route.

31
Glossary
R
ROUTE GUIDANCE SCREEN TYPES
Touch this icon during route guidance, to change the screen configuration to suit personal
preference. A row of option icons appears in the bottom half of the screen. Touch the relevant icon to select the desired screen type, as follows:
Single map mode
This mode shows the main navigation map, with an icon in the top right of the screen indicating the
next navigation instruction (left turn, right turn or third exit at the next roundabout, for example) and the distance to the junction.
Dual map mode
This mode shows the main navigation map, with a second map on the right half of the screen. The
two maps have independent zoom facilities and the secondary map can be viewed in 2D or 3D modes. See 2D/3D VIEW, 63.
The secondary map can be used to show a magnified view of the current vehicle position.
The navigation instruction icon is still shown in the top right corner.
Turn list mode
In addition to the main navigation map, this mode also displays the next three turns or manoeuvres on a panel on the right half of the screen.
NI
1 mi
A 4 3 5
NAV0021ENG
8 mi
WASHINGTONWASHINGTON
PHILADELPHIAPHILADELPHIA
miles
4 25235
h min
mi
CAPITAL BELTWAY S/I-495 S
0.7
NAV0291 NAS
270
WASHINGTONWASHINGTON
8 mi
US-50/ARLINGTON BLVD
86.0
h min
mi
NAV0368NAS
75.3
h min
mi
0.2mi
1.8mi
0.6mi
VA - 236
LITTLE RIVER TNPK
I - 495 S
270
8 mi
Ramp
WASHINGTONWASHINGTON
NAV0205 NAS

Glossary
32
L
Arrow mode
An easy to read guidance arrow is displayed on the right half of the screen.
Guidance screen
This facility is only available once route guidance has started and appears automatically when
approaching an intersection. A magnified view of the next intersection or manoeuvre is displayed on the right half of the screen.
Note: The Guidance screen is displayed automatically if Guidance screen is set to Yes on the User Settings menu. See USER SETTINGS, 67.
Freeway information
This facility is only available when travelling on a freeway and appears automatically to display the
remaining freeway exits (up to the required exit for your route) and the exit numbers. In addition, the points of interest (POIs) available at each exit of the freeway can also be displayed.
Touch the Map icon to view POIs in the area surrounding the freeway exit currently highlighted on the list.
Note: The Freeway Information mode is displayed automatically if Freeway Information is set to Yes on the User Settings menu. See USER SETTINGS, 67.
53.6
h min
mi
270
8 mi
CAPITAL BELTWAY S/I-495 S
WASHINGTONWASHINGTON
0.7
VA-236/LITTLE RIVER T
miles
EXIT 52B-52A
NAV0204 NAS
I-495 S
1/21/2
milesmiles
00
0.4 miles
270
WASHINGTONWASHINGTON
8 mi
US-50/ARLINGTON BLVD
86.0
h min
mi
NAV0203 NAS
53.6
h min
mi
270
8 mi
CAPITAL BELTWAY S/I-495 S
WASHINGTONWASHINGTON
0.9miles
1.0 mi 0h 02m52B-52A
Map
NAV0290 NAS

33
Glossary
R
MAP CONTROLS
Screen configurationTouch this icon to change the screen configuration. See ROUTE GUIDANCE SCREEN TYPES, 31.
CompassThe upper icon indicates that the map is displayed with North pointing upwards. Touch the icon to toggle to the alternative display, where the map is displayed with the vehicle direction pointing upwards.
Map scaleThis icon is your zoom icon, enabling you to alter the map scale. The current level of zoom is shown between the two arrows.
Note: Some functions will not be available if the zoom level is too large. A message will be shown to tell you if this is the case.
Journey time and distanceThis icon shows information concerning journey distance and the estimated time remaining before arrival at way point 1, which is 13 miles away and at your current speed you will arrive in 14 minutes
(if kilometres is your set preference then the display will show kilometres to your way point).
Touch the icon to view the display options for the icon.
The options available are:
• Distance and time to first way point.
• Distance and time to second (or subsequent) way point.
• Distance and time to destination.
Select the desired option or the arrow icon, to return to the guidance screen.
1/16 mi
1413
h min
mi
1
mi
5 28343h min
mi
3 05188h min
mi
2 31159h min
2211
mi
5 28343h min
NAV0148 ENG