Embed Size (px)
Citation preview

Total Hip Joint Replacement SurgeryA Guide for Patients and Their Caregivers
You have decided to have total hip replacement surgery. This book will help guide you through the process. In this book, you will learn
what you need to do before, during, and after your surgery. You will learn all about hip replacement itself—including the benefits and
the risks. By following the advice in this book, you will have the best chance of a good and safe recovery.
In this book, we will teach you about what you need to do to get ready for surgery. One of the most important things you will need to do is find family or friends who can help you once you leave the hospital. Having a support
person will be a key part of your successful recovery.
You will learn what to expect during your hospital stay, including the types of machines you will see in your room and the medicines we
will give you. Most hip replacement patients are able to leave the hospital 1 or 2 days after surgery.
This book will also explain what you can expect as you recover and what you can do to help yourself get better. Even though surgery is a big step
and you will have some pain as you recover, in the long-term, once you are better, you should have less pain than you do now.
Remember: we are here to help you and are committed to your recovery. If you have any questions at any time, please let us know.
About Our Joint Replacement Center

Total Hip Replacement Surgery . . . . . . . . . . . . . . . . . . . . . . . . . . . . . . 1
Getting Ready for Your Surgery: Things to Do . . . . . . . . . . . . . . . . . . . . . 7
At the Hospital . . . . . . . . . . . . . . . . . . . . . . . . . . . . . . . . . . . . . . . . 13
After the Hospital: Your Home Recovery . . . . . . . . . . . . . . . . . . . . . . . 19
Physical Therapy: Before and After Your Surgery . . . . . . . . . . . . . . . . . . 33
Living with Your Hip Replacement in the Long-term. . . . . . . . . . . . . . . . 39
Contents
For information only. Not to replace the advice of your health care provider. Copyright © 2015 Vanderbilt University Medical Center. All rights reserved. HC 1431 (11/2015)
Images on pages 25–27, 34–36 are courtesy of The Staywell Company, 780 Township Line Road, Yardley, Pennsylvania, 19067; (267) 685-2500.
- 1 -
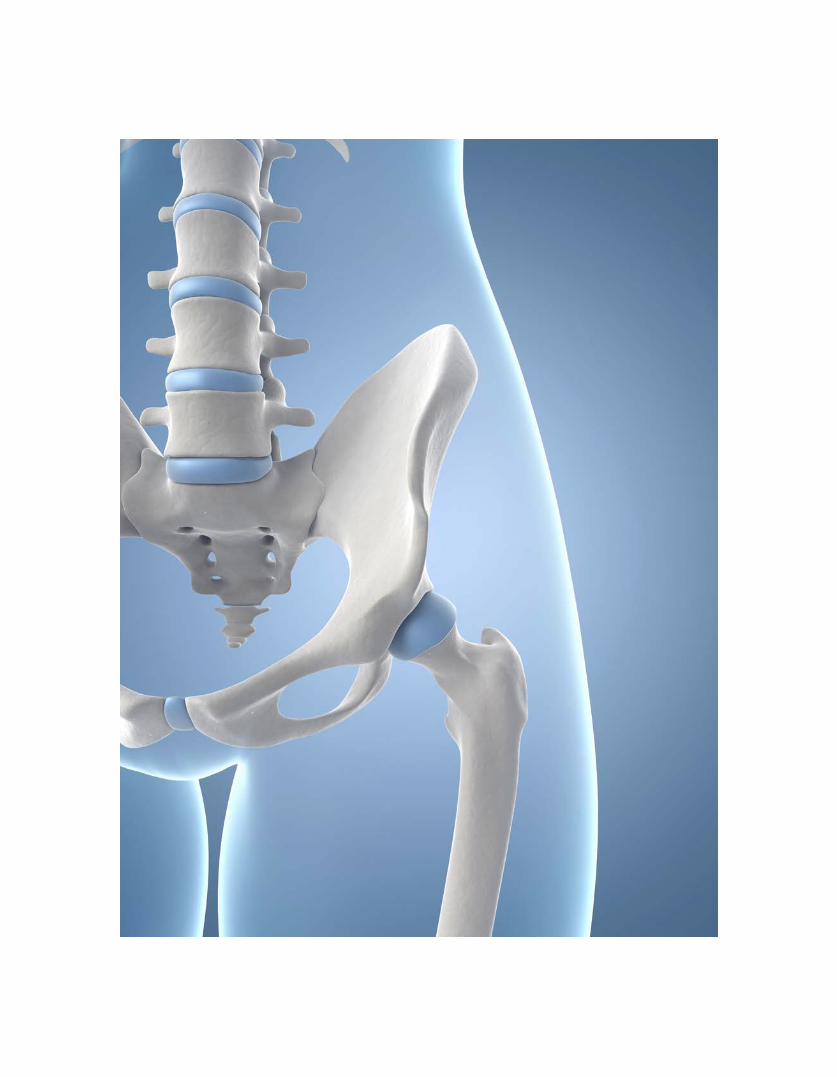
The hip
The hip is a ball-and-socket joint made up of the hip bone (the socket) and the top of the thigh bone (the ball). Your hip joint supports the weight of your body; it is one of the largest joints to do this job.
• A healthy hip joint keeps your hip stable even when you twist, jump, and move in different ways.
• A healthy hip joint allows you to walk, squat, turn, run, and jump without pain.
• A healthy hip joint has a layer of spongy tissue in it called “cartilage.” The cartilage:
– cushions the joint
– absorbs stress
– keeps the bones of the leg and hip from making direct contact with each other
– allows the ball to move easily in its socket.
Causes of hip pain
Arthritis, which means “swelling of the joint,” is the most common cause of hip pain. There are two kinds of arthritis—osteoarthritis and rheumatoid arthritis.
• Osteoarthritis is caused by “wear and tear.”
• Rheumatoid arthritis happens when a person’s immune system attacks her or his own joints.
Both osteoarthritis and rheumatoid arthritis cause pain, swelling, and deformity in the joints. Arthritis also damages the cartilage in the joint. When cartilage gets damaged, the bones of the hip begin making direct contact with each other.
Other causes of hip joint damage include:
• injury
• the bones in the hip joint not getting enough blood flow (a condition called avascular necrosis)
• bones that don’t line up or meet the way they should (called abnormal alignment)
• birth deformity.
Total Hip Replacement Surgery
- 2 -
What is total hip replacement surgery?
Total hip replacement surgery is when damaged bone from the top of the thigh bone and the socket of the hip bone is replaced with metal, ceramic, and plastic parts. These artificial parts become the new hip joint.
In general, this is what happens in surgery:
• For a first-time surgery, the doctor will make an incision over your hip that starts at the back of your body.
• Damaged hip joint bone is removed.
• The artificial parts are attached to the remaining, healthy bone. The new parts are attached with screws, bone cement, or “press fit.” (Press fit is when the implant has rough surfaces into which healthy bone grows.)
• The muscle or bone that is moved out of the way is fixed with stitches, wire, or cables. Complex surgeries may involve replacing missing bone with bone from your own body, bone from a donor, or extra wires or screws.
• The surgeon will use staples or stitches to close your incision.
What are the bene�ts of total hip replacement surgery?
Benefits from total hip replacement surgery include:
• less pain
• more leg strength
• easier movement
• better quality of life.
- 3 -
What are the risks of total hip replacement surgery?
The success rate for hip replacement is very high. But like all surgery, there are risks.
Risk of blood clots
• The main risk of clots is that they may loosen and travel from your surgery leg to your lungs. In the lungs, they may go unnoticed or cause very bad pain. If untreated, they can even cause death.
– It is important to remember that dangerous clots are not common as long as blood thinners or leg compression devices are used.
– The risk of these clots causing death is less than 1 percent.
• Clots may or may not hurt. Clots can happen anywhere in your leg from your pelvis to your feet. You should let your doctor know when you have pain in any of these areas.
• If you have chest pain or feel like you can’t breathe, let your doctor know immediately.
• Clots are treated with blood-thinning medicines and, occasionally, by placing a filter in your veins.
Risk of hip dislocation
Hip dislocation is when the ball of the new hip joint moves out of its socket. This is usually very painful. As long as you move safely after surgery, the risk of dislocation is low. Even though you will always have some risk of hip dislocation after surgery, over time the risk will be less.
• If your hip moves out of its socket, a surgeon will move your leg to get the ball back in the socket. You will be under anesthesia or sedation so you don’t feel pain.
• If your hip keeps moving out of its socket, you may need more surgery.
Risk of infection
You will get antibiotics around the time of the surgery to lower the risk of infection. But infection can happen soon after the surgery or even years after the surgery.
If your hip becomes infected:
• you will probably have to have another surgery to remove infected tissue
• you may need to have your artificial joint removed and replaced. (Replacing the artificial joint is usually possible, but not always. In the end, you may be worse off than if you never had hip surgery, though this is rare.)
Risk of nerve damage
In rare cases, nerves that travel to your thigh, legs, or feet can be damaged during surgery. If these nerves do not heal, your ability to walk could be limited. You may need a brace for your ankle or for your knee to help you walk.
- 4 -
Risk of bleeding
Rarely, the blood vessels around the hip are damaged during surgery. This can cause very heavy bleeding during or after surgery. If this happens, you may need more surgery or other procedures to fix the problem.
Sometimes, blood pools in the wound even if no major blood vessel is damaged. More surgery (or observation) is required to fix the problem.
Risk of one leg being longer than the other
During hip replacement surgery, the surgeon may need to lengthen your surgery leg to help prevent hip dislocation. If this happens and the unequal lengths of your legs bothers you, there is always the option of getting a “lift” built or inserted into the shoe of the shorter leg.
In most cases, your legs will still be about the same length with no more than an inch difference between them.
Risk of limp
Sometimes hip replacement surgery creates a new limp. For those who already had a limp, they may continue to have one. For some, the limp they had before surgery eventually goes away as their muscles become stronger.
Remember: Most people say they walk better after surgery, even if they have a limp.
Risk of fracture
The bone in the pelvis or thigh bone can sometimes crack (fracture) during surgery. This can happen during surgery or even years after. Fractures are usually treated with metal cables or a plate. They tend to heal very well.
Risk of more surgery
Problems that may lead to more surgery are:
• bone forming where it should not
• bone around the artificial joint breaking down during or after surgery
• soft tissues in the hip getting irritated by stitches or the hardware of the artificial hip joint itself.
It is rare for a total hip replacement to fail before 10 years. But if it does happen, you would need more surgery.
Risk of death
Though very rare, some patients have died after hip replacement surgery. This can be caused by medical problems you had before surgery or medical problems that got worse after surgery. It can also be caused by blood clots traveling to the lungs, or from stress caused by too much bleeding.
Risk of other problems
There are other problems surgery may cause. Everyone is unique and may respond differently to hip replacement surgery. Talk with us if you have questions.
- 5 -
How long will a total hip replacement last?
Hip replacements typically fail at a rate of 1 percent each year after surgery. This means that 10 years after surgery, about 90 patients out of 100 have continued success with their replaced hip joint; 20 years after surgery, about 80 patients out of 100 have continued success. Joint replacements wear out faster in younger and more active people, because the joints get more wear and tear.
Will I know if my hip replacement is failing?
Unfortunately, you may have a failing hip and not even know it. Diagnosing hip replacement failure is tricky for several reasons:
• A failing hip replacement usually does not hurt until you have had very bad damage.
• A hip replacement that is loose on an x-ray may not be painful and may work normally for a long time. This means you would not know you had a problem unless you had an x-ray.
• There is no agreed upon time as to when you should have repeat x-rays.
• Your insurance company may not pay for routine screening visits.
Even though it may be hard to know if your hip replacement is failing, you are not powerless:
• Talk to your doctor and decide how often you should schedule screenings.
• Contact your insurance company to find out what screenings they will cover and how often.
• Tell your doctor immediately if you develop new pain or swelling in your hip.
Remember: Surgery to fix your hip replacement can be more difficult if you wait until after the damage has happened.
What happens if my new hip joint wears out?
If your new hip joint wears out, you may have to have revision surgery. Revision surgery has greatly improved over the years, but, in general:
• revision surgery is usually more difficult than first-time hip replacement
• the risks of revision surgery are much higher than first-time hip replacement
• recovery from revision surgery takes longer
• the results of revision surgery are less certain.
Remember: Even if the results of revision surgery are not as good as your first-time surgery, you would still likely have less pain and better hip function.

- 6 -

- 7 -
In order to have the best possible surgery, there are many things you need to do in the month and weeks before surgery.
Get your medical clearances
Before we can schedule your surgery, you must provide medical clearances saying it is safe for you to have surgery. We need medical clearances from:
• the doctor you go to for your regular, primary care
• any medical specialists you go to, such as heart or lung doctors.
Have your medical clearances faxed to us at (615) 936-7131.
Get your dental clearances
Your dentist must give you a dental check-up and fill out a clearance form. Our office needs these dental clearances before we can schedule your surgery. All dental work must be finished before your surgery. Have your dental clearances faxed to us at (615) 936-7131.
We will also give you a form called “Your Joint Replacement, Dental Procedures, and Antibiotics,” that tells you what antibiotics to take before dental procedures. After you have had your hip surgery, some doctors and dentists recommend that you always take antibiotics before dental procedures.
Let us know if you don’t have a regular doctor or dentist
If you do not have a medical doctor or a dentist, call us at (615) 936-7846, and we will ask a qualified doctor or dentist to see you.
Fill out and return all the medical forms we give you
There are more forms the surgery scheduler will give you that you will need to fill out. These forms will ask for information about you, your personal and medical history, and your current living situation. Fill out and and return all of these forms to us right away.
Keep track of your clearances and forms
Please note that all of your clearances and forms are handled by the medical staff and not the surgeons. If you have any questions about your forms or want to call to see if we have gotten all your forms, call us at (615) 936-7846.
Getting Ready for Your Surgery: Things to Do
- 8 -
Talk to your doctor about your medicines
If you take rheumatoid arthritis or blood thinner medicines, it is normal to stop taking these before your surgery. Ask the doctor who prescribed them to include a note on your clearance form saying when you should stop taking these medicines before surgery, and when it will be safe for you to start taking it again after surgery. If your doctor feels that it is unsafe for you to stop these drugs, we need to know that too.
You should keep taking all your other medicines unless your doctor tells you something different.
Call us if you get an infection
If you get any kind of infection before your surgery, call us right away. An infection could move into your joint replacement and cause serious problems. If you still have infection the day of your surgery, your surgery will need to be cancelled in order to keep you safe and healthy.
Call us at (615) 936-7846 if you develop:
• an infection of your teeth
• an infection of your fingernails or toenails
• a bladder infection
• a pimple, cut, scratch, boil, abscess, or insect bite anywhere on your body—especially on the skin over or around the hip that will be operated on
• a rash or flaky skin
• a temperature higher than 100.5°F (38.1°C).
Exercise to stay strong
It is important for you to begin doing exercises for your hip now before your surgery. The exercises you need to do before surgery are shown on pages 34 to 36 in the exercise section of this book.
Exercising now will help you:
• build joint strength
• be able to move without tiring as easily
• improve joint motion
• have a better recovery.
In addition to the exercises in this book, your surgeon may want you to do a physical therapy program before surgery as well.
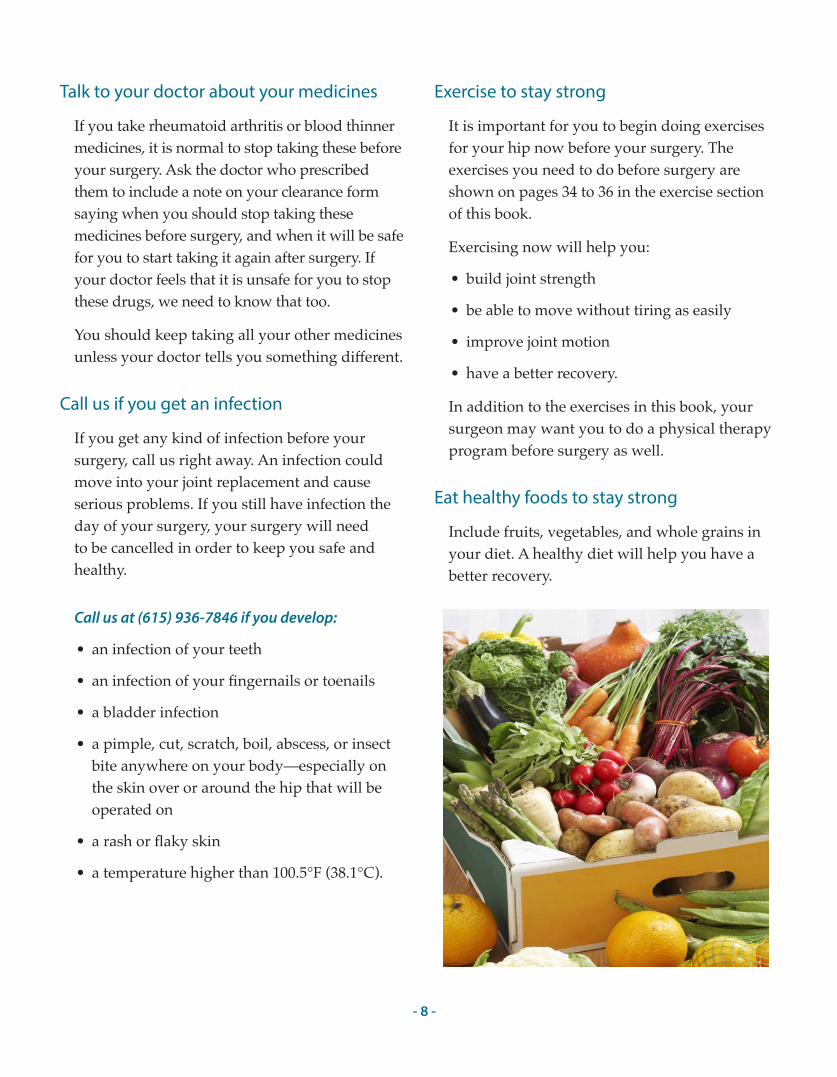
Eat healthy foods to stay strong
Include fruits, vegetables, and whole grains in your diet. A healthy diet will help you have a better recovery.
- 9 -
Lose weight if your doctor says you need to
Start taking steps to lose weight if you need to. Keeping a healthy weight will improve your recovery.
Start planning for your recovery at home
Unless your doctor decides there is a medical reason for you to go to another facility, you can expect to go to your home after surgery. Patients get better faster when they go home to recover since it is helpful to heal in familiar surroundings. Start getting your home ready now, and make your recovery as easy as it can be.
Make your home safe and easy to move around in
Set up your home now so it will be as easy as possible for you to live in as you recover.
• Make sure you have a cordless phone or cell phone that you can reach easily.
• Cook and freeze meals in advance. Or buy frozen dinners and canned fruits and vegetables. This way, you won’t have to worry about doing a lot of cooking.
• Buy heavy or awkward things now before your surgery. This might include dish soaps, detergents, toilet paper, peanut butter, pet food, and heavy jars or cans.
• Store the kitchen items you use the most at counter-top level, above your waist, and below your shoulders.
Remember: While you are healing after your surgery, you should not bend down or reach up high.
Arrange your home to prevent falls
For the first few weeks after surgery, you will likely need to use a walker or cane (or both).Move your furniture so you have a clear path and will be able to use your walker or cane wherever you need to go.
• Pick up any clutter off the floor so you don’t trip or hurt yourself.
• Remove any area rugs in your home so you won’t trip over them.
• Tape down all electrical cords so you don’t trip over them.
• Put shower grab bars in the shower, and put rubber mats in the bathtub and shower. More falls happen in the bathroom than any other room in the house.
• Consider installing handrails on stairs in or outside of your house before your surgery.
• If your bedroom is on an upper-level floor, think about setting up a bed on the first floor of your home to use as you recover.
• Keep the items you use often within easy reach.
• Get a rolling cart to help you move items without having to carry them.
Get your walker and your raised commode
You will get a prescription for a walker and raised commode before surgery. Buy them before surgery. You will need the walker when you leave the hospital. If you live far away, you will also need to have the elevated commode for your trip home.
- 10 -
Arrange for a caregiver
It is important that you have one or more caregivers to help you as you recover. Now is the time to ask family, friends, or others you know if they can help you once you leave the hospital. Remember that you will not be able to drive for 6 weeks after surgery!
After surgery, you will need help with:
• getting to and from the hospital, physical therapy, and doctor appointments
• going to the bathroom and showering
• grocery shopping and meals
• keeping the house clean and safe for you to walk
• caring for small children and pets.
For the first 2 weeks after surgery, it is best if someone can stay with you at night.
Go to your hip replacement class
This class will help you feel more confident about your surgery. Bring this book with you to class. A nurse practitioner will talk about:
• what to expect in the hospital and after you get home
• what is safe and not safe to do after surgery
• the goals for your recovery
• the risks of hip replacement surgery
• the exercises you should do before and after surgery. These exercises are shown in the exercise section of this book. Doing these exercises at home are key to a successful joint replacement.
- 11 -
Go to your VPEC appointment
Before your surgery, you will come to Vanderbilt for what is called a VPEC appointment. This is a very important appointment: do not to miss it. At this visit:
• you will bring a list of all the medicines you take, including herbal medicines and those you buy without a prescription
• you will give some blood for testing
• you may give some of your urine for testing
• you will talk with an anesthesia nurse practitioner. Be sure to tell this person if you drink alcohol regularly
• you will find out what medicines you should not take on the morning of your surgery.
As soon as you know you are having surgery, quit smoking
You must not smoke any time around your surgery—before or after. Smoking increases the risk of having medical complications from surgery. These problems include the risk that your hip replacement will get infected and that your wound won’t heal the way it should.
Fourteen days before surgery, do these things
• Stop drinking any beer, wine, liquor, and all other alcohol drinks.
• Stop taking vitamins, supplements, and all herbals that you buy without a prescription.
• Stop taking all estrogen hormones.
• Contact your doctor to find out when to stop taking Coumadin, Plavix, or other blood-thinner medicines, if you take them.
Seven days before surgery, do these things
Seven days before your surgery, stop taking the medicines listed below. Do not take them again until you are no longer taking the blood thinner we will prescribe for you after surgery. If you have any questions, contact your doctor, your nurse practitioner, or your surgeon.
Important: If one of your doctors thinks it is not safe for you to stop any of these medicines, you must talk to the surgeon!
Seven days before surgery, stop taking:
• aspirin
• ibuprofen
• Advil
• Motrin
• Aleve
• Naprosyn (naproxen)
• any other medicines that contain aspirin, ibuprofen, or other non-steroidal anti-inflammatory drugs (called NSAIDs) that you buy with or without a prescription.
Taking the wrong medicine too close to surgery, can keep you from having your surgery. It could also cause complications.
- 12 -
Three days before surgery, do these things
• Get everything ready to go to the hospital. Plan to bring only a few clothes, including:
– a short, lightweight robe
– nylon type or “slick” fabric shorts or pants with an elastic or drawstring waistband
– t-shirts
– shoes or slippers with a closed back and non-skid soles
– eyeglasses, if you need them, and a hairbrush.
• Make sure you have packages of antiseptic wipes to clean yourself the night before surgery. If you don’t have them, call us at (615) 936-7846.
The day before surgery, do these things
The day before surgery, one of the surgery schedulers will call you to make sure you know what time to come to the hospital. Please give the surgery scheduler a choice of phone numbers to call in case the hospital needs to speak with you.
The night before surgery, do these things
• Remove any nail polish from your fingers and toes.
• Clean your skin to prevent infection:
– Take a bath or shower.
– Wait 1 hour. (As you wait, read the instructions that came with the chlorhexidine gluconate antiseptic wipes that we have given you.)
– After 1 hour, wipe your body with the antiseptic wipes. Follow the instructions exactly. Do not let the wipes touch your eyes, ears, mouth, or genitals. Wipe around the area to be operated on last.
– Let the antiseptic dry on your body. Do not rinse it off.
• Do not apply lotions, moisturizers, powders, or makeup to your body or face.
• Do not eat or drink anything after midnight on the night before surgery. That means no gum, hard candy, or water. This is to prevent stomach upset and vomiting that can be caused by anesthesia.
The day of surgery, do these things
• Before you leave for the hospital, follow the instructions and wipe your body again with the antiseptic wipes. Fill out the form that came with the wipes. Bring this form with you to the hospital. The form will become part of your medical record.
• You may brush your teeth. But only use a small amount of water. Spit the water out.
• You may take your morning pills. But take your pills with no more than one tablespoon of water.
- 13 -
Go to the admission desk when you arrive
When you get to the hospital, go to the patient admission desk in the main lobby on the first floor of the hospital at your scheduled time.
Leave these things at home
• Do not bring your cane, crutches, or walker when you first come to the hospital (Have your cane, crutches, or walker brought to you the last day of your hospital stay when you will need a walking aide for your trip home.)
• Do not bring large amounts of money or valuable items, such as jewelry.
After you have checked in, we will take you to the Holding Room
After you have checked in, someone will take you to the Holding Room. One friend or family member can come with you.
• You will change into a hospital gown. You will give your clothes and anything else like dentures, glasses or contact lenses, hairpins, or jewelry to your support person to take care of while you are in surgery.
• A nurse will clean your skin over the joint that will be replaced. You may also be shaved there.
• Your surgeon (or the surgeon’s assistants) will write their initials on your surgical leg.
• We will put an IV into your arm. An IV is a tube that goes through your skin and puts medicine directly into your body.
• You will meet with your anesthesia team. They will talk with you about your medical history and start managing your pain by giving you some pills to take by mouth with a tiny sip of water.
• We will take you to the operating room on a stretcher.
• If you feel anxious or tense at any time, tell your nurse.
At the Hospital
- 14 -
Surgery
From the Holding Room, we will take you to surgery. Most joint replacements take between 2½ to 3½ hours. You will not feel any pain during surgery because we will give you anesthesia.
Anesthesia
Anesthesia is medicine that we will use to keep you from having pain during surgery. It will also relax you, limit your awareness of what is happening around you, and make you sleep. Anesthesia is part of your surgery. We will create a pain control plan just for you that is based on your personal needs and medical history.
Your anesthesia team
On the day of your surgery, you will meet your anesthesia team in the Holding Room. Your anesthesia team will be made up of at least two people—your anesthesia doctor (anesthesiologist) and either an anesthesia nurse or another doctor. Your team will talk to you about your medical history and the anesthesia plan they have created for you.
During surgery, most joint replacement patients will have spinal anesthesia
We use spinal anesthesia in about 95 percent of our joint replacement surgeries. It is the method we prefer. In general, unless there is a major reason not to use this method, we recommend spinal anesthesia for almost all of our patients.
How does spinal anesthesia work?
Once you are in the surgery room, your anesthesia doctor will numb the skin of your lower back. Next, he or she will use a needle to
inject a small amount of numbing medicine into your back near your spine. This medicine will cause your legs to go temporarily numb. This means you will not be able to feel them during surgery. Spinal anesthesia is like what happens when you get your mouth numbed at the dentist’s before having a tooth filled or pulled.
Your legs will be numb for a few hours so that your surgeon can perform the procedure. During surgery, we will also give you medicine to keep you sedated and make you sleep.
Is spinal anesthesia the same as an epidural?
No. Even though spinal anesthesia is similar to epidural anesthesia, spinal anesthesia is actually easier than an epidural. A much smaller needle is used for spinal anesthesia, and no tubes are left in your back.
What are the advantages of spinal anesthesia?
Overall, spinal anesthesia is safer than general anesthesia (a method that affects your entire body instead of just your legs). Advantages of spinal anesthesia include:
• using less anesthesia overall
• a lower risk of medical problems after surgery, such as heart attack, breathing problems, lung infection, and blood clots
• less blood loss during surgery
• not having to be on a breathing machine during surgery
• less nausea (feeling sick to your stomach) when you wake up
• none of the “hung over” feeling that can happen with general anesthesia.
- 15 -
What are some of the reasons that a patient can’t have spinal anesthesia?
Even though we prefer to use spinal anesthesia for our joint replacement patients if we can, there are a small group of patients who cannot get spinal anesthesia.
Some reasons spinal anesthesia may not work for you include:
1. You have had a previous back surgery.
If you have had previous lower back surgery, spinal anesthesia may not be right for you. On the morning of your surgery, your anesthesia doctor will talk with you and decide how any previous back surgery you have had affects the type of anesthesia you can get. There are many types of back procedures, including spinal fusions, that will not affect your ability to get spinal anesthesia.
2. You have recently taken certain blood thinners.
There are some blood thinners that can raise your risk of having a complication from spinal anesthesia if you take them too close to the day of your surgery. On the morning of your surgery, your surgical team and anesthesia doctor will review all the medicines you take and decide if this is an issue for you.
3. You have a medical condition that makes it risky for you to have spinal anesthesia.
There are some medical issues that make it riskier for a person to have spinal anesthesia. On the day of surgery, your anesthesia team will review your medical history again and make sure spinal anesthesia is safe for you.
Patients who are not able to have spinal anesthesia will get general anesthesia
If spinal anesthesia is not an option for you, then your anesthesiologist will talk to you about general anesthesia. This type of anesthesia is called “general” because it affects your whole body—not just one area of the body or the part being operated on.
How does general anesthesia work?
• Your anesthesiologist will give you medicine to make you fall into a deep sleep during surgery.
• During this time, a tube will be put down into your lungs to help control your breathing.
What are the side e�ects of general anesthesia?
Side effects of general anesthesia are usually more intense than local anesthesia. Side effects of general anesthesia include:
• nausea (feeling sick to your stomach)
• being sleepy (sedated) for a longer time after surgery and after you wake up
• more initial pain after you wake up.
If you do have general anesthesia, it is because your anesthesia team has decided this is the best and safest option for you.
- 16 -
We will manage your pain before, during, and after surgery
The pain from joint replacement surgery is caused by the damage done to the tissues during surgery and the swelling that results from that damage. Pain is a common part of joint replacement surgery; you should expect to have some. But know that we will help you manage your pain. Our goal is to do everything we can to help lower your pain, while managing the side effects of your pain medicine. We want you to be able to get up, move around, and function well enough that you are able to do your physical therapy exercises and recover as quickly as possible.
The approach we will use to treat your pain is what we call a “multimodal” approach. This means we will treat your pain in multiple ways:
• We will give you different types of pain medicines.
• We will give you pain medicines at different times, including before, during, and after your surgery.
Pain management before surgery
In the Holding Room, we will give you a few pills with a small sip of water to help stop some of your pain before it even starts. The types of pills and the amount of pills that we give you will depend on your personal history. Your history includes any other medical conditions you have, any medicines you regularly take, and your age. The exact medicines you get will be decided by your surgical and anesthesia teams before your surgery.
Pain management during surgery
While you sleep during surgery, the anesthesia team will give you more medicines through your IV. This medicine will help lower the overall pain you have after surgery, as well as the pain and nausea you have immediately after the procedure.
Pain management after surgery
After surgery, we will continue to give you more medicine for pain. Like before, the specific medicines we give you will depend on your medical history and the medicines you already take. In general, the medicines you get will usually include a narcotic pain medicine, a medicine to lower inflammation and swelling, and a medicine to lower nerve pain.
In most cases, we will give you prescriptions for these medicines when you leave the hospital, and you will take these medicines for several weeks.
- 17 -
After surgery, we will take you to the Recovery Room
After surgery we will take you to the Recovery Room. A team of nurses and anesthesia specialists will watch over you here.
• When you wake up:
– a nurse will help you breathe deeply and have you cough to clear your lungs
– you will do ankle pumps to lower the risk of blood clots
– you will have an IV in your arm so we can give you medicine as needed
– you may get oxygen to help you breathe.
• Most people stay in the Recovery Room for several hours after surgery. How long you are there depends on how your body reacts to the anesthesia.
• If the nurse feels you are up to it, you may be allowed to have visitors once you are awake and your pain is under control.
Pain medicine
We will do everything we can to lower your pain after surgery. But some pain is simply a part of recovery. Our goal is to make you as comfortable as possible while keeping the side effects of any pain medicine you get as low as possible.
To control your pain after surgery, we will give you:
• pills, including pain pills and anti-inflammatory drugs
• pain medicine through your IV.
Other medicines you will need
In addition to pain medicine, you will get:
• antibiotics to help prevent infection
• blood thinners to prevent blood clots
• nausea medicines, if you need them.
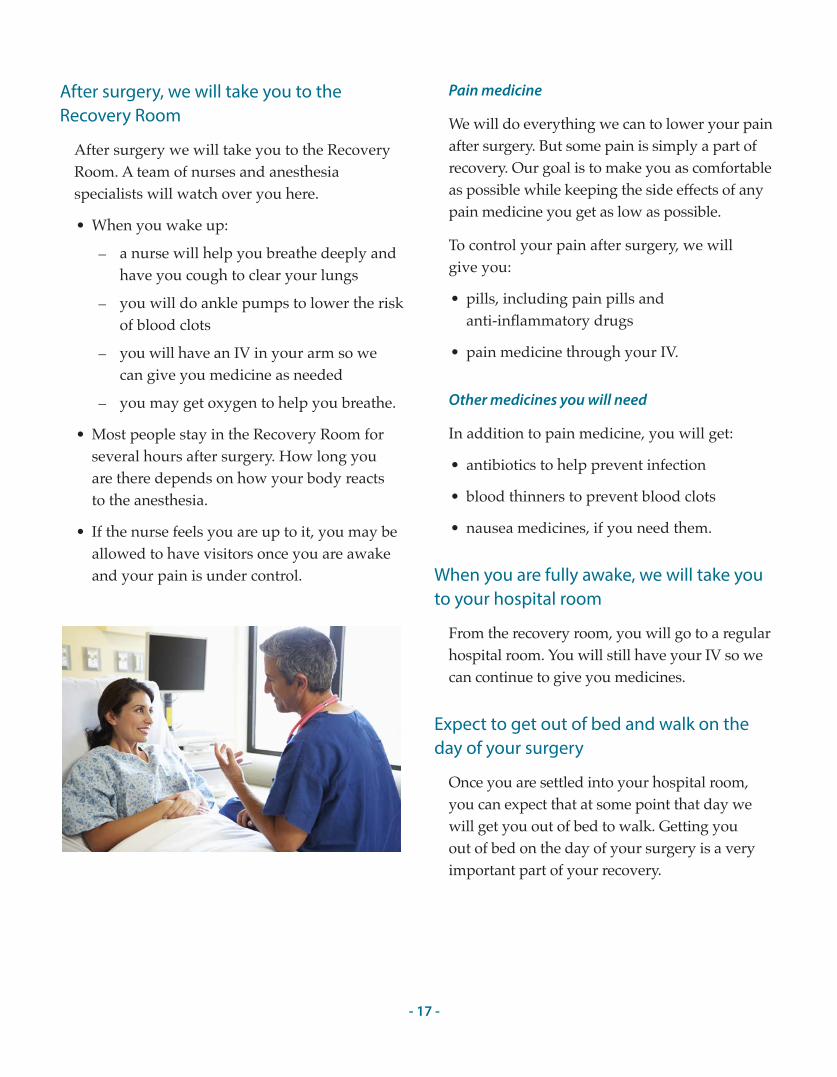
When you are fully awake, we will take you to your hospital room
From the recovery room, you will go to a regular hospital room. You will still have your IV so we can continue to give you medicines.
Expect to get out of bed and walk on the day of your surgery
Once you are settled into your hospital room, you can expect that at some point that day we will get you out of bed to walk. Getting you out of bed on the day of your surgery is a very important part of your recovery.
- 18 -
Stay safe while you are in the hospital
Preventing falls
It is very important to stay safe and avoid falls while you are in the hospital. When you need to get up or go to the bathroom, always ask for help from your nurse or another staff member.
Preventing blood clots
To help prevent blood clots:
• we will give you blood thinning medicines
• you will have a machine around your feet or calves that gently massages them and helps increase blood flow.
Every day while you are in the hospital, we will send a sample of your blood to the lab to make sure your blood is not too thin or too thick.
Keeping your lungs clear
Because you will be in bed a lot over the next few days, we will have you breathe deeply and use a breathing device called an incentive spirometer. Exercising your lungs will help prevent pneumonia.
The length of your hospital stay
How long you will be in the hospital after surgery will depend on how well you are able to walk around and how much pain you have. Most patients leave after 2 nights in the hospital (though some patients are able to leave the hospital the day after surgery). But if you have any other medical issues that slow your recovery, you may need to stay longer. Your surgical team will decide exactly how long you need to stay.
Visitors
You are allowed to have visitors while you are in the hospital. You may even have 1 person age 18 or older stay with you at night. Each room has a pull-out bed.
Getting you ready to leave
A nurse case manager or social worker will probably visit you while you are in the hospital. They are members of your healthcare team. They can help you make plans for the things you will need to do after you leave the hospital. This may include arrangements for outpatient therapy and lab work, home health services, and other rehab programs or services. You can ask to speak with the case manager or social worker at any time during your hospital stay.
Make sure you have a ride home
You must have someone pick you up at the time you are released from the hospital. You will not be allowed to drive yourself home. And you will not be allowed to leave the hospital alone.
Am I allowed to take a taxi or a bus home?
No. You must have someone pick you up.
- 19 -
Take care of your incision
Bandages and ointments
• If your incision is draining, keep the incision covered with clean, dry gauze or a bandage.
• If your incision is dry, you do not need to cover it unless you have pets that will be around you.
• Do not put any cream or ointment on your incision while it heals.
Showering
Do not take a bath for 6 weeks after surgery; take showers instead.
• If your incision is draining, wear a bandage over the incision when you shower.
• If your incision is dry, you can shower without a bandage. It is okay for the shower water to run over your incision.
• When you are done with your shower, gently pat your incision dry with a towel.
Fighting infection
• Always wash your hands before and after you touch your incision.
• Do not get into a bathtub, pool, spa, river, or lake until 6 weeks after surgery.
• Call us at (615) 936-7846 if your incision:
– gets redder or swells
– feels warm or begins to hurt
– begins to drain
– separates at the edges.
• Call us at (615) 936-7846 if you have a temperature higher than 101.5°F (38.6°C).
Removing your staples
When your incision has healed, your doctor, nurse, or physical therapist will remove the staples from your incision. This usually happens about 2 weeks after surgery.
After the Hospital: Your Home Recovery
- 20 -
Reduce swelling
• Exercise 3 times a day.
• Walk every day. Try to walk a little longer each day.
• When you lie down during the day, you may put pillows lengthwise under your leg. This will keep your leg higher than your heart, which will help reduce swelling.
• Use ice packs on your incision to lower swelling. Always wrap the ice in a towel or washcloth. Leave it on for 20 minutes at a time, several times a day.
Prevent blood clots
Surgery may cause the blood flow in your legs to slow down. This could cause a blood clot that may stay in your leg or move to your lungs. Blood clots can be serious. If you have one, you will need to go back to the hospital for treatment.
To lower your risk of a blood clot:
• walk and do your exercises, including your ankle pump exercises
• wear your T.E.D. (anti-clot) hose, if we have told you to use them
• take your blood thinning medicine exactly like you have been told.
Manage your pain
It is normal to have pain after surgery. It is simply part of the healing process. With time, you should have less pain than you had before surgery.
• Ice, exercise, and keeping your leg raised can help lower your pain.
• When you left the hospital, we probably gave you a prescription for pain medicine. While you may need prescription pain medicine at first, it is best to start lowering how much you take as soon as you can.
• Acetaminophen and NSAIDs like ibuprofen, Motrin, Aleve, and Advil are very good at helping your pain after surgery.
– Only take NSAIDs if your doctor says it is safe—especially if you are taking a blood thinner. You may need to complete your blood thinners before you can safely take NSAIDs.
– If you take acetaminophen (Tylenol), take it alone. Do not take it with any prescription pain medicine.
- 21 -
Understand your prescription pain medicine
• Take your pain medicine exactly the way your doctor tells you.
• Pain medicine can make you constipated. Drink plenty of water and eat more fiber (found in foods like fruits, vegetables, and whole grains) to help you stay regular.
• If you are going to need a refill of your pain medicine, call our office at least 2 days before your current prescription runs out. Sometimes you may have to wait 24 hours for a refill. We can’t give refills at night or on weekends.
Expect to take less pain medicine over time!
Prescription pain medicine is addictive; it is important that you do not become dependent on it. We will expect you to use less prescription pain medicine over time.
• When you first leave the hospital, we will give you a prescription for pain medicine with specific instructions.
• At your 2-week follow-up appointment, we will give you a new prescription for pain medicine with new instructions. You can expect to start using less medicine at this time.
• Six weeks after surgery, you should no longer be taking any prescription pain medicine.
Important: Six weeks after your surgery, we will stop refilling prescriptions for pain medicine. If you think you still need prescription pain medicine after 6 weeks, we will refer you to your regular doctor. There are no exceptions to this rule.
Understand your blood-thinning medicine
• If your doctor has prescribed a blood thinner to prevent blood clots, you will take this medicine for about 4 weeks.
• Blood thinners need to be taken at the same time of day, every day. Always take your blood thinner exactly the way your doctor has told you. Never skip a dose. Never take a double dose.
• If you forget to take a dose of your blood thinner one day, call your doctor for instructions. Mark the missed dose in a diary or on a calendar.
• Tell your doctor about every medicine you take (even over-the-counter drugs). Other medicines can change the way your blood thinner works. Your blood thinner can also change the way your other medicines work.
• Products that contain aspirin may lower your blood’s ability to form clots. These products may increase your risk of bleeding when you also are taking a blood thinner.
• Talk to your doctor or pharmacist before you take these medicines with your blood thinner:
– aspirin
– ibuprofen
– most NSAIDs (although Celebrex is okay)
– cold medicines
– estrogen
– vitamins
– herbals.
• Your doctor may prescribe aspirin as a blood thinner instead of a prescription blood thinner. If you are told to take aspirin, you will take it 2 times a day for 6 weeks.
- 22 -
Testing your blood if you are taking Coumadin (warfarin)
Like all blood thinners, Coumadin (warfarin) will cause your blood to clot slower. This is important to prevent blood clots, but at the same time, we need to make sure your blood does not get too thin. If you are given Coumadin after your surgery, you will need to have your blood drawn 2 times a week for testing.
• These blood tests will help us make sure your blood is thin enough but not too thin. Blood that is too thin can make you bleed too much if you cut yourself. Blood that is too thin can also make you bleed inside your body.
• If your test results show that your blood is too thin or too thick, we will likely change the dosage of your medicine.
• Do not miss these appointments; they are for your safety!
Staying safe while taking blood thinners
• Do not drink beer, wine, or other alcoholic beverages. Alcohol thins the blood.
• Avoid getting cuts: Use an electric razor, not a razor with a blade.
• Eat a normal balanced diet, including fruits, vegetables, and whole grains.
• Use waxed dental floss. Do not use toothpicks.
• Wear shoes or non-skid slippers in the house.
• Be careful when you trim your toenails. Do not trim corns or calluses yourself.
• Always wear shoes outdoors.
• Avoid getting bruises: Do not do any activities and sports in which you could easily be hurt.
While you are on blood thinners, call your doctor immediately if you have:
• nosebleeds
• feelings of being dizzy or like you will pass out
• red or brown urine
• skin rash
• sudden change in the color of your bowel movements
• a headache or severe stomach pain
• blood in your saliva
• bruises that get larger
• bleeding gums
• been unable to eat for several days
• vomiting or diarrhea that lasts more than 1 day.
- 23 -
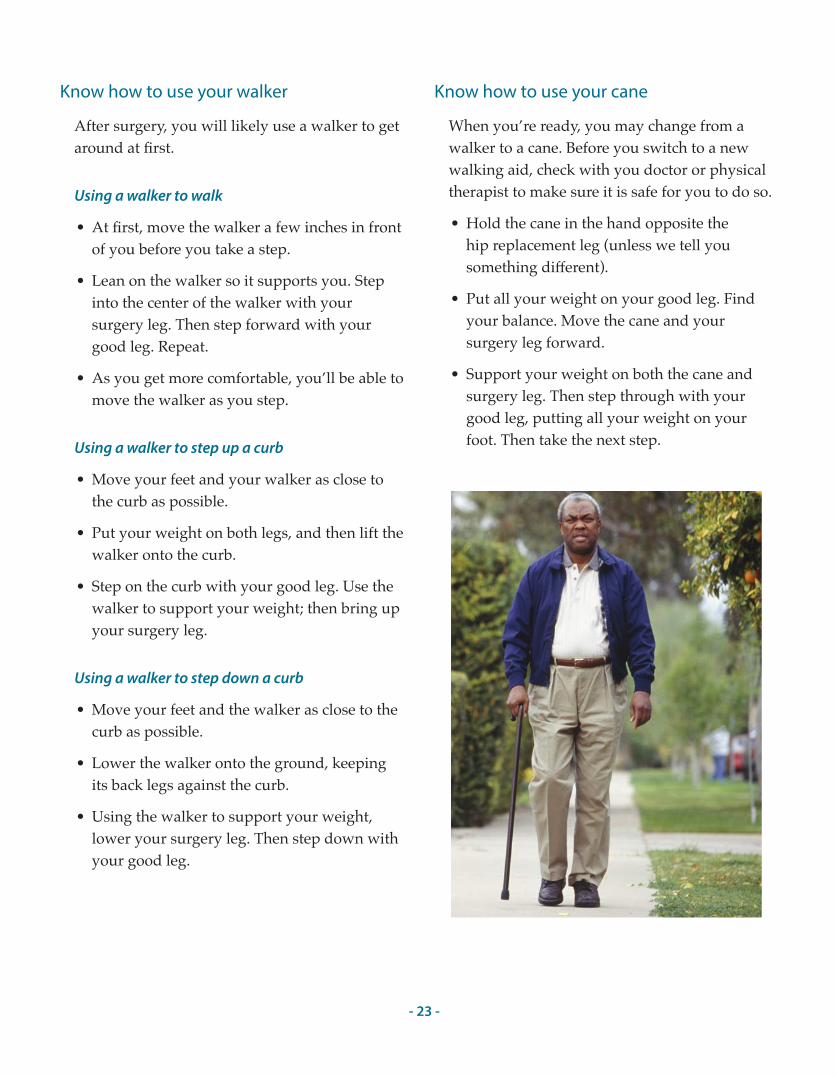
Know how to use your walker
After surgery, you will likely use a walker to get around at first.
Using a walker to walk
• At first, move the walker a few inches in front of you before you take a step.
• Lean on the walker so it supports you. Step into the center of the walker with your surgery leg. Then step forward with your good leg. Repeat.
• As you get more comfortable, you’ll be able to move the walker as you step.
Using a walker to step up a curb
• Move your feet and your walker as close to the curb as possible.
• Put your weight on both legs, and then lift the walker onto the curb.
• Step on the curb with your good leg. Use the walker to support your weight; then bring up your surgery leg.
Using a walker to step down a curb
• Move your feet and the walker as close to the curb as possible.
• Lower the walker onto the ground, keeping its back legs against the curb.
• Using the walker to support your weight, lower your surgery leg. Then step down with your good leg.
Know how to use your cane
When you’re ready, you may change from a walker to a cane. Before you switch to a new walking aid, check with you doctor or physical therapist to make sure it is safe for you to do so.
• Hold the cane in the hand opposite the hip replacement leg (unless we tell you something different).
• Put all your weight on your good leg. Find your balance. Move the cane and your surgery leg forward.
• Support your weight on both the cane and surgery leg. Then step through with your good leg, putting all your weight on your foot. Then take the next step.

- 24 -
Prevent hip injury
Your new hip cannot bend and turn as much as a natural hip. You will need to move differently now than you did before surgery to help keep your new hip from popping out of place. We will work with you and show you how to move your hip safely.
For at least 6 months after surgery:
• don’t bend over at the waist
• don’t sit with your hips lower than your knees
• don’t cross your surgery leg over your good leg
• always sit with your thighs apart.
Safely increase your activity as you recover
• Follow your surgeon and physical therapist’s advice about increasing your level of activity. Do not try to do too much all at once.
• Accept offers of help from friends and family, especially during your first few weeks at home.
• Your physical therapist can help you know when you are ready to walk without your walker or cane.
• Three months after surgery, most people with a new joint can walk without a cane or walker, and are able to do most of the things they want to do.
• Make walking a part of your daily routine. Slowly increase the amount of walking you do around your home. Members of your health care team can help you create a walking program that’s safe for you.
• To move easily, you must walk with a smooth motion. Watch yourself in a mirror while you walk around it. Make sure you’re walking heal to toe, and with equal weight (and time) on each foot.
Sticking with your recovery program will help you get back to doing the things you enjoy. Talk with your doctor about the activities that you want to go back to. Your doctor will tell you when and how you can safely return to activities, such as swimming and gardening.
Remember: Even after you have healed from surgery, you will have some activity restrictions for the rest of your life. This is to protect your hip. Safe and unsafe activities are listed on pages 40 and 41 of this book.

- 25 -
Protect your hip when getting in and out of bed
Your surgery leg should enter the bed first and leave the bed last. If you need to, arrange the sheets and pillows in your bed so the pillow is on the other end of the bed and you can get in with your surgery leg first.
1. Sit down on your bed
• Stand with your back to the bed. Back up to the bed until the back of your good knee touches the bed.
• Keep the foot on your surgery leg forward.
• Hold the crossbar of your walker with one hand. Reach back for the bed with the other hand. Don’t twist.
• Lower your buttocks onto the bed.
2. Support yourself
• Support yourself as you sit down. Put both your hands on the bed behind you for support.
• Lean backward onto the bed.
3. Carefully lie down
• Swing one leg, then the other, from the floor onto the bed. If you have a “leg lifter” you may want to use it. As you move your legs, use your elbows and hands to lower your upper body onto the bed. Move your body as a unit—don’t twist.
• Get comfortable.
• Do not reach to the end of the bed to pull the blankets up. Use a reacher to pull them up.
• Keep your walker in reach from the bed.
A few tips:
• A firm bed is better than a soft bed, if you have a choice.
• Avoid a bed that is too low to the floor. Some people choose to raise their bed on blocks.
• A satin garment or pillowcase placed under your bottom will help you slide your bottom in and out of bed.
- 26 -
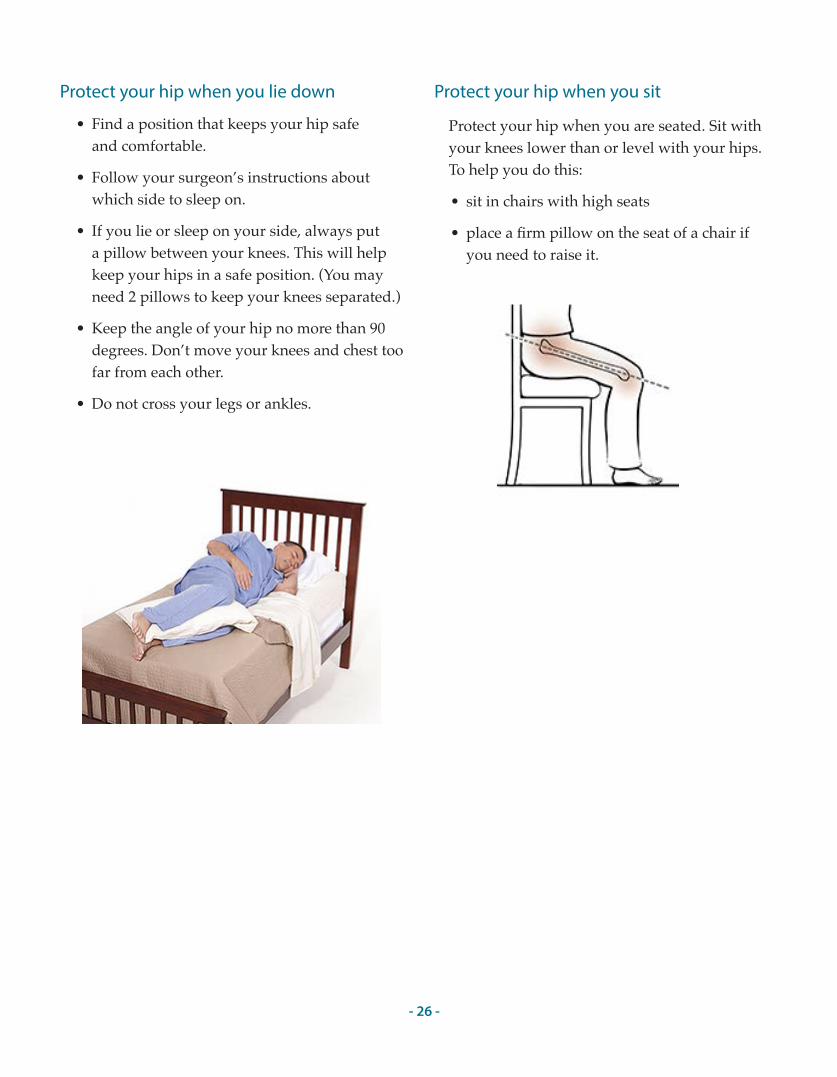
Protect your hip when you lie down
• Find a position that keeps your hip safe and comfortable.
• Follow your surgeon’s instructions about which side to sleep on.
• If you lie or sleep on your side, always put a pillow between your knees. This will help keep your hips in a safe position. (You may need 2 pillows to keep your knees separated.)
• Keep the angle of your hip no more than 90 degrees. Don’t move your knees and chest too far from each other.
• Do not cross your legs or ankles.
Protect your hip when you sit
Protect your hip when you are seated. Sit with your knees lower than or level with your hips. To help you do this:
• sit in chairs with high seats
• place a firm pillow on the seat of a chair if you need to raise it.
- 27 -
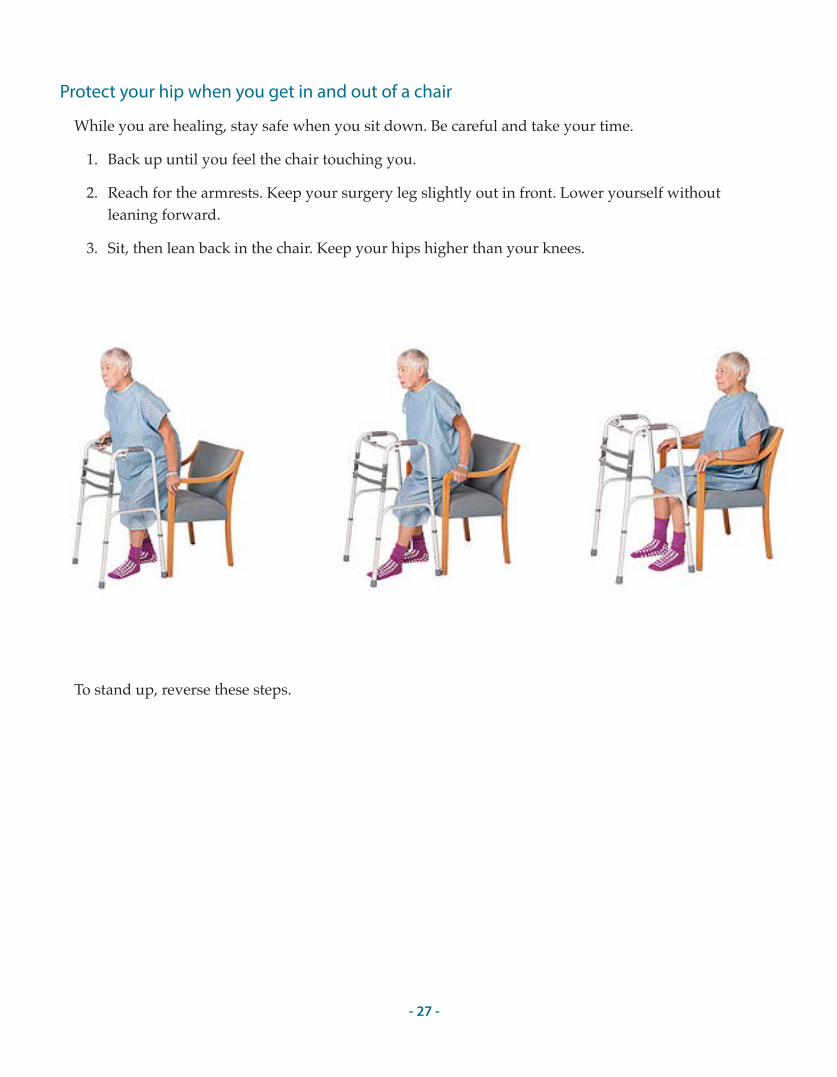
Protect your hip when you get in and out of a chair
While you are healing, stay safe when you sit down. Be careful and take your time.
1. Back up until you feel the chair touching you.
2. Reach for the armrests. Keep your surgery leg slightly out in front. Lower yourself without leaning forward.
3. Sit, then lean back in the chair. Keep your hips higher than your knees.
To stand up, reverse these steps.
- 28 -
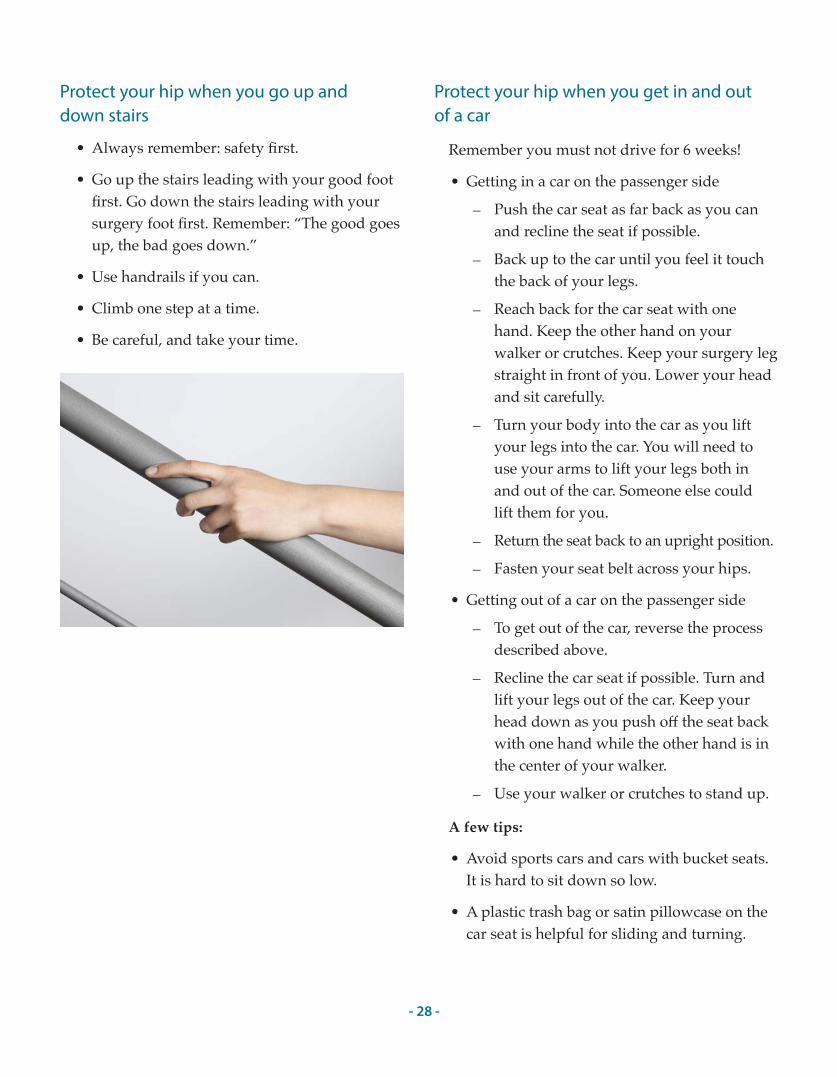
Protect your hip when you go up and down stairs
• Always remember: safety first.
• Go up the stairs leading with your good foot first. Go down the stairs leading with your surgery foot first. Remember: “The good goes up, the bad goes down.”
• Use handrails if you can.
• Climb one step at a time.
• Be careful, and take your time.
Protect your hip when you get in and out of a car
Remember you must not drive for 6 weeks!
• Getting in a car on the passenger side
– Push the car seat as far back as you can and recline the seat if possible.
– Back up to the car until you feel it touch the back of your legs.
– Reach back for the car seat with one hand. Keep the other hand on your walker or crutches. Keep your surgery leg straight in front of you. Lower your head and sit carefully.
– Turn your body into the car as you lift your legs into the car. You will need to use your arms to lift your legs both in and out of the car. Someone else could lift them for you.
– Return the seat back to an upright position.
– Fasten your seat belt across your hips.
• Getting out of a car on the passenger side
– To get out of the car, reverse the process described above.
– Recline the car seat if possible. Turn and lift your legs out of the car. Keep your head down as you push off the seat back with one hand while the other hand is in the center of your walker.
– Use your walker or crutches to stand up.
A few tips:
• Avoid sports cars and cars with bucket seats. It is hard to sit down so low.
• A plastic trash bag or satin pillowcase on the car seat is helpful for sliding and turning.
- 29 -
Protect your hip when you use the bathroom
• Use a commode chair or elevated toilet seat to raise the height of your toilet.
• Back up to the toilet until you feel it touching the back of your knees.
• Carefully reach back for the armrests with both hands.
• Keep your surgery leg in front of you as you bend the other leg to lower yourself to the toilet seat.
• Reverse the process for getting up from the toilet. Use the armrests to push up to a standing position, or use one arm to push up from the armrest while holding onto your walker with the other hand in the center of your walker.
Protect your hip when you shower
• For 6 weeks after your surgery, you should shower instead of bathe. You can sit on a bath bench or shower chair if you like.
• Install grab bars in your shower or tub for support as you get in and out.
• Installing a hand-held shower attachment is also a good idea.
• Use a long-handled sponge to wash hard-to-reach areas.
• Use a rubber-backed bathroom mat to help keep the floor dry.
Protect your hip when getting dressed
Tips for putting on socks
• You will need a sock-aid (a tool that allows you to put on socks or stockings when you can’t reach your feet).
• Sit down to dress.
• Fit the ankle of your sock over the open end of the sock-aid. Make sure the heel of the sock is against the back of your shoe and the toe is tight against the end. Bring the ankle of the sock as far up the sock-aid as possible. Don’t cover the knots at the end.
• While holding onto the rope, drop the sock-aide to the floor. Slide your foot into the sock-aid and pull on the ropes to bring the sock over your foot.
• To take off the sock, use the screw on the end of a reacher to push the sock over your heel.
- 30 -
Tips for putting on pants
• Use your reacher to help you put on your pants.
• Sit down. Use the reacher claw to grasp the waistband and lower the pants to the floor.
• Put your pant on your surgery leg first. Then use the reacher to hold the waistband open to step in with the opposite leg.
• Use the reacher to pull the waistband above your knees. Then use your hands to bring the pants as far up your legs as you can while still sitting.
• Stand up with the walker. After you have your balance, pull your pants over your hips.
• To undress, stand up to push the pants over your hips.
• Sit down. Remove pants from your good leg first. Use the reacher to push the garment off. Repeat with your surgery leg.
A few tips:
• Elastic waist pants work great. They will stay at your thighs while you are standing and will not fall to the floor as you are getting your balance.
• To save energy: Put your underwear and pants on while you are sitting. Then stand up just once to pull both over your hips at the same time.
More tips for staying safe as you heal
Be sure to explain to your entire family what you must do to be safe.
• Always keep a cell phone or cordless phone with you in case you are alone and need help.
• Use a walker basket or shopping bag so you can carry items with you when you use your walker.
• Keep a night light on in hallways and in the bathroom.
• Keep your reacher close by to pick up things you drop so you don’t have to bend over.
• Sit in tall chairs that have armrests. It will be easier to get up. Avoid chairs that rock, roll, or glide.
• Allow extra time when you get up from sitting or lying down. It will keep you from getting dizzy.
• Be careful around your dog or cat because pets may jump.
• Don’t walk outside in icy or snowy conditions.
- 31 -
Sexual activity
You may go back to sexual activity 6 weeks after surgery when your surgical incision has healed and you can move your hip.
• You may need to make some position changes to avoid dislocating your hip.
• Talk with your surgeon or your physical therapist if you have questions about safe positions during sex.
- 32 -
Stay safe when you travel
• For the first 3 months after your surgery, avoid long trips. (Talk to your doctor if you have to travel within 3 months after your surgery.)
• Traveling raises the risk of getting a blood clot. If you do need to travel, talk to your doctor. Tell your doctor if you or anyone in your family has ever had a blood clot. You may need to take a blood thinning medicine.
• When you are away from home, please remember to call a doctor if you think you may be getting an infection.
Flying on a plane
• When making reservations, ask for bulk head seating. You will have more room.
• Ask for an aisle seat. It’s easier to get into and out of.
• Ask for early boarding so you won’t be bumped into or feel so rushed.
• Ask for a wheelchair for going to and from the gate. Call the airline 6 hours before your flight to be sure a wheelchair will be there for you.
• Plan for more time at the security check. As you approach, tell one of the staff that you have had a hip replacement. A security person will likely take you a few steps away and check you with a wand. It is simple and no cause for alarm. It does take a few extra minutes.
• If you are on a long plane flight, it is important that you get up and move around every hour or so if possible. When you sit in one place for a long time, your blood does not move as well through your body. This can lead to a blood clot, which can be very serious.
Taking long car trips
Like long plane trips, it is important to move around during a long car trip to prevent blood clots. On a road trip, get out of the car every 45 to 60 minutes and walk around at least 2 to 3 minutes.
- 33 -
Physical therapy before and after surgery will help you get the most out of your surgery. It is important to keep all your physical therapy appointments and to do all the exercises your therapist tells you to. Be sure to take your pain medicine 30 minutes before you exercise. Your physical therapy will include exercises:
• to increase your joint motion
• to make you stronger so you don’t tire as easily
• to improve your balance
• to help you walk as normally as possible.
Physical Therapy: Before and After Your Surgery
Before your surgery
Before surgery, you will do the 9 exercises listed below. There are 3 exercises to improve your arm strength and 6 exercises for your legs and hips that you can do while lying down. These exercises are pictured and described on pages 34 to 36. Your physical therapist will also show you how to do them.
• Biceps curls
• Triceps curls
• Seated press-ups
• Heel slides
• Abduction/Adduction exercise
• Ankle pumps
• Quadriceps sets
• Gluteal sets
• Internal and external rotation exercise
After your surgery
After surgery, you will do the 11 exercises listed below. You will continue doing the 6 hip and leg exercises you did before surgery. You will do 5 new standing exercises as well. These exercises are described on pages 35 to 38. Your physical therapist will also show you how to do them.
• Heel slides
• Abduction/Adduction exercise
• Ankle pumps
• Quadriceps sets
• Gluteal sets
• Internal and external rotation exercise
• Standing hip extension
• Standing hip adduction
• Resisted hip extension
• Resisted hip abduction
• Standing hip flexion
- 34 -
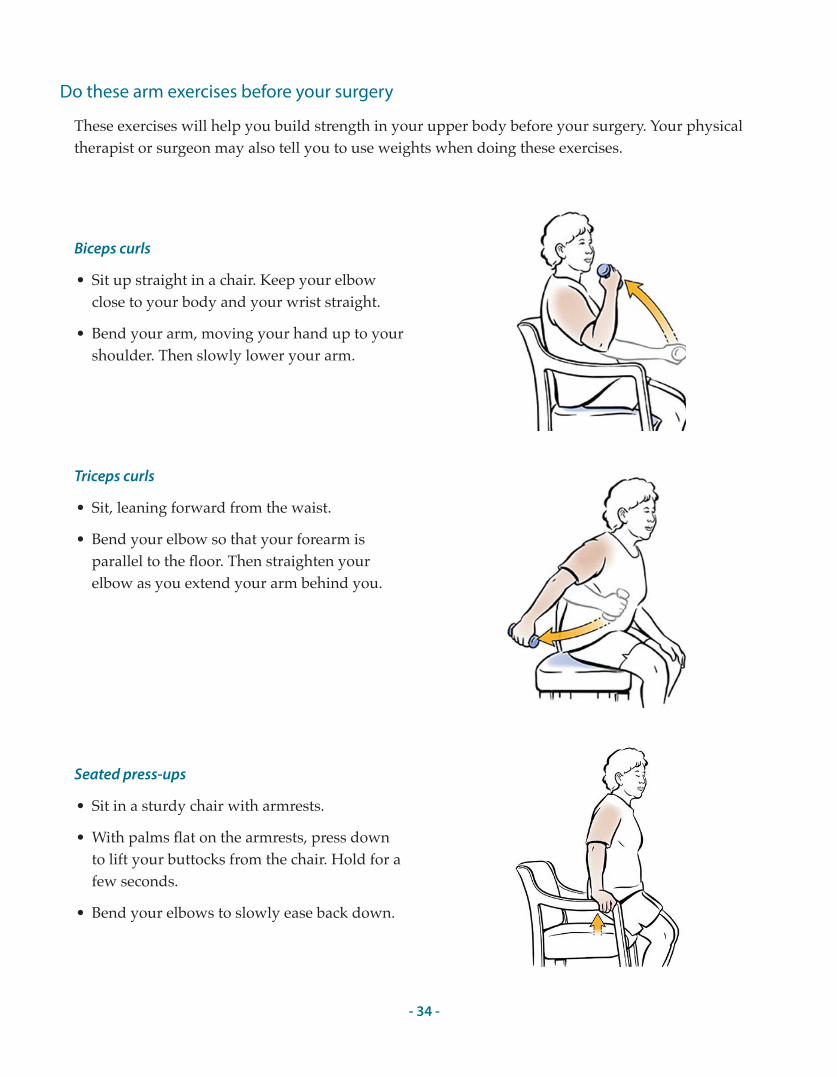
Do these arm exercises before your surgery
These exercises will help you build strength in your upper body before your surgery. Your physical therapist or surgeon may also tell you to use weights when doing these exercises.
Biceps curls
• Sit up straight in a chair. Keep your elbow close to your body and your wrist straight.
• Bend your arm, moving your hand up to your shoulder. Then slowly lower your arm.
Seated press-ups
• Sit in a sturdy chair with armrests.
• With palms flat on the armrests, press down to lift your buttocks from the chair. Hold for a few seconds.
• Bend your elbows to slowly ease back down.
Triceps curls
• Sit, leaning forward from the waist.
• Bend your elbow so that your forearm is parallel to the floor. Then straighten your elbow as you extend your arm behind you.
- 35 -
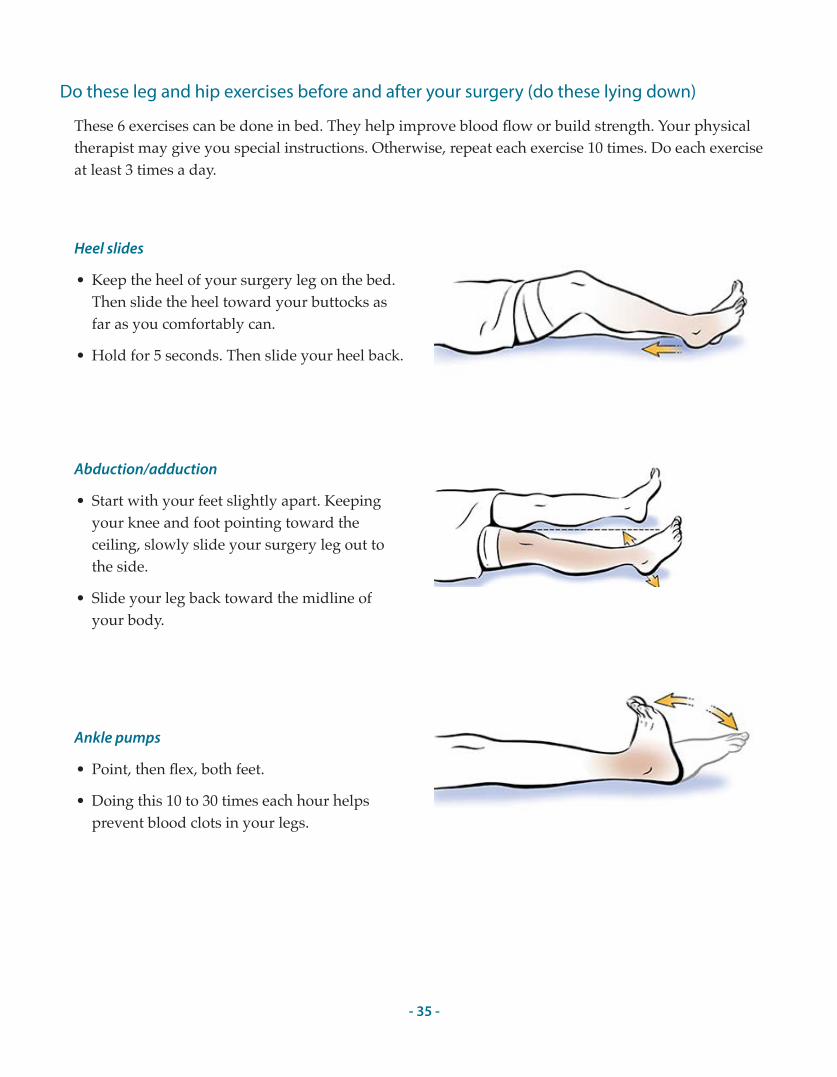
Do these leg and hip exercises before and after your surgery (do these lying down)
These 6 exercises can be done in bed. They help improve blood flow or build strength. Your physical therapist may give you special instructions. Otherwise, repeat each exercise 10 times. Do each exercise at least 3 times a day.
Heel slides
• Keep the heel of your surgery leg on the bed. Then slide the heel toward your buttocks as far as you comfortably can.
• Hold for 5 seconds. Then slide your heel back.
Abduction/adduction
• Start with your feet slightly apart. Keeping your knee and foot pointing toward the ceiling, slowly slide your surgery leg out to the side.
• Slide your leg back toward the midline of your body.
Ankle pumps
• Point, then flex, both feet.
• Doing this 10 to 30 times each hour helps prevent blood clots in your legs.
- 36 -
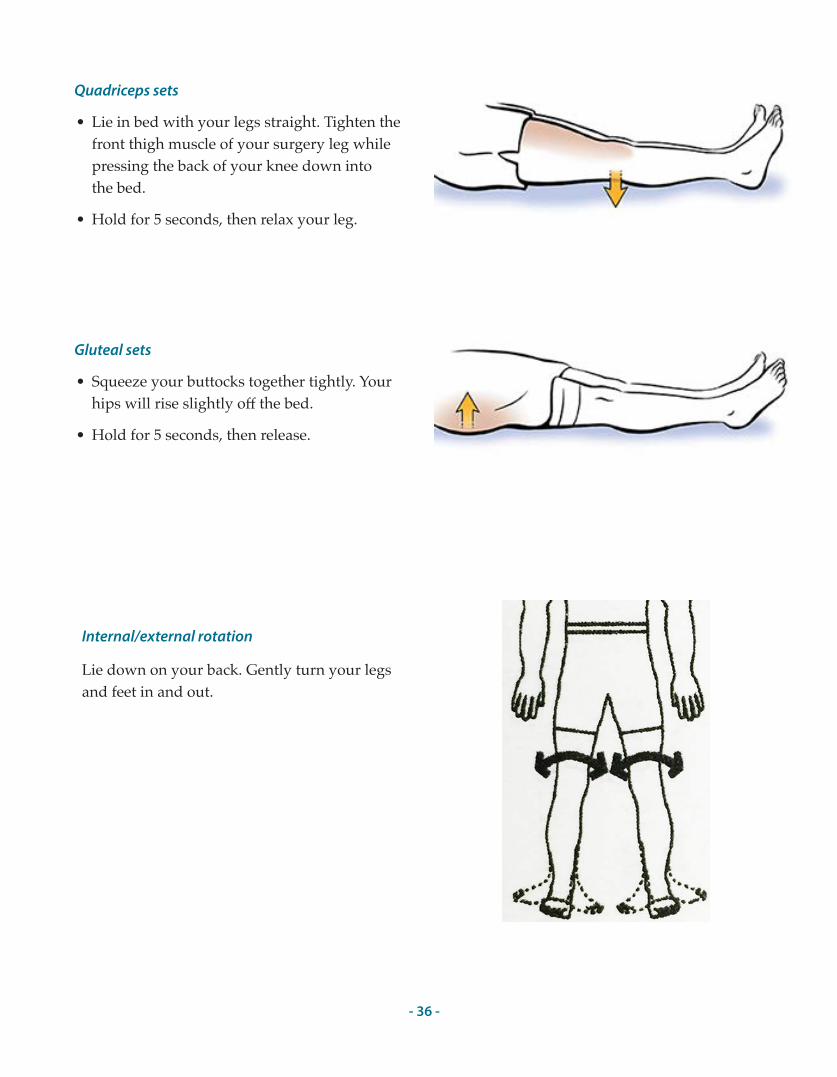
Quadriceps sets
• Lie in bed with your legs straight. Tighten the front thigh muscle of your surgery leg while pressing the back of your knee down into the bed.
• Hold for 5 seconds, then relax your leg.
Gluteal sets
• Squeeze your buttocks together tightly. Your hips will rise slightly off the bed.
• Hold for 5 seconds, then release.
Internal/external rotation
Lie down on your back. Gently turn your legs and feet in and out.
- 37 -
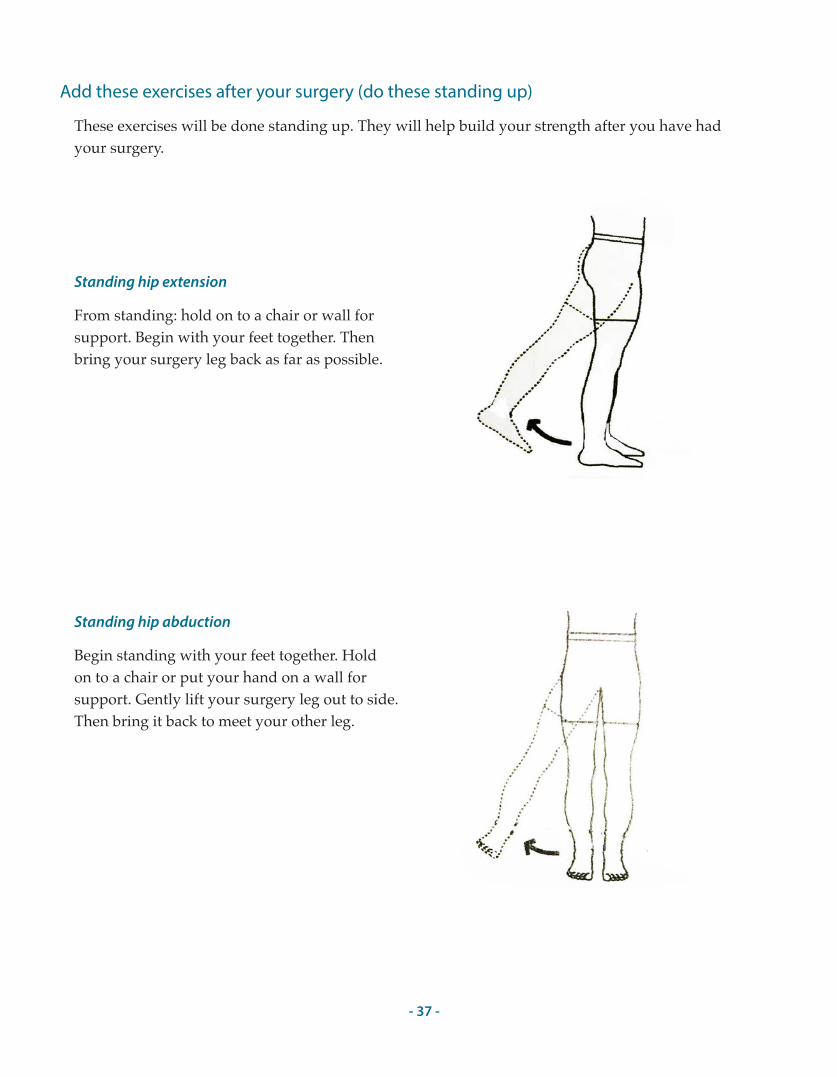
Add these exercises after your surgery (do these standing up)
These exercises will be done standing up. They will help build your strength after you have had your surgery.
Standing hip extension
From standing: hold on to a chair or wall for support. Begin with your feet together. Then bring your surgery leg back as far as possible.
Standing hip abduction
Begin standing with your feet together. Hold on to a chair or put your hand on a wall for support. Gently lift your surgery leg out to side. Then bring it back to meet your other leg.
- 38 -
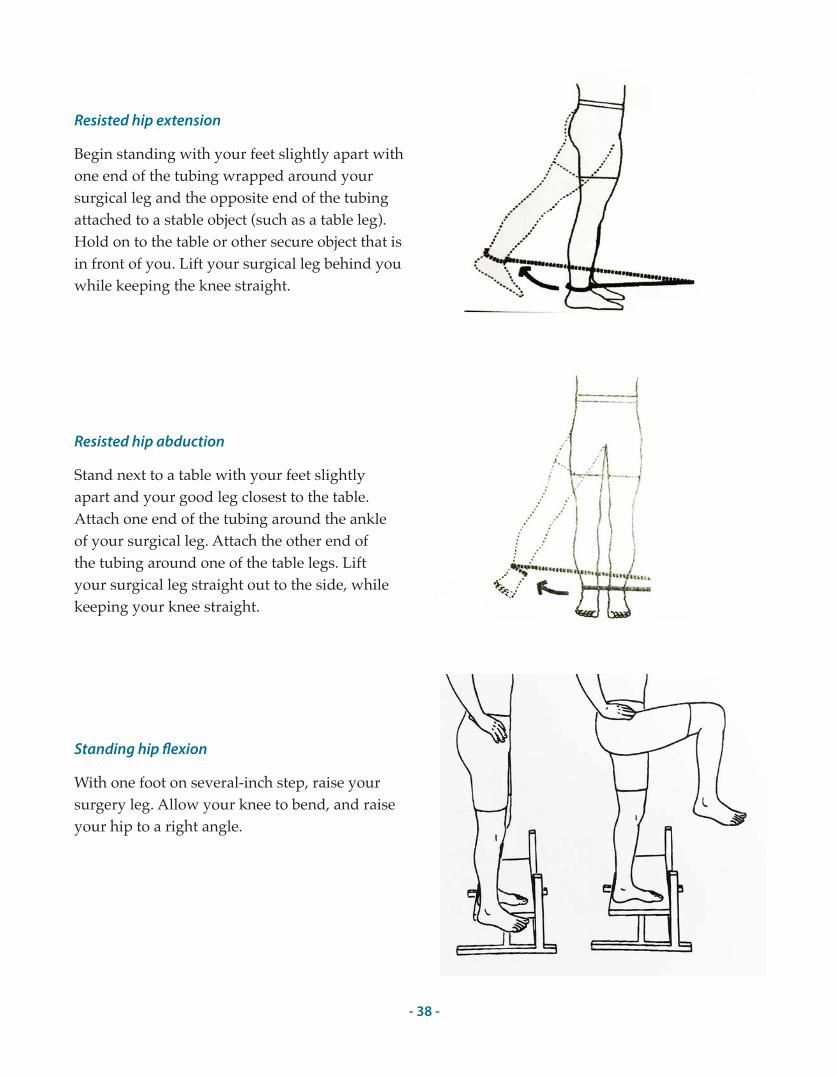
Resisted hip extension
Begin standing with your feet slightly apart with one end of the tubing wrapped around your surgical leg and the opposite end of the tubing attached to a stable object (such as a table leg). Hold on to the table or other secure object that is in front of you. Lift your surgical leg behind you while keeping the knee straight.
Resisted hip abduction
Stand next to a table with your feet slightly apart and your good leg closest to the table. Attach one end of the tubing around the ankle of your surgical leg. Attach the other end of the tubing around one of the table legs. Lift your surgical leg straight out to the side, while keeping your knee straight.
Standing hip �exion
With one foot on several-inch step, raise your surgery leg. Allow your knee to bend, and raise your hip to a right angle.
- 39 -
Risk of infection
Once you have an artificial hip, you are never completely safe from infection. You must always be careful to prevent and treat infections. If you do get an infection, it could travel to your artificial hip. This could lead to a stay in the hospital and possibly more surgery. For the rest of your life, do not ignore any infection. Always contact your doctor if you think you might have any type of infection—even if it is a small one.
Dental and medical procedures
• Always talk to your joint replacement surgeon before you have any other major surgery.
• Always tell the doctors or dentists who treat you that you have a joint replacement. You will need to take extra precautions before having surgery and other medical and dental procedures.
Antibiotics for surgical or dental procedures
The American Academy of Orthopaedic Surgeons and the American Dental Association have developed these guidelines for antibiotic use. Your dentists and doctors will use their own judgment in deciding if you need antibiotics to prevent infection.
• For two years after your hip replacement, you will need antibiotics before all dental procedures, including dental work and cleaning. The bacteria commonly found in the mouth may travel through the bloodstream and settle in your artificial hip.
• For two years after your hip replacement, you will also need antibiotics before medical procedures that are invasive, including colonoscopy, cytoscopy, bronchoscopy, or other procedures that are called invasive.
• After 2 years, you may or may not need antibiotics for certain medical and dental procedures. Some doctors say joint replacement patients should take antibiotics for these procedures for the rest of their lives. Talk to your joint replacement surgeon.
Living with Your Hip Replacement in the Long-term
- 40 -
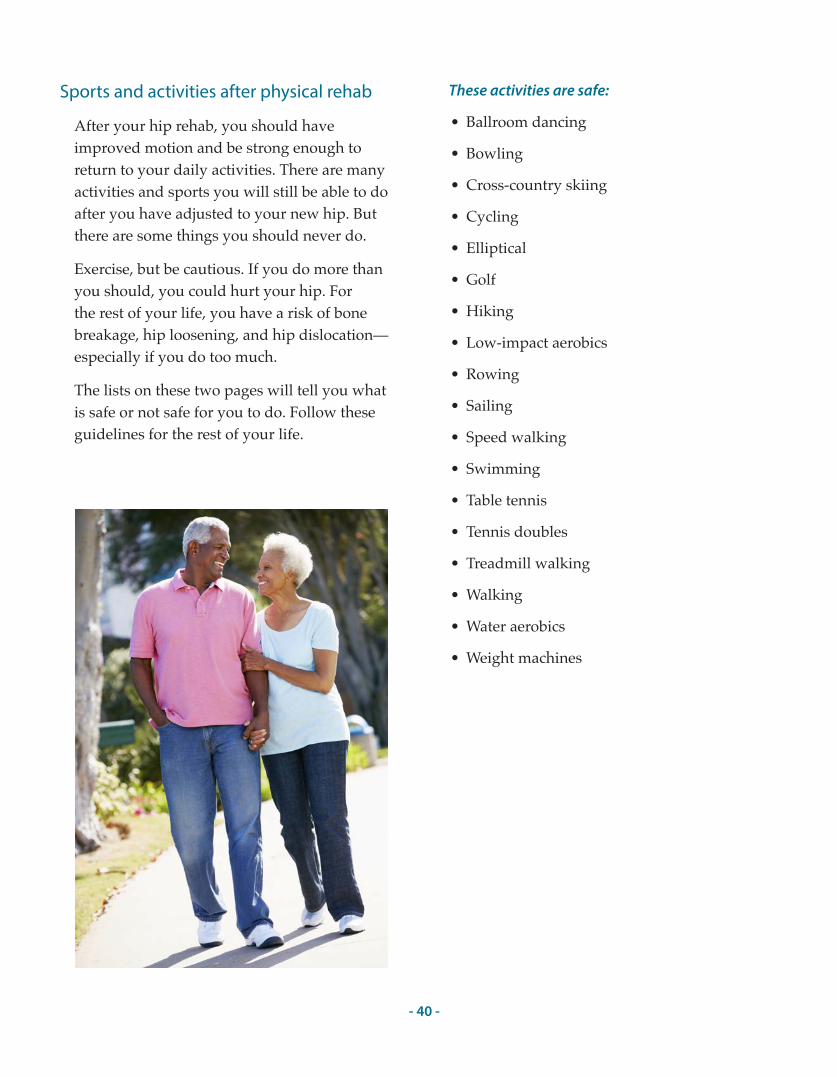
Sports and activities after physical rehab
After your hip rehab, you should have improved motion and be strong enough to return to your daily activities. There are many activities and sports you will still be able to do after you have adjusted to your new hip. But there are some things you should never do.
Exercise, but be cautious. If you do more than you should, you could hurt your hip. For the rest of your life, you have a risk of bone breakage, hip loosening, and hip dislocation—especially if you do too much.
The lists on these two pages will tell you what is safe or not safe for you to do. Follow these guidelines for the rest of your life.
These activities are safe:
• Ballroom dancing
• Bowling
• Cross-country skiing
• Cycling
• Elliptical
• Golf
• Hiking
• Low-impact aerobics
• Rowing
• Sailing
• Speed walking
• Swimming
• Table tennis
• Tennis doubles
• Treadmill walking
• Walking
• Water aerobics
• Weight machines
- 41 -
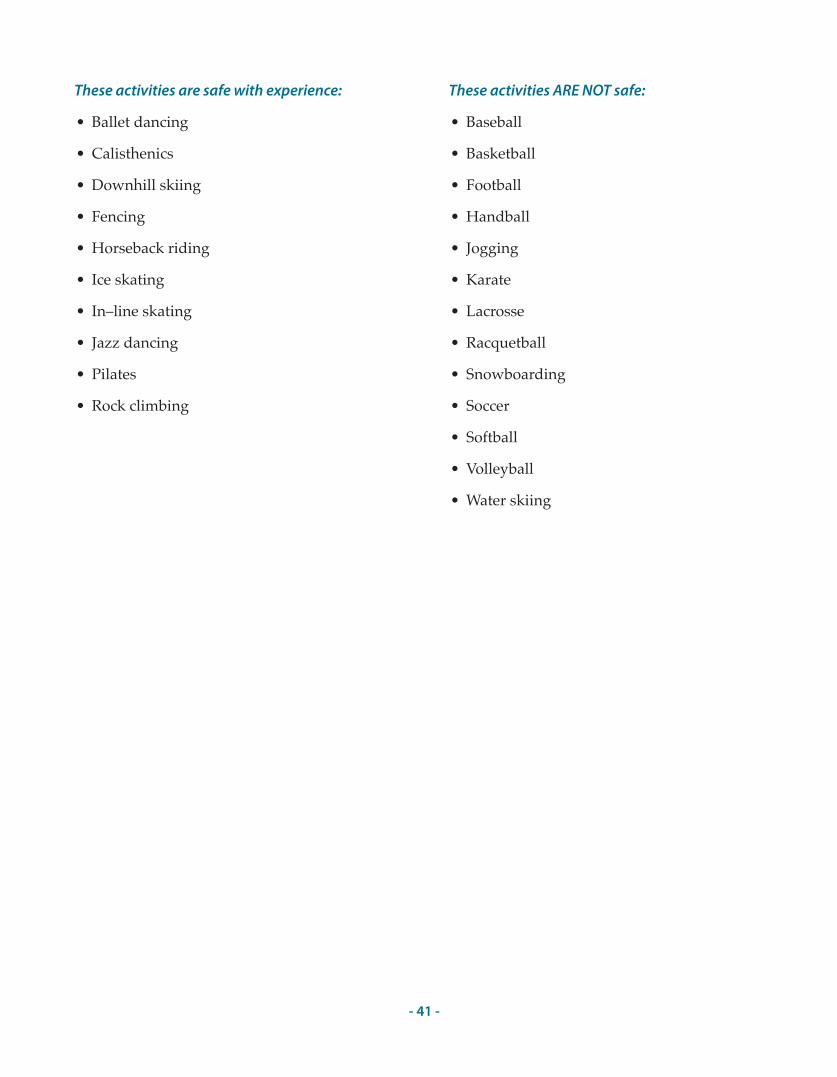
These activities are safe with experience:
• Ballet dancing
• Calisthenics
• Downhill skiing
• Fencing
• Horseback riding
• Ice skating
• In–line skating
• Jazz dancing
• Pilates
• Rock climbing
These activities ARE NOT safe:
• Baseball
• Basketball
• Football
• Handball
• Jogging
• Karate
• Lacrosse
• Racquetball
• Snowboarding
• Soccer
• Softball
• Volleyball
• Water skiing

- 42 -
Notes

- 43 -
Notes

- 44 -