Embed Size (px)
Citation preview
Installation Instructions
Cassette toilet for recreational vehicles
Dometic Saneo ®B
Dometic Saneo ®C
Dometic Saneo ®BS Dometic
Saneo ®CS
Dometic Saneo ®BLP Dometic
Saneo ®CLP
Dometic Saneo ®BW Dometic
Saneo ®CW
10 R - 047317
N 1
MBA 03/2015
EN
2
English For your safety
The toilet must be
installed by trained
staff only.
Cleaning agents for the toilet
must not contain chlorine or
alcohol! Do not shake the cassette tank
violently.
All components of the system must be
installed in frost-protected areas. In minus
temperatures there is a risk of damage due
to frost.
Do not use anti-freeze agents. Such agents
can damage the sanitation system.
The operating pressure range
(waterpressure) of the magnet valve must
not exceed 6 bar. The magnet valve will be
damaged by excessive pressure.
Table of contents 1.0 General . . . . . . . . . . . . . . . . . . . . .
. . . . . . . . . . . . . . . . . . . . . . . . . 4
CAUTION!
CAUTION!
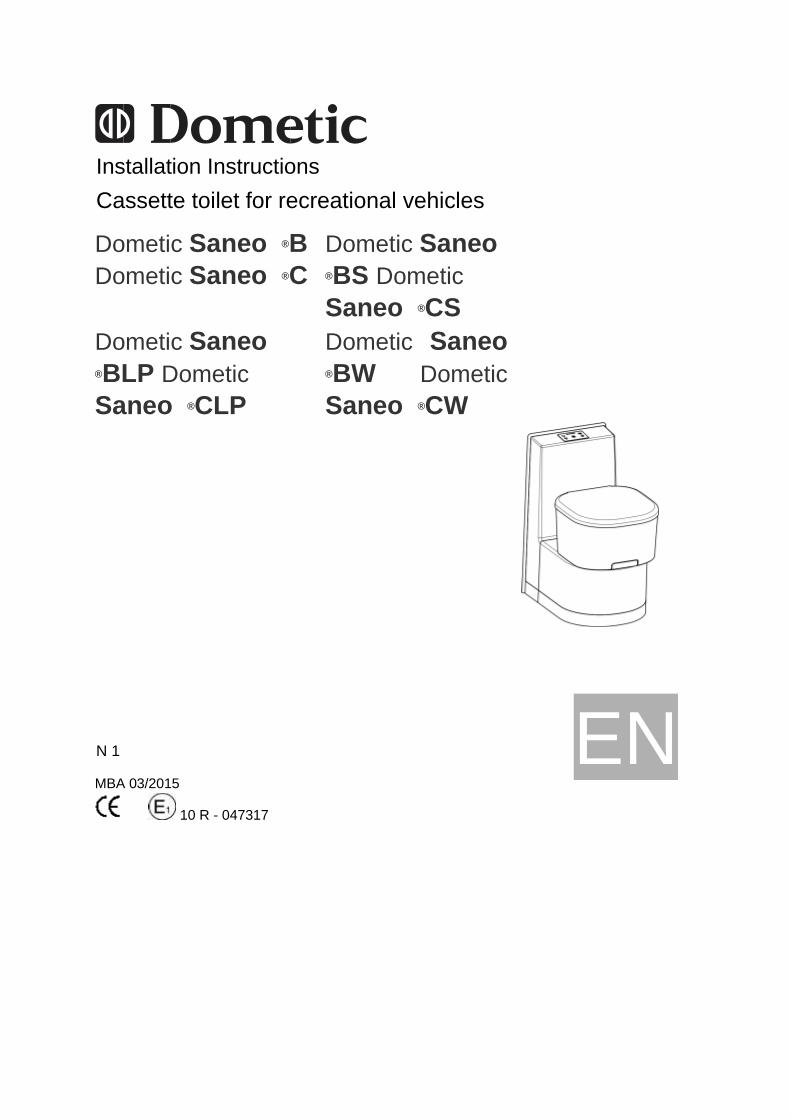
Saneo B
Saneo C
Saneo BS
Saneo CS
Saneo BW
Saneo CW
Saneo BLP
Saneo CLP
© Dometic GmbH - 2015 - Subject to change without prior notice
Dometic GmbH In der Steinwiese 16 D-57074 Siegen
www.dometic.com
3
1.1 Guide to these operating instructions . . . . . . . . . . . . . . . . . . . . . . . . . . . . . . . . . . . . . . . . . . . . 4
1.2 Copyright protection . . . . . . . . . . . . . . . . . . . . . . . . . . . . . . . . . . . . . . . . . . . . . . . . . . . . . . . . . 4
1.3 Explanation of symbols used in this manual . . . . . . . . . . . . . . . . . . . . . . . . . . . . . . . . . . . . . . . 4
1.4 Limitation of liability . . . . . . . . . . . . . . . . . . . . . . . . . . . . . . . . . . . . . . . . . . . . . . . . . . . . . . . . . . 5
1.5 Warranty . . . . . . . . . . . . . . . . . . . . . . . . . . . . . . . . . . . . . . . . . . . . . . . . . . . . . . . . . . . . . . . . . . . 5
1.6 Environmental notices . . . . . . . . . . . . . . . . . . . . . . . . . . . . . . . . . . . . . . . . . . . . . . . . . . . . . . . . 5
1.7 Declaration of conformity . . . . . . . . . . . . . . . . . . . . . . . . . . . . . . . . . . . . . . . . . . . . . . . . . . . . . . 5
2.0 Safety instructions . . . . . . . . . . . . . . . . . . . . . . . . . . . . . . . . . . . . . . 6
2.1 Intended use . . . . . . . . . . . . . . . . . . . . . . . . . . . . . . . . . . . . . . . . . . . . . . . . . . . . . . . . . . . . . . . 6
2.2 Installation notices . . . . . . . . . . . . . . . . . . . . . . . . . . . . . . . . . . . . . . . . . . . . . . . . . . . . . . . . . . . 6
2.3 Standards and regulations . . . . . . . . . . . . . . . . . . . . . . . . . . . . . . . . . . . . . . . . . . . . . . . . . . . . . 6
3.0 Description of model . . . . . . . . . . . . . . . . . . . . . . . . . . . . . . . . . . . . 6
3.1 Model identification . . . . . . . . . . . . . . . . . . . . . . . . . . . . . . . . . . . . . . . . . . . . . . . . . . . . . . . . . . 6
3.2 Toilet identification label . . . . . . . . . . . . . . . . . . . . . . . . . . . . . . . . . . . . . . . . . . . . . . . . . . . . . . . 7
3.3 Technical data . . . . . . . . . . . . . . . . . . . . . . . . . . . . . . . . . . . . . . . . . . . . . . . . . . . . . . . . . . . . . . 7
3.4 Explanation of components . . . . . . . . . . . . . . . . . . . . . . . . . . . . . . . . . . . . . . . . . . . . . . . . . . . . 7
4.0 Installation of toilet . . . . . . . . . . . . . . . . . . . . . . . . . . . . . . . . . . . . . 8
4.1 Installing the service door . . . . . . . . . . . . . . . . . . . . . . . . . . . . . . . . . . . . . . . . . . . . . . . . . . . . . 8
4.2 Create wall apertures . . . . . . . . . . . . . . . . . . . . . . . . . . . . . . . . . . . . . . . . . . . . . . . . . . . . . . . . . 8
4.2.1 Wall aperture service door . . . . . . . . . . . . . . . . . . . . . . . . . . . . . . . . . . . . . . . . . . . . . . . . . . . . . . . . . . . . . 8
4.2.2 Wall aperture flap . . . . . . . . . . . . . . . . . . . . . . . . . . . . . . . . . . . . . . . . . . . . . . . . . . . . . . . . . . . . . . . . . . . . 8
4.3 Installing the toilet . . . . . . . . . . . . . . . . . . . . . . . . . . . . . . . . . . . . . . . . . . . . . . . . . . . . . . . . . . . 8
4.3.1 Placing the Saneo B, Saneo C toilet models . . . . . . . . . . . . . . . . . . . . . . . . . . . . . . . . . . . . . . . . . . . . . . . 9
4.3.1.1 Fitting the Saneo B, Saneo C toilet . . . . . . . . . . . . . . . . . . . . . . . . . . . . . . . . . . . . . . . . . . . . . . . . . . . . . . 9
4.3.1.2 Installing the control and operator panel of the Saneo B, Saneo C toilet . . . . . . . . . . . . . . . . . . . . . . . . . 10
4.3.2 Placing the Saneo BW, Saneo CW, Saneo BS, Saneo CS, Saneo BLP, Saneo CLP toilet models . . . . . 10
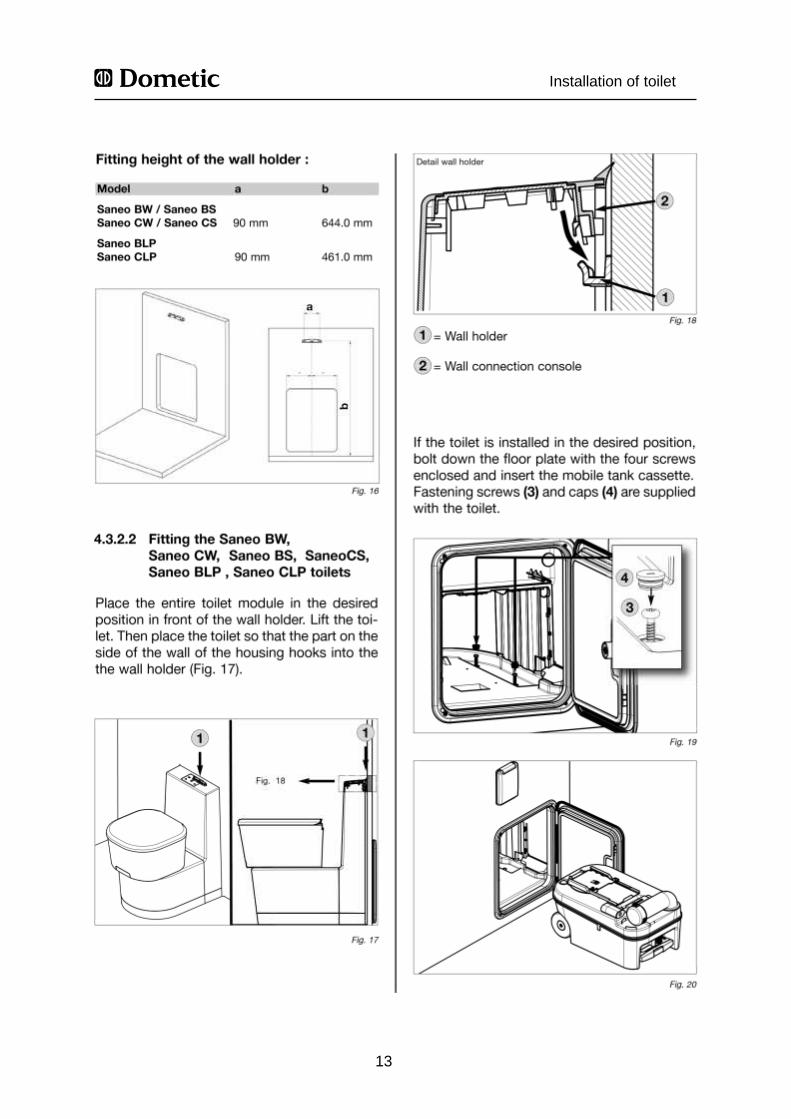
4.3.2.1 Fitting the wall holder . . . . . . . . . . . . . . . . . . . . . . . . . . . . . . . . . . . . . . . . . . . . . . . . . . . . . . . . . . . . . . . . . 10
4.3.2.2 Fitting the Saneo BW, Saneo CW, Saneo BS, Saneo CS, Saneo BLP, Saneo CLP toilet . . . . . . . . . . . . . 11
4.4 Water connection . . . . . . . . . . . . . . . . . . . . . . . . . . . . . . . . . . . . . . . . . . . . . . . . . . . . . . . . . . . . 12
4.5 Flap installation . . . . . . . . . . . . . . . . . . . . . . . . . . . . . . . . . . . . . . . . . . . . . . . . . . . . . . . . . . . . . 12
4.6 Electric connection . . . . . . . . . . . . . . . . . . . . . . . . . . . . . . . . . . . . . . . . . . . . . . . . . . . . . . . . . . . 13
4.6.1 System diagrams . . . . . . . . . . . . . . . . . . . . . . . . . . . . . . . . . . . . . . . . . . . . . . . . . . . . . . . . . . . . . . . . . . . . 13
4
CAUTION!
Information
i
4.6.1.1 General system diagrams . . . . . . . . . . . . . . . . . . . . . . . . . . . . . . . . . . . . . . . . . . . . . . . . . . . . . . . . . . . . . 13
4.6.1.2 System diagram (Saneo xW model with integrated water pump) . . . . . . . . . . . . . . . . . . . . . . . . . . . . . . . 14
4.6.1.3 System diagram (Saneo B, C/ Saneo xS/ Saneo xLP models with external water pump) . . . . . . . . . . . . 14
5.0 Annex . . . . . . . . . . . . . . . . . . . . . . . . . . . . . . . . . . . . . . . . . . . . . . . . A-1
5.1 Circuit diagrams . . . . . . . . . . . . . . . . . . . . . . . . . . . . . . . . . . . . . . . . . . . . . . . . . . . . . . . . . . . . . A-2 5.1.1 Circuit diagram (models with external water tank) . . . . . . . . . . . . . . . . . . . . . . . . . . . . . . . . . . . . . . . . . . . A-2 5.1.2 Circuit diagram (models with internal water tank) . . . . . . . . . . . . . . . . . . . . . . . . . . . . . . . . . . . . . . . . . . . A-4 5.1.3 Circuit diagram (models with internal water tank, GB) . . . . . . . . . . . . . . . . . . . . . . . . . . . . . . . . . . . . . . . . A-6 5.1.4 Circuit diagram (models with external water tank) AUSTRALIA . . . . . . . . . . . . . . . . . . . . . . . . . . . . . . . . A-7 5.1.5 Legend . . . . . . . . . . . . . . . . . . . . . . . . . . . . . . . . . . . . . . . . . . . . . . . . . . . . . . . . . . . . . . . . . . . . . . . . . . . . A-8
5.2 Dimensioned sketches . . . . . . . . . . . . . . . . . . . . . . . . . . . . . . . . . . . . . . . . . . . . . . . . . . . . . . . . A-13 5.3 Attaching the toilet housing . . . . . . . . . . . . . . . . . . . . . . . . . . . . . . . . . . . . . . . . . . . . . . . . . . . . A-18 5.4 Templates . . . . . . . . . . . . . . . . . . . . . . . . . . . . . . . . . . . . . . . . . . . . . . . . . . . . . . . . . . . . . . . . . . A-24
General
1.0 General
1.1 Guide to these installation
instructions
Before installing the toilet read and
understand the contents of this manual.
These instructions provide you with the
necessary guidance for the proper installation
of the toilet. Observe the safety instructions
in particular. Observing the instructions and
handling recommendations is important for
dealing with the toilet safely and for protecting
you from injury and the toilet from damage.
You must understand what you have read
before you carry out a task.
1.2 Copyright protection
The information, texts and illustrations in
these instructions are copyright protected and
are subject to industrial property rights. No
part of these instructions may be reproduced,
copied or utilised in any other way without
written authorisation by Dometic GmbH,
Siegen.
1.3 Explanation of symbols
used in this manual
Warning notices
Warning notices are identified by symbols. A
supplementary text gives you an explanation
of the degree of danger. Observe these
warning notices rigorously. You will thus
protect yourself and other people from
injury, and the sanitation system from
damage. CAUTION!
CAUTION indicates a potentially hazardous
situation which may result in minor or
moderate injury if the given instructions are not
adhered to.
CAUTION (used without the safety alert
symbol) indicates a potentially hazardous
situation which may result in damage to the
appliance if the given instructions are not
adhered to.

5
INFORMATION gives you supplementary and
useful guidance.
Environmental tip
Environmental tip gives you useful guidance
for saving energy and disposal of the
appliance.
General
6
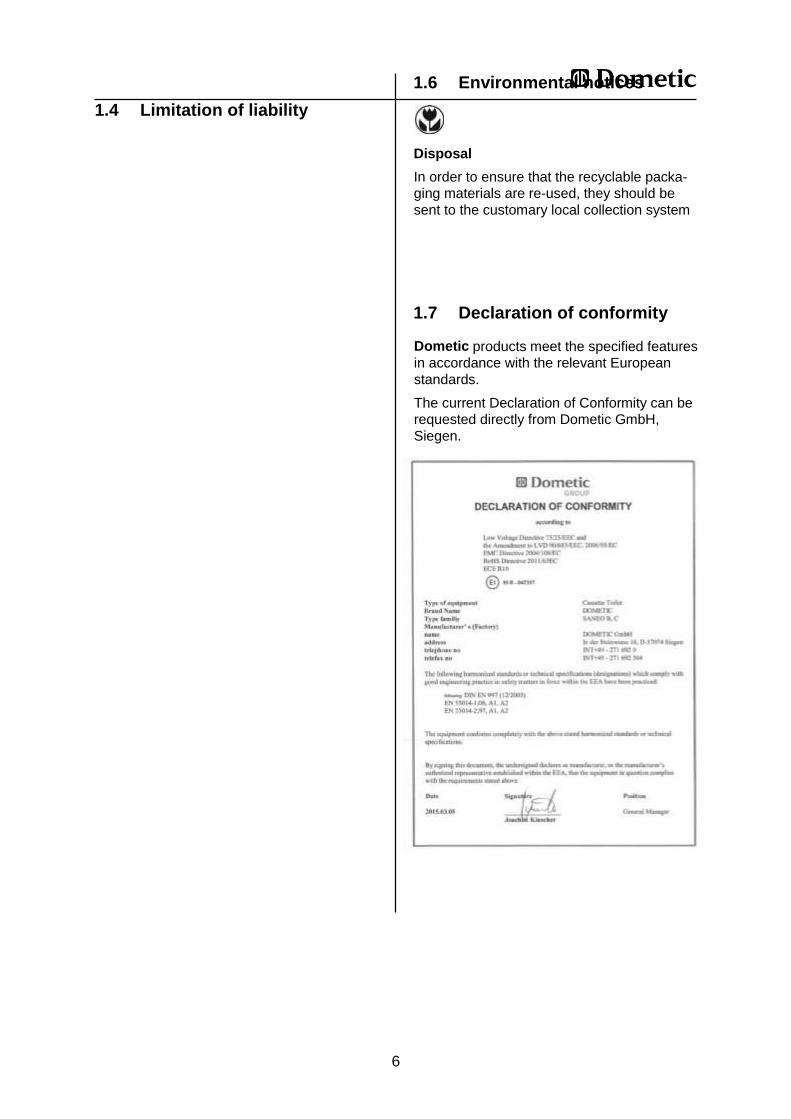
1.4 Limitation of liability
In order to ensure that the recyclable packa- ging materials are re-used, they should be
sent to the customary local collection system
Disposal
Dometic products meet the specified features in accordance with the relevant European
standards.
The current Declaration of Conformity can be requested directly from Dometic GmbH,
Siegen.
1.6 Environmental notices
1.7 Declaration of conformity
7
All information and guidance in these operating instructions were prepared after taking into
consideration the applicable standards and regulations as well as the current state of the art.
Dometic reserves the right to make changes at any time which are deemed to be in the interest of
improving the product and safety.
Dometic will assume no liability for damage in the case of :
non-observation of the installation instructions
non-observation of the operating instructions
application not in accordance with the regulations or provisions
use of non-original spare parts
modifications and interferences to the appliance
1.5 Warranty
Warranty arrangements are in accordance with EC Directive 44/1999/CE and the normal
conditions applicable for the country concerned. For warranty or other maintenance, please contact
our customer services department. Any malfunction due to improper use is not covered by the
warranty. The warranty does not cover any modifications to the appliance or the use of non-
original Dometic parts. The warranty does not apply if the installation and operating instructions
are not adhered to and no liability shall be entertained.
Safety instructions / Description of model
2.0 Safety instructions
2.1 Intended use
This toilet is designed for installation in
recreation vehicles such as caravans or
motorhomes.
2.2 Installation notes
The toilet must be in principle installed so that
it is accessible for maintenance work, can be
easily installed and dismantled and removed
from the vehicle without great effort.
CAUTION!
The toilet must be installed by trained
staff
only.
2.3 Standards and regulations
Installation and connection of the sanitation
system must comply with the latest technical
regulations, as follows:
The electrical installation must comply
with national and local regulations.
European standards
8
EN 1645-1, EN 1646-1,EN 1648-1 ,
EN 1648-2
3.0 Description of model
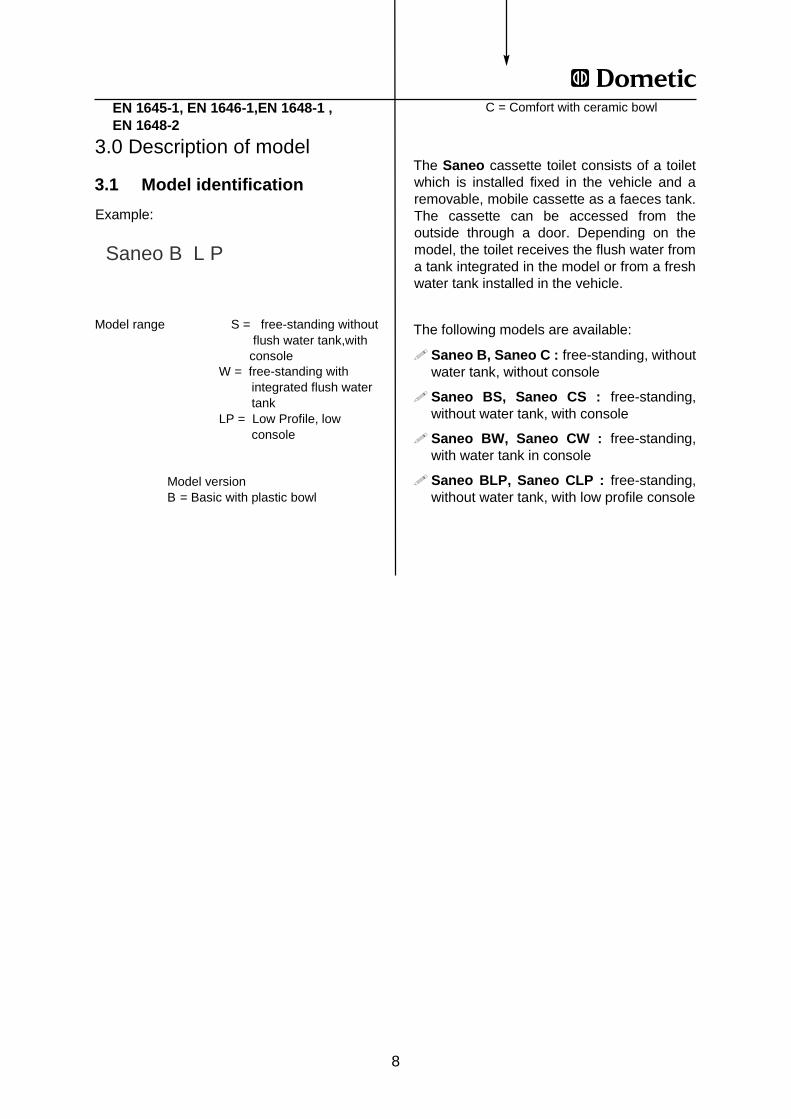
3.1 Model identification
Example:
Saneo B L P
Model range S = free-standing without flush water tank,with
console W = free-standing with
integrated flush water
tank LP = Low Profile, low
console
Model version B = Basic with plastic bowl
C = Comfort with ceramic bowl
The Saneo cassette toilet consists of a toilet
which is installed fixed in the vehicle and a
removable, mobile cassette as a faeces tank.
The cassette can be accessed from the
outside through a door. Depending on the
model, the toilet receives the flush water from
a tank integrated in the model or from a fresh
water tank installed in the vehicle.
The following models are available:
Saneo B, Saneo C : free-standing, without
water tank, without console
Saneo BS, Saneo CS : free-standing,
without water tank, with console
Saneo BW, Saneo CW : free-standing,
with water tank in console
Saneo BLP, Saneo CLP : free-standing,
without water tank, with low profile console

9
Description of model
10
Installation of toilet
4.0 Installation of toilet
4.1 Installing the service door
The description for the installation of the
service door can be found in the document
supplied Dometic Seitz SK 5 )
(optional/depending on model).
4.2 Create wall apertures
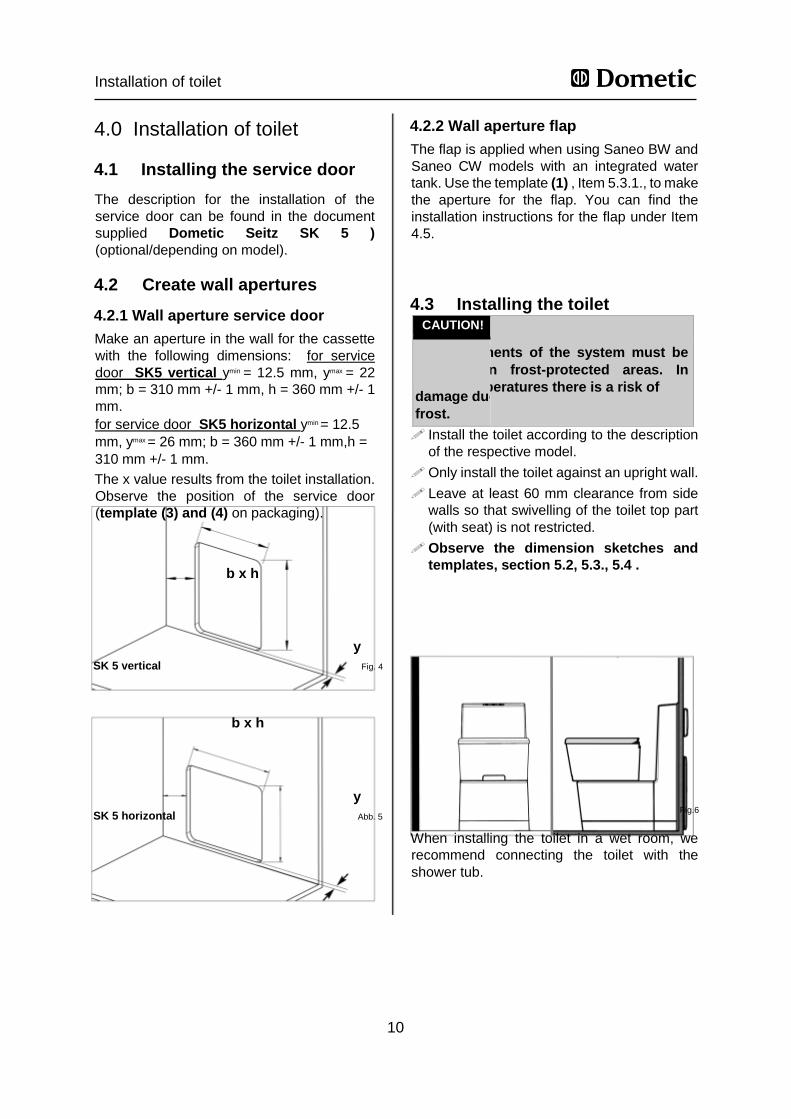
4.2.1 Wall aperture service door
Make an aperture in the wall for the cassette
with the following dimensions: for service
door SK5 vertical ymin = 12.5 mm, ymax = 22
mm; b = 310 mm +/- 1 mm, h = 360 mm +/- 1
mm.
for service door SK5 horizontal ymin = 12.5
mm, ymax = 26 mm; b = 360 mm +/- 1 mm,h =
310 mm +/- 1 mm.
The x value results from the toilet installation.
Observe the position of the service door
(template (3) and (4) on packaging).
b x h
y
SK 5 vertical Fig. 4
b x h
y
SK 5 horizontal Abb. 5
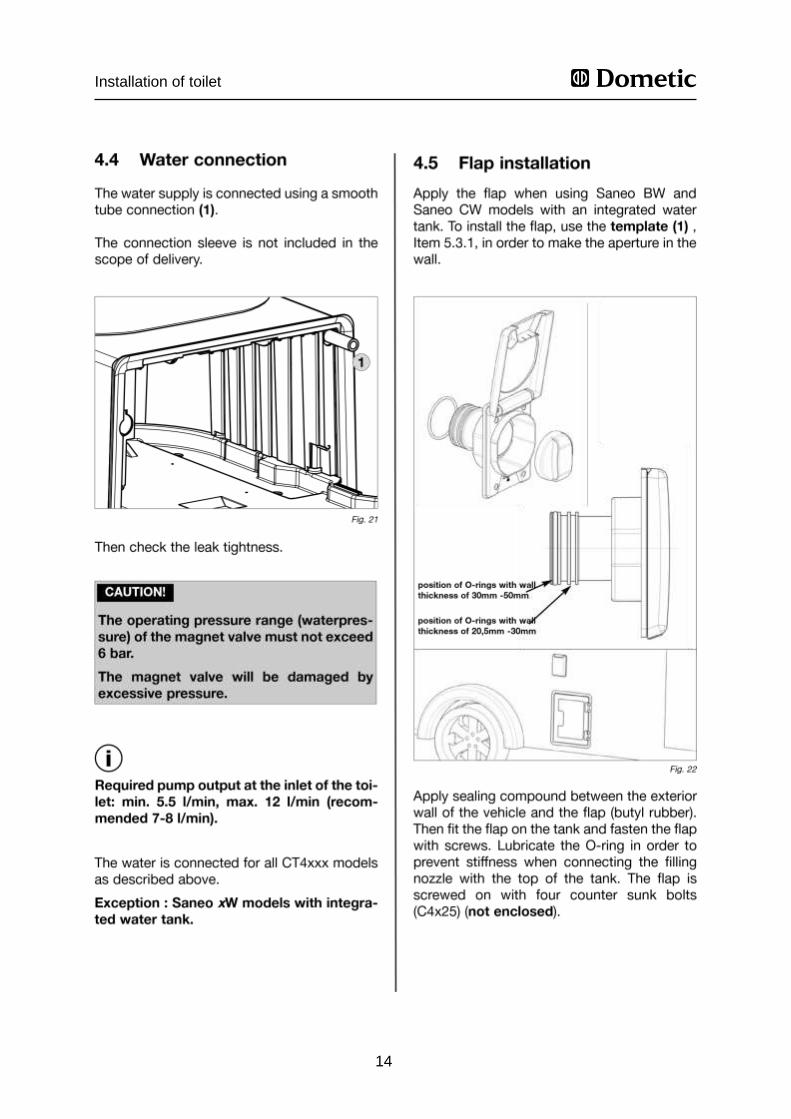
4.2.2 Wall aperture flap
The flap is applied when using Saneo BW and
Saneo CW models with an integrated water
tank. Use the template (1) , Item 5.3.1., to make
the aperture for the flap. You can find the
installation instructions for the flap under Item
4.5.
4.3 Installing the toilet CAUTION!
All components of the system must be
installed in frost-protected areas. In
minus temperatures there is a risk of damage due to
frost.
Install the toilet according to the description
of the respective model.
Only install the toilet against an upright wall.
Leave at least 60 mm clearance from side
walls so that swivelling of the toilet top part
(with seat) is not restricted.
Observe the dimension sketches and
templates, section 5.2, 5.3., 5.4 .
Fig.6
When installing the toilet in a wet room, we
recommend connecting the toilet with the
shower tub.

11
Installation of toilet

12
Installation of toilet
13
Installation of toilet
14
Installation of toilet

15
Installation of toilet
Fig.24
Fig.23
Electric connection 4.6
4.6.1 System diagrams
Electric connection must be carried out by trained staff.
CAUTION!
Note the following instructions before installa-
tion of the cassette toilet:
Connect the toilet to a suitable power supply via the main connection block of
the vehicle (Fig. 23).
The toilet must not be directly connected in parallel to other consumers, otherwise
malfunctions or damage to the toilet controller can occur (Fig. 24).
A line fuse is not necessary as the toilet is fused internally.
V DC 12 Battery
Toilet Saneo
Water pump
Do NOT connect for use of a pressurised water pump!
Toilet Saneo
Water pump 12 V DC
Do not connect toilet to the power supply directly in parallel with other electrical consumers.
CAUTION!
+
-
+
-
+
-
+
- Please find circuit diagrams in Chapt. 5, annex !
i
4.6.1.1 General system diagram
16
Installation of toilet
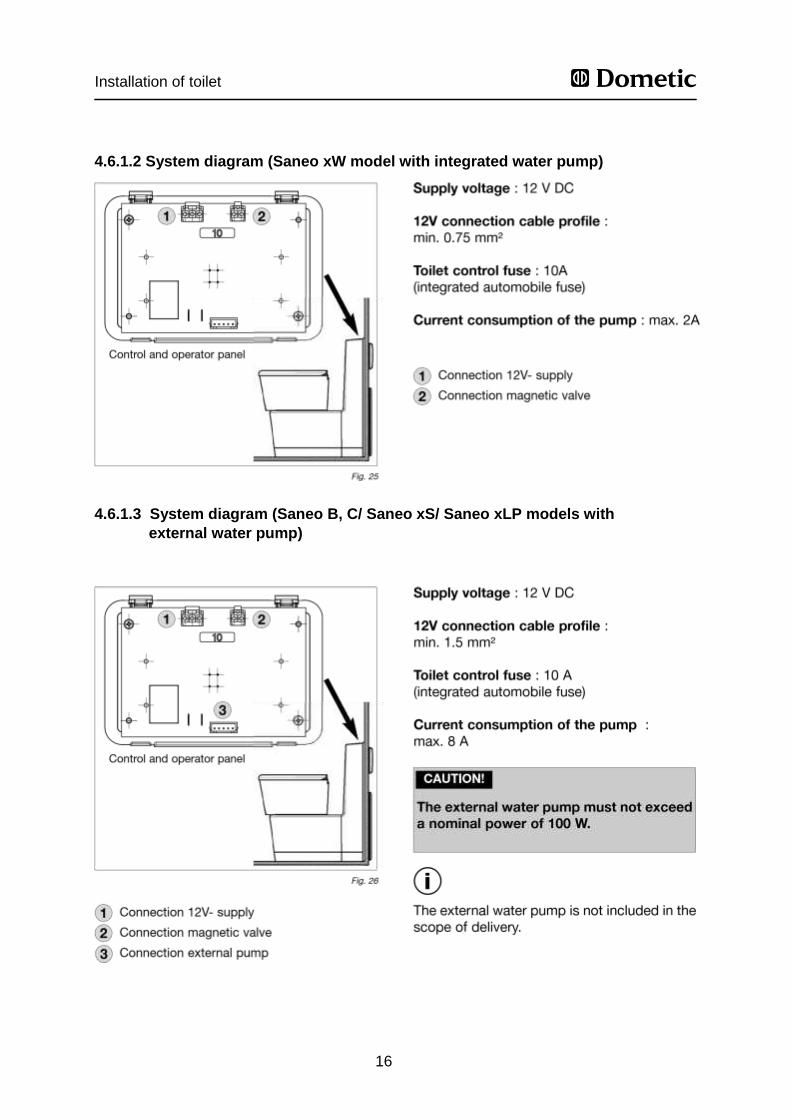
4.6.1.2 System diagram (Saneo xW model with integrated water pump)
4.6.1.3 System diagram (Saneo B, C/ Saneo xS/ Saneo xLP models with
external water pump)


![T921 Toilet Cubicle User Manual - Shades Technics · shades technics [T921 TOILET CUBICLE USER MANUAL] 3 Cubicle Operating Instructions Switching the cubicle ‘ON’ Engage the WC](https://img.pdfslide.us/doc/110x75/5d28d82d88c9934b068c87aa/t921-toilet-cubicle-user-manual-shades-shades-technics-t921-toilet-cubicle.jpg)