Embed Size (px)
Citation preview
O
btai
ned
from
Om
arsh
aunt
edtra
il.com
http://www.mactavishmanor.com/coffinworks1.html
How to toe pincher coffin
Well I decided I wanted a new toe-pincher for myself, something very gothic and old world looking. I built this coffin in basically a weekend of course its my tenth coffin to build of this style so I've had a little practice. Take your time and it should turn out pretty good.
I will give a basic list of the required items and an over-all set of dimensions. Mine is built to my specifications and will fit only myself so you will have to adjust for your size and could increase your bill of materials.
BILL OF MATERIALS:
• 8 EACH 1'-0" X 6'-0" 3/4" PINE BOARDS • 8 EACH 1X4 PINE STRINGERS 8'-0" LONG • WOOD GLUE • TRIM/MOULDING: • THIS IS YOUR CALL MOST HOME IMPROVEMENT CHAINS HAVE A HUGE
SELECTION OF TRIM AND MOULDING ALSO A VARIOUS ASSORTMENT OF DETAIL PIECES TO SPICE UP YOUR COFFIN I BOUGHT ABOUT 16 SMALL PIECES IN 8'-0" LENGTHS OF DETAILED TRIM AND I USED 3 12'-0" PIECES OF 3/4" QUATER ROUND AND ONE 16'-0" PIECE OF BASE BOARD MOULDING
• 1-2 BOXES OF 1-1/4" FINISHING NAILS • SAND PAPER 150 GRIT • 1/16TH INCH TITANIUM DRILL BITS • WOOD PUTTY • WOOD STAIN: YOUR CHOICE OF COLOR
O
btai
ned
from
Om
arsh
aunt
edtra
il.com
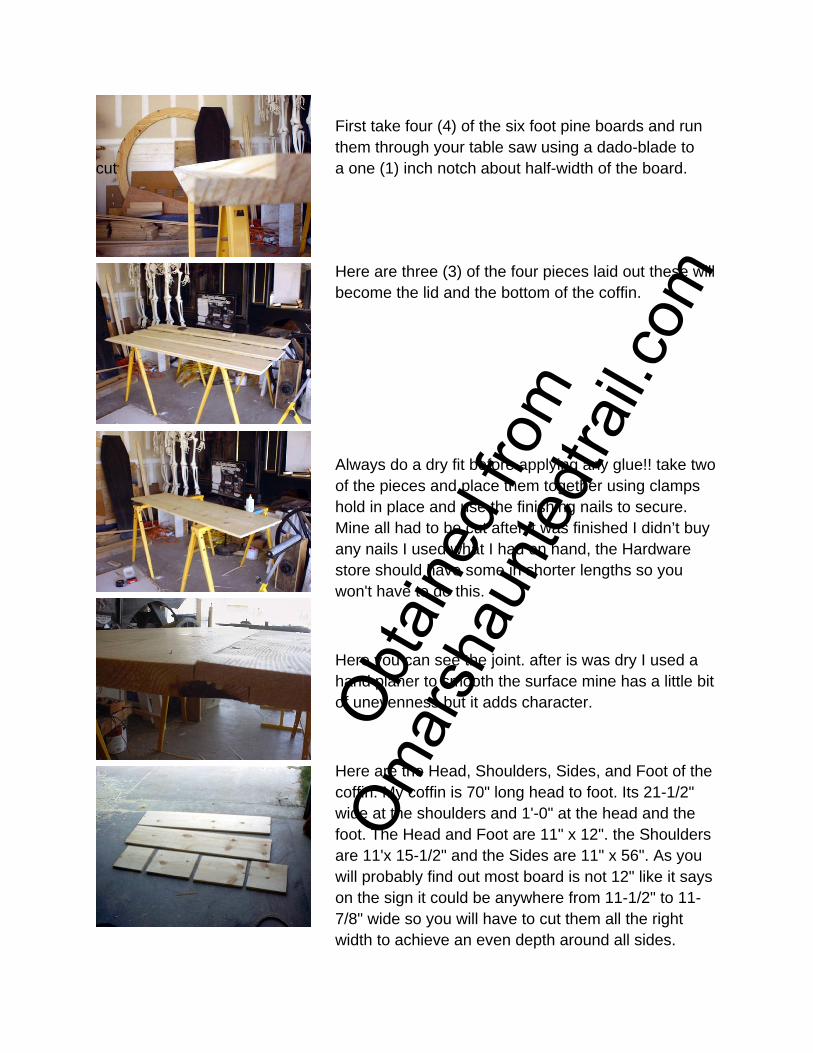
First take four (4) of the six foot pine boards and run them through your table saw using a dado-blade to cut a one (1) inch notch about half-width of the board.
Here are three (3) of the four pieces laid out these will become the lid and the bottom of the coffin.
Always do a dry fit before applying any glue!! take two of the pieces and place them together using clamps hold in place and use the finishing nails to secure. Mine all had to be cut after it was finished I didn’t buy any nails I used what I had on hand, the Hardware store should have some in shorter lengths so you won't have to do this.
Here you can see the joint. after is was dry I used a hand planer to smooth the surface mine has a little bit of unevenness but it adds character.
Here are the Head, Shoulders, Sides, and Foot of the coffin. My coffin is 70" long head to foot. Its 21-1/2" wide at the shoulders and 1'-0" at the head and the foot. The Head and Foot are 11" x 12". the Shoulders are 11'x 15-1/2" and the Sides are 11" x 56". As you will probably find out most board is not 12" like it says on the sign it could be anywhere from 11-1/2" to 11- 7/8" wide so you will have to cut them all the right width to achieve an even depth around all sides.
O
btai
ned
from
Om
arsh
aunt
edtra
il.com
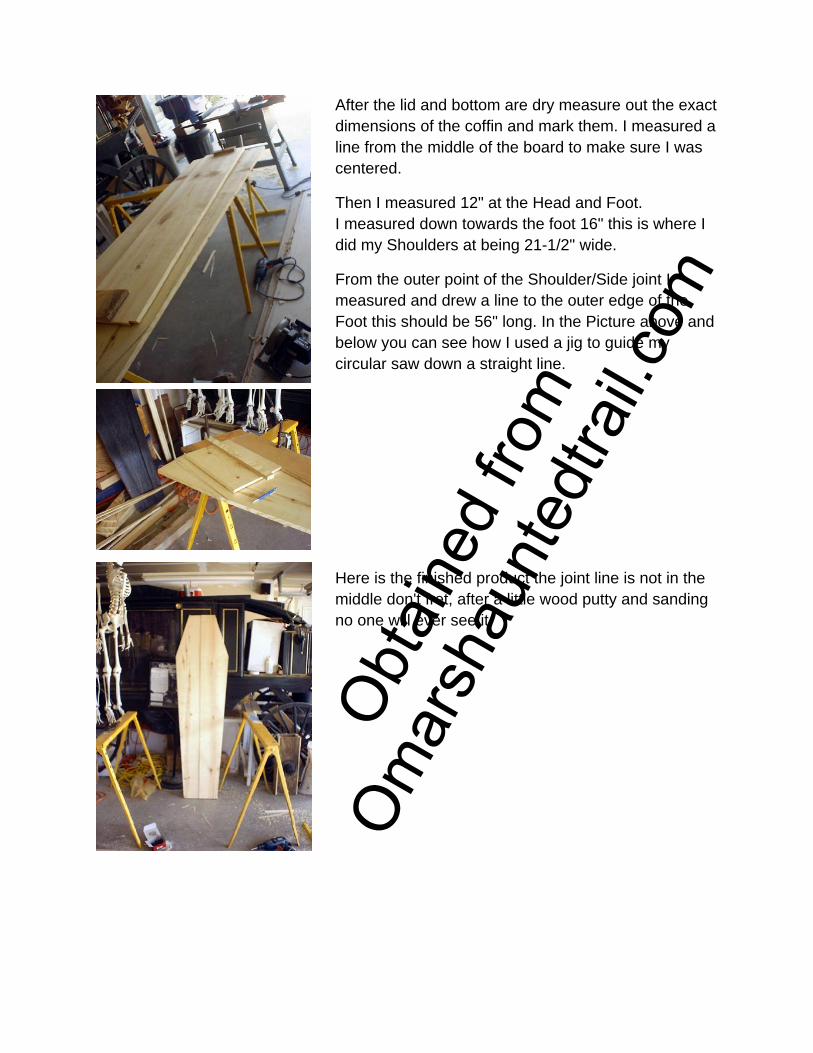
After the lid and bottom are dry measure out the exact dimensions of the coffin and mark them. I measured a line from the middle of the board to make sure I was centered.
Then I measured 12" at the Head and Foot. I measured down towards the foot 16" this is where I did my Shoulders at being 21-1/2" wide.
From the outer point of the Shoulder/Side joint I measured and drew a line to the outer edge of the Foot this should be 56" long. In the Picture above and below you can see how I used a jig to guide my circular saw down a straight line.
Here is the finished product the joint line is not in the middle don't fret, after a little wood putty and sanding no one will ever see it.
O
btai
ned
from
Om
arsh
aunt
edtra
il.com
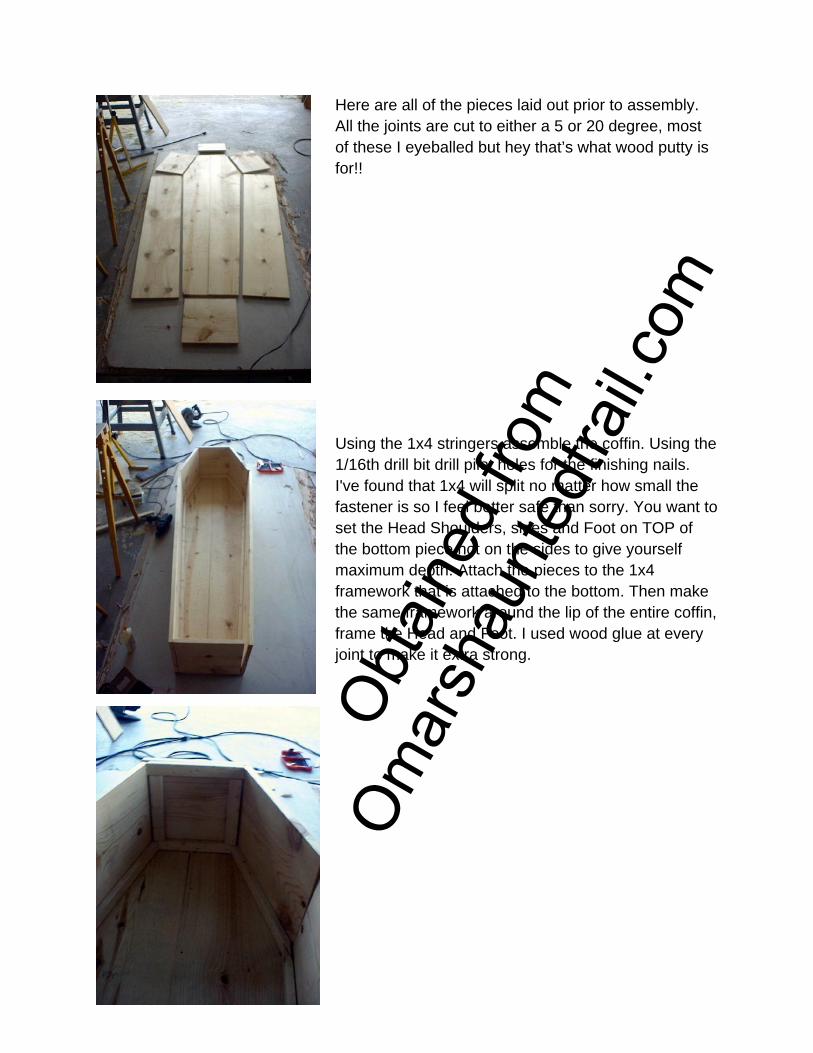
Here are all of the pieces laid out prior to assembly. All the joints are cut to either a 5 or 20 degree, most of these I eyeballed but hey that’s what wood putty is for!!
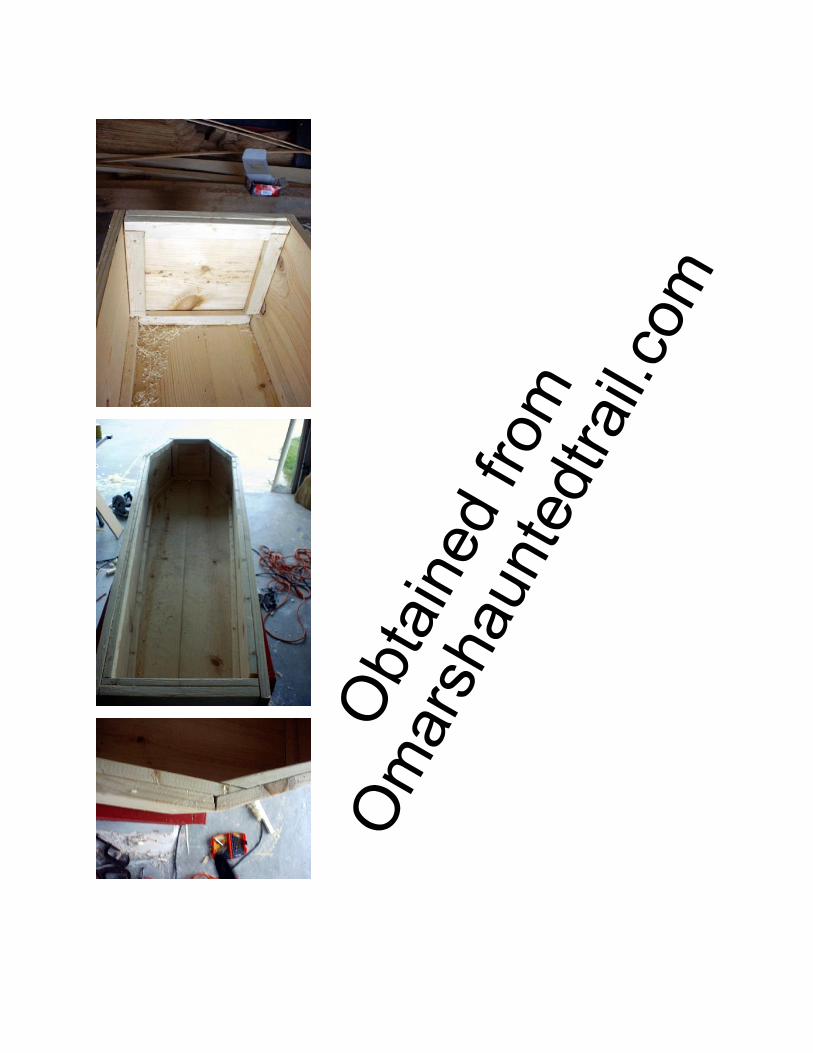
Using the 1x4 stringers assemble the coffin. Using the 1/16th drill bit drill pilot holes for the finishing nails. I've found that 1x4 will split no matter how small the fastener is so I feel better safe than sorry. You want to set the Head Shoulders, sides and Foot on TOP of the bottom piece not on the sides to give yourself maximum depth. Attach the pieces to the 1x4 framework that is attached to the bottom. Then make the same framework around the lip of the entire coffin, frame the Head and Foot. I used wood glue at every joint to make it extra strong.
O
btai
ned
from
Om
arsh
aunt
edtra
il.com
O
btai
ned
from
Om
arsh
aunt
edtra
il.com
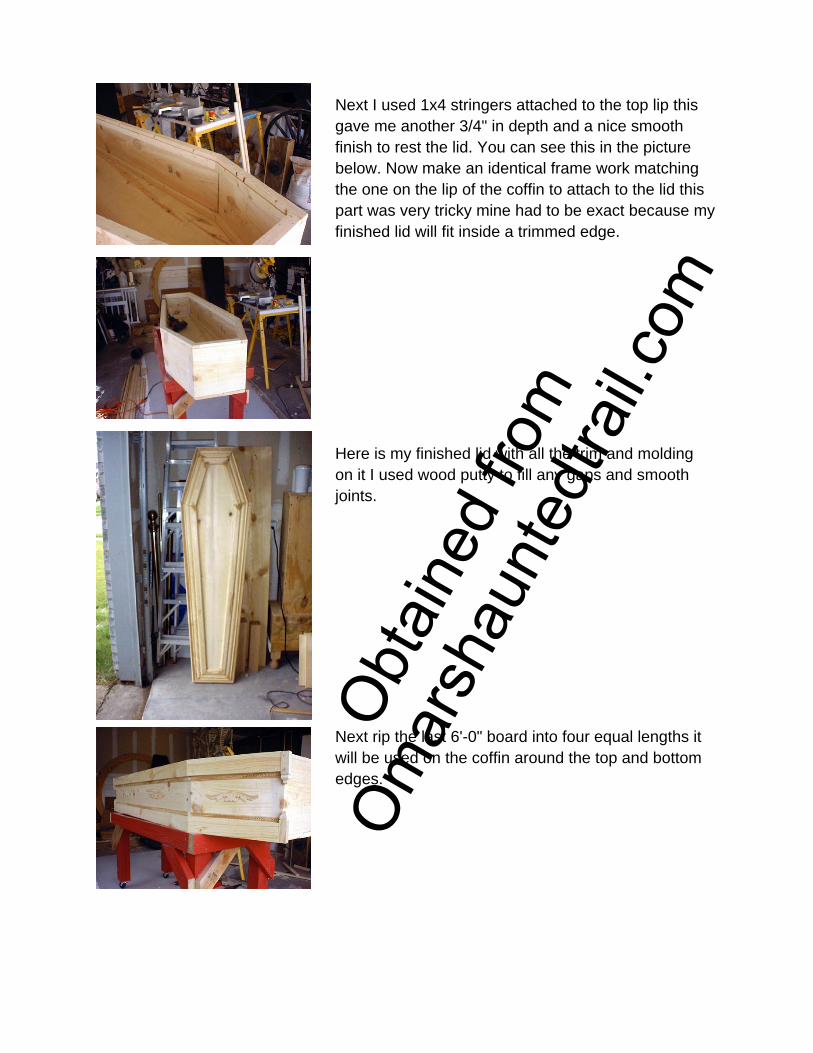
Next I used 1x4 stringers attached to the top lip this gave me another 3/4" in depth and a nice smooth finish to rest the lid. You can see this in the picture below. Now make an identical frame work matching the one on the lip of the coffin to attach to the lid this part was very tricky mine had to be exact because my finished lid will fit inside a trimmed edge.
Here is my finished lid with all the trim and molding on it I used wood putty to fill any gaps and smooth joints.
Next rip the last 6'-0" board into four equal lengths it will be used on the coffin around the top and bottom edges.
O
btai
ned
from
Om
arsh
aunt
edtra
il.com
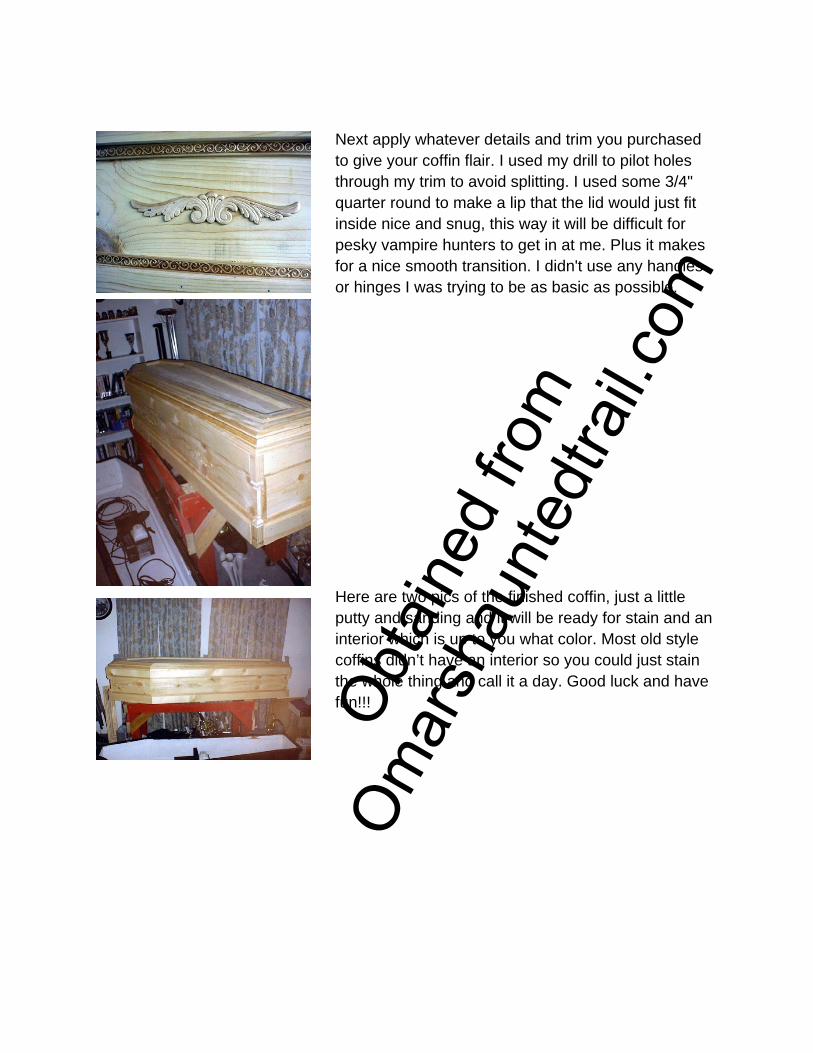
Next apply whatever details and trim you purchased to give your coffin flair. I used my drill to pilot holes through my trim to avoid splitting. I used some 3/4" quarter round to make a lip that the lid would just fit inside nice and snug, this way it will be difficult for pesky vampire hunters to get in at me. Plus it makes for a nice smooth transition. I didn't use any handles or hinges I was trying to be as basic as possible.
Here are two pics of the finished coffin, just a little putty and sanding and it will be ready for stain and an interior which is up to you what color. Most old style coffins didn’t have an interior so you could just stain the whole thing and call it a day. Good luck and have fun!!!