Embed Size (px)
Citation preview

Tivoli Identity Manager
End User GuideVersion 4.5.0
SC32-1152-01
���

Tivoli Identity Manager
End User GuideVersion 4.5.0
SC32-1152-01
���
NOTE:
Before using this information and the product it supports, read the information in “Notices” on page 39.
Second Edition (August 2003)
© Copyright International Business Machines Corporation 2003. All rights reserved.US Government Users Restricted Rights – Use, duplication or disclosure restricted by GSA ADP Schedule Contractwith IBM Corp.
Contents
Preface . . . . . . . . . . . . . . . . . . . . . . . . . . . . . . . . . . . . vWho Should Read This Book . . . . . . . . . . . . . . . . . . . . . . . . . . . . . . vPublications . . . . . . . . . . . . . . . . . . . . . . . . . . . . . . . . . . . v
Tivoli Identity Manager Server library . . . . . . . . . . . . . . . . . . . . . . . . . . vRelated publications . . . . . . . . . . . . . . . . . . . . . . . . . . . . . . . . vAccessing Publications Online . . . . . . . . . . . . . . . . . . . . . . . . . . . . vi
Accessibility . . . . . . . . . . . . . . . . . . . . . . . . . . . . . . . . . . . viContacting software support . . . . . . . . . . . . . . . . . . . . . . . . . . . . . . viConventions used in this book . . . . . . . . . . . . . . . . . . . . . . . . . . . . . vii
Chapter 1. Introduction . . . . . . . . . . . . . . . . . . . . . . . . . . . . . 1Tivoli Identity Manager Structure . . . . . . . . . . . . . . . . . . . . . . . . . . . . 1Navigation . . . . . . . . . . . . . . . . . . . . . . . . . . . . . . . . . . . . 2Organization Management. . . . . . . . . . . . . . . . . . . . . . . . . . . . . . . 2People Management . . . . . . . . . . . . . . . . . . . . . . . . . . . . . . . . . 2Managing Services . . . . . . . . . . . . . . . . . . . . . . . . . . . . . . . . . 3Provisioning . . . . . . . . . . . . . . . . . . . . . . . . . . . . . . . . . . . 3
Chapter 2. Logging In . . . . . . . . . . . . . . . . . . . . . . . . . . . . . . 5Language Selector . . . . . . . . . . . . . . . . . . . . . . . . . . . . . . . . . 5Retrieving New Passwords . . . . . . . . . . . . . . . . . . . . . . . . . . . . . . 5Forgotten Passwords (Password Challenge/Response) . . . . . . . . . . . . . . . . . . . . . 6
Forced Challenge/Response Configuration . . . . . . . . . . . . . . . . . . . . . . . . 6Retrieving a Password . . . . . . . . . . . . . . . . . . . . . . . . . . . . . . . 7
Forced Password Change . . . . . . . . . . . . . . . . . . . . . . . . . . . . . . . 7Expired Passwords . . . . . . . . . . . . . . . . . . . . . . . . . . . . . . . . . 7
Chapter 3. Common Features . . . . . . . . . . . . . . . . . . . . . . . . . . 9Navigation . . . . . . . . . . . . . . . . . . . . . . . . . . . . . . . . . . . . 9
Main Menu Navigation Bar . . . . . . . . . . . . . . . . . . . . . . . . . . . . . 9Task Bar . . . . . . . . . . . . . . . . . . . . . . . . . . . . . . . . . . . . 9
Effective Date . . . . . . . . . . . . . . . . . . . . . . . . . . . . . . . . . . 10Help. . . . . . . . . . . . . . . . . . . . . . . . . . . . . . . . . . . . . . 10
Chapter 4. Home . . . . . . . . . . . . . . . . . . . . . . . . . . . . . . . 11Password Management . . . . . . . . . . . . . . . . . . . . . . . . . . . . . . . 11Account Management . . . . . . . . . . . . . . . . . . . . . . . . . . . . . . . . 12
Adding New Accounts . . . . . . . . . . . . . . . . . . . . . . . . . . . . . . 14Modifying Existing Accounts . . . . . . . . . . . . . . . . . . . . . . . . . . . . 14Suspending or Deprovisioning Accounts. . . . . . . . . . . . . . . . . . . . . . . . . 15Restoring Accounts . . . . . . . . . . . . . . . . . . . . . . . . . . . . . . . . 15Changing Passwords . . . . . . . . . . . . . . . . . . . . . . . . . . . . . . . 16
To Do List . . . . . . . . . . . . . . . . . . . . . . . . . . . . . . . . . . . . 16Viewing To Do List Request Details . . . . . . . . . . . . . . . . . . . . . . . . . . 18
Pending Requests . . . . . . . . . . . . . . . . . . . . . . . . . . . . . . . . . 18Completed Requests . . . . . . . . . . . . . . . . . . . . . . . . . . . . . . . . 18Personal Information . . . . . . . . . . . . . . . . . . . . . . . . . . . . . . . . 19Delegating Authority . . . . . . . . . . . . . . . . . . . . . . . . . . . . . . . . 20
Adding a Delegate . . . . . . . . . . . . . . . . . . . . . . . . . . . . . . . . 20Changing the Delegate . . . . . . . . . . . . . . . . . . . . . . . . . . . . . . 20Modifying the Selected Delegate . . . . . . . . . . . . . . . . . . . . . . . . . . . 21
Password Challenge/Response Answers . . . . . . . . . . . . . . . . . . . . . . . . . . 21
Chapter 5. Reports . . . . . . . . . . . . . . . . . . . . . . . . . . . . . . 23
© Copyright IBM Corp. 2003 iii
Report Types . . . . . . . . . . . . . . . . . . . . . . . . . . . . . . . . . . . 23End User Reports . . . . . . . . . . . . . . . . . . . . . . . . . . . . . . . . 24Operation Report . . . . . . . . . . . . . . . . . . . . . . . . . . . . . . . . 25Service Report . . . . . . . . . . . . . . . . . . . . . . . . . . . . . . . . . 26User Report . . . . . . . . . . . . . . . . . . . . . . . . . . . . . . . . . . 28Rejected Report . . . . . . . . . . . . . . . . . . . . . . . . . . . . . . . . . 29Reconciliation Report . . . . . . . . . . . . . . . . . . . . . . . . . . . . . . . 31Dormant Report . . . . . . . . . . . . . . . . . . . . . . . . . . . . . . . . . 31Account Reports. . . . . . . . . . . . . . . . . . . . . . . . . . . . . . . . . 32Ad-Hoc (and Crystal) Reports . . . . . . . . . . . . . . . . . . . . . . . . . . . . 34
Glossary . . . . . . . . . . . . . . . . . . . . . . . . . . . . . . . . . . . 35
Notices . . . . . . . . . . . . . . . . . . . . . . . . . . . . . . . . . . . 39Trademarks . . . . . . . . . . . . . . . . . . . . . . . . . . . . . . . . . . . 40
Index . . . . . . . . . . . . . . . . . . . . . . . . . . . . . . . . . . . . 43
iv Tivoli Identity Manager: End User Guide
Preface
The IBM® Tivoli® Identity Manager Server (Tivoli Identity Manager Server) is anadministrative tool to manage security across your entire organization. Thismanual describes how to use Tivoli Identity Manager end user functions andfeatures.
Who Should Read This BookThis manual is intended for end users responsible for maintaining their TivoliIdentity Manager accounts. Readers are expected to understand basic Web andbrowser concepts and should be capable of performing routine end user tasks.
PublicationsRead the descriptions of the Tivoli Identity Manager library, the prerequisitepublications, and the related publications to determine which publications youmight find helpful. After you determine the publications you need, refer to theinstructions for accessing publications online.
Tivoli Identity Manager Server libraryThe publications in the Tivoli Identity Manager library are:v Online user assistance for Tivoli Identity Manager
Provides integrated online help topics for all Tivoli Identity Manageradministrative tasks.
v Separate versions of Tivoli Identity Manager Server Installation Guide on eitherUNIX® or Windows®, using either WebSphere or WebLogic. Use the versionappropriate for your site.Provides installation information for Tivoli Identity Manager.
v Tivoli Identity Manager Policy and Organization Administration Guide
Provides topics for Tivoli Identity Manager administrative tasks.v Tivoli Identity Manager Server Configuration Guide
Provides configuration information for single-server and cluster Tivoli IdentityManager configurations.
v Tivoli Identity Manager End User Guide
Provides beginning user information for Tivoli Identity Manager.v Tivoli Identity Manager Server Release Notes
Provides software and hardware requirements for Tivoli Identity Manager, andadditional fix, patch, and other support information.
v Tivoli Identity Manager Troubleshooting Guide
Provides additional problem solving information for the Tivoli Identity Managerproduct.
Related publicationsInformation related to Tivoli Identity Manager is available in the followingpublications:
© Copyright IBM Corp. 2003 v
v The Tivoli Software Library provides a variety of Tivoli publications such aswhite papers, datasheets, demonstrations, redbooks, and announcement letters.The Tivoli Software Library is available on the Web at:http://www.ibm.com/software/tivoli/library/
v The Tivoli Software Glossary includes definitions for many of the technical termsrelated to Tivoli software. The Tivoli Software Glossary is available, in Englishonly, from the Glossary link on the left side of the Tivoli Software Library Webpagehttp://www.ibm.com/software/tivoli/library/
Accessing Publications OnlineThe publications for this product are available online in Portable Document Format(PDF) or Hypertext Markup Language (HTML) format, or both in the TivoliSoftware Library:
http://www.ibm.com/software/tivoli/library/
To locate product publications in the library, click the Product manuals link on theleft side of the Library page. Then, locate and click the name of the product on theTivoli Software Information Center page.
Product publications include release notes, installation guides, user’s guides,administrator’s guides, and developer’s references.
Note: To ensure proper printing of PDF publications, select the Fit to page checkbox in the Adobe Acrobat Print window (which is available when you clickFile > Print).
AccessibilityThe product documentation includes the following features to aid accessibility:v Documentation is available in both HTML and PDF formats to give the
maximum opportunity for users to apply screen-reader software.v All images in the documentation are provided with alternative text so that users
with vision impairments can understand the contents of the images.
Contacting software supportBefore contacting IBM Tivoli Software support with a problem, refer to the IBMTivoli Software support Web site at:
http://www.ibm.com/software/sysmgmt/products/support/
If you need additional help, contact software support by using the methodsdescribed in the IBM Software Support Guide at the following Web site:
http://techsupport.services.ibm.com/guides/handbook.html
The guide provides the following information:v Registration and eligibility requirements for receiving supportv Telephone numbers and e-mail addresses, depending on the country in which
you are locatedv A list of information you should gather before contacting customer support
vi Tivoli Identity Manager: End User Guide
Conventions used in this bookThis reference uses several conventions for special terms and actions and foroperating system-dependent commands and paths.
The following typeface conventions are used in this book:
Bold Bold text indicates selectable window buttons, field entries, andcommands appearing in this manual except from within examplesor the contents of files.
Monospace Text in monospace type indicates the contents of files, file names, orthe output from commands.
italic Italic text indicates context-specific values such as:v path namesv file namesv user namesv group namesv system parametersv environment variables
% The percent sign (%) indicates the C shell screen prompt as part ofexamples included in this manual. Your system’s C shell screenprompt may be different.
Preface vii

viii Tivoli Identity Manager: End User Guide
Chapter 1. Introduction
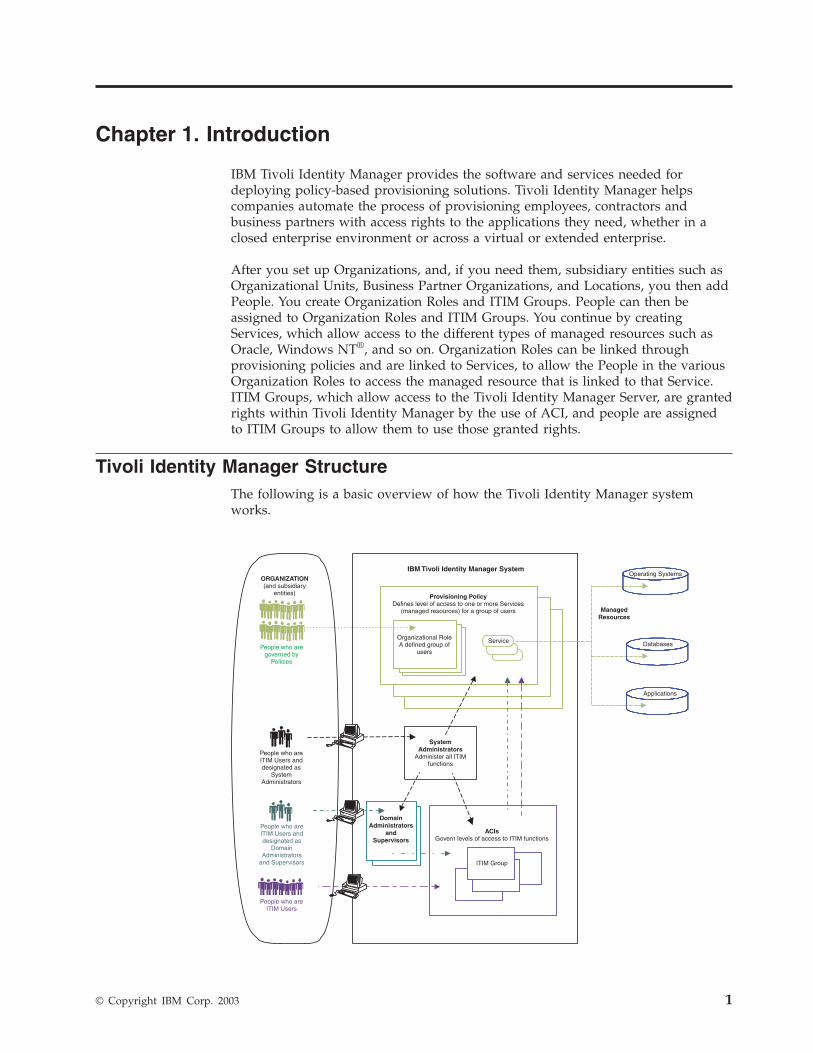
IBM Tivoli Identity Manager provides the software and services needed fordeploying policy-based provisioning solutions. Tivoli Identity Manager helpscompanies automate the process of provisioning employees, contractors andbusiness partners with access rights to the applications they need, whether in aclosed enterprise environment or across a virtual or extended enterprise.
After you set up Organizations, and, if you need them, subsidiary entities such asOrganizational Units, Business Partner Organizations, and Locations, you then addPeople. You create Organization Roles and ITIM Groups. People can then beassigned to Organization Roles and ITIM Groups. You continue by creatingServices, which allow access to the different types of managed resources such asOracle, Windows NT®, and so on. Organization Roles can be linked throughprovisioning policies and are linked to Services, to allow the People in the variousOrganization Roles to access the managed resource that is linked to that Service.ITIM Groups, which allow access to the Tivoli Identity Manager Server, are grantedrights within Tivoli Identity Manager by the use of ACI, and people are assignedto ITIM Groups to allow them to use those granted rights.
Tivoli Identity Manager StructureThe following is a basic overview of how the Tivoli Identity Manager systemworks.
IBM Tivoli Identity Manager System
SystemAdministrators
Administer all ITIMfunctions
Provisioning PolicyDefines level of access to one or more Services
(managed resources) for a group of users ManagedResources
ACIsGovern levels of access to ITIM functions
DomainAdministrators
andSupervisors
ITIM Group
Organizational RoleA defined group of
users
ORGANIZATION(and subsidiary
entities)
People who aregoverned by
Policies
People who areITIM Users
People who areITIM Users anddesignated as
SystemAdministrators
People who areITIM Users anddesignated as
DomainAdministrators
and Supervisors
Service Databases
Operating Systems
Applications
© Copyright IBM Corp. 2003 1
People are added to Organizations and entities that are subsidiaries to anOrganization.
A person can be assigned to an Organizational Role, which confers access toManaged Resources, through a Provisioning Policy, which sets the rights a personhas when accessing the target Managed Resource.
An ITIM User can also be assigned to an ITIM Group, which confers access to theTivoli Identity Manager Server, through the functions granted by ACI.
Some people, usually only one or a few, are assigned as System Administrators,and have access to all Tivoli Identity Manager functions, at all levels.
NavigationThe Main Menu Navigation Bar at the top of each page allows for easy navigationthrough the Tivoli Identity Manager system. You can then access functions withineach Main Menu Navigation Bar selection by using the task bar choices on the leftside of the system page.
Your Tivoli Identity Manager system consists of one or more Organizations thatcan contain subsidiary entities, such as Organizational Units, Locations, andBusiness Partner Organizations, all in a parent-child relationship. Each TivoliIdentity Manager entity can contain people, who you can then assign to ITIMGroups and Organizational Roles. You can assign the role of System Administratorto people who need full access to all functional areas of Tivoli Identity Manager.
Organization ManagementOrganization management is performed using the My Organization tab on theMain Menu Navigation Bar. Clicking My Organization displays the Organizationtask bar on the left side of the page. The task bar displays functions you canperform within the organizations and their subsidiary entities, as well as thepeople contained within the organizations and other entities.
When you click My Organization, Tivoli Identity Manager displays a two-panepage. The left pane displays a list of the Organizations, in a format that can beexpanded/collapsed to show subsidiary entities. You use this list to select an entity.The right pane displays a list of entities (Organizations, Locations, OrganizationalUnits, Business Partner Organizations) or People (for the selected entity).
Any of the subsidiary entities can be subsidiaries of an Organization or of any ofthe other entities. There is no restriction on hierarchy for subsidiary entities, so, forexample, a Location can contain other Locations, and Organization Units cancontain other Organization Units, along with any of the other subsidiary entities.An Organization must always be at the top of the organizational hierarchy.
People ManagementWhen adding people, you must put them into either an Organization or othercontainer such as an Organizational Unit, Business Partner Organization, AdminDomain, or Location. After a person is added to an Organization or othercontainer, that person can be Provisioned with a Service which allows them toaccess a managed resource, including the Tivoli Identity Manager Server.
2 Tivoli Identity Manager: End User Guide
Managing ServicesYou can add a service to an Organization, which opens the ability for people toaccess that service. A service is a managed resource, such as a Windows NT®
Server, MS Exchange Server, or even the Tivoli Identity Manager Server. The termfor allowing access to a managed resource is provisioning. Because the TivoliIdentity Manager Server is also one of the services that can be managed, there willbe people who need that service provisioned, even if only to access and managetheir own Tivoli Identity Manager accounts and personal information. If a personis not provisioned to the ITIM Service, that person has have no access to any oftheir own information in Tivoli Identity Manager. If a person has servicesProvisioned, that person has access to those services.
ProvisioningServices are not provisioned to individual people, only to Organizational Roles. If aperson needs access to a particular service, that person must be assigned to anOrganizational Role that is provisioned with that service.
People who are to act as Users of Tivoli Identity Manager can do so only throughassignment to an ITIM Group. ITIM Groups are granted various types of accessthrough Access Control Information (ACI) routines. An Access Control Informationroutine defines three things:v Types of functions that are granted to the ITIM Groupv Organization or subsidiary entity types upon which the granted functions may
be performedv Level within the organizational hierarchy at which the granted functions may be
performed
Chapter 1. Introduction 3

4 Tivoli Identity Manager: End User Guide
Chapter 2. Logging In
The Log In routine keeps unauthorized people from accessing your Tivoli IdentityManager System, allows you to access the areas to which you have beenauthorized, and presents a Forgotten Password procedure if you cannot rememberyour password.
To log into Tivoli Identity Manager, you must enter your user ID and password.Your account is provisioned with the rights required to complete your duties. Yourpassword must conform to the password rules for your organization.
To log in to Tivoli Identity Manager:
1. Enter your User ID and click Tab to move to the Password field.2. Enter your Password and either press Enter or click Login.
Language SelectorTivoli Identity Manager allows users to select the language used within the TivoliIdentity Manager system.
To change languages:
1. Click Select Another Language in the lower left corner of the login page.The Language Selector page opens.
2. Click the desired language.Tivoli Identity Manager Server is configured to use the selected language andthe Login page reappears.
3. Log into the system and use as desired.
If you log on using the single sign-on capability and need to select a language,append /language to the Web site address. For example, enter:https://mysite.myco.com/itim/enrole/language
For more information on configuring the language default for your Web browser,refer to the Tivoli Identity Manager Server Configuration Guide.
Retrieving New PasswordsAfter a new account has been added to a person, the system will notify the personthrough e-mail, using the e-mail address in the personal information record. Thesystem can be configured so the person receives an e-mail that contains theaccount password in clear text, or a URL and transaction ID number.
The following procedures describe how to retrieve a new password using the URLand the transaction ID. The user must be able to provide the Shared Secret toretrieve the new password.
To retrieve a new password:
1. Click the URL shown in the e-mail to display the Retrieve Password page.The Retrieve Password page opens with the Transaction ID field filled with theTransaction ID number that was provided in the e-mail.
© Copyright IBM Corp. 2003 5
2. Type the shared secret in the Shared Secret text field and click Submit.The Password Retrieval page opens.
3. Make a note of the password and click Done.The Password Retrieval page closes.
Important: Make sure to write the password down, as this page will no longerbe available.
Forgotten Passwords (Password Challenge/Response)If users forget their password, the user can still log in to the system by answeringthe Password Challenge/Response questions correctly. After the user answers thechallenge/response questions, Tivoli Identity Manager responds in one of thefollowing manners, depending on the configuration of the system:v The user is logged in to the system and is forced to change the password
immediately.v The user is e-mailed a new password in plain text.v The user is e-mailed a link to retrieve the new password using the shared secret.
To log in using the Password Challenge/Response feature:
1. Type the login name in the Login Name field.2. Click the Forgot your password? link on the login page.
Note: If the Password Challenge/Response feature is disabled, the followingmessage appears:Password challenge/response is currently disabled.
Please contact your Identity Manager system administrator
for more information.
3. Answer the challenge/response questions and click Submit.The system responds according to one of the system configurations describedbelow:v The user is logged in to the system and is forced to change the password
immediately.v The user is e-mailed a new password in plain text.v The user is e-mailed a link to retrieve the new password using the shared
secret.
Forced Challenge/Response ConfigurationThe Password Challenge/Response feature, if enabled, allows a user access to theTivoli Identity Manager system if the user forgot his password. If the PasswordChallenge/Response feature is disabled, the user is required to contact the systemadministrator for access to the Tivoli Identity Manager system.
Whenever the Password Challenge/Response feature is enabled for the first timeor subsequently modified, users are required to set their responses to the PasswordChallenge/Response questions. Depending on the type of Challenge Mode, a usermight need to define challenges and provide responses to the challenges, selectchallenges and provide responses to the selected challenges, or provide responsesto the challenges presented.
Follow the prompts at the top of each page to configure the PasswordChallenge/Response feature.
6 Tivoli Identity Manager: End User Guide
Retrieving a PasswordIf the Tivoli Identity Manager Server is configured to e-mail the user a link toretrieve the new password, the user must be able to provide the shared secret toretrieve the new password.
To retrieve a password:
1. Click the URL shown in the e-mail to display the Retrieve Password page.The Retrieve Password page opens with the Transaction ID field filled with theTransaction ID number that was provided in the e-mail.
2. Type the shared secret in the Shared Secret text field and click Submit.The Password Retrieval page opens.
3. Make a note of the password and click Done.The Password Retrieval page closes.
Important: Make sure to write the password down, as this page will no longerbe available.
Important: You must log in and change your password immediately afterretrieving the new password. After you click Done, the transaction IDis no longer valid and you will not be able to retrieve the newpassword again.
Forced Password ChangeUsers can be forced to change their password the first time they log in to the TivoliIdentity Manager Server system using a new account or the next time they log inusing an existing account.
Note: This feature applies only to Tivoli Identity Manager accounts.
Users who are forced to change their password are taken to the Enforce PasswordChange > Change Password page immediately after logging in. The user cannotaccess any features in the Tivoli Identity Manager system until the password hasbeen changed.
Expired PasswordsAdministrators can set a limit on the lifetime value of a user’s password. Thissetting is made in:Configuration > Properties > Password expiration period
Users who are forced to change their password because of an expired passwordperiod are taken to the Enforce Password Change > Change Password pageimmediately after logging in. The user cannot access any features in the TivoliIdentity Manager system until the password has been changed.
Chapter 2. Logging In 7

8 Tivoli Identity Manager: End User Guide
Chapter 3. Common Features
There are a few common features used throughout the Tivoli Identity Managersystem. These features include the navigational features (Main Menu NavigationBar and task bar), and the effective dates feature.
NavigationThe main features used to navigate through the Tivoli Identity Manager systemare:v The Main Menu Navigation Barv The task barv Organization Tree
Refer to the following sections for more information about each navigation feature.
Main Menu Navigation BarThe Main Menu Navigation Bar is located at the top of every page and has thefollowing selections:v Homev Reportv Help
These selections allow users to quickly move to specific areas within the TivoliIdentity Manager system.
Note: The current location in the system is displayed on every page in thenavigation path. The navigation path is prefaced with the phrase: You arehere:
Task BarThe task bar is located along the left side of every page of the Home, MyOrganization, Provisioning, and Report areas of the system and displays additionalsub-areas for each topic area in the Main Menu Navigation Bar.
The following table shows what task bar options are available for each Main MenuNavigation Bar topic.
Main Menu Navigation Bar Topic Task Bar Options
Home Manage PasswordsManage AccountsAccess To Do ListView Pending RequestsView Completed RequestsAccess Personal InformationDelegate AuthorityPassword Challenge Response
© Copyright IBM Corp. 2003 9
Main Menu Navigation Bar Topic Task Bar Options
Report Run ReportControl AccessDesign SchemaDesign ReportSynchronize Data
Help No task bar options available
Effective DateThe effective date is the scheduled date and time an event occurs. You can selectthe exact date and time for the event or select the Schedule Immediately box toinitiate the event immediately.
After making your selection, click Submit to process it. When the page returns todisplaying the list of entities you have modified, you might need to click Refreshto update the page being viewed.
HelpThe Help topic in the Main Menu Navigation Bar opens the online help for theTivoli Identity Manager Server in a separate window. The online help providesinformation about concepts and features in the Tivoli Identity Manager system.
Each page also has a context-sensitive link to the online help. This link is thequestion mark button located in the top right corner of each page.
10 Tivoli Identity Manager: End User Guide
Chapter 4. Home
Home allows users to view and edit information that directly applies tothemselves. Any person who is granted access to view his own information canuse the Home section to manage his personal information and his action items.
The Home section allows users to:v Manage passwords for their accountsv Manage their accountsv Access their To Do Listv View their pending and completed requestsv Access their personal informationv Delegate authority to other usersv Set their Password Challenge Response answers
Refer to the corresponding sections for information about each task bar option.
Password ManagementThe password management section of Home is available through the ManagePasswords option in the Home task bar. This section allows users to manage all ofthe passwords to all of their accounts from one location.
The Manage Password page has the following fields and features:
Field Name Field Type Description
New Password Text field Text field used to enter newpassword.
Confirm Password Text field Text field used to confirm password.
Create Password Check box Used to determine if system shouldgenerate a new password for theaccount.
If this check box is selected, thesystem will generate a new passwordfor the account and e-mail theaddress associated with the accountthe information necessary to retrievethe new password.
Effective Date selection field Drop down menus Check box(Schedule immediately)
Selection fields to determine the timeand date the new password will takeeffect. Refer to “Effective Date” onpage 10 for more information.
Service Table Text Table that lists the services to whichthe user has accounts. The table hasfive columns. Refer to the followingtable for more information about theService table.
Submit Button Used to submit the changes to thesystem.
© Copyright IBM Corp. 2003 11
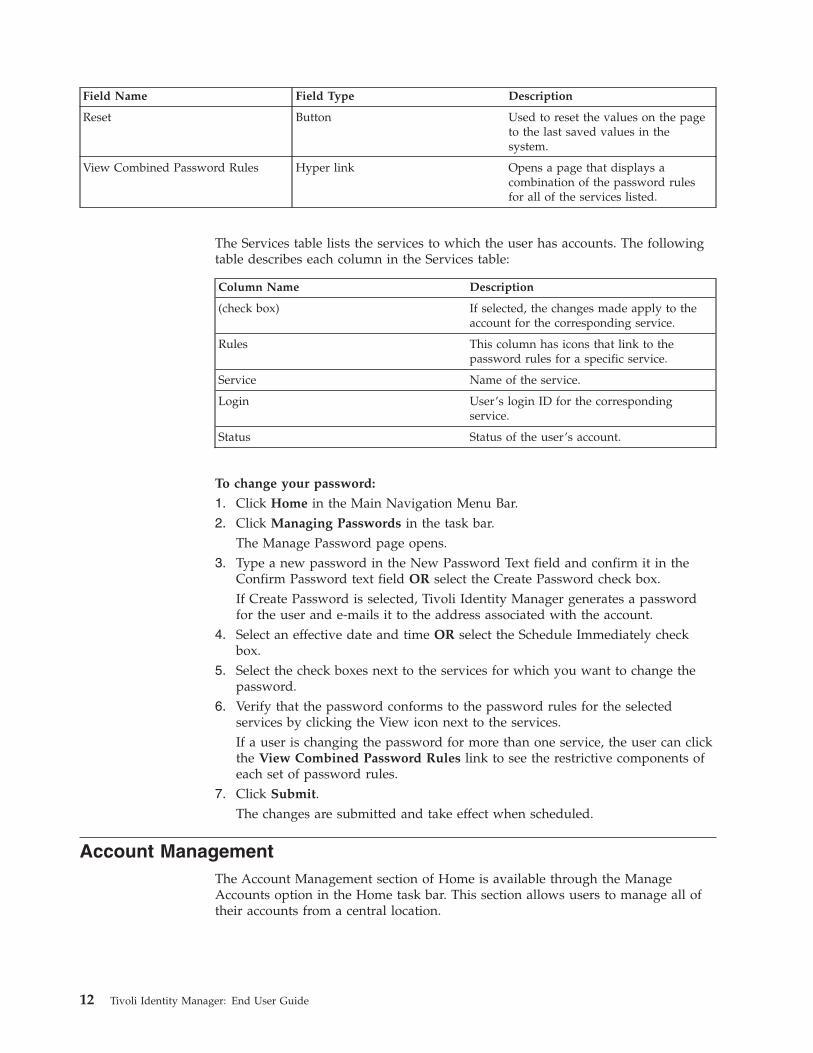
Field Name Field Type Description
Reset Button Used to reset the values on the pageto the last saved values in thesystem.
View Combined Password Rules Hyper link Opens a page that displays acombination of the password rulesfor all of the services listed.
The Services table lists the services to which the user has accounts. The followingtable describes each column in the Services table:
Column Name Description
(check box) If selected, the changes made apply to theaccount for the corresponding service.
Rules This column has icons that link to thepassword rules for a specific service.
Service Name of the service.
Login User’s login ID for the correspondingservice.
Status Status of the user’s account.
To change your password:
1. Click Home in the Main Navigation Menu Bar.2. Click Managing Passwords in the task bar.
The Manage Password page opens.3. Type a new password in the New Password Text field and confirm it in the
Confirm Password text field OR select the Create Password check box.If Create Password is selected, Tivoli Identity Manager generates a passwordfor the user and e-mails it to the address associated with the account.
4. Select an effective date and time OR select the Schedule Immediately checkbox.
5. Select the check boxes next to the services for which you want to change thepassword.
6. Verify that the password conforms to the password rules for the selectedservices by clicking the View icon next to the services.If a user is changing the password for more than one service, the user can clickthe View Combined Password Rules link to see the restrictive components ofeach set of password rules.
7. Click Submit.The changes are submitted and take effect when scheduled.
Account ManagementThe Account Management section of Home is available through the ManageAccounts option in the Home task bar. This section allows users to manage all oftheir accounts from a central location.
12 Tivoli Identity Manager: End User Guide
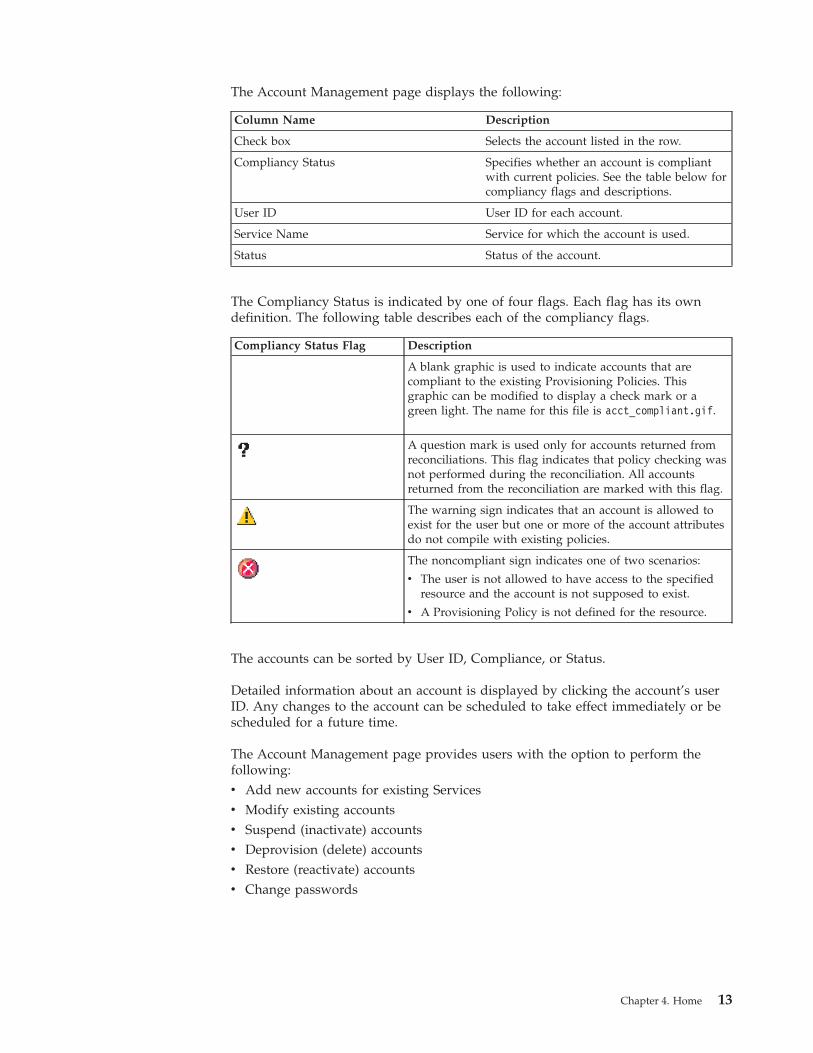
The Account Management page displays the following:
Column Name Description
Check box Selects the account listed in the row.
Compliancy Status Specifies whether an account is compliantwith current policies. See the table below forcompliancy flags and descriptions.
User ID User ID for each account.
Service Name Service for which the account is used.
Status Status of the account.
The Compliancy Status is indicated by one of four flags. Each flag has its owndefinition. The following table describes each of the compliancy flags.
Compliancy Status Flag Description
A blank graphic is used to indicate accounts that arecompliant to the existing Provisioning Policies. Thisgraphic can be modified to display a check mark or agreen light. The name for this file is acct_compliant.gif.
A question mark is used only for accounts returned fromreconciliations. This flag indicates that policy checking wasnot performed during the reconciliation. All accountsreturned from the reconciliation are marked with this flag.
The warning sign indicates that an account is allowed toexist for the user but one or more of the account attributesdo not compile with existing policies.
The noncompliant sign indicates one of two scenarios:
v The user is not allowed to have access to the specifiedresource and the account is not supposed to exist.
v A Provisioning Policy is not defined for the resource.
The accounts can be sorted by User ID, Compliance, or Status.
Detailed information about an account is displayed by clicking the account’s userID. Any changes to the account can be scheduled to take effect immediately or bescheduled for a future time.
The Account Management page provides users with the option to perform thefollowing:v Add new accounts for existing Servicesv Modify existing accountsv Suspend (inactivate) accountsv Deprovision (delete) accountsv Restore (reactivate) accountsv Change passwords
Chapter 4. Home 13
Adding New AccountsAuthorized users can add new accounts to existing services for themselves.
To add a new account:
1. Click Home in the Main Menu Navigation Bar.2. Click Manage Accounts in the task bar.
The Account Management page opens.3. Click New.
The Provision Service page opens.4. Select the radio button for the service for which you want to add a new
account and click Continue.The Provision a New Service page opens. The fields displayed on this page aredependent on the type of service selected.
5. Fill in the applicable data on the screen.
Note: If the Change Password at Next Logon? check box is selected, the user isrequired to change the password when first logging into the system.
6. Click Submit.The Enter Password and Select Effective Date|Time page opens.
7. Enter a password for the account and confirm it in the Confirm Password textfield.Be sure to conform to password rules or the password will not be accepted.
8. Select an effective date and time and click Submit.See “Effective Date” on page 10 for more information.The request is submitted and the Account Management page reappears.
9. Click Refresh to refresh the table.
Modifying Existing AccountsAuthorized users can modify one of their existing accounts from the AccountManagement page.
To modify an existing account:
1. Click Home in the Main Menu Navigation Bar.2. Click Manage Accounts in the task bar.
The Account Management page opens.3. Click the name of the account to be modified.
The Modify Account page opens.4. Change the account information as desired, and click Submit.
Note: The User Id is a required field and must be filled in before continuing.If the Change Password at Next Logon? check box is selected, the user isrequired to change the password when first logging into the system.
The Enter Password and Select Effective Date|Time page opens.5. Select an effective date and time for the changes to take affect or select the
Schedule Immediately check box.See “Effective Date” on page 10 for more information.
6. Click Submit.
14 Tivoli Identity Manager: End User Guide
The request is submitted and the Account Management page reappears.To restore the account, see “Restoring Accounts” on page 15.
7. Click Refresh to refresh the table.
Suspending or Deprovisioning AccountsAuthorized users can suspend or deprovision their own account from the AccountManagement page. Suspending an account deactivates the account so the accountowner cannot log into the Tivoli Identity Manager system. However, the account isnot deleted from the system. Deprovisioning an account deletes the account fromthe Tivoli Identity Manager system.
To suspend or deprovision an account:
1. Click Home in the Main Menu Navigation Bar.2. Click Manage Accounts in the task bar.
The Account Management page opens.3. Select the check boxes next to the accounts you want to deprovision or
suspend.4. Click De-Provision or click Suspend.
The Deprovision Service(s) page or the Suspend Service(s) page opens,depending on your selection.
5. Select an effective date and time or select the Schedule Immediately check box.See “Effective Date” on page 10 for more information.
6. Click Submit.The request is submitted and the Account Management page reappears.To restore the account, see “Restoring Accounts” on page 15.
Restoring AccountsAuthorized users can restore their own suspended account from the AccountsManagement page. A new password must be entered, or created, when restoringaccounts.
To restore an account:
1. Click Home in the Main Menu Navigation Bar.2. Click Manage Accounts in the task bar.
The Account Management page opens.3. Select the check boxes next to the accounts you want to restore and click
Restore.Only suspended accounts can be restored.
4. Enter a New Password, and confirm it, or select the check box to CreatePassword.If you select Create Password, Tivoli Identity Manager generates a passwordfor you and e-mails it to the address associated with the account.
5. Select an effective date and time or select the Schedule Immediately check box.6. Click Submit.
The request is submitted and the Account Management page reappears.7. Click Refresh to refresh the table.
Chapter 4. Home 15
Changing PasswordsITIM Users can change the password for their accounts from the AccountManagement page or the Manage Password page.
By allowing users to manage all of their accounts from one location, users can setthe password for more than one account at the same time. However, if the newpassword does not conform to the password rules for each service, the request failsand the password is not changed. Users should verify that the request iscompleted successfully before attempting to log into the desired resource using thenew password. Users can view the request results on the Completed Requestspage. (Refer to “Completed Requests” on page 18 for more information.)
Changing passwords through the Accounts Management page is very similar tochanging passwords through the Manage Passwords page. (See “PasswordManagement” on page 11 for more information about the Manage Passwordspage.)
To change an account password:
1. Click Home in the Main Menu Navigation Bar.2. Click Manage Accounts in the task bar.
The Account Management page opens.3. Select the check boxes next to the accounts you want to change the passwords
for and click Change Password.The Account Management Change Password page opens.
4. Type a new password in the New Password Text field and confirm it in theConfirm Password text field OR select the Create Password check box.If you select Create Password, Tivoli Identity Manager generates a passwordfor you and e-mails it to the address associated with the account.
5. Select an effective date and time OR select the Schedule Immediately checkbox.See “Effective Date” on page 10 for more information.
6. Verify that the check boxes next to the accounts for which you want to changethe password are selected.
7. Verify that the password conforms to the password rules for the selectedservices by clicking the View icon next to the services.If you are changing the password for more than one service, click the ViewCombined Password Rules link to see a combined list of the restrictivecomponents of each set of password rules.
8. Click Submit.The request is submitted and the Account Management page reappears.
To Do ListThe To Do List page is where ITIM Users view and complete actions items thathave been assigned to them. These action items can be requests for approval orrequests for information. Action items listed in the To Do List are part of workflowprocesses that cannot be completed properly without a response from the ITIMUser.
The To Do List page allows users to approve, reject, abort, or provide informationabout a request. The To Do List page can also be refreshed to capture and display
16 Tivoli Identity Manager: End User Guide
new action items as they are submitted. Requests for approval or information aretypically generated by another user in the system.
Note: Requests that require approval from the requestor are automaticallyapproved. If more than one signature authority is required, only the requestsent to the requestor’s own queue is automatically approved. The requestmust receive approval from additional signature authorities (as required bythe workflow design) to complete the request.
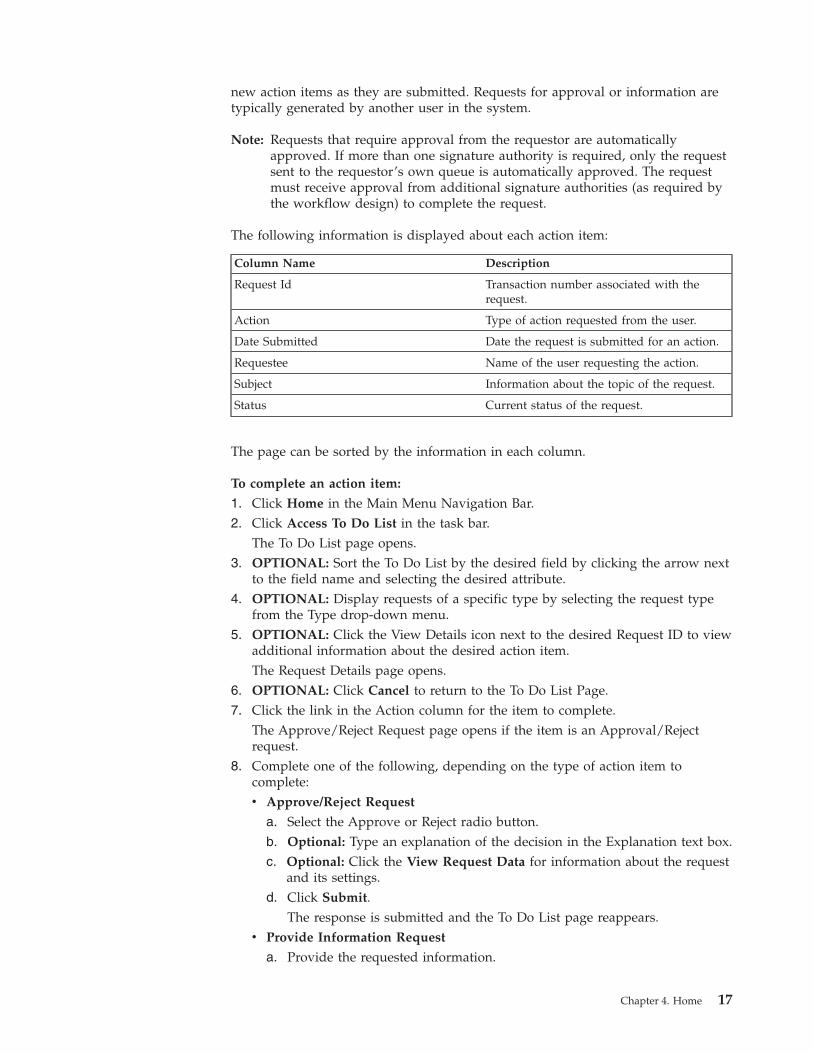
The following information is displayed about each action item:
Column Name Description
Request Id Transaction number associated with therequest.
Action Type of action requested from the user.
Date Submitted Date the request is submitted for an action.
Requestee Name of the user requesting the action.
Subject Information about the topic of the request.
Status Current status of the request.
The page can be sorted by the information in each column.
To complete an action item:
1. Click Home in the Main Menu Navigation Bar.2. Click Access To Do List in the task bar.
The To Do List page opens.3. OPTIONAL: Sort the To Do List by the desired field by clicking the arrow next
to the field name and selecting the desired attribute.4. OPTIONAL: Display requests of a specific type by selecting the request type
from the Type drop-down menu.5. OPTIONAL: Click the View Details icon next to the desired Request ID to view
additional information about the desired action item.The Request Details page opens.
6. OPTIONAL: Click Cancel to return to the To Do List Page.7. Click the link in the Action column for the item to complete.
The Approve/Reject Request page opens if the item is an Approval/Rejectrequest.
8. Complete one of the following, depending on the type of action item tocomplete:v Approve/Reject Request
a. Select the Approve or Reject radio button.b. Optional: Type an explanation of the decision in the Explanation text box.c. Optional: Click the View Request Data for information about the request
and its settings.d. Click Submit.
The response is submitted and the To Do List page reappears.v Provide Information Request
a. Provide the requested information.
Chapter 4. Home 17
b. Click Submit.The response is submitted and the To Do List page reappears.
Viewing To Do List Request DetailsUsers can view details about requests in their To Do Lists at any time.
To view details about a pending request:
1. Click Home in the Main Navigation Menu Bar.2. Click Access To Do List in the task bar.
The To Do List page opens.3. OPTIONAL: Sort the request by the desired field by clicking the arrow next to
the field name and selecting the desired attribute.The To Do List page refreshes with the requests sorted by the selected attribute.
4. Click the View icon next to the request for which you want see the details.The Request Details page opens.
5. Select the tab containing the information you wish to see.6. Click Cancel on any tab to return to the To Do List page.
Pending RequestsThe Pending Requests page is where ITIM Users view requests that have beensubmitted to the Tivoli Identity Manager system but have not been completedwithin the system. When viewing the Pending Requests page, users should clickRefresh periodically to capture and view new requests that are submitted andexisting requests that have been completed.
Pending requests can be sorted by:v Request Idv Date Submittedv Typev Requestorv Requesteev Subjectv Status
Completed RequestsThe Completed Requests page displays all requests that have been completed thatday. Users can sort the page by each column’s information by clicking the arrowsat the top of each column. To view details about each request, click the View iconnext to the Request ID at the left side of the page.
Note: To refine the information that is displayed by Tivoli Identity Manager, usethe Filter Requests selection. The Filter Requests selection allows users tofilter the information shown by Date, Requestor, Requestee, or Type ofrequest.
To reach the Completed Requests page:
1. Click Home in the Main Menu Navigation Bar.2. Click View Completed Requests.
18 Tivoli Identity Manager: End User Guide
Personal InformationThe Personal Information section contains information about you, as the owner ofaccounts managed by Tivoli Identity Manager.
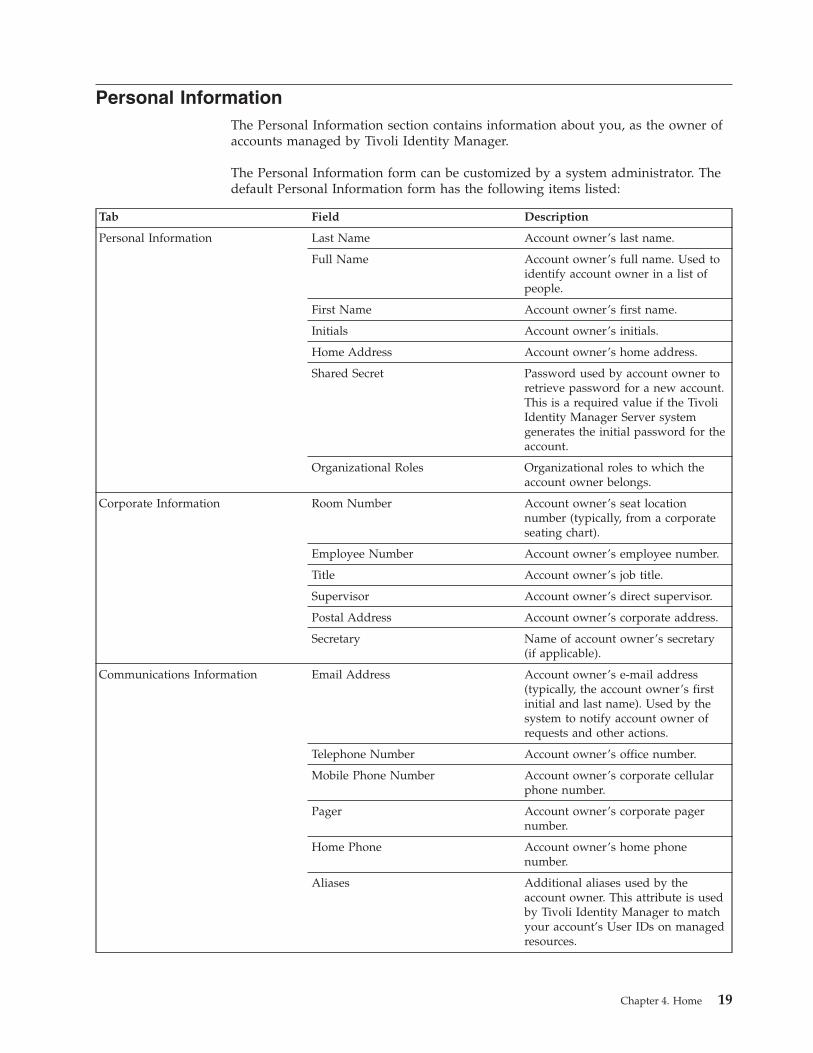
The Personal Information form can be customized by a system administrator. Thedefault Personal Information form has the following items listed:
Tab Field Description
Personal Information Last Name Account owner’s last name.
Full Name Account owner’s full name. Used toidentify account owner in a list ofpeople.
First Name Account owner’s first name.
Initials Account owner’s initials.
Home Address Account owner’s home address.
Shared Secret Password used by account owner toretrieve password for a new account.This is a required value if the TivoliIdentity Manager Server systemgenerates the initial password for theaccount.
Organizational Roles Organizational roles to which theaccount owner belongs.
Corporate Information Room Number Account owner’s seat locationnumber (typically, from a corporateseating chart).
Employee Number Account owner’s employee number.
Title Account owner’s job title.
Supervisor Account owner’s direct supervisor.
Postal Address Account owner’s corporate address.
Secretary Name of account owner’s secretary(if applicable).
Communications Information Email Address Account owner’s e-mail address(typically, the account owner’s firstinitial and last name). Used by thesystem to notify account owner ofrequests and other actions.
Telephone Number Account owner’s office number.
Mobile Phone Number Account owner’s corporate cellularphone number.
Pager Account owner’s corporate pagernumber.
Home Phone Account owner’s home phonenumber.
Aliases Additional aliases used by theaccount owner. This attribute is usedby Tivoli Identity Manager to matchyour account’s User IDs on managedresources.
Chapter 4. Home 19
To enter personal information:
1. Click Home in the Main Menu Navigation Bar.2. Click Access Personal Information in the task bar.
The Access Personal Information page opens.3. Modify the information on the Personal Information tab, Corporate Information
tab, and Communications Information tab as desired.4. Click Submit.
Note: Organizational Roles can be added on the Personal Information page,which confers access to any Managed Resources allowed by membershipin an Organizational Role.
Delegating AuthorityYou use the Delegate Authority page to designate people to whom your approvalauthority is delegated. This is used in request approval and to provide informationas a step in request provisioning.
You can select more than one delegate, but never more than one for the same dateperiod. If you want to change the person delegated for a time period, you mustdelete the original person and add a new one for the selected time period.
Adding a Delegate
To delegate authority:
1. Click Home in the Main Menu Navigation Bar.2. Click Delegate Authority in the task bar.
The Delegate Authority page opens.3. Click Add.4. Locate a person using the Search feature, and then select the check box next to
the person’s name and click Add.5. Select a beginning and ending date for your approval authority being delegated
to the person.6. Click Submit.
Changing the Delegate
To change the person delegated for a time period:
1. Click Home in the Main Menu Navigation Bar.2. Click Delegate Authority in the task bar.3. Select the check box next to the name of the existing delegate and click Delete.
The Confirm Deletion page opens.4. Click Submit.
The delegate is removed from the delegate list.5. Use the Adding a Delegate procedure to add a new delegate for the time
period.
20 Tivoli Identity Manager: End User Guide
Modifying the Selected Delegate
To change the time period for an existing delegate:
1. Click Home in the Main Menu Navigation Bar.2. Click Delegate Authority in the task bar.3. Click the person’s name you want to change.4. Make any changes to the From/To dates.5. Click Submit.
Password Challenge/Response AnswersITIM Users can modify their Password Challenge/Response answers at any time.If there is more than one Password Challenge/Response question to provideanswers for, one answer can be changed without modifying the other answers.
By default, this feature is disabled. If this option is selected and the feature isdisabled, a message appears on the page stating that this feature is currentlydisabled. However, if this feature is enabled, the following procedures can be usedto modify Password Challenge/Response answers.
To modify Password Challenge/Response answers:
1. Click Home in the Main Menu Navigation Bar.2. Click Password Challenge Response in the task bar.
The Challenge Response page opens.3. Modify the answer to the desired challenge/response questions and click
Submit.The changes to the challenges/response answers are saved.
Chapter 4. Home 21

22 Tivoli Identity Manager: End User Guide
Chapter 5. Reports
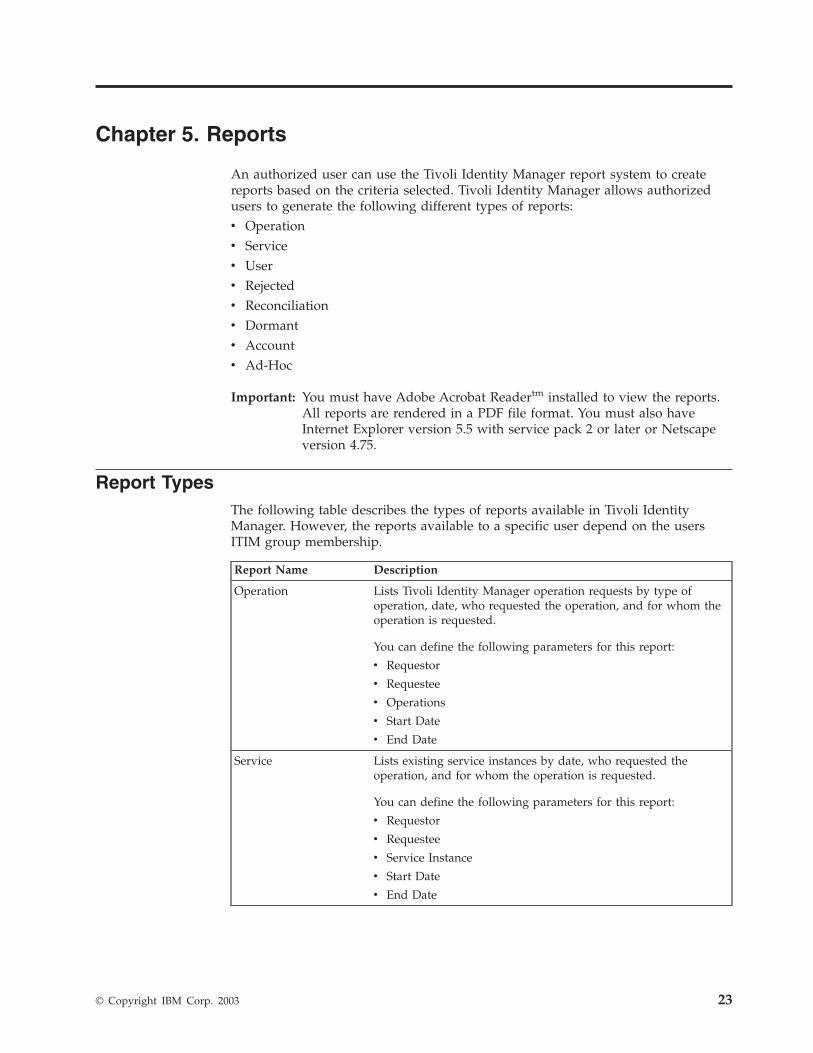
An authorized user can use the Tivoli Identity Manager report system to createreports based on the criteria selected. Tivoli Identity Manager allows authorizedusers to generate the following different types of reports:v Operationv Servicev Userv Rejectedv Reconciliationv Dormantv Accountv Ad-Hoc
Important: You must have Adobe Acrobat Readertm installed to view the reports.All reports are rendered in a PDF file format. You must also haveInternet Explorer version 5.5 with service pack 2 or later or Netscapeversion 4.75.
Report TypesThe following table describes the types of reports available in Tivoli IdentityManager. However, the reports available to a specific user depend on the usersITIM group membership.
Report Name Description
Operation Lists Tivoli Identity Manager operation requests by type ofoperation, date, who requested the operation, and for whom theoperation is requested.
You can define the following parameters for this report:
v Requestor
v Requestee
v Operations
v Start Date
v End Date
Service Lists existing service instances by date, who requested theoperation, and for whom the operation is requested.
You can define the following parameters for this report:
v Requestor
v Requestee
v Service Instance
v Start Date
v End Date
© Copyright IBM Corp. 2003 23
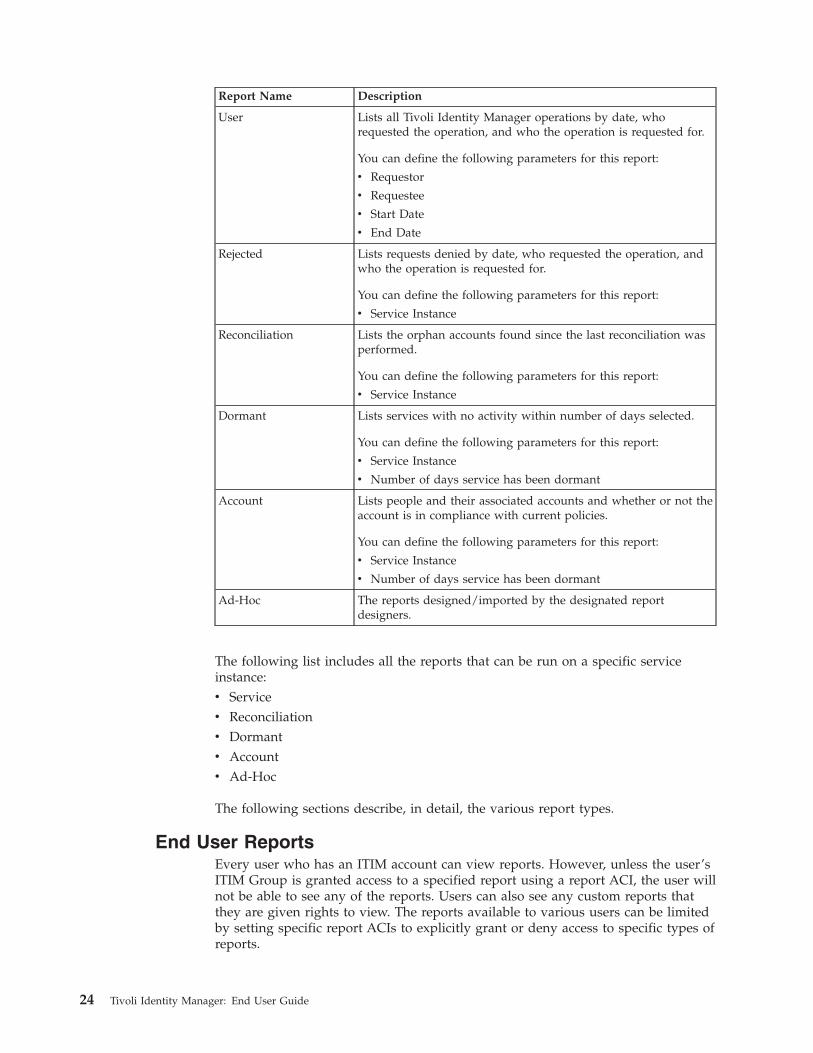
Report Name Description
User Lists all Tivoli Identity Manager operations by date, whorequested the operation, and who the operation is requested for.
You can define the following parameters for this report:
v Requestor
v Requestee
v Start Date
v End Date
Rejected Lists requests denied by date, who requested the operation, andwho the operation is requested for.
You can define the following parameters for this report:
v Service Instance
Reconciliation Lists the orphan accounts found since the last reconciliation wasperformed.
You can define the following parameters for this report:
v Service Instance
Dormant Lists services with no activity within number of days selected.
You can define the following parameters for this report:
v Service Instance
v Number of days service has been dormant
Account Lists people and their associated accounts and whether or not theaccount is in compliance with current policies.
You can define the following parameters for this report:
v Service Instance
v Number of days service has been dormant
Ad-Hoc The reports designed/imported by the designated reportdesigners.
The following list includes all the reports that can be run on a specific serviceinstance:v Servicev Reconciliationv Dormantv Accountv Ad-Hoc
The following sections describe, in detail, the various report types.
End User ReportsEvery user who has an ITIM account can view reports. However, unless the user’sITIM Group is granted access to a specified report using a report ACI, the user willnot be able to see any of the reports. Users can also see any custom reports thatthey are given rights to view. The reports available to various users can be limitedby setting specific report ACIs to explicitly grant or deny access to specific types ofreports.
24 Tivoli Identity Manager: End User Guide
End users can see only a report of the activity that is specific to the end user, eitheras the requestee or the requestor. For example, a manager can view reports forrequests he initiated or requests that are made for him. But, an employee with nosupervisory or managerial position only view reports only for requests that aremade for him because he cannot initiate a request.
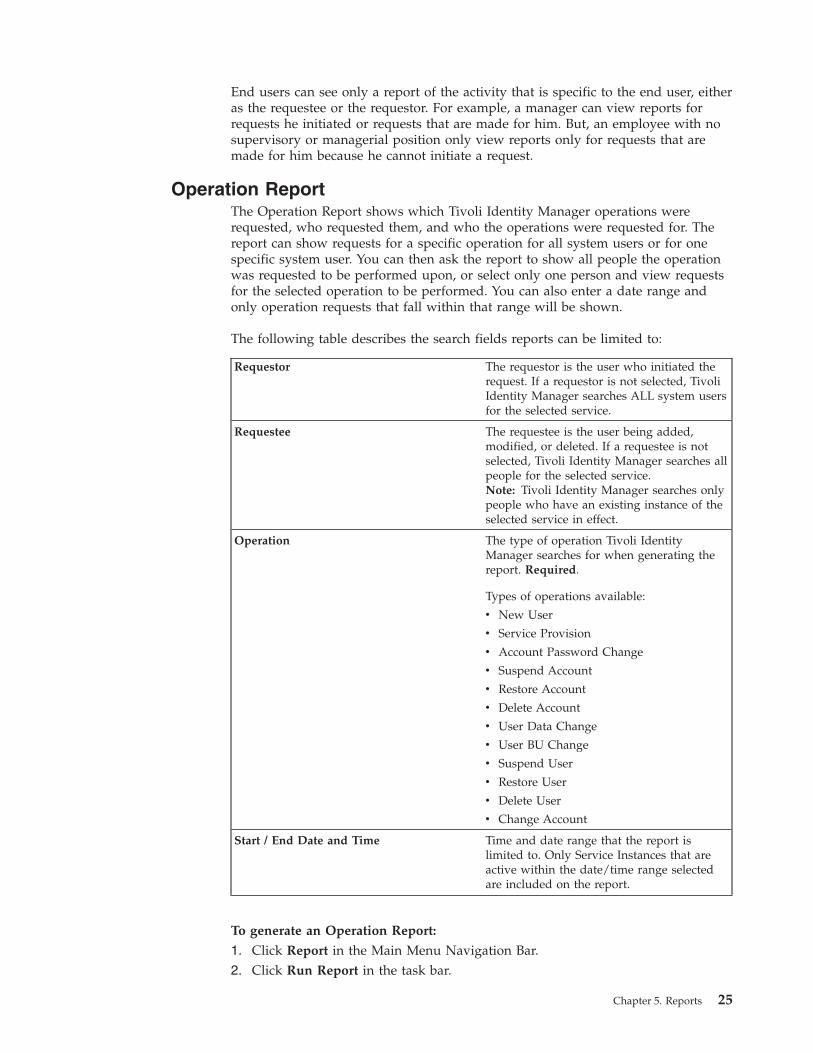
Operation ReportThe Operation Report shows which Tivoli Identity Manager operations wererequested, who requested them, and who the operations were requested for. Thereport can show requests for a specific operation for all system users or for onespecific system user. You can then ask the report to show all people the operationwas requested to be performed upon, or select only one person and view requestsfor the selected operation to be performed. You can also enter a date range andonly operation requests that fall within that range will be shown.
The following table describes the search fields reports can be limited to:
Requestor The requestor is the user who initiated therequest. If a requestor is not selected, TivoliIdentity Manager searches ALL system usersfor the selected service.
Requestee The requestee is the user being added,modified, or deleted. If a requestee is notselected, Tivoli Identity Manager searches allpeople for the selected service.Note: Tivoli Identity Manager searches onlypeople who have an existing instance of theselected service in effect.
Operation The type of operation Tivoli IdentityManager searches for when generating thereport. Required.
Types of operations available:
v New User
v Service Provision
v Account Password Change
v Suspend Account
v Restore Account
v Delete Account
v User Data Change
v User BU Change
v Suspend User
v Restore User
v Delete User
v Change Account
Start / End Date and Time Time and date range that the report islimited to. Only Service Instances that areactive within the date/time range selectedare included on the report.
To generate an Operation Report:
1. Click Report in the Main Menu Navigation Bar.2. Click Run Report in the task bar.
Chapter 5. Reports 25
The Reports Menu page opens.3. Click Operation Report.
The Operation Report Search page opens.4. OPTIONAL: Select a requestor.
a. Click ...get ITIM User.The User Search page opens.
b. Select the Selected Org only check box to search only within the selectedorganization.
c. Select a search attribute from the Search Attribute drop-down menu.d. Select a search filter from the Select an Expression drop-down menu.e. Type a search parameter in the text field, and click Search.
The Search Filter Results page opens.f. Select the radio button next to the desired user and click Add.
The Operation Report Search page reappears with the selected requestorlisted in the Requestor field.
5. OPTIONAL: Select a requestee.a. Click ...get a Person.
The User Search page opens.b. Select the Selected Org only check box to search only within the selected
organization.c. Select a search attribute from the Search Attribute drop-down menu.d. Select a search filter from the Select an Expression drop-down menu.e. Type a search parameter in the text field, and click Search.
The Search Filter Results page opens.f. Select the radio button next to the desired person and click Add.
The Operation Report Search page reappears with the selected requesteelisted in the Requestee field.
6. Select an operation type from the Operations drop-down menu.7. Select start and end dates and times by selecting the month, day, year, and time
from the respective drop-down menus.8. Click Submit.
A report is generated based on the selected search criteria selected. The reportis displayed using Adobe Acrobat Reader.
9. To save the report in PDF format to the client machine, click on the Save iconin the report window toolbar. In some situations, the default file name thatdisplays in the File Name field may be an invalid file name (too manycharacters). Browse to the directory where you want to save this file andre-enter a valid file name in the File Name field. Click Save.
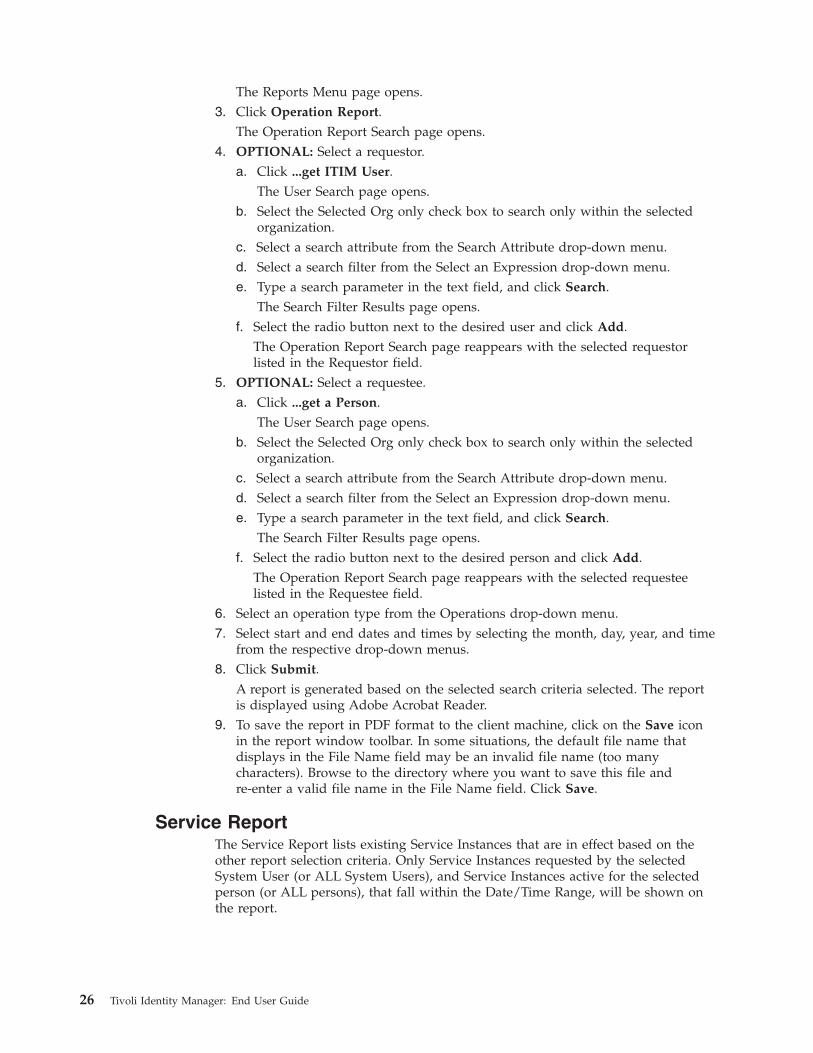
Service ReportThe Service Report lists existing Service Instances that are in effect based on theother report selection criteria. Only Service Instances requested by the selectedSystem User (or ALL System Users), and Service Instances active for the selectedperson (or ALL persons), that fall within the Date/Time Range, will be shown onthe report.
26 Tivoli Identity Manager: End User Guide
The following table describes the search fields that reports can be limited to:
Requestor The requestor is the user who initiated the request. If arequestor is not selected, Tivoli Identity Manager searchesALL system users for the selected service.
Requestee The requestee is the user being added, modified, ordeleted. If a requestee is not selected, Tivoli IdentityManager searches all people for the selected service.Note: Tivoli Identity Manager only searches people whohave an existing instance of the selected service in effect.
Service Instance Required. A Service Instance is a service available in TivoliIdentity Manager or an individual instance of a service, ifthe service has multiple instances.
Start / End Date and Time Time and date range that the report is limited to. OnlyService Instances that are active within the date/timerange selected are included on the report.
To generate a Service Report:
1. Click Report in the Main Menu Navigation Bar.2. Click Run Report in the task bar.
The Reports Menu page opens.3. Click Service Report.
The Service Report search page opens.4. OPTIONAL: Select a requestor.
a. Click ...get ITIM User.The User Search page opens.
b. Select the Selected Org only check box to search only within the selectedorganization.
c. Select a search attribute from the Search Attribute drop-down menu.d. Select a search filter from the Select an Expression drop-down menu.e. Type a search parameter in the text field, and click Search.
The Search Filter Results page opens.f. Select the radio button next to the desired user and click Add.
The Service Report Search page reappears with the selected requestor listedin the Requestor field.
5. OPTIONAL: Select a requestee.a. Click ...get a Person.
The User Search page opens.b. Select the Selected Org only check box to search only within the selected
organization.c. Select a search attribute from the Search Attribute drop-down menu.d. Select a search filter from the Select an Expression drop-down menu.e. Type a search parameter in the text field, and click Search.
The Search Filter Results page opens.f. Select the radio button next to the desired person and click Add.
The Service Report Search page reappears with the selected requestee listedin the Requestee field.
6. Select a Service Instance.
Chapter 5. Reports 27
a. Click ...get a Service.The Service Search page opens.
b. Select a service profile from the Select a profile drop-down menu.c. Select the Selected Org only check box to search only within the selected
organization.d. Select a search attribute from the Search Attribute drop-down menu.e. Select a search filter from the Select an Expression drop-down menu.f. Type a search parameter in the text field, and click Search.
The Search Filter Results page opens.g. Select the radio button next to the desired service and click Add.
The Service Report Search page reappears with the selected service listed inthe Service Instance field.
7. Select start and end dates and times by selecting the month, day, year, and timefrom the respective drop-down menus.
8. Click Submit.A report is generated based on the selected search criteria selected. The reportis displayed using Adobe Acrobat Reader.
9. To save the report in PDF format to the client machine, click on the Save iconin the report window toolbar. In some situations, the default file name thatdisplays in the File Name field may be an invalid file name (too manycharacters). Browse to the directory where you want to save this file andre-enter a valid file name in the File Name field. Click Save.
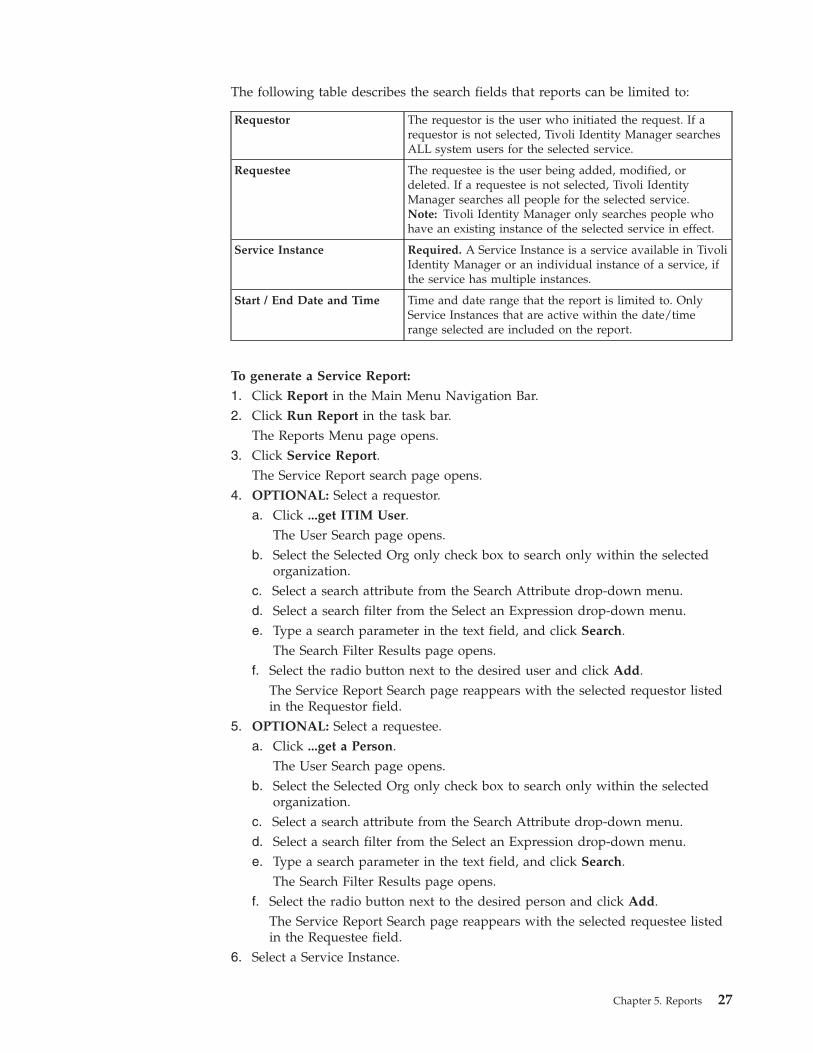
User ReportThe User Report lists all Tivoli Identity Manager operations that were requested,who requested them, and who the operations were requested to act upon. You canchoose to show requests for all system users or for one specific system user. Youcan then ask the report to show all people the requests were to be performedupon, or select only one person and view all requests for that person from allSystem Users or from one selected System User. You can also enter a date rangeand only operation requests that fall within that range will be shown.
The following table describes the search fields reports can be limited to.
Requestor The requestor is the user who initiated the request. If arequestor is not selected, Tivoli Identity Manager searchesALL system users for the selected service.
Requestee The requestee is the user being added, modified, or deleted.If a requestee is not selected, Tivoli Identity Manager searchesall people for the selected service.Note: Tivoli Identity Manager searches only people who havean existing instance of the selected service in effect.
Start / End Date and Time Time and date range the report is limited. Only ServiceInstances that are active within the date/time range selectedare included on the report.
To generate a User Report:
1. Click Report in the Main Menu Navigation Bar.2. Click Run Report in the task bar.
The Reports Menu page opens.3. Click User Report.
28 Tivoli Identity Manager: End User Guide
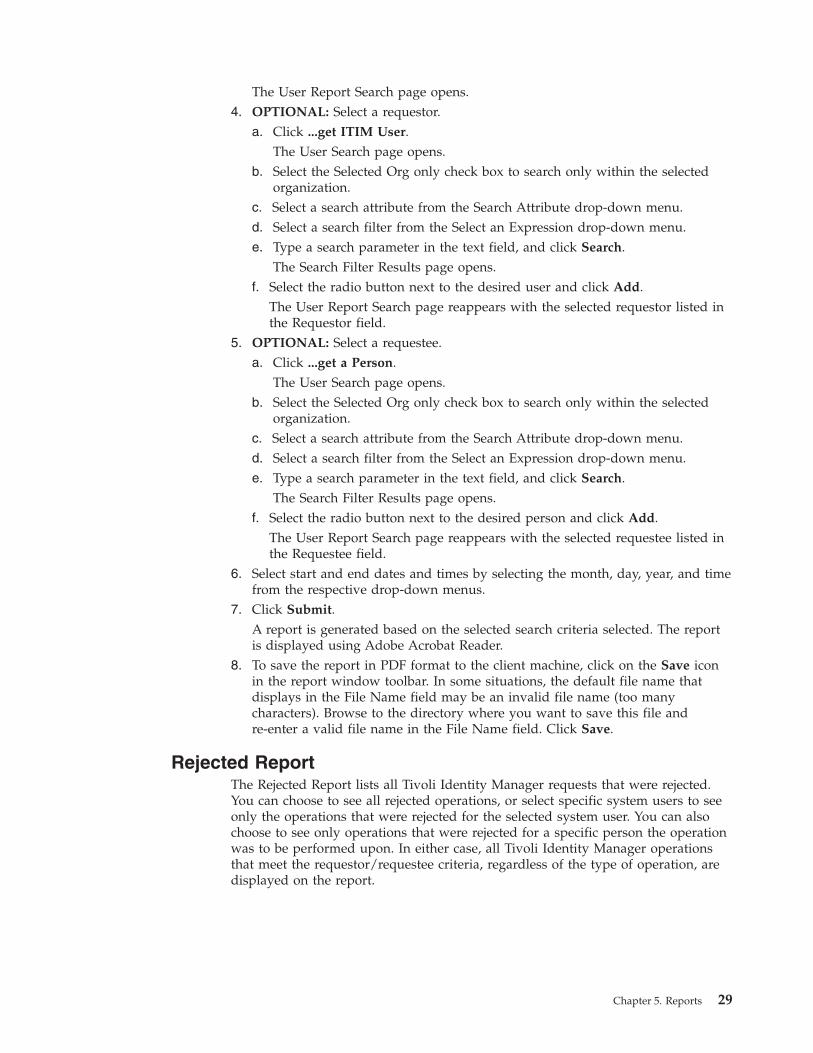
The User Report Search page opens.4. OPTIONAL: Select a requestor.
a. Click ...get ITIM User.The User Search page opens.
b. Select the Selected Org only check box to search only within the selectedorganization.
c. Select a search attribute from the Search Attribute drop-down menu.d. Select a search filter from the Select an Expression drop-down menu.e. Type a search parameter in the text field, and click Search.
The Search Filter Results page opens.f. Select the radio button next to the desired user and click Add.
The User Report Search page reappears with the selected requestor listed inthe Requestor field.
5. OPTIONAL: Select a requestee.a. Click ...get a Person.
The User Search page opens.b. Select the Selected Org only check box to search only within the selected
organization.c. Select a search attribute from the Search Attribute drop-down menu.d. Select a search filter from the Select an Expression drop-down menu.e. Type a search parameter in the text field, and click Search.
The Search Filter Results page opens.f. Select the radio button next to the desired person and click Add.
The User Report Search page reappears with the selected requestee listed inthe Requestee field.
6. Select start and end dates and times by selecting the month, day, year, and timefrom the respective drop-down menus.
7. Click Submit.A report is generated based on the selected search criteria selected. The reportis displayed using Adobe Acrobat Reader.
8. To save the report in PDF format to the client machine, click on the Save iconin the report window toolbar. In some situations, the default file name thatdisplays in the File Name field may be an invalid file name (too manycharacters). Browse to the directory where you want to save this file andre-enter a valid file name in the File Name field. Click Save.
Rejected ReportThe Rejected Report lists all Tivoli Identity Manager requests that were rejected.You can choose to see all rejected operations, or select specific system users to seeonly the operations that were rejected for the selected system user. You can alsochoose to see only operations that were rejected for a specific person the operationwas to be performed upon. In either case, all Tivoli Identity Manager operationsthat meet the requestor/requestee criteria, regardless of the type of operation, aredisplayed on the report.
Chapter 5. Reports 29
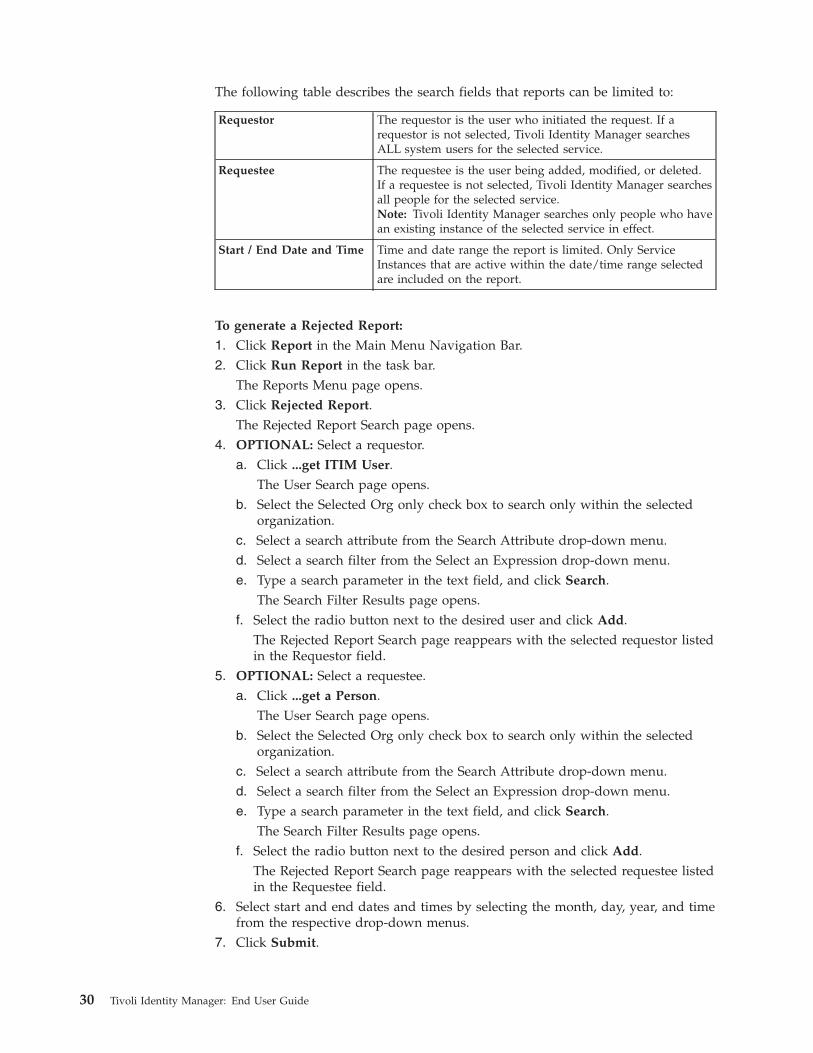
The following table describes the search fields that reports can be limited to:
Requestor The requestor is the user who initiated the request. If arequestor is not selected, Tivoli Identity Manager searchesALL system users for the selected service.
Requestee The requestee is the user being added, modified, or deleted.If a requestee is not selected, Tivoli Identity Manager searchesall people for the selected service.Note: Tivoli Identity Manager searches only people who havean existing instance of the selected service in effect.
Start / End Date and Time Time and date range the report is limited. Only ServiceInstances that are active within the date/time range selectedare included on the report.
To generate a Rejected Report:
1. Click Report in the Main Menu Navigation Bar.2. Click Run Report in the task bar.
The Reports Menu page opens.3. Click Rejected Report.
The Rejected Report Search page opens.4. OPTIONAL: Select a requestor.
a. Click ...get ITIM User.The User Search page opens.
b. Select the Selected Org only check box to search only within the selectedorganization.
c. Select a search attribute from the Search Attribute drop-down menu.d. Select a search filter from the Select an Expression drop-down menu.e. Type a search parameter in the text field, and click Search.
The Search Filter Results page opens.f. Select the radio button next to the desired user and click Add.
The Rejected Report Search page reappears with the selected requestor listedin the Requestor field.
5. OPTIONAL: Select a requestee.a. Click ...get a Person.
The User Search page opens.b. Select the Selected Org only check box to search only within the selected
organization.c. Select a search attribute from the Search Attribute drop-down menu.d. Select a search filter from the Select an Expression drop-down menu.e. Type a search parameter in the text field, and click Search.
The Search Filter Results page opens.f. Select the radio button next to the desired person and click Add.
The Rejected Report Search page reappears with the selected requestee listedin the Requestee field.
6. Select start and end dates and times by selecting the month, day, year, and timefrom the respective drop-down menus.
7. Click Submit.
30 Tivoli Identity Manager: End User Guide
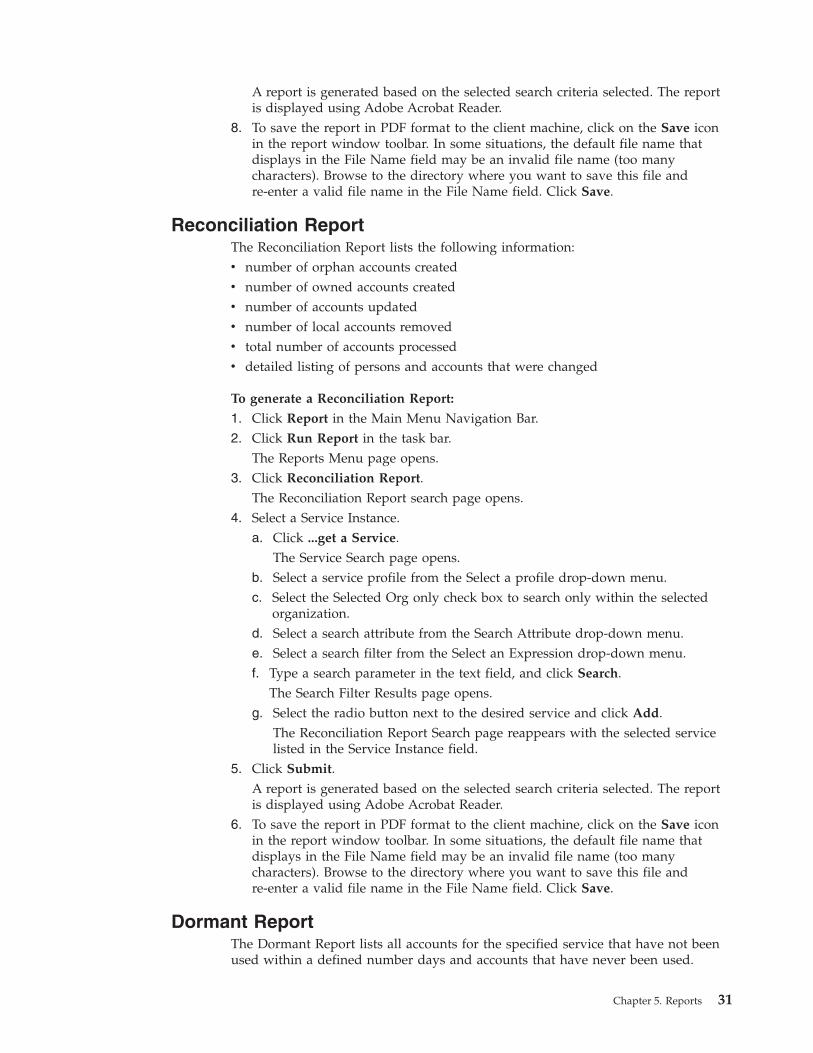
A report is generated based on the selected search criteria selected. The reportis displayed using Adobe Acrobat Reader.
8. To save the report in PDF format to the client machine, click on the Save iconin the report window toolbar. In some situations, the default file name thatdisplays in the File Name field may be an invalid file name (too manycharacters). Browse to the directory where you want to save this file andre-enter a valid file name in the File Name field. Click Save.
Reconciliation ReportThe Reconciliation Report lists the following information:v number of orphan accounts createdv number of owned accounts createdv number of accounts updatedv number of local accounts removedv total number of accounts processedv detailed listing of persons and accounts that were changed
To generate a Reconciliation Report:
1. Click Report in the Main Menu Navigation Bar.2. Click Run Report in the task bar.
The Reports Menu page opens.3. Click Reconciliation Report.
The Reconciliation Report search page opens.4. Select a Service Instance.
a. Click ...get a Service.The Service Search page opens.
b. Select a service profile from the Select a profile drop-down menu.c. Select the Selected Org only check box to search only within the selected
organization.d. Select a search attribute from the Search Attribute drop-down menu.e. Select a search filter from the Select an Expression drop-down menu.f. Type a search parameter in the text field, and click Search.
The Search Filter Results page opens.g. Select the radio button next to the desired service and click Add.
The Reconciliation Report Search page reappears with the selected servicelisted in the Service Instance field.
5. Click Submit.A report is generated based on the selected search criteria selected. The reportis displayed using Adobe Acrobat Reader.
6. To save the report in PDF format to the client machine, click on the Save iconin the report window toolbar. In some situations, the default file name thatdisplays in the File Name field may be an invalid file name (too manycharacters). Browse to the directory where you want to save this file andre-enter a valid file name in the File Name field. Click Save.
Dormant ReportThe Dormant Report lists all accounts for the specified service that have not beenused within a defined number days and accounts that have never been used.
Chapter 5. Reports 31
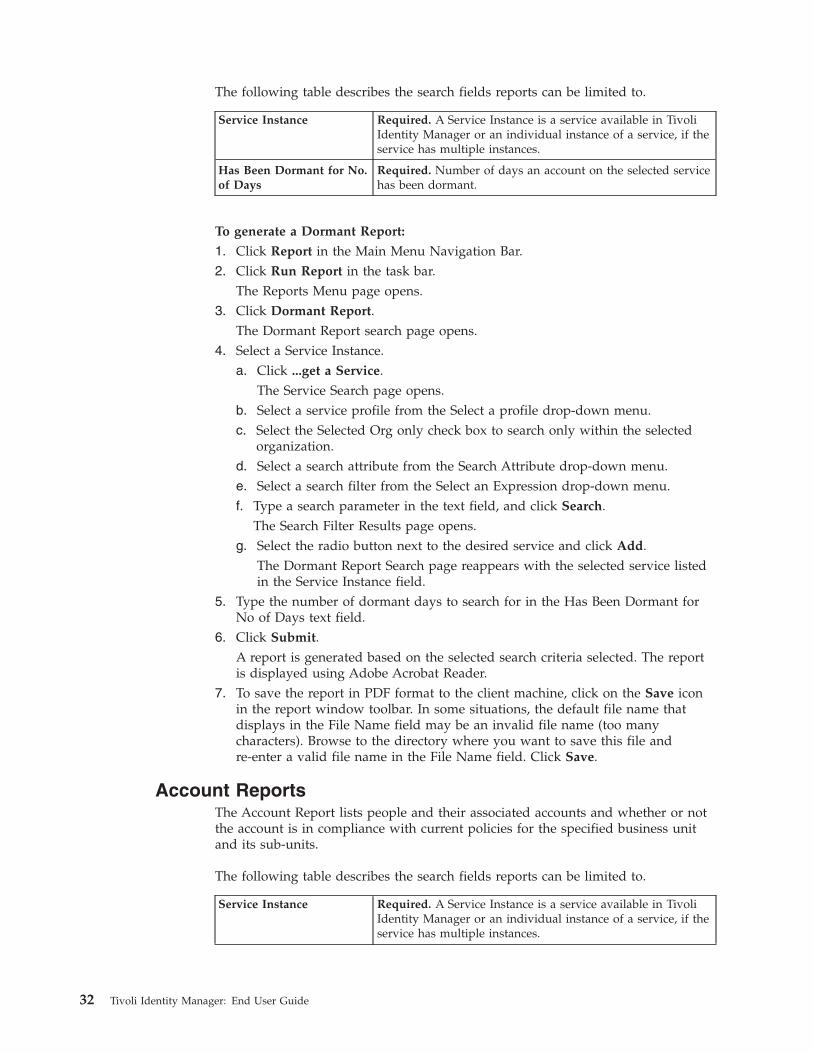
The following table describes the search fields reports can be limited to.
Service Instance Required. A Service Instance is a service available in TivoliIdentity Manager or an individual instance of a service, if theservice has multiple instances.
Has Been Dormant for No.of Days
Required. Number of days an account on the selected servicehas been dormant.
To generate a Dormant Report:
1. Click Report in the Main Menu Navigation Bar.2. Click Run Report in the task bar.
The Reports Menu page opens.3. Click Dormant Report.
The Dormant Report search page opens.4. Select a Service Instance.
a. Click ...get a Service.The Service Search page opens.
b. Select a service profile from the Select a profile drop-down menu.c. Select the Selected Org only check box to search only within the selected
organization.d. Select a search attribute from the Search Attribute drop-down menu.e. Select a search filter from the Select an Expression drop-down menu.f. Type a search parameter in the text field, and click Search.
The Search Filter Results page opens.g. Select the radio button next to the desired service and click Add.
The Dormant Report Search page reappears with the selected service listedin the Service Instance field.
5. Type the number of dormant days to search for in the Has Been Dormant forNo of Days text field.
6. Click Submit.A report is generated based on the selected search criteria selected. The reportis displayed using Adobe Acrobat Reader.
7. To save the report in PDF format to the client machine, click on the Save iconin the report window toolbar. In some situations, the default file name thatdisplays in the File Name field may be an invalid file name (too manycharacters). Browse to the directory where you want to save this file andre-enter a valid file name in the File Name field. Click Save.
Account ReportsThe Account Report lists people and their associated accounts and whether or notthe account is in compliance with current policies for the specified business unitand its sub-units.
The following table describes the search fields reports can be limited to.
Service Instance Required. A Service Instance is a service available in TivoliIdentity Manager or an individual instance of a service, if theservice has multiple instances.
32 Tivoli Identity Manager: End User Guide
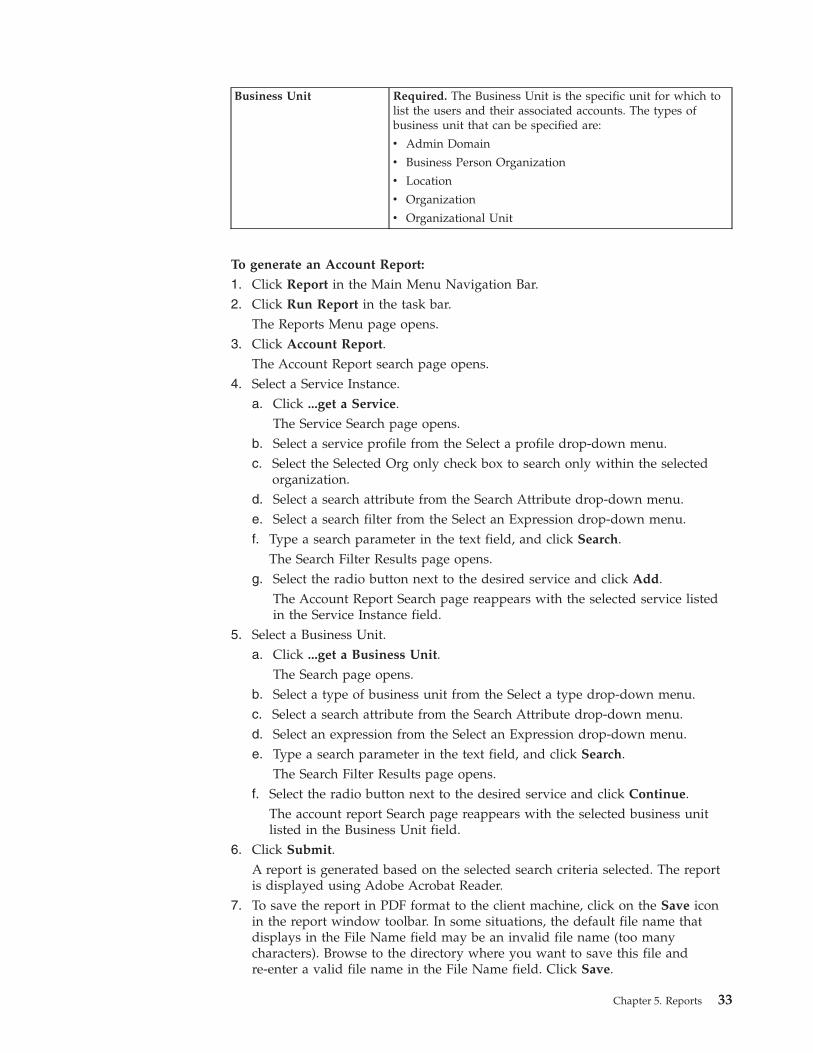
Business Unit Required. The Business Unit is the specific unit for which tolist the users and their associated accounts. The types ofbusiness unit that can be specified are:
v Admin Domain
v Business Person Organization
v Location
v Organization
v Organizational Unit
To generate an Account Report:
1. Click Report in the Main Menu Navigation Bar.2. Click Run Report in the task bar.
The Reports Menu page opens.3. Click Account Report.
The Account Report search page opens.4. Select a Service Instance.
a. Click ...get a Service.The Service Search page opens.
b. Select a service profile from the Select a profile drop-down menu.c. Select the Selected Org only check box to search only within the selected
organization.d. Select a search attribute from the Search Attribute drop-down menu.e. Select a search filter from the Select an Expression drop-down menu.f. Type a search parameter in the text field, and click Search.
The Search Filter Results page opens.g. Select the radio button next to the desired service and click Add.
The Account Report Search page reappears with the selected service listedin the Service Instance field.
5. Select a Business Unit.a. Click ...get a Business Unit.
The Search page opens.b. Select a type of business unit from the Select a type drop-down menu.c. Select a search attribute from the Search Attribute drop-down menu.d. Select an expression from the Select an Expression drop-down menu.e. Type a search parameter in the text field, and click Search.
The Search Filter Results page opens.f. Select the radio button next to the desired service and click Continue.
The account report Search page reappears with the selected business unitlisted in the Business Unit field.
6. Click Submit.A report is generated based on the selected search criteria selected. The reportis displayed using Adobe Acrobat Reader.
7. To save the report in PDF format to the client machine, click on the Save iconin the report window toolbar. In some situations, the default file name thatdisplays in the File Name field may be an invalid file name (too manycharacters). Browse to the directory where you want to save this file andre-enter a valid file name in the File Name field. Click Save.
Chapter 5. Reports 33
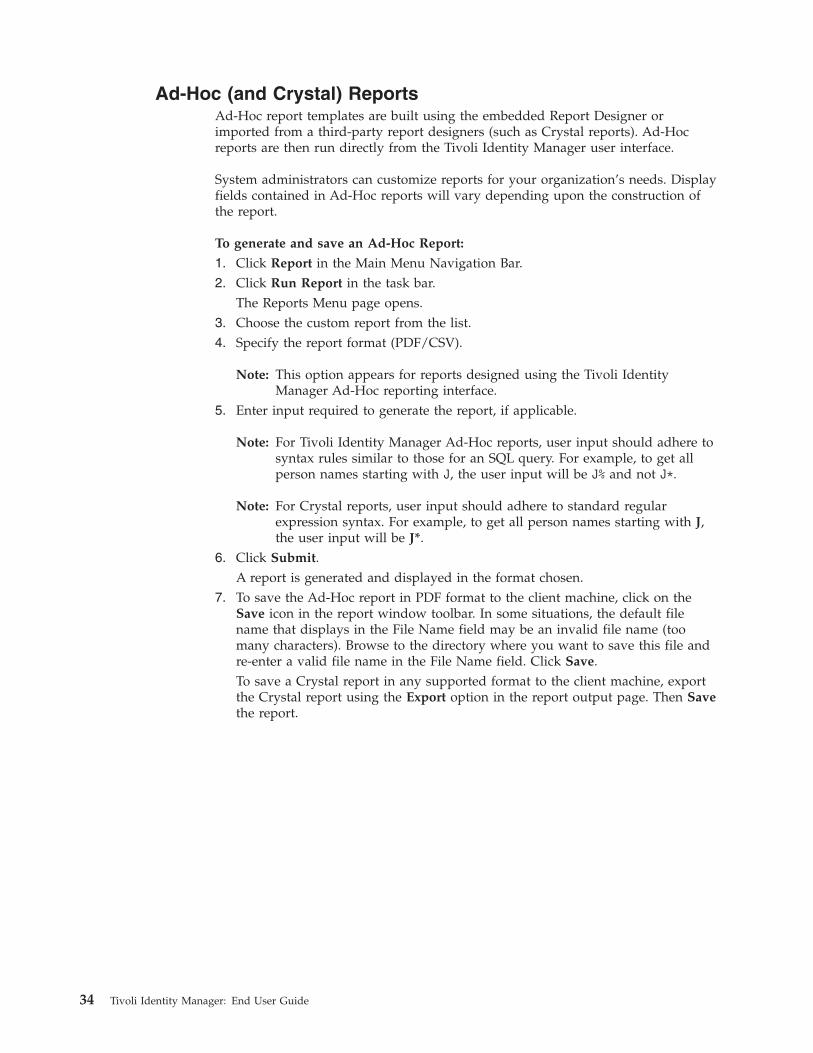
Ad-Hoc (and Crystal) ReportsAd-Hoc report templates are built using the embedded Report Designer orimported from a third-party report designers (such as Crystal reports). Ad-Hocreports are then run directly from the Tivoli Identity Manager user interface.
System administrators can customize reports for your organization’s needs. Displayfields contained in Ad-Hoc reports will vary depending upon the construction ofthe report.
To generate and save an Ad-Hoc Report:
1. Click Report in the Main Menu Navigation Bar.2. Click Run Report in the task bar.
The Reports Menu page opens.3. Choose the custom report from the list.4. Specify the report format (PDF/CSV).
Note: This option appears for reports designed using the Tivoli IdentityManager Ad-Hoc reporting interface.
5. Enter input required to generate the report, if applicable.
Note: For Tivoli Identity Manager Ad-Hoc reports, user input should adhere tosyntax rules similar to those for an SQL query. For example, to get allperson names starting with J, the user input will be J% and not J*.
Note: For Crystal reports, user input should adhere to standard regularexpression syntax. For example, to get all person names starting with J,the user input will be J*.
6. Click Submit.A report is generated and displayed in the format chosen.
7. To save the Ad-Hoc report in PDF format to the client machine, click on theSave icon in the report window toolbar. In some situations, the default filename that displays in the File Name field may be an invalid file name (toomany characters). Browse to the directory where you want to save this file andre-enter a valid file name in the File Name field. Click Save.To save a Crystal report in any supported format to the client machine, exportthe Crystal report using the Export option in the report output page. Then Savethe report.
34 Tivoli Identity Manager: End User Guide
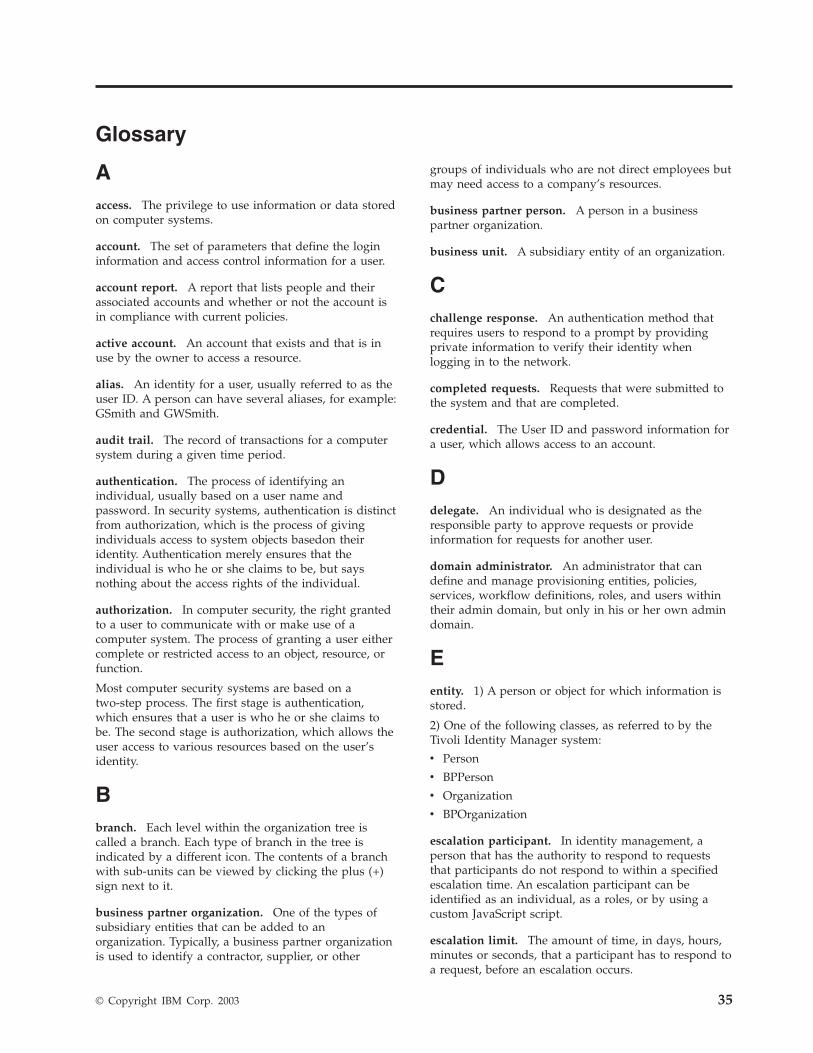
Glossary
Aaccess. The privilege to use information or data storedon computer systems.
account. The set of parameters that define the logininformation and access control information for a user.
account report. A report that lists people and theirassociated accounts and whether or not the account isin compliance with current policies.
active account. An account that exists and that is inuse by the owner to access a resource.
alias. An identity for a user, usually referred to as theuser ID. A person can have several aliases, for example:GSmith and GWSmith.
audit trail. The record of transactions for a computersystem during a given time period.
authentication. The process of identifying anindividual, usually based on a user name andpassword. In security systems, authentication is distinctfrom authorization, which is the process of givingindividuals access to system objects basedon theiridentity. Authentication merely ensures that theindividual is who he or she claims to be, but saysnothing about the access rights of the individual.
authorization. In computer security, the right grantedto a user to communicate with or make use of acomputer system. The process of granting a user eithercomplete or restricted access to an object, resource, orfunction.
Most computer security systems are based on atwo-step process. The first stage is authentication,which ensures that a user is who he or she claims tobe. The second stage is authorization, which allows theuser access to various resources based on the user’sidentity.
Bbranch. Each level within the organization tree iscalled a branch. Each type of branch in the tree isindicated by a different icon. The contents of a branchwith sub-units can be viewed by clicking the plus (+)sign next to it.
business partner organization. One of the types ofsubsidiary entities that can be added to anorganization. Typically, a business partner organizationis used to identify a contractor, supplier, or other
groups of individuals who are not direct employees butmay need access to a company’s resources.
business partner person. A person in a businesspartner organization.
business unit. A subsidiary entity of an organization.
Cchallenge response. An authentication method thatrequires users to respond to a prompt by providingprivate information to verify their identity whenlogging in to the network.
completed requests. Requests that were submitted tothe system and that are completed.
credential. The User ID and password information fora user, which allows access to an account.
Ddelegate. An individual who is designated as theresponsible party to approve requests or provideinformation for requests for another user.
domain administrator. An administrator that candefine and manage provisioning entities, policies,services, workflow definitions, roles, and users withintheir admin domain, but only in his or her own admindomain.
Eentity. 1) A person or object for which information isstored.
2) One of the following classes, as referred to by theTivoli Identity Manager system:
v Person
v BPPerson
v Organization
v BPOrganization
escalation participant. In identity management, aperson that has the authority to respond to requeststhat participants do not respond to within a specifiedescalation time. An escalation participant can beidentified as an individual, as a roles, or by using acustom JavaScript script.
escalation limit. The amount of time, in days, hours,minutes or seconds, that a participant has to respond toa request, before an escalation occurs.
© Copyright IBM Corp. 2003 35
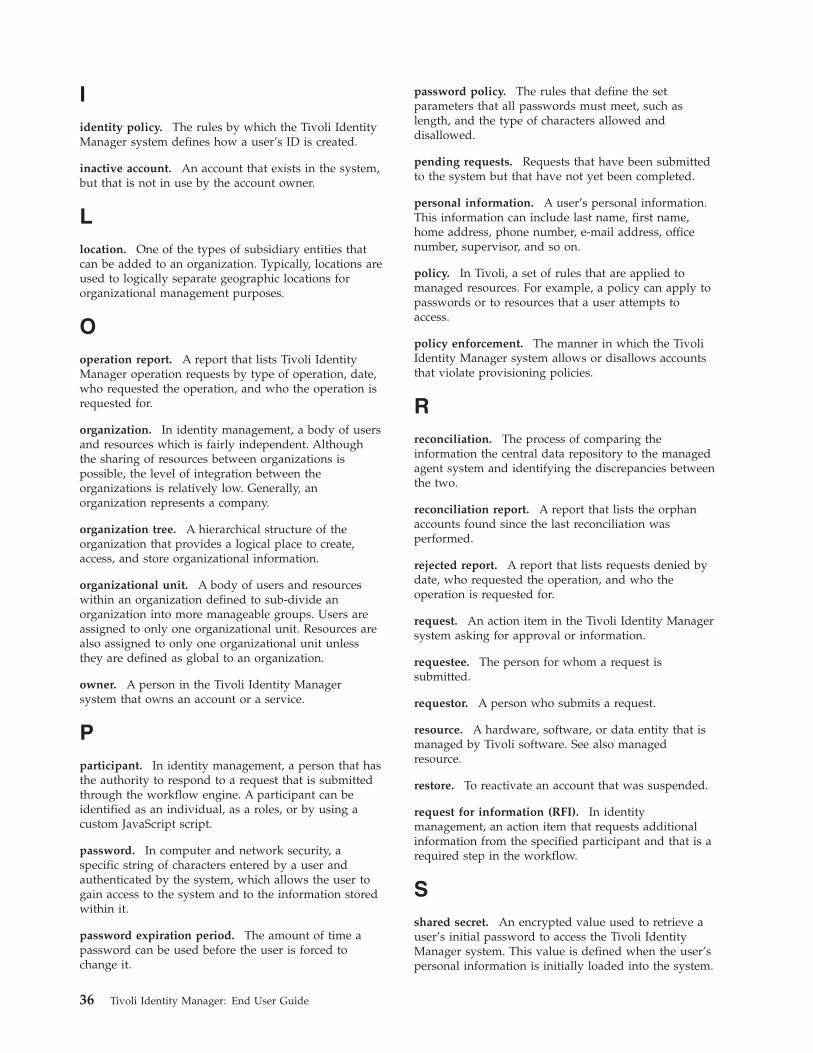
Iidentity policy. The rules by which the Tivoli IdentityManager system defines how a user’s ID is created.
inactive account. An account that exists in the system,but that is not in use by the account owner.
Llocation. One of the types of subsidiary entities thatcan be added to an organization. Typically, locations areused to logically separate geographic locations fororganizational management purposes.
Ooperation report. A report that lists Tivoli IdentityManager operation requests by type of operation, date,who requested the operation, and who the operation isrequested for.
organization. In identity management, a body of usersand resources which is fairly independent. Althoughthe sharing of resources between organizations ispossible, the level of integration between theorganizations is relatively low. Generally, anorganization represents a company.
organization tree. A hierarchical structure of theorganization that provides a logical place to create,access, and store organizational information.
organizational unit. A body of users and resourceswithin an organization defined to sub-divide anorganization into more manageable groups. Users areassigned to only one organizational unit. Resources arealso assigned to only one organizational unit unlessthey are defined as global to an organization.
owner. A person in the Tivoli Identity Managersystem that owns an account or a service.
Pparticipant. In identity management, a person that hasthe authority to respond to a request that is submittedthrough the workflow engine. A participant can beidentified as an individual, as a roles, or by using acustom JavaScript script.
password. In computer and network security, aspecific string of characters entered by a user andauthenticated by the system, which allows the user togain access to the system and to the information storedwithin it.
password expiration period. The amount of time apassword can be used before the user is forced tochange it.
password policy. The rules that define the setparameters that all passwords must meet, such aslength, and the type of characters allowed anddisallowed.
pending requests. Requests that have been submittedto the system but that have not yet been completed.
personal information. A user’s personal information.This information can include last name, first name,home address, phone number, e-mail address, officenumber, supervisor, and so on.
policy. In Tivoli, a set of rules that are applied tomanaged resources. For example, a policy can apply topasswords or to resources that a user attempts toaccess.
policy enforcement. The manner in which the TivoliIdentity Manager system allows or disallows accountsthat violate provisioning policies.
Rreconciliation. The process of comparing theinformation the central data repository to the managedagent system and identifying the discrepancies betweenthe two.
reconciliation report. A report that lists the orphanaccounts found since the last reconciliation wasperformed.
rejected report. A report that lists requests denied bydate, who requested the operation, and who theoperation is requested for.
request. An action item in the Tivoli Identity Managersystem asking for approval or information.
requestee. The person for whom a request issubmitted.
requestor. A person who submits a request.
resource. A hardware, software, or data entity that ismanaged by Tivoli software. See also managedresource.
restore. To reactivate an account that was suspended.
request for information (RFI). In identitymanagement, an action item that requests additionalinformation from the specified participant and that is arequired step in the workflow.
Sshared secret. An encrypted value used to retrieve auser’s initial password to access the Tivoli IdentityManager system. This value is defined when the user’spersonal information is initially loaded into the system.
36 Tivoli Identity Manager: End User Guide
supervisor. A person in the Tivoli Identity Managersystem that is designated as the owner of a businessunit.
suspend. The act of deactivating an account so theaccount owner cannot log into the resource.
Tto do list. The list of actions items assigned to a userfor completion.
Uuser. Any person who interacts with the system.
user interface (UI). The display used by the user tointeract with the system.
user name. The ID used by the user to access thesystem. This ID also identifies the user to the systemand allows the system to determine the user’s accessrights based on the user’s membership in variousorganizational roles and ITIM groups.
user report. A report that lists all Tivoli IdentityManager operations by date, who requested theoperation, and who the operation is requested for.
Glossary 37

38 Tivoli Identity Manager: End User Guide
Notices
This information was developed for products and services offered in the U.S.A.IBM may not offer the products, services, or features discussed in this document inother countries. Consult your local IBM representative for information on theproducts and services currently available in your area. Any reference to an IBMproduct, program, or service is not intended to state or imply that only that IBMproduct, program, or service may be used. Any functionally equivalent product,program, or service that does not infringe any IBM intellectual property right maybe used instead. However, it is the user’s responsibility to evaluate and verify theoperation of any non-IBM product, program, or service.
IBM may have patents or pending patent applications covering subject matterdescribed in this document. The furnishing of this document does not give youany license to these patents. You can send license inquiries, in writing, to:
IBM Director of LicensingIBM CorporationNorth Castle DriveArmonk, NY 10504-1785U.S.A.
For license inquiries regarding double-byte (DBCS) information, contact the IBMIntellectual Property Department in your country or send inquiries, in writing, to:
IBM World Trade Asia CorporationLicensing2-31 Roppongi 3-chome, Minato-kuTokyo 106-0032, Japan
The following paragraph does not apply to the United Kingdom or any othercountry where such provisions are inconsistent with local law:
INTERNATIONAL BUSINESS MACHINES CORPORATION PROVIDES THISPUBLICATION “AS IS” WITHOUT WARRANTY OF ANY KIND, EITHEREXPRESS OR IMPLIED, INCLUDING, BUT NOT LIMITED TO, THE IMPLIEDWARRANTIES OF NON-INFRINGEMENT, MERCHANTABILITY OR FITNESSFOR A PARTICULAR PURPOSE. Some states do not allow disclaimer of express orimplied warranties in certain transactions, therefore, this statement may not applyto you.
This information could include technical inaccuracies or typographical errors.Changes are periodically made to the information herein; these changes will beincorporated in new editions of the publication. IBM may make improvementsand/or changes in the product(s) and/or the program(s) described in thispublication at any time without notice.
Any references in this information to non-IBM Web sites are provided forconvenience only and do not in any manner serve as an endorsement of those Websites. The materials at those Web sites are not part of the materials for this IBMproduct and use of those Web sites is at your own risk.
IBM may use or distribute any of the information you supply in any way itbelieves appropriate without incurring any obligation to you.
© Copyright IBM Corp. 2003 39
Licensees of this program who wish to have information about it for the purposeof enabling: (i) the exchange of information between independently createdprograms and other programs (including this one) and (ii) the mutual use of theinformation which has been exchanged should contact:
IBM Corporation2ZA4/10111400 Burnet RoadAustin, TX 78758U.S.A.
Such information may be available, subject to appropriate terms and conditions,including in some cases, payment of a fee.
The licensed program described in this information and all licensed materialavailable for it are provided by IBM under terms of the IBM Customer Agreement,IBM International Program License Agreement, or any equivalent agreementbetween us.
Any performance data contained herein was determined in a controlledenvironment. Therefore, the results obtained in other operating environments mayvary significantly. Some measurements may have been made on development-levelsystems and there is no guarantee that these measurements will be the same ongenerally available systems. Furthermore, some measurements may have beenestimated through extrapolation. Actual results may vary. Users of this documentshould verify the applicable data for their specific environment.
Information concerning non-IBM products was obtained from the suppliers ofthose products, their published announcements or other publicly available sources.IBM has not tested those products and cannot confirm the accuracy ofperformance, compatibility or any other claims related to non-IBM products.Questions on the capabilities of non-IBM products should be addressed to thesuppliers of those products.
TrademarksThe following terms are trademarks or registered trademarks of InternationalBusiness Machines Corporation in the United States, other countries, or both:
AIXDB2IBMIBM logoOS/390SecureWayTivoliTivoli logoUniversal DatabaseWebSpherez/OSzSeries
Lotus® is a registered trademark of Lotus Development Corporation and/or IBMCorporation.
Domino™ is a trademark of International Business Machines Corporation andLotus Development Corporation in the United States, other countries, or both.
40 Tivoli Identity Manager: End User Guide
Microsoft®, Windows, Windows NT, and the Windows logo are trademarks ofMicrosoft Corporation in the United States, other countries, or both.
Java™ and all Java-based trademarks and logos are trademarks or registeredtrademarks of Sun Microsystems, Inc. in the United States and other countries.
UNIX is a registered trademark of The Open Group in the United States and othercountries.
Java and all Java-based trademarks and logos are trademarks orregistered trademarks of Sun Microsystems, Inc. in the United Statesand other countries.
Other company, product, and service names may be trademarks or service marksof others.
Notices 41

42 Tivoli Identity Manager: End User Guide
Index
Aaccount
reportdescription 24
account reportdescription 32generating 33
accountsadding 14deprovisioning 15managing 12modifying 14restoring 15retrieving password 5suspending 15
ad hocreport
description 24ad hoc report
description 34generating 34
audience v
Bbold text vii
CCompleted Requests
description 18viewing 18
Ddelegate authority
adding 20changing 20description 20
documentsaccessing online vi
dormantreport
description 24dormant report
description 31generating 32
Eeffective date 10employee
contact informationaliases 19cellular phone number 19e-mail address 19home phone number 19office phone number 19pager number 19
employee (continued)corporate information 19
number 19postal address 19room number 19secretary 19supervisor 19title 19
personal informationfirst name 19full name 19home address 19initials 19last name 19organizational roles 19shared secret 19
Ggeneral features
effective date 10navigation
Main Menu Navigation Bar 9methods 9task bar 9
online help 10
HHome
account managementadding new accounts 14deprovisioning accounts 15description 12modifying existing accounts 14restoring accounts 15suspending accounts 15
changing passwords 16completed requests
description 18delegating authority
adding a delegate 20changing a delegate 20description 20modifying a delegate 21
functional areas 11password
management 11modifying Challenge/Response answers 21
pending requestsdescription 18
personal informationdescription 19
To Do Listdescription 16viewing request details 18
Iitalic text vii
© Copyright IBM Corp. 2003 43
Llogin
forgotten password 6routine 5
Mmain menu navigation bar 9managing
accounts 12password 11
monospace text vii
Nnavigation
main menu navigation bar 9methods 9taskbar 9
Oonline help 10operation report
description 23, 25generating 25
Ppassword
Challenge/Responseanswers 6, 21purpose 6
forgottenconfiguring Challenge/Response answers 21logging in 6
managing 11Pending Requests
description 18Personal Information 19
adding 20Communications Information tab
Aliases 19Email Address 19Home Phone 19Mobile Phone Number 19Pager 19Telephone Number 19
Corporate Information tabEmployee Number 19Postal Address 19Room Number 19Secretary 19Supervisor 19Title 19
modifying 20Personal Information tab
First Name 19Full Name 19Home Address 19Initials 19Last Name 19Organizational Roles 19Shared Secret 19
policy enforcementcompliancy flag
compliant 13noncompliant 13question mark 13warning 13
publicationsaccessing online vi
Rreconciliation
reportdescription 24, 31generating 31
rejectedreport
description 24rejected report
description 29generating 30
reportaccount
description 24, 32generating 33
ad hocdescription 24, 34generating 34
available types 23dormant
description 24, 31generating 32
operationdescription 23, 25generating 25
reconciliationdescription 24, 31generating 31
rejecteddescription 24, 29generating 30
servicedescription 23, 26generating 27
typesaccount 24, 32ad hoc 24, 34dormant 24, 31operation 23, 25reconciliation 24, 31rejected 24, 29service 23, 26user 24, 28
userdescription 24, 28generating 28
Sservice
reportdescription 23, 26generating 27
shared secret 19
44 Tivoli Identity Manager: End User Guide
Ttaskbar 9To Do List
description 16sorting 18viewing details 18
Uuser
reportdescription 24, 28generating 28
user interfacenavigation
Main Menu Navigation Bar 9task bar 9
Index 45

46 Tivoli Identity Manager: End User Guide


����
Program Number: 5724-C34
Printed in U.S.A.
SC32-1152-01