Embed Size (px)
Citation preview
Title: Different types of file extensions, for example: .txt, .doc, .pptOrganizing a storage hierarchy (creating folders etc).Such as: keeping all related files in a subfolder.
Date: July, 2007 REF No: 4.17, 4.18
Contributers: Dhanya, Usha Viswanathan Std: 4
Reviewers: Farida
Brief Description: This topic introduce the different types of file extensions and storing them in an organised fashion.
Goal: The student should be able to identify file types from some of the commonly used file name extensions. He/she will also be able to store files in a hierarchical manner.
Prerequisites: The child should know the concept of files and folders.
Duration: 2 sessions
References http://www.kidsdomain.com/brain/computer/lesson/comp_les7.html
Detailed Description
Computers can store a lot of information(data). Computers use files and folders to organize these information. A file is a collection of information with a name attached to it. A file name has two parts: NAME and TYPE (EXTENSION). Here is a typical file name format : filename.filetype. Usually the file types or extensions are written as abbreviations or in short form, usually with 3 letters.
Computer files are of different types text files, music files, picture (graphic) files, etc. the file might be a text document, a picture, sound, a video, a web page or many other things. The type of the file can be identified by the extension of the file, which comes after the filename.
Some common file extensions are● '.txt' for simple text files● '.jpg/ .gif' for photo or image files ● '.odt' for document files in edubuntu ● '.mp3' for music files
● '.QT', '.mov', '.mpeg' for movie clips
How to store these files?
We now already know that when related files are stored in the same location, it becomes easy to search and retrieve them. Consider the following example.
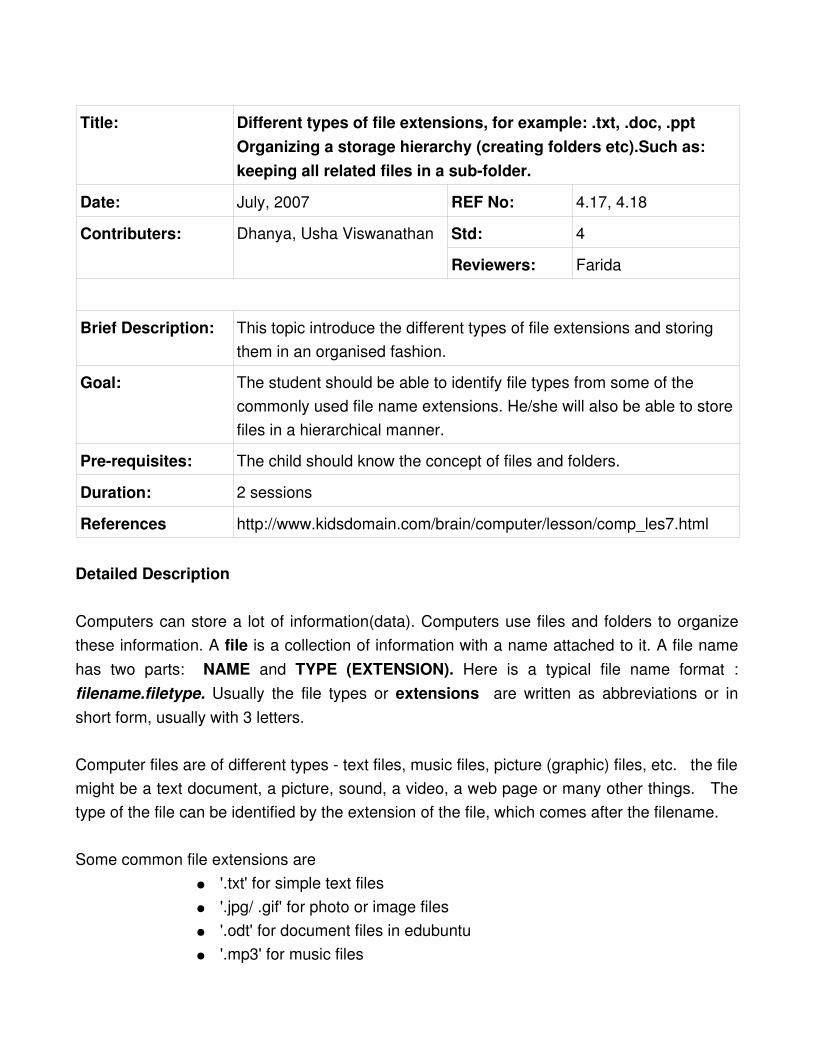
Suppose you have created many files containing your study materials for different subjects, like Science, Mathematics and English. Instead of storing all the materials together, we can create separate folders for each subject, such as 'Mathematics', 'Science' , 'English, etc. Now you can keep all the files dealing with mathematics in a single folder. If a subject has other subcategories, we can also create subfolders/ subdirectories (Directories inside another directory). For example under science category, if we have documents relating to plants, animals and our surroundings. We can create subdirectories 'Plants, 'Animals' and 'Surroundings'. Now we can store the related files in these sub folders. This way searching for a file become easier.
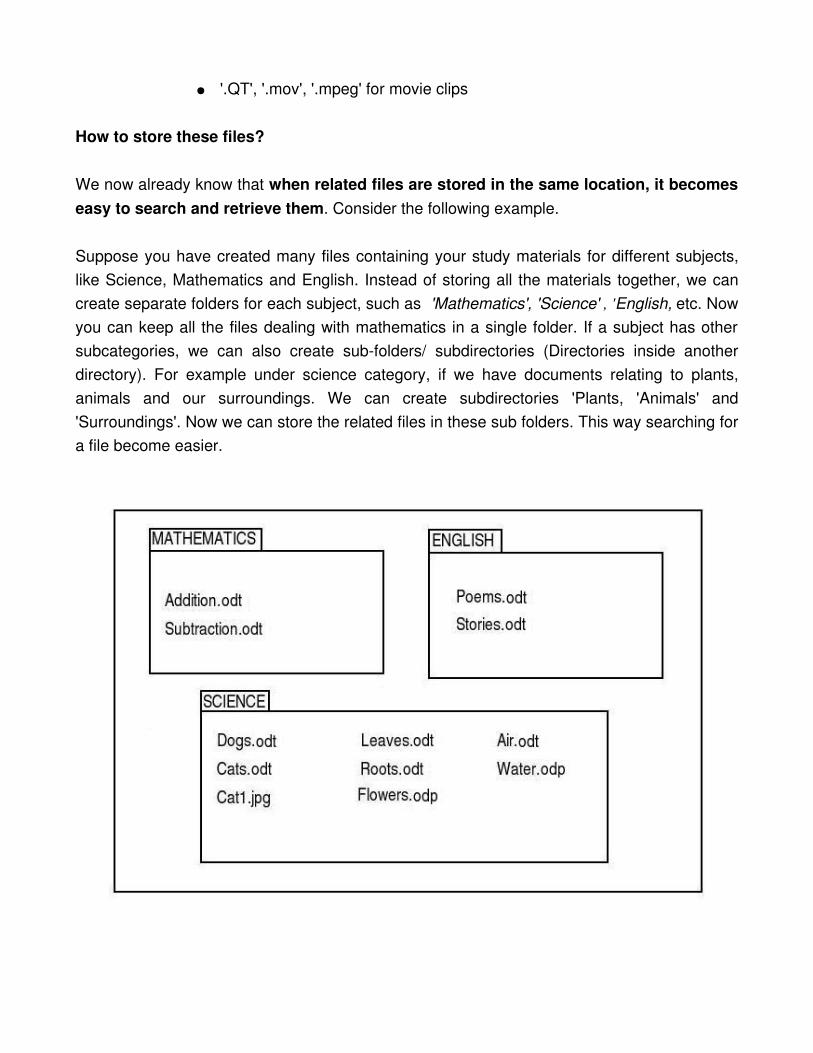
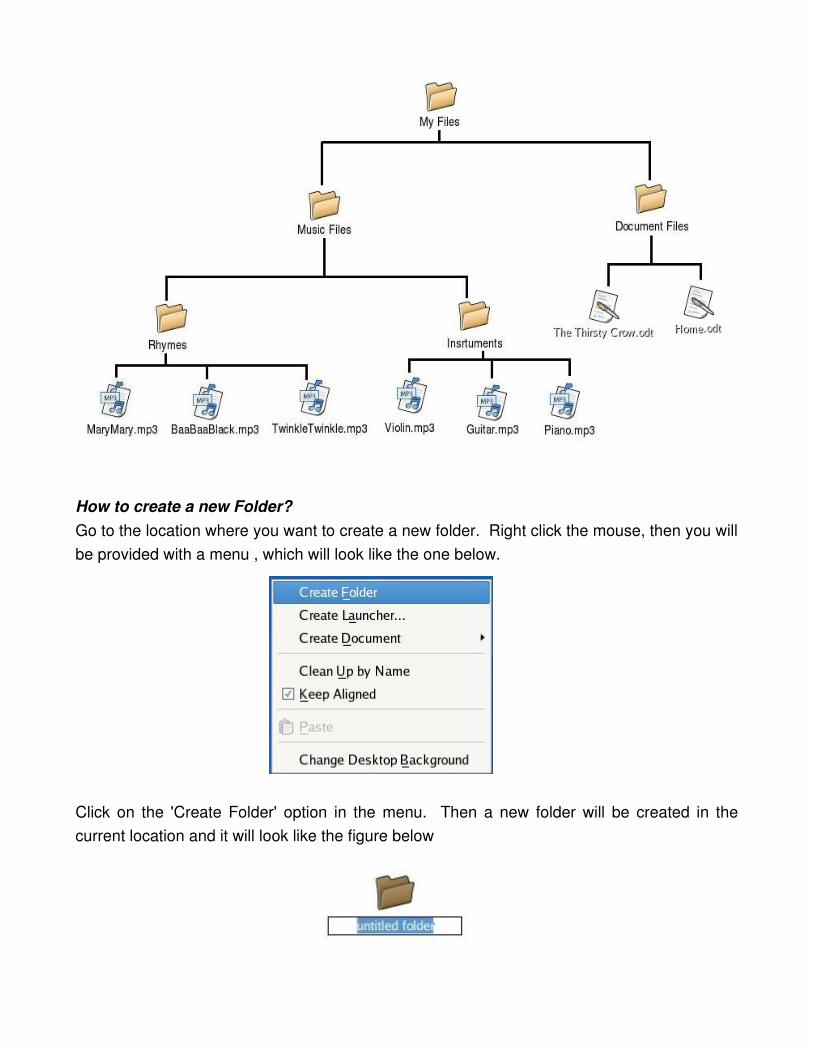
The above figure shows some files which are categorised according to their subjects. These can be stored in a computer according to the storage hierarchy as shown below. Under Science category, we can again subdivide the files into Plants, Animals and Surroundings.
We can also store files according to the file extensions. For example, consider we have a number of music and document files . These files can be grouped and kept in a single location. This way we will know where to look for music or the document files. These files can also be divided into sub categories. For example. In music files we have both rhymes and instrumental music. These can be separately grouped and stored. This way it becomes convenient and saves time in locating a file.
How to create a new Folder?Go to the location where you want to create a new folder. Right click the mouse, then you will be provided with a menu , which will look like the one below.
Click on the 'Create Folder' option in the menu. Then a new folder will be created in the current location and it will look like the figure below

Now we can give a name to this folder, by just typing the name on the highlighted area. Let us name the new folder 'First', then it will look like the figure below
Lesson Plan
1. Start the class asking the children what are the steps they followed while saving a file. Now list out the steps.
2. Open a new document. Type in some matter.3. Select the save option either from the file menu or from the tool bar shortcut. 4. Show them the pop up window. See the following figure.
5. Now ask them to show the location where the file name is to be entered. In case of a new file, the file name will be “Untitled” (as shown in the figure). This can be changed and relevant file name can be given.
6. Now show them the 'File type” option. Here we get the file type on the left hand side and the three letter extension corresponding to that name on the right hand side. This is the place where we can decide the type of the file. Once an option is selected then three letter extension is added after the name of the file.
7. Another question that may arise is why we need an extension. Ask the kids to consider the school, where there are different classes . Each classes will have kids who are of a
particular age groups. For example, kids of Class I will be of age group 56 years. So by knowing the class of a kid, we can guess his age. Just like this, by seeing the file extension we will know the content of a file, like '.mp3' for a music file, '.jpg' for pictures, etc.
8. Once the idea of file extensions are clear, click the 'Save' option to save the file.9. Now show them some of the already saved files in the computer. Ask them to observe
the file names and extensions.10.Open some sound/video, paint, word processor or picture files and ask them to notice
the file extensions. Let them get familiarized with some of the commonly used file types.
11.Close all the files and ask them to identify different files types from the file extension.12.Open the files and show whether they have identified the files correctly or not.13.Now we will get into the importance of organising the files and how files can be
grouped and stored depending on the file extensions.14.Tell the students about some day to day activities where we need to keep things
organised, like keeping their text books and notebooks, dresses etc. Ask them why we keep things organised ?
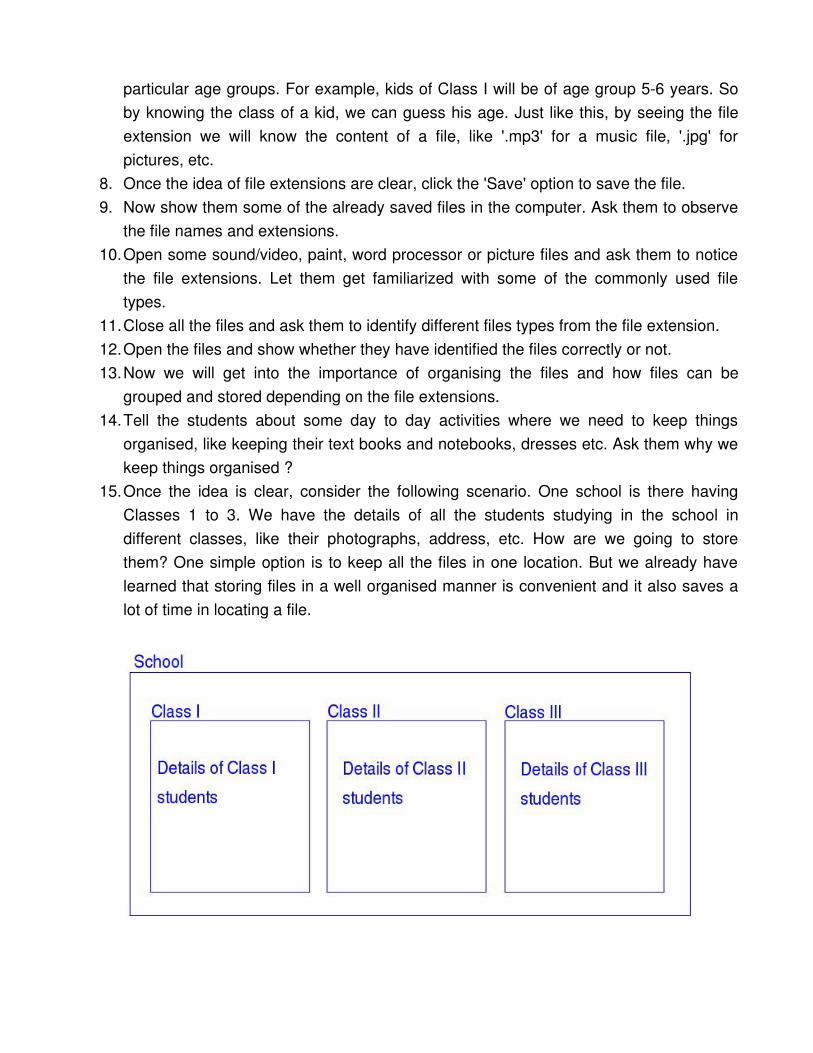
15.Once the idea is clear, consider the following scenario. One school is there having Classes 1 to 3. We have the details of all the students studying in the school in different classes, like their photographs, address, etc. How are we going to store them? One simple option is to keep all the files in one location. But we already have learned that storing files in a well organised manner is convenient and it also saves a lot of time in locating a file.

16. If there are more than one division under each class, then we can create subfolders for each division. If the student details( let it be '.odt' files) and photographs (let it be '.jpg' files) are there, then for different file types we can create separate folders for storing the files. See the following figure.
17.Once the idea is clear, we can go ahead with the process of creating a folder. Create a folder 'School' on the Desktop. For this first go to the location(Desktop), right click the mouse and select the option 'Create Folder' from the drop down menu. Then give the name 'School' to the created folder.
18.Create a new file in word processor/text editor. Write a brief description of your school and store in this folder. Ask the children to notice the file extension.
19.For creating subfolder inside the folder 'School', open the folder and then follow the same steps as in 17. You can create as many folders and files as you wish and store the files in a well organized manner.
Worksheet
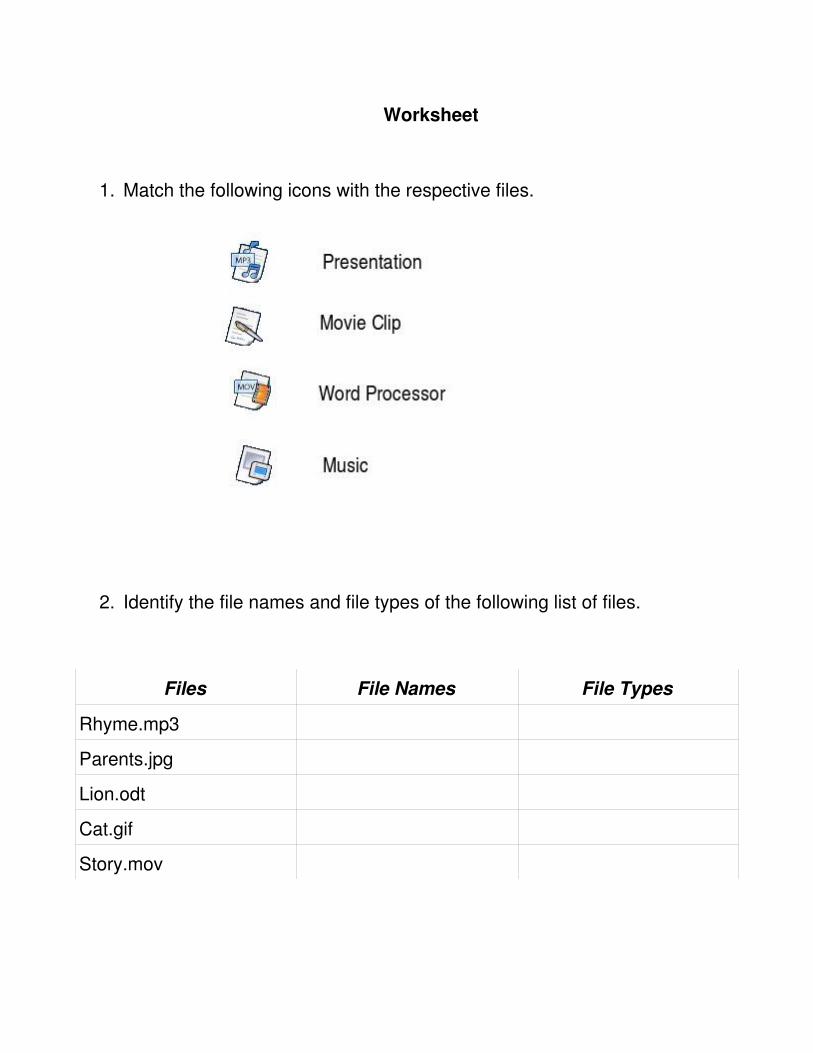
1. Match the following icons with the respective files.
2. Identify the file names and file types of the following list of files.
Files File Names File Types
Rhyme.mp3
Parents.jpg
Lion.odt
Cat.gif
Story.mov
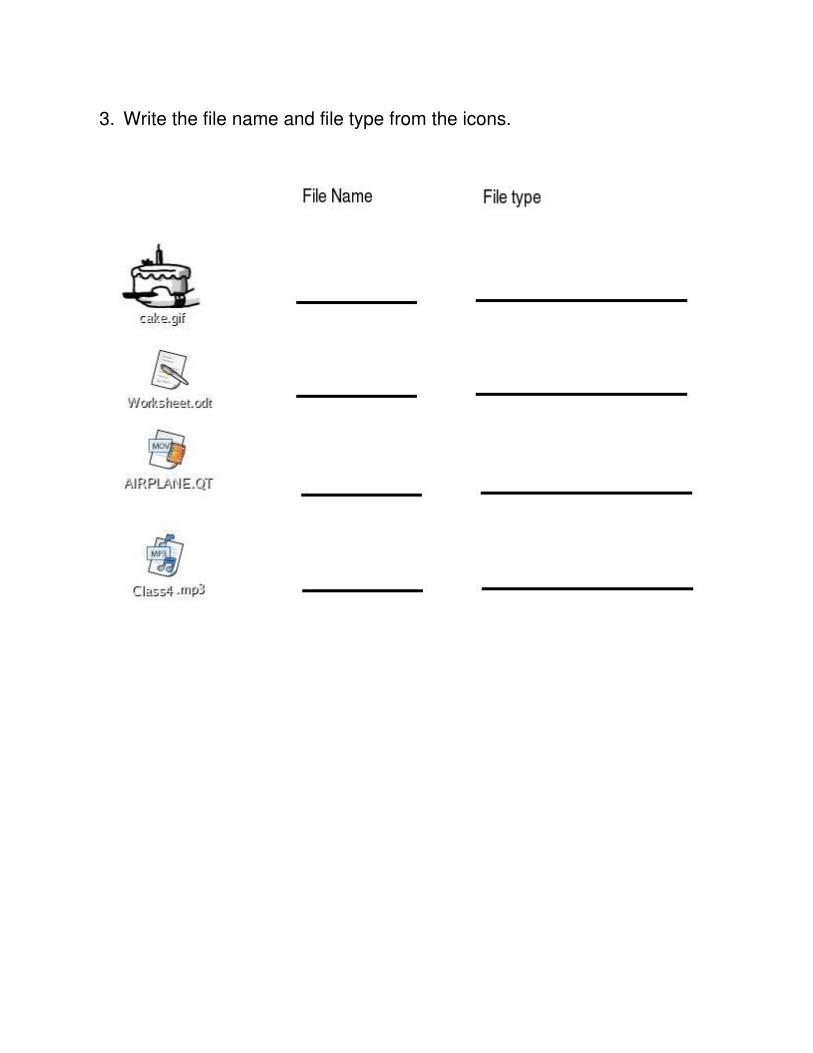
3. Write the file name and file type from the icons.


![[]_Narcissistic_Personality_Disorder( ).txt](https://img.pdfslide.us/doc/110x75/577cc03a1a28aba7118f53b5/narcissisticpersonalitydisorderbookfiorgtxt.jpg)