Embed Size (px)
Citation preview
Tinker Bell Fairy Wings Tutorial
By Hachiko Nana
*These style wings need to be supported with a corset underneath your costume otherwise you will need to have elastic or ribbon to tie the
wings to your body.
Supplies:
-12 gauge stainless steel wire. You can get a spool at the hardware store. (You can make prob 3-4 sets of wings in 1 roll )
-1 roll cellophane iridescent gift wrap.
-Spray adhesive.
-White floral tape.
-1 large bottle of the diamond glitter puffy paint.
-Wire cutters.
-Low temp hot glue gun.
-Scissors
Step 1: Draw your wing template. You need the outside frame and the inner veins you want. Your drawing needs to be true to the size that
you want your final wings to be. You also need to plan a “U” shape to go in-between your wings. This is what will be inserted into your
corset. To give the illusion that your wings are floating. If you do not want to wear a corset under your costume, you can just have a line
going across and you can plan to use elastic or ribbons to tie the wings to your body. I also typically only draw one wing and turn the piece
of paper over and trace it on the other side so both will be perfectly symmetrical.
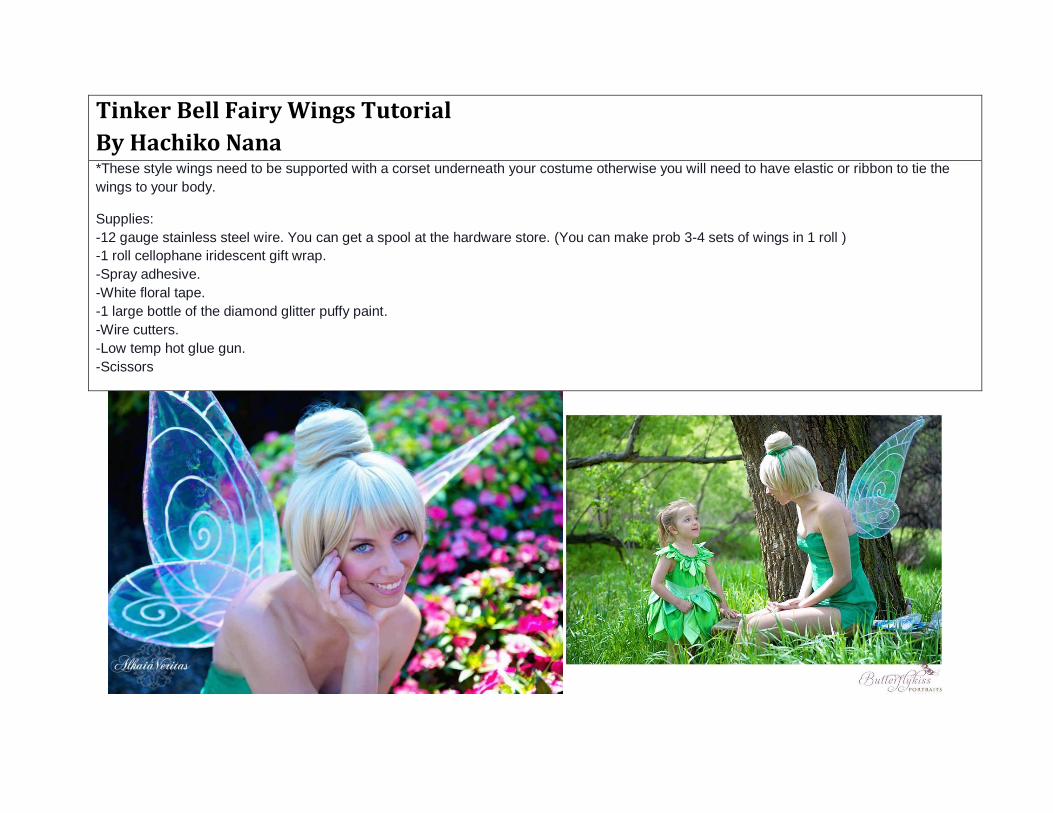
Step 2: Start bending the wire around your wing template. (Two people helping is a good idea here). You want one single piece of wire for
the two sets of wings; this helps for structure and stabilization. As you can see in the close up, There are only two ends of wire on one
section of the wings. You will make one piece for the small set and one piece for the large set (two sets of wings for Tinkerbell’s wings).
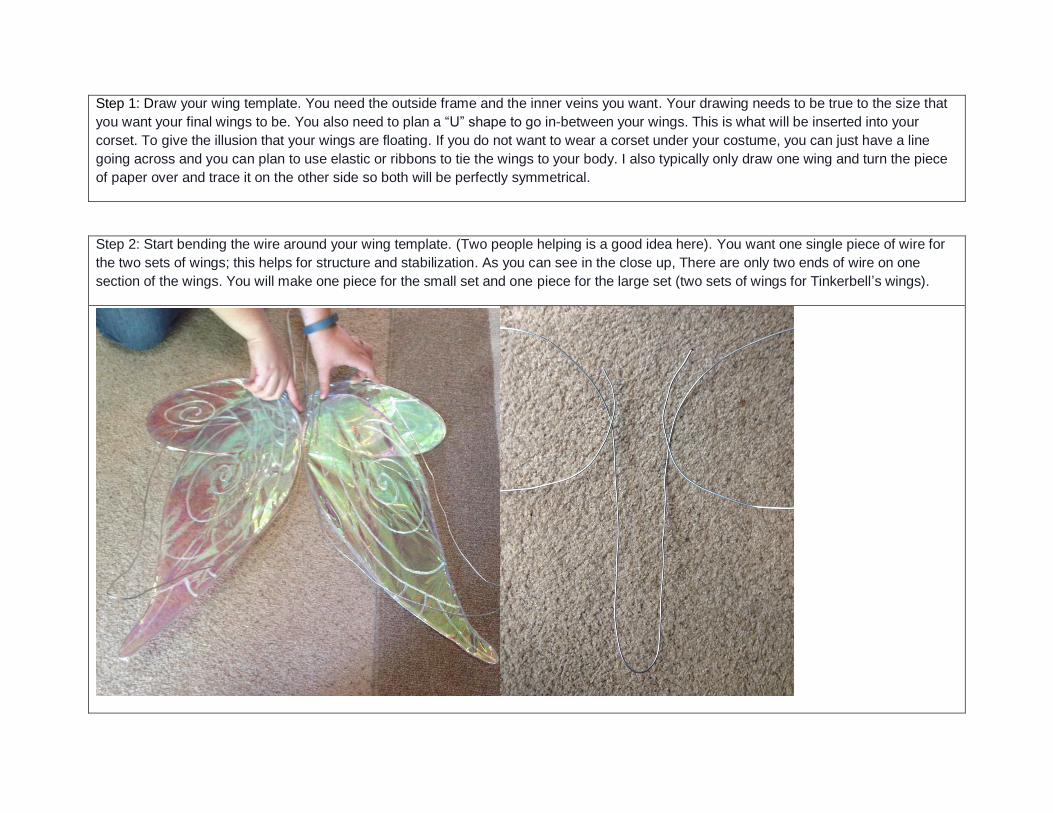
Step 3: Use floral tape to hold and finish the two ends of the wire. Do this for both the large and small set of wings. As you can see in the
second picture here the ends of wire are finished with the floral tape.
Step 4: Do final tweaking on the overall shape of your wings. Make sure they line up and that they are as symmetrical as possible. Also try
to make them so they lay as flat as possible. After step 5 you can no longer adjust the shape of the wings.
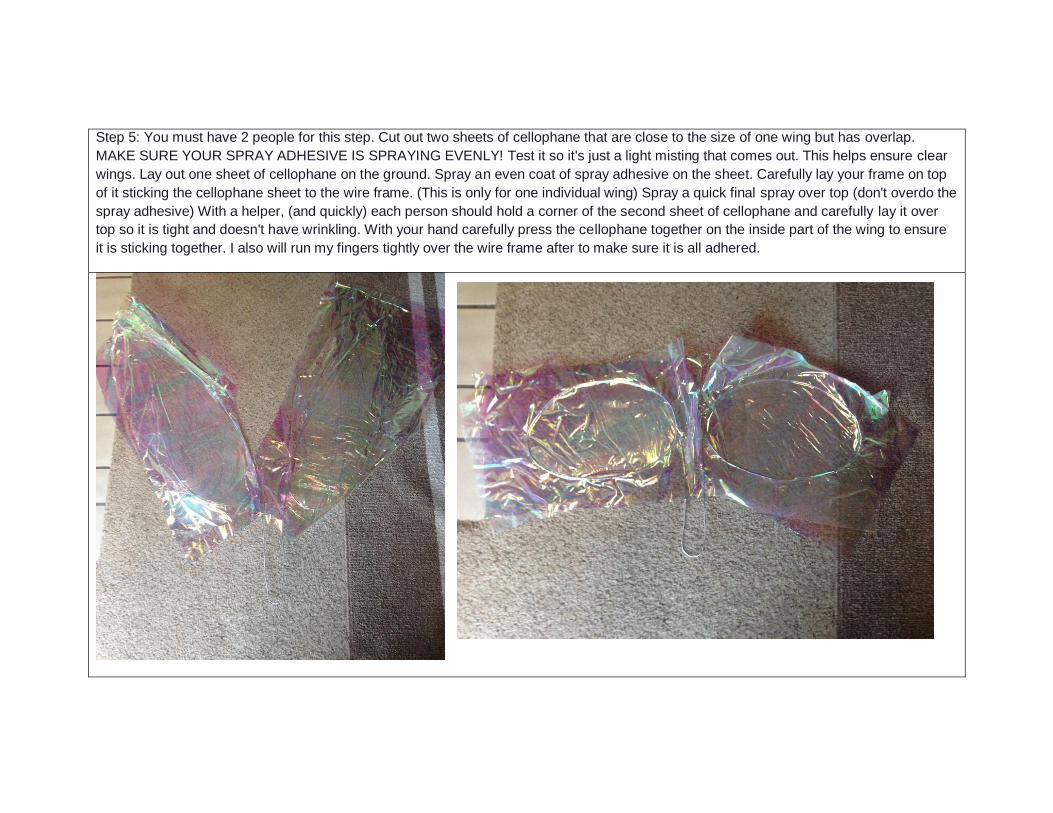
Step 5: You must have 2 people for this step. Cut out two sheets of cellophane that are close to the size of one wing but has overlap.
MAKE SURE YOUR SPRAY ADHESIVE IS SPRAYING EVENLY! Test it so it's just a light misting that comes out. This helps ensure clear
wings. Lay out one sheet of cellophane on the ground. Spray an even coat of spray adhesive on the sheet. Carefully lay your frame on top
of it sticking the cellophane sheet to the wire frame. (This is only for one individual wing) Spray a quick final spray over top (don't overdo the
spray adhesive) With a helper, (and quickly) each person should hold a corner of the second sheet of cellophane and carefully lay it over
top so it is tight and doesn't have wrinkling. With your hand carefully press the cellophane together on the inside part of the wing to ensure
it is sticking together. I also will run my fingers tightly over the wire frame after to make sure it is all adhered.
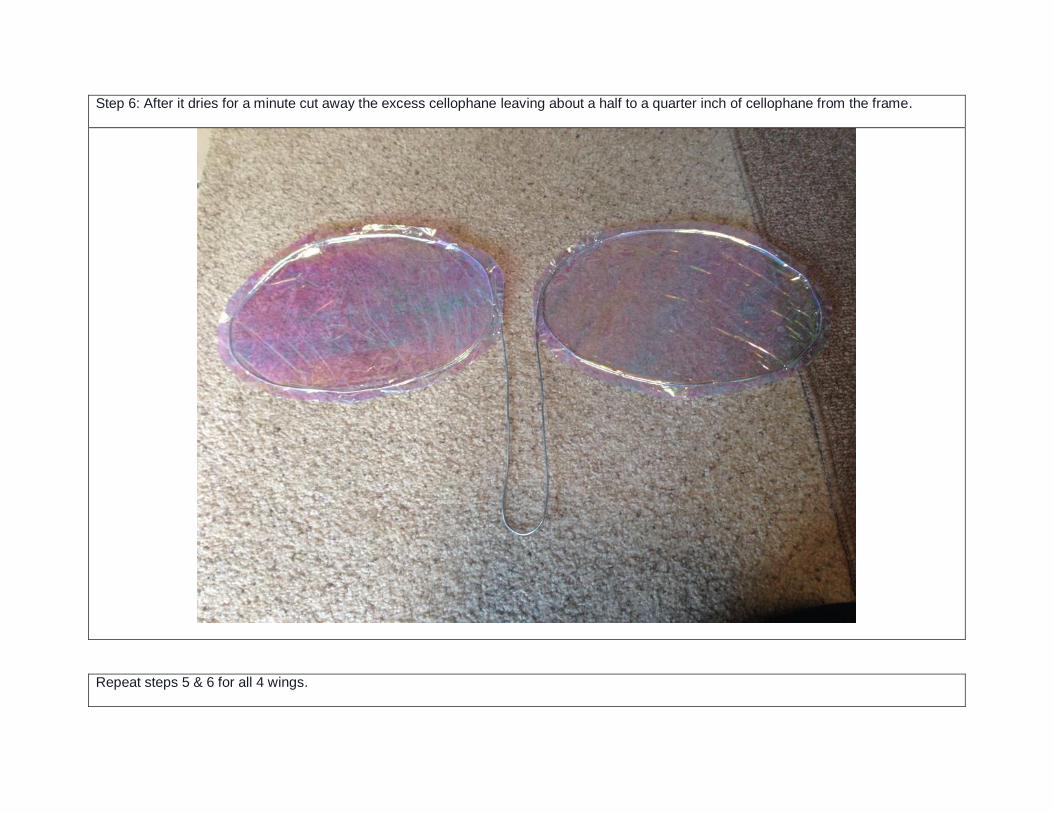
Step 6: After it dries for a minute cut away the excess cellophane leaving about a half to a quarter inch of cellophane from the frame.
Repeat steps 5 & 6 for all 4 wings.

Step 7: Use a LOW temp hot glue gun to fold over the excess cellophane to finish the edge.
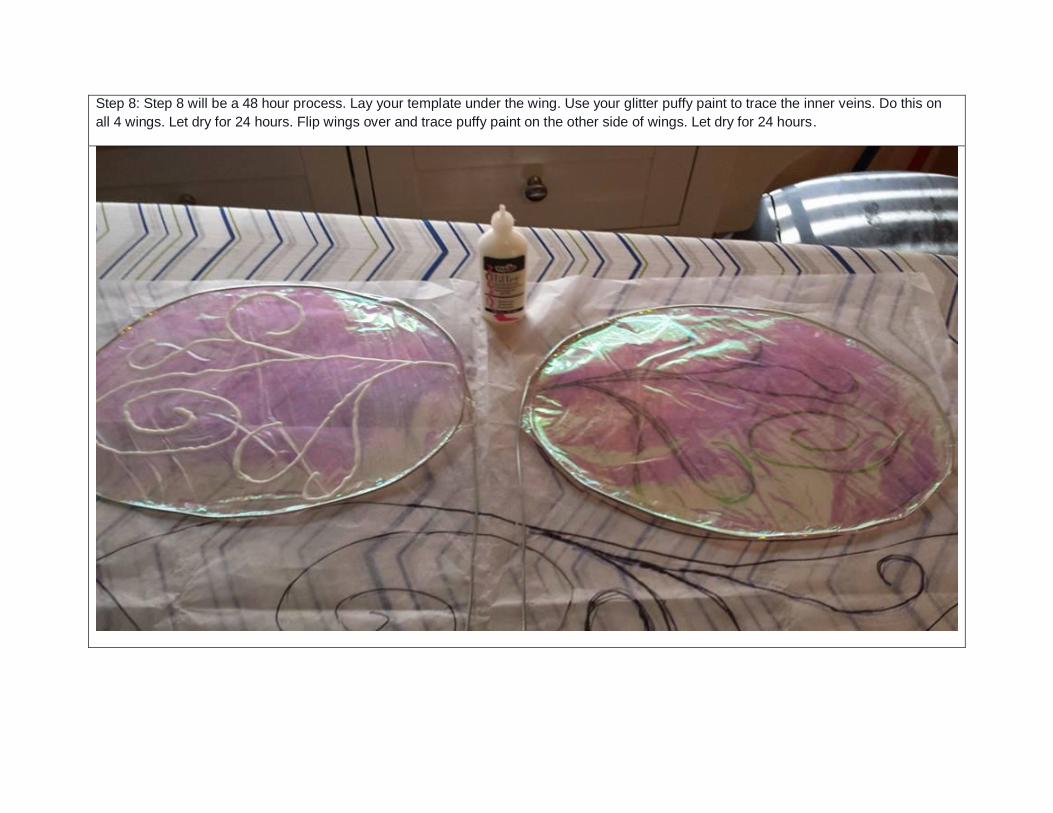
Step 8: Step 8 will be a 48 hour process. Lay your template under the wing. Use your glitter puffy paint to trace the inner veins. Do this on
all 4 wings. Let dry for 24 hours. Flip wings over and trace puffy paint on the other side of wings. Let dry for 24 hours.
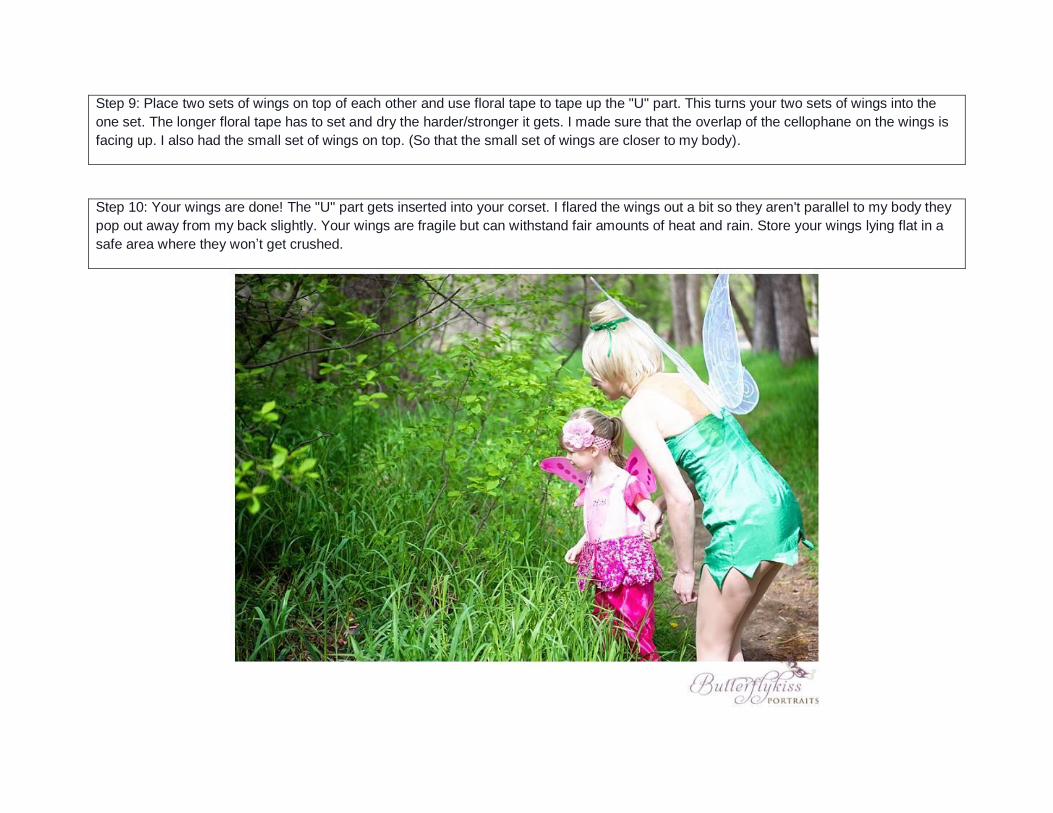
Step 9: Place two sets of wings on top of each other and use floral tape to tape up the "U" part. This turns your two sets of wings into the
one set. The longer floral tape has to set and dry the harder/stronger it gets. I made sure that the overlap of the cellophane on the wings is
facing up. I also had the small set of wings on top. (So that the small set of wings are closer to my body).
Step 10: Your wings are done! The "U" part gets inserted into your corset. I flared the wings out a bit so they aren't parallel to my body they
pop out away from my back slightly. Your wings are fragile but can withstand fair amounts of heat and rain. Store your wings lying flat in a
safe area where they won’t get crushed.