Embed Size (px)
Citation preview

This Documentation, which includes embedded help systems and electronically distributed materials (hereinafter referred to as the “Documentation”), is for your informational purposes only and is subject to change or withdrawal by CA at any time.
This Documentation may not be copied, transferred, reproduced, disclosed, modified or duplicated, in whole or in part, without the prior written consent of CA. This Documentation is confidential and proprietary information of CA and may not be disclosed by you or used for any purpose other than as may be permitted in (i) a separate agreement between you and CA governing your use of the CA software to which the Documentation relates; or (ii) a separate confidentiality agreement between you and CA.
Notwithstanding the foregoing, if you are a licensed user of the software product(s) addressed in the Documentation, you may print or otherwise make available a reasonable number of copies of the Documentation for internal use by you and your employees in connection with that software, provided that all CA copyright notices and legends are affixed to each reproduced copy.
The right to print or otherwise make available copies of the Documentation is limited to the period during which the applicable license for such software remains in full force and effect. Should the license terminate for any reason, it is your responsibility to certify in writing to CA that all copies and partial copies of the Documentation have been returned to CA or destroyed.
TO THE EXTENT PERMITTED BY APPLICABLE LAW, CA PROVIDES THIS DOCUMENTATION “AS IS” WITHOUT WARRANTY OF ANY KIND, INCLUDING WITHOUT LIMITATION, ANY IMPLIED WARRANTIES OF MERCHANTABILITY, FITNESS FOR A PARTICULAR PURPOSE, OR NONINFRINGEMENT. IN NO EVENT WILL CA BE LIABLE TO YOU OR ANY THIRD PARTY FOR ANY LOSS OR DAMAGE, DIRECT OR INDIRECT, FROM THE USE OF THIS DOCUMENTATION, INCLUDING WITHOUT LIMITATION, LOST PROFITS, LOST INVESTMENT, BUSINESS INTERRUPTION, GOODWILL, OR LOST DATA, EVEN IF CA IS EXPRESSLY ADVISED IN ADVANCE OF THE POSSIBILITY OF SUCH LOSS OR DAMAGE.
The use of any software product referenced in the Documentation is governed by the applicable license agreement and such license agreement is not modified in any way by the terms of this notice.
The manufacturer of this Documentation is CA.
Provided with “Restricted Rights.” Use, duplication or disclosure by the United States Government is subject to the restrictions set forth in FAR Sections 12.212, 52.227-14, and 52.227-19(c)(1) - (2) and DFARS Section 252.227-7014(b)(3), as applicable, or their successors.
Copyright © 2016 CA. All rights reserved. All trademarks, trade names, service marks, and logos referenced herein belong to their respective companies.
This document references the following CA Technologies products:
■ CA Datacom®/DB
■ CA Datacom® CICS Services
■ CA Datacom® Datadictionary™ (Datadictionary)
■ CA Datacom® DL1 Transparency
■ CA Datacom® Server
■ CA Datacom® SQL (SQL)
■ CA Datacom® VSAM Transparency
■ CA Dataquery™ for CA Datacom®
■ CA ACF2™
■ CA eMail+
■ CA Ideal™ for CA Datacom® (CA Ideal)
■ CA Librarian®
■ CA Top Secret®
■ CA CIS
Contact CA Support
For your convenience, CA Technologies provides one site where you can access the information that you need for your Home Office, Small Business, and Enterprise CA Technologies products. At http://ca.com/support, you can access the following resources:
■ Online and telephone contact information for technical assistance and customer services
■ Information about user communities and forums
■ Product and documentation downloads
■ CA Support policies and guidelines
■ Other helpful resources appropriate for your product
Providing Feedback About Product Documentation
If you have comments or questions about CA Technologies product documentation, you can send a message to [email protected].
To provide feedback about CA Technologies product documentation, complete our short customer survey which is available on the CA Support website at http://ca.com/docs.
Installation Methodology ............................................................................................................................................. 9
Maintain System History Program (MSHP) ........................................................................................................... 9
Sample JCL ........................................................................................................................................................... 10
Loading Product Code ......................................................................................................................................... 10
CA CIS ......................................................................................................................................................................... 11
System Adapter ................................................................................................................................................... 11
z/VSE Common Code........................................................................................................................................... 11
CAICCI .................................................................................................................................................................. 12
CAISSF.................................................................................................................................................................. 12
CA LMP ................................................................................................................................................................ 12
Using CA LMP ...................................................................................................................................................... 12
Defining KEYS ...................................................................................................................................................... 13
Upgrading CA Dataquery ............................................................................................................................................ 14
Other Related Publications ........................................................................................................................................ 15
JCL Requirements ....................................................................................................................................................... 15
Hardware and Software Requirements ...................................................................................................................... 17
Hardware Requirements ..................................................................................................................................... 17
Software Requirements ...................................................................................................................................... 17
DASD Requirements ................................................................................................................................................... 18
Library Requirements ................................................................................................................................................. 19
CA Dynam/D for z/VSE Considerations ...................................................................................................................... 19
Base Product Installation Tape ................................................................................................................................... 21
CA Datacom SQL Installation Tape ............................................................................................................................. 22
MSHP Overview .......................................................................................................................................................... 23
Objectives ............................................................................................................................................................ 23
Facilities............................................................................................................................................................... 24
MSHP and CA Datacom ....................................................................................................................................... 24
MSHP Benefits ............................................................................................................................................................ 25
MSHP Operations ....................................................................................................................................................... 25
System History File ..................................................................................................................................................... 26
Dedicated System History File ............................................................................................................................. 26
Overview .................................................................................................................................................................... 28
Procedures ................................................................................................................................................................. 28
Step 1. Review Materials .................................................................................................................................... 28 Step 2. Special Notes for Upgrades .................................................................................................................... 29
Step 3. Install CA CIS ........................................................................................................................................... 30
Step 4. Review System Requirements ................................................................................................................ 31
Step 5. Load SAMPJCL and Retrieve Member BEINS01.Z ................................................................................... 32
Step 6. Produce Install JCL and Define Install Library ......................................................................................... 34
Step 7. Modify BEINS04.Z ................................................................................................................................... 35
Step 8. Modify Installation JCL ........................................................................................................................... 35
Fallback to Version 11.0 from 12.0 ......................................................................................................... 40
Fall Forward to Version 12.0 from 11.0 .................................................................................................. 40
Upgrade Libraries 40 Step 9. Update CICS System Tables .................................................................................................................... 40
Step 10. Make CICS Modifications ................................................................................................................... 411
Step 11. Verify the CA Datacom Products ........................................................................................................ 411
Subsequent Installation of Optional Products ........................................................................................................... 42
CA Datacom SQL.................................................................................................................................................. 43
CA Dataquery ...................................................................................................................................................... 43
System Maintenance .................................................................................................................................................. 47
Sample PTF Applied Using MSHP ........................................................................................................................ 47
Maintenance Process Steps ................................................................................................................................ 48
Diagnostic Procedures ................................................................................................................................................ 49
Problem Resolution .................................................................................................................................................... 50
Verify the Problem .............................................................................................................................................. 50
Collect Diagnostic Data ....................................................................................................................................... 50
Interpret Diagnostic Data .................................................................................................................................... 50
Access the Online Client Support System................................................................................................................... 51
Licensing .............................................................................................................................................................. 51
Contact CA Support .................................................................................................................................................... 51
Prepare for a Call on a New Issue ....................................................................................................................... 52
Prepare for a Call on an Existing Issue ................................................................................................................ 52
Where to Call for Support ................................................................................................................................... 53
Describe and Prioritize the Problem ................................................................................................................... 53
Make the Call ...................................................................................................................................................... 54
Sample Forms ............................................................................................................................................................. 56
CA SUPPORT CONTACT NUMBER LOG ....................................................................................................................... 56
CA SUPPORT CONTACT INFORMATION ...................................................................................................................... 58
Request Enhancements .............................................................................................................................................. 60

This guide contains information specific to installing and maintaining CA Datacom/DB and related products in a z/VSE environment.
It documents background and preparatory information and the step-by-step procedures to install, customize, and maintain the CA Datacom product line.
This chapter provides an overview of the CA Datacom product installation process for the z/VSE environment.
All references to the generic term tape represent an AWS file.
Important! Review any cover letters or Product Information Packets (PIPs) provided in your CA Datacom installation package. These contain important information about the latest maintenance level of the CA Datacom product line and include information you may need to consider before beginning any installation activity.
This section contains the following topics:
Installation Methodology (see page 9) CA CIS (see page 11) Upgrading CA Dataquery (see page 14) Other Related Publications (see page 15) JCL Requirements (see page 15)
In addition to the installation materials and utilities provided, the CA Datacom installation process requires use of the IBM Maintain System History Program (MSHP) product. MSHP controls the CA Datacom installation and maintenance and provides a history of all installation and maintenance activities. MSHP concepts are detailed in the MSHP Overview (see page 23).
MSHP provides a standard installation methodology for all CA z/VSE products and ensures the stability and integrity of the execution libraries. General MSHP installation considerations are as follows:
■ MSHP is required to install and maintain CA Datacom.
■ MSHP maintains a record of the entire CA Datacom system on the System History file (IJSYSHF). The System History file contains information about the components and products installed, and the maintenance activities applied to the system.
■ The System History file is required for all MSHP processing and we recommend that a new System History file, dedicated to CA Datacom, be used for this installation. The installation procedure generates JCL to create and initialize a dedicated System History file.
■ MSHP also uses an Auxiliary History file (IJSYS02). The Auxiliary History file is normally used as a work file for installation and maintenance activities. The installation procedure also generates JCL to create and initialize the Auxiliary History file.
■ The Auxiliary History file can refer to two different files in MSHP:
Alternate or second History file
All commands that directly address the System History file distinguish between System History file and Auxiliary History file.
Work file
Some of the MSHP commands need an internal work file for processing.
You can use IJSYS02 rather than IJSYSHF to point to a second History file.
You can install a number of CA Datacom products during a single, integrated session.
Note: CA Datacom SQL is delivered on a separate tape.
The installation tape includes a file that contains sample installation JCL. This file, SAMPJCL, contains all the JCL required for the installation process and for customizing your CA Datacom environment. Instructions and sample JCL to load SAMPJCL to a library are detailed in Step 4. Load SAMPJCL and Retrieve Member BEINS01.Z.
JCL found in the SAMPJCL library, needs to be retrieved and customized to provide parameters unique to your installation and to define your site environment. Instructions for modifying install JCL are embedded at the top of each job.
The CA Datacom product code on the installation tape is prelinked. It can be downloaded only using IBM's MSHP utility. The MSHP utility loads the required phases from the installation tape into standard IBM libraries and the History file.
Note: The majority of the required link-edit steps are now prelinked, and you do not have to include link-edit steps in most job streams.
The MSHP History file is required when installing z/VSE software. The MSHP utility loads products from an installation tape to libraries at your site using MSHP. The base-product installation tape contains all the CA Datacom products except CA Datacom SQL, which is on a separate tape.
The MSHP utility can execute in any z/VSE partition with an allocation of 1024 KB or more. This partition can be in any address space. There is no shared address space requirement.
Install the required z/VSE CA CIS (Common Infrastructure Services) before you begin this installation. Complete instructions for installing CA CIS are documented in the CA CIS Installation Guide - z/VSE. Further more information about installing the required z/VSE CA CIS, see Step 2. Install CA CIS.
The CA CIS installation tape and installation materials are included in the CA Datacom installation package. The guides are on the online support website for CA. For more information about CA's online support, see Access the Online Client Support System (see page 51). The CA Datacom z/VSE products require the following components of the CA CIS:
■ System Adapter
■ z/VSE Common Code
■ CAICCI
■ CA LMP
■ CAISSF - if you are using external security
These CA CIS components can be tailored for any size site, and can be altered to suit the specific needs of individual users.
The CA System Adapter provides operating system-dependent services, such as program retrieval and recovery, for a variety of CA products. Made through generic requests, these services facilitate the development of operating system-independent products.
z/VSE Common Code is used by all CA z/VSE products that require CA CIS.
The CAI Common Communications Interface (CAICCI) is a communications facility that offers a simple and flexible approach enabling CA products to communicate with each other. This facility provides a layer that isolates application software from the specifics of the communications environment.
The CA Standard Security Facility (CAISSF) is a standardized security interface to CA-ACF2 and CA Top Secret.
The CA License Management Program (CA LMP) provides a standardized and automated approach to the tracking of licensed software. It uses common realtime enforcement software to validate user configuration. CA LMP reports on activities related to the license, usage, and financials of your CA products. CA LMP features include:
■ Common key data sets which can be shared among many CPUs
■ "Check digits" used to detect errors in transcribing key information
■ Execution keys you can enter without affecting any CA product already running
■ No special maintenance requirements
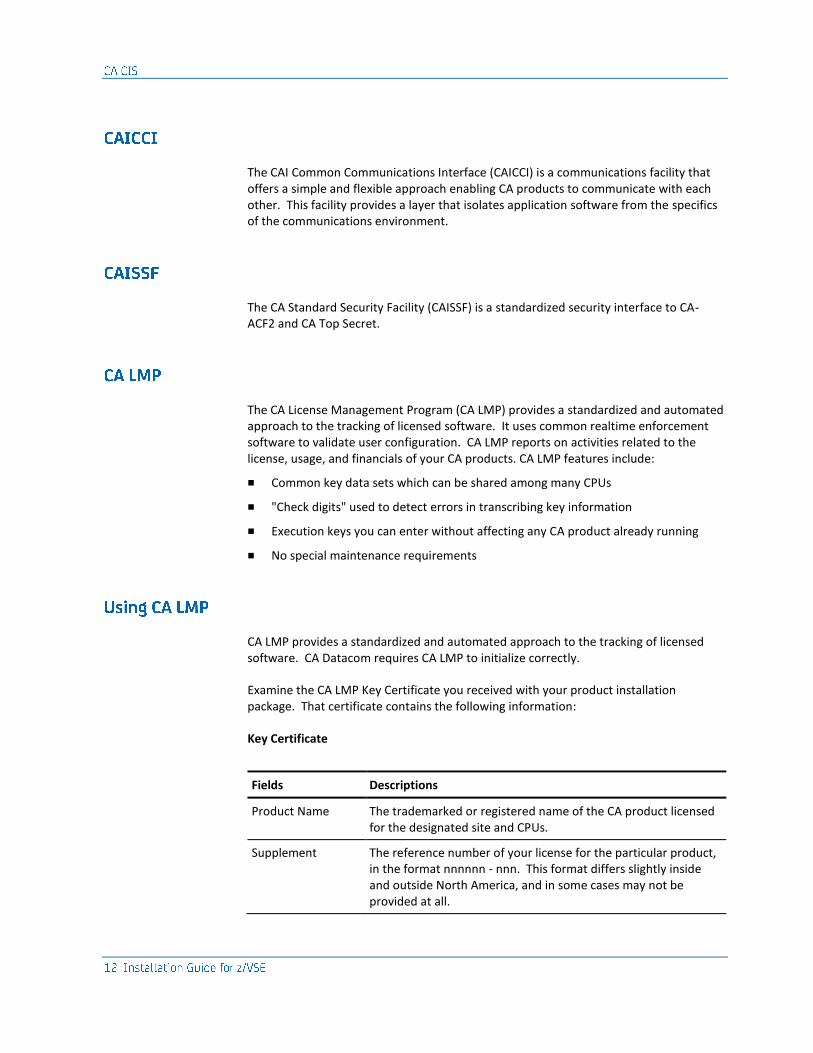
CA LMP provides a standardized and automated approach to the tracking of licensed software. CA Datacom requires CA LMP to initialize correctly.
Examine the CA LMP Key Certificate you received with your product installation package. That certificate contains the following information:
Key Certificate
Fields Descriptions
Product Name The trademarked or registered name of the CA product licensed for the designated site and CPUs.
Supplement The reference number of your license for the particular product, in the format nnnnnn - nnn. This format differs slightly inside and outside North America, and in some cases may not be provided at all.
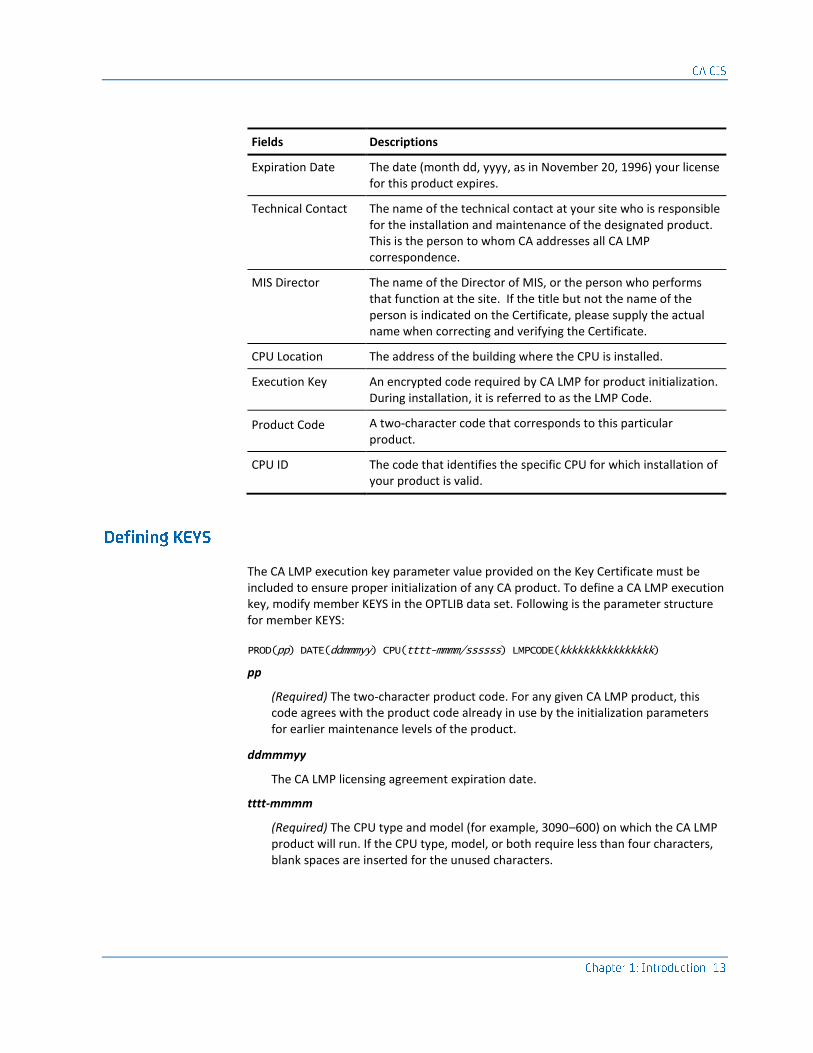
Fields Descriptions
Expiration Date The date (month dd, yyyy, as in November 20, 1996) your license for this product expires.
Technical Contact The name of the technical contact at your site who is responsible for the installation and maintenance of the designated product. This is the person to whom CA addresses all CA LMP correspondence.
MIS Director The name of the Director of MIS, or the person who performs that function at the site. If the title but not the name of the person is indicated on the Certificate, please supply the actual name when correcting and verifying the Certificate.
CPU Location The address of the building where the CPU is installed.
Execution Key An encrypted code required by CA LMP for product initialization. During installation, it is referred to as the LMP Code.
Product Code A two-character code that corresponds to this particular product.
CPU ID The code that identifies the specific CPU for which installation of your product is valid.
The CA LMP execution key parameter value provided on the Key Certificate must be included to ensure proper initialization of any CA product. To define a CA LMP execution key, modify member KEYS in the OPTLIB data set. Following is the parameter structure for member KEYS:
PROD(pp) DATE(ddmmmyy) CPU(tttt-mmmm/ssssss) LMPCODE(kkkkkkkkkkkkkkkk)
pp
(Required) The two-character product code. For any given CA LMP product, this code agrees with the product code already in use by the initialization parameters for earlier maintenance levels of the product.
ddmmmyy
The CA LMP licensing agreement expiration date.
tttt-mmmm
(Required) The CPU type and model (for example, 3090–600) on which the CA LMP product will run. If the CPU type, model, or both require less than four characters, blank spaces are inserted for the unused characters.
ssssss
(Required) The serial number of the CPU on which the CA LMP product will run.
kkkkkkkkkkkkkkkk
(Required) The execution key needed to run the CA LMP product. This CA LMP execution key is provided on the Key Certificate shipped with each CA LMP product.
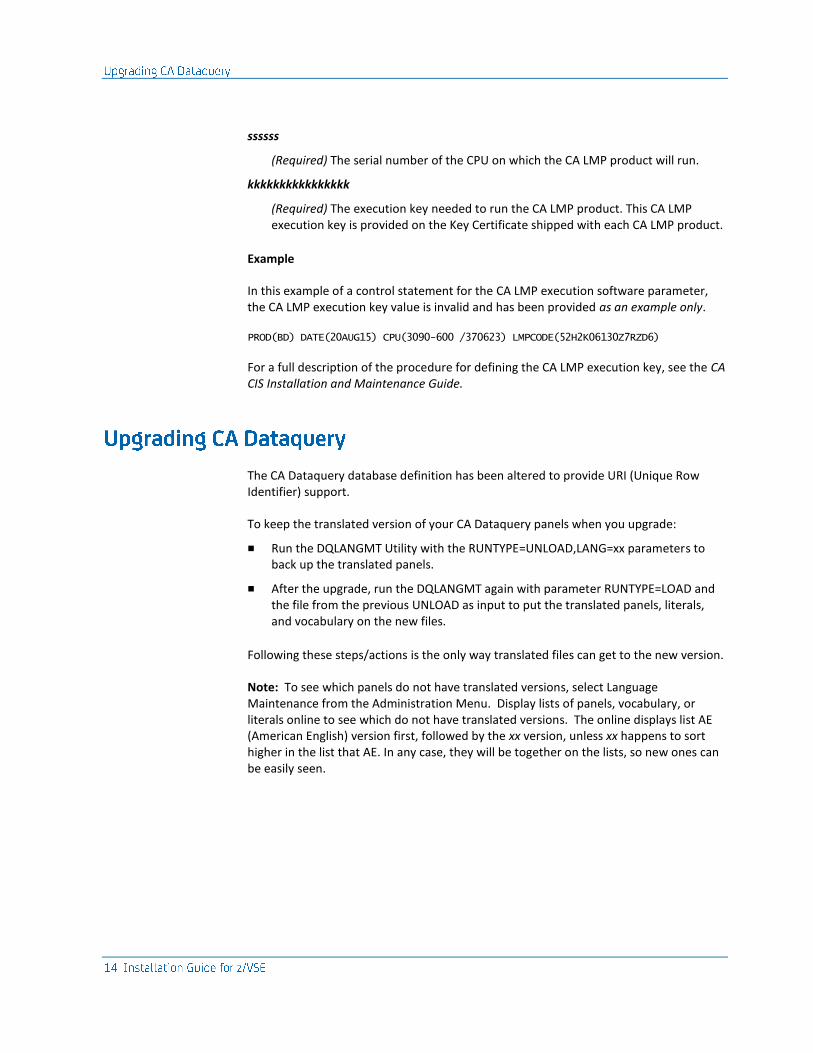
Example
In this example of a control statement for the CA LMP execution software parameter, the CA LMP execution key value is invalid and has been provided as an example only.
PROD(BD) DATE(20AUG15) CPU(3090-600 /370623) LMPCODE(52H2K06130Z7RZD6)
For a full description of the procedure for defining the CA LMP execution key, see the CA CIS Installation and Maintenance Guide.
The CA Dataquery database definition has been altered to provide URI (Unique Row Identifier) support.
To keep the translated version of your CA Dataquery panels when you upgrade:
■ Run the DQLANGMT Utility with the RUNTYPE=UNLOAD,LANG=xx parameters to back up the translated panels.
■ After the upgrade, run the DQLANGMT again with parameter RUNTYPE=LOAD and the file from the previous UNLOAD as input to put the translated panels, literals, and vocabulary on the new files.
Following these steps/actions is the only way translated files can get to the new version.
Note: To see which panels do not have translated versions, select Language Maintenance from the Administration Menu. Display lists of panels, vocabulary, or literals online to see which do not have translated versions. The online displays list AE (American English) version first, followed by the xx version, unless xx happens to sort higher in the list that AE. In any case, they will be together on the lists, so new ones can be easily seen.

The following IBM publications are not available from CA, but are referenced in this document and are recommended reading.
Catalog Number Title of Publication
SC33-6513 IBM z/VSE z/VSE/Enterprise Systems Architecture
SC33-6199 IBM Virtual Storage Extended/Advanced Functions Maintain System History Program Reference
Guidelines to assist you in preparing your JCL are provided in this manual. The sample code provided in this document is intended for use as a reference aid only and no warranty of any kind is made as to completeness or correctness for your specific installation.
Samples for JCL and programs are provided in the sublib. In z/VSE, sample PROCs allow you to make use of parameter substitution. You can copy and modify these samples for your specific requirements.
Any JOB statements should be coded to your site standards and specifications. All data set names and library names should be specified with the correct names for the installation at your site. In many examples, a REGION= or SIZE= parameter is displayed in an EXEC statement. The value displayed should be adequate in most instances, but you can adjust the value to your specific needs.
The libraries listed for searching must include the following in the order shown:
1. User libraries you may have defined.
2. CA Datacom base libraries.
3. CA IPC libraries
4. CA CIS base libraries
5. Libraries for additional CA products.
CA Dataquery users also need the data set DQOUT only if the DQBATCH execution uses the EXPORT function.
If you are going to use CA eMail+, include definitions of the message, folder, and network libraries in the JCL to be accessible to DQBATCH.

This chapter describes the system requirements for installing and implementing CA Datacom Version 12.0 for z/VSE
This section contains the following topics:
Hardware and Software Requirements (see page 17) DASD Requirements (see page 18) Library Requirements (see page 19) CA Dynam/D for z/VSE Considerations (see page 19)
The following are the hardware and software requirements for CA Datacom products in a z/VSE environment.
Hardware requirements are as follows:
■ The CA Datacom product line is distributed on tape cartridges.
■ CA Datacom requires an IBM 30xx, 93xx, or ES90xx processor, or any mainframe system that is plug-compatible with one of these.
You must have the following installed prior to installing CA Datacom:
■ The z/VSE operating system as supported by IBM, which provides the Virtual Addressability Extension (VAE). VAE enables you to use multiple address spaces. For more information about VAE, see the CA Datacom/DB Database and System Administration Guide.
The 3390 support uses Extended Count-Key-Data channel commands to improve performance and functionality.
■ MSHP (Maintain System History Program). Install the CA Datacom product line into a System History file dedicated to CA Datacom. For more information about MSHP, see MSHP Overview (see page 23).
■ DITTO
■ The default configuration of CA Datacom expects a 4 MB partition for execution. If the CA Datacom SQL is utilized, a 16 MB partition is required. Final partition requirements depend on your system configuration.
■ For upgrades, any version of CA Datacom prior to Version 11.0 must first upgrade to Version 11.0 before beginning an upgrade to Version 12.0.
■ Any site that is running Version 11.0 with a Version 10.0 Directory (CXX), must convert the Version 10.0 CXX to Version 11.0 before upgrading to Version 12.0
■ CICS Version 2.3 or later as supported by IBM (if using CA Datacom CICS Services or CA Datadictionary online). If CICS system modifications are required, see Installation Process.
■ CA IPC Version 11.0
■ The following components of CA CIS for z/VSE
– CA LMP
– CAICCI
– CAISSF
– System Adapter
– z/VSE Common Code
For information, see CA CIS.
Note: CA Datacom does not require CICS, but if you are running it, be aware that CA Datacom CICS Services is the CA Datacom product that supports CICS. See the CA Datacom CICS Services documentation for installation of that product. Read the installation step descriptions carefully to ensure that you are installing appropriately for your version of CICS.
The installation of the default configuration of CA Datacom requires a total of 4920 tracks on a 3390 disk drive.
The total (in either tracks or blocks) includes all the required libraries, the database files, and the MSHP System History file.
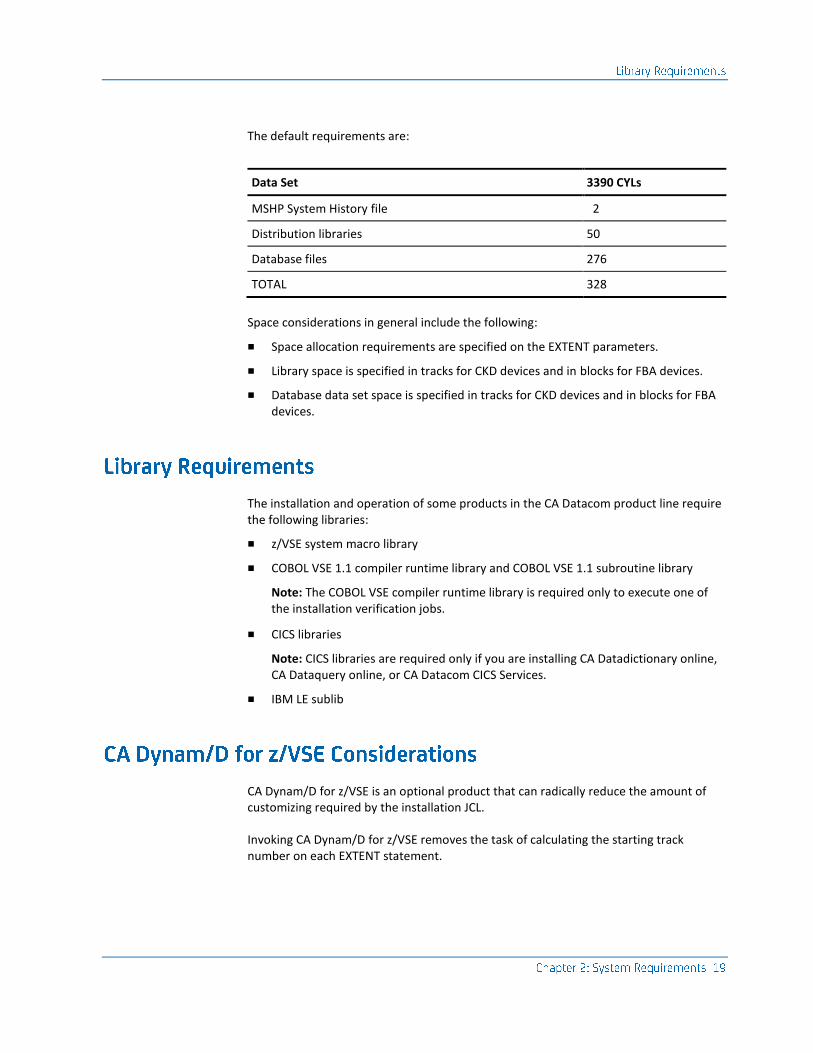
The default requirements are:
Data Set 3390 CYLs
MSHP System History file 2
Distribution libraries 50
Database files 276
TOTAL 328
Space considerations in general include the following:
■ Space allocation requirements are specified on the EXTENT parameters.
■ Library space is specified in tracks for CKD devices and in blocks for FBA devices.
■ Database data set space is specified in tracks for CKD devices and in blocks for FBA devices.
The installation and operation of some products in the CA Datacom product line require the following libraries:
■ z/VSE system macro library
■ COBOL VSE 1.1 compiler runtime library and COBOL VSE 1.1 subroutine library
Note: The COBOL VSE compiler runtime library is required only to execute one of the installation verification jobs.
■ CICS libraries
Note: CICS libraries are required only if you are installing CA Datadictionary online, CA Dataquery online, or CA Datacom CICS Services.
■ IBM LE sublib
CA Dynam/D for z/VSE is an optional product that can radically reduce the amount of customizing required by the installation JCL.
Invoking CA Dynam/D for z/VSE removes the task of calculating the starting track number on each EXTENT statement.
All CA Dynam/D for z/VSE facilities are functionally available to CA Datacom/DB. At the highest level of use, data sets could be placed in pools and allocated across multiple volumes, then dynamically retrieved by CA Dynam/D for z/VSE on behalf of CA Datacom/DB.
For a complete list and explanation of CA Dynam/D for z/VSE features, see the CA Dynam/D for z/VSE documentation set.
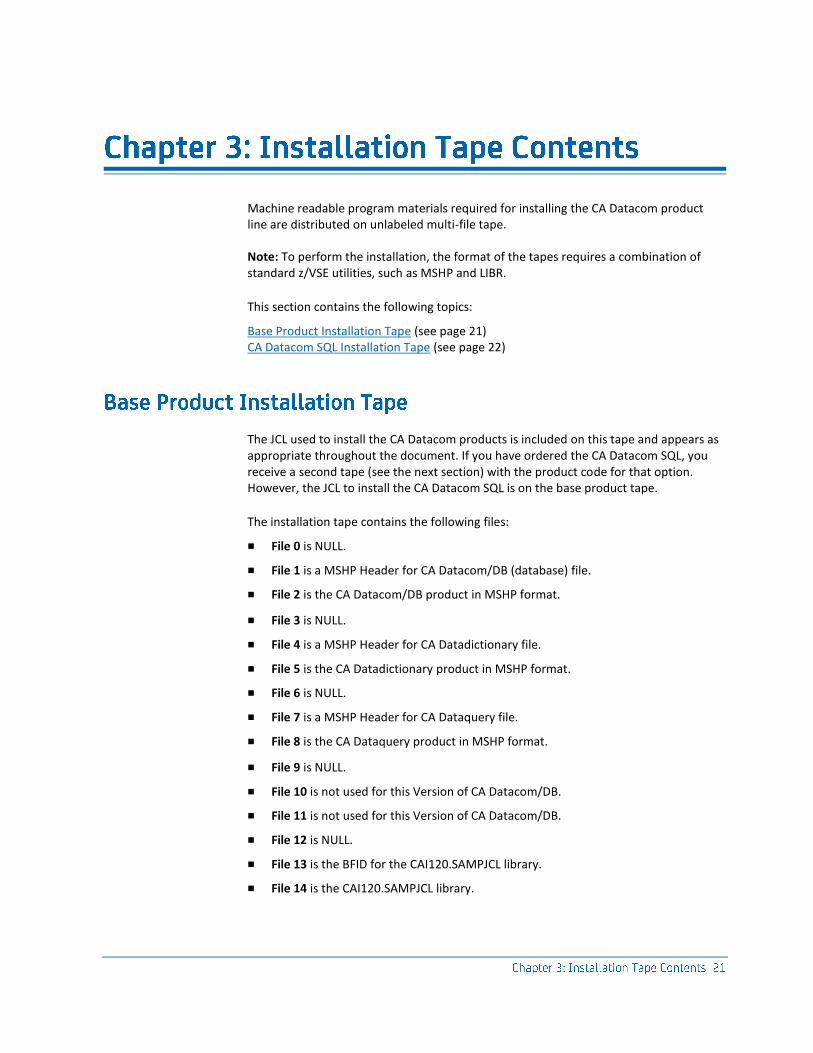
Machine readable program materials required for installing the CA Datacom product line are distributed on unlabeled multi-file tape.
Note: To perform the installation, the format of the tapes requires a combination of standard z/VSE utilities, such as MSHP and LIBR.
This section contains the following topics:
Base Product Installation Tape (see page 21) CA Datacom SQL Installation Tape (see page 22)
The JCL used to install the CA Datacom products is included on this tape and appears as appropriate throughout the document. If you have ordered the CA Datacom SQL, you receive a second tape (see the next section) with the product code for that option. However, the JCL to install the CA Datacom SQL is on the base product tape.
The installation tape contains the following files:
■ File 0 is NULL.
■ File 1 is a MSHP Header for CA Datacom/DB (database) file.
■ File 2 is the CA Datacom/DB product in MSHP format.
■ File 3 is NULL.
■ File 4 is a MSHP Header for CA Datadictionary file.
■ File 5 is the CA Datadictionary product in MSHP format.
■ File 6 is NULL.
■ File 7 is a MSHP Header for CA Dataquery file.
■ File 8 is the CA Dataquery product in MSHP format.
■ File 9 is NULL.
■ File 10 is not used for this Version of CA Datacom/DB.
■ File 11 is not used for this Version of CA Datacom/DB.
■ File 12 is NULL.
■ File 13 is the BFID for the CAI120.SAMPJCL library.
■ File 14 is the CAI120.SAMPJCL library.

■ File 15 is NULL.
■ File 16 contains the input to load the CA Datadictionary database.
■ File 17 contains the Data Definition Directory (DDD) database.
■ File 18 contains the input to load the Human Resource database.
■ File 19 contains the input to load the Order Entry database.
■ File 20 contains the input to load the CA Datacom/DB Directory (CXX).
■ File 21 contains the input to load the CA Datadictionary Virtual Library System (VLS) panels.
■ File 22 contains the input to load the CA Dataquery Language Area (DQM).
■ File 23 contains the input to load the CA Dataquery Query Area (DQQ).
For details about the maintenance tape, see Maintenance Process.
The JCL used to install the CA Datacom SQL is generated along with the other JCL members from the CA Datacom/DB installation tape when the CA Datacom SQL is coded. The install JCL does not exist on the CA Datacom SQL tape. In your job stream, you will be requested to mount the CA Datacom SQL install tape when it is needed.
The installation tape contains the following files.
■ File 0 is NULL.
■ File 1 is a MSHP Header for CA Datacom SQL file.
■ File 2 is the CA Datacom SQL product in MSHP format.
■ File 3 is NULL.
Maintenance for CA Datacom SQL will be delivered on a separate tape along with maintenance for the other CA Datacom products. For details about the maintenance tape, see Maintenance Process.

This chapter presents an overview of the IBM Maintain System History Program software product used to manage the installation and maintenance of CA Datacom products in a z/VSE environment. It does not provide a complete presentation of MSHP functions and capabilities, but does provide enough information to use MSHP to install CA Datacom.
Note: If you have experience using MSHP, you can skip this chapter.
For additional information about the IBM Maintain System History Program, refer to the publications identified in Other Related Publications (see page 15).
This section contains the following topics:
MSHP Overview (see page 23) MSHP Benefits (see page 25) MSHP Operations (see page 25) System History File (see page 26)
Consistent with CA policy to take advantage of standard operating system installation and maintenance methodologies, the installation process for CA Datacom for z/VSE uses the IBM MSHP product.
MSHP manages the installation and modification of z/VSE products. It is required for installation of CA Datacom products in a z/VSE environment and for the application of future product maintenance and upgrades.
MSHP has two major objectives:
■ To automate and manage the installation of products and all modifications to those products
■ To ensure that all modifications are applied correctly, completely, and to the proper product version levels
To meet these objectives, MSHP provides the facilities needed to:
■ Create and maintain a set of history files. These history files record all of the installation and maintenance activity on the z/VSE system.
■ Install and store the basic software product.
■ Ensure that all modifications installed are:
– Properly formatted
– Appropriate to the product
– At the correct service level for the product
– Free of known errors
– Not dependent on modifications which contain errors
– Installed completely
■ Ensure that all modifications dependent on each other are installed together.
■ Remove modifications after installation, if errors are uncovered.
■ Maintain a historical record of product modifications.
■ Provide facilities that allow you to maintain and make queries against the history files MSHP uses to record information concerning product structure and modification status.
During the installation and maintenance process, MSHP manages the basic program elements that make up the CA Datacom product line and the creation of the executable CA Datacom load library. Program elements include:
■ Macros
■ Source modules
■ Object modules
■ Executable phases
MSHP does not control installation processes involving:
■ CA Datacom database file preparation
■ CA Datadictionary installation
■ Runtime system configuration
■ System generation
The implementation of MSHP support for CA Datacom is designed to be easy to use for installation and maintenance, so that a database administrator with little or no MSHP background can use it to install and maintain CA Datacom. An MSHP product expert is not required to use MSHP in the CA Datacom environment.
The Install JCL provided contains the elements required to define and access the MSHP System History file and perform MSHP processing steps.
To initiate the installation process, you must code input parameters which define the:
■ MSHP environment
■ Operating system environment
■ Products you are installing
The major benefit to using the IBM Maintain System History Program for software product installation is the ability of MSHP to accurately and explicitly control the application of system maintenance.
MSHP ensures that all maintenance delivered by CA is applied completely and accurately to your CA Datacom system in an easy and efficient manner.
You do not have to track which Program Temporary Fixes (PTFs) are applied to your system. MSHP tracks all maintenance activity.
MSHP is used to install and maintain software on z/VSE operating systems.
■ Software products designed to be installed with MSHP must be installed with MSHP.
■ Software products not designed to be installed with MSHP cannot be installed using MSHP.
■ If a software product is installed using MSHP, all subsequent maintenance and modifications to that software must be applied by MSHP.
CA Datacom is designed to be installed and maintained with MSHP. You must have installed MSHP on your system before attempting to install CA Datacom.
The installation process provides customized installation JCL. If you specify all of the appropriate parameters correctly, you can install CA Datacom with very little knowledge of MSHP. However, you should understand the basic principles of MSHP to effectively maintain your CA Datacom system and to take advantage of the maintenance tracking capabilities which MSHP offers.
During the MSHP installation of CA Datacom, all phases, source, macro, and object modules are placed in their proper libraries. Throughout the installation process, MSHP retains information about every module, library, and process that is used. MSHP keeps a record of the entire product installation and configuration. Virtually all of this information is stored in the System History file.
■ The System History file is a sequential data set which is the repository for all processing activities. The System History file is the primary data set for MSHP.
■ Every MSHP job must refer to a System History file on a DLBL statement using IJSYSHF or IJSYS02 as the label.
■ The System History file points to the libraries which are referenced or updated.
Based on the information stored in the System History file, MSHP is able to track and apply maintenance. For example, if a PTF is issued against a phase, MSHP will automatically verify that the PTF has not already been applied.
CA recommends that you install the CA Datacom product line into a dedicated System History file. Therefore, job BEINS01 of the CA Datacom installation defines and initializes a new System History file customized for the CA Datacom product line.
Using a dedicated System History file allows for greater flexibility in determining which person or group will install and maintain CA Datacom. The person or group responsible for z/VSE or CICS system installation and maintenance does not have to perform CA Datacom installation and maintenance activities.
Other z/VSE products are not affected by jobs that run using the CA Datacom System History file, and CA Datacom is not affected by jobs that run using another System History file.
This chapter describes, step-by-step, the procedures required to install (or upgrade) and customize the CA Datacom product line in a z/VSE environment.
If upgrading CA Datacom/DB from the previous version, be sure to read the CA Datacom Release Notes. It contains information that will significantly facilitate your upgrade process.
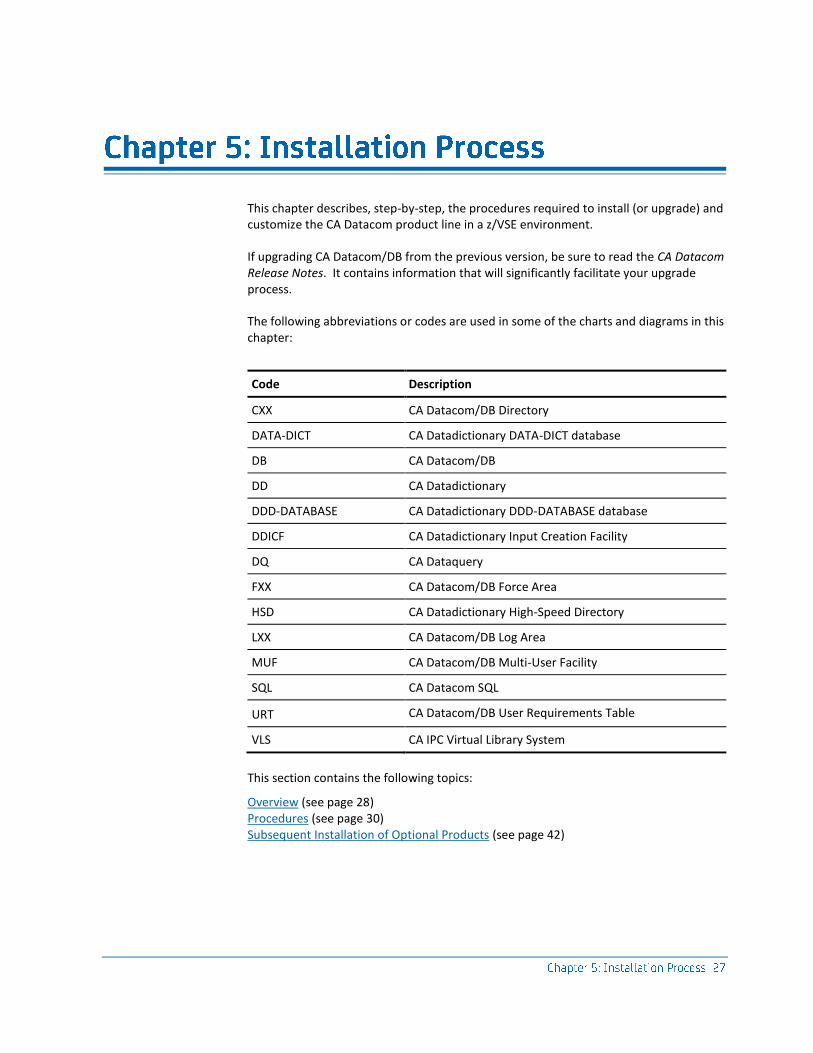
The following abbreviations or codes are used in some of the charts and diagrams in this chapter:
Code Description
CXX CA Datacom/DB Directory
DATA-DICT CA Datadictionary DATA-DICT database
DB CA Datacom/DB
DD CA Datadictionary
DDD-DATABASE CA Datadictionary DDD-DATABASE database
DDICF CA Datadictionary Input Creation Facility
DQ CA Dataquery
FXX CA Datacom/DB Force Area
HSD CA Datadictionary High-Speed Directory
LXX CA Datacom/DB Log Area
MUF CA Datacom/DB Multi-User Facility
SQL CA Datacom SQL
URT CA Datacom/DB User Requirements Table
VLS CA IPC Virtual Library System
This section contains the following topics:
Overview (see page 28) Procedures (see page 30) Subsequent Installation of Optional Products (see page 42)

The following list summarizes the steps involved in the CA Datacom installation process. Review this list before you begin to install.
Step Description
1 Review the installation package cover letter and any PIPs included with the package for pertinent installation information.
2 Review Special Notes for Upgrades if you are upgrading your site from Version 11.0 to 12.0.
3 Install the required CA CIS.
4 Review the CA Datacom system requirements. Be sure all requirements are met before beginning the installation process.
5 Restore the CAI12.SAMPJCL sublibrary from the installation tape to disk with LIBR and retrieve member BEINS01.Z.
6 Modify BEINS01.Z in accordance with the embedded instructions and submit to produce the installation JCL.
7 Modify BEINS04.Z and submit to load the install library.
8 Modify the installation JCL produced by Step 6 and submit to complete the installation or upgrade.
9 Update the CICS system tables.
10 Make any necessary modifications to CICS.
11 Verify the successful installation of your CA Datacom software.
The remainder of this chapter describes the part of the installation process performed in each installation step.
Review any cover letters or Product Information Packets (PIPs) in your installation package. Check this information for any additional steps or site-relevant information required to complete your CA Datacom installation.
Review all installation step descriptions before beginning to install or upgrade. The topics discussed may have an impact on the parameters you select during installation.
The CA Datacom utility products may require additional installation steps or affect your selection of parameters for the installation.
Any additional installation steps that are not documented in this installation guide will be documented in the PIPs.
Note: If upgrading CA Datacom/DB from Version 11.0 to 12.0, review the CA Datacom Release Notes carefully to take advantage of any procedures that can make the installation easier.
After completing the steps commonly required for all installations, skip the section for new installations. Then, follow the steps in Upgrade Install of CA Datacom/DB from Version 11.0 to 12.0 (see page 37). Review the following considerations before performing an upgrade.
Before You Begin
You must have adequate backups of your MSHP system and CA Datacom environments before beginning the upgrade. If there is a problem at any point, these backups are available for use.
Directory (CXX) Requirements
Your CXX must be in an 11.0 format before you can complete a Version 11.0 to 12.0 upgrade. CA Datacom Version 11.0 supports either a Version 10.0 or 11.0 formatted CXX. Therefore, your site might have elected to stay with the Version 10.0 CXX. Because, once you converted it to a Version 11.0 format, there was not an easy way to return the CXX back to a 10.0 format. Convert your Version 10.0 CXX to an 11.0 CXX before starting the upgrade. Access your Version 11.0 SAMPJCL library for the BECNV01, BECNV02, and BECNV03 members to convert your 10.0 CXX to a 11.0 format successfully. For more information, see "Convert CXX from Version 10.0 to 11.0." in the Version 11.0 CA Datacom Getting Started for z/VSE.
Note: We recommend that you convert your CXX to Version 11.0 and run with it for several days before performing the 12.0 upgrade. Performing this task ensures that there are no problems with your 11.0 CXX before you perform the upgrade. This task could save you some valuable time in problem solving during your upgrade.
When you finish the last step of the upgrade section, you have completed the upgrade of the following:
■ CA Datadictionary
■ the demonstration databases
■ CA Dataquery (if you have CA Dataquery at your site)
■ CXX is upgraded to the 12.0 format as part of the upgrade
CA Datadictionary
You can run upgrade jobs, up to a point, without impacting your existing 11.0 environment before performing the rest of the upgrade process.Locate any problems with your CA Datadictionary (DATA-DICT) definitions and make the corrections before completing the upgrade process.
Run the basic install jobs for an upgrade BEINSnn where nn is the job number along with the upgrade jobs BEUPG02 through BEUPG05. These jobs do not impact your existing 11.0 environment.
These jobs can be run at any time, even during your daily processing in your 11.0 MUF environment. We recommend running these jobs a few days before you intend to complete the upgrade process. You can clear any discrepancies in your Datadictionary before starting the complete upgrade process.
Upgrading a System with Multiple Multi-User Environments
If your site has multiple Multi-User Facility partitions, then most of the upgrade procedure must be performed on each Multi-User Facility. The notes in each of the SAMPJCL members indicate which jobs are not required for every Multi-User Facility. Notes are also provided in the following sections clarifying working in this environment.
The required CA CIS (Common Infrastructure Services) must be installed before starting this installation. The installation tape, materials, and documentation for the CA CIS are shipped with your CA Datacom installation package.
Important! Install the appropriate components and services from the CA CIS tape before installing CA Datacom.
CA Datacom requires the following CA CIS components and services:
■ CA LMP
■ CAICCI
■ CAISSF
■ System Adapter
■ z/VSE Common Code
For more information about these components, see CA CIS.
Considerations
For complete, detailed instructions for installing CA CIS, see the CA CIS Getting Started guide. Also consider the following steps before you install CA CIS:
1. CA Datacom supports Version 1.4 or later of CA CIS for z/VSE. Ensure that you are installing a valid version.
2. Install only those CA CIS components that are required to facilitate CA Datacom, not all available CA CIS components.
3. Several other CA products use System Adapter. Check with your System Administrator to determine whether the appropriate version of System Adapter is already installed on the system where you install CA Datacom.
■ To install System Adapter, follow the instructions in the CA CIS Getting Started guide.
■ Activate System Adapter after you install it. Follow the instructions for activating System Adapter in the CA CIS Administration Guide.
■ Be sure that System Adapter is active on the system on which you install CA Datacom before starting the installation.
Review System Requirements (see page 17). Be certain that all system requirements are complete before you begin the CA Datacom installation process.
IPL
System Adapter Utility (CASAUTIL) must be aware that CA Datacom is present in the system before any CA Datacom/DB DBUTLTY jobs are run or before the Multi-User Facility is activated. Including the CA Datacom/DB library in the LIBDEF search string for CASAUTIL insures that CASAUTIL is aware that CA Datacom/DB is present in the system.
A set of labels defining the CA Datacom installation library and a LIBDEF defining the installation sublibrary can be placed in the ASI startup procedure and an IPL performed.
If you find it necessary to identify the CA Datacom products to CASAUTIL, use the START DATACOMnn (where nn is the version number, such as DATACOM12) in CASAUTIL.
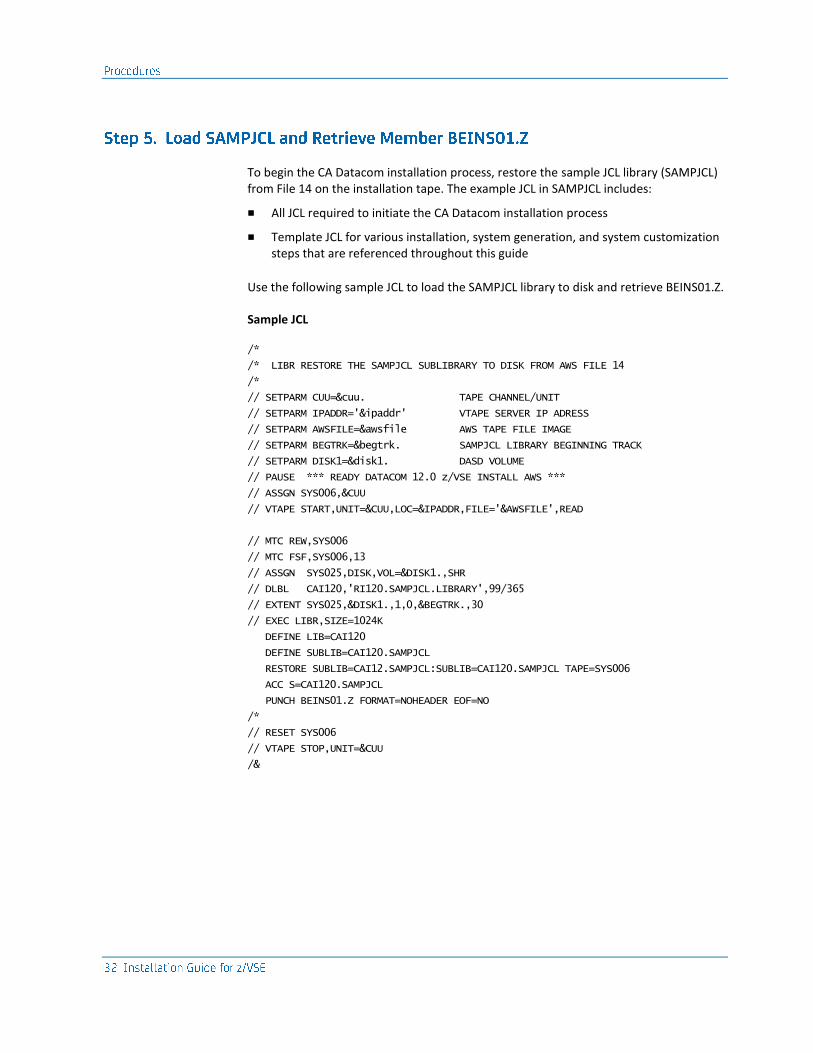
To begin the CA Datacom installation process, restore the sample JCL library (SAMPJCL) from File 14 on the installation tape. The example JCL in SAMPJCL includes:
■ All JCL required to initiate the CA Datacom installation process
■ Template JCL for various installation, system generation, and system customization steps that are referenced throughout this guide
Use the following sample JCL to load the SAMPJCL library to disk and retrieve BEINS01.Z.
Sample JCL
/*
/* LIBR RESTORE THE SAMPJCL SUBLIBRARY TO DISK FROM AWS FILE 14
/*
// SETPARM CUU=&cuu. TAPE CHANNEL/UNIT
// SETPARM IPADDR='&ipaddr' VTAPE SERVER IP ADRESS
// SETPARM AWSFILE=&awsfile AWS TAPE FILE IMAGE
// SETPARM BEGTRK=&begtrk. SAMPJCL LIBRARY BEGINNING TRACK
// SETPARM DISK1=&disk1. DASD VOLUME
// PAUSE *** READY DATACOM 12.0 z/VSE INSTALL AWS ***
// ASSGN SYS006,&CUU
// VTAPE START,UNIT=&CUU,LOC=&IPADDR,FILE='&AWSFILE',READ
// MTC REW,SYS006
// MTC FSF,SYS006,13
// ASSGN SYS025,DISK,VOL=&DISK1.,SHR
// DLBL CAI120,'RI120.SAMPJCL.LIBRARY',99/365
// EXTENT SYS025,&DISK1.,1,0,&BEGTRK.,30
// EXEC LIBR,SIZE=1024K
DEFINE LIB=CAI120
DEFINE SUBLIB=CAI120.SAMPJCL
RESTORE SUBLIB=CAI12.SAMPJCL:SUBLIB=CAI120.SAMPJCL TAPE=SYS006
ACC S=CAI120.SAMPJCL
PUNCH BEINS01.Z FORMAT=NOHEADER EOF=NO
/*
// RESET SYS006
// VTAPE STOP,UNIT=&CUU
/&

Sample jobs must be executed in sequential order by name and number. Be sure to review, edit, execute, and complete each installation step before proceeding to the next step.
Follow these guidelines when installing:
1. MSHP Installation Phase
Execute members whose names start with BEINS. This pertains to installations and upgrades.
2. New Installation Phase
If you are installing CA Datacom for the first time, execute members whose names start with BENEW. After all BENEW jobs have executed successfully, the CA Datacom/DB 12.0 product environment is ready for use.
3. Upgrade Installation Phase
If performing an upgrade installation, execute members whose names start with BEUPG. When the BEUPG jobs have executed successfully, the upgrade to CA Datadictionary is complete and the CA Datacom Version 12.0 product environment is ready for use.
4. Fallback (to Version 11.0) Phase Hard Fallback
If you are performing a hard fallback, run member BEUPG04R to restore the r11 CXX, DD areas, DDD areas, and DQ areas. Run Step 5 of the upgrade job BEUPG09 using your r11 library to set the CASYSTEMTABLES database back to the r11 format.
Soft Fallback
If you are performing a soft fallback, run the BEFBK01, BEFBK02, BEFBK03, and BEFBK04 members to perform the following actions:
Convert the CXX from 12.0 to 11.0
Assemble and link DDSYSTBL for the Datadictionary System Resource Table
Add CA SYSTEMTABLE back to 11.0 format and catalog the DD and DDD
Change the DDOL panels back to 11.0 format
5. Fall Forward (to Version 12.0) Phase
If you are performing a fall forward, run the BEFFW01, BEFFW02, BEFFW03, and BEFFW04 members to perform the following actions:
Convert the CXX from 11.0 to 12.0
Assemble and link DDSYSTBL for the Datadictionary System Resource Table
Add CA SYSTEMTABLE back to 12.0 format and catalog the DD and DDD
Change the DDOL panels back to 12.0 format
6. Demonstration Phase
Execute members whose names start with BEIVP. When the BEIVP jobs have executed successfully, the CA Datacom Version 12.0 product sample execution is complete.
7. Post-Installation Phase
Make any CICS modifications necessary for your specific site. If desired, verify CA Datadictionary and CA Dataquery online.
Modify BEINS01.Z in accordance with the embedded instructions and submit. This produces the new or upgrade installation JCL as determined by the parameters you selected and define the install library.
The following is the Selection Criteria Array which indicates what JCL is produced based on the various // SETPARM statements. Job BEINS01 has all of the SETPARM statements delivered with the variables set to NO.
Note the following:
■ Basic install JCL is produced when all // SETPARM are set to 'NO' in select product job (BEINS01).
■ All required BEINSnnc jobs should be executed before BENEWnnc or BEUPGnnc jobs.
■ Submit the BENEWnnc or BEUPGnnc jobs in ascending sequence.
Execution of BEINS01.Z provides either the NEW or UPG PROC template JCL depending on the parameters selected.
■ BEINS01N.Z contains template JCL for creating an install PROC that can be used throughout the installation of CA Datacom Version 12.0. BEINS01U.Z contains template JCL for creating two upgrade install PROCs:
– PROC11 can be used when the execution of upgrade install JCL calls for CA Datacom Version 11.0 to be concatenated before CA Datacom Version 12.0.
– PROC12 can be used when the execution of upgrade install JCL calls for CA Datacom Version 12.0 to be concatenated before CA Datacom Version 11.0.
Be advised although use of these PROCs is optional, the installation JCL is designed to default to the procedures generated by either BEINS01N.Z or BEINS01U.Z. If you choose not to use them, either furnish your own PROCs or the ASSGN, DLBL, EXTENT, and LIBDEF statements that describe the required libraries.

Note: If you are performing an upgrade in a system with multiple Multi-User Facilities (MUFs), define separate PROCs for each Multi-User Facility (MUF). For example:
■ PROC12S0 for Version 12.0 SUBID=0
■ PROC12S1 for Version 12.0 SUBID=1...
■ PROC11S0 for Version 11.0 SUBID=0
■ PROC11S1 for Version 11.0 SUBID=1...
By completing the SETPARM statements and submitting the jobs, PROCs are created that define the libraries that are required to complete the installation or upgrade.
Member BEINS04.Z in the SAMPJCL library contains the JCL required to establish the MSHP environment.
The MSHP Utility loads products from the installation tape into your libraries.
■ Modify the BEINS04.Z JCL by substituting your procedure names, disk volume identification, EXTENT ranges, and so on.
■ Code the MSHP Utility parameters to install the products desired and modify the JCL to your site standards.
■ Remove the ARCHIVE and INSTALL parameters for any products you are not installing.
Submit the JCL to establish the MSHP history file, and to load selected products from the installation tape to your libraries.
All Installation JCL has embedded instructions at the beginning.
Note: We recommend that you run the jobs individually.
1. Modify the JCL according to the instructions, and submit the jobs in sequence.
2. Check for return codes from each step within each job before continuing with the next job.
When all jobs submitted have completed successfully, the desired products will have been installed or upgraded.

The following shows all the jobs that may possibly be produced when you execute the JCL in Install Job BEINS01. Based on parameter selection of optional products, not all of the jobs shown may be produced. Run BEINSnn jobs before BENEWnn jobs. Submit BENEWnn jobs in ascending sequence.
BEINS01N - Create procedure for new installations
BEINS15 - Assemble/Link Multi-User dependent macros
BENEW02 - Initialize/load CXX/FXX/LXX and database areas for Datadictionary
BENEW03 - Start Multi-User
BENEW03A
BENEW04 - Reset HSD. initialize/load CASYSTEMTABLES and sample databases
BENEW04B
BENEW05 - Back up CXX and databases
BENEW05B
BENEW06 - Shut down Multi-User
BENEW06B
BENEW07 - Initialize/load VLS files for Datadictionary
BEINS01S - Select subsequent Install JCL by selecting the product
BEINS04B - Install CA Dataquery using MSHP
BEINS10B - Restore CA Dataquery backup files
BENEW03B
BENEW05B - Initialize, load, and report on the CA Dataquery database, link online phase, initialize Product and Language files, back up CXX
BENEW06B
BENEW07B - Back up CA Dataquery areas after install
BEIVP04 - Optional CA Dataquery demonstration program
BEINS01S - Select Subsequent Install JCL the product
BEINS04A - Install SQL using MSHP
BEINS14A - Assemble and link URTs for SQL
BENEW03A - Initialize SQL databases 16 and 17
BEIVP02 - Optional SQL demonstration program
BEIVP03 - Optional SQL demonstration program
Note: Step 1 of install verification program job BEIVP03 has a maximum return code of 0004, to allow for the following expected CA Datadictionary warning messages:
*** VERIFY WARNING MESSAGES ***
DDWKEY0011 EXTENDED FIELD IN KEY
ENTITY=SQLDM1.KEY01
DDWKEY0011 EXTENDED FIELD IN KEY
ENTITY=SQLDM2.KEY02
DDWKEY0011 EXTENDED FIELD IN KEY
ENTITY=SQLDM3.KEY04
Check the DDUPDATE report to verify that only the above warning messages were generated. If you receive any other errors, correct the problem and rerun the job.
The following lists all of the jobs that can possibly be produced when you execute the JCL in Install Job BEINS01. Based on parameter selection of optional products, not all of these jobs may be produced. Run BEINSnnc jobs before BEUPGnnc jobs. Submit BEUPGnnc jobs in ascending sequence.
Note: Items marked with an asterisk (*) need only be executed for the first MUF being upgraded in a multiple MUF environment.
■ BEINS01U - Create procedures for upgrade jobs
■ BEINS04 - Install core products *
■ BEINS04A - Install SQL option *
■ BEINS10 - Restore external DB/DD files *
■ BEINS10B - Restore external DQ files *
■ BEINS11 - Generate Datacom products CICS PROC members
■ BEINS14A - Assemble/Link Dictionary URTs for SQL sites
■ BEINS15 - Assemble/Link Multi-User dependent macros
■ BEUPG02 - Assemble/link DDSRTLM phase for upgrade process
■ BEUPG03 - Start 11.0 Multi-User
■ BEUPG04 - Back up 11.0 CXX, datadictionary
■ BEUPG04B - Optional job to back up 11.0 CA Dataquery databases
■ BEUPG04R - Optional job to restore 11.0 databases in case fallback is necessary
■ BEUPG05 - Update datadictionary and reload modified database tables
■ BEUPG06 - Shut down 11.0 Multi-User
■ BEUPG07 - Convert the CXX to 12.0 version
■ BEUPG08 - Start 12.0 Multi-User
■ BEUPG09 - Finish update of datadictionary and CASYSTEMTABLES database
■ BEUPG09B - Optional job to update CA Dataquery DQM file
■ BEUPG10 - Back up CXX and datadictionary
■ BEUPG10B - Back up CA Dataquery database
■ BEUPG11 - Shut down 12.0 Multi-User
■ BEUPG12 - Format/load/initialize VLS files for datadictionary
■ BEUPG13 - Change DBID format in CXX from format 1 to format 2
■ BEIVP01 – Sample COBOL compile
■ BEIVP02 - Sample dynamic SQL program
■ BEIVP03 - Create sample database 1001 for SQL self-study training
■ BEIVP04 - Sample Dataquery batch program
Note 1
If you receive a return code of 0008 from Job BEUPG05, review your output. If you find that the return code is acceptable, modify your JCL and continue to the next step in the Install Block. Acceptable return codes occur for the following:
DDPNTF000n
A not-found condition on a DELete or NEWNAME function, or UPD of a profile.
DDPFLD00nn
An ADD of a field that already exists.
DDPOAE0001
An OAE on an ADD.
DDFGUP0170
A warning that a value was given for filler.
DDPELM0003
A field is already in an element.
DDPP020001
Errors in the profile transactions.
Note 2
After BEUPG05 is complete, you can no longer run CA Datacom/DB 11.0 transactions or 11.0 batch and online CA Datadictionary functions.
Note 3
Step 1 of install verification program job BEIVP03 has a maximum return code of 0004 that allows for the following expected CA Datadictionary warning messages:
*** VERIFY WARNING MESSAGES ***
DDWKEY0011 EXTENDED FIELD IN KEY
ENTITY=SQLDM1.KEY01
DDWKEY0011 EXTENDED FIELD IN KEY
ENTITY=SQLDM2.KEY02
DDWKEY0011 EXTENDED FIELD IN KEY
ENTITY=SQLDM3.KEY04
Check the DDUPDATE report to verify that only the above warning messages were generated. If you receive any other errors, correct the problem and rerun the job.
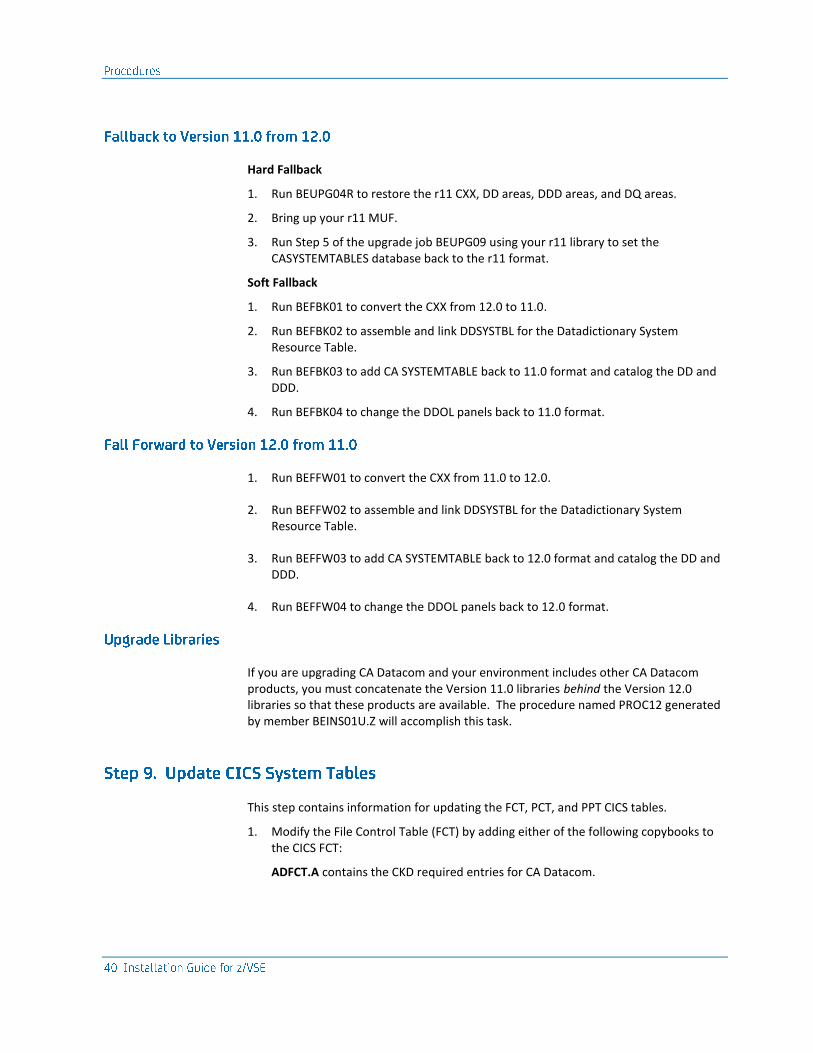
Hard Fallback
1. Run BEUPG04R to restore the r11 CXX, DD areas, DDD areas, and DQ areas.
2. Bring up your r11 MUF.
3. Run Step 5 of the upgrade job BEUPG09 using your r11 library to set the CASYSTEMTABLES database back to the r11 format.
Soft Fallback
1. Run BEFBK01 to convert the CXX from 12.0 to 11.0.
2. Run BEFBK02 to assemble and link DDSYSTBL for the Datadictionary System Resource Table.
3. Run BEFBK03 to add CA SYSTEMTABLE back to 11.0 format and catalog the DD and DDD.
4. Run BEFBK04 to change the DDOL panels back to 11.0 format.
1. Run BEFFW01 to convert the CXX from 11.0 to 12.0.
2. Run BEFFW02 to assemble and link DDSYSTBL for the Datadictionary System Resource Table.
3. Run BEFFW03 to add CA SYSTEMTABLE back to 12.0 format and catalog the DD and DDD.
4. Run BEFFW04 to change the DDOL panels back to 12.0 format.
If you are upgrading CA Datacom and your environment includes other CA Datacom products, you must concatenate the Version 11.0 libraries behind the Version 12.0 libraries so that these products are available. The procedure named PROC12 generated by member BEINS01U.Z will accomplish this task.
This step contains information for updating the FCT, PCT, and PPT CICS tables.
1. Modify the File Control Table (FCT) by adding either of the following copybooks to the CICS FCT:
ADFCT.A contains the CKD required entries for CA Datacom.
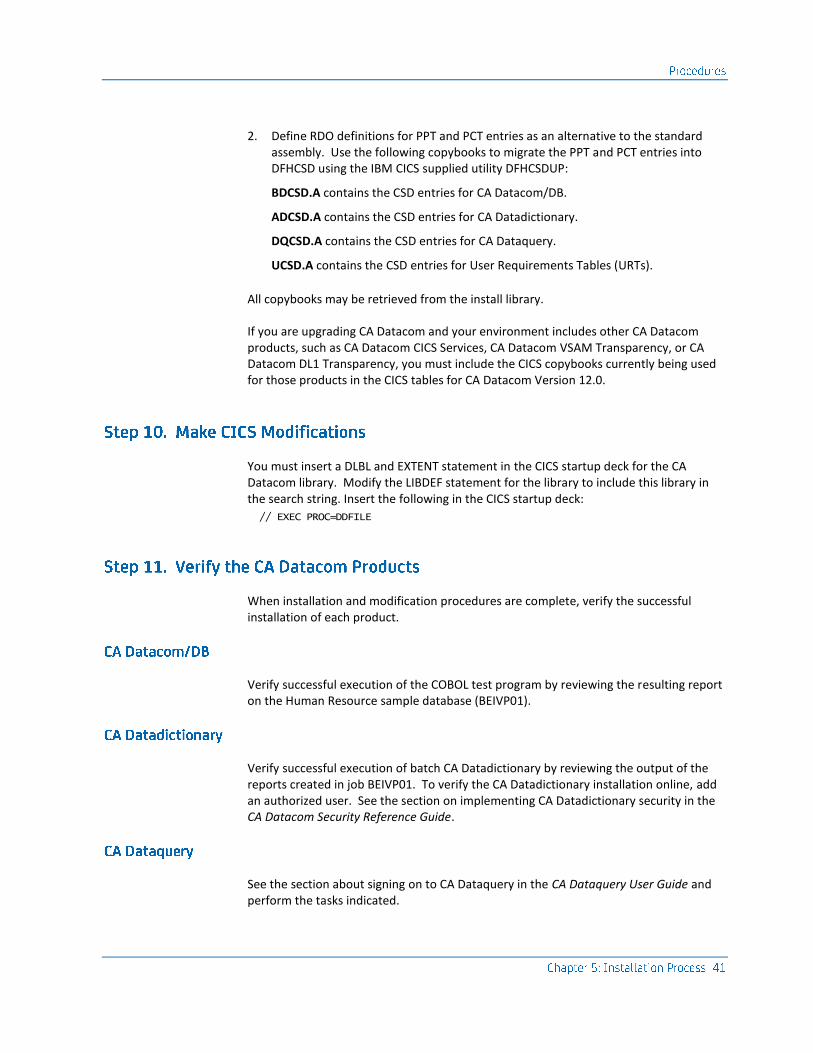
2. Define RDO definitions for PPT and PCT entries as an alternative to the standard assembly. Use the following copybooks to migrate the PPT and PCT entries into DFHCSD using the IBM CICS supplied utility DFHCSDUP:
BDCSD.A contains the CSD entries for CA Datacom/DB.
ADCSD.A contains the CSD entries for CA Datadictionary.
DQCSD.A contains the CSD entries for CA Dataquery.
UCSD.A contains the CSD entries for User Requirements Tables (URTs).
All copybooks may be retrieved from the install library.
If you are upgrading CA Datacom and your environment includes other CA Datacom products, such as CA Datacom CICS Services, CA Datacom VSAM Transparency, or CA Datacom DL1 Transparency, you must include the CICS copybooks currently being used for those products in the CICS tables for CA Datacom Version 12.0.
You must insert a DLBL and EXTENT statement in the CICS startup deck for the CA Datacom library. Modify the LIBDEF statement for the library to include this library in the search string. Insert the following in the CICS startup deck:
// EXEC PROC=DDFILE
When installation and modification procedures are complete, verify the successful installation of each product.
Verify successful execution of the COBOL test program by reviewing the resulting report on the Human Resource sample database (BEIVP01).
Verify successful execution of batch CA Datadictionary by reviewing the output of the reports created in job BEIVP01. To verify the CA Datadictionary installation online, add an authorized user. See the section on implementing CA Datadictionary security in the CA Datacom Security Reference Guide.
See the section about signing on to CA Dataquery in the CA Dataquery User Guide and perform the tasks indicated.
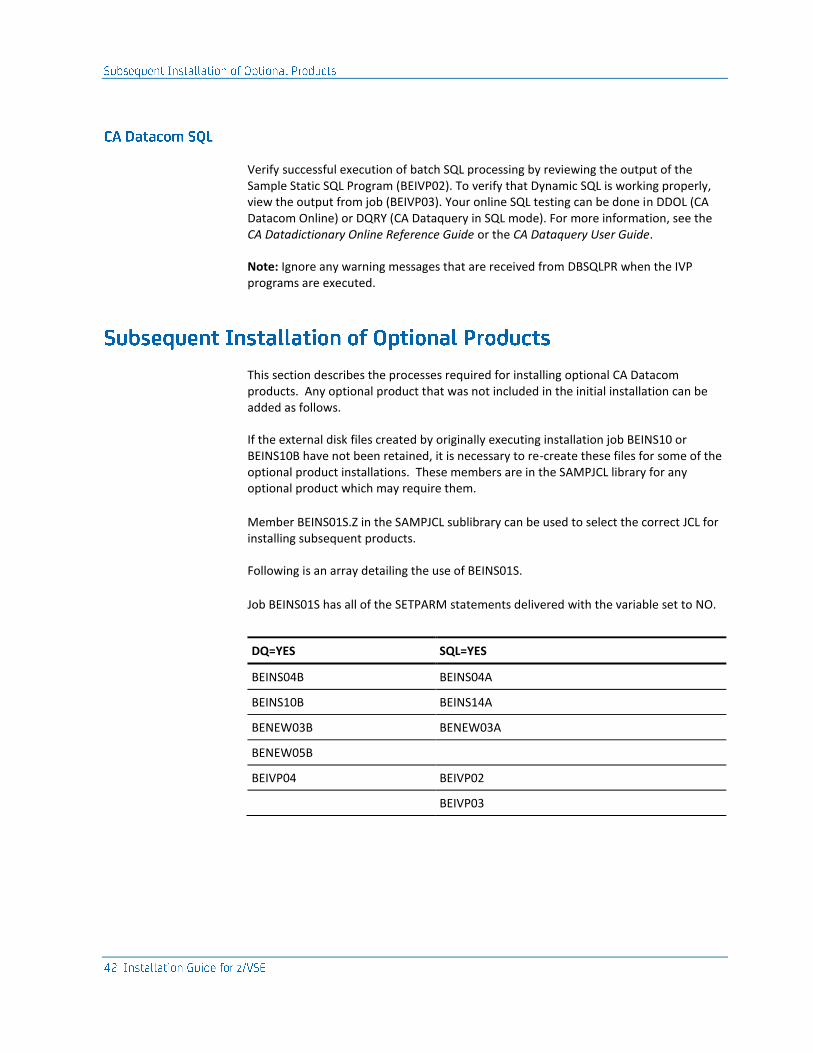
Verify successful execution of batch SQL processing by reviewing the output of the Sample Static SQL Program (BEIVP02). To verify that Dynamic SQL is working properly, view the output from job (BEIVP03). Your online SQL testing can be done in DDOL (CA Datacom Online) or DQRY (CA Dataquery in SQL mode). For more information, see the CA Datadictionary Online Reference Guide or the CA Dataquery User Guide.
Note: Ignore any warning messages that are received from DBSQLPR when the IVP programs are executed.
This section describes the processes required for installing optional CA Datacom products. Any optional product that was not included in the initial installation can be added as follows.
If the external disk files created by originally executing installation job BEINS10 or BEINS10B have not been retained, it is necessary to re-create these files for some of the optional product installations. These members are in the SAMPJCL library for any optional product which may require them.
Member BEINS01S.Z in the SAMPJCL sublibrary can be used to select the correct JCL for installing subsequent products.
Following is an array detailing the use of BEINS01S.
Job BEINS01S has all of the SETPARM statements delivered with the variable set to NO.
DQ=YES SQL=YES
BEINS04B BEINS04A
BEINS10B BEINS14A
BENEW03B BENEW03A
BENEW05B
BEIVP04 BEIVP02
BEIVP03
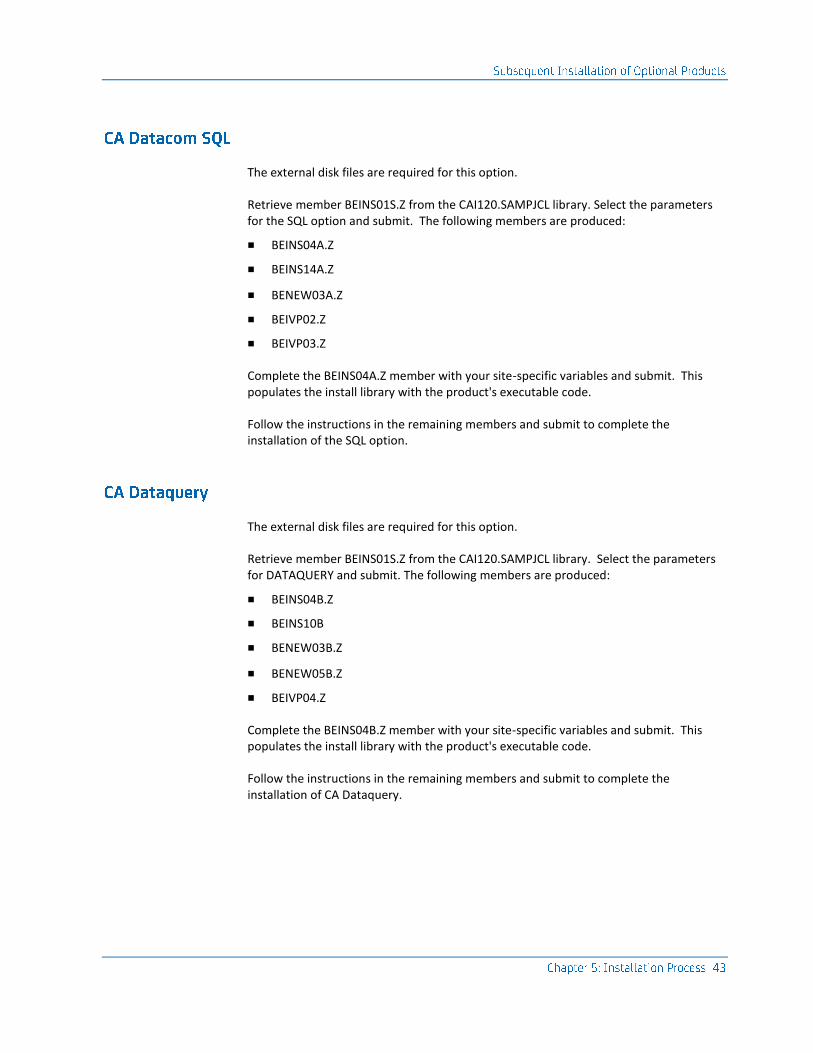
The external disk files are required for this option.
Retrieve member BEINS01S.Z from the CAI120.SAMPJCL library. Select the parameters for the SQL option and submit. The following members are produced:
■ BEINS04A.Z
■ BEINS14A.Z
■ BENEW03A.Z
■ BEIVP02.Z
■ BEIVP03.Z
Complete the BEINS04A.Z member with your site-specific variables and submit. This populates the install library with the product's executable code.
Follow the instructions in the remaining members and submit to complete the installation of the SQL option.
The external disk files are required for this option.
Retrieve member BEINS01S.Z from the CAI120.SAMPJCL library. Select the parameters for DATAQUERY and submit. The following members are produced:
■ BEINS04B.Z
■ BEINS10B
■ BENEW03B.Z
■ BENEW05B.Z
■ BEIVP04.Z
Complete the BEINS04B.Z member with your site-specific variables and submit. This populates the install library with the product's executable code.
Follow the instructions in the remaining members and submit to complete the installation of CA Dataquery.


After you have demonstrated the successful installation of the products, tailor them according to your site-specific requirements before designating them as production systems. Be sure to back up the data sets before you begin the tailoring process. See the appropriate documentation for instructions on tailoring individual products.
Defaults
Defaults were established during the installation process. Consider these defaults as you determine the tailoring necessary for your site.

Maintenance for CA Datacom is no longer delivered on a separate tape as in previous releases. For more information, see the Product Maintenance Letter.
Maintenance for your CA Datacom system is now packaged and delivered as phase replacements on the installation tape. The following sections discuss this further.
This section contains the following topics:
System Maintenance (see page 47)
CA Datacom maintenance is produced periodically.
The following example shows how a single PTF is applied using MSHP.
The MSHP History File created during the installation must be present in the job stream.
PTF Application Sample JCL
// DLBL IJSYSHF,'history.file',9999
// EXTENT SYS000,volser,1,0,begtrk,ntrks
// ASSGN SYS000,DISK,VOL=volser,SHR
// EXEC MSHP,SIZE=1024K
APPLY 0202-DDY-C0-VS5:TD4nnnn
RESOLVES APAR=TD4nnnn
AFFECTS PHASE=(DDTRSLM) -
MODULES = (DDTRSPR)
INVOLVES LINK = (C#DTRSLK)
DATA
CATALOG DDTRSPR.OBJ REPLACE=YES
ESD
TXT
RLD
/+
/$
The CAPTFSEL utility is no longer used for applying maintenance. The recommended method of applying maintenance is to run jobs BEINS04 and BEINS04A from the SAMPJCL to refresh the sublibraries using the installation tape.
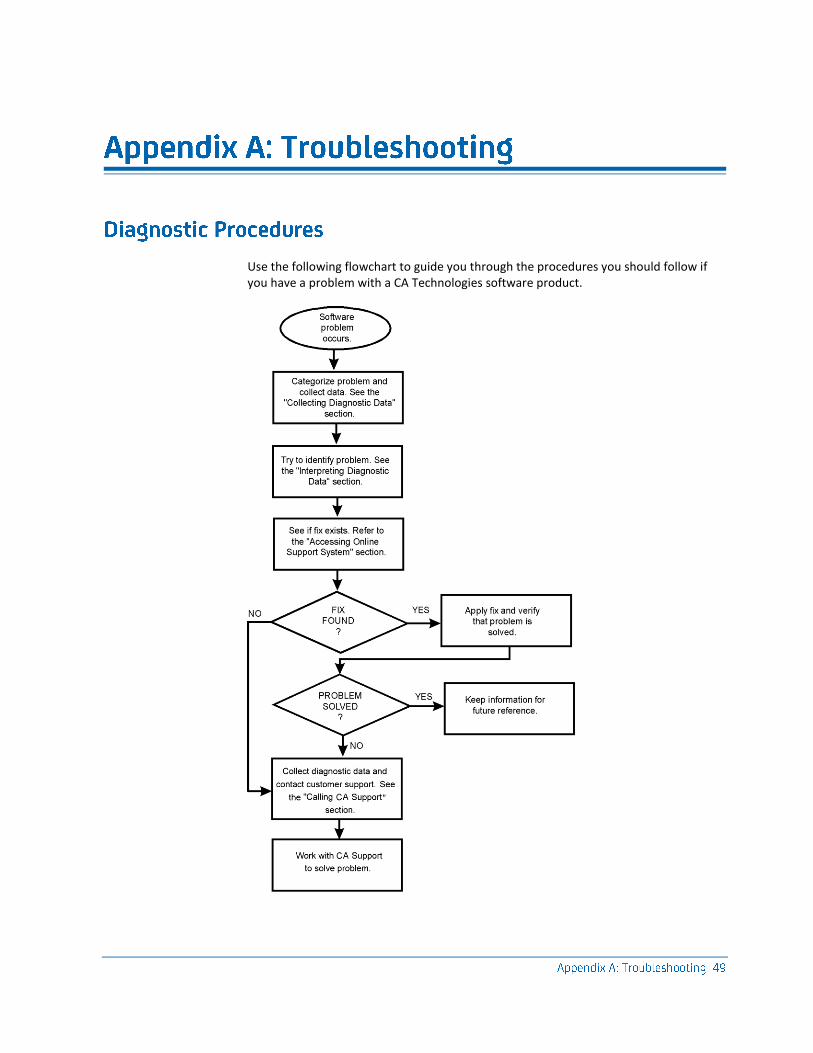
Use the following flowchart to guide you through the procedures you should follow if you have a problem with a CA Technologies software product.
Before contacting CA Support, attempt to resolve the problem yourself using the following procedures identified in the following sections.
1. Examine the procedure that you used and compare it to the documented procedure for performing the required activity.
2. Section Diagnostic Procedures (see page 49) identifies several potential problem areas and presents general debugging suggestions. Review this section for solutions which apply to your current problem.
3. If you find no discrepancies between your procedures and the documented procedures, repeat the activity under conditions similar to those that existed when the problem first appeared. (If you no longer get unsatisfactory results, an inadvertent error can have caused the problem.)
4. If the same error occurs when you repeat a given activity, and you can find nothing in the documentation to suggest that your procedure is flawed, try to secure assistance in resolving the problem from others at your site.
This section identifies some potential problem areas and presents debugging suggestions. It also lists the documentation to have on hand when communicating with CA Support about each type of problem.
When you have collected the specified diagnostic data, write down your answers to the following questions:
1. What was the sequence of events prior to the error condition?
2. What circumstances existed when the problem occurred and what action did you take?
3. Has this situation occurred before? What was different then?
4. Did the problem occur after a particular PTF was applied or after a new version of the software was installed?
5. Have you recently installed a new version of the operating system?
6. Has the hardware configuration (tape drives, disk drives, and so forth) changed?
From your responses to these questions and the diagnostic data, try to identify the cause and resolve the problem.
If you determine that the problem is a result of an error in a CA Technologies software product, you can make use of the online client support system to see if a fix (APAR or PTF) or other solution to your problem has been published and call CA Support.
CA Support Online is the CA Technologies online product support and service system available on the Internet. It contains an extensive Knowledge Base that allows you to retrieve many types of product-related information with a single search.
The online support system includes the following benefits:
■ Solution downloads
■ CA Support issue management
■ Product downloads
■ Product documentation downloads
■ License key downloads
■ Virus signature downloads
■ Product-specific FAQs
■ Newsgroup open forums
■ E-News newsletters
For full access to all the services related to your licensed products, you must log in. Many areas require that you are a registered support.ca.com user. You can register at the site.
Many CA Technologies products use license keys or authorization codes to validate your hardware configuration. If you need assistance obtaining a license key or authorization code, click the Licensing link on Support Online.
For online technical assistance and a complete list of locations, primary service hours, and telephone numbers, contact CA Support at http://support.ca.com/.
Prior to placing the call on a new issue, prepare the following:
■ A photocopy of the Support Contact Information form (see SUPPORT CONTACT INFORMATION (see page 58)) with the following sections completed:
– General Information
– Your Company Information
– Product Versions
■ Your most recent Support Contact Number Log or a blank form with the date of the call recorded in the "Date Opened" field (See SUPPORT CONTACT NUMBER LOG (see page 56).)
■ A history of the problem
Note: The person calling CA Support should be generally familiar with the CA Datacom products installed at the site, their current versions, their current maintenance levels, and the various options and features in use. For example, the CA Support Specialist might need to know various options specified in your MUF startup options, User Requirements Tables, CA Datadictionary System Resource Table, or CA Dataquery Options List assemblies. If the caller does not have this information, he should have immediate access to someone who does.
When you call CA Support, see the issue at hand by contact number, not by the name of the Specialist with whom you previously spoke. The issue might have been transferred to a different group internally, and a new Specialist might have assumed responsibility for further action on the issue. All prior history of the contact is retained in the CA Support tracking and reporting system under that contact number, so that the new Specialist has immediate access to it.
Prior to placing the call, have the following available:
■ The Support Contact Information form containing the supplied information: CA Support Specialist name, contact number, issue number (if there is more than one issue associated with the contact number), solution number, if provided, and your CA Client ID.
Note: If you no longer have the Support Contact Information form, look up the contact number recorded on your Support Contact Number Log form.
■ A brief description of the nature of this call.
If you are in North America, see the telephone support directory on the CA Technologies website for the CA Support phone number. Outside North America, call your local CA Support Center during normal business hours.
Note: Only your local CA Support Center can provide native language assistance. Please use English when contacting any North American center.
If you are unable to resolve the problem, please have the following information ready before contacting CA Support:
1. Identify the context in which the problem occurred:
Initial installation
Problem during the installation of the product
Product upgrade
Problem during the installation of a maintenance tape or new version
Pilot project
Problem occurring during a pilot project
Test
Problem with something that is not in production
Production
Problem with something that is currently in production
2. If this is a new installation, product upgrade, pilot project, or problem with a test system, list the steps followed up to this point.
3. If the problem occurred in a production environment, describe the following in detail:
a. The attempted activity, with expected results and actual results
b. The attempts to resolve the problem and their results
Note: The very act of producing an accurate description of the problem might be sufficient for you to determine its cause and perhaps a way to correct it. If not, an accurate description assists the CA Support Specialist in helping you to resolve it.
4. CA uses a rating system to expedite resolution of support calls. Use the following guide to establish the severity of your problem.
1
Production system down or major business impact
2
Major component nonfunctional or serious business impact
3
Minor component nonfunctional or moderate business impact
4
General question or a noncritical problem
5. Make a photocopy of each of the following forms and complete the applicable sections of each form.
Support Contact Information form
Prior to making the call, use this form to record all the information required by the CA Support Specialist. During the call, use this form to record all the information the Specialist provides. See SUPPORT CONTACT INFORMATION (see page 58).
Support Contact Number Log
Use this form to keep a permanent record of the contact numbers associated with the issues about which you contact CA Support. If an issue which has been closed reappears due to incomplete resolution, this form can serve as a reference of the original contact number so that the Specialist can reactivate the appropriate file. See SUPPORT CONTACT NUMBER LOG (see page 56).
1. Provide the CA Support Specialist with the following information:
■ Your CA Client ID, if known
■ Severity of your problem
■ "Your Company Information" (see Support Contact Information on SUPPORT CONTACT INFORMATION (see page 58))
■ History of your problem
Note: When you call about a new issue, do not use a contact number previously assigned for a different issue. This could impede the resolution of your current problem.
If you do not know your CA Client ID or are not certain what the problem severity code should be, the Specialist provides this information to you. Record the Client ID and severity level on the Support Contact Information form.

2. The Specialist enters your issue(s) in the CA Support tracking system and give you a contact number and, if you address multiple issues, the issue numbers. Record this information on the Support Contact Information form.
3. The Specialist might request that you:
■ Relate additional information.
■ Follow directions on a terminal to perform directed troubleshooting.
■ Relate certain options in use at your site.
4. If a solution is determined at the initial call, the Specialist gives you a solution number. Record the solution number on the Support Contact Information form. Also, record the current date under "Date Closed" on the Support Contact Number Log.
5. If the problem cannot be resolved immediately over the phone, the Specialist gives you a solution number and advise you to expect the solution in the form of a module replacement, ZAP, or source change. As soon as the solution is ready, the Specialist supplies it to you by one of the following methods:
■ FAX, telex, or through the mail
■ Over the telephone
■ On tape
■ Through the online client support system
6. If the solution resolves the problem, record the date of resolution under "Date Closed" on the Support Contact Number Log. Otherwise, continue the dialog with the Specialist until the problem is resolved.
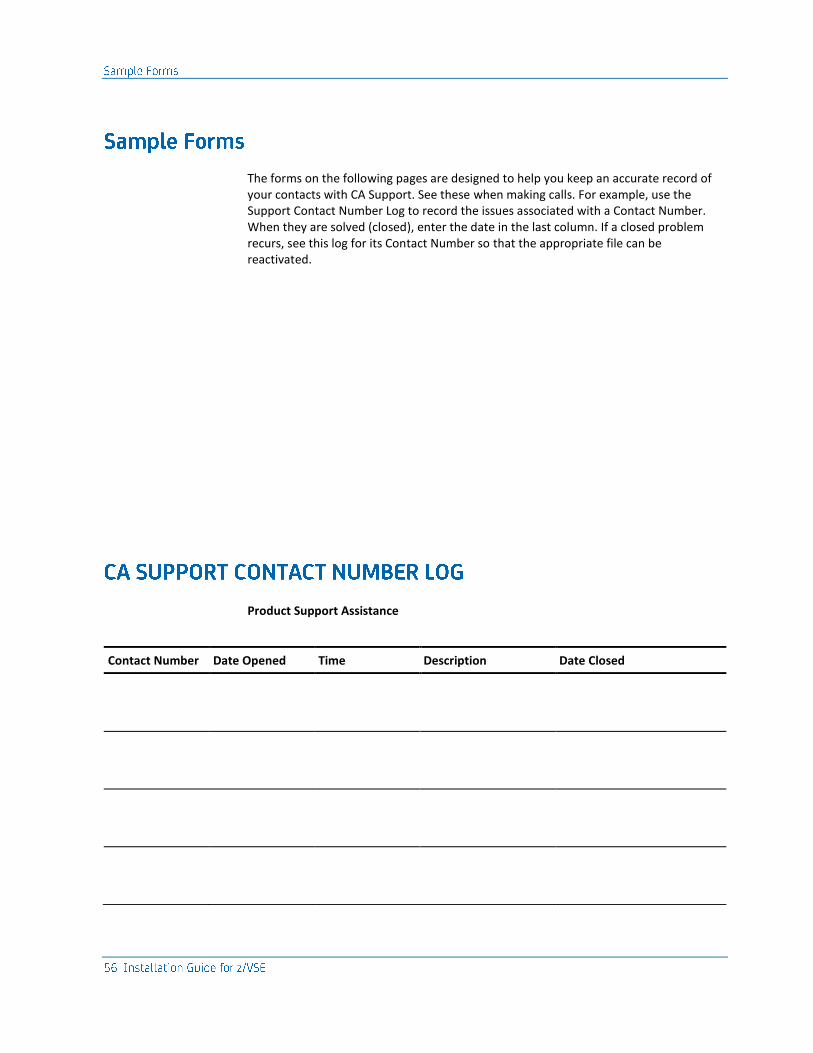
The forms on the following pages are designed to help you keep an accurate record of your contacts with CA Support. See these when making calls. For example, use the Support Contact Number Log to record the issues associated with a Contact Number. When they are solved (closed), enter the date in the last column. If a closed problem recurs, see this log for its Contact Number so that the appropriate file can be reactivated.
Product Support Assistance
Contact Number Date Opened Time Description Date Closed
Contact Number Date Opened Time Description Date Closed
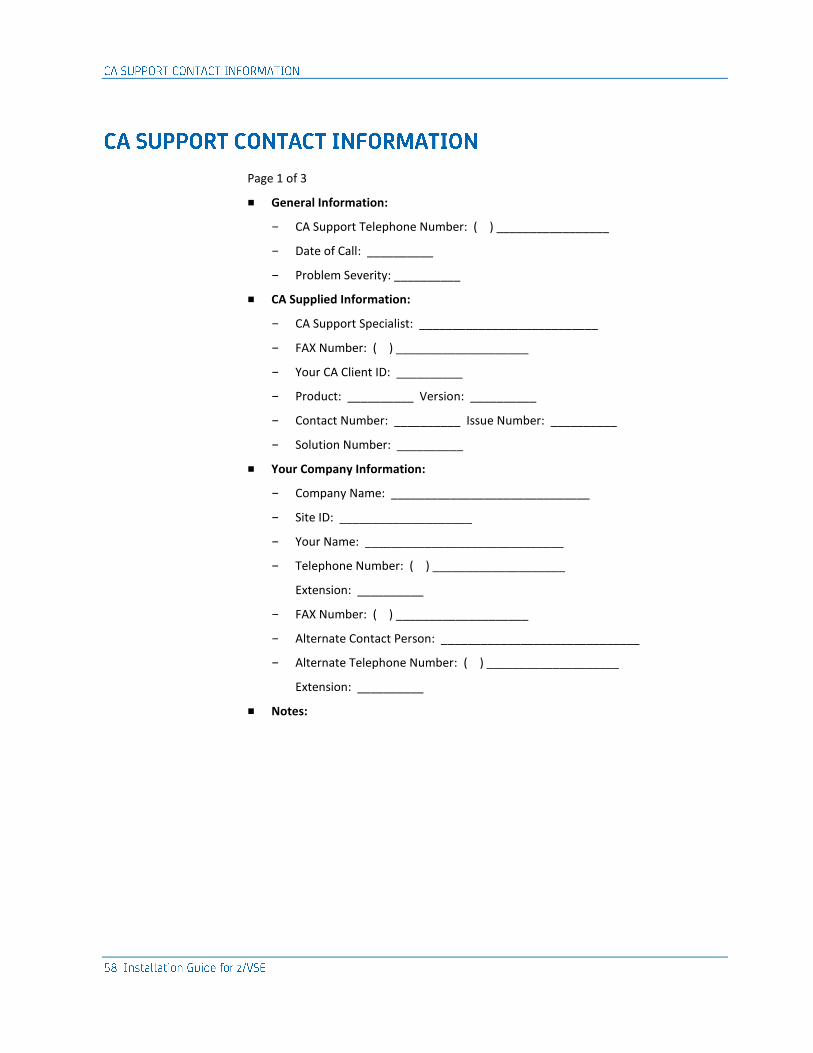
Page 1 of 3
■ General Information:
– CA Support Telephone Number: ( ) _________________
– Date of Call: __________
– Problem Severity: __________
■ CA Supplied Information:
– CA Support Specialist: ___________________________
– FAX Number: ( ) ____________________
– Your CA Client ID: __________
– Product: __________ Version: __________
– Contact Number: __________ Issue Number: __________
– Solution Number: __________
■ Your Company Information:
– Company Name: ______________________________
– Site ID: ____________________
– Your Name: ______________________________
– Telephone Number: ( ) ____________________
Extension: __________
– FAX Number: ( ) ____________________
– Alternate Contact Person: ______________________________
– Alternate Telephone Number: ( ) ____________________
Extension: __________
■ Notes:
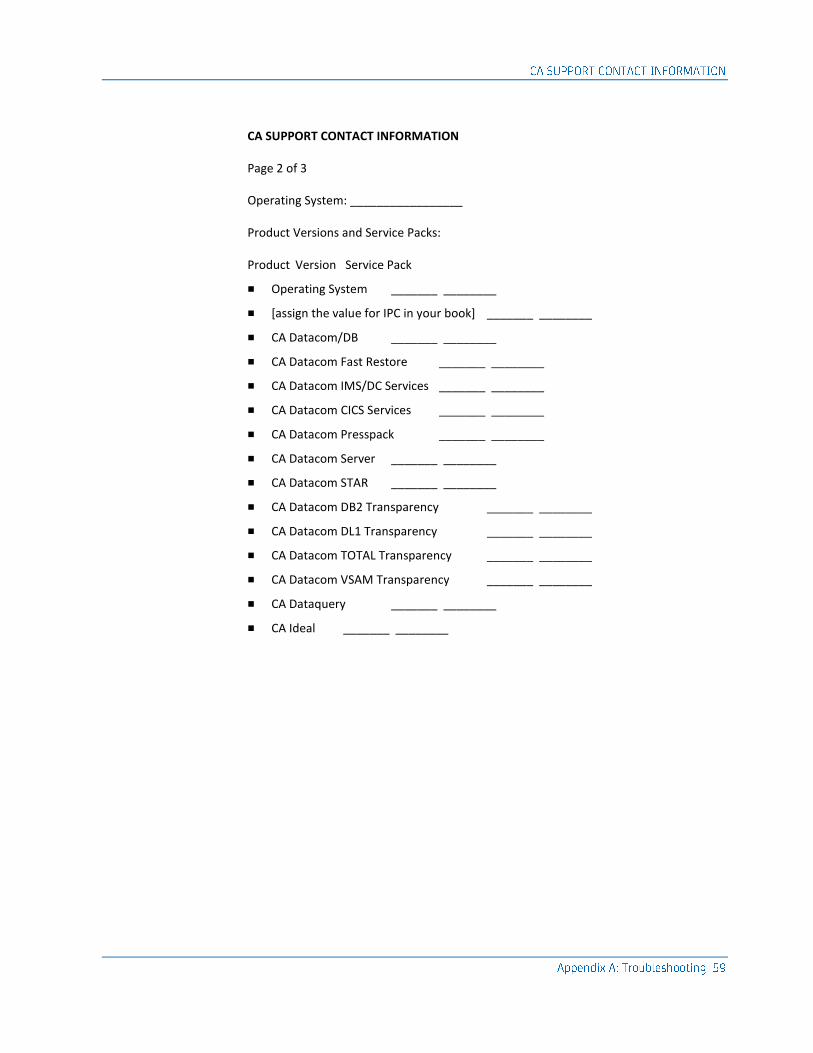
CA SUPPORT CONTACT INFORMATION
Page 2 of 3
Operating System: _________________
Product Versions and Service Packs:
Product Version Service Pack
■ Operating System _______ ________
■ [assign the value for IPC in your book] _______ ________
■ CA Datacom/DB _______ ________
■ CA Datacom Fast Restore _______ ________
■ CA Datacom IMS/DC Services _______ ________
■ CA Datacom CICS Services _______ ________
■ CA Datacom Presspack _______ ________
■ CA Datacom Server _______ ________
■ CA Datacom STAR _______ ________
■ CA Datacom DB2 Transparency _______ ________
■ CA Datacom DL1 Transparency _______ ________
■ CA Datacom TOTAL Transparency _______ ________
■ CA Datacom VSAM Transparency _______ ________
■ CA Dataquery _______ ________
■ CA Ideal _______ ________

CA SUPPORT CONTACT INFORMATION
Page 3 of 3
Additional solutions applied:
Product Solution Numbers
___________________________________________
___________________________________________
___________________________________________
___________________________________________
___________________________________________
Enclosed Documentation:
1. _________________ 5. ________________
2. _________________ 6. ________________
3. _________________ 7. ________________
4. _________________ 8. ________________
CA Technologies welcomes your suggestions for product enhancements. All suggestions are considered and acknowledged. You can contact your Account Manager who initiates the request for you.
Applying • 48 maintenance • 48
ASI startup • 31 Auxiliary History file • 9
BEINS01U.Z • 40 BEINS04.Z • 35 Benefits of MSHP • 25
CA CIS • 14 CA Datacom/AD • 40, 45
tailoring • 45 verifying • 40
CA Datacom/DB • 40, 45 tailoring • 45
CA Dataquery • 14, 40, 45 tailoring • 45
CA Dynam/D for z/VSE • 19 CA License Management Program (CA LMP) • 12 CA Standard Security Facility (CAISSF) • 12 CAI Common Communications Interface (CAICCI) •
12 CAPTFSEL Utility • 48
Maintenance Process Steps • 48 CASAUTIL • 31 Controlling maintenance application • 25 Cover letter • 30 Customizing • 10, 25, 35
installation JCL • 25 JCL • 10, 35
Dedicated System History file • 26 DLBL statement • 26 DQLANGMT • 14
Establishing install library • 35 Example • 35, 41
batch and online in DBSAMPLE • 41
establish MSHP • 35
Facilities provided by MSHP • 24
History files • 24
IBM publications • 15 IJSYS02 • 9, 26 IJSYSHF • 9, 26 Install Block • 10, 24 Install JCL • 34 Installation • 9, 17, 23, 25, 30, 31, 34, 35, 40, 45
custom JCL • 25 methodology • 9, 23 process • 30, 31, 34, 35, 40, 45
modifying BEINS04.Z • 35 producing install JCL • 34 reviewing materials • 30 reviewing system requirements • 31 verifying product installation • 40
system requirements • 17 Introduction to CA Datacom • 17 IPL • 31
JCL • 10 customizing • 10
Labels • 31 LIBDEF statement • 31 Libraries • 40 Loading • 35
products from install tape • 35
Maintain System History Program • 9, 23, 24 introduction to • 23 methodology • 9 relationship to product • 24
Maintain System History Program (MSHP) • 23, 25, 26 benefits • 25 operations • 25 overview • 23 System History file • 26
Maintenance • 23, 25 process • 23
methodology • 23 tracking • 25
Methodology for installation/maintenance • 9, 23 Modifying • 24, 25, 35
history files • 24 JCL • 35
MSHP History file • 48
Objectives of MSHP • 23 Overview • 23, 28
installation • 28 MSHP • 23
Panels, translated • 14 Passwords • 35 Post installation requirements • 40 Product • 25
design • 25 Product Authorization Sheet • 35 Product Information Packets (PIPs) • 30, 48 Program Temporary Fixes (PTFs) • 25, 26, 48
Reviewing • 30, 31 materials • 30 system requirements • 31
SAMPJCL • 10, 35 Sample • 10
installation JCL • 10 Sample jobs • 45 Second History file • 9 System • 17, 19, 31
requirements • 17, 19, 31 CA Dynam/D for z/VSE • 19
System Adapter • 11 System History file • 9, 24, 26, 35, 48
Tailoring the CA Datacom products • 45 Tracking capabilities • 25
Upgrading • 14 CA Dataquery • 14
Using • 12, 14 CA LMP • 12, 14
Utility • 30 products • 30
Verifying installation • 40
Work file • 9
z/VSE • 11 Common Code • 11