Embed Size (px)
Citation preview
The Built EnvironmentUtah Museum of Fine Arts • www.umfa.utah.eduLesson Plans for Educators • October 3, 2012
Table of ContentsPage
2
3
4
5
1213
18
19
2526
2930
3738
4243
Image List
Introduction – What is the Built Environment?
Neighborhood Around Hawthorne, Sheri Sohm’s 4th Grade Class, Hawthorne Elementary writ-ten by Joanna WaldenExploring the Neighborhood around Your School written by Joanna Walden
Lesson plan for Neighborhood Around Hawthorne
Grey Interior, Alex Katz written by Joanna WaldenPlaces Reflect Our Identity written by Joanna Walden
Lesson plan for Grey Interior
Jaguar, The Caracol (Observatory), Chichen Itza, Yucatan, Mexico (R15), Patrick Nagataniwritten by Jill Dawsey
Write a False History for a Real Place written by Tracey MatthewsLesson plan for Jaguar, The Caracol (Observatory), Chichen Itza, Yucatan, Mexico (R15),
Fermator, Carl Andre written by Jill DawseySculpture as Place written by Tracey Matthews
Lesson plan for Fermator
NY, Helen Levitt written by Joanna WaldenCreate a shape poem written by Joanna Walden
Lesson plan for NY
Pinckney and Joy Streets, Boston, Berenice Abbott written by Jennie LaFortuneThe Landscape and You written by Jennie LaFortune
Lesson Plan for Pinckney and Joy Streets, Boston
Bingham Mine, Jonas Lie written by Donna PoultonBefore and After: A timeline of Art and Environment written by Jennie LaFortune
Lesson Plan for Bingham Mine
Evening for Educators is funded in part by the StateWide Art Partnership andthe Professional Outreach Programs in the Schools (POPS)
through the Utah State Office of Education1
Contents
The Built EnvironmentUtah Museum of Fine Arts • www.umfa.utah.eduLesson Plans for Educators • October 3, 2012
Image List1. Sheri Sohm’s 4th Grade Class, Hawthorne Elementary
Neighborhood Around Hawthorne2012Mixed mediaL2012.38.1
2. Alex Katz, AmericanGrey InteriorScreenprintGift of Friends of the Art Museum; Art © Alex Katz/Licensed by VAGA, New York, NYMuseum #1972.023.001
3. Patrick Nagatani, AmericanJaguar, The Caracol (Observatory), Chichen Itza, Yucatan, Mexico (R15)Gelatin silver printGift of Dr. Terry D. and Lee Anne BoxMuseum #2005.33.15
4. Carl Andre, American, 1997FermatorPurchased with funds from the Phyllis Cannon Wattis Endowment for Modern and ContemporaryArt; Art © Carl Andre/Licensed by VAGA, New York, NYMuseum #2009.2.1
5. Helen Levitt, American, circa 1940NYGelatin silver printGift of Toby Levitt (c) Estate of Helen LevittMuseum #2007.25.1
6. Berenice AbbottPinckney and Joy Streets, BostonGelatin silver printGift of Pearl, Dr. James E. & Debra Photographic Collection; ©Berenice Abbott/CommerceGraphicsMuseum #1992.001.012
7. Jonas Lie, American, 1917Bingham MineOil paintingPurchased with funds from the Wattis Endowment for Modern & Contemporary ArtMuseum #2009.1.1
2
The Built EnvironmentUtah Museum of Fine Arts • www.umfa.utah.eduLesson Plans for Educators • October 3, 2012
Introduction- What is the built environment?In the academic world the term “built environment” refers to an established and recognized, multi-discipli-nary field of study and is described as “subjects concerned with the design, development and management ofbuildings, spaces and places” (Griffiths, 2004). Essentially the built environment includes architecture, engi-neering, construction, landscape design and urbanism. It includes a range of sub-disciplines such as architec-tural design, architectural technology, building and construction management, urban design, urban planning,urban regeneration, real estate management, land management, public policy, public health, geography, envi-ronmental sustainability and surveying.
Anecdotally the phrase built environment refers to the tangible structures humans have created. In essencethe built environment is the result of human intervention in the “natural environment.” It includes everythingfrom skyscrapers to mines to bird baths.
In the built environment places and spaces have defining characteristics and identities. Humans create spacesand places according to their needs and cultural values. Conversely humans are shaped by the spaces andplaces they populate in explicit ways and also in subtle ways which are difficult to discern.
Built environment curricula allow students to explore core concepts in history, geography, civics, and eco-nomics. By scrutinizing the built environment students analyze the relationship between people and the natu-ral environment in the past and present and develop critical thinking skills in response to environmentalissues.
Equally by teaching students to examine the built environment in terms of aesthetics and functionality stu-dents can identify positive aspects of the built environment and appreciate its cultural and historic value. Thisoften leads to conversations on how people try to balance the sometimes conflicting goals of historic preser-vation, environmental protection and economic development. Ultimately built environment educators believethat by gaining insight into the complex policy and planning issues surrounding the built environment studentsare able to actively engage in shaping the built environment.
Source:Griffiths, R., 2004, Knowledge production and the research-teaching nexus: the case of the built environmentdisciplines, Studies in Higher Education, Vol. 29(6), pp. 709-26.
3
The Built EnvironmentUtah Museum of Fine Arts • www.umfa.utah.eduLesson Plans for Educators • October 3, 2012
Neighborhood Around Hawthorne Sheri Sohm’s 4th Grade Class, Hawthorne Elem.
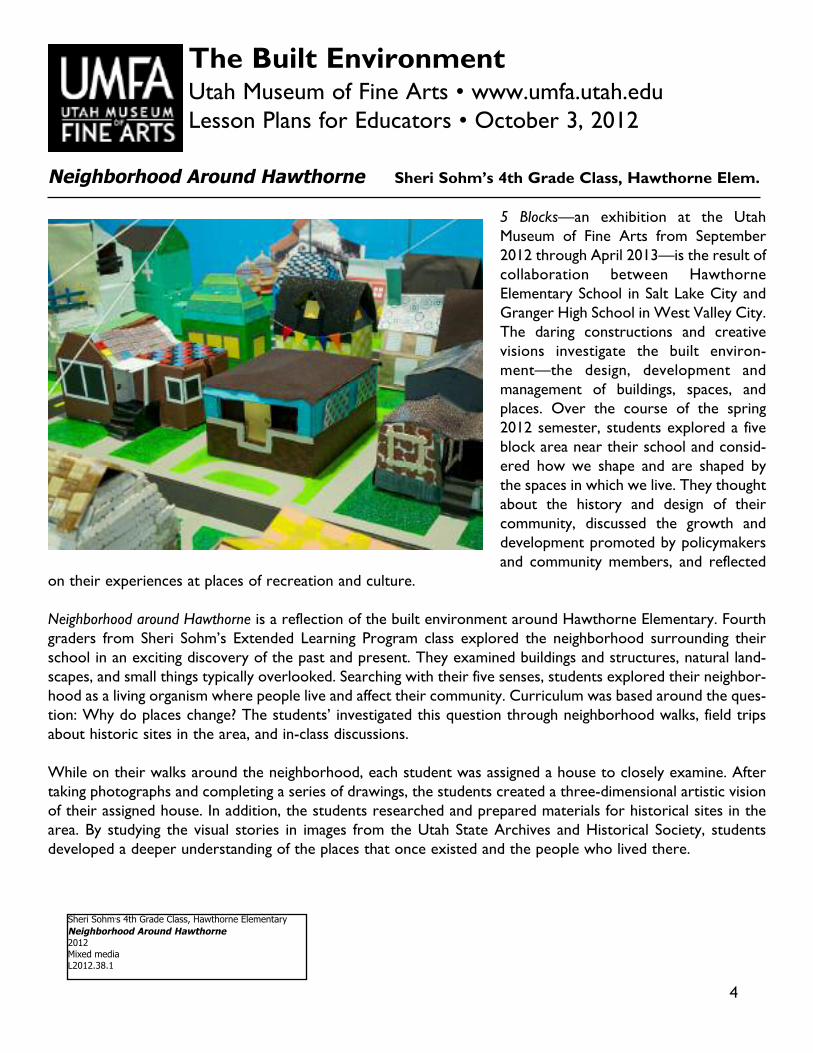
5 Blocks—an exhibition at the UtahMuseum of Fine Arts from September2012 through April 2013—is the result ofcollaboration between HawthorneElementary School in Salt Lake City andGranger High School in West Valley City.The daring constructions and creativevisions investigate the built environ-ment—the design, development andmanagement of buildings, spaces, andplaces. Over the course of the spring2012 semester, students explored a fiveblock area near their school and consid-ered how we shape and are shaped bythe spaces in which we live. They thoughtabout the history and design of theircommunity, discussed the growth anddevelopment promoted by policymakersand community members, and reflected
on their experiences at places of recreation and culture.
Neighborhood around Hawthorne is a reflection of the built environment around Hawthorne Elementary. Fourthgraders from Sheri Sohm’s Extended Learning Program class explored the neighborhood surrounding theirschool in an exciting discovery of the past and present. They examined buildings and structures, natural land-scapes, and small things typically overlooked. Searching with their five senses, students explored their neighbor-hood as a living organism where people live and affect their community. Curriculum was based around the ques-tion: Why do places change? The students’ investigated this question through neighborhood walks, field tripsabout historic sites in the area, and in-class discussions.
While on their walks around the neighborhood, each student was assigned a house to closely examine. Aftertaking photographs and completing a series of drawings, the students created a three-dimensional artistic visionof their assigned house. In addition, the students researched and prepared materials for historical sites in thearea. By studying the visual stories in images from the Utah State Archives and Historical Society, studentsdeveloped a deeper understanding of the places that once existed and the people who lived there.
4
Sheri Sohm’s 4th Grade Class, Hawthorne ElementaryNeighborhood Around Hawthorne2012Mixed mediaL2012.38.1
Neighborhood Around HawthorneExploring the Neighborhoodaround Your School
written by Joanna Walden
Objectives:1. Students will learn about communities and discuss why they change over time. They will apply this under-standing to their own neighborhood and community.2. Students will be assigned a business or house on a neighborhood walk near their school. They will usetheir senses to fill out a worksheet about their building which will include drawings and written observations.3. Students will create a replica of the building they were assigned on their walk.
State Core Links:Social StudiesStudents will understand the interaction between Utah’s geography and its inhabitants.Objective 4: Examine how people affect the geography of Utah.Assess how people change the landscape.
Geography for LifeStudents will understand the human and physical characteristics of places and regions.Objective 1: Interpret place by its human and physical characteristics.Recognize that places change over time.
Visual Arts (Contextualizing)The student will interpret and apply visual arts in relation to cultures, history, and all learning.Objective 2: Connect various kinds of art with particular cultures, times, or places.
Grade Levels:2-12
Amount of Time:This lesson has multiple steps including a discussion, walk around your school’s neighborhood, and an artactivity where the students recreate houses or other structures from their walk. You may want to break thisup into several sessions. The lesson can also be modified to be a small unit (by focusing on only one portionof the lesson plan, such as the neighborhood walk) or a large unit (students can build a mini neighborhoodwith their recreated houses).
Discussion about Communities:In this lesson, students will explore the history and present state of their neighborhood in order to get inspi-ration for the homes or other structures they will create. Throughout this process the students will discoverwhat it means to be part of a community both in the past and the present. Before the students make physicalconnections on their walk around the neighborhood, it’s important they make mental connections that willsupplement their experience.
5
Begin with an in-class conversation about communities. Here are some questions to help guide the discus-sion.
-What is a community?It is a group of people sharing a common space or interest. Community usually refers to a social unit largerthan a household that shares common values and has social cohesion. A community is a group or societyhelping each other. There are different types of communities which have various purposes. For instance, acommunity can be defined by geographic boundaries. This can be further divided into categories such as ruralor urban. Or a community is defined by people who share the same interest or passion. Another type ofcommunity is one where people work in the same profession or undertake the same activities. What types ofcommunities do you belong to?
-What is a neighborhood?It is a geographically localized community within a larger city, town, or suburb. Neighborhoods are oftensocial communities with considerable face-to-face interaction among members. Where is your neighborhood?Where do you live?
-What do we do in neighborhoods and communities?We make friends, work, go to school, eat, shop, play, etc.Where do people interact with each other? (work, stores, churches, schools, houses, parks, streets, side-walks, etc.)
-What do we need? What resources can we find in our neighborhood?FoodSafety and protection (fire, police)Health (hospitals)Recreation (parks, gyms, swimming pools)Businesses (places where we work)Stores (food, clothing, etc)Religious institutionsEconomics and governmentCommunication (Post offices, phones, internet)
-Why do places change?What evidence do you think you could find in your neighborhood to show it has changed over time?What do you think your neighborhood looked like 50 years ago? How about 100 years ago?How can you find out about these changes?• Utah Historical Society• Research on the internet• Librarians and/or historians• Ask a grandparent or someone who has seen your neighborhood or community change• Old photographs and maps*OPTIONAL: Before the discussion, you could print historic photos of your community or of Salt Lake ingeneral to show how places have changed. Visit the following link to search for and print photos directlyfrom your computer.http://history.utah.gov/research_and_collections/photos/index.htmlThe following link is a great resource for digital maps through the University of Utah.http://www.lib.utah.edu/collections/digitalCollections.php
6
Why and how have people changed the natural environment?• People make man-made things within the natural environment in order to meet their personal needs.
EXAMPLES• Agriculture needs have changed over time- farms, orchards, gardens. Grocery stores were created inthe 1950s, which replaced many personal gardens and farms. Today, produce is shipped in from around theworld, but there are still local farmers and gardeners.• Population increase- more houses and buildings in the natural environment• Mining- changes the natural environment, such as the use and look of mountains• Man-made rivers and lakes• Shelter from the natural elements: places to live, work, and play.
-How do we share space?Who or what do we share space with? (people, animals, natural and built environment)What do you see in your neighborhood that lets you know people share space? (sidewalks, community gar-dens, shared driveways, streets, lights, telephone/cable poles, parks, etc.)Why should we share our spaces?
Walk around the Neighborhood:
Materials:Neighborhood walk worksheet—one copy for each student (see attached copy)Walking guide questions for group leaders (see attached copy)Map of area to explore (type in your school’s address in www.googlemaps.com, zoom in on the walking loca-tion, press the “print screen” button on your keyboard, then paste into a Word or PowerPoint document)PencilsClipboards*Optional: Disposable cameras for students in each group to share. Photos are a great way to document theneighborhood and are especially helpful for students to reference when they build their assigned structures.
Activity:Now it’s time to go on a walk!1. Depending on the size of your class, you may want to split up into smaller groups. Parents or volun-teers can act as group leaders. Have group leaders use the “walking guide for group leaders” worksheet(attached) to direct the conversation while on the walk.2. Before the walk designate specific routes to explore. If you split up into smaller groups, have eachgroup explore a different area near the school.3. Explain that the students will be looking closely at a portion of the neighborhood around their school.They should pay attention to the buildings, natural elements, and small details often overlooked. Remindthem to look for evidence that things may have changed. For example, look for worn down or older buildingmaterials such as stone, brick, or wood. Also, look for old structures and architecture such as coal shoots,alleys, garages, fences, etc.
7
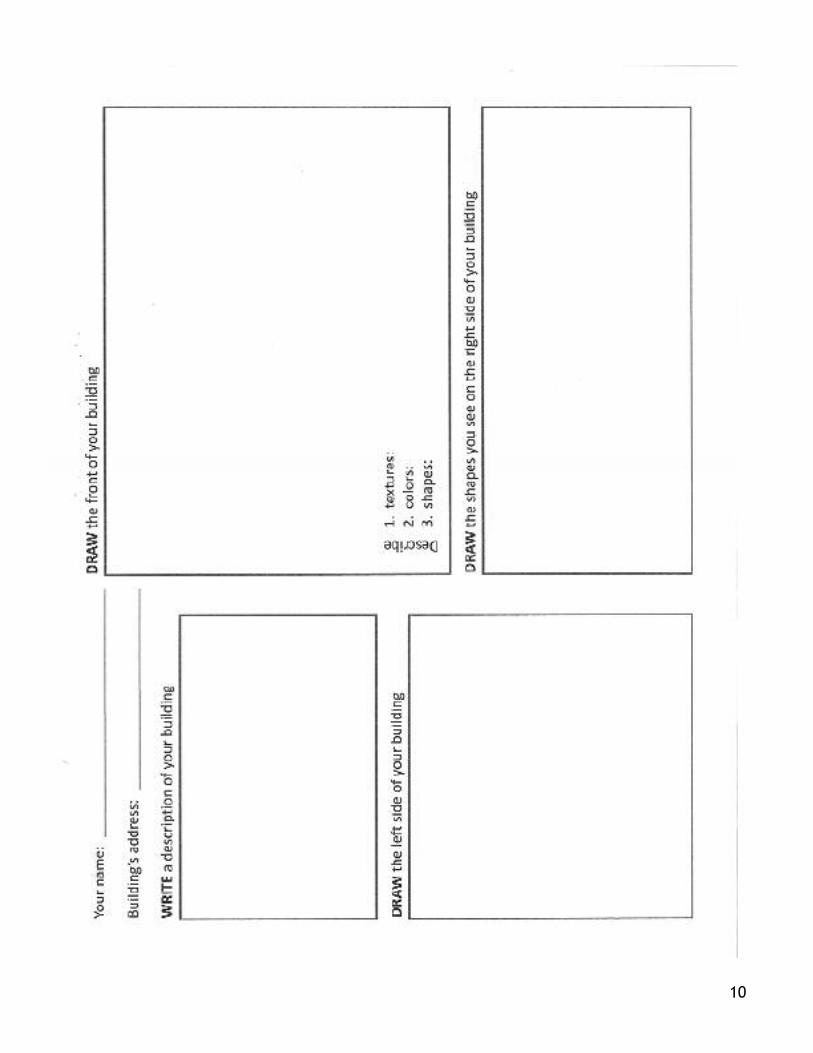
4. Assign each student one building (house or business) to closely inspect on the walk.5. Have each student fill out the worksheet about their building.6. If using cameras, have the students take pictures of their buildings from far away and close up.Encourage them to take photos of the landscape and other interesting details such as street signs, firehydrants, telephone poles, animals, plants, as well as textures and shapes.
Create a Replica of Your Building:Materials (a suggested list, but not all items are necessary):Boxes—these can be purchased at Xpedx© or Michaels©, or anywhere where small boxes are sold. Studentscan also bring in their own boxes from home.Thin cardboard or thick paper for roofsFeltFoam sheetsPaper—colored, patterned, texturedGlitterPaintTapeGlueScissorsMarkersPopsicle sticksFabricSmall tiles
Activity:1. Using the boxes, have the students create the shape of the assigned building from their walk. Use tapeor glue to assemble the boxes and roofs.2. Refer back to the worksheets and photos for inspiration and guidance. The houses should reflect howthe actual house looks (i.e., shape, structural details such as fire places, windows, and stairs) combined withthe student’s own artistic interpretation.3. Next, have the students add details such as brick, siding, or stucco to their structures.4. Now students can add windows, chimneys, doors, etc.5. *Extension—create a mini neighborhood with all the houses. The students could work together toconstruct a replica of their school. To create a mini neighborhood, first attach the students’ structures tocardboard sheets or other sturdy material. Then have the students paint yards, streets, and sidewalks. Finally,add details such as signs, trees, cars, and animals. In order to see a bird’s eye view of the neighborhood toduplicate, go to www.googlemaps.com and type in the street address, press the “print screen” button onyour keyboard, and then paste into a Word or PowerPoint document.
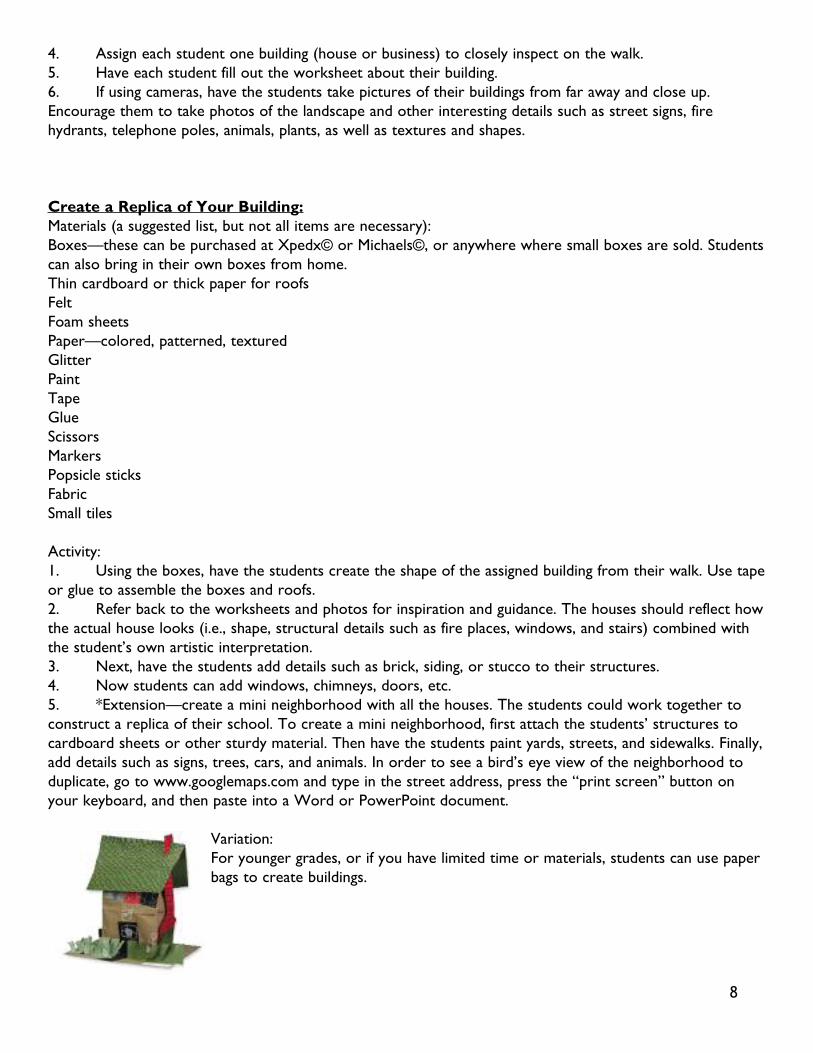
Variation:For younger grades, or if you have limited time or materials, students can use paperbags to create buildings.
8
Assessment:Possible areas to assess:
The student participated in the discussion about communities.The student filled out their worksheet on the neighborhood walk.The student completed a replica of their house.
Extension:Go on a nature walk! This will add another dimension to your discussion and exploration of the built envi-ronment in the neighborhood around your school. Look at everything from grass, plants, and trees, to insectsand animals. Discuss as a group how the natural environment fits in with the built environment. How havepeople changed the natural environment? (Refer back to the discussion portion of this lesson about the natu-ral environment) Have your students record their discoveries through drawings, written descriptions, orphotographs. Then they can recreate these natural elements and include them with their miniature buildings.
Other ideas for walking themes• Safety and protection (fire station, police station, hospitals, safety signs, cross walks)• Modes of communication (mail boxes, cable, phone lines, internet cables)• Recreation (parks, gyms, swimming pools, dog parks)• Businesses and retail• Stores (food, clothing, crafts, entertainment)• Religious institutions• Economics and government
9
10
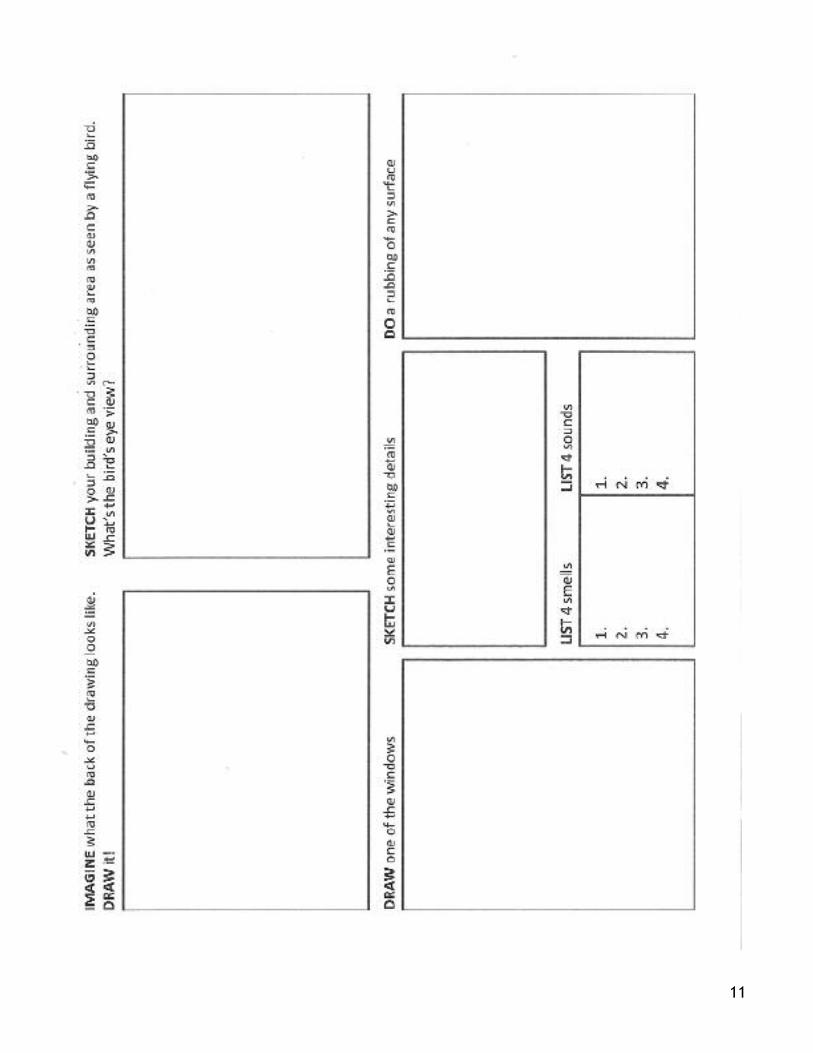
11
The Built EnvironmentUtah Museum of Fine Arts • www.umfa.utah.eduLesson Plans for Educators • October 3, 2012
Grey Interior Alex Katz, American
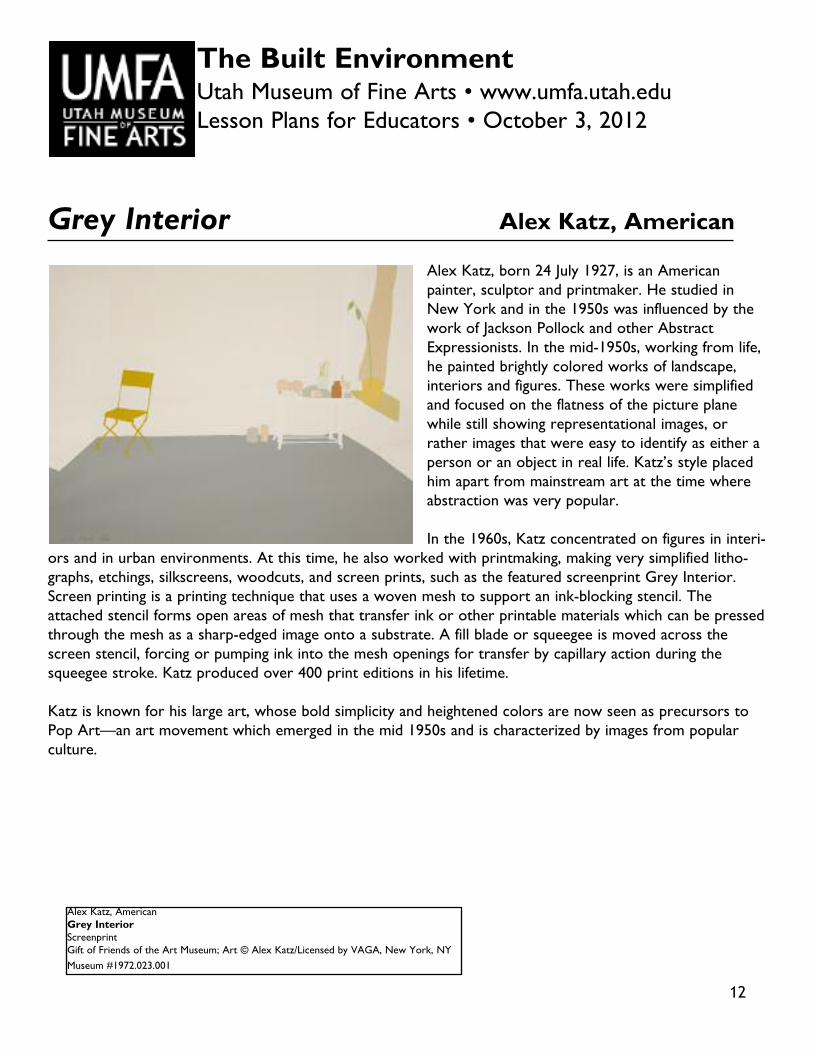
Alex Katz, born 24 July 1927, is an Americanpainter, sculptor and printmaker. He studied inNew York and in the 1950s was influenced by thework of Jackson Pollock and other AbstractExpressionists. In the mid-1950s, working from life,he painted brightly colored works of landscape,interiors and figures. These works were simplifiedand focused on the flatness of the picture planewhile still showing representational images, orrather images that were easy to identify as either aperson or an object in real life. Katz’s style placedhim apart from mainstream art at the time whereabstraction was very popular.
In the 1960s, Katz concentrated on figures in interi-ors and in urban environments. At this time, he also worked with printmaking, making very simplified litho-graphs, etchings, silkscreens, woodcuts, and screen prints, such as the featured screenprint Grey Interior.Screen printing is a printing technique that uses a woven mesh to support an ink-blocking stencil. Theattached stencil forms open areas of mesh that transfer ink or other printable materials which can be pressedthrough the mesh as a sharp-edged image onto a substrate. A fill blade or squeegee is moved across thescreen stencil, forcing or pumping ink into the mesh openings for transfer by capillary action during thesqueegee stroke. Katz produced over 400 print editions in his lifetime.
Katz is known for his large art, whose bold simplicity and heightened colors are now seen as precursors toPop Art—an art movement which emerged in the mid 1950s and is characterized by images from popularculture.
12
Alex Katz, AmericanGrey InteriorScreenprintGift of Friends of the Art Museum; Art © Alex Katz/Licensed by VAGA, New York, NYMuseum #1972.023.001
Grey InteriorPlaces Reflect Our Identity
written by Joanna WaldenObjectives:1. Students will learn about identity and how the built environment can reflect this.2. Students will fill out a worksheet about their bedroom to explore how rooms reflect who they are.3. Students will get to know their classmates better as they share their bedroom worksheets through a shar-ing game.
Useful Terms:•Representational- in art, a record of a physical object that can be easily recognized from the visible world•Abstraction- art unconcerned with the literal depiction of things from the visible world•Expressionism- meaning or an emotional experience expressed rather than physical reality•Screen print- a printmaking technique that uses a woven mesh to support an ink-blocking stencil
State Core Links:Geography for LifeStandard 2: Students will understand the human and physical characteristics of places and regions.Interpret place by its human and physical characteristics.
Visual Arts (Contextualizing)The student will interpret and apply visual arts in relation to cultures, history, and all learning.Objective 2: Connect various kinds of art with particular cultures, times, or places.
Grade Level:2-6
What is the “Built Environment?”:The built environment is the result of human intervention and interaction in the natural environment. Thebuilt environment refers to the tangible structures humans have created that provide the setting for humanactivity, ranging in scale from buildings and parks, neighborhoods and cities, to homes and rooms. It can bedefined as human-made spaces in which people live, work, and play on a day-to-day basis.
Essentially the built environment includes architecture, engineering, construction, landscape design and urban-ism. Built environment curricula allow students to explore core concepts in history, geography, civics, andeconomics. By investigating the built environment students analyze the relationship between people and thenatural environment in the past and present and develop critical thinking skills in response to environmentalissues that allow them to actively engage in shaping their own built environments.
Materials:Image of Grey Interior by Alex KatzWorksheet about bedrooms, one per student (attached)PencilsColoring tools- markers, crayons, colored pencils
13
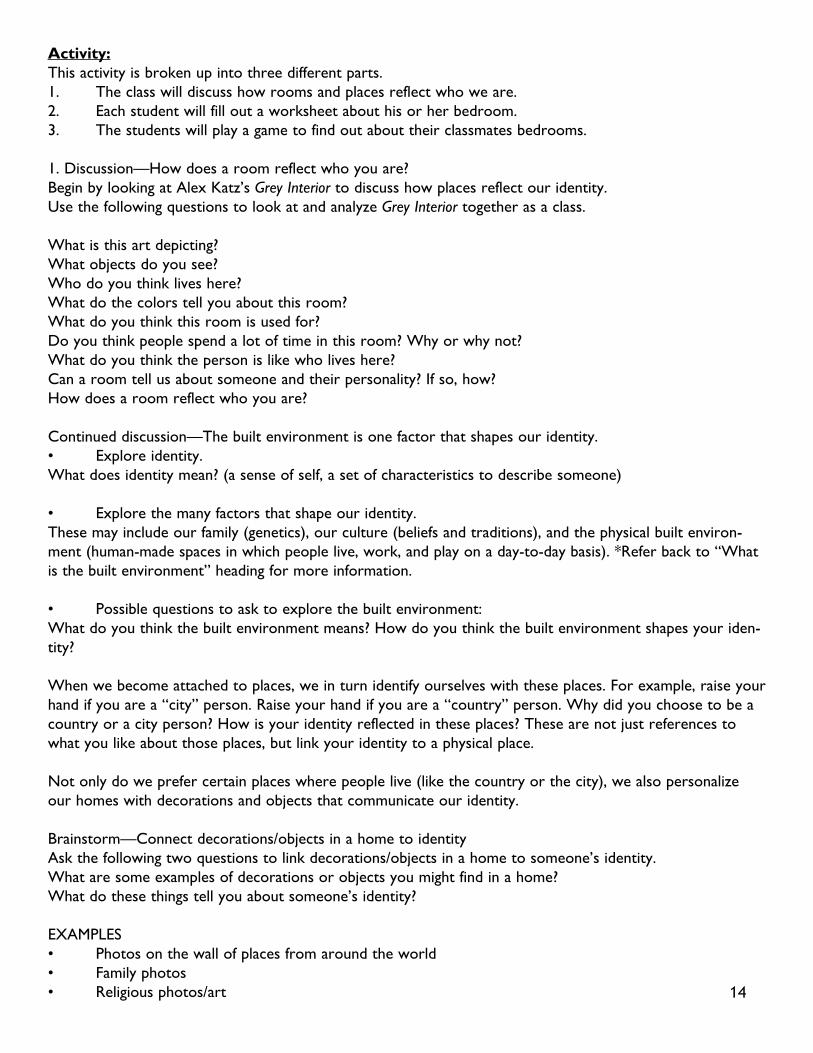
Activity:This activity is broken up into three different parts.1. The class will discuss how rooms and places reflect who we are.2. Each student will fill out a worksheet about his or her bedroom.3. The students will play a game to find out about their classmates bedrooms.
1. Discussion—How does a room reflect who you are?Begin by looking at Alex Katz’s Grey Interior to discuss how places reflect our identity.Use the following questions to look at and analyze Grey Interior together as a class.
What is this art depicting?What objects do you see?Who do you think lives here?What do the colors tell you about this room?What do you think this room is used for?Do you think people spend a lot of time in this room? Why or why not?What do you think the person is like who lives here?Can a room tell us about someone and their personality? If so, how?How does a room reflect who you are?
Continued discussion—The built environment is one factor that shapes our identity.• Explore identity.What does identity mean? (a sense of self, a set of characteristics to describe someone)
• Explore the many factors that shape our identity.These may include our family (genetics), our culture (beliefs and traditions), and the physical built environ-ment (human-made spaces in which people live, work, and play on a day-to-day basis). *Refer back to “Whatis the built environment” heading for more information.
• Possible questions to ask to explore the built environment:What do you think the built environment means? How do you think the built environment shapes your iden-tity?
When we become attached to places, we in turn identify ourselves with these places. For example, raise yourhand if you are a “city” person. Raise your hand if you are a “country” person. Why did you choose to be acountry or a city person? How is your identity reflected in these places? These are not just references towhat you like about those places, but link your identity to a physical place.
Not only do we prefer certain places where people live (like the country or the city), we also personalizeour homes with decorations and objects that communicate our identity.
Brainstorm—Connect decorations/objects in a home to identityAsk the following two questions to link decorations/objects in a home to someone’s identity.What are some examples of decorations or objects you might find in a home?What do these things tell you about someone’s identity?
EXAMPLES• Photos on the wall of places from around the world• Family photos• Religious photos/art 14
• Brightly colored walls• Vases filled with flowers• Paintings or sculpture• Piano or other musical instruments• College diplomas• Plants• Books/library• Holiday decorations• The same color painted on all the walls• Toys• Electronics
2. Worksheet—What does my bedroom say about me?1. Give each student one copy of the attached worksheet about bedrooms.2. Provide different writing and coloring supplies such as markers, pencils, crayons or colored pencils to fillout the worksheet.
3. Game—Find someone who...Once the students are done completing their worksheets, they will play a game to learn more about theirclassmates. Ask or write the following questions on the board. If time permits, have the students talk to sev-eral classmates for each question. This is a time to share and tell. Encourage the students to show theirworksheets to their classmates during the game.
Find someone who…has one or more of the same colors in their bedroom as you.shares their bedroom .has a clean bedroom.does not share a bedroom.likes to read books in their bedroom.likes to play games in their bedroom.has a picture on their wall. What is in the picture?is willing to show you what’s on their wall in their bedroom.has a messy bedroom.is willing to show you their favorite thing in their bedroom.has all the same colors in their bedroom as you.is willing to tell you what their bedroom says about them.
Assessment:Questions to ask students at the end of the lesson:
What new thing did you learn today?What did you learn about yourself by filling out the bedroom worksheet?What does identity mean?What does the built environment mean?How can rooms reflect our identities?
Sources:"Katz, Alex." Grove Art Online. Oxford Art Online. 1 Sep. 2012 <http://www.oxfordartonline.com/sub-scriber/article/grove/art/T046012>.
15

Hauge, Ashild Lappegard. “Identity and place: a critical comparison of three identity theories.” ArchitecturalScience Review. 1 Sep. 2012 <http://faculty.arch.utah.edu/benham/group%203/Place-Identity.pdf>.
Extension(s):Choose a few students who are willing to share their worksheet with the class.
Other worksheet ideas:Explore different rooms in your home (living room, kitchen, garage, yard).Explore your school.Draw a city map to determine what kind of city you live in (include entertainment, churches, shops, houses,parks, businesses, recreation).
16
17
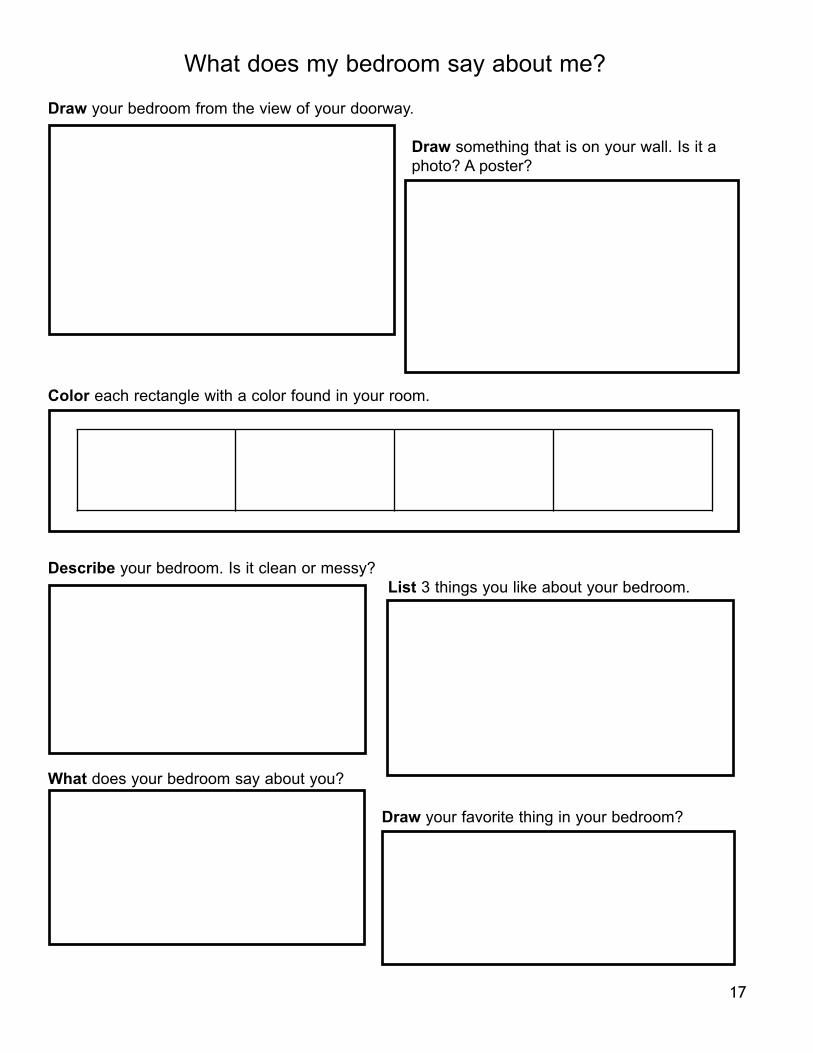
What does my bedroom say about me?
Draw your bedroom from the view of your doorway.
Draw something that is on your wall. Is it aphoto? A poster?
Color each rectangle with a color found in your room.
Describe your bedroom. Is it clean or messy?List 3 things you like about your bedroom.
What does your bedroom say about you?
Draw your favorite thing in your bedroom?
The Built EnvironmentUtah Museum of Fine Arts • www.umfa.utah.eduLesson Plans for Educators • October 3, 2012
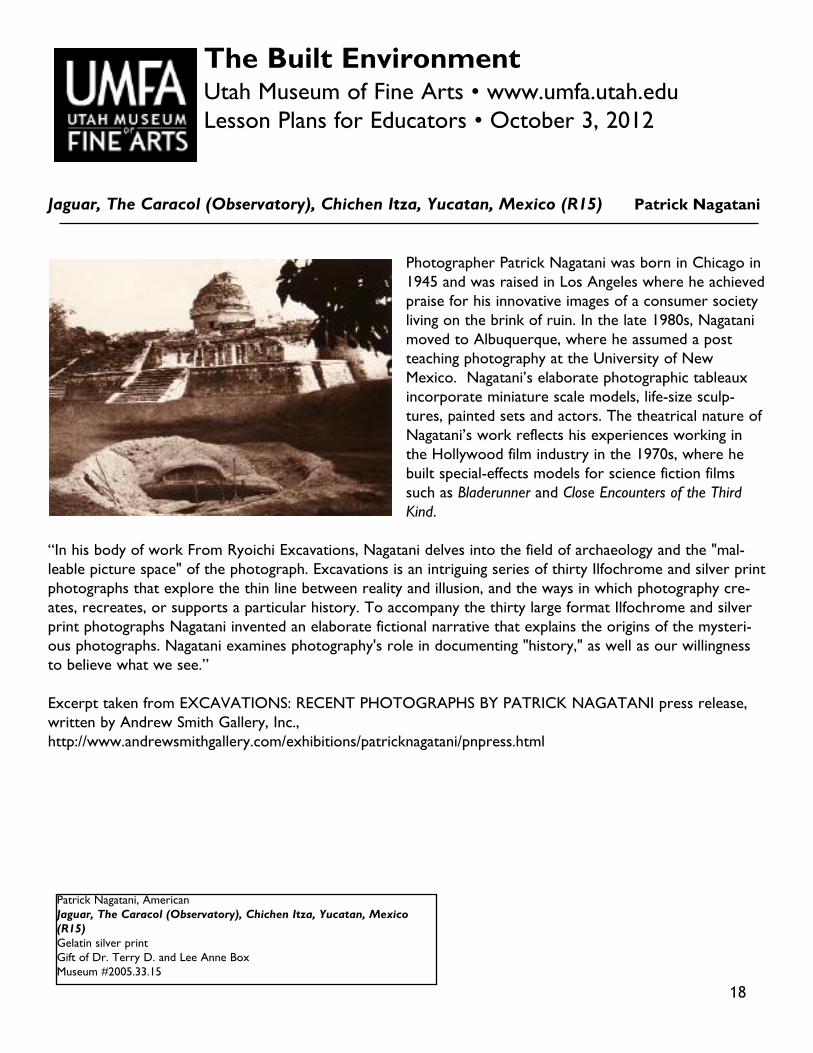
Jaguar, The Caracol (Observatory), Chichen Itza, Yucatan, Mexico (R15) Patrick Nagatani
Photographer Patrick Nagatani was born in Chicago in1945 and was raised in Los Angeles where he achievedpraise for his innovative images of a consumer societyliving on the brink of ruin. In the late 1980s, Nagatanimoved to Albuquerque, where he assumed a postteaching photography at the University of NewMexico. Nagatani’s elaborate photographic tableauxincorporate miniature scale models, life-size sculp-tures, painted sets and actors. The theatrical nature ofNagatani’s work reflects his experiences working inthe Hollywood film industry in the 1970s, where hebuilt special-effects models for science fiction filmssuch as Bladerunner and Close Encounters of the ThirdKind.
“In his body of work From Ryoichi Excavations, Nagatani delves into the field of archaeology and the "mal-leable picture space" of the photograph. Excavations is an intriguing series of thirty Ilfochrome and silver printphotographs that explore the thin line between reality and illusion, and the ways in which photography cre-ates, recreates, or supports a particular history. To accompany the thirty large format Ilfochrome and silverprint photographs Nagatani invented an elaborate fictional narrative that explains the origins of the mysteri-ous photographs. Nagatani examines photography's role in documenting "history," as well as our willingnessto believe what we see.”
Excerpt taken from EXCAVATIONS: RECENT PHOTOGRAPHS BY PATRICK NAGATANI press release,written by Andrew Smith Gallery, Inc.,http://www.andrewsmithgallery.com/exhibitions/patricknagatani/pnpress.html
18
Patrick Nagatani, AmericanJaguar, The Caracol (Observatory), Chichen Itza, Yucatan, Mexico(R15)Gelatin silver printGift of Dr. Terry D. and Lee Anne BoxMuseum #2005.33.15
Jaguar, The Caracol (Observatory), Chichen Itza,Yucatan, Mexico (R15)Write a False History for a Real Place
written by Tracey Matthews
Objectives:Students will examine elements of the built environment as a reflection of culture.Students will be able to identify elements of the built environment as artifacts and understand that archaeolo-gy is the study of human history and prehistory.Students will develop their own opinion on the purpose of archaeology.Students will invent a short story to explain a mysterious and unusual discovery.
State Core Links:Third Grade Standard II: Students will understand cultural factors that shape a community. Objective 1: Evaluatekey factors that determine how a community develops. a. Identify the elements of culture. f. Explain changeswithin communities caused by human inventions Fourth Grade Standard I: Students will understand the rela-tionship between the physical geography in Utah and human life. Objective 2: Analyze how physical geographyaffects human life in Utah. f. Explain how archaeology informs about the past (e.g. artifacts, ruins, and excava-tions).
Grade levels:3-4
Discussion:Teach students the term built environment- the design, development and management of buildings, spaces, andplaces. Describe elements of the built environment, i.e. buildings, roads, airports, mines, gardens, birdhouses,landfills, boats on the bottom of the ocean, ruins, etc. Describe examples of how the built environment tells uswho about who we were, who we are and who we might become. Example: Stonehenge tell us about theimportance of seasons to early people, freeways tell us about how important trade and travel is to modern peo-ple, and the growing use of cell phones and innovations in cell phone technology means that no matter wherethey are people in the future will always be connected to the global community.
Explain that we will be looking at a work of art that uses the elements of the built environment to tell a story.
Have students examine Jaguar, The Caracol (Observatory), Chichen Itza, Yucatan, Mexico (R15) by Patrick Nagatani.Ask students to discuss the following questions in groups:
1. Describe what you see: What do you notice first in this image? Describe the light and shadow in the image.What is the most important part of the image? Describe the natural environment. Describe the man-made ele-ments. Describe the condition of the man-made elements. What assumptions can you make about the manmade elements?
2. Talk about the story behind the image: Describe the building. Who do you think made the building? Whatdo you think the building was used for? Do you think it is a big building or a small building? What is the build-ing made of? When do you think the building was made? Describe the car. Who do you think made the car?
19
What do you think the car was used for? When do you think the car was made? How did the car becomeburied? Why do you think someone began to excavate the car? Why do you think someone left the car onlypartially uncovered? Think of a story that explains how this image came to be.
3. Talk about the artist’s medium: How do you think the artist made this image? What type of tools did heuse? Why do you think it is colored that way? What is the texture of the image like?
Activity:Have students complete the “HOW DO OBJECTS TELL STORIES ABOUT PEOPLE?” worksheet.
Discussion:Share with students the story by Patrick Nagatani that he shared to explain the origins of the photograph:“Nagatani informs us that in 1985, a Japanese archeologist named Ryoichi received a mysterious set of mapsthat led him to excavate numerous historic and contemporary sites around the world noted for their culturalsignificance. For fifteen years Ryoichi and his team secretly excavated Stonehenge, Chaco Canyon, Ayers Rock,Kitt Peak National Observatory, the very Large Array radio-telescope, and other sites. At each location theyunearthed a different make of car. Buried in the volcanic ash at Herculaneum they found a Ferrari. Ryoichi haddiscovered a worldwide "automobile culture" that appeared to parallel our own, although it was anachronisticboth historically and geographically. After unearthing the artifacts, Ryoichi's team covered up all evidence oftheir digs, but not before Nagatani had photographed each site, providing the only existing record of Ryoichi'sdiscoveries.”
Excerpt taken from EXCAVATIONS: RECENT PHOTOGRAPHS BY PATRICK NAGATANI press release, written by Andrew Smith Gallery, Inc.,http://www.andrewsmithgallery.com/exhibitions/patricknagatani/pnpress.html
In groups have students reflect on Nagatani’s story. Ask students to decide if Nagatani’s story is true or made-up. Discuss what about the story and artwork seems real and what seems false. List examples on the board,for example the ruins seem real, the car seems real but was likely buried recently, etc.
Discuss as a class why the artist invented a fake story using real places and objects.
Ask the students to contemplate the following questions: Archaeologists piece together stories about the pastbased on artifacts. If an ancient “automobile culture” did exist how would that change our world today? Whatis the role of documentary photography in recording historical events and scientific discoveries? In our mod-ern-world information is easily obtained. How do you determine if a source is credible? Do you think the artistis suggesting that we cannot always trust something that is presented as credible?
Write on the board “In your opinion, what is the purpose of archaeology?” Have students write 3-4 sentencesstating their thoughts.
Activity:Have students invent their own false history using real places and artifacts. Each should use the worksheet“PATRICK NAGATANI: INVENTING A FALSE HISTORY” to get started. Have individual students volunteerto share thier story with the class.
Wrap-up Activity:Read the book Motel of the Mysteries by David Macaulay
20

Description: It is the year 4022; all of the ancient country of Usa has been buried under many feet of detritusfrom a catastrophe that occurred back in 1985. Imagine, then, the excitement that Howard Carson, an amateurarcheologist at best, experienced when in crossing the perimeter of an abandoned excavation site he felt theground give way beneath him and found himself at the bottom of a shaft, which, judging from the DO NOTDISTURB sign hanging from an archaic doorknob, was clearly the entrance to a still-sealed burial chamber.Carson's incredible discoveries, including the remains of two bodies. One of them on a ceremonial bed facingan altar that appeared to be a means of communicating with the Gods and the other lying in a porcelain sar-cophagus in the Inner Chamber permitted him to piece together the whole fabric of that extraordinary civiliza-tion.
21

HOW DO OBJECTSTELL STORIES ABOUTPEOPLE?
Jaguar, The Caracol (Observatory),Chichen Itza, Yucatan, Mexico(R15)
by Patrick Nagatani
An ARTIFACT is an object made by a human being, typically an item of cultural or historical interest.What ARTIFACTS do you see?
ARCHAEOLOGY is the study of human history and prehistory through the excavation of sites and the analy-sis of artifacts.
Describe evidence of ARCHAEOLOGY you see.
CULTURE is the characteristics of a particular group of people, defined by everything from language, religion,cuisine, social habits, music and arts.
Describe the evidence of CULTURE you see.
22
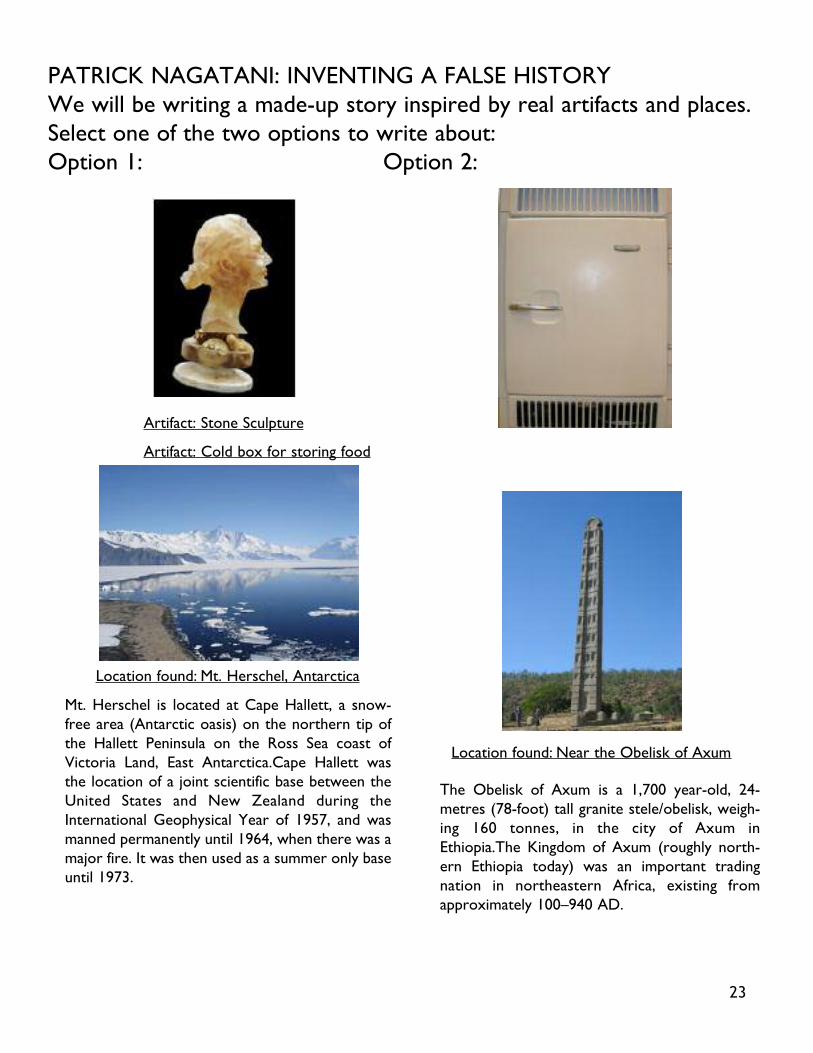
PATRICK NAGATANI: INVENTING A FALSE HISTORYWe will be writing a made-up story inspired by real artifacts and places.Select one of the two options to write about:Option 1: Option 2:
Artifact: Stone Sculpture
Artifact: Cold box for storing food
Location found: Mt. Herschel, Antarctica
Location found: Near the Obelisk of Axum
23
Mt. Herschel is located at Cape Hallett, a snow-free area (Antarctic oasis) on the northern tip ofthe Hallett Peninsula on the Ross Sea coast ofVictoria Land, East Antarctica.Cape Hallett wasthe location of a joint scientific base between theUnited States and New Zealand during theInternational Geophysical Year of 1957, and wasmanned permanently until 1964, when there was amajor fire. It was then used as a summer only baseuntil 1973.
The Obelisk of Axum is a 1,700 year-old, 24-metres (78-foot) tall granite stele/obelisk, weigh-ing 160 tonnes, in the city of Axum inEthiopia.The Kingdom of Axum (roughly north-ern Ethiopia today) was an important tradingnation in northeastern Africa, existing fromapproximately 100–940 AD.
Answer the following questions to begin to plan your story:1. Who discovered the artifact?
2. How did they discover the artifact? What tools did they use?
3. Why did they travel to the location?
4. Did they tell anyone about the discovery?
5. In your story you should explain the history of the artifact. How did it get buried at the location? Whomade it? What was it used for?
Using your ideas from the questions above write your story...
24
25
The Built EnvironmentUtah Museum of Fine Arts • www.umfa.utah.eduLesson Plans for Educators • October 3, 2012
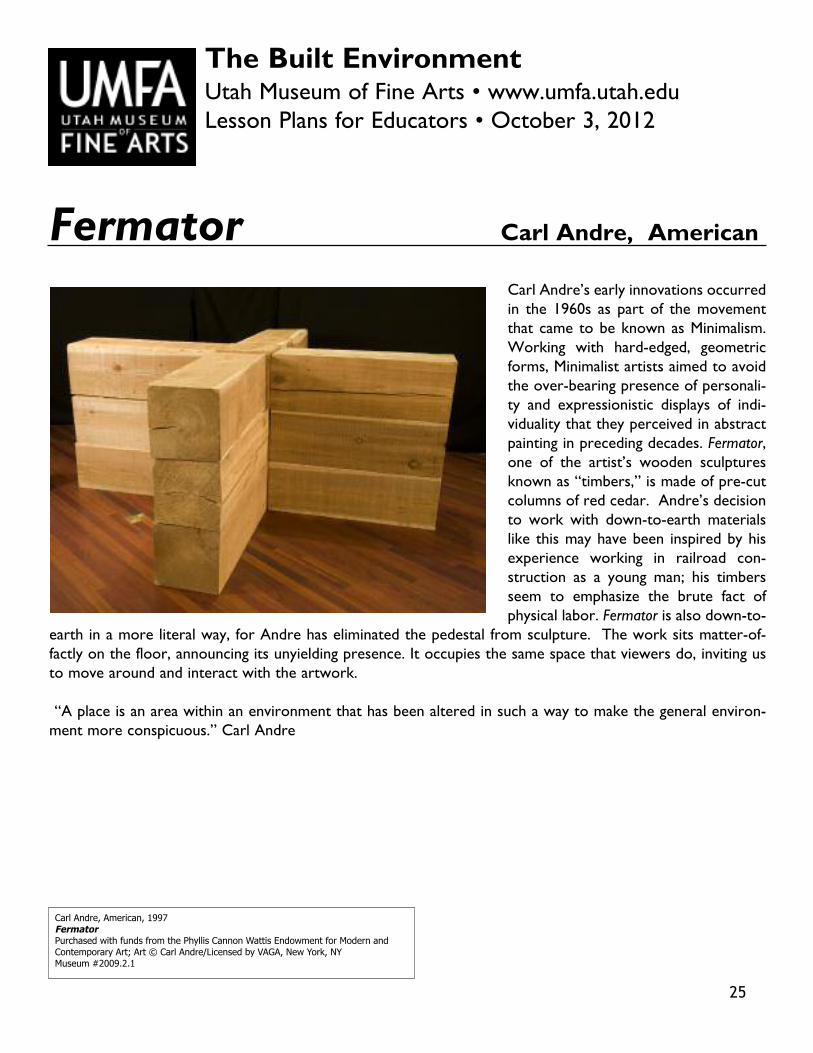
Fermator Carl Andre, American
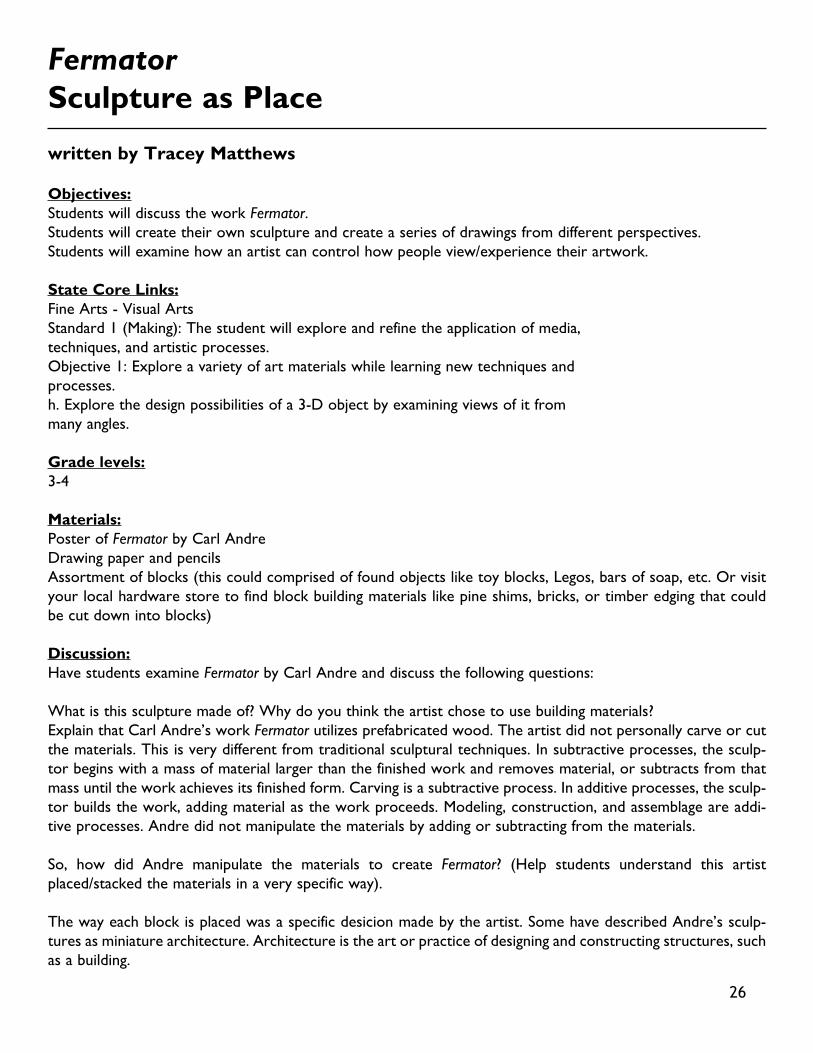
Carl Andre’s early innovations occurredin the 1960s as part of the movementthat came to be known as Minimalism.Working with hard-edged, geometricforms, Minimalist artists aimed to avoidthe over-bearing presence of personali-ty and expressionistic displays of indi-viduality that they perceived in abstractpainting in preceding decades. Fermator,one of the artist’s wooden sculpturesknown as “timbers,” is made of pre-cutcolumns of red cedar. Andre’s decisionto work with down-to-earth materialslike this may have been inspired by hisexperience working in railroad con-struction as a young man; his timbersseem to emphasize the brute fact ofphysical labor. Fermator is also down-to-
earth in a more literal way, for Andre has eliminated the pedestal from sculpture. The work sits matter-of-factly on the floor, announcing its unyielding presence. It occupies the same space that viewers do, inviting usto move around and interact with the artwork.
“A place is an area within an environment that has been altered in such a way to make the general environ-ment more conspicuous.” Carl Andre
Carl Andre, American, 1997FermatorPurchased with funds from the Phyllis Cannon Wattis Endowment for Modern andContemporary Art; Art © Carl Andre/Licensed by VAGA, New York, NYMuseum #2009.2.1
26
FermatorSculpture as Place
written by Tracey Matthews
Objectives:Students will discuss the work Fermator.Students will create their own sculpture and create a series of drawings from different perspectives.Students will examine how an artist can control how people view/experience their artwork.
State Core Links:Fine Arts - Visual ArtsStandard 1 (Making): The student will explore and refine the application of media,techniques, and artistic processes.Objective 1: Explore a variety of art materials while learning new techniques andprocesses.h. Explore the design possibilities of a 3-D object by examining views of it frommany angles.
Grade levels:3-4
Materials:Poster of Fermator by Carl AndreDrawing paper and pencilsAssortment of blocks (this could comprised of found objects like toy blocks, Legos, bars of soap, etc. Or visityour local hardware store to find block building materials like pine shims, bricks, or timber edging that couldbe cut down into blocks)
Discussion:Have students examine Fermator by Carl Andre and discuss the following questions:
What is this sculpture made of? Why do you think the artist chose to use building materials?Explain that Carl Andre’s work Fermator utilizes prefabricated wood. The artist did not personally carve or cutthe materials. This is very different from traditional sculptural techniques. In subtractive processes, the sculp-tor begins with a mass of material larger than the finished work and removes material, or subtracts from thatmass until the work achieves its finished form. Carving is a subtractive process. In additive processes, the sculp-tor builds the work, adding material as the work proceeds. Modeling, construction, and assemblage are addi-tive processes. Andre did not manipulate the materials by adding or subtracting from the materials.
So, how did Andre manipulate the materials to create Fermator? (Help students understand this artistplaced/stacked the materials in a very specific way).
The way each block is placed was a specific desicion made by the artist. Some have described Andre’s sculp-tures as miniature architecture. Architecture is the art or practice of designing and constructing structures, suchas a building.
Have you ever built a structure? How many decisions did you have to make? How did you know when youwere done? What was the function of the structure? Did you only think about function or did you also makedecisions to create a specific look or design?
Carl Andre did not use any glues or fixitives to attach the blocks together. Why do you think he wanted eachblock to stay seperate? Andre has suggested that his procedure for building up a sculpture from small, regular-ly-shaped units is based on "the principle of masonry construction" - like stacking up bricks to build a wall.
This sculpture is a similar size to that of a table or a couch. Imagine walking around this sculpture. Have stu-dents draw what this sculpture would look like if you could hover above it. Would it be different if it was tentimes larger? How would it be different if it could fit on your palm?
The artist did not want Fermator to sit on a pedestal. Why do you think he placed his artwork right on the floor?What does it say about an object when its placed on a pedestal?
Andre described his work as "sculpture as place," and felt that by placing his work on the floor in a specific wayit had "place generating" properties. Andre defined "place" as "an area within an environment which has beenaltered in such a way as to make the general environment more conspicuous."
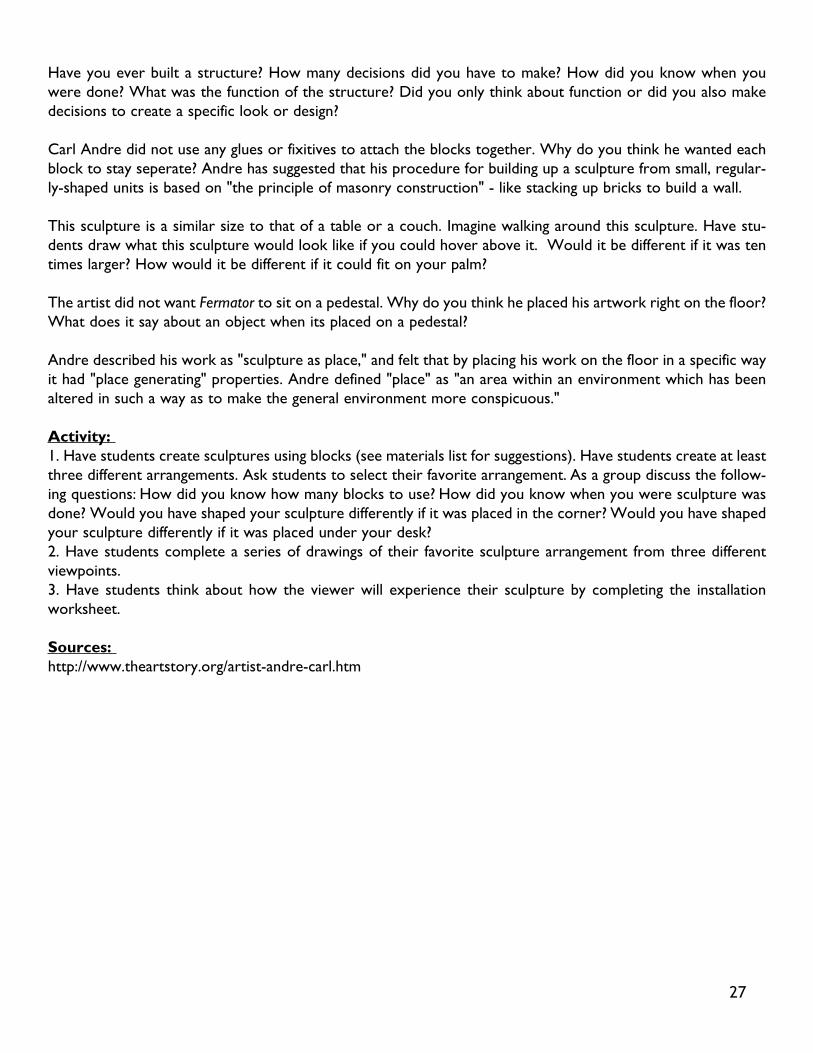
Activity:1. Have students create sculptures using blocks (see materials list for suggestions). Have students create at leastthree different arrangements. Ask students to select their favorite arrangement. As a group discuss the follow-ing questions: How did you know how many blocks to use? How did you know when you were sculpture wasdone? Would you have shaped your sculpture differently if it was placed in the corner? Would you have shapedyour sculpture differently if it was placed under your desk?2. Have students complete a series of drawings of their favorite sculpture arrangement from three differentviewpoints.3. Have students think about how the viewer will experience their sculpture by completing the installationworksheet.
Sources:http://www.theartstory.org/artist-andre-carl.htm
27
How would you install your sculpture?
Step 1: Where would you like to place your scultpure? Circle one.
Museum Park City street Desert
Step 2: How big will your sculpture be? Circle one.
Smaller than a shoe box Larger than a person As big as a building
Step 3:What will your sculpture be made of? Circle one.
Rock Wood Metal Clay Plastic Ice Wax Dirt
Step 4: How will people interact with the sculpture? Underline all that apply.
People must stay 2 feet away from it People can only see it from far away
People can get really close to it People are not allowed to touch it
People can walk around it People can touch it People can climb on it
It is on a pedestal It is attached to the ground It can be moved around
It has no label It has bright white lights on it It has a label with information
People are allowed to move it around People can add blocks to it
People are allowed to take blocks home with them People can take pictures of it
People can read information about it on the internet People can look at it at night
People can take home free posters of it People can destroy it
Step 5: Give your sculpture a title. _____________________________________________
28
29
The Built EnvironmentUtah Museum of Fine Arts • www.umfa.utah.eduLesson Plans for Educators • October 3, 2012
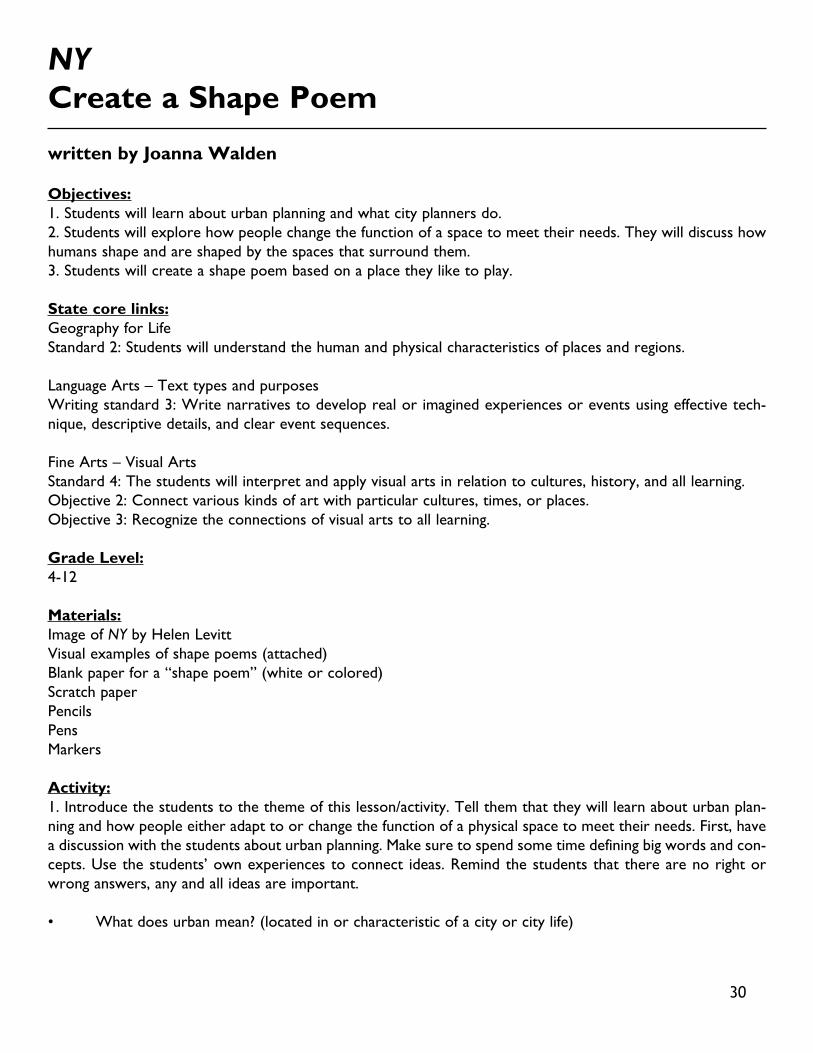
NY Helen Levitt, American
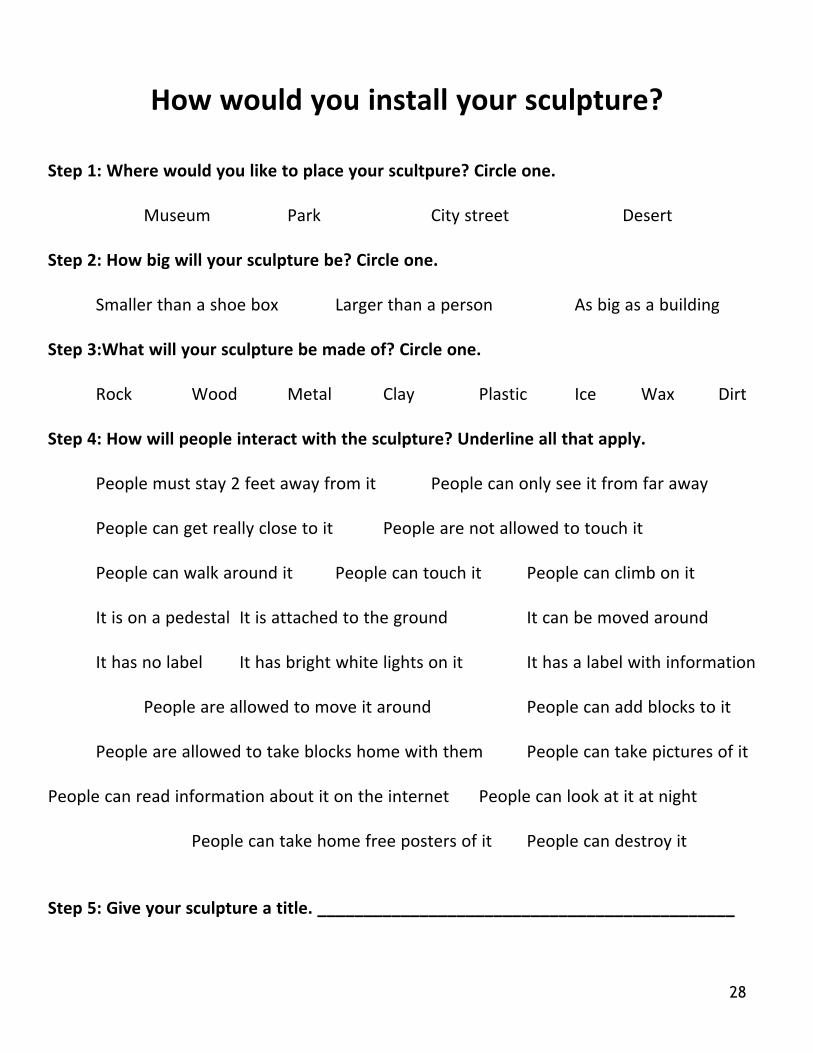
Helen Levitt was an American photographer,born in New York on August 31, 1913. Levitttaught herself photography while working fora commercial photographer. She admired andwas heavily influenced by photographer HenriCartier-Bresson, a French photographer whofocused on photojournalism and “street pho-tography.” Levitt was identified with “streetphotography,” a type of documentary photog-raphy that features subjects in candid situa-tions in public places such as city streets. Thistype of photography uses a technique calledstraight photography, or in other words, anattempt to depict a scene as realistically aspossible without manipulation.
Levitt studied with photographer Walker Evans in 1938-39, working with him in the subways. She worked onseveral projects that promoted humanist causes. Society suffered many hardships during the Great Depression,some of which were documented by photographers like Levitt in an attempt to raise awareness to help cor-rect social problems. In the 1940s, she began to photograph children on the streets of New York. Since thechildren lived in a large city, many of these photographs show children using the streets as their playground.
Levitt, together with Janice Loeb and James Agee in the late 1940s, made two documentary films: In the Streetand The Quiet One. These films were an extension of Levitt’s street photography. In 1965 she published herfirst book, A Way of Seeing, with Agee. In 1970 she began to work with color, one of the first street photog-raphers to do so. Levitt has been called “the most celebrated and least known photographer of her time.” Shedied in New York in 2009.
Helen Levitt, American, circa 1940NYGelatin silver printGift of Toby Levitt (c) Estate of Helen LevittMuseum #2007.25.1
30
NYCreate a Shape Poem
written by Joanna Walden
Objectives:1. Students will learn about urban planning and what city planners do.2. Students will explore how people change the function of a space to meet their needs. They will discuss howhumans shape and are shaped by the spaces that surround them.3. Students will create a shape poem based on a place they like to play.
State core links:Geography for LifeStandard 2: Students will understand the human and physical characteristics of places and regions.
Language Arts – Text types and purposesWriting standard 3: Write narratives to develop real or imagined experiences or events using effective tech-nique, descriptive details, and clear event sequences.
Fine Arts – Visual ArtsStandard 4: The students will interpret and apply visual arts in relation to cultures, history, and all learning.Objective 2: Connect various kinds of art with particular cultures, times, or places.Objective 3: Recognize the connections of visual arts to all learning.
Grade Level:4-12
Materials:Image of NY by Helen LevittVisual examples of shape poems (attached)Blank paper for a “shape poem” (white or colored)Scratch paperPencilsPensMarkers
Activity:1. Introduce the students to the theme of this lesson/activity. Tell them that they will learn about urban plan-ning and how people either adapt to or change the function of a physical space to meet their needs. First, havea discussion with the students about urban planning. Make sure to spend some time defining big words and con-cepts. Use the students’ own experiences to connect ideas. Remind the students that there are no right orwrong answers, any and all ideas are important.
• What does urban mean? (located in or characteristic of a city or city life)
• What do you think a city planner does?City planners (also known as urban planners) help design cities. They make decisions such as the height ofbuildings, the width of streets, where sidewalks will go, the number of street signs, and the design and loca-tion of street “furniture” (everything from bus stops and lamp posts to newsstands and wastebaskets). Thecity planner begins by surveying sites and performing demographic (social statistics), economic, and environ-mental studies to assess the needs of the community and encourage public participation in the process.
• Why do you think we have city planners? Is their job important? Why?
2. Looking activityContinue the discussion by looking at Helen Levitt’s photo, NY, as a class. Talk about what the students seein the photo and explore how we change the function of physical space to meet our needs. Here are somequestions to help guide the conversation. In order to let the students discover the elements in this photo ontheir own, hold off on telling them the title, NY, at the beginning of the looking activity. After discussing thephoto, refer to the biography section at the beginning of the lesson plan to tell the students more aboutHelen Levitt and “street photography.”
• What is going on in this photo? What do you see?• When do you think this photo was taken? What makes you think that?• Where do you think this photo was taken?• Do you think the city where this was taken is big or small?• Looking at the elements in the photo, what things do you think a city planner designed? (i.e., streets,sidewalks, streetcar, safety poles next to streetcar, fire hydrant)• What are the two children doing in this photo? (boy playing in fire hydrant water and boy holdingonto the back of the trolley)• Why do you think the boys are playing in the streets? (i.e., big city, no grass in the photo, no play-grounds or parks in the photo) The boys have changed the function of the city to meet their needs. Whatare their needs as kids?• What is the real purpose of the fire hydrant and trolley?• Where do you like to play? Is there somewhere you like to play/spend time with a friend that serves adifferent purpose other than playing? (i.e., sidewalks, streets, stairs, alleys, driveways, etc.)
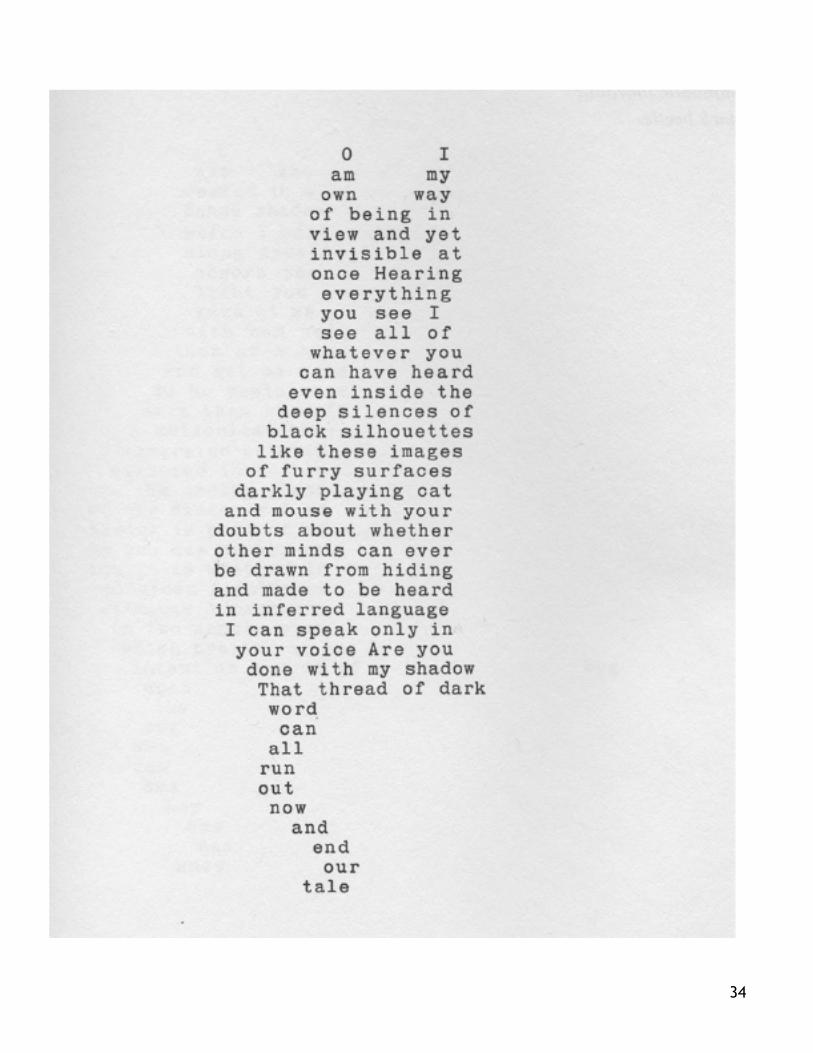
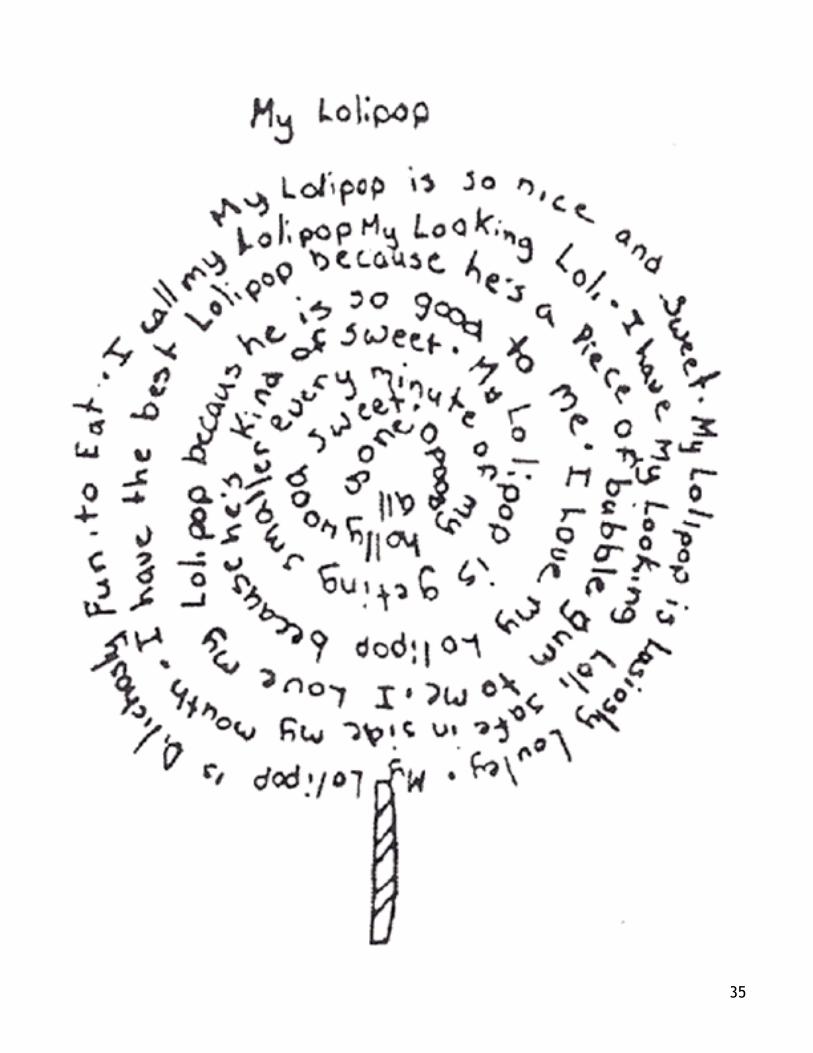
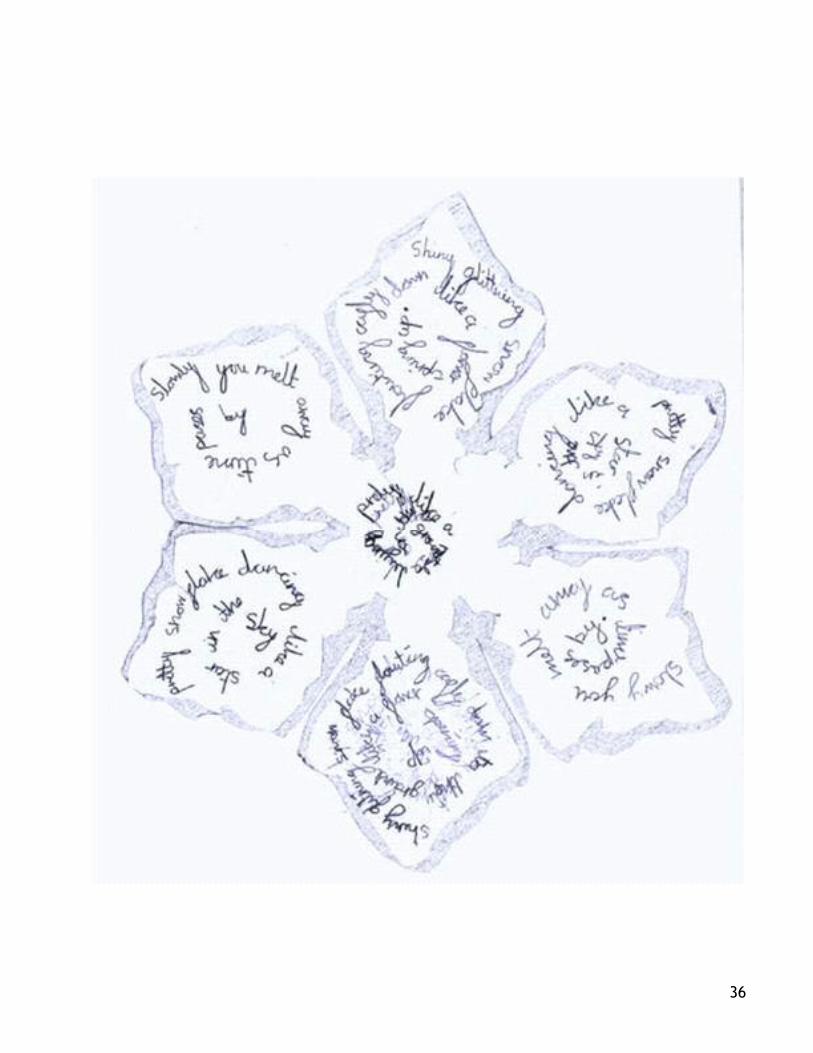
3. Create a shape poem!Now have the students create their own shape poem. Their poems will look like (be shaped like) what theydescribe. The theme will be about where they like to play or spend time with friends.
Materials:Visual examples of shape poems (attached)Scratch paper for experimenting with the words and shape of the poemPencilsPaper for final shape poem (white or colored)Pens, markers (optional)
1. Ask the students to think of a place they like to play. For older students, ask them to think of a place theylike to spend time with their friends. This place could be anywhere: parks, bedrooms, sidewalks, backyards,streets, empty fields, basketball quarts, kitchen tables, living rooms, a friend’s house, driveways, libraries, apond or lake, etc.
31
2. After the students have chosen a place they like to play, have them come up with an object that bestdescribes that place: for example, bedrooms = bed, a friend’s house = house, streets = street sign, basketballquart = basketball hoop, parks = tree or swing, pond/lake = fish, etc. It’s important to choose only oneobject for the shape poem. It is too difficult to draw an entire park or backyard. This object should representthe place they like to play.
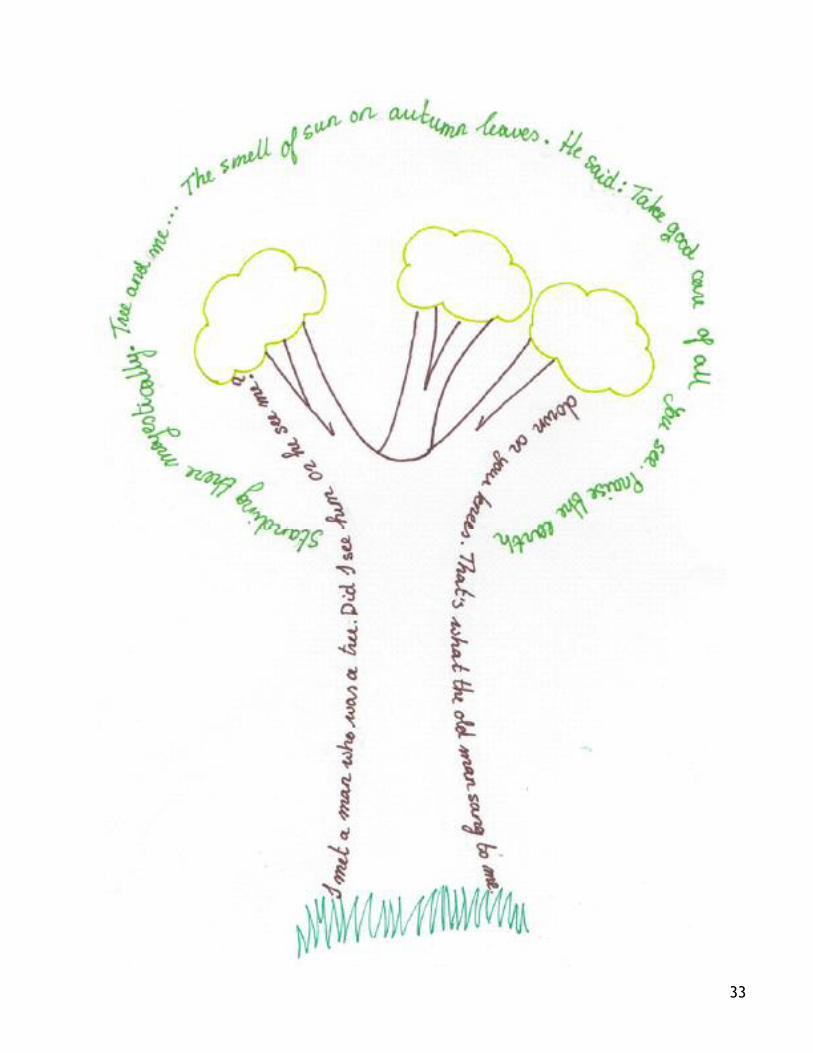
3. Next, show the students some examples of shape poems (attached). Explain that they will be making theirown shape poem. These will be shaped like an object where they like to play.
4. Hand out scratch paper and pencils. First, ask the students to sketch out a simple outline or shape of theobject they’re writing about. Remind the students to only choose one object to draw.
5. Next, ask the students to work on their poem about where they like to play. The poems can be simple orcomplicated. They can rhyme, but do not have to. They can tell a story.
Questions to help the students begin writing: (write on board)• What is the most important idea you want to share?• Describe what your favorite place to play looks like.• What sounds do you hear?• What textures do you feel?• What colors do you see?• Who do you like to play with?• What objects do you play with? (i.e., basketball, sidewalk chalk, toys, jump rope)• Why do you like to play here?
6. Once the poems are written, have the students start placing their words into or around the shape. Thewords can outline or fill in the shape. Older students can either draw an object, or have the words make upthe shape without an outline. Display examples of shape poems for students to reference. Words do notneed to go on a straight line, they can curve or spiral. Also, poems do not need to be complete sentences.
7. Now that the poems are planned out according to the shapes, have the students recreate their final ver-sion on a new piece of paper. These can be completed in pencil, pens, or markers.
8. Ask for volunteers to share their poems with the rest of the class.
Sources:Sheryl Conkelton. "Levitt, Helen." In Grove Art Online. Oxford Art Online,http://www.oxfordartonline.com/subscriber/article/grove/art/T050750
Wikipedia contributors, "Helen Levitt," Wikipedia, The Free Encyclopedia,http://en.wikipedia.org/w/index.php?title=Helen_Levitt&oldid=507998255
Variations:For older grades, students can create their shape poem in a Word document on the computer.
32
33
34
35
36
37
The Built EnvironmentUtah Museum of Fine Arts • www.umfa.utah.eduLesson Plans for Educators • October 3, 2012
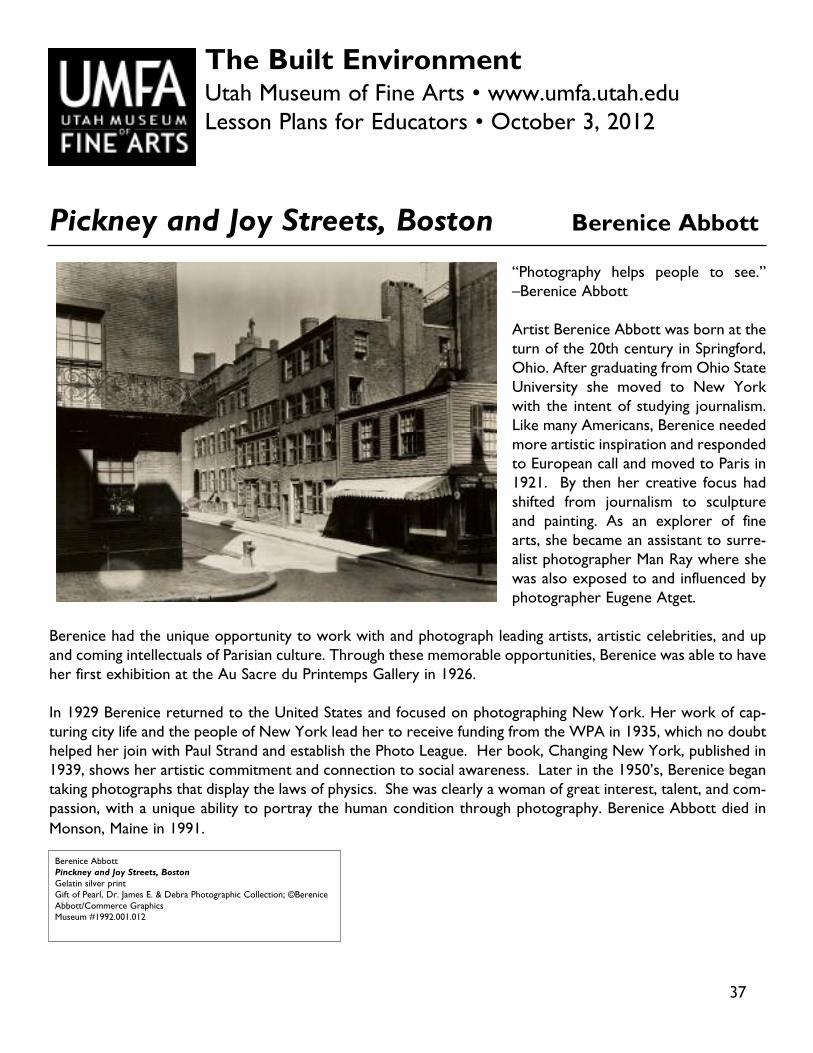
Pickney and Joy Streets, Boston Berenice Abbott
“Photography helps people to see.”–Berenice Abbott
Artist Berenice Abbott was born at theturn of the 20th century in Springford,Ohio. After graduating from Ohio StateUniversity she moved to New Yorkwith the intent of studying journalism.Like many Americans, Berenice neededmore artistic inspiration and respondedto European call and moved to Paris in1921. By then her creative focus hadshifted from journalism to sculptureand painting. As an explorer of finearts, she became an assistant to surre-alist photographer Man Ray where shewas also exposed to and influenced byphotographer Eugene Atget.
Berenice had the unique opportunity to work with and photograph leading artists, artistic celebrities, and upand coming intellectuals of Parisian culture. Through these memorable opportunities, Berenice was able to haveher first exhibition at the Au Sacre du Printemps Gallery in 1926.
In 1929 Berenice returned to the United States and focused on photographing New York. Her work of cap-turing city life and the people of New York lead her to receive funding from the WPA in 1935, which no doubthelped her join with Paul Strand and establish the Photo League. Her book, Changing New York, published in1939, shows her artistic commitment and connection to social awareness. Later in the 1950’s, Berenice begantaking photographs that display the laws of physics. She was clearly a woman of great interest, talent, and com-passion, with a unique ability to portray the human condition through photography. Berenice Abbott died inMonson, Maine in 1991.
Berenice AbbottPinckney and Joy Streets, BostonGelatin silver printGift of Pearl, Dr. James E. & Debra Photographic Collection; ©BereniceAbbott/Commerce GraphicsMuseum #1992.001.012
38
Pickney and Joy Streets, BostonThe Landscape and You
written by Jenny LaFortune
Objectives:Using Berenice Abbott’s piece and story as a catalyst, students will:
1. Be exposed to local historic buildings and locations.2. Construct meaning through the historic sites.3. Analyze how their identity is formed by geography and places around them.4. Produce a significant “map” showcasing an influential building or place in their neighborhood or city.
Duration: approximately 1 ½ hours or two 45 minute class periods. Lesson may be stretched for greatercomplexity and depth.
Grade level: grades 6-12. Lesson may be simplified or advanced depending on grade.
Materials:- Image of Pinckney and Joy Streets, Boston by Berenice Abbott- Other images (optional) by Berenice Abbott- Online gallery found here: http://www.commercegraphics.com/ba_gallery.html- Access to a computer or LCD for classroom discussion and map examples- Handout for walking neighborhood tour and reflection pre-activity (attached)- Students’ photographs from walking tour- Map-making supplies (i.e. rulers, graph paper, cardstock, colored pencils, tracing paper, etc.)
Additional Helpful Resources:- Utah Historic Society website for photographs and extension ideas to be used in lesson: http://history.utah.gov- Images from the book: From Here to There: A Curious Collection from the Hand Drawn Map Associationby Kris Harzinski- Song “The House that Built Me” by Miranda Lambert to set the mood and get students thinking about build-ings with stories
Concepts/Key Terms to Review or Introduce:Cartography- the practice or science of drawing maps.Commentary – personal remarks, interpretation, and or analysisConcrete detail – factual information that is true.Historic- famous or important in history, or potentially so; of or concerning the past.Photojournalism- the art or practice of communicating news, moments, or events by photographs.
1.Getting Started: Begin with a short writing prompt to get students thinking about the geography aroundthem. Question ideas may include: How do the buildings and houses that surround you everyday influence orshape who you are? How are the buildings you grew up with a part of your life? What is the story insidethe four walls of your house? Are there any historic buildings you know of in our city? Why do we try andsave historic buildings in our town? Do you know about any of your ancestors’ old homes or buildings thatwere significant in their lives?
*option: play Miranda Lambert’s song “The House that Built Me” after while sharing responses to reinforcethe idea of “if these walls could talk” and the narrative in buildings around us.
2.Directing the Learning:
a.While sharing some of the students’ responses, incorporate Berenice Abbott’s photograph, Pinckney and JoyStreets, Boston into the discussion while reinforcing the idea of place and its connection to identity.b.Ask students questions about where they think this town may be and what year the photograph was taken.Have them orally brainstorm possible stories for the buildings, or what they may have been at the time thephotograph was taken.c.Use the above as a springboard to introduce the artist, Berenice Abbott and a brief summary of her historyand background.d.As you tie the pieces of their writing prompt together with the class discussion about place, show a fewmore examples from Berenice’s portfolio while reinforcing the importance of visual preservation. Includeexamples and pictures of Utah streets and cities in this conversation (http://history.utah.gov).
3.Activity: Students will be creating their own map of a significant part of their neighborhood or a meaningfulroom or building. There are many options for how maps look (see examples from From Here to There toinspire original ideas in students) as well as how the “cartographer” or student chooses to display their placeof history and meaning in their own life. The final product must include a]. a detailed portrayal of a certainarea, room, or building of personal significance b]. basic identification or concrete detailed labels (i.e.Highland Pharmacy, grandma’s house), as well as c]. commentary or personal identifiers or symbols that signi-fy personal meaning to show identity and connection (i.e. the most peaceful place in Murray, a location ofhorrific memories, etc. ).a.Before students begin their own map, they must go on a 15 minute neighborhood walk as a pre-projectbrainstorm (see attached guide). Assign this as homework a day or two in advance.
b.Once it is completed they will use this to help them decide what area, building, or specific place they willdraw and map.
c.After the above conversations and prompts have taken place, show examples of maps to inspire ideas, origi-nality, and meaning.
d.Students will then be given time to get to work!
e.Once projects are completed, it would be nice to display, or showcase the students’ work.
39
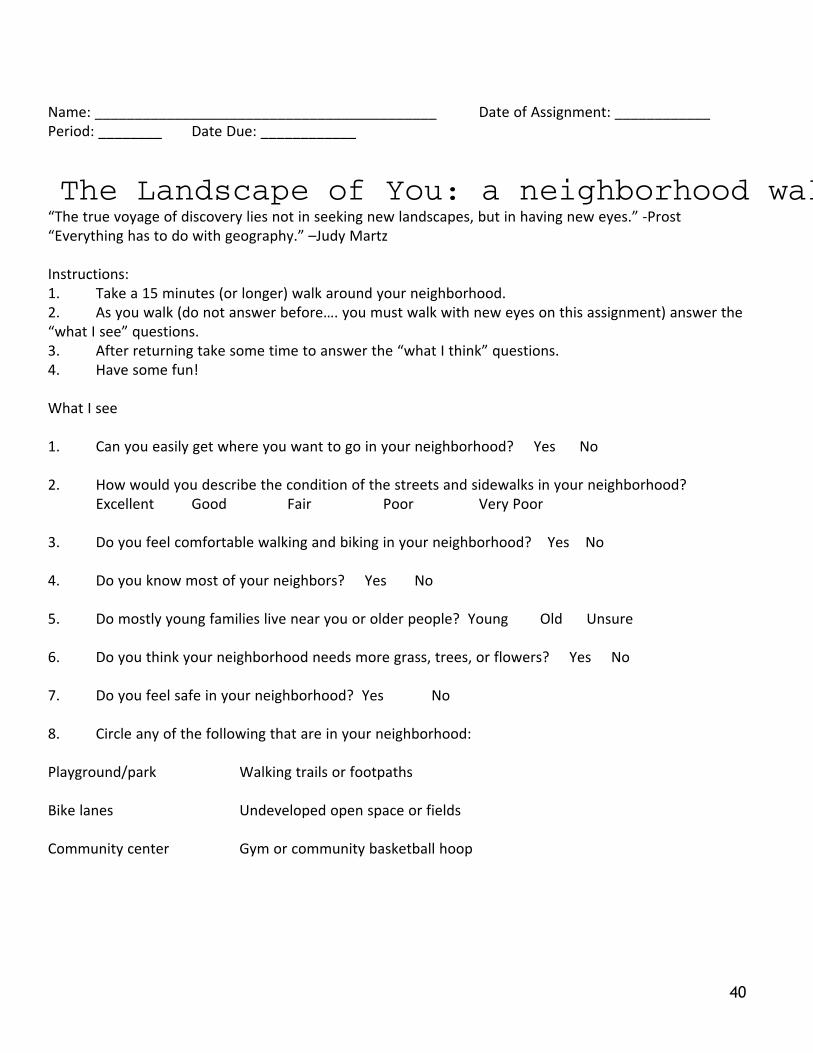
Name: ___________________________________________ Date of Assignment: ____________Period: ________ Date Due: ____________
The Landscape of You: a neighborhood wal“The true voyage of discovery lies not in seeking new landscapes, but in having new eyes.” -Prost“Everything has to do with geography.” –Judy Martz
Instructions:1. Take a 15 minutes (or longer) walk around your neighborhood.2. As you walk (do not answer before…. you must walk with new eyes on this assignment) answer the“what I see” questions.3. After returning take some time to answer the “what I think” questions.4. Have some fun!
What I see
1. Can you easily get where you want to go in your neighborhood? Yes No
2. How would you describe the condition of the streets and sidewalks in your neighborhood?Excellent Good Fair Poor Very Poor
3. Do you feel comfortable walking and biking in your neighborhood? Yes No
4. Do you know most of your neighbors? Yes No
5. Do mostly young families live near you or older people? Young Old Unsure
6. Do you think your neighborhood needs more grass, trees, or flowers? Yes No
7. Do you feel safe in your neighborhood? Yes No
8. Circle any of the following that are in your neighborhood:
Playground/park Walking trails or footpaths
Bike lanes Undeveloped open space or fields
Community center Gym or community basketball hoop
40
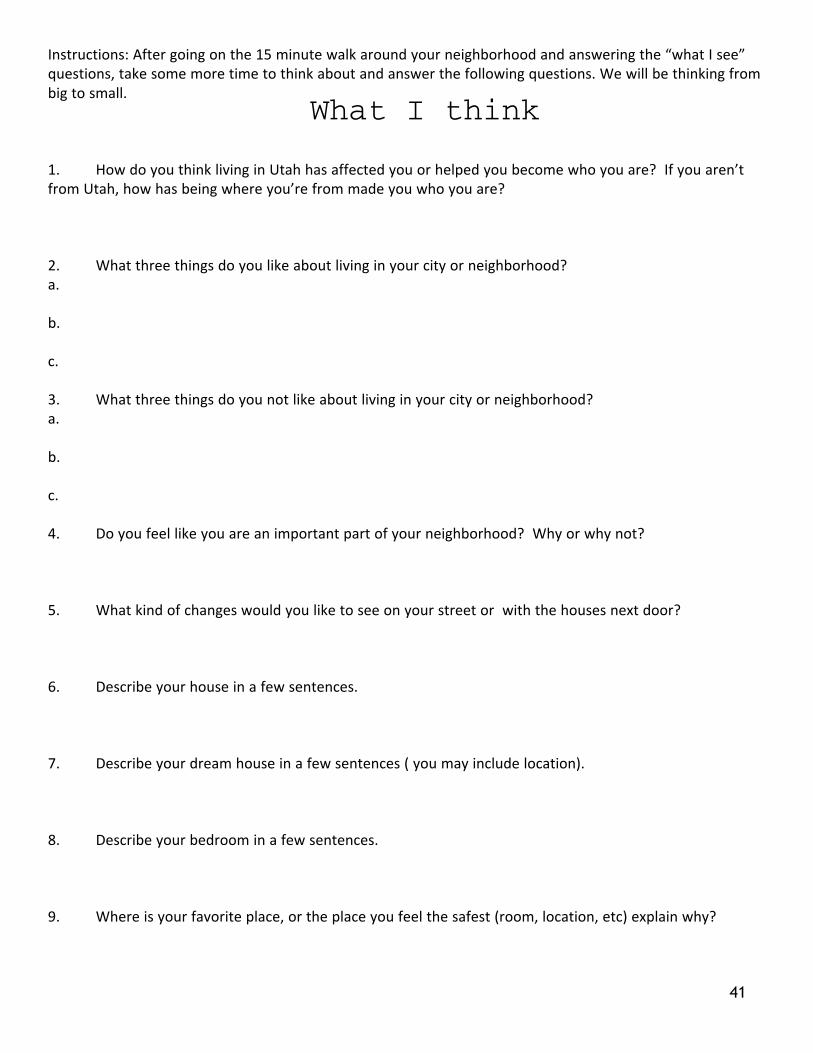
Instructions: After going on the 15 minute walk around your neighborhood and answering the “what I see”questions, take some more time to think about and answer the following questions. We will be thinking frombig to small.
1. How do you think living in Utah has affected you or helped you become who you are? If you aren’tfrom Utah, how has being where you’re from made you who you are?
2. What three things do you like about living in your city or neighborhood?a.
b.
c.
3. What three things do you not like about living in your city or neighborhood?a.
b.
c.
4. Do you feel like you are an important part of your neighborhood? Why or why not?
5. What kind of changes would you like to see on your street or with the houses next door?
6. Describe your house in a few sentences.
7. Describe your dream house in a few sentences ( you may include location).
8. Describe your bedroom in a few sentences.
9. Where is your favorite place, or the place you feel the safest (room, location, etc) explain why?
41
What I think

42
The Built EnvironmentUtah Museum of Fine Arts • www.umfa.utah.eduLesson Plans for Educators • October 3, 2012
Bingham Mine Jonas Lie, American
Jonas Lie was born in 1880 in Norwayto an American mother and Norwegianfather. He is known for his colorfullandscape paintings of New England andNew York, but has also done manysketches and paintings of other coun-tries and states. He was named after anuncle who was a famous Norwegianauthor. At the young age of 12, Jonas’sfather died and Jonas went to go livewith an artist near Oslo for threemonths.
Jonas was exposed to many cultural artsin his youth and his first love was music.He was also exposed and interested to
drawing, which no doubt flourished while living with the artist.
After his brief stay in Oslo he moved in with his namesake and uncle, author Jonas Lie and his family in Paris.He was frequently in the company of great literary, artistic, and musical expatriates of the likes of Grieg andIbsen in his uncle’s home. His uncle, noticing Jonas’ interest and ability in drawing enrolled him in a privateart school in Paris and took him to frequent visits to the Louvre, no doubt nourishing an already blossomingtalent in the arts.
A few years later Jonas’s life changed again when he was reunited with his mother and sisters in New York in1893. He continued to study art and was enrolled in the Ethical Cultural School. After graduation he took ajob as a textile designer to support his mother and sisters, but continued to paint and sketch at night andalso take classes at the National Academy of Design. He quit his job in 1906 and returned to Paris in 1909to paint along the Seine river. He returned back to America a year later and became a prominent figure andoutspoken artist in New York.
Jonas Lie, American, 1917Bingham MineOil paintingPurchased with funds from the Wattis Endowment forModern & Contemporary ArtMuseum #2009.1.1
43
Bingham MineBefore and After: A Timeline of Art andEnvironment
written by Jennie La Fortune
Objectives:Using Jonas Lie’s piece Bingham Mine, students will:1.See the relationship between humans and the environment.2.Interpret nature as art.3.Identify connections of present action and future results.4.Create a natural timeline depicting their view and or opinion of environmental sustainability.
Duration approximately 1 ½ hours or two 45 minute class periods. Lesson may be stretched for greater com-plexity and depth.
Grade level: grades 6-12. Lesson may be simplified or advanced depending on grade.
Materials:- Image of Bingham Mine by Jonas Lie- Lie’s preparatory drawings found here:http://collections.umfa.utah.edu/index.php/Detail/Entity/Show/entity_id/2397- Bingham Mine’s Fun Facts and Resource page found here:http://www.kennecott.com/library/media/TeacherGuide.pdf- Timeline handout for student (template attached)- Objects found outside- Glue (to glue to timeline)
Concepts/Key Terms to Review or Introduce:Environment- the surroundings or conditions in which a person, animal, or plant lives or operates.Environmental sustainability (*for older grades)- the capacity of nature to endure; how biological systemsremain diverse and productive over time.Natural resource- a material source of wealth, such as oil, water, or mineral deposit that occur in a natural stateand has economic value.
1. Getting Started: Draw a simple timeline on the board. Place Lie’s painting at the end with the date 1917below. Print out (prior to lesson) pictures of the preparatory drawings Lie drew while preparing to paintBingham Mine. Pass out and have students place them in the order they believe Lie would have drawn them.While we are not sure (they are all done in 1917), allow this to begin a dialogue about process. Show the pic-tures (on LCD) for greater clarity and point out the different angles of the mine Lie drew (found on UMFAaddress above). Ask why questions. Analyze the painting together as a class. Carry this idea to how differentangles and opinions exist on what to do with our environment and how humans fit into the picture. Also pointout that there are portions of the mine we do not see in the final oil painting that Lie drew in his sketches.Make the connection that there is more to a story or environment that what the human eye sees at the pres-ent moment.
2. Directing the Learning:
a. Ask students for their own stories and memories of Bingham (Kennecott) mine. Many Utah students havegone, or at least heard of it. Use the resource link to share facts and a bit of history of the mine with stu-dents. Be sure to incorporate pros and cons and remain neutral – allowing the facts to speak to the studentsfor them to draw and notice their own conclusions.(http://www.kennecott.com/library/media/TeacherGuide.pdf ).
b. Show pictures of the mine today. Add this to the timeline – extending the line to 2012. Briefly participatein a class discussion (or partners can discuss and then have one idea ready to share with the class) aboutwhat students notice from past to present. Ask for future predictions.
c. Again, revisit pros and cons of mining for natural resources. Extend this to beyond the Bingham mine,reminding students that this occurs in many places. This will prime students’ minds to depict their own workdisplaying their thoughts on how our decisions today affect tomorrow.
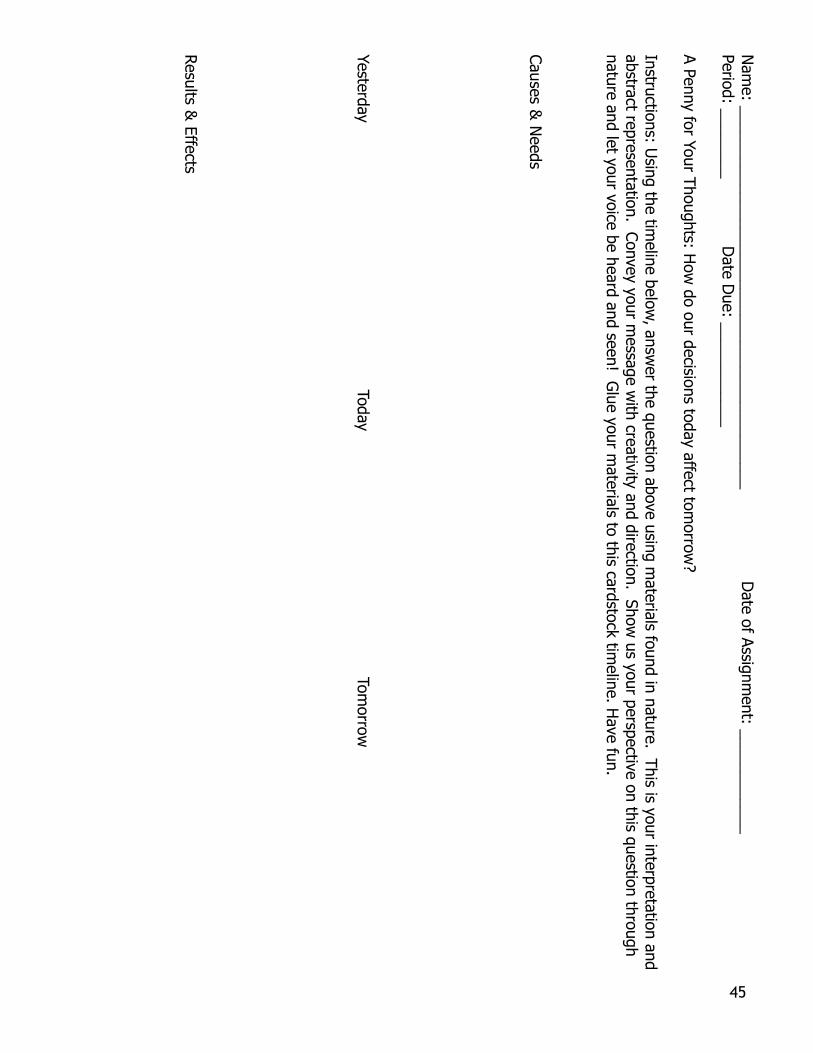
3. Activity: Students will create an art timeline which communicates their answer to the question: how doour decisions today affect tomorrow? The timeline will be abstract and use materials found outside (i.e.,leaves, sticks, flowers, small rocks, litter, found objects left in nature, etc.) to convey their feelings andanswers on this topic.
a. Pass out timeline template to students after class introduction, analysis and discussion.b. Explain the purpose and give general directions. They are to gather materials from nature. These can alsoinclude man-made objects if they have been left outside. These objects are to portray and represent theiranswer to the above questions. Given the material discussed earlier using Lie’s work, they should have agood foundation for personal opinion.c. Go for it!d. When students hand their art timeline in have them do a group show and tell. Pick a few to share withthe class, explaining the method and message of their art work.*possible extension: field trip to the Kennecott Copper Bingham Mine
44
45
Name:____________________________________________
Date
ofAssignm
ent:____________
Period:________
Date
Due:
____________
APenny
forYour
Thoughts:How
doour
decisionstoday
affecttom
orrow?
Instructions:Using
thetimeline
below,answ
erthe
questionabove
usingmaterials
foundinnature.
Thisisyour
interpretationand
abstractrepresentation.
Conveyyour
message
withcreativity
anddirection.
Showusyour
perspectiveonthis
questionthrough
natureand
letyour
voicebeheard
andseen!
Glue
yourmaterials
tothis
cardstocktimeline.
Have
fun.
Causes&Needs
YesterdayToday
Tomorrow
Results&Effects