Embed Size (px)
Citation preview

TT 515
.W12
^

lO .*1^^* ^ V* * ' y^ lO- ••!nL'.
>-^ ^^.r% . '.TO^ • ..<.^'''\ '-mm: .*^̂ •v.
i*. A* /^V/k'' '*'«•. ^i* .*^siB»*. t^ ^
'
.:
'. *^o<
•"-•%** >* .••. ** ..-•. **e^ '« . .
*
^'"X •.^'° ^"^'"-^^ °-^*' /\ -IP
^o Vc.^'^ ;'o>V

>°-n^. jp-^*.
*>
.V .
' ^"^ 'o^**rr'**\iO
V *'T:t«' A• ^^'\


^The Secret of
Successful Tailoring
By EDWARD WATKINS
NEW YORK
THE MORSE-BROUGHTON CO.
Publisher! of L'ART DE LA MODE, "The Fashion AuAorily

Copyrighted, 1910
BY
The Morse-Broughton Co.
New York
©CLA265058
10-- 19.0% I

mmPREFACE
HIS little handbook is compiled from
the series of twelve articles on "The
Secret of Successful Tailoring"
which were published monthly in
L'Art de la Mode, concluding in
the April (1910) number. The author, Mr. Ed-
ward Watkins, who was formerly with the Mrs.
Osborn Company, is now recognized as
one of New York's most distinguished tailors
and an authority on the art of tailoring and dress-
making. Mr. Watkins writes from his wide
experience in a way that gives practical informa-
tion of inestimable value to the ambitious tailor
and dressmaker, as well as to the woman whomakes her own clothes. No new ,or essential
point on this interesting subject has been over-
looked, and we believe the chapters present the
clearest, most accurate and most condensed workon the subject ever published.
While the articles were appearing serially in
the magazine, readers of L'Art de la Mode were
encouraged to write personally to Mr. Watkins,
who cheerfully solved for them any puzzling
problems. Many of these questions and their

THE SECRET OF SUCCESSFUL TAILORING
answers have been incorporated in this handbook,
as we believe them to be of general interest to
those who now study the book for the first time.
—
Editor L'Art de la Mode.

CONTENTSCHAPTER PAGE
I. The Choice of Material and Design. 7
11. First Fittings 13
III. Cutting 19
IV. Second Fittings 26
V. Collars, Facings, Sleeves and Lining 34
VI. Skirt Construction and Finishing. . 42
VII. Designing 50
VIII. Lines 61
IX. Waist Linings 67
X. Practical Suggestions to Dress-
makers 74
XL Furs 79
XII. Bookkeeping 85
Questions Answered by Mr. Wat-kins 93


THE SECRET OF SUCCESSFULTAILORING
CHAPTER I.
THE CHOICE OF MATERIAL AND DESIGN
|HEN ordering a suit, the first thing
considered is the material, and to
this subject the present chapter will
be mainly devoted. Impress upon
your customer the importance of
using the best materials when she is considering
a tailored suit.
Here you must depend upon good workman-
ship, the cut, and material to give the desired ef-
fect of smartness.
The average woman thinks a good tailored
suit should wear longer and give more service
than she would expect from three gowns, and if
you remind her that it costs just as much to makeup a poor material as it does a good one, the
chances are that she will not hesitate to pay the
ten or fifteen dollars more you must ask for the
better suit, especially as she and not you will re-
ceive the full merchandise value of the addi-
tional charge.

THE SECRET OF SUCCESSFUL TAILORING
Materials that are obviously cheap are not
worth the attention of the tailor who desires
to turn out first-class work. Avoid every suit-
ing that is not all wool and of the softest kind.
It may be loosely or closely woven. The cheaper
suitings are often made in the best designs and
are most alluring when the difference in price
is considered, but they contain cotton or a poor
quality of wool, and although carefully sponged
and shrunk before cutting they continue to
shrink each time they go under the iron. Muchaltering is the result and you almost lose confi-
dence in your own fitting because of the "queer
puckers" that are so much in evidence and are so
hard to explain.
The next thing to be considered is the purpose
for which your customer intends the suit.
If for town walking, the rough, mannish
woolens, plainly tailored, are considered the best
form. A small amount of braiding, on such a
suit, is not a breach of good taste, and where your
customer's wardrobe is limited and a fancy
tailored suit for afternoon wear is not available
the braided, plain suit may be used on semi-
formal occasions where the strictly tailored suit
would be more or less out of place. For after-
noon wear, the high finished cloths are most de-
sirable.
These later materials lend their glossy sur-
8

THE CHOICE OF MATERIAL AND DESIGN
faces and soft folds most admirably to designs
that are as elaborate and ornate as the customer's
tastes and requirements demand. Of course, if
the suit is elaborate the skirt should be trailing,
but one sees at present a large number of womenwearing very fancy and much ornamented coats
over short skirts. The combination, however, is
not a happy one, according to the writer's way of
thinking.
The design of the contemplated suit should
next receive consideration. Becomingness,
rather than prevailing fashions, should influence
the selection, for no suit or gown that is unbe-
coming can be smart or stylish. Study the in-
dividual requirements of your customer, em-
phasize her good lines and coloring and strive
to conceal those that are not good. If she de-
sires something that you know will not be be-
coming or appropriate, don't hesitate to tell her
so. Obtain her confidence by demonstrating your
ability to make her gowns more becoming than
she has ever had them made before. Guard
against over-elaboration. Simplicity is muchmore effective and you will find it represents the
highest development in the tailoring and dress-
making art.
Here, in the selection of the design, you will
find your greatest opportunity for artistic de-
velopment.
9

THE SECRET OF SUCCESSFUL TAILORING
Remember the mamifacturers can offer the
smartest materials, embroideries and designs, but
they can't offer ''individual" gowns. By this I
mean gowns that are designed for, or adapted to,
a given personality.
That is why your customers pay you more for
your suits and gowns than they would have to
pay for a ready-made garment in the shops, and
if you don't give them more for their money, in
an artistic way, than they get there, you may be
assured that it is only a question of timx when
they will join the ranks of those who buy ready-
to-wear garments.
SPONGING.
The material and design having been selected,
attention should next be directed toward the care-
ful shrinking and sponging of the material, for
if this part of the work is not carefully done
much trouble results later on in the construction.
It usually appeals to one as of minor impor-
tance, but it is not. If the sponging is not prop-
erly done at the beginning, it is more than
likely to cause much trouble, not only to the
tailor, who will have to spend much time mak-
ing alterations made necessary by the goods
shrinking while being pressed in the later stages
of construction, but the customer as well will be
annoyed by her suit losing its shape if she hap-
10

THE CHOICE OF MATERIAL AND DESIGN
pens to wear it on a damp day or be caught in
the rain. The shrinking quahties of all kinds of
goods used in tailor work should positively be
eliminated before the shears are used.
Different materials should be treated accord-
ing to their various needs. Broadcloth should
be shrunk by steam. On a well padded table,
the larger the better, spread two thicknesses of
the cloth and over this lay a thick cotton cloth
that is quite wet. With a rather hot iron, press
this wet cloth, forcing the seam down and
through the broadcloth, and continue this process
until the cotton cloth or sponge rag is nearly
dry. Next remove the sponge rag and with
your iron, which by that time will not be too hot,
press your broadcloth until it is quite dry, and
there will be very Httle "shrink" left.
Cheviots, serges and all worsteds that are
made without a glossy finish should be shrunk
by being rolled on a board w^ith a wet cloth be-
tween the folds.
Unbleached muslin, a yard wide, makes the
best shrinking cloth, because it is wide enough to
extend beyond the edges of the woolen, and all
parts therefore receive an equal amount of
moisture. It should remain rolled in the wet
cloth for about two hours, after which it should
be pressed until it is dry. Use irons that are
only moderately hot, for the shrinking will be
II

THE SECRET OF SUCCESSFUL TAILORING
more complete if the pressing is done slowly. If
broadcloth is sponged this way the glossy finish
is much impaired and the beauty lost. Broad-
cloth does not shrink as much as the average
woolen; the steam process above described is
therefore sufficient, but is not effective enough
for the other suitings. Linens that are intended
for tub suits should be immersed in water and
dried in the open air. Repeat this treatment
two or three times, for linen shrinks more while
it is drying than when it is in the water.
Before it is entirely dry, after wetting it for
the last time, linen should be pressed smooth with
moderately hot irons. The average linen suiting
can remain in water overnight without injury.
While the drying is taking place, care should be
taken not to have too strong a light on the linen,
for the best dyes are sometimes damaged if left
in a very bright light for any length of time.
12

CHAPTER II.
FIRST FITTINGS
HEN taking measures, stand behind
and not in front of your customer.
You will find it much more con-
venient and comfortable than taking
measures from the front. And just
here I cannot refrain from saying a word about
"systems," for I am sure that at present there
must be many tailors and dressmakers who are
not satisfied with the quality of work leaving their
workrooms, and, in an effort to improve their
work, are asking themselves, just as I did a few
years ago, if there is not some system with which
they can cut garments that will not require alter-
ations.
It must always be borne in mind that no mat-
ter how accurate your system, no two materials
stretch or work up the same. If your material
would not "stretch" or "give" any more than
paper, then it would be a mechanical possibility
to draft a perfect-fitting pattern, but mathemat-
ics cannot always make allowances for the dif-
ferent ways different materials stretch and
"work up."
If six coats are cut by one pattern, in various
1.3

THE SECRET OF SUCCESSFUL TAILORING
textures, no two will require the same alterations.
That means that no matter how good your pat-
ern is, there will be a certain amount of fitting
necessary when the garment is tried on.
Let your study therefore be devoted to your
fittings and not to the defects of your "system."
I know one very successful cutter who does
not have a stitch in the coat when it is first fitted.
He cuts the coat by a well-shaped pattern, allow-
ing about one-inch seams, and with the various
pieces on his arm goes down to the customer,
on whom he pins the several parts in about the
position they should go. After these are placed
he pins the seams together. If a seam does not
run in the right slope or direction, it is a small
task to remove a few pins and re-pin the seam
where it should be.
When one-half of the coat is put together in
this manner, his first fitting is completed, and the
other side of the coat is made like the first part,
the canvas or cambric is put in the front of the
coat, the sleeve is basted in, and when it is next
put on the customer there are fewer alterations
necessary than in any garment I ever saw that
had been cut by a pattern drafted by a "system."
The reader may think that the cutter I refer to
is exceptionally expert, and so he is. But he has
not studied nearly as hard as the tailor who has
been trying to draft a perfect-fitting pattern for
14
FIRST FITTINGS
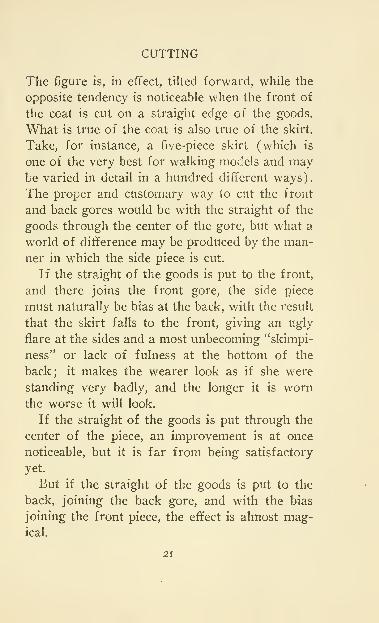
each coat he cuts. If you have a ''system" with
which you can make a well-shaped pattern,
use it by all means, but let the most of your study
be devoted to the actual fittings. The following
method of pattern making and construction,
which is at present employed in my ownestablishment and is the same I used when I was
personally doing the cutting and fitting for more
than half a hundred tailors at the Mrs. Osborn
Co., is undoubtedly the safer and more economi-
cal plan.
The first fitting of a coat should be prepared
in unbleached drilling, which does not stretch
and has about the weight of the average suiting.
Only one-half of the coat is required and it
should be pinned together and not basted.
To cut this drilling fitting, a great number of
measures are not necessary ; in fact none is really
required if you will give your eye a chance to do
the work the average cutter requires of his tape-
line.
A glance will tell you that your customer is
about the size and general build of Mrs. A. or
Mrs. B., whose patterns you have. Better still,
buy a good pattern from some pattern house
which is recognized as an authority on lines and
proportions. Then by this pattern cut your
drilling fitting, making it a little larger or smaller
as you think the case may require. The cutting

THE SECRET OF SUCCESSFUL TAILORING
and pinning together can be done in from five
to ten minutes, and the customer would usually
rather wait this time for a fitting than come
again. In my own establishment we keep a
number of these canvases prepared, in small,
medium and large sizes, so that when a customer
places an order we are instantly prepared to give
the first fitting. This saves a great deal of time
to both customer and tailor.
The drilling should now be fitted just as care-
fully as if you were fitting the coat proper.
Study the lines, improve them every place you
can. Try the seams in different positions if
there is any doubt in your mind as to where
they should be. Look it over and over again
until there is nothing you can improve. Study
to emphasize your customer's best lines and to
cleverly conceal any that are not so good. Markthe size, shape and length of the lapels and fit a
canvas or crinoline back collar if there is to be
one. Fit a drilling sleeve, getting the proper
length and width; in fact, get every line and de-
tail, at this drilling fitting, that you possibly can,
for it will save much time later and we all knowthat time is money.
Next carefully mark with colored chalk the
position of every pin; the waist line, which you
have indicated while the pattern was on the cus-
tomer ; cross marks at the shoulder seam to show
i6

FIRST FITTINGS
the exact place that the front joins the back;
and the length of the coat.
In taking the pattern to pieces, remove the
pins from the shoulder seam first. Spread the
pattern out so that the armhole lies flat on the
table. While in this position, mark the armhole,
the size of which you indicated at the fitting.
After this remove all pins from the drilling
and press the pieces flat. Lay one piece at a
time on a press board, the cloth surface of which
prevents slipping as would be the case if you at-
tempted to work on a smooth table, and with
colored tailor's chalk, the edge of which is
sharpened, draw a line through the row of dots
you made where the pins were.
When this has been done to all the various
parts, the pattern should be trimmed, cutting ex-
actly in the marks you have made so that the
edges of the pattern have no seams allowed.
The above described process will give you a
pattern that no "system" can equal, for the lines
have been taken from the person who is to wear
the garment, and not from a square, chart or tape
line.
You can readily see how naturally you are
making "individual" garments, and as I said in
the last chapter, this is what you must do if you
desire to protect your trade from the temptations
of the manufacturer of ready-to-wear clothes.
17

THE SECRET OF SUCCESSFUL TAILORING
First fittings for skirts should be done in the
same manner that I have described for coats,
only instead of using drilling, cambric, which
costs less, may be employed.
With a little practice, you can hang a cambric,
take up the darts, mark the waist line and get
the length to the floor by simply marking with a
lead pencil, all in less than five minutes and the
alterations necessary when the skirt is tried on
should be very trifling. Don't try to get the
length of a walking skirt at the first fitting.
When the belt is basted on at the second fitting,
and is not to come off or be disturbed any more,
then the length may be taken in a manner that
will be described in the next chapter.
iS

CHAPTER III.
CUTTING
UTTING is the next logical subject
to discuss, and to this subject the
present chapter is devoted. In lay-
ing the patterns on the cloth or other
material that is to be cut, much care
is required to get each piece on the proper "grain"
of the goods. If the coat is to have all the cus-
tomary seams, the back and underarm pieces
should be cut with the straight of the goods run-
ning through the center, so that each edge is
slightly bias.
The next two pieces, which form the fronts of
the coat, should be cut so that the cross grain of
the material has a decided downward slope, as
indicated in the illustration on page 20. If your
goods is cut on this grain, and is otherwise prop-
erly fitted, the fronts will not fall open when the
coat is unbuttoned.
That is one of the best tests you can make.
How many coats have you ever seen that would
not fall apart when they were unbuttoned?
It can be prevented by cutting as I have
described. But this is not the only advantage
19

THE SECRET OF SUCCESSFUL TAILORING
gained, for you will find, especially in checked or
striped goods, that the lines are vastly improved.
20
CUTTING
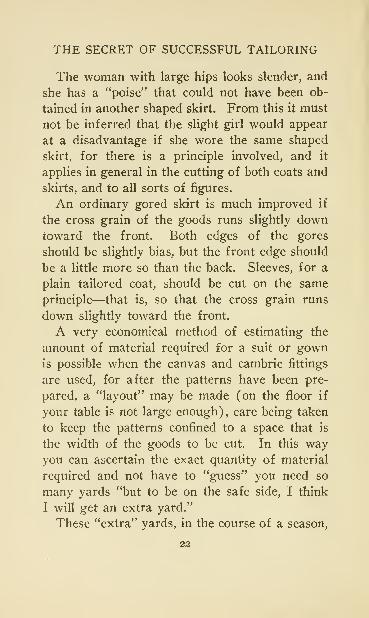
The figure is, in effect, tilted forward, while the
opposite tendency is noticeable when the front of
the coat is cut on a straight edge of the goods.
What is true of the coat is also true of the skirt.
Take, for instance, a five-piece skirt (which is
one of the very best for walking models and maybe varied in detail in a hundred different ways).
The proper and customary way to cut the front
and back gores would be with the straight of the
goods through the center of the gore, but what a
world of difference may be produced by the man-
ner in which the side piece is cut.
If the straight of the goods is put to the front,
and there joins the front gore, the side piece
must naturally be bias at the back, with the result
that the skirt falls to the front, giving an ugly
flare at the sides and a most unbecoming "skimpi-
ness" or lack of fulness at the bottom of the
back; it makes the wearer look as if she were
standing very badly, and the longer it is worn
the worse it will look.
If the straight of the goods is put through the
center of the piece, an improvement is at once
noticeable, but it is far from being satisfactory
yet.
But if the straight of the goods is put to the
back, joining the back gore, and with the bias
joining the front piece, the effect is almost mag-ical.
21
THE SECRET OF SUCCESSFUL TAILORING
The woman with large hips looks slender, and
she has a*
'poise" that could not have been ob-
tained in another shaped skirt. From this it must
not be inferred that the slight girl would appear
at a disadvantage if she wore the same shaped
skirt, for there is a principle involved, and it
applies in general in the cutting of both coats and
skirts, and to all sorts of figures.
An ordinary gored skirt is much improved if
the cross grain of the goods runs slightly downtoward the front. Both edges of the gores
should be slightly bias, but the front edge should
be a little more so than the back. Sleeves, for a
plain tailored coat, should be cut on the same
principle—that is, so that the cross grain runs
down slightly toward the front.
A very economical method of estimating the
amount of material required for a suit or gownis possible when the canvas and cambric fittings
are used, for after the patterns have been pre-
pared, a "layout" may be made (on the floor if
your table is not large enough), care being taken
to keep the patterns confined to a space that is
the width of the goods to be cut. In this wayyou can ascertain the exact quantity of material
required and not have to "guess" you need so
many yards "but to be on the safe side, I think
I will get an extra yard."
These "extra" yards, in the course of a season.

CUTTING
amount to a considerable sum; certainly muchmore than enough to pay for all the cambric and
drilling that you have used in the preliminary
fittings. The garments having been cut, allow-
ing about a three-quarter inch seam, the edges of
the pattern should be carefully marked with
tailor's chalk (and the edges of the chalk should
be kept sharp in order to make a clean, sharp
line), after which the pattern may be removed
from the goods. "Thread marking" is the next
process, which is done by laying the two pieces
flat on the table (I say "two pieces," for, of
course, the material was cut on the double), and
with double basting thread take deep, .clean
stitches directly on the chalk line and about a
quarter of an inch apart. Instead of drawing
the thread tight, each stitch should be left loose,
so that it will make a little arch about a quarter
of an inch high.
After this, the edges of the two pieces should
be most carefully pulled apart as far as the loose
stitches will permit ; then, with your shears lying
between the two layers of material, cut the
threads in the middle. These ends are then
trimmed off, close to the goods, and the garment
is ready to be put together, for, of course, the
object of "thread marking" is to get an exact
duplicate of the lines of the pattern on both
pieces of material. Another method, somewhat

THE SECRET OF SUCCESSFUL TAILORING
quicker, but not at all in favor with first-class
tailors, is to turn the pattern over and mark the
second piece with chalk just as the first piece was
marked.
The coat is then put together by the chalk
marks instead of the thread marks. Personally,
I think this way all right where the lines are long
and loose as they would be in an evening wrap,
but for accuracy the thread marking is the most
reliable.
When basting a coat together, start at the
waist line and baste down. Then come back to
the waist line and baste up. When stitching, sew
down one seam and up the next. That is, one
seam should be stitched down and the corre-
sponding seam on the opposite side of the coat
should be stitched up, the object being to prevent
the possibility of a twist in the coat, which you
will be glad to avoid if it has ever been your
misfortune to encounter such trouble. After the
stitching is done, remove the basting threads and
press the seams open.
If it is desired to keep the coat very soft, use
cambric instead of canvas for the fronts of the
coat. In either case, cut the cambric or canvas
on the same grain of the goods as the outside
part is cut, or a trifle more bias is sometimes
desirable.
This cambric or canvas should be searned up
24

CUTTING
separately from the outside, the seams pressed
open, after which it is ready to baste in the out-
side part of the coat.
When this is done, the coat is ready for a fit-
ting. Exactly the same processes I have de-
scribed for coats should be followed in the mak-ing of a tailored skirt. Very few walking skirts
have any lining; sometimes a silk drop skirt, en-
tirely separate from the outside, is made to go
with the suit, while some of the recent importa-
tions show a lining made in the skirt. In this
latter case, the outside part of the skirt is seamed
up entirely separate from the lining, after which
the lining is fitted in and felled just as you would
put in the coat lining.
This sort of lining in a skirt is highly desirable
when the skirt is a plain or gored one, but it does
not give such satisfaction when the skirt has
plaits, for the lining would prevent the plaits
from lying in close, sharp folds if i]t was put in
every plait. While the skirts intended for walk-
ing purposes have been very plain for the past
season or two, the newer models show a decided
tendency toward plaits.
25

CHAPTER IV.
SECOND FITTINGS.
HEN the coat is tried on the cus-
tomer for the second time, the front
edge should be turned in and basted
;
the bottom should be turned up and
basted ; all seams, except the under-
arm and shoulder, should be stitched ; a bias piece
of thin, loosely woven, French canvas should be
in readiness for the collar fitting; the seams of
the sleeves should be stitched, gathered at the
top, and properly turned up at the bottom, but
not basted in the coat, and you should have a
feeling, born of the painstaking effect you
should have put in the former fitting, that there
will be very little alteration required.
Having put the coat on the customer, allow the
fronts to lap in a comfortable and easy manner,
and pin them in this position. The material of the
coat, being usually of a looser weave than the
cambric or drilling pattern which you fitted,
stretches a small amount, and the fronts of the
coat, consequently, may not lie as close to the
figure as they should. If such is the case, open
the shoulder seam and move the front of the
26

SECOND FITTINGS
coat closely to the figure, after which pin your
shoulder seams together. It is well to fit both
shoulders at this fitting, care being taken that
the two fronts join the back of the coat at the
shoulder seam in relatively the same position,
for the shoulders of the average person are
slightly different. One shoulder may be higher
than the other, or the shoulder joint may be
placed farther front on one side of the body
than on the other, but in either case it is best to
fit both shoulders in order to have the coat drop
squarely from the shoulders or "balance"
properly, as many tailors refer to the matter.
If your customer has very sloping shoulders,
or is round-shouldered or stooped, do not at-
tempt to fit the coat too closely around the arm.-
hole, but rather leave it loose, and build it out
with several layers of cotton wadding basted to-
gether. This pad is to be sewn in the coat before
the lining goes in.
This will greatly improve the appearance of
the shoulders, making them look less sloping,
and the person with the round back is made to
look more erect.
The same principle holds good in fitting the
front of the coat. If your customer is hollow
in front of the arm, instead of fitting the coat
closely, leave it a bit loose, so that the line from
the shoulder to the bust is straight.
27

THE SECRET OF SUCCESSFUL TAILORING
Then if there is too much fulness, build it up
with wadding. It is often desirable whenplanning for wadding to experiment a little in
an endeavor to ascertain what the finished ef-
fect will be, and a bit of crumpled tissue paper
placed inside the coat where the wadding is to
be used, will show both the customer and the
fitter what result the padding will produce. The
armhole of the coat should receive your most
careful attention. It should be just as small as
the customer can comfortably wear it, especially
when the sleeve is to be small, for you cannot
make a small sleeve look well if the armhole is
too large.
A small armhole also gives greater freedom
of the arm, for it is obvious that if the armhole
is cut out too much, the sleeve will drag the
coat upward when the arm is raised. The coat
should be a little higher at the back of the arm-
hole than it is in the front, and keeping the coat
high in the back will greatly assist you in fitting
a sleeve that will permit the wearer to bend her
arm and move forward her elbow without an un-
comfortable drag in the back where the sleeve
joins the coat.
The "gentleman's" collar, regarded by the
average tailor and dressmaker as the most
difficult part of the coat to make, is very easily

SECOND FITTINGS
put together and fitted, if a few principles
governing its shaping are understood.
Start with a piece of thin canvas about five
inches wide and nine inches long, cut on a true
bias, as indicated in Fig. i.
FIG. I
FI&.2
(Right here I think it well to tell you that
every coat should have an individual collar pat-
tern fitted to it. Many tailors and dressmakers
try to use the same pattern on different coats,
and that is the beginning of many of their
troubles with back collars. After you have fitted
a few collar patterns, according to the directions
here given, you will find that the making and
fitting of the entire pattern will not consume
more than two or three minutes.)
Next fold your canvas on a line that runs
like the dotted line C C, Fig. i. The edge A is
to become the under or standing part of the
29

THE SECRET OF SUCCESSFUL TAILORING
collar, while B is the turnover part. Stretch
the edges A and B all that the canvas will per-
mit. Your canvas will then look like the draw-
ing in Fig. 2. Next, starting at the center of
the back, pin the canvas to the neck line of the
coat as indicated in Fig. 3.
FIG 3 FIG. ^
The folded line of the canvas should run
downward, so that if it were continued it would
form the line on which the lapel of your coat
turns over. Having pinned the canvas to the
coat as indicated in Fig. 3, turn the collar and
lapei over as shown in Fig. 4. If the collar
seems too tight, turn it up again and raise or
lower the forward part of the canvas (D in
Fig. 3) as the case may require. After you
have found the place it fits best, mark, with a
piece of tailor's chalk or pencil, the line E E,
Fig. 4, or any other desired shape. The line
30

SECOND FITTINGS
F F, Fig. 4, is the surplus goods which is to be
cut away, leaving sufficient quantity for seam.
Mark the center of the back of the collar,
being careful to have the line straight up and
down. It is this seam that largely affects the
set of the collar at the back of the neck, making
it lie close to the neck or otherwise.
Next, trim your canvas in the line E, after
which the edge may be stretched a little more.
The pattern should now fit perfectly, and if you
will follow this method, making a pattern for
each coat, and fitting it on the customer, I think I
can assure you that in the future you will take
pleasure in this part of your coat construction
instead of regarding it with dread. After the
fitting, and before the canvas is removed from
the coat, carefully outline where the edge of
the collar pattern joins the coat, so that after
you have made the collar it can be attached to
the coat in the same position the pattern held.
The canvas you have fitted is the pattern only,
and is not to be used in the collar proper. Pre-
pare this collar proper by cutting two pieces of
canvas exactly the shape and grain of your pat-
tern, joining the two with a seam in the center
of the back; likewise cut two pieces of the coat
material, on the same grain of the goods, join
them with a seam in the back, after which baste
the canvas and material together.
31
THE SECRET OF SUCCESSFUL TAILORING
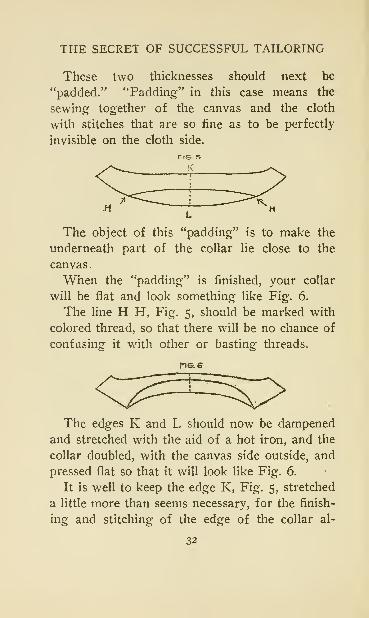
These two thicknesses should next be
"padded." "Padding" in this case means the
sewing together of the canvas and the cloth
with stitches that are so fine as to be perfectly
invisible on the cloth side.
L
The object of this "padding" is to make the
underneath part of the collar lie close to the
canvas.
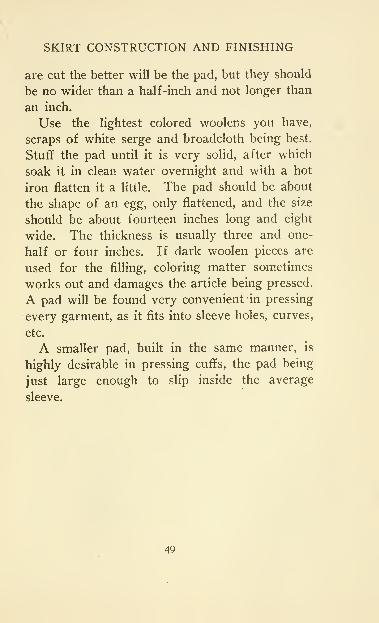
When the "padding" is finished, your collar
will be flat and look something Hke Fig. 6.
The line H H, Fig. 5, should be marked with
colored thread, so that there will be no chance of
confusing it with other or basting threads.
The edges K and L should now be dampened
and stretched with the aid of a hot iron, and the
collar doubled, with the canvas side outside, and
pressed flat so that it will look like Fig. 6.
It is well to keep the edge K, Fig. 5, stretched
a little more than seems necessary, for the finish-
ing and stitching of the edge of the collar al-
32

SECOND FITTINGS
ways draws in the edge some, and if this is not
allowed for, the outer edge of the collar will
be too tight when finished, producing an uncom-
fortable draw on the customer's neck and un-
sightly wrinkles.
In sewing the collar to the coat, the seam
should be pressed open. The coat is often per-
mitted to run up under the collar, but this is
not correct, for when the collar facing has been
attached, there will be a thick ridge where the
collar joins the coat, and it is very apt to be un-
comfortable to the wearer.
Don't think that the lines of the collar pattern
you make must be exactly like those of the
sketches shown with this chapter, for while these
sketches were made from an actual coat in
course of construction, you will find, as I said
before, that each pattern will be a little different.
The subject of the second fittings will be con-
tinued in the next chapter, with illustrations in-
dicating the manner in which the facings and the
top of the back collar are finished.
63

CHAPTER V.
COLLARS, FACINGS, SLEEVES AND LINING
iONTINUING our consideration of
back collars and facings, let us ex-
amine Fig. I (page 35), which
shows a coat turned inside out be-
fore the facings have been placed.
CCC is cambric or canvas as may be desired;
the line DD is a seam in the cambric, which
should be cut by the same pattern used in cutting
the outside or cloth part of the coat. This cam-
bric or canvas should not be seamed up with
the goods. The seam of the goods should be put
directly over that of the cambric and sewn there.
The piece of shaped cambric around the armhole
is most important, as it keeps the armhole from
stretching.
The line BB is where the collar and rever turn
over. Note the manner in which the collar and
rever are "padded," as described in the preced-
ing chapter. The standing part of the collar maybe done on the machine to make it a little more
rigid than hand ''padding."
When the back undercollar has been attached
to the coat, as described in chapter four, the
34

COLLARS, FACINGS, SLEEVES AND LINING
coat is ready for the facings. Before these are
actually put in place, however, a narrow piece of
very thin tape (the selvage from ordinary five-
cent cambric, cut about one-quarter of an inch
Fig. 1
wide, makes a good substitute) is sewn along the
front edge of the coat as shown in Fig. i. Theobject of this tape is to prevent the front edge of
the coat from stretching and getting out of shape
after the garment has had some wear, and it is
35

THE SECRET OF SUCCESSFUL TAILORING
also used to hold in any unnecessary fulness that
may be found on the front edge of the coat over
the fullest part of the bust. Another tape is
sewn on the line on which the rever turns over,
and a little fulness may also be held in by this
tape if the coat does not lie close enough to the
chest, but the better way is to dispose of such
fulness at the fittings so that when you come to
place the tapes you will not have to depend upon
them to remedy the defects of your fittings. The
edges of these tapes should be firmly sewn to the
canvas or cambric (care being taken that the
stitches do not show on the right side of the
coat), after which press and carefully inspect
your work, being sure that all thread knots and
wrinkles are removed so that the facings will
have a smooth surface against which to lie.
The coat facing is next basted to the outside
or top of the coat, with the right side of the
facing next to the right side of the coat. Baste
the edges firmly, so that when the facing is
stitched the different materials will not creep
and pucker under the machine.
The tape in the front of the coat should have
been placed so accurately that the edge may be
followed when stitching, which should be done
from the bottom of the coat to the point A,
Fig. I.
After trimming the edges, press the seam open
36

COLLARS, FACINGS, SLEEVES AND LINING
and turn the facing into its proper position, again
basting the edges firmly before doing the outside
stitching.
Beyond the point A the facing should be
turned in by hand and left basted until the collar
facing has been attached. Good and thorough
basting is one of the things you must depend on
for **that smartly tailored effect" so deserving of
admiration in first-class work and so hard for be-
ginners or indifferent workers to obtain.
I should estimate that the proper basting of an
ordinary coat requires about twenty hours' work,
while the actual machine stitching does not con-
sume more than one hour.
From this ratio you will understand how im-
portant a good workman considers the basting.
The dressmaker who uses a milliner's needle
(which is very long), and takes large, loose
stitches when basting tailored work, must not be
surprised if her customers complain that her fin-
ished coat or skirt does not look as if' it had been
"made by a man."
And when such criticism reaches her ears, she
should not be discouraged into believing that
serious study and honest effort cannot remedy
this defect, for I have often seen coats, madeentirely by women, that were the equal in every
way of the best work done by men. But one
does not hear much about these workers for the
37

THE SECRET OF SUCCESSFUL TAILORING
simple reason that there are always dozens of
permanent positions waiting for the expert
tailoress, or else she speedily builds up a profit-
able business of her own.
Fig. 2
If, however, she discards her long needle for
a short one (they are called ''betweens" or tail-
or's needles), with which she can take deep,
firm stitches, close together, she will find that
the goods is held so firmly while the machine
38

COLLARS, FACINGS, SLEEVES AND LINING
stitching is being done that the improvement will
be noticeable to even an untrained eye, and she
will have left behind one of the earmarks of the
dressmaker's coat.
Therefore, dont slight your basting.
The facing should be ample in width so that
when the coat is worn open the lining is well
back from the front and shows only when the
coat is out of its proper position. The inside
edge of the facing should be caught to the cam-
bric or canvas.
The collar facing is next cut by the same pat-
tern that was used in preparing the undercollar.
The edges should be stretched in the same man-
ner, after which it is basted to the undier part of
the collar, the seam stitched, pressed open and
turned into its proper position just as the coat
facings were turned. When stitching the edge
of the collar, keep it stretched as it passes under
the machine, otherwise it is likely to be drawn in
and the shape ruined. Where the collar facing
meets the coat facing (S, Fig. 2) the edge of
each should be turned under and the two blind-
stitched together.
To properly put together a coat sleeve proceed
as follows : the front part of the top sleeve
piece should be stretched along its entire length
so that when it is stitched to the under part the
sleeve will lie flat on the table with the seam
39

THE SECRET OF SUCCESSFUL TAILORING
about three-quarters of an inch from the front
edge of the sleeve.
The object is, of course, to make the seam less
visible when the sleeve is on the arm. When the
back seam is properly put together, the sleeve
will lie flat on the table, and before the stitching
is done the sleeve should be put to this test. In
cutting the sleeve, keep the back part of the
under piece very high, for this will prevent that
uncomfortable drag so often found in women's
coats when the arm is moved forward. As I
cautioned in a former chapter, keep the body
part of the coat, to which the back of the sleeve
is sewn, very high also.
The bottom of the sleeve is finished by turning
it over a piece of bias cambric, which is first
blind-stitched to the sleeve proper.
If the top part of the sleeve has more fulness
than can be shrunk out, gathers are to be pre-
ferred rather than plaits. If you desire to put
the sleeve in without fulness, after the manner
in which a man's coat sleeve is placed, gather the
top slightly and press the fulness out ; then draw
the gathering thread a little tighter and again
press out the fulness, continuing this process
until the sleeve has the proper roundness at the
top.
After this kind of a sleeve has been stitched
in the coat, the seam should be pressed open and
40

COLLARS, FACINGS, SLEEVES AND LINING
a little wadding placed under the seam. Do not
attempt these plain sleeves unless the coat is cut
amply wide on the shoulders, and, being wide,
the wadding is necessary to keep the shoulder
from having a drooped effect that is most un-
desirable in a tailored coat. Loose woven ma-
terials lend themselves better to plain sleeves
than tighter weaves, such as broadcloths, etc. In
this latter material it is very hard to make a per-
fectly plain sleeve, and fine gathers are safer and
better looking. The coat lining should be basted
in one piece at a time, holding it a little full both
crossways and' up and down. Another method
is to stitch two or three seams in the back, tack-
ing them to the seams of the coat; stitch and
tack the dart seams in like manner, which will
leave only the underarm piece to be felled in by
hand. This is a little quicker than felling the
entire lining, and the results are just as satis-
factory, but more skill is required to do it prop-
erly.
In either case, the seams of the lining should
be tacked to those of the coat. Don't overlook
the value of lead weights, which should be cov-
ered with cambric, and sewn in the bottom of
the coat, as far down as will permit them being
covered by the lining.
These weights are also used to advantage in
all kinds of linen or silk coats that are unlined.

CHAPTER VI.
SKIRT CONSTRUCTION AND FINISHING
|0 obtain best results from the fol-
lowing suggestions on skirt con-
struction, it will be to the reader's
advantage to refer to Chapter 2,
where first or cambric skirt fittings
were given consideration, and to Chapter 3, in
which the proper grain on which to cut the ma-
terial was discussed.
Do not attempt to turn up the bottom of the
skirt evenly until the band is pinned or basted
where it is to remain, or, in fact, as long as there
is any fitting or changes to be made on the upper
part of the skirt. When the top part is in a sat-
isfactory condition (which should be at the sec-
ond fitting) and no further changes are to be
made that will in any way affect the bottom of
the skirt, the following method will insure you
a skirt that is perfectly even around the bottom
(providing you skillfully follow these directions),
regardless of any difference there may be in the
size of your customer's hips.
First make sure that the band is pinned to the
proper tightness and then request your customer
42

SKIRT CONSTRUCTION AND FINISHING
to stand with heels together, and insist that she
maintain this position during the entire time you
are taking the length, for if the feet are ever so
little distance apart, more weight will uncon-
sciously be placed upon one foot than the other,
and as every movement of the body affects the
length of the skirt, the result will be a very un-
even line around the bottom. The customer
should maintain her natural position in standing.
Next, with the aid of a small box, card or
block, which should rest on the floor (the block
is the better on account of its weight), put a row
of pins around the bottom of the skirt the height
of the block from the floor. Be sure the block
rests directly under where the skirt will naturally
fall or hang and keep the block about the same
distance from the feet, for it is obvious that the
pins will not be the same distance from the floor
if one is placed when the block is near the feet
and the next when the block is further removed.
It is well to have the skirt roughly basted up at
the bottom before attempting the accurate length,
for if the line is taken when the hem is resting on
the floor, the skirt will not drop or stretch as
much as it does when it swings clear, and if it
drops after the line has been taken, of course
the line becomes inaccurate. The block I have
suggested using in taking the skirt length maybe sawed from a piece of hard wood or cut from
43

THE SECRET OF SUCCESSFUL TAILORING
marble, and should be in size about two inches
thick, three inches wide and four inches long.
A good block may be made by taking a pin
box and filling it with plaster of Paris.
When the plaster has hardened, the pasteboard
may be broken away, leaving a nice block the
size of the box, the inside of which should have
been oiled with salad oil to prevent the plaster
from sticking to the pasteboard. As the block
may be used when lying on any one of its sides,
three different lengths are available. Of course,
it is not necessary to turn the skirt up exactly
in the line of pins. Suppose that after having
taken a line three inches from the floor it is
decided the skirt should be a half-inch longer,
instead of taking a new line you would simply
measure down a half-inch from each pin and
your line would not be affected in the least de-
gree, and measuring up from the pins is just as
simple if the skirt is desired shorter than the pins.
I have tried most of the patent devices now
on the market that are made for taking an even
length on the skirt, but none has given me such
satisfaction as the simple method I have de-
scribed. Of course, the above suggestions apply
to walking-length skirts.
The length of long skirts is obtained by putting
the fitted lining on a form, over which the
outside is draped and the length turned up to the

SKIRT CONSTRUCTION AND FINISHING
length of the Hning. If the skirt is not to have a
Hning, it is cut, fitted and finished just as you
would fit a lining.
POCKETS
In the making of a flap pocket, the flap is first
made, lined and finished on all sides except
the one that is to be attached to the garment,
which is left raw edge. With the garment on a
figure, pin the flap in the position that seems best.
The garment should be on a figure or on your
45

THE SECRET OF SUCCESSFUL TAILORING
customer when the position of the pocket is
decided upon, for this precaution will prevent
poorly placed pockets and requires very little
time to accomplish. A very good way is to pin
the flaps in position at the fitting, so that the
customer may help decide. This may seem like
a ''detail" that is beneath being called to the
attention of the customer, but remember people
have their clothes made to order because they
are particular about ''details" and confidence is
46

SKIRT CONSTRUCTION AND FINISHING
inspired by your close attention to "details."
Having pinned the flap in position, the line AAis marked with thread or chalk before the flap
is removed, as shown in Fig. i.
In Fig. 2 the flap is shown basted on the line
AA upside down. After stitching the flap to
the coat on the line AA, the pocket hole BB is
cut close to the stitching and the flap turned
down in its proper position, the seam being al-
lowed to turn upward, in which position it is
basted. The back of the pocket proper is nowbasted so that when the top of the flap is stitched
on the outside the pocket lining will also be held.
A piece of the material, on the same grain of
the goods as the front, is now stitched on the
lower edge of the cut BB and turned into the
pocket opening, enough of the piece being al-
lowed to extend upward to fill in the space that
has been caused by the turning away of the two
seams. The front part of the pocket lining is
now basted in position and a line of stitching
running parallel with, and a little below the line
BB, secures the pocket lining and makes the edge
of the pocket firm at the same time. The two
pieces of pocket lining are now sewn together,
forming the pocket.
A firm tack, about a quarter of an inch long,
is placed at either end of the pocket slit to pre-
vent tearing. A close study of the pockets in a
47

THE SECRET OF SUCCESSFUL TAILORING
man's coat will undoubtedly be beneficial if there
is any doubt in your mind as to how any detail
is worked out.
FINISHING
Linen and unlined silk coats may be beauti-
fully finished by turning the seams to the out-
side, where each raw edge is turned over under
itself, forming a narrow straplike trimming.
When both edges of a seam have been thus
turned and stitched, the seam appears to have
been strapped and stitched three times, but, of
course, what appears to be the center line of
stitching is in reality the seam. The inside of the
coat is perfectly free from bound seams or other
finishing, and presents the appearance of a
beautifully lined coat.
The bottom of the coat may be turned up and
finished in the same manner. Where the coat is
so treated, the skirt should be built in the samemanner, and if you have never tried finishing
seams in this manner you will admire the clean,
neat appearance your work presents when this
method is employed.
Skirt braids should be shrunk before using.
The best press cushion is made by cutting upclean woolen rags and stuffing them into a bag
made of drilling or canvas. The finer the pieces
48
SKIRT CONSTRUCTION AND FINISHING
are cut the better will be the pad, but they should
be no wider than a half-inch and not longer than
an inch.
Use the lightest colored woolens you have,
scraps of white serge and broadcloth being best.
Stuff the pad until it is very solid, after which
soak it in clean water overnight and with a hot
iron flatten it a little. The pad should be about
the shape of an egg, only flattened, and the size
should be about fourteen inches long and eight
wide. The thickness is usually three and one-
half or four inches. If dark woolen pieces are
used for the filling, coloring matter sometimes
works out and damages the article being pressed.
A pad will be found very convenient "in pressing
every garment, as it fits into sleeve holes, curves,
etc.
A smaller pad, built in the same manner, is
highly desirable in pressing cuflfs, the pad being
just large enough to slip inside the average
sleeve.
49

CHAPTER VII.
DESIGNING.
AVE you ever asked why the French
excel all other nations in designing?
Of course you have; but have you
ever had a satisfactory answer? It
is doubtful. We may tell each other
that a long experience and a natural talent for the
work have placed the French in the lead; that
they have excelled so long that the balance of
the world is now prejudiced in their favor, but
that line of reasoning is not entirely satisfactory,
even if it is quite true as far as it goes, for weall know that opportunity and talent are not all
that is required to make a success—it takes ef-
fort and study in addition.
But, you say, there are no models going into
Paris, so what do they study? Before consider-
ing further, let us realize one or two important
facts: First, that human beings do not create;
that is left to a higher power. Second, that in
our best efforts we only adopt or adapt. If you
copy, you are adopting. If you take an idea and
change it to suit your requirements, you are
adapting.
SO

DESIGNING
A beautiful gown is often referred to as a
''creation," and, while it is a pretty and compli-
mentary term, it is unmerited and apt to be mis-
leading to the lay mind. The gown in reality is
only a clever adaptation of ideas that were copied
from or inspired by the greatest of all designers.
Nature, and it is her ''models" and art works
that we must study if we desire to surpass in
anything where colors are employed. Color is
Nature's favorite child; form takes second place
in her affections, but a perfect combination of
both are visible in everything produced by her
wonderful creative powers. She blends and har-
monizes her colors with unerring skill and ac-
cording to laws that are as fixed as those of the
solar system. Furthermore, Nature has fur-
nished us not only color laws, but somewhere
in the sky, earth or sea she has given us a con-
crete example of every combination of color that
is possible under those laws. What an unlimited
source of inspiration is open by this thought!
Remember that Nature makes no mistakes in
her color schemes and combinations—they will
all stand the test of strictest investigation.
One of the first of the great Parisian dress-
makers (I have forgotten which) studied sun-
sets the world over and won fame and fortune
from the "daring" combinations he assembled.
He was original in his adaptations, and that is
SI

THE SECRET OF SUCCESSFUL TAILORING
what we should try to be. The original Redfern
confined his studies to flowers and copied their
combinations in his gowns.
Chevreul, who was director of the dye works
of the Gobelins for many years, said that ''color
is music to the eye," and he used the terms
"tones" and "scales" so often in referring to
colors that we still employ them.
Those "Frenchy" effects, which is the way werefer to any unusual and pleasing color scheme
emanating from Paris, are only most careful
copies of Nature. The mole and taupe shades
that have been so much in vogue of recent sea-
sons were inspired not only by the silky fur of
the little animal, but by the lichens that can be
found all over our country on dead and dying
wood, and to relieve the somberness of their
hues, Nature often adds a touch of color that
would be a valuable suggestion to any progres-
sive tailor or dressmaker.
It is said that a piece of moss, beautiful in
color and smooth of surface, so appealed to the
artistic eye of a weaver that he tried to repro-
duce the effect upon his loom—velvet was the
result.
The first spangles were fish scales, and fur-
nished the idea for the hundreds of kinds nowin use. But don't fancy all the suggestions
Nature has to offer have been made use of. A52

DESIGNING
walk through the woods on a summer's day will
show you more color hints than an ordinary
establishment could use in a year. How manyof us grasp the opportunity? Instead, we kneel,
like the slaves that we are, to the whims and
fancies of our Parisian masters. We seek our
inspiration second-hand; from the result of
other people's thought; from the result of other
people's imagination; from the result of other
people's effort.,
It is not in keeping with the progress of other
branches of art and science, for dressmaking is
both. It is conceded that designing gowns is
an art; certainly the construction requires con-
siderable scientific knowledge.
What hope is there for us, as a nation, of
being anything but "copyists" as long as wework in this manner?
The value of Nature's suggestions in form
are hardly surpassed by those of color. Howmany times have you seen the grape used in a
design for dress ornamentation? The daisy,
clover, pine cones, ferns, cherries and Flower of
France are only a few of the many things wefrequently see in outline and form, if not in
color.
Almost any leaf becomes beautiful and full
of suggestions for braiding and stitching de-
signs when examined closely.
53
THE SECRET OF SUCCESSFUL TAILORING
As a matter of fact, when one becomes ac-
customed to being constantly on the lookout for
ideas, hints and suggestions, it is surprising in
what queer places we find them.
For example, my eye was one day attracted
by the design of a parquet floor ; I made a rough
sketch and used it an entire season as a braiding
design. Since then I have often used designs
found on other floors. Ornamental iron work
in the subway stations here in New York has
also contributed to my braiding designs, but
understand, that when such a suggestion is
used and worked over according to your own re-
quirements, there is seldom any resemblance to
the design from which the idea was taken.
Therefore you are not copying, but adapting.
From this remark you are not to understand
that I consider it any crime against professional
ethics to copy anything that is available and
needed, for often it is absolutely necessary.
My only objection to copying is that it de-
prives me of that much practice and experience.
Thinking that perhaps you will say that all
this sounds very well in theory but that you
have your doubts about it working out practi-
cally, I have selected several of the very com-
monest of our national flowers, which I will try
to convince you offer practical and artistic sug-
54


THE SECRET OF SUCCESSFUL TAILORING
gestions that can be employed and developed in
the ordinary workroom.
In Fig. I (see page 55) we have a design sug-
gested by the sumac and adapted to the lines of
that very admirable street suit, which appeared as
a cover design on the September, 1909, issue of
L'Art de la Mode, It was one of the new models,
for it is evident that until we learn to be original
in small things we must continue to depend upon
Paris for the lines on which we build our gowns
and suits.
By way of illustrating my plea for some show
of individuality in every dressmaking establish-
ment throughout the country, let us suppose that
some other gownmaker in your town has and is
making duplicates of the design as shown in
L'Art de la Mode. The suit appeals to you, and
you wish to duplicate it also. But, being pro-
gressive, you do not wish to make anything that
resembles the work of your contemporaries;
therefore you take a suggestion for your decora-
tive scheme from something that Nature offers,
just as I have evolved the suggestion shown in
Fig. I.
You thereby become original in your adap-
tation, your customer is much pleased that she
has a gown different from any other, and you
have given the inventive and artistic tendencies
of your nature something to feed upon. Your
S6

bESlGNlNG
second and succeeding efforts will cause you less
and less effort, and at the same time they will
show improved results. In despair you say, "I
cannot draw." It is not at all necessary; de-
velop your ideas in the workroom with needle
OActual Size
of Disk
and thread, scissors, ^nd \some scraps of the
same material you contemplate using. In de-
sign Fig. I, I would form the leaves and stems of
soutache braid and the flower of small discs of
cloth, cut with a punch that can be purchased in
any good hardware store, and so sewn to the
garment with a couple of stitches in each disc
(permitting the stitches to show or not, as
fancy may indicate) that the edges- overlap just
as the scales of a fish. This sort of trimming
is very effective when done on nets and chiffon,
which can be developed into a most charming
waist or bodice to go with the suit.
Fig. 2, page 58, is a design inspired by the wild
strawberry plant. The body of the waist could
be of chiffon cloth (which is the most ser-
viceable material to wear under a coat), the
leaves may be cut from thin cloth and used raw
57

THE SECRET OF SUCCESSFUL TAILORING
edge, and the stem could be either embroidered
or done with braid. The little buttons are the
fruit of the vine, small strawberries, and add
charm and completeness to the design. In this
case the natural strawberry tint used for the ber-
ries might supply a happy touch of color if it
58

DESIGNING
with the general tone of thewould harmonize
suit or gown.
I once obtained a unique design from the
clover blossom and leaf. The gown was made
of a mauve marquisette with a separate coat of
silk, both of which were ornamented with the
clover design. But it was so easily done that
the apprentice girls were able to do it, and a very
ornate effect was obtained at very little cost.
59

THE SECRET OF SUCCESSFUL TAILORING
Fig. 3 shows how pieces of silk of which the
coat was made were first cut the size of a
quarter. These were basted wherever a blossom
was required, and long stitches of zephyr and
silk, used together, produced a very pretty
flower.
A little padding was used under the piece of
silk to give an elevated or raised effect, and
there was a small difference between the shade
of the zephyr and that of the embroidery silk
used with it.
The stems were made of the zephyr and em-
broidery silk done in outline stitch, and the leaves
were cut from the coat silk, the raw edges of
which were concealed by an outlining of the
zephyr.
Let us aim to be our own designers, appre-
ciating our own thoughts as much as we do those
of others, and by intelligent study turn the work-
room (which we have heretofore regarded as a
sort of prison) into a studio where our ideas are
given expression and where labor transforms it-
self into pleasure. Then you may be sure you
are progressing and helping to free the gown-
makers of this country from their Parisian mas-
ters.
60

CHAPTER VIII.
LINES.
HE artist finds in the lines of a gown
or suit as great a field for the dis-
play of judgment and talent as in
the coloring, ornamentation and
texture of material.
The material and trimming your customer de-
cides upon may limit the available designs, but in
the lines of the gown the maker is unrestricted
and has ample opportunity for the' display of
skill, conception of proportion and the empha-
sizing or concealing of good or bad lines.
No matter how carefully your model and color
scheme are thought out, they will count for noth-
ing when the gown is finished if the lines are not
correct, for the becomingness and individuality
of the gown are absolutely dependent upon the
correctness and quality of the lines.
Another thought that should be constantly
borne in mind is that no gown or suit can possi-
bly be smart or stylish unless it is becoming.
Loose fitting conceals and tightness emphasizes
the good or bad qualities of the lines beneath.
For this reason it is just as important to gown
6i

THE SECRET OF SUCCESSFUL TAILORING
large figures loosely as small ones, but, unfor-
tunately, the average large person does not real-
ize this fact as keenly as the very slight indi-
vidual does. Of course, the treatment of the
two figures is quite different, but the principle
involved is the same, namely, that of concealing
the undesirable lines.
We are all familiar with the distressing sight
of the middle-aged or elderly woman, whose
form is inclined to corpulency, dressed in a gownor coat that is so tight fitting that the abdomen,
large arms, round shoulders and short neck com-
pel attention by their very prominence. The
sight is a sad reflection on the woman's gown-
maker, who should be the one to save her from
such an exhibition of the punishment that time,
carelessness and ignorance have inflicted.
Much of this unsightliness is, of course, due
to improper and poor corsetting, but this fact
does not excuse the gown maker, who is foolish
enough to attempt to build a gown on such a
foundation, for the corset bears the same rela-
tion to the modern gown that the foundation of
a building does to architecture. Insist on your
customer being well corsetted if you have any
hope of your work showing quality. This does
not mean that she must part with a fancy price
for a custom-made corset; many stays of most
excellent shape and workmanship are on the
62

LINES
market, and can be had in innumerable shops
where there is usually an expert to advise the
purchaser as to what particular model will best
adapt itself to her figure and to make any small
changes that may be necessary. The possessor
of any but an extreme sort of figure in this wayobtains stays which have most of the good points
of the high-priced custom-made article, gets them
quicker than if made to measure and at a third
of the cost.
Such corsets are sold at a very reasonable
profit, and are easily within the reach of the
purse of any woman who makes any pretense of
dressing even moderately well. As a matter of
fact, consideration should be given to the stays
before the gown is even thought of, and, if a
diplomatic explanation to your customer of the
necessity for proper stays does not convince her
of the reasonableness of your request, you
should, in justice to yourself and your work, re-
fuse to accept her order. This, quicker than
anything else, will convince her that you know
what you are talking about, and will increase her
confidence in your ability and judgment. She
may plead that she must be comfortable; if so,
assure her that she does not know what comfort
is if she still clings to the old-fashioned stay that
permits, and helps to increase, the size and quan-
tity of the fatty tissues of the abdomen; that
63

^HE SECRET OF SUCCESSFUL TAILORING
destroys all "poise" and "carriage" ; that elevates
the bust to a horrible line which shortens the
length of the neck (in effect, if not in reality),
and which does not possess a single point in its
favor. Happily, this type is growing scarcer as
modern methods of dress are understood, but
they are still seen enough to be a serious reflec-
tion on the intelligence of our gownmakers at
large.
A serious and common error is often made in
lacing the stay too tight, causing the flesh to pro-
trude above or below. This difficulty is easily
overcome by using three lacers, each one lacing
about one-third of the stay. The center lacer is
used to take the greater part of the strain, while
the top and bottom ones are drawn only suffi-
ciently tight to make the stay lie smoothly against
the figure.
A figure that is round-shouldered may be
greatly improved by building out the shoulders
in the back so that the line across the back will
be less curved. This may be done with ruffles in
a waist lining and with padding in a coat, and in
both cases the trimming or ornamentation can be
made to assist. Fitting closely to the waist in
the back should be avoided in such cases, unless
the figure is slight ; the short-waisted or Empire
64

LINES
effects are better, but, of course, it is only directly
in the center of the back that the line is so help-
ful, therefore the short-waisted line need only be
employed there, normal or modish lines being
used elsewhere.
A figure that possesses a large bust and flat
abdomen should be fitted loose below the bust line
in order not to exaggerate the size of the bust.
The ornamentation is often permitted to hang
away from the figure at this point, which makes
the form look smaller beneath.
Large hips seem smaller if the waist is madelarge. This should be accomplished in the fitting
of the stay, but wonders can also be worked into
the gown or suit by fitting loose under the arm.
The best illustration of this argument is to be
seen in the difference the same figure presents
when clothed, respectively, in a tight-fitting coat
and one that is loose.
Hardest of all the abnormal lines to conceal is
the large abdomen. The best remedy available
is first to make sure that the skirt does not poke
out in front at the bottom. This is accomplished,
in a gored skirt, by holding the top of the gore a
little full and likewise each side of the gore over
the fullest part of the abdomen. The fulness
65

THE SECRET OF SUCCESSFUL TAILORING
thus held in should be retained by a thin tape,
which may be sewn in with the seam, and the
shaping is thereby secured indefinitely. Sec-
ondly, the bust should be built out, for the larger
the bust the smaller will appear to be the abdo-
men. Aside from a few good lines that may be
obtained in the ornamenting, this is all that can
be done with such a figure.
But remember, you are not doctoring the evil,
you are only concealing it (or trying to) when
you follow these suggestions. The remedy
should be cured by the corsetier, and it is an
acknowledged fact that it can be cured, even
when the person is well along in years, but it re-
quires time and perseverance and more than one
pair of stays. However, the results possible are
worth the efforts of both the customer and her
gownmaker.
66

CHAPTER IX.
WAIST LININGS.
HE waist lining in general use with
first-class gownmakers consists of
five pieces on each side ; that is, the
entire lining is composed of ten sep-
arate parts. The dart seam extends
to the shoulder, and there is also a seam in the
back that runs to the same place.
It is not at all necessary to have these seams
meet or match at the shoulder ; on the contrary,
there is often a good reason for having them
reach the shoulder at different points, for, unlike
the seams of a coat that are used to divide the
proportions of a figure, and thereby become part
of the ornamentation of the garment, the seams
of a waist lining are always covered, and for that
reason may be placed in any position that will
add to the comfort of the lining and make it fit
better. There is usually a slight depression in
the front of the shoulder between the neck and
shoulder joint, and the dart seam should run up
through the center of this depression, which, of
course, varies in different figures, sometimes
67

THE SECRET OF SUCCESSFUL TAILORING
being close to the neck, and in other figures
nearer the shoulder joint.
In the back the shoulder blade is more or less
prominent in the average figure, and the back
seam should run over the fullest part, conse-
quently it may not meet or match the front seam
at the shoulder.
The underarm piece is employed in this lining,
making two seams under the arm, but in small,
slight figures it may be discarded by cutting both
the front and back pieces a little wider, v/hich,
when joined, give but a single seam under the
arm in place of the customary two.
Keep the armhole as small as possible. This
necessitates having the lining very high under
the arm.
Personally, I consider the armhole by far the
most important part of the lining, for more good
or damage may be accomplished with it than
with any other portion.
Round shoulders may be prevented and also
cured if, when fitting, you wall have your cus-
tomer stand abnormally erect, with shoulders
back and chest expanded.
Be unusually careful to keep the armhole
small, and fit the lining quite tight across the
back. Then, when the finished garment is worn,
it will be found to be uncomfortable if an erect
position of the body is not maintained, and, while
68

WAIST LININGS
some annoyance is likely to be experienced at
first, just as is the case with a new shoe, the body
soon adjusts itself to the condition, greatly to the
benefit of the individual's appearance. This is
not an untried theory. I have put it to practical
test many times, and it has always been success-
ful if the customer was sufficiently interested in
the proceeding to endure the slight annoyance
at first noticeable.
A small, well-fitted armhole also permits of a
sleeve that will give great freedom to the move-
ments of the arm, and, of course, the higher the
garment is fitted under the arm the longer
waisted the person appears. Many people have
an idea that a large armhole means comfort.
Such is not the case when sleeves' of the present
dimensions are in vogue, and this rule applies
not only to waists but to coats as well.
There is no good reason for fitting tight across
the bust and chest, but the average woman looks
and feels better if her bodices are snug across
the back.
Open the linings in the back when it is prac-
ticable, as the yokes and collars may be made to
fit better than when the opening is in the front.
Avoid tafifeta silk for linings when possible, as it
is stifif and not sufficiently porous, is apt to split,
and has other disadvantages. Corsica silk is far
better, but is sold only in black and white. This
69

THE SECRET OF SUCCESSFUL TAILORING
silk is thin, soft and possesses wonderful wearing
qualities.
When I require colored linings I use sapho or
other similar weaves, the softness and pliability
influencing my decision. A safe rule in selecting
linings is to always have them softer than the
outside material. This is most essential in the
present styles, and will remain so as long as soft
materials continue in favor. Financial reasons
compel some gownmakers to use cotton linings.
In such cases the waist lining will stretch less if
the goods is cut on the cross instead of the
length, but the skirt lining is cut on the length.
In the boning of waists, I have found that
Featherbone gives most satisfactory results. It
is an American invention that is not only used
extensively in this country, but has been adopted
by many of the gownmakers on the other side
of the Atlantic.
Where the proportions will permit, chiffon
cloth or a heavy mousseline de soie makes an
admirable waist lining, and, of course, it is made
without boning of any kind. Soft silks are also
used in this same way with satisfactory results,
but the character of the bodice or waist must
determine the availability of such a lining. These
soft linings find their greatest usefulness in the
waist that is used with a tailored suit, for, being
soft, they are more comfortable under a coat
70

WAIST LININGS
than a boned bodice. Sleeves require most care-
ful fitting, especially when they are small in con-
tour. If, in fitting the cambric for your pattern,
the hand is laid on the opposite shoulder and the
elbow elevated to the level of the shoulder, a
splendid position of the arm is obtained for the
fitting, and comfort to the wearer is assured.
With the arm in this position it will be noticed
that great length is required in the back from
the elbow to the shoulder, and the lining should
be so cut.
Even with sufficient length of sleeve to allow
for the extreme position I have suggested, com-
fort is impossible, unless the waist lining is cut
high under the arm. Long, slight arms require
sleeves that are almost straight. Stout or fleshy
arms need sleeves that are more curved ; that is,
there is more bend to the sleeve at the elbow.
The average gownmaker and tailor depend en-
tirely too much on the tape line. Cultivate your
eye so that a glance is better, and means more,
than any number of measures. For instance,
have you ever seen a waist that was "twisted"?
Your tape line will probably show that every
piece is exactly right in proportion, yet the least
trained eye can see that "something" is wrong.
Incidentally, this "twist" may be avoided in both
waists and coats by stitching up one seam and
dozun the next.
71

THE SECRET OF SUCCESSFUL TAILORING
That is, if one underarm seam is stitched up,
the other or corresponding seam on the opposite
side of the garment should be stitched down.
Secure basting also helps in avoiding a
"twisted" garment. In my own establishment
the tape line has very little work to do, for when
an order is taken we do not measure the cus-
tomer with a tape line but with cambric. A num-
ber of waist linings in different sizes, cut from
five cents a yard cambric and only pinned to-
gether, are kept in readiness so that when "meas-
ures" are required, a pattern somewhere near the
size of the customer is put on and fitted, usually
over the bodice the customer is wearing, and the
result is a pattern that has more character and
better proportions than any I have ever seen cut
by systems, charts or other means. This cambric
pattern has the waist line marked, not because we
really need the waist line but just to give us a
guide in putting the real lining together. A line,
one, two or three inches above the real waistline,
would answer the purpose just as well. The
location of each pin is then marked and the pat-
tern taken apart, pressed out flat, and with a
piece of tailor's chalk a line is made through the
row of pin marks, and any slight corrections
necessary are made. After this pattern has been
placed on the lining proper and cut, the lines are
traced and the lining basted together, and any
12

WAIST LININGS
small changes or alterations made at the fitting
are carefully marked on the original cambric pat-
tern, so that they will not be required on the next
lining, for the cambric pattern is preserved for
future use.
L'Art de la Mode Block Waist Patterns
may be obtained in single sizes or in sets.
When the customer calls for the first fitting
the lining is stitched and boned with the excep-
tion of the front and back seams, and at this
fitting, when the customer is in a plain lining,
''test" measures may be taken with the tape if
they seem indispensable.

CHAPTER X.
PRACTICAL SUGGESTIONS TO DRESSMAKERS.
NE-PIECE gowns, which are still
very much in demand, are easily
made by fitting a separate waist and
skirt lining and joining them at the
waist line, after which it is padded
out on the fitting form and the outside draped
over it. The lining with the upper or waist part
and the lower or skirt portion cut all in one, is
harder to handle and more difficult to bring to a
state of perfection, but it is certainly best adapted
to the gown made of very thin materials, and it
can also be advantageously employed where long
loose lines are desired.- The first fitting should
be given in cambric and altered until it is be-
yond criticism. Look carefully to the fulness
of the skirt part, and the manner in which it
falls, keeping the straight of the goods through
the center of each piece, or, to be more exact,
nearly so, for the cross grain should run lightly
downward toward the front. This lining, like
the one made of two pieces, should be padded
out on the form and the draping as nearly fin-
ished as possible before fitting. In padding out
74

PRACTICAL SUGGESTIONS TO DRESSMAKERS
these linings or others, tissue paper is usually
employed, but if it remains in work very long,
the tissue becomes crushed, and the lining con-
sequently loose, which prevents good draping.
Curled hair is a little more expensive at the
start, but can be used repeatedly, and so long
that the initial cost is hardly to be considered.
At the same time it will keep the lining filled
out indefinitely and cannot be crushed or flat-
tened, no matter how much it is handled.
A new undergarment recently designed by a
large French house, for wear under the gowns
that are clinging about the feet, is made of
Milanese silk.
It is cut just like the one-piece lining above
mentioned, but is not boned. It is low in the neck
and has no sleeves, but is charmingly trimmed
about the top with lace, ribbons and embroidery.
The main feature of the garment is the bottom,
which is made of silk fringe, twelve inches
deep, in the same shade as the garment.
The bottom of the fringe falls to about the
length of a short walking skirt, and gives weight
to the garment at the proper place, without
making anything bulky around the feet.
It is worn under gowns that are made without
lining.
Like many other tailors and gown makers,
we have experienced our share of annoyance
75

THE SECRET OF SUCCESSFUL TAILORING
and trouble, caused by the stretching of the
loosely woven woolens, in favor this season. Wehave overcome the difficulty in the skirts by lin-
ing them just as a coat is lined. That is, the
skirt is first made without any lining and fitted
in this condition, and after the lines are satisfac-
tory each gore is spread smoothly on a large
press-board and a gore of silk basted in place.
The lining is attached all around, bottom and all,
and gives a foundation that prevents the outside
part from sagging and becoming ''kneed." Thelining must, of course, be soft, otherwise the
clinging effect will be lost and the skirt will ap-
pear to be lined with hair cloth or canvas.
It should reach to the top of the hem, or in
other words, a few inches of the material are left
at the bottom to take the extra hard wear the
skirt will receive at that point. An ordinary
skirt braid finishes the extreme bottom. This
braid should always be shrunk, and when sew-
ing it on, hold it rather full. For these ex-
tremely loose weaves the gored pattern offers
the best model as the skirt will have less oppor-
tunity to sag than where the pieces are wider.
If plaits are used, the edge of each should be
stitched as close to the edge as possible, which
will help to prevent stretching. Don't be dis-
couraged if either the coat or skirt appear to be
"twisted," for the popular loose weaves are
76
PRACTICAL SUGGESTIONS TO DRESSMAKERS
again responsible, as many of them stretch
more on one bias than they do on the other.
The remedy is to open the seam and let the
edge stretch as much as it seems to require and
then take a new line with your pattern.
Still another way (and a very good one it is)
is to cut out your material roughly, allowing
large seams and fit it to your customer just as
you ordinarily would fit the cambric. Thenmark the position of each pin, take the pins out,
lay each piece down flat and run a chalk line
through the marks where the pins were, laying
the corresponding pieces together and thread
mark them to get the two parts alike. Don't
omit the lead weights in these coats, as they are
most essential.
Also, cut your arm holes unusually small, for
the material is apt to stretch so much that it
(the arm hole) will be so large, the garment will
be ruined, or a great deal of work will be re-
quired to right the defect. Remember, an
ounce of prevention is worth a pound of cure.
At my establishment we often make wide
stitched belts to use with our tailored skirts, but
of course the customer's figure is considered
first. We like the belts as wide as the figure
can becomingly wear them. These belts are
made on two thicknesses of cambric and both it
and the outside goods should be cut bias and
11

THE SECRET OF SUCCESSFUL TAILORING
firmly basted together. Then, before stitching,
stretch both upper and lower edge with the aid
of an iron, so that the center of the belt will rest
against the figure.
Where we make a separate bodice or waist to
go with the tailored suit, an extra girdle of
trimming silk is usually sent home with the
order.
For instance, we recently made a strictly
tailored suit of mauve cheviot that was most
appropriately worn with white linen shirts, and
the wide belt of the same material above re-
ferred to, for morning shopping, etc. Then for
afternoon wear, we made a bodice of net, chif-
fon and satin, all in the same shades of the coat
and skirt and to use with this, there was a
crushed girdle of satin, which had hanging ends,
about eight or nine inches long, around the
edge of which there was a narrow plaiting of
the net with satin edge. This dressy bodice
made the suit available and appropriate for
matinee and semi-formal occasions of the after-
noon, and it is safe to say that the average
American woman can and does get more service
from such a suit than from any other part of
her wardrobe.
78

CHAPTER XL
FURS.
NY ordinarily intelligent gownmakeror tailor can add a considerable
amount to his yearly profits by
altering and remodeling furs.
The experience and knowledge
gained from this class of work soon inspires suffi-
cient confidence to warrant the undertaking of
new orders, and as the average regular furrier
requires much larger profits than the tailor or
gownmaker receives, very attractive estimates
can be offered the customer.
The gownmaker can usually add something in
the way of ornamentation that would not be
found on the furrier's work except in the very
high-priced models that come from' Paris. At-
tractive ornaments and trimming certainly im-
prove most furs and relieve the severeness of
appearance that they otherwise have.
The French models, especially this season,
shovv^ great variety of trimming, and few coats
or mufifs and neckpieces are made entirely of a
single kind of fur. Chiffon the color of fur,
over satin, either in self or contrasting shades,
79

THE SECRET OF SUCCESSFUL TAILORING
seems to be the most effective and popular, and
in shapes there is just as great opportunity for
the display of originality and ingenious ideas as
in any branch of garment making. A clever
muff I saw recently was made like a large en-
velope, only with the ends open to receive the
hands. The flap covered an immense pocket the
size of the entire muff, into which several toilet
articles such as a lady might require during an
afternoon's absence from home were fitted, still
leaving considerable room, which would be most
convenient when one was shopping. Another
imported model was made of strips of Australian
opossum (which is a serviceable gray fur that
greatly resembles chinchilla and is not very ex-
pensive), and between the strips of fur were
puffings of cobalt-blue satin which was covered
with gray chiffon, also puffed. The effect was
most pleasing, and this model would be an ideal
one for the beginner to use, either in new work
or alterations, for the matching of the furs to
make the seams as nearly invisible as possible
(which is perhaps the most difficult part of fur
work) is not necessary, owing to the puffings be-
tween the bands of fur. An old muff of small
size could be cut into bands, and with the aid of
satin and chiffon or other trimming a muff of
fashionable size could be made without the addi-
tion of any fur. Black astrachan is probably
80

FURS
the easiest fur to work with, and at the same
tbie it is the most serviceable.
Skins with long, curly hair can be purchased
for $1.50, and as the hair gets shorter and glossy
the price goes higher, the best being worth about
$8.00 each. As the breed of animal is smaller in
these better class skins, it requires about two of
the $8.00 kind to equal in size one of the $1.50
variety, and they do not wear as well as the
heavier ones. The Australian opossum I men-
tioned is a skin about eight inches wide and
twelve inches long, and about two-thirds of it
can be used. The price per skin runs from
$2.00 to $3.00.
'It is a popular fur and has good wearing quali-
ties, as well as possessing smartness. In my ownestablishment we have used this fur to modernize
handsome astrachan coats, which were made a
season or two ago. In one case that is typical a
three-quarter coat that was made three winters
ago had some of the fulness taken out of the
skirt part and fitted in a little closer to the figure.
The pieces taken from the skirt part were used
to repair such places as needed attention, and a
large rolling collar of the Australian opossum
added. A wide band of this fur was also added
to the bottom of the coat, making it full length.
If you do not care to take the responsibility of
cutting the fur and having it put together in your
81

THE SECRET OF SUCCESSFUL TAILORING
own workrooms, there is another method prev-
alent among good houses here in New York that
has many advantages. It consists of fitting a
canvas to your customer and sending the recti-
fied pattern to a good furrier for the construc-
tion.
It is even advisable to give the canvas a second
fitting, so that a minimum amount of alteration
will be necessary when the fur garment is tried
on. In this way your customer gets the benefit
of your knowledge of her lines, and, with the
addition of braid, embroidery or other trimming,
a very handsome and individual garment leaves
your establishment. The furrier will give you
an estimate of the cost when he sees your canvas,
and can plan just how many pelts will be required
to build the coat or whatever else you may be
making.
In any case, it is safe to say that after paying
the furrier, and making a reasonable charge for
yourself, the garment will cost the customer less
than it could be purchased in the shops, to say
nothing of the greater satisfaction she would
have in the custom-made article.
One customer brought us a beaver muff and
neckpiece that had been discarded on account of
the "queer" old shapes they were cut. At a cost
of $12.00 we added tan chiffon over a lighter
shade of satin, making the two pieces not only
82

FURS
vs^earable but smart, and the customer was de-
lighted to pay us a profit of loo per cent. In
another case we used an old Persian lamb neck-
piece with the best parts of a sealskin coat to
make a good muff and a large collar for a storm
coat. These two furs combine well. We used
the Persian lamb as a band on the outer edge of
the collar and around the ends of the muff; the
rest was of the seal.
Skins or pelts should be moistened on the hide
side and, while damp, stretched and tacked on a
board or wall to dry. The cutting should be
done with a sharp knife from the skin side, so as
not to cut the hair on the opposite side. There-
fore, don't lay the fur on the table when cut-
ting, but rather hold it up. The ^hape should
first be marked on the pelt side with chalk. If
the fur you are working with is old or tender
and will not hold stitches well, the whole fur
may be greatly strengthened and made more ser-
viceable by sewing it to a thin, firm percaline or
cambric, which should also be soft. We recently
handled a very costly ermine lining that had
ceased to be useful on account of its tearing as
fast as it could be mended. We mounted it on a
fine linen lawn, which was ''padded" to the fur
with stitches not more than a quarter of an inch
apart, and I believe it will now stand more hard
wear than it has already given its owner. By
83

THE SECRET OF SUCCESSFUL TAILORING
^'padding" is meant the same stitch that is used
to sew the canvas and material together in the
construction of the under part of a man's collar.
The linen lawn or percaline lining is designed
to take the strain that otherwise would come on
the fur.

CHAPTER XII.
BOOKKEEPING.
N all dressmaking establishments the
problem of ascertaining the exact
cost of each order leaving the work-
rooms is most important both in the
large and the small business, but the
large concern has the advantage over the smaller
one by reason of the greater amount of bookkeep-
ing required, making it necessary to employ ex-
perienced accountants to do the work. In the
small establishment, where there is comparatively
little, the bookkeeping is often undertaken by
someone who has other duties, and this circum-
stance in connection with a lack of training or
understanding of the best methods, often leads to
complications, and "guessing" has to be resorted to.
The writer believes that most of the objections
encountered in ordinary systems have been pro-
vided for and overcome in the one described
herein, which, with minor changes, has given
complete satisfaction in his own establishment
for the past five years. It is adapted to a busi-
ness of any proportion, but where the amount of
orders executed in a season are small, several
85

THE SECRET OF SUCCESSFUL TAILORING
slight changes may be made to simplify the work.
The books required are the Day book, Journal,
Ledger, Order and Cost books in addition to the
Pay-Roil and Individual time books for each em-
^AMJL
!>'
1
\^i^, ^\i^% Wll wl
ploye. In the Order book a memorandum of all
details connected with each order is written and
each is given a number. Each page of the Cost
book is numbered to correspond with the num-
bers in the Order book.
This order number should be written on a tag,
together with the customer's name, and sewn to
86

BOOKKEEPING
the garment, where it remains until the garment
is ready to be deHvered. The tag is for the pur-
pose of identifying the order when the employes
give an account of their time each day, which
they do in the manner shown in the ''Sample of
kWCuwvOxK \ixdiji^\J^Asw^^Jy
DEC 6 1909
DEC 7 1909
t!EC8 1909
3 y
DEC 9 1909
DEC 101909,
^ fifCni909
individual time book." One of these little books
is provided for each person, and if they are sup-
posed to work from eight o'clock in the morn-
ing until six in the evening, allowing an hour for
lunch, the working day is composed of nine
hours' labor, and this amount of time must be
shown in this individual time book if the em-
ploye is to be paid for a full day's work.
This account of time may be kept by each
87

THE SECRET OF SUCCESSFUL TAJLORING
person, but a better way is to let one of the girls
take all the time each day in order that the wri-
ting may all be the same, and therefore less con-
fusing to the bookkeeper than when each per-
son does her own. The number of the order
and the name of the customer are copied from
the tag on each garment that has been worked
on, and the number of hours indicated opposite.
By using two pages, as shown in the sample, the
entire week's work may be seen at a glance, and
the number of hours worked each day may be
quickly copied into the regular time or pay-roll
book, a specimen page of which is also shown.
Let it be understood that no time will be paid
for unless it appears in this little book, for the
hours are also copied into the "Cost Book," which
will be described next. One of the chief ad-
vantages of this system is that the amount of
wages paid out in a given time will equal the
amount of labor charged against orders, a con-
dition that seldom prevails in a gownmaking
establishment.
The ''Cost Book," a sample page of which is
herewith shown, is the only book used that is
different from the regular and conventional man-
ner of accounting. Its simplicity and accuracy
is apparent at a glance, showing, as it does, the
entire cost of materials, the total of the labor
cost and the sum total of both of these.
88

BOOKKEEPING
The number of hours any employe has spent
on the garment is obtainable in a second, and
you have the satisfaction of knowing to the
}m.^^^Sij.-

THE SECRET OF SUCCESSFUL TAILORING
December 6, on order No. 447, which is being
made for Mrs. Miller. Tuesday, the 7th inst,,
shows she worked three hours, and so on. Check
each individual book as the time is entered. OnSaturday she worked an hour overtime, which
Time for Week ending it^iliu\^e,\\ i9o^
is so noted, and in making out the pay-roll she
is paid accordingly, and the time charged against
the order just as the other is, but the letters
O.T. are inserted to indicate that it was over-
time, which explains why more than nine hours,
the regular day's work, has been charged up.
The "day," "journal" and "ledger" are used
in just the same manner as usual, but note on
the specimen of the ledger page how the order
is charged to Mrs. Miller; by simply charging
the number. No. 447, and when Mrs. Miller's
90

BOOKKEEPING
check is received the account balances without
an unnecessary figure.
Every gownmaker has to make some altera-
tions on old work to accommodate her customers,
but she should not have to do it at a financial
loss, and this system will prevent just that sort
of undercharging. In my own establishment, we
have a rule not to give estimates for alterations
;
when they are finished a fair percentage of profit
is added to the workroom cost and a bill ren-
dered for that amount. Often the alterations
cost less than we thought they would, but usually
they cost more, and to guard against loss from
91

THE SECRET OF SUCCESSFUL TAILORING
underestimating we have made the rule above
referred to.
All goods received are first charged to stock,
and from stock they are recharged to the dif-
ferent orders they are to be used on.
We have found that instead of having separate
books for the ''cash" and "stock" accounts, they
may be carried for a season in an ordinary "jour-
nal." We use an entirely new set of books for
each season, and have them of uniform size, so
that we can refer at a moment's notice to any
order we have ever made and obtain at a glance
any information we may desire.
92

QUESTIONS ANSWERED BY MR.WATKINS
Will Mr. Watkins kindly tell me whether or not I
should line the coat of a white mohair or serge suit?
It seems to me that it cannot be lined unless the lining
is to be removed to- clean.
Mohair coats are often made without Hnlng
because they slip on easily, but such is not the
case with serge, which should always be lined.
It would be dangerous to make up without a
lining some of the new very thin mohairs, as
they have not sufficient body in themselves to
stand the strain. Both mohairs and" serges clean
just as well with lining in them as without.
* * *
I wish to know if the silk like enclosed sample should
be shrunk or sponged before making into coat suit, No.
1990. As water spots all silks belonging to the pongee
family, I would like your advice.
Silks do not require sponging or shrinking.
They are apt to spot from rain, but this cannot
be avoided by shrinking them beforehand.
Since writing the chapter containing a descrip-
tion of the proper methods of sponging and
shrinking different materials, I have been asked
why I did not describe the manner in which silks
are sponged. The omission was due entirely
93

THE SECRET OF SUCCESSFUL TAILORING
to the fact that silks are cut as they reach you,
no sponging or shrinking being necessary. In
fact, if you should attempt to do so, you would
take great chances of ruining the fabric.
And don't dampen seams or any other part of
a silk garment when pressing. Place a thin
piece of cambric over the part to be flattened,
and use only a moderately warm iron. This will
sometimes cause a seam to lie flat that would
not do so if the iron was placed next to the silk.
In making a coat, my material had been shrunk. After
putting my canvas in and pressing, it seemed to be all
right until I gave my last pressing, and now that mycoat is practically finished the outside seems to be too
tightly stretched. Is there anything I can do? The idea
of ripping and making my coat over has discouraged
me dreadfully, and I hope you may help me out.
Your material may have been shrunk, but
it is quite evident that it was not shrunk suffi-
ciently. Read the instructions for sponging. If
the shrinking has not made your coat too short-
waisted or otherwise ruined the shape of the
outside, the "tight" effect you describe may be
remedied by cutting the canvas, allowing the
edges to overlap sufficiently to relieve the
"stretch" of the outside material. Take a few
stitches in the overlapping edges of the canvas.
The lesson this experience has taught you is
worth much more to you than the trouble it will
94

QUESTIONS ANSWERED BY MR. WATKINS
require to make the coat right, even if you have
to take it entirely to pieces.
Can you tell me why in pressing a tailor-made coat
the cloth separates from the canvas ; that is, doesn't look
flat as it should. I have basted it closely, dampened
well and pressed until dry, and it leaves marks of bast-
ings and looks as if it had not been well done.
The reason the cloth and canvas do not
lie close together is because either one or both
were not properly shrunk. I imagine the canvas
was put in on the straight of the grain (it should
have been slightly bias) and that it shrank some
when the coat was being pressed. Your press-
ing is probably all right as far as it has been
done, and the marks of bastings and the shine
that results from pressure of the iron mayeasily be removed by first covering the affected
part with a slightly damp cloth and pressing
very lighly with a moderately hot iron, the ob-
ject being to force just enough steam through
the cloth to raise the nap of the cloth.
Should shantung silk be sponged to prevent spotting,
and should it be shrunk in cold water or steam-sponged?
My piece is smooth finish, not a rough pongee.
Also will you tell me what causes small, puckering
wrinkles at a distance of, say, one and one-half inches
above, below and at the waist line, on the seam on
each side of the front and on each side of the back of
95

THE SECRET OF SUCCESSFUL TAILORING
a coat, where there is no center-back seam? This
has been my greatest difficulty in making semi-fitted
coats. Have used several L'Art de la Mode patterns,
and, while they are in every way satisfactory, I have
always had this difficulty. Also, how should I press
these seams; should they be stretched? I have slashed
all the curved places in each case.
Your first question, relative to the shrinking
of silks, is answered in Chapter II.
The wrinkles that have bothered you have
been caused by one of two things. Either the
pieces of your coat have been cut too wide, or
you have been fitting too tight. With a wide,
straight, seamless back, even on a slight figure,
it is obvious that the lines must be left very loose.
If a slightly fitted effect is desired, the coat
must have more pieces, thereby making them
narrow, which will make it possible to give the
coat more shape.
After cutting, and before putting the coat to-
gether, stretch the edges of each piece with the
aid of an iron for a distance of four or five
inches above and below the waist line.
If the material is silk, do not dampen ; if it is
woolen or anything that water will not damage, a
little moisture will aid the pressing.
Will you please tell me in making coat 4954 in Sep-
tember L'Art de la Mode if the front would just be
q6

QUESTIONS ANSWERED BY MR. WATKINS
lined with cambric or canvas? Also if the neck and
armsizes should have any facing of canvas? What kind
of cambric do you mean for facing, common cambric,
5c. per yard ?
Should the coat be lined throughout if made of heavy
zibeline? In basting in a lining, which is the correct
way? To baste the lining onto the goods or have the
goods on the side you do the basting?
The use of cambric makes a lighter, softer
coat, than when canvas is employed, and the
cambric is easier to work than the canvas.
The selection of one in preference to the
other is purely a matter of personal like or dis-
like for ''soft" or ''stiff" work. Some customers
like the one kind, others like the reverse. The
canvas or cambric, whichever is employed, should
go around the arm holes and neck: The cambric
is the ordinary five cent quality and, like canvas,
should be thoroughly shrunk before using. The
coat should not be lined throughout with the
canvas or cambric, no matter what the material.
The silk lining should be basted onto the coat
;
the basting should not be done from the outside.
A small raised press board is very helpful in
basting in the lining.
* * *
I have been reading over your lessons on successful
tailoring and I see that in the third article you say
that the canvas should be seamed up separately from
the outside.
Now does that mean that canvas is sewn up like the
97

THE SECRET OF SUCCESSFUL TAILORING
lining, and then when you put your finishing stitches on
the seams of the coat you stitch right through the can-
vas, or is the canvas just attached by hand after all out-
side stitching is done on the coat? And would you
please tell me whether in light weight goods such as
serge, the canvas should go all through the coat, clear
to the bottom, both back and front, or whether you
would advise using linen tape from the hips down, and
whether in a broadcloth suit you would use the canvas
the same as you described to be used in the shantung
coat at the end of lesson 2?
Would you also give me information on how to makethe pockets without the flap and also the pocket that is
similar to the top left-hand pocket of a man's vest which
is sometimes put on the left-hand side of a woman'scoat.
The stitching should all be done on the
outside material before the canvas is put in.
The latter is seamed separately and then fastened
to the outside part of the seams.
The canvas should never go entirely through
the coat. In Chapter II you will find descrip-
tions and illustrations of the way the canvas and
cambric is used.
The pocket you inquire about is made by
basting the flap upside down onto the coat, after
which it is stitched on what is then the upper
edge. The pocket hole is then cut and the back
of the pocket lining stitched in place.
The flap is next turned up and stitched along
the outside edges, and the front of the lining
98

QUESTIONS ANSWERED BY MR. WATKINS
attached, usually by stitching through the seam
that attaches the flap to the coat.
Lastly, the two pieces of the lining are sewn
together, which makes the pocket.
* * *
I made a coat and find, after finishing it, that it
wrinkles badly at the waistline at the side front. I
have tried taking it in, but that doesn't help. Can you
give me some advice?
A number of different things may cause
the wrinkles in the front of the coat you write
about. The front piece may be held too full
where the wrinkles occur, or it may require
stretching, which necessarily would be indicated
by the wrinkles appearing some distance from
the seam, and there are other things that would
cause the same trouble, but the easiest remedy,
if the defect does not respond to simple treat-
ment, would be to pin the wrinkles up in any
position they will go easiest, then take the fronts
entirely out of your coat, and make a new pat-
tern by the front that has the wrinkles pinned
in. After you have an accurate pattern, remove
the pins from the part that was wrinkled, and
the difference between the new pattern and the
old front will probably show you where your
trouble was.* *
In pressing the seams, how do you prevent the shin-
ing on the right side and how do you remove the same?
99

THE SECRET OF SUCCESSFUL TAILORING
I also have great difBculty in pressing plaits, a streak
on the right side being caused by the edge of plait on
wrong side. How do you prevent this?
What is the best interlining that you can suggest,
something that is light in weight but warm? Is there
anything that is better than crinoline to line a voile coat
with? If so, do you think the coat should be lined
throughout with this? Is a coat interlined with chamois
equal to one lined with fur? I have great difficulty in
obtaining a perfect hanging skirt. I have tried a num-ber of the skirt markers. Is there one that you can
recommend that is inexpensive?
In interlining a coat do you stitch the interlining
in with the seams of the material or do you stitch both
separately?
The gloss on the right side of the gar-
ment, which is noticeable after you have pressed
the seam, may be removed by laying a slightly
damp cloth over the shiny part and touching it
lightly with a moderately warm iron. This proc-
ess may have to be repeated a number of times.
By laying several folds of thick wrapping paper
under each plait while it is being pressed, you
will obviate the streaks you complain of. We are
sending you a sample of the interlining used in
our establishment. It may be purchased in the
better class dry goods shops and costs from sixty
to ninety cents a yard. Do not line your voile
coats with crinoline. A better plan is to stitch
your voile and silk lining together. The seams
may be turned to the outside, pressed open, and
100

QUESTIONS ANSWERED BY MR. WATKINS
covered with braid or other trimming, or they
may be turned to the inside and covered with a
strip of hning silk. This makes a very thin and
light coat. If you will study Chapter VI, I
think you will have little bother in getting an
even line on your skirts in future. A very inex-
spensive skirt marker is described in that article.
When interlining a coat after the seams have been
pressed open, baste the inner lining to the seams
of the coat to hold it in place and have the
edges of the inner lining only meet; for if they
overlap, there will be an unnecessary thickness.
* * *
I suppose 3'our offer to answer perplexing questions
on tailoring is for the home tailor also. Would you
line coat No. 5023 throughout with drilfing (I am using
broadcloth) for extra weight? Also how shall I use
an interlining of light canvas for body part? Whatmay be the reason that with every coat I make there
is always a fold under the back collar? Your answer
will be of great assistance to me.
The drilling you inquire about would only
make your coat heavy without giving any
warmth. Use instead a loosely woven wool inner
lining, that is made especially for the purpose,
and use it only in the sleeves and upper part of
the coat. Canvas should be used only in the
fronts of the coat and around the armholes, as
described in an early chapter. The wrinkle un-
der the back of the collar is caused by improper
lOI

THE SECRET OF SUCCESSFUL TAILORING
shoulder fitting, probably (in a coat that has a
seam in the center of the back it might be caused
by the seam being too curved—that is, not as
nearly straight as it should be), and if you will
only pin the shoulder seams of your next coat
on the outside, so that they can be changed eas-
ily when fitting, you will undoubtedly be able,
with a little experimenting, to ascertain the
cause of the trouble.* * *
Will you kindly tell me if velvet requires an inter-
lining for skirt as well as for coat, and what kind of
interlining should be used? Is there a particular wayto work on velvet?
The velvet, a sample of which you en-
close, should make a very smart Winter costume
if built on simple lines. A drop skirt of soft silk
should be worn, but the velvet skirt must not be
lined solidly like a coat. In cutting velvet, re-
member there is an up and down to it, and that
if you do not cut all your pieces on the same
grain of the goods, your gown, when finished,
will shade in such a way as to appear not to be
all cut from the same piece of velvet. I refer
you to the Editor's article on this subject on page
21 in the January (1910) UArt de la Mode,
which you will find very helpful.* * *
Will you kindly tell me what makes a sleeve pull on
the back seam from the elbow up? It seems too short,
102

QUESTIONS ANSWERED BY MR. WATKINS
and how can it be lengthened? This is one thing that
has baffled me.
The sleeve draws because it is too short
from the elbow to the armhole. If you have
this sort of difficulty you should fit a cambric
sleeve first. This cambric sleeve may be cut
as indicated in the accompanying sketch, and if
you are fitting the right arm have the customer
put the right hand on the left shoulder; and
while the arm is in this position allow the parts
of the sleeve to separate as much as necessary,
then pin the upper and lower portions together
as indicated in sketch.
103

36 91


jy.^i:^^ > P^.tl^rl^V
^ •01^ AT '>\, oVJ^Xk «?' '%^ • ©Bra -
o ^^ 9^
"•.,%
"oV"
""%_
^^^',/\'W/ .
^^'^-- .'I
<t.'- .^'<> *Omt,

•' -» •>
."** ^
^^0^
'ECKMAN Irt i ^^ ,NDERY INC. ISll^^c,^ :
^ DEC 90 h^^ \'
^^ N. MANCHESTER

LIBRARY OF CONGRESS
014 064 033 5 #