Embed Size (px)
Citation preview

Get Smartworking with smart objects
PAGE
81
I decided at the last minute to add a Smart Objects chapter to this book
instead of the one tutorial that I had originally intended. Why? Because
not only are Smart Objects a new feature in CS2, but they’re an incredibly
powerful and timesaving one as well. That’s what this book is all about,
right? Working faster and smarter in Photoshop. Smart Objects mark an
entirely new way of thinking and working inside Photoshop and you’ll be
amazed at how much time and hassle they can save you. In a nutshell,
this new feature is pure dynamite and I felt it deserved an entire chapter
instead of just a few pages.
PAGE82 The Photoshop CS2 Speed Clinic chapter 5
TURBO BOOST
creating a smart PictUre Package
I have to tell you that one of my favorite things to demo in front of people is Photoshop CS2’s new Smart Object feature. Imagine this: I create a custom picture package in Photoshop. I go on to insert multiple copies of a photo at different sizes in a document. Then I talk about changing the custom package to use another photo and how I need to go in and replace all of the photos manually. After that, I show how to do the same thing with Smart Objects with basically two clicks. The “ooooh” and “ahhhh” reactions that I get are priceless.
What is a smart object and why use them?I actually received this exact question from someone and I think it’s a great place to start. Smart Objects allow you to non-destructively scale, transform, rotate, and warp any raster or vector graphic in Photoshop. The best part about them is the fact that Photoshop preserves the editability of the Smart Object layer no matter what, even for high-resolution vector graphics from Adobe Illustrator.
The results of enlarging an image that wasn’t
a Smart Object
The same image enlarged as a Smart Object
If you use the Place command in Photo-shop (File>Place), Photoshop will auto-matically turn the placed image into a Smart Object for you.
PAGE83get smart
TURBO BOOST
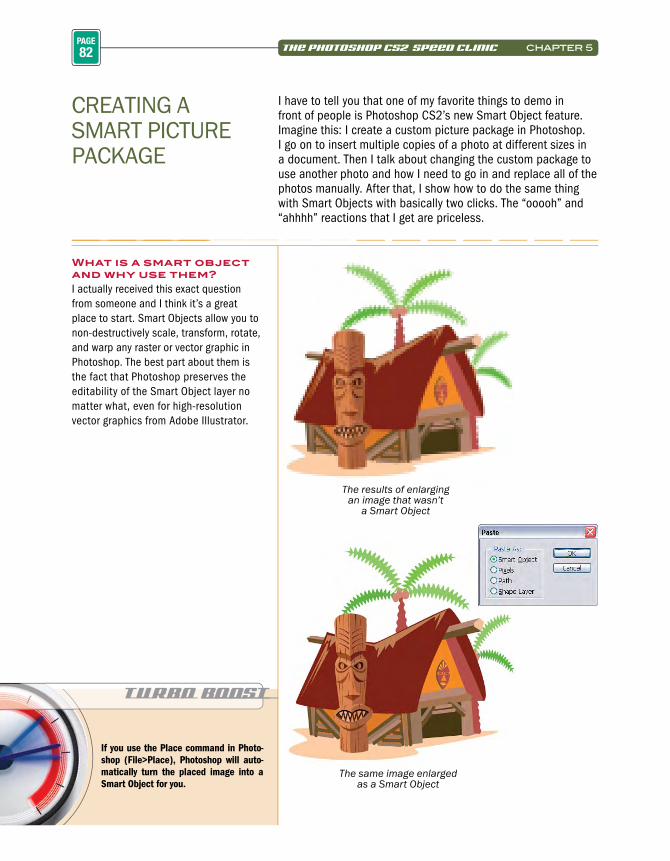
Step One:Choose File>New or press Command-N (PC: Control-N) to create a new blank document. From the Preset pop-up menu, choose 8x10 and then click OK. Turn on the grid by pressing Command-’ (PC: Control-’), and turn on snapping by choos-ing View>Snap. Choose File>Place and navigate to a photo you want to add to the document. Click the Place button and your image will appear in the document. Press-and-hold the Shift key and adjust the bounding box around the photo to scale it down. Click-and-drag the photo toward the top-right corner and press the Return (PC: Enter) key to confi rm the placed image. You can tell it was placed as a Smart Object because you’ll see a small icon in the bottom-right corner of the layer thumbnail in the Layers palette.
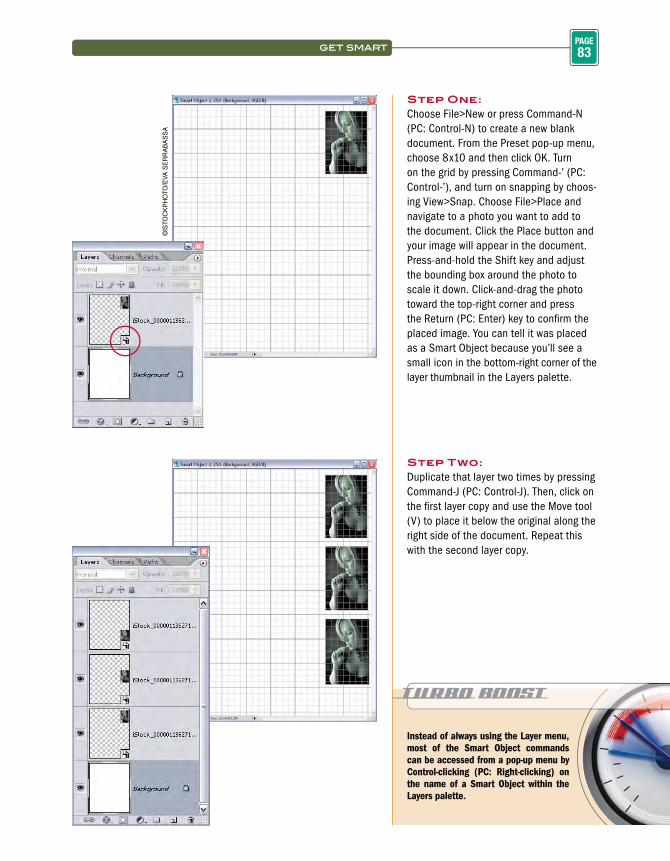
Step Two:Duplicate that layer two times by pressing Command-J (PC: Control-J). Then, click on the fi rst layer copy and use the Move tool (V) to place it below the original along the right side of the document. Repeat this with the second layer copy.
©IS
TOC
KP
HO
TO/E
VA S
ER
RA
BA
SS
A
Instead of always using the Layer menu, most of the Smart Object commands can be accessed from a pop-up menu by Control-clicking (PC: Right-clicking) on the name of a Smart Object within the Layers palette.
TURBO BOOST
PAGE84 The Photoshop CS2 Speed Clinic chapter 5
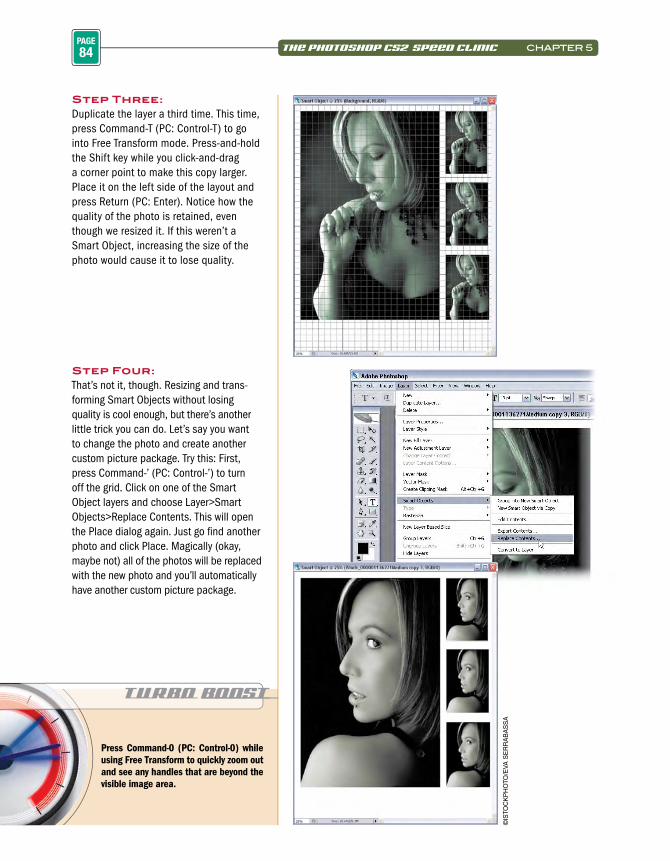
Step Three:Duplicate the layer a third time. This time, press Command-T (PC: Control-T) to go into Free Transform mode. Press-and-hold the Shift key while you click-and-drag a corner point to make this copy larger. Place it on the left side of the layout and press Return (PC: Enter). Notice how the quality of the photo is retained, even though we resized it. If this weren’t a Smart Object, increasing the size of the photo would cause it to lose quality.
Step Four:That’s not it, though. Resizing and trans-forming Smart Objects without losing quality is cool enough, but there’s another little trick you can do. Let’s say you want to change the photo and create another custom picture package. Try this: First, press Command-’ (PC: Control-’) to turn off the grid. Click on one of the Smart Object layers and choose Layer>Smart Objects>Replace Contents. This will open the Place dialog again. Just go fi nd another photo and click Place. Magically (okay, maybe not) all of the photos will be replaced with the new photo and you’ll automatically have another custom picture package.
©IS
TOC
KP
HO
TO/E
VA S
ER
RA
BA
SS
A
Press Command-0 (PC: Control-0) while using Free Transform to quickly zoom out and see any handles that are beyond the visible image area.
TURBO BOOST
PAGE85get smart
In the previous tutorial, you saw how you can easily replace a Smart Object. However, what happens if you don’t want to replace all of the Smart Objects? Maybe you only want to change some or one of them. Sometimes Smart Objects are too smart for their own good, but there are ways to work around them and get the results you want.
rePLacing onLY one smart object
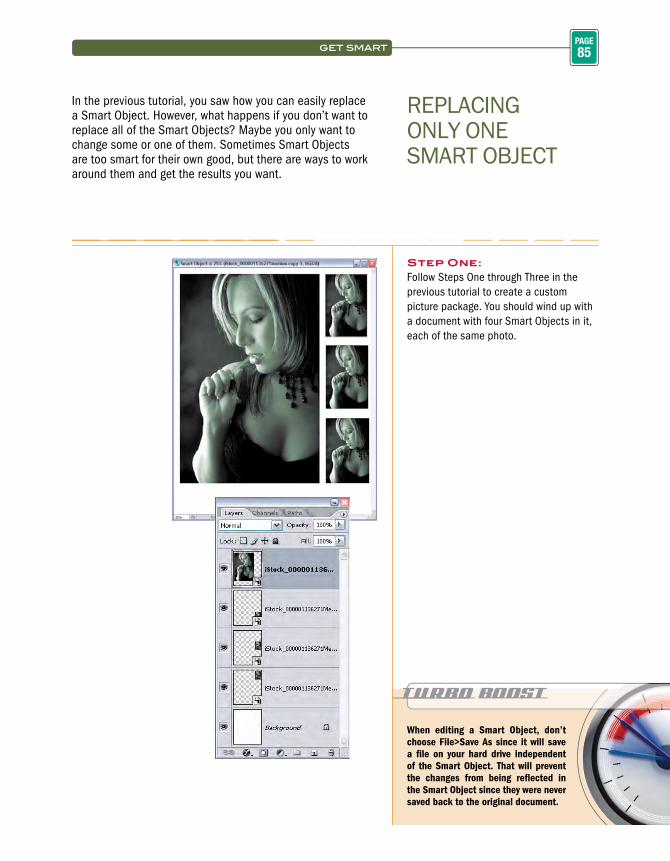
Step One:Follow Steps One through Three in the previous tutorial to create a custom picture package. You should wind up with a document with four Smart Objects in it, each of the same photo.
When editing a Smart Object, don’t choose File>Save As since it will save a fi le on your hard drive independent of the Smart Object. That will prevent the changes from being refl ected in the Smart Object since they were never saved back to the original document.
TURBO BOOST
PAGE86 The Photoshop CS2 Speed Clinic chapter 5
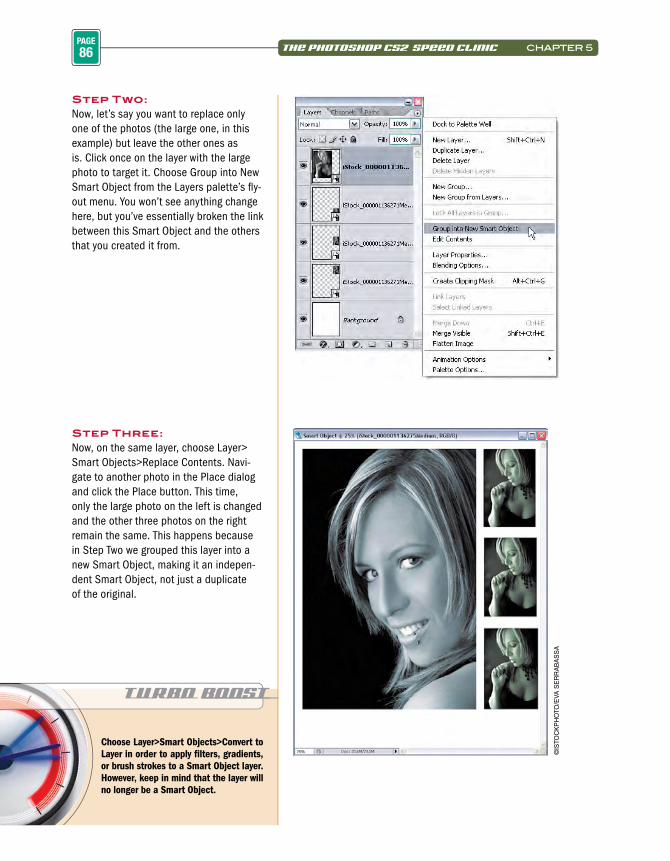
Step Two:Now, let’s say you want to replace only one of the photos (the large one, in this example) but leave the other ones as is. Click once on the layer with the large photo to target it. Choose Group into New Smart Object from the Layers palette’s fl y-out menu. You won’t see anything change here, but you’ve essentially broken the link between this Smart Object and the others that you created it from.
Step Three:Now, on the same layer, choose Layer>Smart Objects>Replace Contents. Navi-gate to another photo in the Place dialog and click the Place button. This time, only the large photo on the left is changed and the other three photos on the right remain the same. This happens because in Step Two we grouped this layer into a new Smart Object, making it an indepen-dent Smart Object, not just a duplicate of the original.
©IS
TOC
KP
HO
TO/E
VA S
ER
RA
BA
SS
A
Choose Layer>Smart Objects>Convert to Layer in order to apply fi lters, gradients, or brush strokes to a Smart Object layer. However, keep in mind that the layer will no longer be a Smart Object.
TURBO BOOST
PAGE87get smart
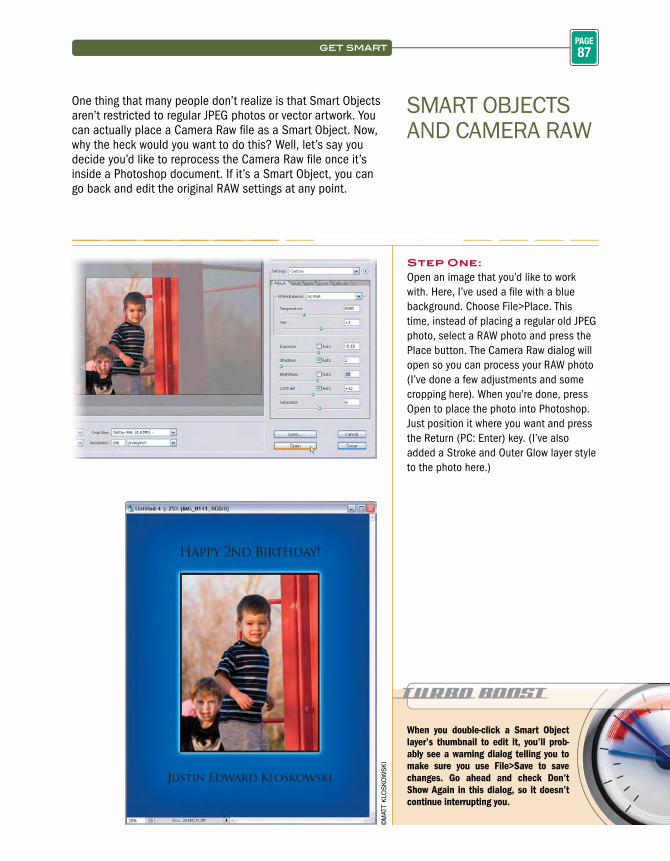
Step One:Open an image that you’d like to work with. Here, I’ve used a fi le with a blue background. Choose File>Place. This time, instead of placing a regular old JPEG photo, select a RAW photo and press the Place button. The Camera Raw dialog will open so you can process your RAW photo (I’ve done a few adjustments and some cropping here). When you’re done, press Open to place the photo into Photoshop. Just position it where you want and press the Return (PC: Enter) key. (I’ve also added a Stroke and Outer Glow layer style to the photo here.)
smart objects anD camera raw
One thing that many people don’t realize is that Smart Objects aren’t restricted to regular JPEG photos or vector artwork. You can actually place a Camera Raw fi le as a Smart Object. Now, why the heck would you want to do this? Well, let’s say you decide you’d like to reprocess the Camera Raw fi le once it’s inside a Photoshop document. If it’s a Smart Object, you can go back and edit the original RAW settings at any point.
©M
ATT
KLO
SKO
WS
KI
When you double-click a Smart Object layer’s thumbnail to edit it, you’ll prob-ably see a warning dialog telling you to make sure you use File>Save to save changes. Go ahead and check Don’t Show Again in this dialog, so it doesn’t continue interrupting you.
TURBO BOOST
PAGE88 The Photoshop CS2 Speed Clinic chapter 5
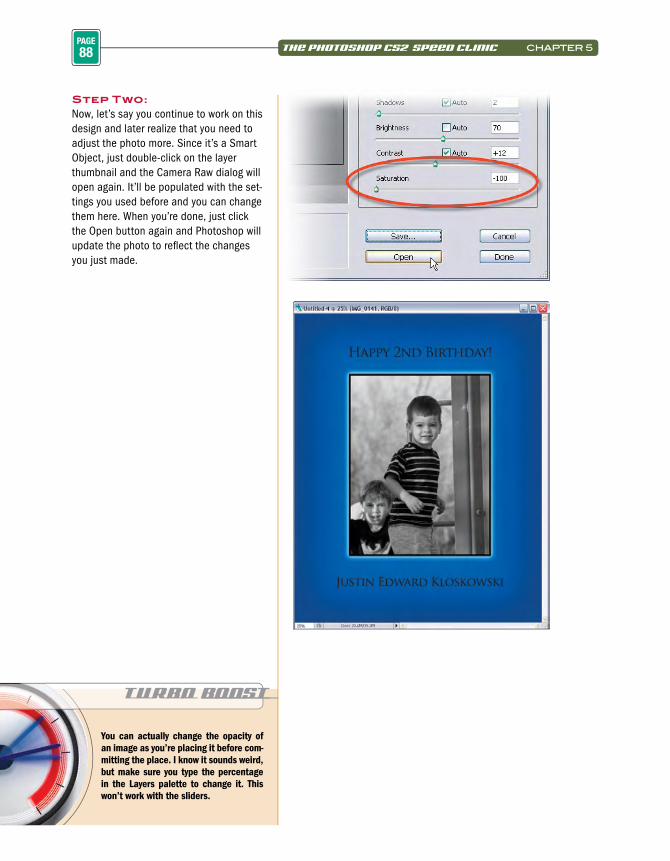
Step Two:Now, let’s say you continue to work on this design and later realize that you need to adjust the photo more. Since it’s a Smart Object, just double-click on the layer thumbnail and the Camera Raw dialog will open again. It’ll be populated with the set-tings you used before and you can change them here. When you’re done, just click the Open button again and Photoshop will update the photo to refl ect the changes you just made.
You can actually change the opacity of an image as you’re placing it before com-mitting the place. I know it sounds weird, but make sure you type the percentage in the Layers palette to change it. This won’t work with the sliders.
TURBO BOOST
PAGE89get smart
working with smart objects in PhotoshoP anD iLLUstrator
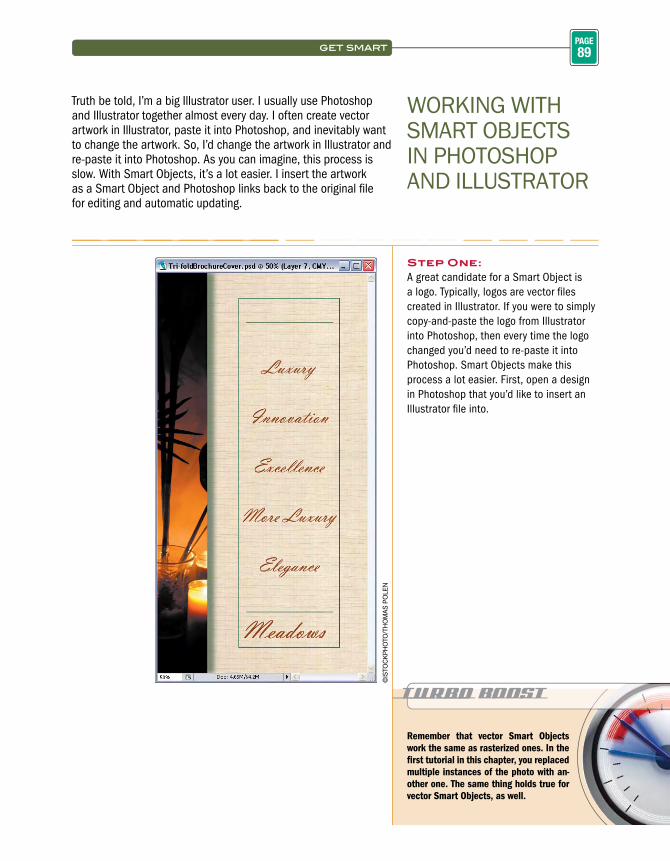
Truth be told, I’m a big Illustrator user. I usually use Photoshop and Illustrator together almost every day. I often create vector artwork in Illustrator, paste it into Photoshop, and inevitably want to change the artwork. So, I’d change the artwork in Illustrator and re-paste it into Photoshop. As you can imagine, this process is slow. With Smart Objects, it’s a lot easier. I insert the artwork as a Smart Object and Photoshop links back to the original fi le for editing and automatic updating.
Step One:A great candidate for a Smart Object is a logo. Typically, logos are vector fi les created in Illustrator. If you were to simply copy-and-paste the logo from Illustrator into Photoshop, then every time the logo changed you’d need to re-paste it into Photoshop. Smart Objects make this process a lot easier. First, open a design in Photoshop that you’d like to insert an Illustrator fi le into.
Remember that vector Smart Objects work the same as rasterized ones. In the fi rst tutorial in this chapter, you replaced multiple instances of the photo with an-other one. The same thing holds true for vector Smart Objects, as well.
©IS
TOC
KP
HO
TO/T
HO
MA
S P
OLE
N
TURBO BOOST
PAGE90 The Photoshop CS2 Speed Clinic chapter 5
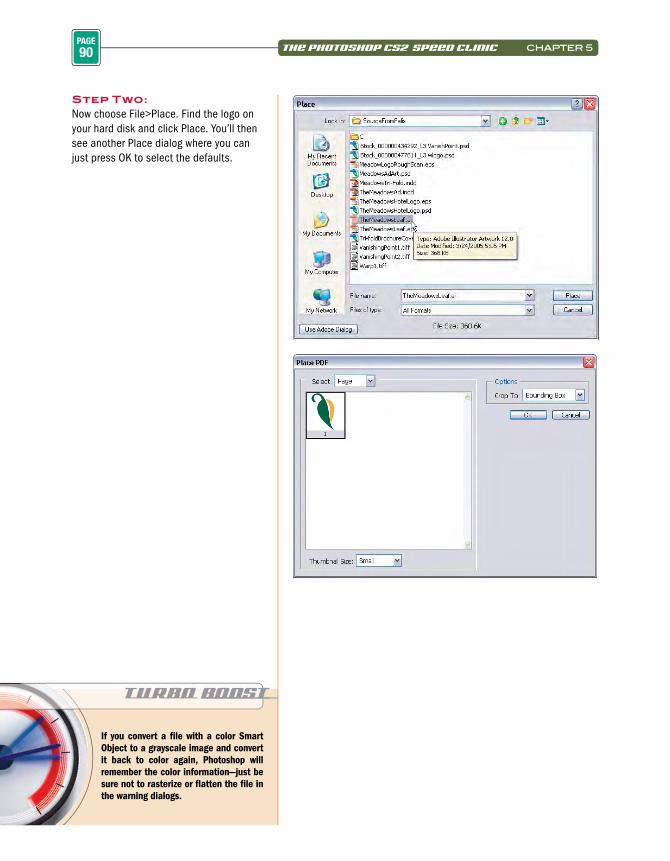
If you convert a fi le with a color Smart Object to a grayscale image and convert it back to color again, Photoshop will remember the color information—just be sure not to rasterize or fl atten the fi le in the warning dialogs.
Step Two:Now choose File>Place. Find the logo on your hard disk and click Place. You’ll then see another Place dialog where you can just press OK to select the defaults.
PAGE91get smart
TURBO BOOST
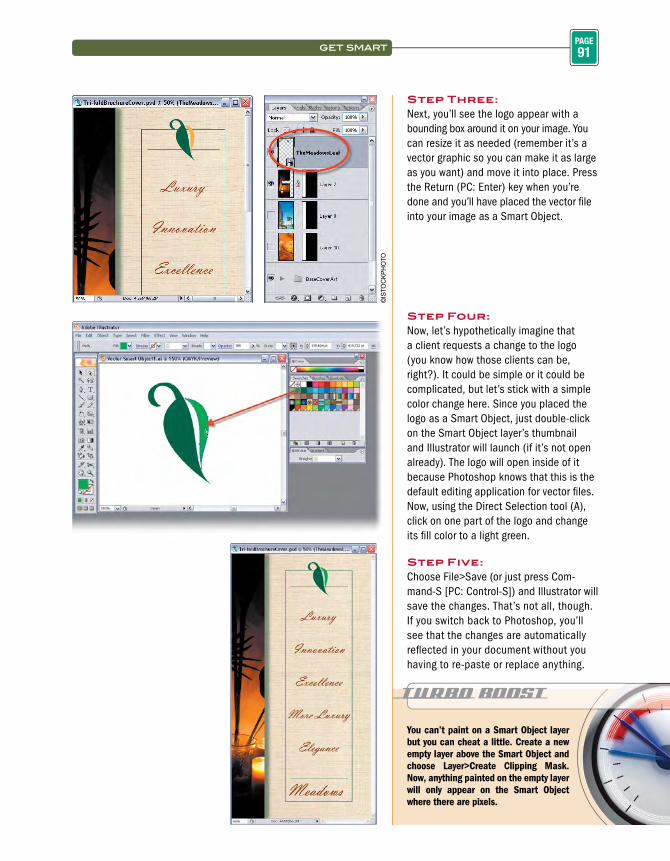
Step Three:Next, you’ll see the logo appear with a bounding box around it on your image. You can resize it as needed (remember it’s a vector graphic so you can make it as large as you want) and move it into place. Press the Return (PC: Enter) key when you’re done and you’ll have placed the vector fi le into your image as a Smart Object.
Step Four:Now, let’s hypothetically imagine that a client requests a change to the logo (you know how those clients can be, right?). It could be simple or it could be complicated, but let’s stick with a simple color change here. Since you placed the logo as a Smart Object, just double-click on the Smart Object layer’s thumbnail and Illustrator will launch (if it’s not open already). The logo will open inside of it because Photoshop knows that this is the default editing application for vector fi les. Now, using the Direct Selection tool (A), click on one part of the logo and change its fi ll color to a light green.
Step Five:Choose File>Save (or just press Com-mand-S [PC: Control-S]) and Illustrator will save the changes. That’s not all, though. If you switch back to Photoshop, you’ll see that the changes are automatically refl ected in your document without you having to re-paste or replace anything.
You can’t paint on a Smart Object layer but you can cheat a little. Create a new empty layer above the Smart Object and choose Layer>Create Clipping Mask. Now, anything painted on the empty layer will only appear on the Smart Object where there are pixels.
©IS
TOC
KP
HO
TO
PAGE92 The Photoshop CS2 Speed Clinic chapter 5
TURBO BOOST
warP, twist, tUrn, Distort, anD transForm anYthing non-DestrUctiVeLY
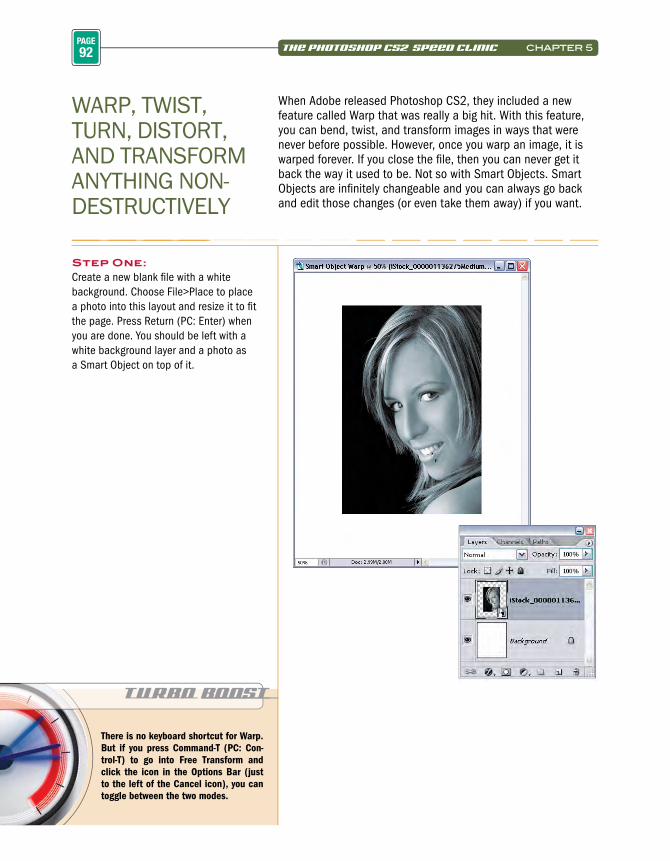
When Adobe released Photoshop CS2, they included a new feature called Warp that was really a big hit. With this feature, you can bend, twist, and transform images in ways that were never before possible. However, once you warp an image, it is warped forever. If you close the fi le, then you can never get it back the way it used to be. Not so with Smart Objects. Smart Objects are infi nitely changeable and you can always go back and edit those changes (or even take them away) if you want.
Step One:Create a new blank fi le with a white background. Choose File>Place to place a photo into this layout and resize it to fi t the page. Press Return (PC: Enter) when you are done. You should be left with a white background layer and a photo as a Smart Object on top of it.
There is no keyboard shortcut for Warp. But if you press Command-T (PC: Con-trol-T) to go into Free Transform and click the icon in the Options Bar (just to the left of the Cancel icon), you can toggle between the two modes.
PAGE93get smart
TURBO BOOST
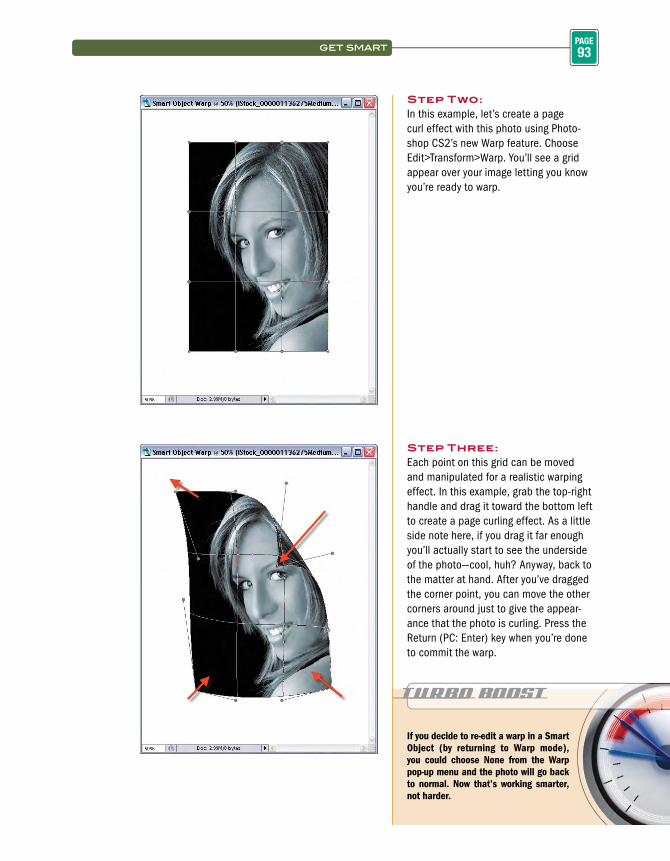
Step Two:In this example, let’s create a page curl effect with this photo using Photo-shop CS2’s new Warp feature. Choose Edit>Transform>Warp. You’ll see a grid appear over your image letting you know you’re ready to warp.
Step Three:Each point on this grid can be moved and manipulated for a realistic warping effect. In this example, grab the top-right handle and drag it toward the bottom left to create a page curling effect. As a little side note here, if you drag it far enough you’ll actually start to see the underside of the photo—cool, huh? Anyway, back to the matter at hand. After you’ve dragged the corner point, you can move the other corners around just to give the appear-ance that the photo is curling. Press the Return (PC: Enter) key when you’re done to commit the warp.
If you decide to re-edit a warp in a Smart Object (by returning to Warp mode), you could choose None from the Warp pop-up menu and the photo will go back to normal. Now that’s working smarter, not harder.
TURBO BOOST
PAGE94 The Photoshop CS2 Speed Clinic chapter 5
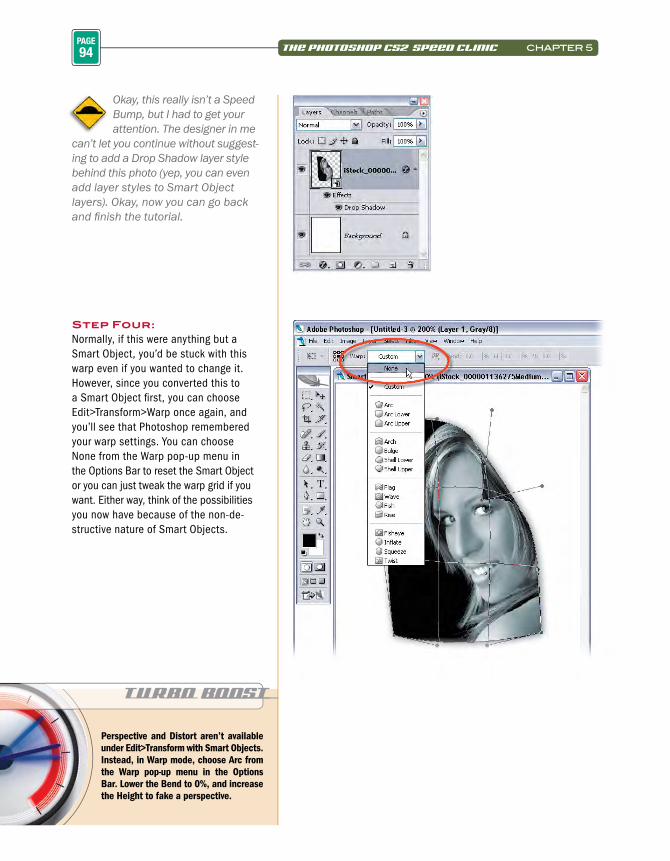
Okay, this really isn’t a Speed Bump, but I had to get your attention. The designer in me
can’t let you continue without suggest-ing to add a Drop Shadow layer style behind this photo (yep, you can even add layer styles to Smart Object layers). Okay, now you can go back and fi nish the tutorial.
Step Four:Normally, if this were anything but a Smart Object, you’d be stuck with this warp even if you wanted to change it. However, since you converted this to a Smart Object fi rst, you can choose Edit>Transform>Warp once again, and you’ll see that Photoshop remembered your warp settings. You can choose None from the Warp pop-up menu in the Options Bar to reset the Smart Object or you can just tweak the warp grid if you want. Either way, think of the possibilities you now have because of the non-de-structive nature of Smart Objects.
Perspective and Distort aren’t available under Edit>Transform with Smart Objects. Instead, in Warp mode, choose Arc from the Warp pop-up menu in the Options Bar. Lower the Bend to 0%, and increase the Height to fake a perspective.

PAGE95get smart
TURBO BOOST
While in Warp mode, you can press Com-mand-T (PC: Control-T) to quickly switch to Free Transform. Unfortunately, press-ing Command-T again doesn’t switch back to Warp mode.