Embed Size (px)
Citation preview
Go to www.preparedpantry.com for more baking guides!
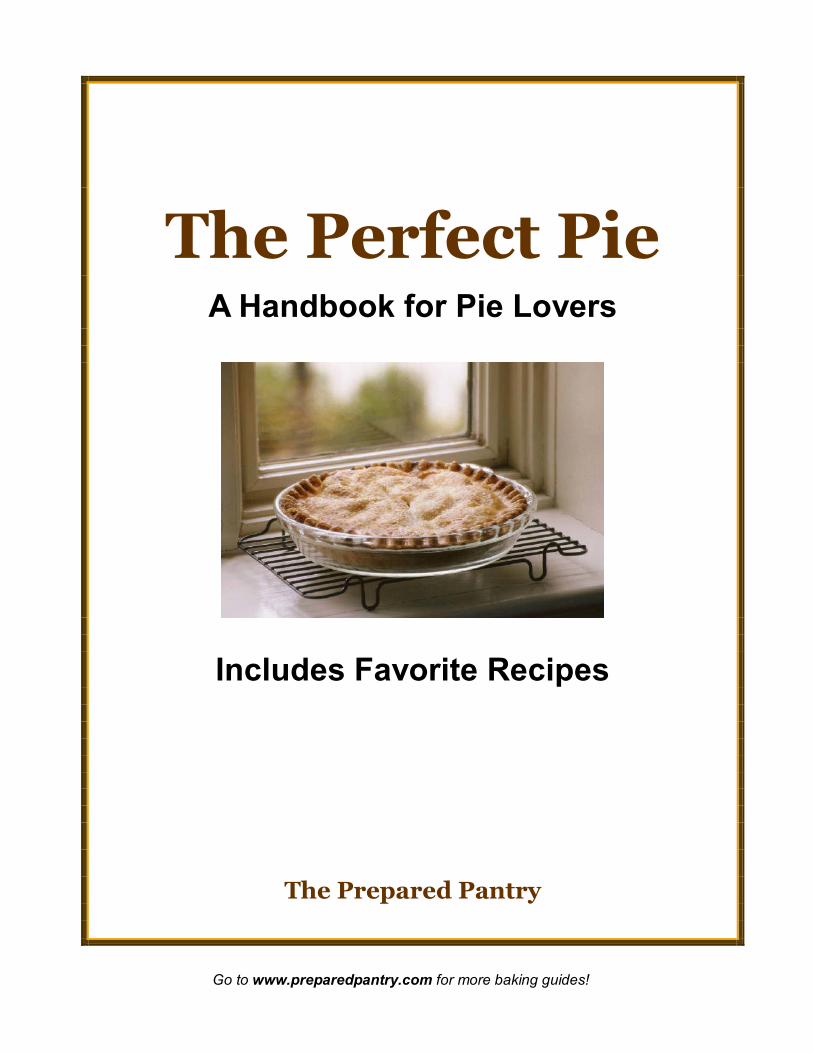
The Perfect Pie
A Handbook for Pie Lovers
Includes Favorite Recipes
The Prepared Pantry
Go to www.preparedpantry.com for more baking guides!
Contents
“I'm not sure my mother really understands just what her cooking means to me. It represents everything warm and good and cozy.”
Carmen Jackson Crofton Washington Post, 1999
• The Wonderful World of Pies • Types of Pies and Their Construction • Building the Perfect Crust • The Perfect Pie: A Troubleshooting Guide • Selecting the Right Pie Pan • Customizing Pie Recipes • Favorite Recipes
o Pink Lemonade Pies o Cherry Cheesecake Pie o Master Recipe: Cream Pie o Banana Cream Pie o Chocolate Cream Pie o Double-Decker Cherry Cream Pie o Coconut Cream Pie o Deluxe Dutch Apple Pie o Raspberry Peach Pie with Streusel Topping
• Favorite Recipes: Near Pies for the Busy Baker
o Pumpkin Pie Squares o Apple Pie Cake o Peach Mock Pie with Cranberries and Mango o Cranapple Crumble Mock Pie
Unless stated otherwise, this material is the property of The Prepared Pantry and provided as a courtesy for private use only. It may not be used for commercial purposes or published without the written consent of the owners. It may be copied and shared with others for their private use only. By receiving and retaining this material either from The Prepared Pantry or from an intermediate party, the recipient agrees to use this only for private and not for commercial purposes. All rights reserved, Copyright 2004, The Prepared Pantry, unless noted otherwise.

Go to www.preparedpantry.com for more baking guides!
The Wonderful World of Pies We love pies. We love fruit pies, nut pies, cream pies, pies with pastry crusts, and pies with crumb crusts. There is a pie for every taste, for every mood, for every occasion. Early American pioneers made a pie for every meal. When they ran out of fruit, they used pumpkin, corn, or nuts. When they ran out of these, they used whatever else was on hand—such ingredients as applesauce, molasses, vinegar, and crackers. Today, we have an amazing array of pies to choose from . . . and the opportunity to experiment beyond the normal. Pies don’t need to be hard. And if you’ve never made a pie, there’s no reason to hesitate. Pies tend to be forgiving and even a less than perfect pie, is still very good. If you don’t feel that you’re ready to tackle a pastry crust, start with a crumb crust or one of the near-pies, Pumpkin Pie Squares, a mock pie, or a crumble. But, we’ll help you build a great pastry crust and troubleshoot those that don’t come out perfect. This handbook is divided into two sections: pie construction and recipes. We’ll start out by talking about the different types of pies and the requirements for success for each. Then we’ll tackle the crusts, since that is where most folks hesitate. We’ll then help you customize your pie to make it uniquely yours and fit your tastes. Finally, we’ll give you a troubleshooting guide in question and answer form for easy reference. The recipe section is not meant to be comprehensive—you can get hundreds of recipes from cookbooks or on line. Rather, it’s meant to be just a sampler of pies that we’ve enjoyed with a broad enough range to incite your desire to explore. We’ve included some near pies, pies that don’t require the traditional crusts and therefore quicker and—to most folks—easier to make. Good luck, enjoy your pies, and happy baking. Dennis and Merri Ann Weaver and Company Your friends at . . . The Prepared Pantry

Go to www.preparedpantry.com for more baking guides!
Types of Pies and Their Construction Pies can be categorized by crust type but for our purposes, we’ll categorize pies by filling type—you can often match fillings to more than one kind of crust. Before we talk about fillings, let’s take a quick look at crust types. There are pastry crusts and crumb crusts. Pastry crusts can be categorized as flakey crusts—a mixture of flour, fat, and water—and sweet crusts with sugar and usually eggs added. Crusts can be baked, unbaked, or partially baked. Pies can be single-crusted, double-crusted, open topped, lattice topped, or crumble pies with a streusel topping. Pies can be baked in a pan or free-formed. They can be made as turnovers or baked in smaller pans as individual servings. In the world of pies, the combinations of crusts and fillings are endless. Fruit pies occupy center stage. The filling is a combination of fruit, spices and flavorings, and a sweetened syrup or slurry. They can be made with fresh fruit, frozen fruit, or canned fruit. The slurry can be made by cooking the juice from the fruit or added juice, by cooking the fruit with the juice, or by tossing the fruit with flour and letting the slurry form as the pie bakes. Strawberry pies, for example, are usually made by cooking a slurry and then pouring the slurry over the uncooked fruit. The most common fruit pies made in America’s kitchens are made by tossing the fruit with flour prior to baking—called the “Old-Fashioned Method” in some text books. We’ll explore these methods later in this handbook. Custard pies, including pumpkin and pecan pies, are made with eggs. The eggs coagulate as they bake to set the pie to the desirable consistency. (The exception to this is Key Lime Pie which is so acidic that the acid sets the egg protein.) Often a small amount of starch—either cornstarch or flour--is added to keep the custard from weeping. In the troubleshooting section, we’ll tackle some of the problems that may occur with custard pies. Cream pies are made with a pudding-like filling. Where puddings are often made with flour, cream pie fillings are made with cornstarch. The cornstarch gives them a firmer set so that they will hold their shape when cut. If you have a favorite pudding and would like to try it in a pie, try replacing the flour with a lesser amount of cornstarch. Cream pies are usually filled with a hot filling. The hot filling sets up firmer but tends to make the crust soggy. We compromise by letting the filling partially cool before pouring it into the shell. Chiffon pies are light and fluffy concoctions made with beaten egg whites and sometimes, whipped cream. Usually they have added starch or gelatin as a stabilizer.
Go to www.preparedpantry.com for more baking guides!
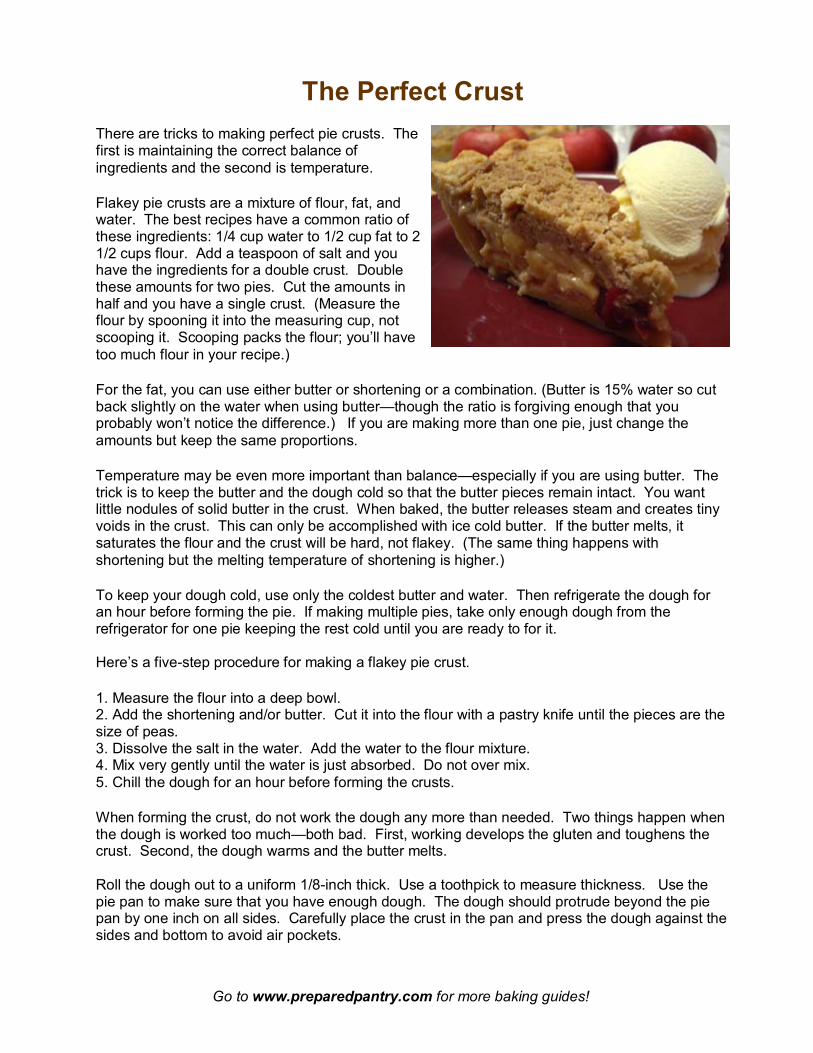
The Perfect Crust There are tricks to making perfect pie crusts. The first is maintaining the correct balance of ingredients and the second is temperature.
Flakey pie crusts are a mixture of flour, fat, and water. The best recipes have a common ratio of these ingredients: 1/4 cup water to 1/2 cup fat to 2 1/2 cups flour. Add a teaspoon of salt and you have the ingredients for a double crust. Double these amounts for two pies. Cut the amounts in half and you have a single crust. (Measure the flour by spooning it into the measuring cup, not scooping it. Scooping packs the flour; you’ll have too much flour in your recipe.)
For the fat, you can use either butter or shortening or a combination. (Butter is 15% water so cut back slightly on the water when using butter—though the ratio is forgiving enough that you probably won’t notice the difference.) If you are making more than one pie, just change the amounts but keep the same proportions.
Temperature may be even more important than balance—especially if you are using butter. The trick is to keep the butter and the dough cold so that the butter pieces remain intact. You want little nodules of solid butter in the crust. When baked, the butter releases steam and creates tiny voids in the crust. This can only be accomplished with ice cold butter. If the butter melts, it saturates the flour and the crust will be hard, not flakey. (The same thing happens with shortening but the melting temperature of shortening is higher.)
To keep your dough cold, use only the coldest butter and water. Then refrigerate the dough for an hour before forming the pie. If making multiple pies, take only enough dough from the refrigerator for one pie keeping the rest cold until you are ready to for it. Here’s a five-step procedure for making a flakey pie crust.
1. Measure the flour into a deep bowl. 2. Add the shortening and/or butter. Cut it into the flour with a pastry knife until the pieces are the size of peas. 3. Dissolve the salt in the water. Add the water to the flour mixture. 4. Mix very gently until the water is just absorbed. Do not over mix. 5. Chill the dough for an hour before forming the crusts.
When forming the crust, do not work the dough any more than needed. Two things happen when the dough is worked too much—both bad. First, working develops the gluten and toughens the crust. Second, the dough warms and the butter melts. Roll the dough out to a uniform 1/8-inch thick. Use a toothpick to measure thickness. Use the pie pan to make sure that you have enough dough. The dough should protrude beyond the pie pan by one inch on all sides. Carefully place the crust in the pan and press the dough against the sides and bottom to avoid air pockets.
Go to www.preparedpantry.com for more baking guides!
The Perfect Pie A Troubleshooting Guide
The following reference guide is organized by topic—such as “pie dough crusts” and “fruit fillings”—and is in a question and answer format to make it easy to find the information
that you need. ____________________________________
I. Pie Dough Crusts
1. What kind of flour is best?
Use unbleached pastry flour if you have it available. All-purpose flour will do. Never use bread flour—the higher gluten content will make for a tougher, chewier crust.
2. Can I use butter instead of shortening?
Butter adds a wonderful flavor to pie crusts but shortening is more moldable and plastic. Try combining the two in a ratio of 2/3 butter to 1/3 shortening. Butter adds more water to the dough so be prepared to reduce the amount of water slightly. Use only the coldest butter and work quickly. Once the butter becomes warm, the dough is soggy and hard to work with and the crust will turn out tough.
3. How much water should I add?
The rule of thumb is 1/4 cup water for every 2 1/2 cups of flour. If you use too much water, the gluten will develop and the crust will be tough. Too little and the dough won't hold together. We prefer to error on the side of too little, even though the dough may be a little difficult to mold.
4. What temperature should the water be?
Ice cold—especially if you are using butter in the dough.
5. Can I use milk instead of water in the dough?
You can but we don't recommend it. The milk will make the crust brown more quickly and the crust will not be as crisp.
6. How should I add the salt?
To ensure that the salt is evenly distributed, dissolve it in the water before adding the water to the dough.
7. Can I sweeten my dough with sugar?

Go to www.preparedpantry.com for more baking guides!
Yes. Many people appreciate a sweeter, more pastry-like pie crust. Add the sugar to the water and dissolve it rather than adding the sugar to the flour. Sugar melts when baked and the crust will tend to be crisper and browner.
8. Why are egg yolks sometimes added to the dough?
The egg yolks make for a richer crust and can replace some of the other fat in the dough. Mix the egg yolks with the cold water. Always use the coldest eggs.
9. How can I make my crusts flakier and not so tough?
Use the lowest gluten flour available—pastry flour is the best. Don't use too much water—excess water will develop the gluten and toughen the dough. Keep the dough cold so that the butter or shortening does not melt. And don't handle the dough anymore than necessary. Handling the dough develops the gluten which makes the crust chewy instead of flakey. Finally, use as little flour dusting on the counter as possible.
10. What can I do about soggy bottom crusts?
There are several tricks that may help:
• Try baking your pie in the lower portion of the oven where there is more heat directed to the bottom of the pan. The higher heat will help set the crust before it becomes soggy. • Use a dark pan to absorb more heat and set the crust faster. • Avoid pouring a hot fruit filling into your unbaked crust. • Use more starch or flour in the filling. A thicker filling will not absorb as rapidly.
Also, we've heard that you can sprinkle cake or bread crumbs on the crust before filling—though we've never tried it ourselves. The crumbs will absorb some of the moisture that may otherwise go into the crust.
11. How thin should I roll my crusts?
To a uniform 1/8 inch.
12. How can I move my dough crust from the counter to the pie pan without breaking?
There are several methods:
• Try rolling the dough out on a pastry cloth or waxed paper. • Fold the dough in half or even fourths and then lift it to the pie pan. • Try rolling the dough around the rolling pin to transfer the dough to the pan.
Press the dough into the pan without stretching it. Stretched dough will shrink during baking.
Make sure there are no air bubbles between the pan and dough.
13. How do I place a top crust on my pie?
Use this step-by-step procedure:
Go to www.preparedpantry.com for more baking guides!
1. Moisten the top edge of the bottom crust with milk or egg to help seal the two crusts together. 2. Lift the top crust to the pie using one of the methods described in the preceding question. 3. Use the palms of your hands and press the excess dough against the edges of the pan to pinch the dough off. 4. Press the edges together to get a good seal—using the tines of a fork is a quick way to do this.
14. Can you give me a general procedure for mixing a crust?
Yes. Here goes:
1. Measure the flour into a deep bowl. 2. Add the shortening and/or butter. Cut it into the flour with a pastry knife until the pieces are the size of peas. 3. Dissolve the salt in the water. Add the water to the flour mixture. 4. Mix very gently until the water is just absorbed. Do not over mix. 5. Chill the dough for an hour before forming the crusts.
II. Crumb Crusts
1. What can I use for crumbs?
Anything you like. Graham crackers are, of course, the most popular. You can also use cookie crumbs—vanilla or chocolate wafers or gingersnaps. For a delicious change of pace, add chopped nuts.
2. For what pies should I use a crumb crust?
Crumb crusts work best for cream or chiffon pies—those with no or little baking. Pies that require a long baking time—such as custard pies or those made with raw fruit—are not good candidates; the crumbs are likely to burn.
Choose a crust with a flavor that will not overwhelm the taste of the filling.
Bake the crumb crust for ten minutes at 350 degrees to give it a toasted flavor.
3. Can you give me a general procedure for making crumb crusts?
Yes. Here it is:
1. Crush the cookies or crackers to fine crumbs. 2. Add sugar and mix well. 3. Melt the butter. Stir the butter into the crumb mixture until the crumbs are uniformly coated. 4. Spread the mixture across the bottom and up the sides of the pan. 5. Press a second pan onto the crust to pack the crumbs and create a uniform depth. (If you don’t have a second pan available, you may press the crumbs with a spatula.). 6. Bake for ten minutes at 350 degrees. Cool the crust before filling.

Go to www.preparedpantry.com for more baking guides!
III. Fruit Fillings
1. My pie is too runny. How do I make the filling thicker?
Fruit fillings have two components: the fruit and the syrup or gel. The syrup contains sugars, spices and a thickening agent—usually flour or cornstarch. Flour makes a cloudier filling but may be easier to work with. The amount of thickener that you use will vary depending on how juicy the fruit is.
There are two ways to apply the thickener. The most common—and quickest and easiest—is to toss the fruit with the flour and spices to coat the fruit then put the coated fruit in the pie shell. But it's hard to judge how much thickener you will need and it must reach a high enough temperature to gelatinize the starches.
A more foolproof method is to make a syrup with the thickeners and some juice in a saucepan on the stovetop. Cool the syrup till it is warm and mix the fruit with the syrup in the pan before adding it to the pie shell.
2. How can I make a fruit pie without cooking the fruit?
Some fruits, such as strawberries, require little or no cooking. By making the syrup on the stovetop, you can avoid cooking the fruit. Mix the thickener, sugars, spices, and some juice—apple juice from concentrate works well for this—in a saucepan and cook it on the stovetop until it is thick and bubbly. Let it cool and add the fruit. Pour the filling into a prebaked shell.
3. Can I use second quality fruit for my pies?
You can. We prefer to use the very best fruit for our pies. Of course, you can cut around minor bruises and use that fruit.
4. Can I use canned fruit for my pies?
Yes, you can. Make your syrup on the stovetop as explained above—otherwise your fruit is likely to turn to a soggy, over-cooked mess.
Hints for Double-Crust Pies
1. When making a double-crust pie, be careful not to spill filling on the edge of the crust. The filling will make it harder to seal the top crust to the bottom crust.
2. Moisten the rim of the bottom crust with water and a pastry brush. It will make it easier to get a good seal between the crusts.
3. Press the edges of the top and bottom crusts firmly together to get a good seal.
4. Pressing the edges together with the tines of a fork works well.
5. Be sure to put slits in the top crust to allow the steam to escape.
6. Brush the top crust with an egg, butter, or milk wash. Egg washed tops have a shiny appearance while the butter and milk washes have a softer, homemade appearance. Sprinkle the tops with granulated or turbinado sugar after the wash.

Go to www.preparedpantry.com for more baking guides!
IV. Custard Fillings (including Pumpkin)
1. How do custard fillings work?
Custard fillings are egg based with some flour or cornstarch added for thickening and to reduce weeping. The eggs are cooked until they coagulate and the pie filling is set.
2. I tend to burn the crusts of my custard pies before the filling is set. How can I avoid that?
Set the pie at the bottom of a hot oven—425 to 450 degrees—and bake for ten or fifteen minutes. Then move the pie higher in the oven and reduce the heat to 350 degrees. Bake until done at the lower temperature.
3. How do I tell if the pie is done?
The most common way is to insert a thin knife blade near the center. If the blade comes out clean, the pie is done.
If you don't want to slit the top surface of the pie, you can tell if the pie is done by shaking. The filling is set when the center is slightly soft. The pie filling will continue to set as the pie cools.
V. Cream Pie Fillings
1. My cream pie fillings don’t hold their shape when cut. How can I fix that?
Cream pie fillings are made with cornstarch. So, if you add more cornstarch, the filling will be firmer.
When you cook the filling, make sure that it comes to a boil and thickens before removing it from the heat—otherwise the starch will not gelatinize.
2. Should I add the filling while it is still hot or let it cool first?
The debate rages. (Well, maybe that is an exaggeration.) Putting the filling in hot will make the pie firmer. However, a hot filling tends to cause a soggy bottom crust. Try compromising with a warm filling and then adjusting for the next pie after you see the results.
Tips for Meringue
1. Whip the egg whites until just stiff. Do not over-beat. 2. Spread a generous amount of meringue on each pie. Spread the meringue to the edges of the pie so that the meringue attaches to the crust. 3. Bake the pie with the meringue topping at 400 degrees for ten minutes or until attractively browned. 4. Cool the pie before slicing. Hot meringue will stick to the knife.

Go to www.preparedpantry.com for more baking guides!
Selecting the Right Pie Pan Metal, glass, and ceramic pans transfer heat differently:
♦ Light colored aluminum pans reflect heat and are not suitable for pies that need a crisp, well-baked crust. Juicy pies often come out soggy when baked in light colored pans.
♦ Heavy, dark, steel pans conduct heat evenly and make for a well-baked crust. ♦ Glass is a good conductor of heat though not as good as dark-colored steel pans. ♦ Ceramic insulates the crust from the heat and often the crust is not well baked. We
recommend ceramic pans for pre-baked shells and crumb crusts.
Go to www.preparedpantry.com for more baking guides!
Customizing Pie Recipes
Pies are for freelance baking. You can choose your filling, your crust, your method and your ingredients. You can use canned fruit or fresh; butter crust, a shortening crust, or a combination. You can thicken the slurry with flour or cornstarch. In this piece, we’ll explore some of these choices—the pro’s and the con’s—to help you make that special pie uniquely yours.
Flour versus Cornstarch
All fruit pies have thickened slurries made with either flour or cornstarch. Each requires a different method. Cornstarch slurries are made on the stovetop while flour slurries are usually created by tossing the fruit with flour or mixing the flour into a slurry in a bowl and pouring it over the fruit. The two methods are interchangeable. What are the advantages of each?
We can think of three advantages to cornstarch slurries made on the stovetop:
1. Stovetop slurries are easier to control. You can get them as thick or as thin as your would like. 2. Since most stovetop slurries are made with added juice, you can introduce more or a different flavor--like mango juice in a peach pie or cranberry juice with apples or pears. 3. Cornstarch makes a clearer slurry that gives a shine that attractively presents the fruit. Flour makes a more milky slurry.
So what’s the advantage to tossing the fruit with flour? It’s quick and easy and makes a fine pie—though getting the right amount of flour to match the amount and juiciness of the fruit is a bit of a guess.
Fresh Fruit versus Canned
You can make a fine pie with canned fruit. Consider canned fruit when you are in hurry—you don’t need to peel and slice the canned fruit—or when the desired fruit is out of season.
If you make a pie with canned fruit, make the slurry on the stovetop. Drain the juice into a saucepan and thicken it with cornstarch. If you want more slurry, add juice.
When you bake a pie using canned fruit, use a baked or partially packed crust. If you bake the pie as long as you would a fresh fruit pie, the canned fruit is likely to turn mushy. A great choice is to put the filling in a baked shell and then top the pie with a streusel for a crumble topping.
Butter versus Shortening in the Crust
Shortening is more plastic and makes an easy-to-form crust. Because shortening has a higher melting point, you can work with shortening-based crusts without as much care to temperature. Shortening makes a more tender crust and butter, a crisper crust.
We prefer butter crusts or crusts partially made with butter. We like to reduce the hydrogenated fat when we can and we love the taste of butter. Butter makes a more pastry-like crust; shortening adds no flavor.

Go to www.preparedpantry.com for more baking guides!
Favorite Recipes Pink Lemonade Pie
This is an absolutely scrumptious dessert. And yes, it is made with pink lemonade.
This pie can be made in a deep dish pie pan or a spring form pan (as was the pie in the picture).
Crust
1 1/2 cups graham cracker crumbs (one packet) 1/4 cup sugar 4 tablespoons butter
1. Mix the crumbs, sugar, and butter in a nine inch pie pan or spring form pan. Mix until the crumbs have absorbed the butter and the mixture is uniform. 2. Press the crumbs across the bottom of the pan and up the sides. 3. Bake for ten minutes at 350 degrees.
Filling
1 8-ounce packet of cream cheese, softened 1 14-ounce can sweetened condensed milk 2/3 cup thawed pink lemonade concentrate (not mixed with water) 2 tablespoons lemon juice (fresh or bottled) red food coloring as desired
1. In a medium bowl, beat the cream cheese until soft. Add the sweetened condensed milk and beat until smooth. 2. Add the lemonade concentrate and lemon juice and continue beating until smooth. Color with red food coloring as desired. 3. Poor into the pie shell and place in the freezer while you mix the topping.
Topping
1/3 cup shredded coconut Several drops of red food coloring 1 cup whipping cream 3 tablespoons sugar 1 teaspoon vanilla extract
1. Place the coconut in a small bowl with several drops of food coloring and stir until the coconut turns pink. 2. Whip the cream until stiff, adding the sugar and vanilla in the process. 3. Spoon the cream over the pie filling and garnish with the pink coconut. 4. Freeze the pie until firm.

Go to www.preparedpantry.com for more baking guides!
Cherry Cheesecake Pie
Is this a pie or a cheesecake? We don't think your guests will care. This has a graham cracker crumb crust and can be made in a deep dish pie pan or a spring form pan.
Crust
1 2/3 cups graham cracker crumbs 3 tablespoons sugar 1/2 tablespoon cinnamon 4 tablespoons butter
1. Mix the crumbs, sugar, cinnamon, and butter in a nine inch pie pan or spring form pan. Mix until the crumbs have absorbed the butter and the mixture is uniform. 2. Press the crumbs across the bottom of the pan and up the sides. 3. Bake for ten minutes at 350 degrees.
Note: This is a crumb crust that will tend to burn during baking. To reduce the chances of burning, use a ceramic pan or a bright silver pan. A ceramic pan will tend to insulate the crust and a silver pan reflects heat.
Filling
2 8-ounce packets of cream cheese, softened 1/2 cup sugar 2 large eggs 1/2 teaspoon almond extract 1 21-ounce can of cherry pie filling
1. In a medium bowl, beat the cream cheese until soft. Add the sugar and beat until smooth. 2. Add the eggs one at a time and the extract. Continue beating until smooth. 3. Poor into the pie shell and bake at 325 degrees until the center of the pie no longer jiggles. 4. Cool on a wire rack. Spoon the prepared pie filling over the cheese filling.

Go to www.preparedpantry.com for more baking guides!
Carrot Pie Don't tell the kids that the secret ingredient is carrots. I know a carrot pie sounds strange—but a carrot cake doesn't. It looks like pumpkin pie and tastes like pumpkin pie. (Once you know about the carrots, you can taste them.) Try it. It's a great pie—nutritious, delicious, and economical. You will need a deep-dish, nine-inch pie pan for this dessert.
Filling:
3 large eggs 1/2 cup brown sugar 1/2 cup granulated sugar 1/2 teaspoon salt 2 cups cooked and pureed or mashed carrots 1 teaspoon vanilla extract 1 teaspoon ginger 1/2 tablespoon cinnamon 1/4 teaspoon cloves 1/4 teaspoon ground mace 2 tablespoons flour 1 can (12 fluid ounces) evaporated milk
Crust:
A single crust for a deep-dish nine-inch pie.
Preheat the oven to 400 degrees. 1. In a large bowl, whisk the eggs until frothy. 2. Add the sugars and salt and stir till dissolved. 3. Add the rest of the ingredients and mix well. 4. Pour the filling into an unbaked pie shell. 5. Bake for 45 to 50 minutes or until a knife inserted in the center comes out clean.
Serve warm with ice cream or whipped cream.
Master Recipe: Cream Pie
It's handy to have a basic cream pie recipe available. From it you can make vanilla, chocolate, coconut, banana cream pie, and more.
We've used this recipe for over 20 years to make everything from coconut cream to strawberry cream pies. We'll give you the basic cream pie recipe and then tell you how to make other scrumptious pies with the basic recipe.
Go to www.preparedpantry.com for more baking guides!
Filling
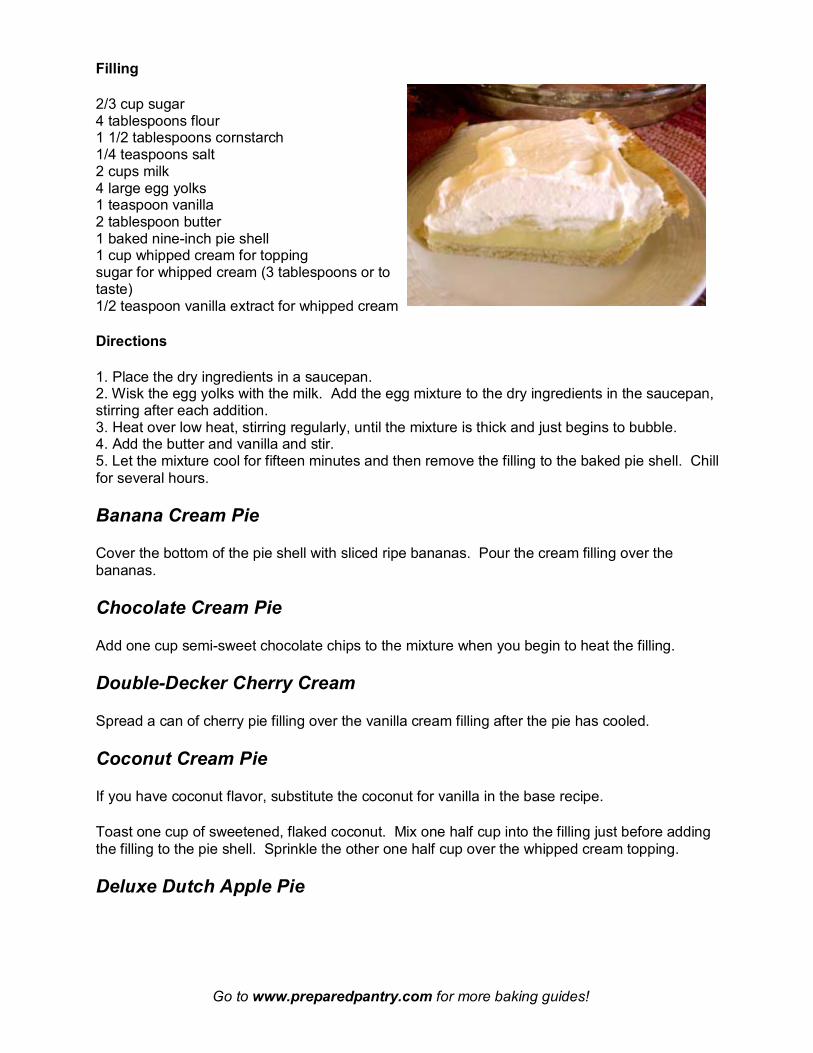
2/3 cup sugar 4 tablespoons flour 1 1/2 tablespoons cornstarch 1/4 teaspoons salt 2 cups milk 4 large egg yolks 1 teaspoon vanilla 2 tablespoon butter 1 baked nine-inch pie shell 1 cup whipped cream for topping sugar for whipped cream (3 tablespoons or to taste) 1/2 teaspoon vanilla extract for whipped cream
Directions
1. Place the dry ingredients in a saucepan. 2. Wisk the egg yolks with the milk. Add the egg mixture to the dry ingredients in the saucepan, stirring after each addition. 3. Heat over low heat, stirring regularly, until the mixture is thick and just begins to bubble. 4. Add the butter and vanilla and stir. 5. Let the mixture cool for fifteen minutes and then remove the filling to the baked pie shell. Chill for several hours.
Banana Cream Pie
Cover the bottom of the pie shell with sliced ripe bananas. Pour the cream filling over the bananas.
Chocolate Cream Pie
Add one cup semi-sweet chocolate chips to the mixture when you begin to heat the filling.
Double-Decker Cherry Cream
Spread a can of cherry pie filling over the vanilla cream filling after the pie has cooled.
Coconut Cream Pie
If you have coconut flavor, substitute the coconut for vanilla in the base recipe.
Toast one cup of sweetened, flaked coconut. Mix one half cup into the filling just before adding the filling to the pie shell. Sprinkle the other one half cup over the whipped cream topping.
Deluxe Dutch Apple Pie
Go to www.preparedpantry.com for more baking guides!
There's a reason why this is called deluxe. It's loaded with sweet apples and brown sugar and then accented with sour cream. (We like to spike it up with cranberries or walnuts but those are optional.) Then of course, it's topped with a streusel topping. (And of course, a streusel topping makes for an easier pie.) Deluxe Dutch Apple Pie Deep dish pie shell for a nine-inch pie 8 cups peeled and sliced apples 2/3 cup dried cranberries (optional) 2/3 cup chopped walnuts (optional) 1/2 cup sugar 1/2 cup brown sugar 1/4 cup all-purpose flour 1/4 teaspoon nutmeg 1 teaspoon cinnamon 1/2 cup sour cream Brown Sugar and Cinnamon Streusel 1 cup all-purpose flour 1/2 cup brown sugar 1/2 tablespoon cinnamon 1/3 cup cold butter cut into small pieces (Or use our Cinnamon Streusel Mix.) Directions 1. Mix the sugars, flour, and spices in a large bowl. Add the apples, optional cranberries, optional nuts, and sour cream. Toss the fruit through the mixture with a spatula to coat. 2. Spoon the fruit mixture into the pie shell. 3. For the streusel, mix all the ingredients in a deep bowl. With a pastry knife, cut the butter through the mixture until it becomes coarse and granular. Spoon the streusel over the pie. 4. Bake in a preheated oven at 375 degrees for 40 minutes or until the topping is browned and the pie is bubbly. 5. Cool in the pan on a wire rack. Serve with ice cream or whipped cream.
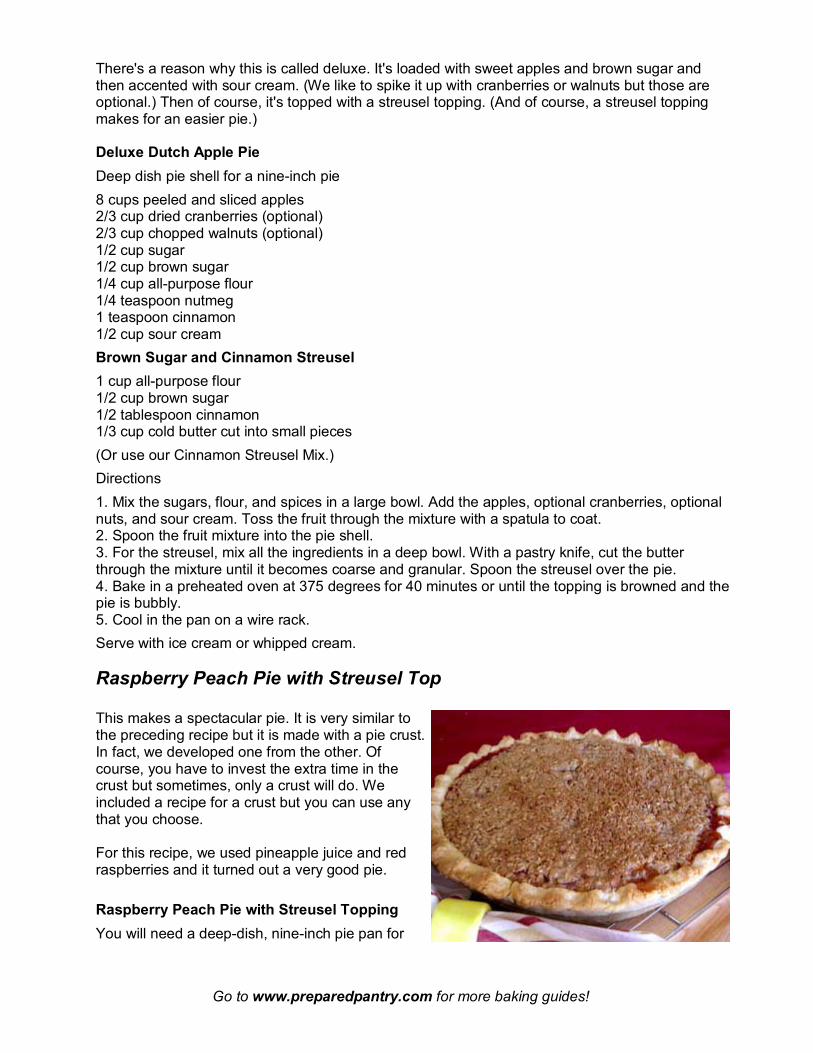
Raspberry Peach Pie with Streusel Top This makes a spectacular pie. It is very similar to the preceding recipe but it is made with a pie crust. In fact, we developed one from the other. Of course, you have to invest the extra time in the crust but sometimes, only a crust will do. We included a recipe for a crust but you can use any that you choose. For this recipe, we used pineapple juice and red raspberries and it turned out a very good pie. Raspberry Peach Pie with Streusel Topping You will need a deep-dish, nine-inch pie pan for

Go to www.preparedpantry.com for more baking guides!
this dessert. Fruit filling: 3/4 cup pineapple juice 1/2 teaspoon vanilla extract 2/3 cup all purpose flour 3/4 cup brown sugar 3/4 cup fresh of frozen raspberries 5 cups ripe peaches, peeled and sliced (about five medium peaches) Pie Crust: 2 cups all purpose flour 1/2 teaspoon salt 2/3 cup shortening 5-6 tablespoons cold water Crumble Topping: 3/4 cup all purpose flour 1/3 cup brown sugar 1/2 cup old fashioned rolled oats 1 teaspoon cinnamon 6 tablespoons cold butter 1/2 cups chopped walnuts or pecans To prepare the crust: 1. Mix the flour and salt together. Cut in the shortening with a pastry knife until the pieces are the size of a pea. 2. Add the cold water a tablespoon at a time, tossing with a fork until all the flour is moistened. 3. Gather the pastry into a ball. Flatten it on a countertop lightly dusted with flour. Roll flat with a rolling pin until it is two inches larger than the inverted pie pan. 4. To remove the crust from the counter, fold the crust in fourths, lift, and place in the pie pan. Unfold the crust, press into the pan, and trim and shape the top edge. To make the pie: Preheat the oven to 375 degrees. 1. In a large bowl, whisk the juice, extract and flour together. 2. Add the brown sugar and stir till dissolved. 3. Add the raspberries and the peaches. Stir to coat the fruit with the liquid mixture. 4. For the streusel topping, mix the flour, brown sugar, oats, and cinnamon together. Cut the butter into small pieces and then cut into the mix with a pastry knife or two kitchen knives. Add the nuts. 5. Place the fruit filling in a deep-dish, nine-inch pan. Level the filling. Cover with the streusel topping. 6. Bake for 25 minutes or until the topping begins to brown.
Go to www.preparedpantry.com for more baking guides!
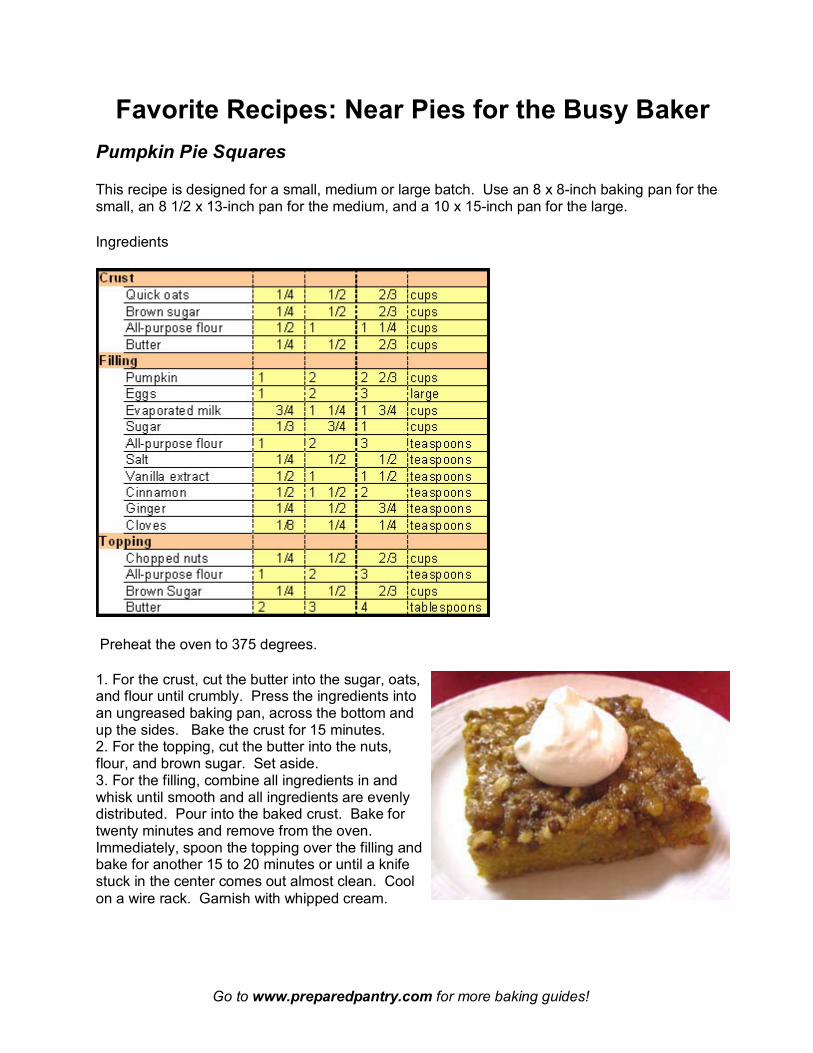
Favorite Recipes: Near Pies for the Busy Baker Pumpkin Pie Squares
This recipe is designed for a small, medium or large batch. Use an 8 x 8-inch baking pan for the small, an 8 1/2 x 13-inch pan for the medium, and a 10 x 15-inch pan for the large.
Ingredients
Preheat the oven to 375 degrees.
1. For the crust, cut the butter into the sugar, oats, and flour until crumbly. Press the ingredients into an ungreased baking pan, across the bottom and up the sides. Bake the crust for 15 minutes. 2. For the topping, cut the butter into the nuts, flour, and brown sugar. Set aside. 3. For the filling, combine all ingredients in and whisk until smooth and all ingredients are evenly distributed. Pour into the baked crust. Bake for twenty minutes and remove from the oven. Immediately, spoon the topping over the filling and bake for another 15 to 20 minutes or until a knife stuck in the center comes out almost clean. Cool on a wire rack. Garnish with whipped cream.

Go to www.preparedpantry.com for more baking guides!
Apple Pie-Cake “You should make this every day of my life,” said Katie our 13-year old daughter. We're glad that she likes this cross between a cake and pie and we can make it often because it is so easy. Because it uses canned pie filling and takes just a few steps, it's a snap to make. We couldn't decide whether this was a cake masquerading as a pie or a pie masquerading as a cake so we called it a “Pie-Cake”. You can serve this as a coffeecake for brunch or with ice cream or whipped cream as a dessert. 2 large eggs 1/2 teaspoon vanilla extract 1/3 cup sugar 1 1/4 cup all-purpose flour 2 teaspoons baking powder 1/2 teaspoon cinnamon 1/4 teaspoon nutmeg 1/4 teaspoon salt 1 21-ounce can of apple pie filling 1 1/2 tablespoon turbinado sugar for sprinkling on top Directions Preheat the oven to 350 degrees 1. In a medium bowl, beat the eggs, vanilla, and sugar together until smooth and thick—about one minute. 2. In another bowl, mix the dry ingredients. Add them to the egg mixture and stir until well combined. 3. Stir in the pie filling. 4. Pour the mixture into a well-greased, nine-inch deep dish pie pan. Sprinkle the turbinado sugar on top and bake for 20 minutes or until browned and a toothpick inserted in the middle comes out clean. Serving suggestion: This is one of those desserts that is much better served warm. Heat individual servings in the microwave.
Peach Mock Pie with Cranberries and Mango (Peach Crumble) If it's peach season, you’re probably awash in peaches. So we decided to share this great peach dessert. It’s really a crumble but it's made with a little less liquid and in a pie pan to look more like a pie. It's a quicker version of a pie. This is one of those recipes that allow you to experiment, to be creative. We bought a selection of juices—both frozen concentrates and bottled juices—before starting this project. We also visited the frozen fruit section in the grocer's freezer case and picked up several berry choices. (Buy the individually frozen berries, not the berries frozen in syrup.) For this version, we settled on sweet

Go to www.preparedpantry.com for more baking guides!
mango juice to complement the peaches and tart cranberries to accent them. We used our cold processed cranberries—we much prefer them. You will need a deep-dish, nine-inch pie pan for this dessert. Fruit filling: 3/4 cup mango juice 1/2 teaspoon vanilla extract 2/3 cup all purpose flour 3/4 cup brown sugar 2/3 cup dried cranberries 5 cups ripe peaches, peeled and sliced (about six medium peaches) Crumble Topping: 3/4 cup all purpose flour 1/3 cup brown sugar 1/2 cup old fashioned rolled oats 1 teaspoon cinnamon 6 tablespoons cold butter 1/2 cup chopped walnuts or pecans Preheat the oven to 375 degrees. 1. In a large bowl, whisk the juice, extract, flour, and brown sugar together. Stir till dissolved. 2. Add the cranberries and the peaches. Stir to coat the fruit with the liquid mixture. 3. For the streusel topping, mix the flour, brown sugar, oats, and cinnamon together. Cut the butter into small pieces and then cut into the mix with a pastry knife or two kitchen knives. Add the nuts. 4. Place the fruit filling in a deep-dish, nine-inch pan. Level the filling. Cover with the streusel topping. 5. Bake for 25 minutes or until the topping begins to brown. Serve warm or cold with ice cream or whipped cream.
Cranapple Crumble Mock Pie Desserts that are easy and loaded with fresh fruit seem just right for summertime. So we've been cruising for ideas. Everyone loves apple pie but in a busy summer, we sometimes don't have the time to bake a favorite pie. So we invented this crustless pie to make the baking faster and easier. We used all the fruit and loaded a nut-filled streusel on top. We added some cranberries and cranberry juice to give it some zing. We think it's great. We bet your family will love it—especially steaming hot and topped with vanilla ice cream. Without a crust, this will not hold together like a slice of pie. When you serve it, it will look more like a crumble or a crisp. We don't think that will matter . . . it will still look and taste great. You can use this same recipe and substitute other fruit combinations. We can't wait to try fresh peaches with raspberries and pears with blueberries. You may never go back to pie crusts.

Go to www.preparedpantry.com for more baking guides!
You will need a deep-dish, nine-inch pie pan for this dessert. Fruit filling: 3/4 cup sweetened cranberry juice 1/2 teaspoon vanilla extract 1/3 cup all purpose flour 3/4 cup brown sugar 2/3 cup dried cranberries 4 cups tart apples, peeled and cubed (about four medium apples) Crumble Topping: 3/4 cup all purpose flour 1/3 cup brown sugar 1/2 cup old-fashioned rolled oats 1 teaspoon cinnamon 6 tablespoons cold butter 1/2 cups chopped walnuts or pecans Preheat the oven to 375 degrees. 1. In a large bowl, whisk the cranberry juice, extract and flour together. 2. Add the brown sugar and stir till dissolved. 3. Add the cranberries and the apples. Stir to coat the apples with the liquid mixture. 4. For the streusel topping, mix the flour, brown sugar, oats, and cinnamon together. Cut the butter into small prices and then cut into the mix with a pastry knife or two kitchen knives. Add the nuts. 5. Place the fruit filling in a deep-dish, nine-inch pan. Level the filling. Cover with the streusel topping. 6. Bake for 25 minutes or until the topping begins to brown. Serve warm with ice cream or whipped cream. Bake at 375 degrees for 25 minutes or until the streusel top begins to brown.