Embed Size (px)
Citation preview
The ImagePrint 10.X for Windows Troubleshooting Guide
Revision 1.0Despite our best efforts, when computers, software, printers and color management come together, somewhere along the line problems may occur. This guide will help to solve the majority of issues that users run into as well as answer common questions regarding the
use of ImagePrint.
Note: This guide is designed for users of ImagePrint 10.x and may not apply to earlier versions of the software. Users of most previous versions can access trouble-shooting in
the back of their manual, which is typically installed into their ImagePrint folder.
The latest revision of this guide is always available on the Technical Support page on the ColorByte web site: www.colorbytesoftware.com
TroubleShooting Guide Contents
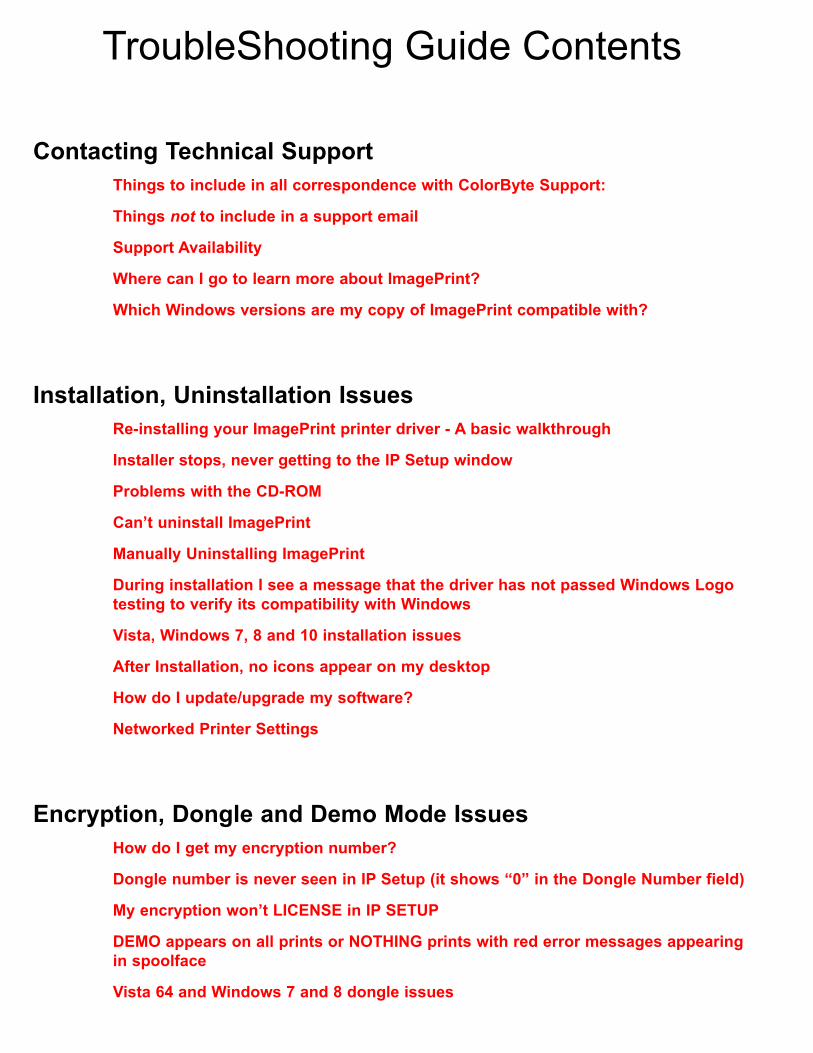
Contacting Technical SupportThings to include in all correspondence with ColorByte Support:
Things not to include in a support email
Support Availability
Where can I go to learn more about ImagePrint?
Which Windows versions are my copy of ImagePrint compatible with?
Installation, Uninstallation IssuesRe-installing your ImagePrint printer driver - A basic walkthrough
Installer stops, never getting to the IP Setup window
Problems with the CD-ROM
Can’t uninstall ImagePrint
Manually Uninstalling ImagePrint
During installation I see a message that the driver has not passed Windows Logo testing to verify its compatibility with Windows
Vista, Windows 7, 8 and 10 installation issues
After Installation, no icons appear on my desktop
How do I update/upgrade my software?
Networked Printer Settings
Encryption, Dongle and Demo Mode IssuesHow do I get my encryption number?
Dongle number is never seen in IP Setup (it shows “0” in the Dongle Number field)
My encryption won’t LICENSE in IP SETUP
DEMO appears on all prints or NOTHING prints with red error messages appearing in spoolface
Vista 64 and Windows 7 and 8 dongle issues

Problems starting or using ImagePrintImagePrint won’t launch
Files won’t open
JPEG files are opening and printing at the wrong size!
Some windows (such as the Image Strip, Shuffle, etc) or SpoolFace not appearing when chosen
TIFF files won’t open (or open very slowly)
PSD (Photoshop) files won’t open (or print slowly)
Options button is grayed out in Dashboard->Advanced->Print Setup
The Image Strip doesn’t work correctly
The Profile Valet doesn’t show any profiles!
Deleting the ImagePrint Registry Settings
Display IssuesImages appear split, reversed or in triplicate on screen
Images appear scrambled, low resolution, or full of artifacts
Colorized B/W Images appear distorted
Two monitor system and ImagePrint’s colors are not displaying correctly
Printing Issues (Also see Spoolface error codes)Nothing Prints!
Nothing appears in SpoolFace when PRINT is selected
Printer outputs garbage text
“Load ROLL” (or Sheet) Paper message on printer
“Forbidden Media” message on printer
“Reload Paper”/”Paper Out” message on printer
“Wrong Page Size” message on printer
SpoolFace generates an error when launched
Epson 2200 or 2400 doesn’t print, red paper feed light shows
Warning: Unknown TAG (or other Warnings) in SpoolFace
I keep getting extra jobs sent to spoolface
Printer flashes lights, or generates Command Error when attempting to print
“Can’t print scanlines” error, jobs go into the spooler but never print
Couldn’t Set Up Watch folder
Print Jobs move quickly to the finished side of the spool face window before the job prints. “Couldn’t Spawn Queue Command” error when clicking print
How do I print directly from an Application like Photoshop, InDesign or Illustrator?
Problems printing from a networked client
Job doesn’t move to finished side of queue when cancelled
Old computer names appear in my SpoolFace Computers menu
Connect 10061 Error when attempting to launch spoolface
Spoolface error codesERROR 1
ERROR 2 or ERROR 15 (Printer not found)
ERROR 37
ERROR 97
ERROR 163
ERROR 609
ERROR 611 or 104 or 99 or “Out of Disk Space error”
ERROR 653
ERROR 768
ERROR 107############
Output Quality IssuesMy output is darker than it appears on screen
Color cast in prints
Images are not centered on page
I’m getting an unwanted margin on my prints
I’m getting a wasted strip of paper between each print
My print is too long or too short
The last few lines of my prints fade or don’t print
Jobs print distorted or as negatives
Prints show banding (lines)
What do Passes (4-pass, 8-pass, etc.) mean in the Speed listing?
What does HS mean in the Speed Listing of the Print Setup area of the Dashboard?
What Quality value should I use when printing? (2880? 1440? Photo? Best?)
What Resolution (PPI) should my images be saved at for best results?
Where should I scale my images--Photoshop, ImagePrint, or using a specialized pro-gram?
What is gloss differential?
What is bronzing?
What is metamerism and color inconstancy?
Profiles & Color Management/The Profile Manager utilityMy printed colors/tones don’t match my display
What do the profile names mean?
What are the LIGHTING designations within the profile filenames?
ImagePrint doesn’t match my Photoshop display! (SoftProofing)
Where can I put profiles to have Photoshop see them (for use in Soft Proofing?)
How do I achieve consistent Color Management
I want to make my own profiles
How do I get new paper profiles?
Downloading/accessing profiles is slow
The Profile Manager doesn’t launch at all!
I downloaded a profile but don’t see it in ImagePrint’s printer/paper profile list
The Profile Manager launches, but is not working correctly
I can’t find the paper profile I need
PTA (Print through Applications) IssuesFor issues specific to the Print through Applications option, please see the PTA chapter of the User’s manual, located in your ImagePrint folder or on the ColorByte support page at www.colorbytesoftware.com. Trouble-shooting information is located at the end of the PTA section.
AutoPrint IssuesAutoPrint lays out images, but they never go to the spooler
AutoPrint jobs print with the wrong colors
AutoPrint jobs show an error in spoolface
AutoPrint doesn’t show all my profiles in its Color Settings window
AutoPrint won’t launch
AutoPrint layouts show a border along the edge
I Can’t find AutoPrint
How do I access different printers and/or hot folders with one copy of AutoPrint?
Troubleshooting Solutions
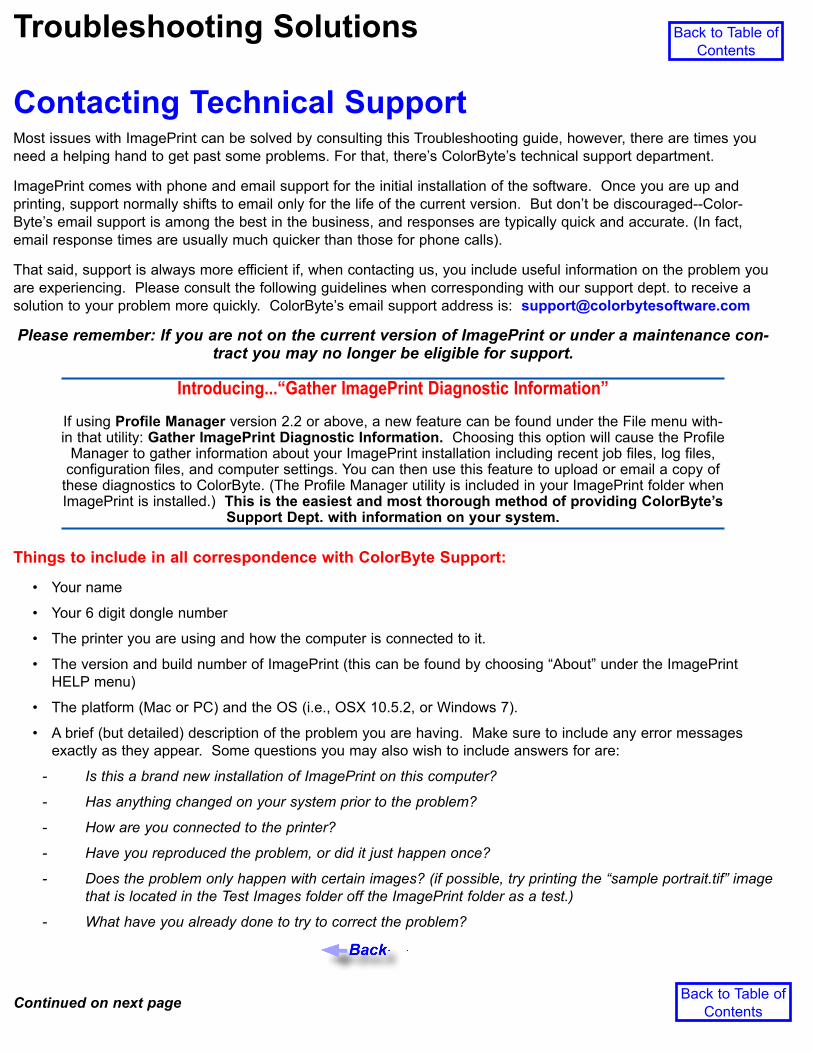
Contacting Technical SupportMost issues with ImagePrint can be solved by consulting this Troubleshooting guide, however, there are times you need a helping hand to get past some problems. For that, there’s ColorByte’s technical support department.
ImagePrint comes with phone and email support for the initial installation of the software. Once you are up and printing, support normally shifts to email only for the life of the current version. But don’t be discouraged--Color-Byte’s email support is among the best in the business, and responses are typically quick and accurate. (In fact, email response times are usually much quicker than those for phone calls).
That said, support is always more efficient if, when contacting us, you include useful information on the problem you are experiencing. Please consult the following guidelines when corresponding with our support dept. to receive a solution to your problem more quickly. ColorByte’s email support address is: [email protected]
Please remember: If you are not on the current version of ImagePrint or under a maintenance con-tract you may no longer be eligible for support.
Introducing...“Gather ImagePrint Diagnostic Information”
If using Profile Manager version 2.2 or above, a new feature can be found under the File menu with-in that utility: Gather ImagePrint Diagnostic Information. Choosing this option will cause the Profile
Manager to gather information about your ImagePrint installation including recent job files, log files, configuration files, and computer settings. You can then use this feature to upload or email a copy of
these diagnostics to ColorByte. (The Profile Manager utility is included in your ImagePrint folder when ImagePrint is installed.) This is the easiest and most thorough method of providing ColorByte’s
Support Dept. with information on your system.
Things to include in all correspondence with ColorByte Support:
• Yourname
• Your6digitdonglenumber
• Theprinteryouareusingandhowthecomputerisconnectedtoit.
• TheversionandbuildnumberofImagePrint(thiscanbefoundbychoosing“About”undertheImagePrintHELP menu)
• Theplatform(MacorPC)andtheOS(i.e.,OSX10.5.2,orWindows7).
• Abrief(butdetailed)descriptionoftheproblemyouarehaving.Makesuretoincludeanyerrormessagesexactly as they appear. Some questions you may also wish to include answers for are:
- Is this a brand new installation of ImagePrint on this computer?
- Has anything changed on your system prior to the problem?
- How are you connected to the printer?
- Have you reproduced the problem, or did it just happen once?
- Does the problem only happen with certain images? (if possible, try printing the “sample portrait.tif” image that is located in the Test Images folder off the ImagePrint folder as a test.)
- What have you already done to try to correct the problem?
Continued on next page
Back to Table of Contents
Back to Table of Contents
T2 IMAGEPRINTTroubleshooting
ImagePrint Windows Troubleshooting Guide (Cont.) Back to Table of Contents
Back to Table of Contents
Other Information that may be helpful to include in the email:(Note: If using the Profile Manager’s Gather Diagnostics option (recommended) mentioned earlier in this section, these items (and much more) will be included automatically)
• Job File: - This is typically the most valuable diagnostic information we can receive. If you are having a problemrelatedtoprinting,a“jobfile”isoftenthefirstthingwewillrequest.JobfilesarethefilessenttospoolfacewhenyouclickPRINTandcontainalltheinformationaboutthatprintjob.(continued)
To get a job file:
- In Spoolface, move the print job to the finished side of the spoolface window.
- Double-click the job--a text window will appear
- Highlight all of the text in the window (scroll down to get it all)
- Copy and paste this information into your email.
• IP Config-Thefilecalled“ipconfig”islocatedinyourImagePrintUSERDATAfolder.(\ProgramData\ColorByteSoftware\ImagePrint).YoucanalsogettherebygoingtotheImagePrintprogramfolder(/programfiles(x86)/ImagePrint)anddouble-clickingtheImagePrintUSERDATAFoldershortcut.Thisfilecontainsinformationonyourinstalledprinters.Attachingthatfiletoanemailcanbehelpfulindiagnosingproblemswith ImagePrint itself (such as launch problems, or problems with communication with the printer)
• LOG-ThespoolerlogfileisfoundintheSPOOLfolder.(c:\ProgramData\ColorbyteSoftware\Imageprint\spool\log).Attachingthistextfilecanbehelpfulindiagnosingpersistenterrorconditionswhenprinting.
Things not to include in a support email
• Vagueorverygeneralinformation,suchas“Igetanerror”,withoutspecifyingwhatitis.Thesetypesofemails waste time as they invariably require another round of emails as we ask for specifics.
• Imagesorscreengrabsover1megabytesinsize.Often,bigfilessentoveremaildon’tcomethroughprop-erly.Screengrabsofsettingscanbeuseful,butpleasemakesuretokeepthemtoasmallsize
• Pricingandsalesquestions.Oursupportdepartmentisnotabletoanswerspecificquestionsonpricing.Those are best sent to our sales dept. at: [email protected]
Support Availability
Colorbyte Technical Support is available during regular business hours: 9:00 am to 5:00 pm, Eastern Standard Time. Most emails are responded to within 2 hours of receipt (often much more quickly) however volume received and other factors may affect response times. If you have not received a response within 24 hours, please resend the email. If you are no longer using the current version of ImagePrint, you may no longer be eligible for support.
If you are not on the current version of ImagePrint or under a maintenance contract you may receive an automatic response from support detailing your support options.
T3 IMAGEPRINTTroubleshooting
ImagePrint Windows Troubleshooting Guide (Cont.) Back to Table of Contents
Back to Table of Contents
Where can I go to learn more about ImagePrint?
Users Guide: The ImagePrint user’s manual is the first place to find information about the various tools and features available within the software. The manual is installed in your ImagePrint folder. The default location is:
c:\Program Files(x86)\Imageprint\ImagePrint Manual.pdf
You can access the manual by choosing ImagePrint Users Manual from the Help menu within ImagePrint. The latest revision of the manual is also availabe on our web site’s (www.colorbytesoftware.com) Support page. The manual is large and comprehensive, and is often best used as a general reference rather than read cov-er-to-cover.
Training Movies: RECOMMENDED Sometimes you need to see a feature in action in order to understand it. The numerous training movies located on our web site: www.colorbytesoftware.com can be incredibly useful in that regard.
Users Group: The Yahoo ImagePrint Users Group is a great source of information about ImagePrint. Users of the software share their advice, tips, solutions (and complaints) in an often lively discussion. Many of the participants are long time users of ImagePrint and gurus in the ways of printing. To access the group use the following link:
http://tech.groups.yahoo.com/group/colorbyte_imageprint/
Workshops, trade shows, seminars: WhileColorBytedoesn’tcurrentlyproduceworkshopsorseminars,thereareexistingonesthatutilizeandteachwithImagePrint.Also,ColorBytepersonelsometimesappearatindustry trade shows or participate in dealer seminars. For information on upcoming events in your area, con-tact the sales department at:
Updates: The latest build of ImagePrint can be found at the ColorByte support page:
http://www.colorbytesoftware.com/Ver10/support.shtml
For more information on updating, see Updating ImagePrint
T4 IMAGEPRINTTroubleshooting
ImagePrint Windows Troubleshooting Guide (Cont.) Back to Table of Contents
Back to Table of Contents
Which Windows versions are my copy of ImagePrint compatible with?
ImagePrint10.0iscompatiblewithVista(32and64),Windows7(32and64)andWindows8andWindows10.
If your copy of ImagePrint is incompatible with your Operating System, you will need to update the software in order to use it on that OS. Depending on your current ImagePrint version, updates may be free or may need to be purchased. To find out your current upgrade eligibility and applicable pric-ing, send an email request including your dongle number to: [email protected]
The latest build of ImagePrint can be found at the ColorByte web site’s Downloads page:
www.colorbytesoftware.com
For more information on updating, see Updating ImagePrint
T5 IMAGEPRINTTroubleshooting
ImagePrint Windows Troubleshooting Guide (Cont.) Back to Table of Contents
Back to Table of Contents
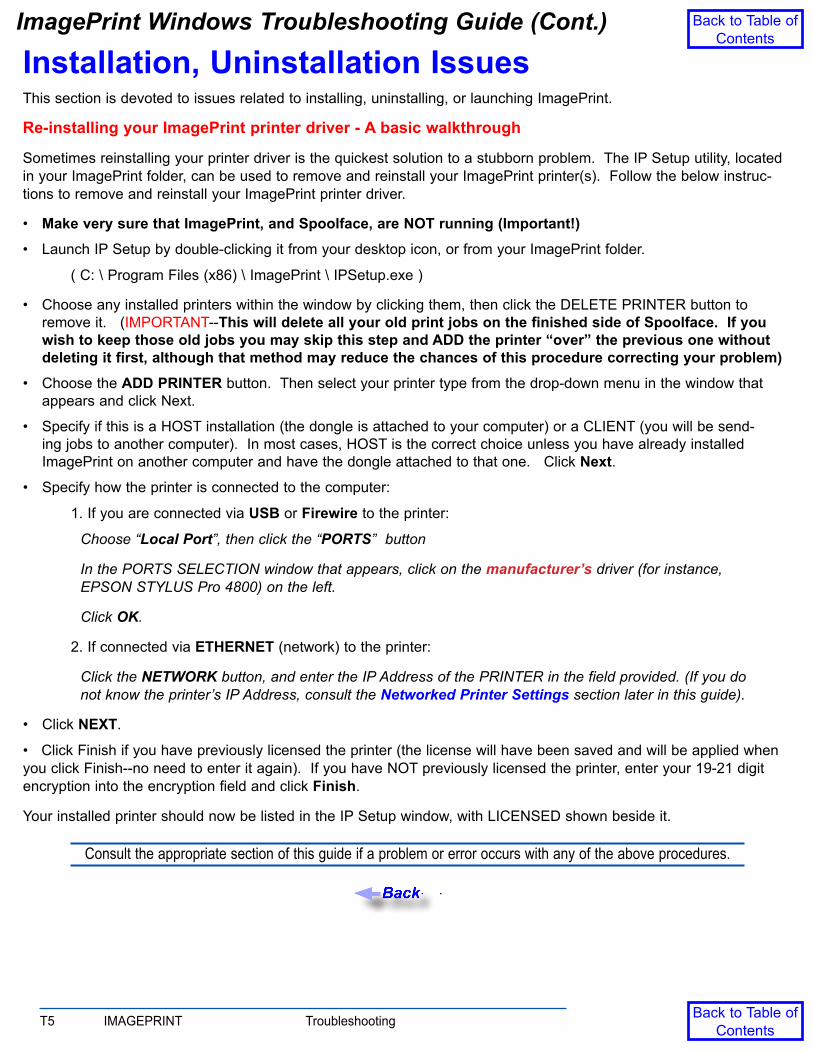
Installation, Uninstallation IssuesThis section is devoted to issues related to installing, uninstalling, or launching ImagePrint.
Re-installing your ImagePrint printer driver - A basic walkthrough
Sometimes reinstalling your printer driver is the quickest solution to a stubborn problem. The IP Setup utility, located in your ImagePrint folder, can be used to remove and reinstall your ImagePrint printer(s). Follow the below instruc-tions to remove and reinstall your ImagePrint printer driver.
• Make very sure that ImagePrint, and Spoolface, are NOT running (Important!)• LaunchIPSetupbydouble-clickingitfromyourdesktopicon,orfromyourImagePrintfolder.
(C:\ProgramFiles(x86)\ImagePrint\IPSetup.exe)
• Chooseanyinstalledprinterswithinthewindowbyclickingthem,thenclicktheDELETEPRINTERbuttontoremove it. (IMPORTANT--This will delete all your old print jobs on the finished side of Spoolface. If you wish to keep those old jobs you may skip this step and ADD the printer “over” the previous one without deleting it first, although that method may reduce the chances of this procedure correcting your problem)
• ChoosetheADD PRINTER button. Then select your printer type from the drop-down menu in the window that appears and click Next.
• SpecifyifthisisaHOSTinstallation(thedongleisattachedtoyourcomputer)oraCLIENT(youwillbesend-ing jobs to another computer). In most cases, HOST is the correct choice unless you have already installed ImagePrint on another computer and have the dongle attached to that one. Click Next.
• Specifyhowtheprinterisconnectedtothecomputer:
1. If you are connected via USB or Firewire to the printer:
Choose “Local Port”, then click the “PORTS” button
In the PORTS SELECTION window that appears, click on the manufacturer’s driver (for instance, EPSON STYLUS Pro 4800) on the left.
Click OK.
2. If connected via ETHERNET (network) to the printer:
Click the NETWORK button, and enter the IP Address of the PRINTER in the field provided. (If you do not know the printer’s IP Address, consult the Networked Printer Settings section later in this guide).
• ClickNEXT.
•ClickFinishifyouhavepreviouslylicensedtheprinter(thelicensewillhavebeensavedandwillbeappliedwhenyou click Finish--no need to enter it again). If you have NOT previously licensed the printer, enter your 19-21 digit encryption into the encryption field and click Finish.
Your installed printer should now be listed in the IP Setup window, with LICENSED shown beside it.
Consult the appropriate section of this guide if a problem or error occurs with any of the above procedures.
T6 IMAGEPRINTTroubleshooting
ImagePrint Windows Troubleshooting Guide (Cont.) Back to Table of Contents
Back to Table of Contents
Installer stops, never getting to the IP Setup window
If the Installer fails or never launches, check the following for possible causes and solutions:
Anti-Virus software: FailuretoinstallmaybecausedbyVirusdetectionsoftwarepreventingthesecondphase of the ImagePrint install from proceeding.
Permissions: You may also see this error if there is a permissions issue that prevent the installer from writingtothenecessaryfolder(c:\programfiles(x86)).Tryright-clickingtheinstallerandchoosingto“RunAsAdministrator”.
Disk space: It is also possible that there is insufficient disk space to complete the installation (ImagePrint requires approx. 100 megabytes of disk space, depending on the number of profiles you have selected to install).
Problem with CD-ROM: If you are installing from cd, you may have a problem with the cd, or your cd drivemayhavecompatibilityissuespreventingitfromreadingthecd.(Ifyouseeany“media”errorsthisis most likely the case). See the section later in this guide: Problems with the CD-ROM for information on this issue.
T7 IMAGEPRINTTroubleshooting
ImagePrint Windows Troubleshooting Guide (Cont.) Back to Table of Contents
Back to Table of Contents
Problems with the CD-ROM
IfinstallingImagePrintviaCD-ROM,someerrorsmaybeduetoproblemswiththephysicalCD-ROMdisk.Any“media”errorsgeneratedbythesystemareapossiblesignthatthisistheproblem.Belowaresomesuggestions that may help get around disk problems:
• IMPORTANT:Checkyourc:\programfiles(x86)foldertoseeifanImagePrintfolderhasbeencreated.If so, delete it before retrying the installation. Installing over a partially installed folder may cause prob-lems later on.
• ChecktheCDforcracksorotherobviousdefects.Cleanthediskifyouseeanysmudgesorfinger-prints.
• TrycopyingthefilesfromtheCDtoafolderonthedesktopofyourcomputer.Ifyoucandothiswithoutanerror,thenrunthe“ImagePrintInstaller.exe”filefromthedesktopfolder.
• TrycopyingthefilesfromtheCDtoafolderonadifferent computer. If this works, it indicates a compat-ibility issue with the CD drive on the first computer. Copy the installation files from the 2nd computer to the first and then try to install it (or burn the files to a CD and use that as your installation disk).
• Finally,rememberyoucandownloadthefullinstallerfromourupdatesiteontheinternet.Sinceweupdate the software occasionally it’s likely your CD will become obsolete in time anyway so this is often preferred over cd installation even if your cd is fine. Installing from the downloadable installer is the best way to stay up to date. Check the section of this guide entitled: How do I Update ImagePrint for more information on downloading the installer.
T8 IMAGEPRINTTroubleshooting
ImagePrint Windows Troubleshooting Guide (Cont.) Back to Table of Contents
Back to Table of Contents
Can’t uninstall ImagePrint
ImagePrintv10nowusesthestandardWindowsUninstallprocedures.
TouninstallImagePrint,gotoyourWindowsControlPanelandchoose“ProgramsandFeatures”.You’llseeImageprint v10 in the list of programs to uninstall.
Afterdouble-clickingtheImagePrintv10entry,you’llbepromptedtoRepairorUninstall.ChooseUninstalltoremovethe software. You’ll be given a choice to remove User settings and spooler files as part of the uninstall process--if you choose to remove those files, old jobs and settings will not be preserved if you reinstall ImagePrint later.
If the Uninstaller has any problems, it will likely be because a running process is preventing it from removing the ImagePrint folder. Make sure that ImagePrint and Spoolface are NOT running when you run the uninstaller. If they aren’t, and you still have an error in uninstalling, usually our background process “MUXD.EXE” is the problem. You canmanuallyendthatprocess(andany“hung”uninstallerprocesses)andruntheuninstalleragainaccordingtotheinstructions below:
Toendthe“MUXD.EXE”process,theWindowsTaskManagerisused.LaunchtheTaskManagerbypressingtheControl->ALT->Deletekeysonyourkeyboard,andchooseTASKMANAGERinthewindowthatappears.IntheTaskManager,choosePROCESSES,andlookforMUXD.EXEamongtheactiveprocesses.HighlighttheMUXD.EXElist-ing,thenclickthe“EndProcess”buttontoendit(youmaythengetawarningmessagethatyoucanclickOKto).Ifyou see any instances of the Uninstaller, you should end those in the same way.
If you still have problems with the Uninstaller, you can manually uninstall ImagePrint using the procedure in the next section, Manually Uninstalling ImagePrint.
Manually Uninstalling ImagePrint
If the Imageprint Uninstall fails, you can manually remove ImagePrint by following these steps.
Step 1: Make sure no ImagePrint related programs are running. Make sure ImagePrint and Spoolface are closed, and thenkilltheMUXD.EXEbackgroundprocessviatheWindowsTaskManageraccordingtothefollowingprocedure:
Killing MUXD Toendthe“MUXD.EXE”processlaunchtheTaskManagerbypressingtheControl->ALT->Deletekeysonyourkeyboard,andchooseTASKMANAGERinthewindowthatappears.IntheTaskManager,choosePROCESSES,andlookfor
MUXD.EXEamongtheactiveprocesses.HighlighttheMUXD.EXElisting,thenclickthe“EndProcess”buttontoendit(youmaythengetawarningmessagethatyoucanclickOKto).ThenclosetheTaskManager
STEP2:Goto/ProgramFiles(x86)/ImagePrint,anddouble-clickthe“ImagePrintUSERDATAfolder”shortcut.Moveuponedirectorylevel(youwillbeinafoldercalled“ColorByteSoftware”andthere,deletefhefoldercalledImagePrint. This will remove all your settings and old print jobs.
STEP 3: Go to the folder: / Windows / SysWow64anddeletethefile“libiccdll.dll”ifitisthere.NOTE:Youmayneed to adjust your window settings to Show Hidden System Filesifyoudonotseeany“dll”filesinthisfolder.
STEP4:DeletetheImagePrintfolderfromitslocationinthe“ProgramFiles(x86)”folderofyoursystem(default:c:\programfiles(x86)\imageprint)
STEP5(OPTIONAL):YoucannowdeleteanyshortcutsonyourdesktopandtheWindowsStartMenurelatedtothesoftware.
T9 IMAGEPRINTTroubleshooting
ImagePrint Windows Troubleshooting Guide (Cont.) Back to Table of Contents
Back to Table of Contents
During installation I see a message that the driver has not passed Windows Logo testing to verify its compatibility with Windows
This message indicates that the Dongle driver software installed during ImagePrint setup has not been submitted for testing to Microsoft. This message can safely be ignored—click continue to proceed with the installation.
Vista, Windows 7, 8 and 10 installation issues
ImagePrint should work fine on these operating systems, but due to the often more stringent security set-tings, you may need to adjust user access settings. If you have problems installing, try running the installer asanAdministrativelyprivilegeduser.(YoucandothisbyRIGHTclickingtheinstallerandchoosingRunasAdministrator.)
Issueswiththedongledriversnotinstallingmayalsobeduetosecuritysettings.64bitsystemsmaynotallowthe installation of unsigned drivers. If the dongle drivers report an error, or the dongle number does not show up in the dongle field of the IP Setup window, consult the Vista 64 dongle issues entry in the Encryption, Demo and Dongle Issues section of this guide.
After Installation, no icons appear on my desktop
Shortcuts for ImagePrint, Spoolface and the ImagePrint PDF manual should exist on your desktop after installation. Iftheydon’t,it’slikelythatyouarenotsettoviewthecommonWindow’sdesktop“AllUsers”.Youcanlocatethemissing shortcuts by opening the following folder, and dragging them out to your current desktop.
/Users/AllUsers/Desktop
You can of course also create shortcuts by going to the ImagePrint folder, right clicking the program you wish to makeashortcutfor(suchasImagePrint.exeorSpoolface.exe)andchoosing“CreateShortcut”fromthemenuthatappears. Then drag the newly created shortcut file to your desktop.
T10 IMAGEPRINTTroubleshooting
ImagePrint Windows Troubleshooting Guide (Cont.) Back to Table of Contents
Back to Table of Contents
How do I update/upgrade my software?
- Updating to the latest revision of v10 when already running v10
Updating ImagePrint v10 to the most current revision is easy. The latest update of ImagePrint v10 is always available from within the software via the Help -> Check for Updates command in the Main menu.
If,forsomereason,theUPDATEprocessdoesnotwork(oryouarenotconnectedtotheinternetonyourImagePrintcomputer)youcanmanuallydownloadtheUPDATERandapplyit.Tomanuallydownloadtheupdater--gotothefol-lowing internet location via a web browser:
www.colorbytesoftware.com/aupdates/v10
ThelatestupdatefilewillbeavailablewithintheMacorWindowsfolderonthatsite--downloadtheupdatefiletoyourImagePrint computer and double-click it to run.
- Upgrading from a previous version of ImagePrint to ImagePrint 10
UpgradingfromapreviousversionofImagePrint(suchas7,8or9)toImagePrint10isdoneviatheImagePrintUpgradeutility,whichcanbedownloadedfromtheSUPPORTpageatwww.colorbytesoftware.com
The Upgrade utility should only be used to upgrade a system already running a previous version of Imageprint. If installing on a computer that does not have Imageprint installed, you should use the Full Installer, also available on the ColorByte Support page.
!! Do not install or upgrade your software to a new VERSION (eg, from 7 to 8) if you do not already have an ImagePrint encryption for the new version or the software will run in demo mode (putting the word DEMO on
your prints).
- Determining your Version and build (revision) number
To check the version and revision number of your copy of ImagePrint:
Macintosh-Choose“AboutImagePrint”fromtheImagePrintmenu
Windows-Choose“About...”fromtheImagePrintHelpmenu
- Installer and Upgrade Dtility Download Location
If you need to reinstall completely, the latest full install of Imageprint is available at the ImagePrint version 10.0 web site via the Technical Support page (accessed via the HELP menu):
www.colorbytesoftware.com
- Upgrade Eligibility and Pricing
Updates to a new revision of the same version (for example, from ImagePrint 10.0.1 to 10.0.2 is free.
Updating to a different version (for example, from version 9 to 10) usually is a purchased update, dependent on how long since you’ve last updated or purchased. To check your status, send an email (including your dongle number!) to: [email protected]
Upgrade pricing depends on your printer license(s) and how long you have had the software since last updating. For pricing information, email our sales dept. with your dongle number at: [email protected]
T11 IMAGEPRINTTroubleshooting
ImagePrint Windows Troubleshooting Guide (Cont.) Back to Table of Contents
Back to Table of Contents
Networked Printer Settings
ThefollowinginformationistakenfromtheAppendixoftheImagePrintmanual
Getting the Printer IP Address
Whenprintingtoaprinterviaanethernetconnection,theTCP/IPcommunicationprotocolwillbeused.Thisprotocoldependsoneachdeviceonthenetworkhavingavalid,uniqueIPAddress.
YouwillneedtoprovidetheIPAddressof the printer to IP Setup during installation so ImagePrint can communi-catewithitatprinttime.Althoughdifferentprintersandnetworkcardsmayvary,somemethodofaccessingtheipaddress, either by printing a status page or via the front panel of the device, will be available.
Front Panel:MostprintersallowyoutoseeandspecifytheIPAddressviathefrontpanelcontrolsontheprinter.Consult your printer’s manual for instructions for how to do this.
Status Page:IncaseswhereyouarenotabletousethefrontpaneltosettheIPAddress,checkforasmallorrecessed button beside the port where the network cable plugs into the printer. Pushing this button for one second willcausemostprinterstooutputapageshowingtheircurrentsettings,includingtheIPAddress.(Make sure to load scrap paper on the printer--not expensive art paper!)
TheIPAddresswillconsistof4numbers,eachbetween0and255,separatedbyperiods.Thisisthenumberyouwillneed to use in the Network fields when installing the printer with IP Setup.
Checking TCP/IP connectivity
Onceyouhavetheprinter’sIPAddress,typeitintotheaddressfieldofawebbrowser(likeInternetExplorer,SafariorFirefox).Justtypethe4numbersoftheipaddress,separatedbyperiods,intotheaddressfield--noothertext(likehttp://)isneeded.YoushouldseethePrinter’sHTMLsetupscreen.Using a web browser in this way is a good test ofyourcomputer’sTCP/IPconnectivitytotheprinter--ifthebrowserfailstoshowtheprinter’ssetupscreen,thenyouknowyouhaveaTCP/IPcommunicationsproblem.
Even if you can print to the printer via the manufacturer’s driver, it does not necessarily mean you have TCP/IP communi-cation to the printer. TCP/IP is required by ImagePrint when printing to a printer connected via Ethernet.
Different IP Address sub-nets between printer and computer: Communication problems can arise if the IP Addressnumberingschemeoftheprinterisdifferentthanthatofcomputer.Forexample,iftheprinter’sIPAddressis:192.168.0.12,andyourcomputer’sis30.40.16.8,thenitislikelytherewillbenocommunicationviaTCP/IPbetweenthedevices.ComparetheIPAddressofyourcomputertothatofyourprinter.Ifthefirst3setsofnum-bers are not the same, this may be the problem (the last number should always be unique for each device). In caseswherethenetworkschemesdiffer,youmaynotbeabletocommunicatewiththeprinteruntiltheIPAddressischanged to one that is compatible with the rest of your network.
You can check the ip address of your computer on Macs via the Network Control Panel in System Preferences, on PC’s it isavailableintheTCP/IPpropertiesofyournetworkcard.
Continued
T12 IMAGEPRINTTroubleshooting
ImagePrint Windows Troubleshooting Guide (Cont.) Back to Table of Contents
Back to Table of Contents
Network Printer Settings (Continued)
Changing the printer’s IP Address (if needed)
Front panel:IftheprinterallowsyoutochangetheIPAddressviathefrontpanelontheprinter,changingthe address is relatively easy--consult your printer’s manual for instructions.
Manufacturer’s utility:Incaseswhereyoucan’tsettheIPAddressviathefrontpanel,youmayneedtouse a setup utility provided by the manufacturer. For Epson printers, the Net Assist utility is used to setup the network parameters on your printer. That utility is provide on the Epson printer setup cd’s, and is also available for download from the Epson web page.
Reset the printer to factory defaults: If your network uses a router, another method of changing the printer’sIPAddressistoresettheprintertoitsfactorydefaultsettingsbyholdingdowntherecessedbuttononthenetworkcardoftheprinterwhileturningtheprinteroff,thenon.Whentheprintercomesbackup,itwilldefaulttoDHCPmode,whichwillcauseittogetanewIPAddressfromtherouterwhichshouldthenbe correct for your network. Press the recessed button again (for 1 second) to output a new status page showingthecurrentIPAddressandtrytoreachtheagainwiththenewIPAddressinawebbrowser.
Setting the printer to a Manual (Static) IP Address
Onceyouhavetheprinter’sIPAddress(andhaveusedittospecifytheconnectiontotheprinterinIPSetup), itisimportantthatthisIPAddressdoesn’tchangeinthefuture.Otherwise,ImagePrintwillnolon-gerbeabletofindtheprinter.AnIPAddressthatdoesn’tchangeiscalled“Static”or“Manual”.
TosetyourprintertoaManualIPAddress,logintotheprinterviaawebbrowserasdescribedearlierinthissectionbyputtingtheIPAddressoftheprinterintothebrowser’saddressfieldandpressingthereturnkey. If the printer is reachable on your network, you should get a login window, with access to the printer’s configuration settings.
Onceyouareontheprinter’ssetuppage,youneedtospecifythe“Method for Acquiring the IP Address”. For most printers this setting is in the TCP/IP portion of the Configuration section of the Printer Setup window, however the specific location and terminlogy may vary for some printers. The choicesaretypically:AUTOorMANUALMakesureitissettoMANUALtopreventtheIPAddressfromchangingeachtimetheprinterisrestarted.Afterchangingthesetting(ifnecessary)applythesettings--usually that is done via the SUBMIT button at the bottom of the setup screen.
Note:Mostprintersetupscreenswillaskforausernameand/orpasswordwhenapplyingnewsettings.Unless you have previously set a password for your printer, the entries should be left blank for most printers asthatisthedefaultusernameandpassword.Ifthatfails,tryusingthename“admin”fortheusernameand
nothing for the password.
T13 IMAGEPRINTTroubleshooting
ImagePrint Windows Troubleshooting Guide (Cont.) Back to Table of Contents
Back to Table of Contents
Encryption, Dongle and Demo Mode IssuesImagePrint licensing problems and solutions are listed in this section
How do I get my encryption number?
In order to enable your software to print in non-demo mode, you must first license it.
Licensing is done via an encryption number (19 to 20 digits in length) which is specially made for your unique dongle number and the printer(s) you are using with ImagePrint. This number must be entered into the encryption field of IP Setupafterinstallingtheprinter.WhentheLicensebuttonispressed,theinstalledprinterwillshow“Licensed”andyou’ll be ready to print.
To get your encryption number, you must use the ColorByte license server web page. This server is available on the internet24hoursaday,7daysaweek.
To use the ColorByte encryption server you will need 3 things:
1. Your unique 6 digit dongle number. This number is provided on the dongle itself, as well as on the label on the back of your software cd case. It will
also be listed in any upgrade emails you receive from ColorByte.
2. The 6 letter login code for each printer type you will be using with ImagePrint. This login code can be found on the back of your original cd case although be careful. That code will be for the
version of ImagePrint you’re original cd was created for. If you have updated to a new version, use the login code you recieved in the emailed upgrade instructions from Colorbyte.
Remember--logincodesarespecifictotheversion of ImagePrint you are using--do not use an older login code to get an encrytpion for a later version of ImagePrint or you will just re-receive the previous versions encryption code and it will either fail to license the software, or cause it to print in demo mode.
Ifyouhavepurchasedmultipleprinterlicensesforthesamecategoryofprinter(forexample,two17inchprinterssuch as an Epson 3800 and an Epson 4800) then you will have one single login code that is good for two printers.
3. A valid email address
Log on to the ColorByte encryption server by clicking the following web address or by pasting it into your web browser’s address bar and pressing the return key:
www.colorbytesoftware.com/getcode.php
Note: Do not type the above address into a search engine such as Google. Put it in the address bar of the browser.
Youwillbetakentoapagecontainingfieldsforthe6digitdonglenumber,the6letterlogincode,andtheemailaddresstheencryptionshouldbesentto.Afterfillingoutthosefields,clickSubmittohavetheencryptionemailedtoyou.Youwillusuallyreceivetheemailwithin5minutes.
If you don’t receive the email: Check for any junk mail filters on your computer or in use by your Internet Service provider---in most cases, instances where the encryption email is not received are due to them being misinterpreted as junk (spam) mail by such systems.
There is no limit to the number of times you can use the encryption server, and you can use it with a different email addressifyouhaveproblemswithyouroriginalemailone.Justmakesuretousetherightlogincodeforyourversionof
ImagePrint(i.e.,don’tuseyourversion7.0logincodeifinstallingversion10.0).
T14 IMAGEPRINTTroubleshooting
ImagePrint Windows Troubleshooting Guide (Cont.) Back to Table of Contents
Back to Table of Contents
Dongle number is never seen in IP Setup (it shows “0” in the Dongle Number field)
Ifthe6digitdonglenumberdoesnotappearintheDongleNumberfieldinIPSetup,trypluggingthedongle into a different USB port, or a USB hub if available. (Note that the light on the dongle does not stay on all the time--not seeing the light is not necessarily an indication that the dongle is malfunction-ing). Make sure to quit and restart IP Setup after trying a different port so it will recheck for the dongle.
Ifthedonglenumberstillfailstoappear,theremaybeaproblemwiththedongledriver.WheninstallingImagePrint,itisimportanttoinstallthesoftwareBEFOREinsertingthedongle,orWindowswillattempttoputitsowndriverinplacewhenitsensesthedongle.SinceWindowsdoesn’thaveaccesstothecorrect dongle drivers, the operation will fail, and the dongle will not be seen correctly by the system.
YoucancheckifthedongledrivershavebeeninstalledcorrectlybyopeningtheWindowsDevice Manager. (To open the Device Manager, choose Control Panels from the Windows Start menu, then System, then click Hardware, then the Device Manager link). If there is a question mark, or exclamation mark, beside the USB entry for the dongle, the dongle drivers have probably been incorrectly installed.
To reinstall the dongle drivers:
• Rightclickthedrivershowingaquestionmarkorexclamationpointandchoose“Uninstall”inthewin-dow that appears.
• Removethedongle.
• Reboot.
• Oncethecomputerisbackup,openthec:\program files(x86)\ImagePrint folder on your sys-tem, then the License folder, then the Marxfolder.RuntheCBSetup program by double-clicking it. Whenprompted,specifythatitinstalltheUSB drivers for the dongle.
• Rebootagain.
• Insertthedongleonemoretime.Thenewhardwarewizardshouldappear,andshouldautomaticallyfindthedrivers.(IfyouseeawarningthattheyareunsignedbyMicrosoft,clickOKtoignoreit).LettheWizardfinish.
• RunIPSetupbydouble-clickingitfromyourdesktopicon,orfromtheImagePrintfolder,and,hope-fully, the dongle number will appear.
If the dongle still fails to appear in IP Setup, there may be a problem with the dongle, or with the USB bus on your computer. If possible, try installing ImagePrint as a test on another computer to confirm the dongle can still not be seen (for test purposes, no printer need be attached to the other computer--just specify any printer within during installation).
If the dongle fails to appear on a second computer, the dongle may have malfunctioned (this is rare, but can happen due to physical or electronic damage). Contact ColorByte or your ImagePrint dealer in this case.
Until the dongle number can be seen by the computer, and your encryption can be suc-cessfully entered, the software will either run in DEMO mode (printing DEMO on all out-
put) or will not print at all!
T15 IMAGEPRINTTroubleshooting
ImagePrint Windows Troubleshooting Guide (Cont.) Back to Table of Contents
Back to Table of Contents
My encryption won’t LICENSE in IP SETUP
The IP Setup program is used to both setup and license your printers. If, after entering your encryption the installed printer(s) don’t show as LICENSED in IP Setup, check the following:
1. Make sure the 6 digit dongle number is showing within the dongle number field of the IP SETUP window. Ifthedonglefieldshows“0”,thenthesystemisnotcurrentlyseeingthedongle.Check the entry in this guide entitled: Dongle never seen in IP Setup; Dongle number shows 0
2. If the dongle number is showing up correctly in IP Setup, but the encryption still won’t license, check each of the following points:
• If you have more than one printer, make sure to try all of the encryptions you have received. IP Setup will automatically apply the correct encryption to the installed printer it was created for. If that printer type has not been installed yet, the encryption will be stored and automatically applied when the printer is installed.
•Ifyouhavemultipleprintersofthesamecategory(forinstance,two44inch(largeformat)printers)thenyouwillhavereceivedasingle“multipleprinter”encryption.EnterthisencryptionintheLicensewindowas you install each printer of that type.
• If you receive NO error message but the printer doesn’t show LICENSED at the end of the printer line inIPSetupafterenteringtheencryption,trydeletingthefile“ipauth”,fromitslocationintheImagePrintUSERDATAfolderonyoursystem.YoucangettotheUSERDATAfolderbydouble-clickingthe“ImagePrintUSERDATAfolder”shortcutlocatedinyour“/programfiles(x86)/imageprint”folder.Onceyou have deleted the ip auth file, try to LICENSE the encryption again via IP Setup.
• Make sure you are using the right encryption for your version of ImagePrint. Even if IP Setup shows LICENSED for the printer, an older encryption will cause DEMO to appear on your prints at print time.Forinstance,a7.0versionencryptionwillNOT work with version 8.0, even if it allows you to license the encryption in IP Setup.
If updating from a previous version, typically, the new encryption information is included when you receive your upgrade information via email. (Do not use your old login code to receive your encryp-tion from ColorByte’s encryption web server, as it will just send you the old version encryption again).
T16 IMAGEPRINTTroubleshooting
ImagePrint Windows Troubleshooting Guide (Cont.) Back to Table of Contents
Back to Table of Contents
DEMO appears on all prints or NOTHING prints with red error messages appearing in spool-face
ThisoccurswhenImagePrintisrunningin“DEMO”modeduetothedonglenotbeingavailableortheproperprinterencryptionnotbeinginplace.(NOTHINGwillprintifyouarecurrentlysetto“NotPrintinDemo”mode under spoolface’s QUEUE menu). CheckSPOOLFACE’sstatusarea,ontherightside,forlicensingmessages(typicallyinRED)toconfirmthiscondition).If no red messages appear, and licensing appears to be correctly set up, and nothing prints, then this may be a non-license related printing issue. See the PRINTINGISSUESsectionofthisdocumenttotroubleshoot.
Be aware that if you are using the Desktop (LITE) version of ImagePrint, use of TEMPLATES, PAGE TILING, BACKGROUNDS, FRAMES, GALLERY WRAP and the COLOR CORRECTION TOOLS will cause the software to run in DEMO Mode. Many Epson 2200, 2400 and 2880 printers are pur-chased as LITE versions.
If the above doesn’t apply, please check the following:
1. Make sure that an ImagePrint dongle is attached to your computer. You may want to try plugging the dongle into another USB port, or a USB hub. You can check to see if the dongle is being seen by launching the IP Setup program from the ImagePrint folder, and checking that the 6digitdonglenumberappearsintheDongleNumberfield.
2. Make sure that a valid encryption has been entered and licensed in the IP SETUP utility. (IP SETUPcanbelaunchedfromtheImagePrintfolderonyoursystem(c:\programfiles(x86)\image-print\ipsetup.exe))
If even after entering the encryption, the installed printer(s) doesn’t show as LICENSED, see the entry in this guide entitled: Encryption won’t license in IP Setup.
3. If the dongle is connected to your computer or USB hub, the printer has been licensed in IP Setup, and DEMO still appears on prints, double-check in IP Setup that the dongle is still seen. (Sometimes, plugging other USB devices in or unplugging them can cause the dongle to not be seen temporarily).
4. If none of the above suggestions apply, its possible that the dongle drivers have been incor-rectly installed. Try the procedure listed in the previous entry Dongle number never seen In IP SETUP.
T17 IMAGEPRINTTroubleshooting
ImagePrint Windows Troubleshooting Guide (Cont.) Back to Table of Contents
Back to Table of Contents
Vista 64 and Windows 7 and 8 dongle issues
IfanerroroccurswhenyoupluginyourdongleonaVista64system,orthedonglenumberdoesnotshowupinIPSetuponaVista64system,theremaybeproblemswiththedongledriversandthatoperatingsystem.
AnalternatesetofdongledriversisavailableintheImagePrintfolderafterinstallationthatmayworkbetterwithVista64.Trythefollowingproceduretousethesedriversinsteadofthestandardones:
• WiththedonglepluggedintoaUSBport,opentheWindowsDeviceManager (ChooseControlPanelsfromtheWindowsStartmenu,thenSystem,thenclicktheDeviceManagerlink).
• Inthe“UniversalSerialBus”(USB)interfacelist,lookforthedongledriver.Itmayappearwiththename“CBUSB”inthetitle,orappearasadevicewithaquestionmarkorexclamationmarkbesideit.Ifunsurewhichdevicerepresentsthedongle,tryremovingthedonglefromtheUSBport.WatchastheDeviceManager list updates to reflect the absence of the dongle. Plug the dongle back in, and note which device re-appears in the list. That’s the dongle driver.
• RightclickthedongledriverintheDeviceManagerlist,andinthemenuthatappears,choose“UpdateDriverSoftware”.
• Inthewindowthatappears,choosetoBrowseyourcomputerforthedriversoftware,andnavigatetothefol-lowing folder:
C:\ProgramFiles\ImagePrint(x86)\license\Marx\vista_cb_drivers
• Click“Next”tohaveVistaupdatethedongledriverstothenewversions.Onceitisdone,closethedevicemanager, and try launching IP Setup (from the ImagePrint folder) to see if the dongle number now appears.
(Ifthevista_cb_driversfolderisnotavailable,contactColorByte’ssupportdept.tohaveitemailed.)
T18 IMAGEPRINTTroubleshooting
ImagePrint Windows Troubleshooting Guide (Cont.) Back to Table of Contents
Back to Table of Contents
Problems starting or using ImagePrintProblems related to launching or using the ImagePrint interface are listed in this section
ImagePrint won’t launch
• MakesurethatyouhavesetupyourprintersusingtheIPSetuputilityduringtheinitialinstallationfromthe CD. (You can double-check your installation by launching IP Setup from the ImagePrint folder on your system:defaultlocation:c:\programfiles\imageprint(x86)).Ifnoprintersarelisted,thennonehavebeeninstalled and ImagePrint will fail to launch.
• MakesurethattheImagePrintfolderhasnotbeenmovedorrenamed.Thisfoldermustretainthesamename and location as it had after installation or the software will not run.
• MakesurethatyouarelaunchingtheapplicationfromeitheravalidshortcutordirectlyfromtheImagePrintfolder. Do NOT move ImagePrint’s application files to a different location other than the folder they were installed to or they will NOT work. For information on ImagePrint shortcuts, see the entry in this guide enti-tled: After Installation, no icons appeared on my desktop.
• IfImagePrintpreviouslylaunched,thensuddenlystoppedresponding,somethingmaybecorruptinit’sset-tings.Remove,thenreinstalltheinstalledImagePrintprinterviaIPSetupbyfollowingtheinstructionsinthe Reinstalling your ImagePrint printer driver entry earlier in this guide. (You will lose all old print jobs when removing the printer).
• TryrightclickingtheImagePrint.exefilefromit’slocationintheImagePrintfolder(c:\programfiles(x86)\imageprint)andinthemenuthatappears,choose“Runasadministrator”.Ifthisworks,youmayhavesecurity or permissions settings on your system that prevent your user login to launch Imageprint.
• Aninvalidorcorruptmonitorprofilemaycausethiscondition.Ifyou’veprofiledyourmonitorrecentlytestthisbyaccessingyourWindowsControlPanels,chooseDisplay,thenSettings,thenAdvanced,andtempo-rarilychangetheSystemMonitorprofiletoastandardworkingspace(suchasAdobe1998).Remembertheprevious profile so you can return to it later. Then try launching ImagePrint again. If it works, there may an issue with your monitor profile. (ImagePrint supports only ICC version 2 (not 4) profiles, and only the Matrix (not LUTS) type.
• RemovingImagePrintcompletelyandreinstallingmaycorrectseriouscorruptionswithinthesoftware.Consult the ImagePrint users manual (located in your ImagePrint folder) for information on removing and reinstalling ImagePrint completely.
• Anti-virus software or other security related software has been known to prevent ImagePrint from launch-ing. Try disabling such software (or removing it temporarily as disabling often does not fully de-activate anti-virus software) and launching again.
• Ifallelsefails,bootintoSAFEmodeandtrylaunchingImagePrint.Ifthatworks,somebackgroundprocess(like anti-virus software or a device driver) is incompatible with ImagePrint. Disable or uninstall any non-essential processes in a process of elimination to locate the one causing the problem.
T19 IMAGEPRINTTroubleshooting
ImagePrint Windows Troubleshooting Guide (Cont.) Back to Table of Contents
Back to Table of Contents
Files won’t open
Far and away, the most common problem with images failing to open is due to an illegal character in the file name OR THE NAME OF THE FOLDER(S) THAT THE FILE IS IN. Check the name of the file (and the folder(s) the file is in) for any character that is not a letter, number, underline, hyphen or space. Check the entire path of folders--any problem character in any folder in the file path will cause the image not to open. Don’t simply check the file name--check each folder, and sub-folder, along the path containing the file for illegal characters. (Did we mention that you should check the entire path?)
Problem characters include (but are not restricted to): parenthesis (), pound signs #, apostrophes ‘, ampersands &, commas,,dollarsigns$andbullets•.Also--makesureyourfileshavetheproperextensions in the file name for theirformat.(.tif(or.tiff),.psd,.jpg)ortheywillnotberecognizedasimagefilesbyImagePrint.Asatest,tryrenam-ing your file to a simple name (i.e., test.tif, test.jpg or test.psd) and move it to your local computer’s desktop. Then try to open it in ImagePrint. If it opens, then either something in the filename or pathname is causing an issue, or per-missions on the original folder or drive the image was located in was the culprit.
If the image still fails to open, check the sections of this guide pertaining to problems with the file type you are working with(JPEG,PSDorTIFF).
Remember that ImagePrint only opens JPEG (RGB only), PSD and TIFF files. Other formats such as PostScript, EPS, PDF, or Raw files are not supported.
JPEG files won’t open (or open very slowly)
• Tryre-savingtheJPEGfilefromPhotoshop,andmakesureNOTtouse“PROGRESSIVE”astheJPEGcompres-sionformat.Also,onlyRGBJPEGfilesaresupported(notCMYKJPEGfiles).
JPEG files are opening and printing at the wrong size!
Currently,ImagePrinttreatsallJPEGfilesas300PPI.Thisistoavoidproblemsbecauseofincorrectdpidatathatsometimes is saved by Digital Cameras. If they were created at a different resolution, try re-saving them at 300 PPI tocorrectthesizeproblem,orsavethemasTIFForPSDfiles,whichwillusethecorrectdpisettingfortheimage.
Some windows (such as the Image Strip, Shuffle, etc) or SpoolFace not appearing when chosen
Display Change: If you are using a new monitor with a different resolution, or have recently changed the resolution on your current monitor, or have gone from two monitors down to one, it’s possible that the window is being placed outside of your current displayed area. To fix the problem, temporarily reset your monitor to the old resolution and then manually move the windows back into range.
If a change in your display is definitely not the problem, or it is not possible to go back, you may need to delete ImagePrint’sRegistrykey.Note:deletingthiskeywillrevertmostImagePrintsettingsbacktotheirdefaults.Follow the procedure in this guide entitled: Deleting the ImagePrint Registry Settings to correct the problem.
Make sure that ImagePrint and Spoolface are NOT running before deleting the registry key.
T20 IMAGEPRINTTroubleshooting
ImagePrint Windows Troubleshooting Guide (Cont.) Back to Table of Contents
Back to Table of Contents
TIFF files won’t open (or open very slowly)
• MakesuretocheckthegeneralquestionregardingFileNamesearlierinthisdocument--nothingbutletters,spaces, underlines, hyphens and periods should be in the file name.
• Make sure compression is not used when saving your images. ZIP compression is often turned on for no discernible reason in Photoshop CS 3 even when it had previously been turned off so don’t assume that it isoffifyou’veneveraccessedit.Doa“SaveAs...”inPhotoshoponyourimagetoensurethatnocompres-sion is used.
• The Pixel Order can also cause images not to open, or to open and display incorrectly or to open and print veryslowly.InPhotoshop’s“SaveAs...”dialog,intheTIFFoptionssection,makesurethePixelOrderisalwaysINTERLEAVED,never“PerChannel”.
• Alpha Channels: ImagePrint does not support non-color channels in TIFF files. Make sure that no extra channels are present in your image. To check for extra channels, open the file in Photoshop. Choose CHANNELSunderthePhotoshopWindowsmenu.IntheChannelspalettethatappears,youshouldonlyseethestandardcolorchannels(i.e.,R,G,BforanRGBimage).Deleteanyextrachannelsandsaveacopyof your image for printing.
PSD (Photoshop) files won’t open (or print slowly)
• MakesuretocheckthegeneralquestionregardingFileNamesearlierinthisdocument--nothingbutletters,spaces, underlines, hyphens and periods should be in the file name
• Inmanycases,problemsopeningPhotoshopfilescanberesolvedbyflatteningtheimageinPhotoshoppriortoopeningitinImagePrint.Whilelayersoftenarefine,therearesomelayersthatcancauseproblems--thisisespeciallytrueof“vector”typelayers,likeclippingpathsorlivetext.
Newer versions of Photoshop (CS, CS2 and CS3) have modified their file format, and sometimes need to be flattened before being opened in ImagePrint even if the same file, saved with a previous Photoshop version, worked.
• Also,makesurethatnoextra(non-color)channelsexistintheimage.Tocheckforextrachannels,openthefileinPhotoshop.ChooseCHANNELSunderthePhotoshopWindowsmenu.IntheChannelspalettethatappears,youshouldonlyseethestandardcolorchannels(i.e.,R,G,BforanRGBimage).Deleteanyextrachannels and save a copy of your image for printing.
• TrysavingthefileasaTIFF,orJPEGtoavoidanyissueswiththePhotoshopimageformat(whichcansometimeshavePhotoshopspecificinformationthatdoesn’tworkwellwithnon-Adobeapplications)
Options button is grayed out in Dashboard->Advanced->Print Setup
This usually means that some needed libraries were not correctly installed. Try updating the software via the Help -> Check for Updates option within Imageprint’s main menu.
T21 IMAGEPRINTTroubleshooting
ImagePrint Windows Troubleshooting Guide (Cont.) Back to Table of Contents
Back to Table of Contents
The Image Strip doesn’t work correctly
IftheImageStripdoesn’tappearwhenyouchooseImageStripfromtheImagePrintViewmenu,theremaybea problem with its settings. This can happen if you’ve had a system crash, or if the File Browser was access-ing a drive that is no longer available. Follow the procedure in this guide entitled: Deleting the ImagePrint Registry Settings to correct the problem.
If the Image Strip appears, but shows no files or folders, check that you have chosen a folder that actually containssupportedimagefilesintheIMAGEFILELOCATIONsectionoftheDashboard.(ImagePrintsup-ports jpeg, tiff and Photoshop psd files).
Remember--theImageStrip,whileconvenient,isnottheonlywaytoopenfiles.Youcanalsodrag
filesdirectlyfromtheirWindowsfolderintotheImageprintlayoutarea,orusethestandard File -> Open menu dialog.
Also,inmostcases,AdobeBridgecanbeusedwithImagePrint.
The Profile Valet doesn’t show any profiles!
1.TheProfileValetdoesnotworkwithsomeolderprintersduetochangesinthewaytheprofilesareindexed.TheEpson9600,7600,4000and2200(andolder)printersdonotworkwiththeProfileValet.Forthose printers, the Choose by Profiles option can be used instead, and new profiles can be downloaded via theProfileManager(describedinchapter6oftheImagePrintUsersManual).
2.IfyouareonasupportedprinterandtheProfileValetshowsnoprofiles,theprofileindexfilesmaybecor-rupt. Delete the indexes and relaunch ImagePrint as follows:
GotoyourImagePrintprogramfolder(c:/programfiles(x86)/ImagePrint)
Double-click the shortcut: ImagePrint Data Folder.
Inthefolderwindowthatappears,openthefoldercalled“pindices”
Deleteallfileswithinthatfolder(theywillallendwithaziporxmlextension)
RelaunchImagePrintandtrytheProfileValetagain.
T22 IMAGEPRINTTroubleshooting
ImagePrint Windows Troubleshooting Guide (Cont.) Back to Table of Contents
Back to Table of Contents
Deleting the ImagePrint Registry Settings
ImagePrintmaintainsmanyofitssettingsintheWindowsRegistry.Ifthesesettingsbecomecorrupt,prob-lems may result, including issues with the File Browser, or settings windows that no longer appear on screen. In these cases, deleting the ImagePrint registry entry may solve the problem. The registry entry will be rebuilt the next time ImagePrint is launched with default settings in place.
Follow one of the below procedures to delete the ImagePrint registry settings.
NOTE:AnycustompagesizesyouhavecreatedwillbelostasaresultofdeletingtheImagePrintRegistryset-tingsandwillneedtoberecreatedviatheUserDefinedpagesizewindowwithinImagePrint.Also,yourcurrent
Color Management selections will be returned to their default state, so you will need to re-select your profiles and settings within the Color Management window after deleting the registry entry. (You may want to record
those Color Management settings before proceeding so you can easily re-select them afterwards).
IMPORTANT: Make sure to close ImagePrint and Spoolface before removing the Registry entry.
Method 1 (preferred) - Deleting the ImagePrint registry entry via the ImagePrint Uninstaller
• LaunchtheUninstallerbychoosingitfromyourWindowsStartMenu’sImagePrintprogramgroup,orlaunchitdirectlybydouble-clickingthe“Uninstall.exe”fileinitslocationwithintheImagePrintfolder(c:\programfiles(x86)\imageprint)
• Click“Continue”whentheUninstallerwindowappears.
• Inthenextwindow,makesuretouncheck the entries for ImagePrint Program Files and Color Profiles, leaving only the Registry Entries selection checked. Click Continue.
• ThenextwindowwillconfirmthatonlytheRegistryentrieswillberemoved.Afterconfirmingthat,clickOKtohavetheUninstallerremovetheregistrysettings.
• ClosetheUninstallerwhenitreportsthatitiscomplete
• LaunchImagePrinttoseeiftheproblemhasbeencorrected.
Method 2-ManuallydeletingtheImagePrintregistryentryviaRegEdit
Only use this method if the Method 1 reports a problem or the ImagePrint Uninstaller is unavailable
The Windows registry contains vital Windows system settings. Failure to follow these instructions carefully could result in problems with your Operating System.
• LaunchtheWindowsRegeditutility:
Type regedit in the Windows Search field, and double-click Regedit.exe when it appears in the results listing.
• WhentheRegeditwindowappearsdouble-clicktheHKEY_CURRENT_USER folder in the list of folders appearing on the left side to expand the list. Double click the Software folder icon, then the ColorByte Software folder icon.
• Right-clickthe ImagePrint 10.0 folder icon and choose DELETE. That will delete our registry entry (it will be rebuilt when Imageprint restarts).
• RestartImagePrintandcheckiftheproblemisresolved.
T23 IMAGEPRINTTroubleshooting
ImagePrint Windows Troubleshooting Guide (Cont.) Back to Table of Contents
Back to Table of Contents
Display IssuesIf images aren’t displaying on screen properly within ImagePrint, look here for solutions
Images appear split, reversed or in triplicate on screen
This condition can occur if you do not have a proper source profile chosen in the Profile section of the ImagePrintPREFERENCESwindow(Preferencesisfoundunder“File”inthemainmenuatthetopofthescreen). This problem is most often when using a grayscale paper profile or opening a grayscale image. Make sure to have a valid gray profile selected in the Missing Profile section’s Grayscale field(either“Graygamma1.8”or,mosttypically,“Graygamma2.2”).Also,youshouldmakesuretheEmbeddedActionfieldissettoAPPLYifusingembeddedprofilesinyourimages.Without a source profile chosen, the software will have no way of determining how to map the single channel grey data to the 3 color screen dis-play, and distortion will result.
Also,inthesamewindow,the“Pressmatch”profileshouldbesettoNONEunlessyouarespecificallytryingto cause your output to match to a press (in which case the press profile can be used there).
In the vast majority of printing workflows, the Press Match profile should always be NONE.
Images appear scrambled, low resolution, or full of artifacts
• Extrachannelsintheimagemaycauseittodisplayincorrectly.Tocheckthis,openyourimageinPhotoshopandcheckintheCHANNELSwindowthatonlythenormalColorchannelsappear(nomaskinglayers or other non-color channels should be in the image).
• Somelayersmaycauseproblems.TrysavingaflattenedversionofthefilefromPhotoshop.
• Ifnoextrachannelsappear,anditisflattened,anditisatifffile,tryre-savingtheimagefromPhotoshop,andintheSave...dialogbox,makesurethe“PixelOrder”is“interleaved”(notperchannel)andthatNOcompression is being used.
• Ifthedisplayappearslowres,checkintheImagePrintPreferenceswindow(availableundertheViewmenu) that Use Thumbnails is not selected.
• Remember,togetahigherresolutionpreviewoftheimage,youcanrightclickitandchooseHighResolution.

T24 IMAGEPRINTTroubleshooting
ImagePrint Windows Troubleshooting Guide (Cont.) Back to Table of Contents
Back to Table of Contents
Colorized B/W Images appear gray on screen
Thisisnormalbehavior.Onscreen,thecolorizedimagewilldisplayusingonlytheGRAYprofile,butwhenprinted,thecoloredportionsoftheimagewillusetheselectedCOLORIZEDB/Wprofile.
Colorized B/W Images appear distorted
Thisisusuallytheresultoftheimagebeing16bit,orcontaininganAlphachannel.Only8bitRGBimages,with no alpha channels, are supported with this feature.
Two monitor system and ImagePrint’s colors are not displaying correctly
Ifyouareusingatwomonitorsystem,itisimportanttounderstandthatImagePrintwillonlyrecognizethemonitor profile for your System monitor. Therefore, if ImagePrint’s display is residing on a secondary display, the monitor profile may be incorrect. It may be necessary to designate the secondary monitor profile as the System monitor profile to have ImagePrint show colors properly on the second monitor.

T25 IMAGEPRINTTroubleshooting
ImagePrint Windows Troubleshooting Guide (Cont.) Back to Table of Contents
Back to Table of Contents
Printing Issues (Also see Spoolface error codes)Problems and questions related to printing and printing errors are listed in this section
Nothing Prints!
Therecouldbemanyreasonsforyourjobsnottomakeittotheprinter.Whileothersectionsofthistroubleshootingguide lists more specific error conditions, here are the general things to check when you are unsure of the problem:
DEMOprintingoccurswhenImagePrintisrunningin“DEMO”modeduetothedonglenotbeingavailableortheproperprinter encryption not being in place. You will get no output from the printer if a license issue is detected and you are setto“DonotprintinDemo”modeinSpoolfaceundertheQueuemenu.Checkthestatusareaontherightsideofthespoolfacewindowtoseeifanencryption/licensingissueisreported.
IMPORTANT:IfusingtheLITEversionofImagePrint(availablefor13inchwideprintersonly)youwillgetDEMOorNOOUTPUT if using any of the non-LITE features. Those features include: Templates, Color Correction tools, Backgrounds and Frames. Multiple images on a boundary area will also cause demo with the LITE version.
•Numeric Codes: For a list of common numeric error codes that may appear in SpoolFace, see the section later in this guide: Spoolface Error Codes ·
• Wrong connection specified in IP Setup:AmajorcauseofprintingproblemsisanincorrectPrinterconnection(i.e., USB, firewire, Ethernet) having been specified in IP Setup when ImagePrint was originally installed. If you sus-pect this is a problem, reinstall the printer following the basic setup instructions earlier in this guide in the entry enti-tled: Reinstalling your ImagePrint Driver
• Un-pause the Queue: Make sure that the Queue menu at the top of the SpoolFace window is not set to PAUSED. The spooler will pause if it encounters an error (such as running out of ink or paper) and it is important that you un-pause the spooler after correcting the problem, or nothing new will be sent to the printer.
• Old Jobs in the way: Remember that the topmost job on the top of SpoolFace is the next to print. If that job hasaproblemthatpausesthespooler,untilthejobisdraggedtothe“done”sidenootherjobswillbeabletoprint.
• No Dongle: Make sure the Dongle is attached to the computer or a powered usb hub. No printing can take place without the dongle attached.
• Roll vs Sheet: Make sure that ImagePrint is set to SHEET mode if you are printing to sheet (not roll) paper, and vice-a-versa. The sheet setting is in the row of icons located in the Media Feed section of the Dashboard. If some small-erprinters,ifthesheet/rollsettingisincorrectforthetypeofpapercurrentlyloaded,theprinterwillflashitsredpaperlightandneverprint,onprinterswithfrontLCDpanels,a“Loadroll/sheet”errorwilloccur..
• ImagePrint settings issues: Many printing problems are the result of an incorrect setting within ImagePrint (usually relatingtoColorManagementorpagesize).(Error768isacommonerrorcodethatoftenindicatesacolorman-agement issue). Make sure you have correctly specified your Color Management settings within ImagePrint’s Color Managementwindow.(Aftermakinganychanges,remembertomoveoldjobsfromtheleftsideofSpoolFace,andto un-pause SpoolFace from the Queue menu before attempting another print). For information on proper color set-tings,pleaseseechapter6oftheImagePrintPDFmanual.
• Check the Status:InnoprintingisoccurringafterclickingPRINT,makesuretocheckthestatusinSpoolFace,theinterface to the ImagePrint Spooler. (To launch spoolface, click the Spoolface icon at the bottom of the ImagePrint floating toolbar). In SpoolFace, make sure that the Computers menu shows the computer that is connected to the printer selected, and the Printer menu shows the correct printer. Check for pertinent errors within Spoolface that may shed light on the problem. The bottom left corner of the SpoolFace window will show the current status of the printer (forexample,Active-IDLE),andthescrollableareaontherightofSpoolFacewilllistjoberrormessages.Makesureto read through this section for information that might show the cause of the printing problem.
• Nothing appears in Spoolface: 1.) First,makesureyouhavetherightprinterselectedinthePRINTERSmenuat
Continued on next page
T26 IMAGEPRINTTroubleshooting
ImagePrint Windows Troubleshooting Guide (Cont.) Back to Table of Contents
Back to Table of Contents
the top of the SpoolFace screen! 2.) If you have recently upgraded the Operating System, ImagePrint libraries may have been overwritten. To fix that, try checking for updates from ImagePrint’s Help menu. 3.) This condition can also happen if IP Setup was used to install an ImagePrint printer while SpoolFace and/or ImagePrint were run-ning in the background.Thiswilloftencausethingstoseemfine,but,whenPRINTisclicked,jobswon’tgotothespooler with no error message generated. The solution in that case is simply to close SpoolFace and ImagePrint, relaunch IP Setup (from the ImagePrint folder) and remove, then reinstall, the printer(s). 4.) Anti-virus software orothersecuritysoftwaremightpreventjobsfrommakingittospoolface.Anewoption(asofversion8.0,build1.0.0.5)hasbeenaddedtoImagePrint’sPreferenceswindow--”Print Directly to Print Spooler”--enabling that option may allow jobs to go to spoolface as it uses a method of foreground printing not (usually) blocked by secu-rity or anti-virus methods. If that option fails to correct the problem, try disabling any anti-virus software--Note: because disabling often leaves anti-virus components still running, you may need to uninstall the anti-virus soft-ware to ensure it is still not blocking the printing processes.OnWindows7andVistasystems,UAC(UserAccountControls)cansometimesblockImagePrintfromprinting.UACsettingscanbeadjustedviatheUserAccountsControl Panel accessed from your Start menu.
• IP BATCH Error:Ifan“IPBatch”errormessageappearsaftersendingajobtoprint,checkthefollowing:Make sure you have chosen the correct profile settings in the ImagePrint Color Management window. Consult chapter 6 of the ImagePrint user’s guide for instructions.
Make sure you have selected a Media Type in the ImagePrint Options menu (accessed by clicking OPTIONS in the Print dialog) for printers that support that feature.
If printing from a networked Client to a Host computer, make sure the printer/paper profile chosen on the Client is available in ImagePrint’s COLOR folder on the Host computer as well.
In rare cases, a problem with the dongle can cause an IP Batch error. This typically occurs with older dongles used with ImagePrint 5.6 or below that have never successfully been used with ImagePrint 8.0. If this is the case on your system, contact ColorByte support for more information.
• Print to File:MakesurethePrinttoFileoptionisnotselectedintheDasboard->Advanced->PrintSetupsectionorno output will be printed (only a tiff file containing the layout will be saved).
• NETWORKED PRINTER PROBLEMS: If your printer is connected via Ethernet, the usual reason for print fail-ureisanincorrectIPAddressspecificationfortheprinterinImagePrint’ssettings.Iftheprinter’sIPAddresshaschanged since installing ImagePrint, ImagePrint will no longer be able to find the printer until it is changed back or ImagePrint is updated (via IP Setup) to reflect the new IP address. For information on accessing and changing the printer’sIPAddress,checktheentryinthisguideentitled:Networked printer settings. Once you know the cur-rentIPAddressoftheprinter,double-checkthatthesameIPAddresswasusedinIPSetup(launchIPSetup,andchecktheIPAddressshownintheprinter’slisting(itwillhave/9100afterit).Ifitisnotcorrect,reinstalltheprinterusing the instructions at the beginning of this guide entitled: Reinstalling your ImagePrint Driver.
Nothing appears in SpoolFace when PRINT is selected
See the Nothing Appears in Spoolface section in the previous entry (Nothing Prints).
Nothing Prints (Continued)

T27 IMAGEPRINTTroubleshooting
ImagePrint Windows Troubleshooting Guide (Cont.) Back to Table of Contents
Back to Table of Contents
Printer outputs garbage text
Thisconditionoccurswhenbaddataorpartialdataissenttotheprinter,causingtheprintertogointo“text”mode. Since turning off the printer can still leave stray data in the buffer of the computer, and turning off the computer can still leave stray data in the printer buffer, it is advised that to correct this condition you power down both the printer and the computer to ensure that neither device retains any partial data in its buffer. (MakesuretodisabletheImagePrintqueuebeforepoweringdownthecomputerbychoosingDISABLEfromthe QUEUE menu in SpoolFace). Then, turn the computer and printer back on. Un-pause Spoolface (choose QUEUE->Pause to remove the checkmark beside the Pause entry) and try sending a new job to the printer.
“Load ROLL” (or Sheet) Paper message on printer
This message appearing on the printer means that ImagePrint set to a paper type (sheet or roll) that is not currently loaded in the printer. Make sure the correct setting is in place in the ImagePrint Dashboard, in the Media Feed section.
Likewise, make sure the printer’s control panel (on the front of the printer) is set to the right mode for the cur-rentlyloadedpapertype.(Often,pressingtheRoll/Sheetbuttonontheprinterwhenthiserroroccurswillletthe job continue).
“Forbidden Media” message on printer
This message, on the front console of the printer occurs when the printer rejects paper as illegal to load in the paper tray. Only certain papers are certified to work with the printer tray. If you wish to have the printer usetheloadedpaperanyway,chooseanotherpaperasthe“MediaType”byclickingOptionswithintheDashboard’sADVANCED->PrintSetupsection.Media Type settings control the paper feed controls of the printer--pick one as close as possible to the thickness of the paper in the paper tray to avoid banding issues.
“Reload Paper”/”Paper Out” message on printer
“ReloadPapermessagesoftenmeanthepaperloadedintheprinterisNARROWERthanthepagesizespec-ifiedinImagePrint.YoucancorrectthisbyspecifyingasmallerpagesizeinImagePrint,or,bydisablingthe“CheckSheetSize”optioninthePrinter’sfrontcontrolpanel.Insomecases,manufacturersshippaperthatisincorrectlysized,somakesuretomeasureyourpapertoensureitisthesizestatedonitspackaging--evensmalldifferencesinsizecancausethiserrortooccur.
“PaperOut”messages,orthepaperfeedingthroughtheprinterwithoutprinting,typicallyoccursifthepaperintheprinterisSHORTERthanthepagesizespecifiedinImagePrint.Tocorrect,specifyapagesizeinImagePrint that is the same as the physical paper’s length or shorter. (Double check by measuring the actual paper--some manufacturers can be slightly inaccurate in the dimensions specified on the box).
Anothercauseofpaperfeedingrightthroughtheprinterwithoutprintingisapapersensorissue.Makesureto use a clean sheet of paper, as the printer’s sensors check for paper white and can be fooled by previously printed images on a page.
T28 IMAGEPRINTTroubleshooting
ImagePrint Windows Troubleshooting Guide (Cont.) Back to Table of Contents
Back to Table of Contents
“Wrong Page Size” message on printer
Ifthemessage“WrongPageSize”appearsonanEpsonprinterwhenattemptingtoprint,itisduetotheprintersensingadifferentpagesizethanthatbeingspecifiedbyImagePrint.Printerscanbeverysensitivetoslightdifferencesinpagesize,especiallywhenloadingthickerpapertypes.Insomecases,manufacturersshippaperthatisincorrectlysized,somakesuretomeasureyourpapertoensureitisthesizestatedonitspackaging--evensmalldifferencesinsizecancausethiserrortooccur.
Onewaytoavoidthaterroristoturnoffthe“PageSizeChecking”featureoftheprinter.Thiswillcausetheprintertonolongercheckthepagesizewhenprinting.Toturnpagesizecheckingoff,ontheEpson’sfrontcontrol panel, use the Menu button to enter the Printer Setup section. Use the up and down keys to find the “PageSizeChk”entry.Hittherightarrowbuttontoaccessthatsetting,thenusetheUParrowtotoggletoOFFandhittheEnterkey.AnasteriskwillappearnexttothewordOFFshowingitisnowineffect.Thenusetherightarrowbuttonrepeatedlytogetbackto“Ready”.NOTE:Turningoffhe“PageSizeChk”settingmaycause prints to not be centered correctly when sheet paper is loaded manually on the printer. (Often, press-ingtheRoll/Sheetbuttonontheprinterwhenthiserroroccurswillletthejobcontinue)
SpoolFace generates an error when launched
Ifyougeta“Connect”error,oranimmediatecrashwhenlaunchingspoolface,mostcommonlytheproblemisanecessarybackgroundprocess(muxd.exe)notrunning.DuringImagePrint’sinstallation,MUXD.EXEissettoautomaticallylauncheachtimesWindowsstarts,butAnti-virusproramssometimespreventtheautomaticlaunch from happening, or even delete the muxd.exe file entirely. It is beyond the scope of this manual to provide support for the myriad anti-virus products available, but check your anti-virus logs to see if there’s a reportofmuxd.exebeingblocked.TheWindowsFirewallcanalsoblockmuxd.exe,socheckitssettingsaswell.Youmayneedtosetan“exclusion”forthe\programfiles(x86)\ImagePrintfolderwithinyourantivirussoftware settings to prevent the software from interfering with ImagePrint.
Note: Even if your anti-virus software has worked with imagePrint in the past, it doesn’t mean it can’t change withnowarning.Antivirussoftwarecanupdatetheirvirusdefinitionsatanytimeandsuddenlymisidentify
muxd.exe (or another ImagePrint component) as suspicious.
Youcanmanuallylaunchmuxd.exefromit’slocationwithintheImagePrint/spool/muxfolder.Justgoto
c:\programfiles(x86)\ImagePrint\Spool\Mux
anddouble-clickmuxd.exe.Abriefwindowwillflashastheprocessisputintothebackground.ThenSpoolface should work, at least until you reboot windows.
If, after rebooting, spoolface shows a problem again, chances are your firewall or antivirus software is stop-ping muxd from automatically launching again--you can manually launch it per the above steps again each time windows boots, or track down what anti-virus software on your system is blocking it (or firewall). If you can’tdeterminetheculprit,tryputtingashortcutformuxd.exeinyourWindowsstartupfoldertohaveitauto-maticallylaunchthatway(whichmayavoidtheanti-virustblock).Todothat:Rightclickthemuxd.exefile,andchooseCreateShortcutinthemenuthatappears,thencopythatshortcut(NOTMUXD.EXEitselfintoyourWindowsstartupfolder.Findingthestartupfoldervariesannoyinglyaccordingtoyourversionofwindows,buttogetthereonWindows8and10,clickstart,type%AppData%andhitreturn,thendouble-clickthefolderthat appears and navigae to:
T29 IMAGEPRINTTroubleshooting
ImagePrint Windows Troubleshooting Guide (Cont.) Back to Table of Contents
Back to Table of Contents
...Roaming\Microsoft\Windows\StartMenu\Programs\Startup
No Muxd.exe found!
Ifmuxd.execannotbefoundinyourImageprint\Spool\MUXfolder,it’sprobablethatyouranti-virussoftwaredeletedorquarantineditasasuspiciousfile.Togetitback,youcanperforma“repair”fromtheWindows“ProgramsandFeatures”ControlPanel.Choose“ImagePrintv10”withintheProgramsandFeatureslist,andchoose“Repair”(Notuninstall!)andmuxd.exeshouldbereturnedtotheproperfolder,though if may disappear again if your anti-virus software is still active.
No printers found error when launching Spoolface
Youmayalsoseea“NoPrintersavailable”messageisyourareonanImagePrintCLIENTcomputer.Thisisnormalbehavior,asthespooleristryingtofindaprinteronthelocalmachine.JustchooseCOMPUTER(fromtheSpoolFacemenu),andpicktheIPAddressorcomputernameoftheImagePrintHOSTcomputer.
IfthereisnoPRINTERorCOMPUTERmenuatthetopofthescreenwhenSpoolFaceisactive,thereisaproblem with the installation. Close SpoolFace and ImagePrint, then re-launch IP Setup (from the ImagePrint folder), remove and reinstall the printer(s). Be aware that removing printers will delete all old print jobs for that printer!
Epson 2200 or 2400 doesn’t print, red paper feed light shows
This is typically caused when ImagePrint is set to the wrong paper mode (sheet vs roll). The 2200 and 2400 are picky about this setting, and if ImagePrint is set to the wrong one for the type of media loaded in the printer,theresultisnooutput,andaredlightontheprinter.MakesuretheRoll/Sheeticon,inthebottomrightcorner of the main ImagePrint window, is set correctly to Sheet. (Hover your mouse over those icons to see their function)
Warning: Unknown TAG (or other Warnings) in SpoolFace
WarningssuchasUNKNOWNTAGarenotcritical.Theseareinformationaldisplaysandcanbeignored.Almost all TIFF files will report “Unknown TAG warnings”.
I keep getting extra jobs sent to spoolface
ThisistheresultofadditionalpagesexistingintheImagePrintlayoutwindow.ThiscanhappenifAutoFlowis enabled and you have added images to your layout without first deleting previous images via the scis-sors tool--new pages are generated for new images when there is no room on the current page and by default,ALLimagesonallpageswillprintwhenPRINTisselected.AutoflowcanbeturnedonandoffviatheAutoFlowcheckboxintheDashboard’sADVANCED->AutoLayoutSettingssection.
TodeleteALLimagesfromallpages,clicktheRedscissorsiconintheFloatingtoolbar.
T30 IMAGEPRINTTroubleshooting
ImagePrint Windows Troubleshooting Guide (Cont.) Back to Table of Contents
Back to Table of Contents
Printer flashes lights, or generates Command Error when attempting to print
This error is caused when ImagePrint is set to an inkset other than that currently in use by your printer. This canhappenifyouhaveselectedthewrongPrinter/Paperprofilefortheblackinktypeyouareusing(MatteorPhoto)intheProfilessectionoftheDASHBOARD.
ThePrinter/Paperprofileisresponsiblefordeterminingtheinksetusedinthejob--pickingaprofilemadeforan ink set not currently installed on the printer will cause this error occur.
“Can’t print scanlines” error, jobs go into the spooler but never print
This is usually an issue with the connection to the printer. Confirm that you designated the correct port for your printer during the installation (you can double check this setting by launching the IP Setup utility and see-ing what is listed in the Installed Printers area for your printer. The device selection will show up within the parenthesis in the printer line. If you suspect the wrong connection was specified, try removing and reinstall-ing the printer according to the Re-installing your printer entry earlier in this guide.
Couldn’t Set Up Watch folder
IfprintingfromanetworkedCLIENTcomputer,thismessagetypicallymeansthePRINTERNAMEusedwheninstallingImagePrintontheCLIENTdoesn’texactlymatchthePRINTERNAMEusedwheninstallingonthehost. Launch IP Setup from your ImagePrint folder on the CLIENT and make sure the installed printer match-es that shown on the HOST. If not, remove and reinstall the printer on the client with the correct name.
IfyouareNOTonaremoteClientandyouseethe“Couldn’tSetUpWatch”foldererror,thattypicallymeansyour printer spool folder structure is corrupt. Possilbly due to a failed printer installation that couldn’t write files to your hard drive because it did not have permissions, or pre-existing files it needed to overwrite were busy when IP Setup was run Usually, removing and reinstalling the printer via IP SETUP will correct this problem (you will lose your old spooled jobs however when removing the printer).
Print Jobs move quickly to the finished side of the spool face window before the job prints. Epson Driver stealing the job:TheEPSONStylusWindowsdrivercansometimesinterceptjobsgoingtotheportitisusing.Inthisscenario,jobssentfromImagePrintareputintotheWindowsspoolerandnolon-ger monitored by Spoolface. Jobs should always stay on the active (top) side of the spoolface window until just before the printer is done with them.
YoucancheckforthisconditionbyrightclickingtheEPSONStylusdriverforyourprinterinWindow’sPrinterandFaxeslist,andchoosingPROPERTIESinthemenuthatappears.IntheAdvancedsectionofproper-ties window, make sure it is set to Print Directly to Printer. (Note: you should check the EPSON Stylus driver--NOT the ImagePrint driver that may also exist in Printer’s and Faxes. The EPSON Stylus driver will typically have STYLUS in its name, and is put there by EPSON. )
T31 IMAGEPRINTTroubleshooting
ImagePrint Windows Troubleshooting Guide (Cont.) Back to Table of Contents
Back to Table of Contents
“Couldn’t Spawn Queue Command” error when clicking print
Computer name change: This error indicates that ImagePrint is not able to communicate with its spooler. The most common cause is a change in the name of the computer since the printer was installed via IP Setup. If you have changed your computer name, it is necessary to run IP SETUP again to remove, then reinstall, the printer (the new computer name will automatically be used for the new installation). Important: Make sure that ImagePrint and Spoolface are not running when reinstalling your printers via IP Setup.
Host/Client printing: This error can also occur when printing from an ImagePrint CLIENT to an ImagePrint HOST computerifthetwocomputerscannotseeeachviatheTCP/IPnetworkprotocol.Firewallsoranti-virussoftwaremayalsopreventtheClientfromcommunicatingwiththeHost.YoushouldalsocheckviatheWindowsTaskManagerthat the “muxd.exe”processisrunningonboththeHostorClient(muxdisnecessaryforclient/hostprintingtotakeplace). Check the section: Problems printing from a networked client for information on troubleshooting problems in this area.
How do I print directly from an Application like Photoshop, InDesign or Illustrator?
IMAGEPRINTallowsyoutoprintdirectlyfromvirtuallyanyotherapplication,includingPhotoshop,InDesignwiththeoptionalPTA(PrintThroughApplications)feature.ApplicationlevelprintingisinstalledwhenyouinstalleithertheWindowsorMacintoshversionofIMAGEPRINTbutmustbelicensedtoruninnon-demomode..
NOTE: It is recommended for troubleshooting purposes that before using application printing, you confirm that you can successfully print directly from the ImagePrint application first.
InformationonPTAisinthePTAchapterwithintheImagePrintusersmanual,alongwithTroubleshootinginformationfor common problems.
T32 IMAGEPRINTTroubleshooting
ImagePrint Windows Troubleshooting Guide (Cont.) Back to Table of Contents
Back to Table of Contents
Problems printing from a networked client
AClientinstallationofImageprintwillrunthenormalImagePrintinterface,but,whenPrintisselected,willsendallof its jobs to the ImagePrint HOST computer (the Host is always the computer with the DONGLE attached). When installing a client, remember that the Client does not need to be licensed in IP Setup (even if it shows “disabled” or “unlicensed” in the IP Setup window). All licensing is handled by the HOST at print time, so only the HOST com-puter needs to be licensed.
Below are things to check if you experiencing problems printing from a client to a host:
1. Make sure that the Host computer can print directly to the printer first to rule out a problem with the print-ing in general.
2. Make sure that the Client computer can “see” the Host across the network via Network neighborhood, or “pinging” it via a DOS or OSX Terminal window.
To “ping” the remote computer from Windows:
Open a DOS window (choosing START->RUN, and typing in “Command” and hitting Return is one way to launch a DOS window).
In the DOS window, type in the following command and hit return:
ping “computer name” (Where “computer name” is the name (or if pinging a Mac, the ip address) of the remote computer.)
Check the messages that appear after typing the ping command to see if the remote computer can be reached from the host. Error messages indicate a net work problem that needs to be addressed before ImagePrint can utilize network printing.
3. Firewall settings, on either the Host and Client, can block ImagePrint from sending jobs. Try printing from the Client with the Firewall disabled. Also, security software like Zone Alarm, or anti-virus software, may be blocking the TCP/IP port that ImagePrint uses for network communication. (ImagePrint uses port 1 for it’s client/host printing).
4 If the Host can print, but jobs from the Client do not appear in the Host’s SpoolFace window, make sure that you specified the name of the Host computer (or the IP Address if the Host is a Macintosh) when installing ImagePrint on the Client. To double-check, launch IP SETUP and see what setting is listed in the HOST column for the printer. If it does not show the proper computer (the Host computer should be the computer with the dongle) If incorrect, delete the printer using the DELETE button in IP Setup, choose the printer type again, choose CLIENT as the installation type, enter the NAME of the Host com-puter (or ip address if the remote computer is a MAC) and click INSTALL. Important: Make sure that ImagePrint, and SpoolFace, are NOT running when you perform this reinstall.
5. Couldn’t set up Watch Folder: If you receive this error, it’s likely the PRINTER NAME you specified when installing ImagePrint on the CLIENT does not exactly match the name you used on the HOST.
6. If you are receiving a message along the lines of “Can’t write file”, or ERROR 97, you may have a per-missions issue. When CLIENT jobs are sent to the spooler, all images within the job are written as tem-porary files to the HOST computer in the Spool/printers/”printer name” foler within the ImagePrint USER DATA folder (accessed via the shortcut by that name in the “/program files(x86)/ImagePrint” folder). If that folder is not accessible, you may get this error. Make sure that the IMG folder exists, and has full write permissions. Also, make sure you have ample hard disk space on the HOST computer.
7. The process “muxd.exe” must be running on each Windows computer (host or client) in order for com-munication to take place. You can confirm that this process is running via the Windows Task Manager (hit Control-Alt-Delete to access it). If muxd.exe is NOT running on either computer, it can be manually started from it’s location in the /Program Files(x86)/ImagePrint/ SPOOL/MUX folder. (This process is set to start automatically when ImagePrint is installed).
T33 IMAGEPRINTTroubleshooting
ImagePrint Windows Troubleshooting Guide (Cont.) Back to Table of Contents
Back to Table of Contents
Job doesn’t move to finished side of queue when cancelled
Normally,draggingajobfromthetop(“Active”)panetothebottom(“Finished”)paneshouldcancelit.Ifthejobwillnotmoveover,itmeansthattheprintingprocessisnotbeingallowedtoquitnormallybyWindows.Toforcethejobover, do one of the following:
1. The cleanest way to handle this condition is to PAUSE the queue by choosing Queue->Pause from the Spoolface menu, then reboot the computer. The job should move over with no problem when the system comes back up. (It is important to pause the queue first, to make sure the spooler doesn’t attempt to print again as soon as the system reboots.) After rebooting and moving the job over, remember to re-enable the queue by choosing “Pause” from the same menu to get rid of the check mark beside the Pause entry. This method is the cleanest, as it will reset the computer ports.
Although the following method will also work to clear the job from spoolface, if the computer ports are “hung”, you may still have trouble printing until you reboot.
2. Access the Windows task manager by pressing Control-Alt-Delete. Click TASK MANAGER, then PROCESSES. Choose either the printer driver executable (i.e. epson10000.exe) or the process “ipbatch.exe” and click the “End Process” button. The job will immediately move over in spoolface.
Old computer names appear in my SpoolFace Computers menu
ToremoveanyoldcomputernamesfromtheSpoolfaceCOMPUTERSmenu,closespoolfaceandlocatethefile“iphosts”locatedintheSpoolfolderwithintheImagePrintfolder.Editthe“ip_hosts”fileusingastandardtexteditorsuchas notepad and delete any lines containing unwanted printers and resave the file, then relaunch Spoolface.
Connect 10061 Error when attempting to launch spoolface
Thiserrorindicatesabackgroundprocess,muxd.exe,isnotrunning.“Muxd.exe”issetviaaWindowsRegistryentryto run in the background each time your computer boots. If you receive this error, it is likely that an anti-virus or secu-rity program is preventing it from launching.
To test that this is indeed the problem, try launching muxd.exe manually.To manually launch muxd.exe, go to the fol-lowing folder on your system:
c:\programfiles(x86)\ImagePrint\Spool\Mux
IntheMuxfolder,double-click“muxd.exe”tolaunchit(youwillseeaquickflashbutnothingelse).Then,trylaunchingSpoolface again.
If launching muxd.exe manually allows you to launch Spoolface without error, ImagePrint and Spoolface should func-tion normally until your next reboot. Of course, manually launching muxd.exe each time your computer boots is incon-venient.Ifyoufindthatthe“Connect10061”errorreturnsafterrebooting,youshouldcheckyouranti-virussoftwaretomakesureit’snotblockingthemuxd.exeprocess.Youcanusuallyset“exceptions”inanti-virusprogramsthatwillallow specified programs to run, so you may need to do that if you discover your anti-virus is blocking it.
Advanced info: The default registry entry to launch muxd.exe is put in place during ImagePrint installation. The Windows Registry entry Key is:
HKEY_LOCAL_MACHINE\SOFTWARE\Microsoft\Windows\CurrentVersion\Run
With value name: CBSpoolDaemon And value data: “C:\Program Files(x86)\imageprint\spool\mux\muxd.exe”
T34 IMAGEPRINTTroubleshooting
ImagePrint Windows Troubleshooting Guide (Cont.) Back to Table of Contents
Back to Table of Contents
Spoolface error codesWhenthereisaproblemprinting,Spoolfaceusuallyshowsatextornumericerrorcodethatcanbereferencedinthissection.Alwayschecktheright(status)sideofSpoolfaceforinformationregardingprintingerrors.Thebottom-mosttextisthenewest.LookforanythinginRED,andanymessagesthatclearlystatethatanerrorhasoccurred.Also,thebottomLEFTcornerofspoolfaceshowsthecurrentspoolerstatusorthestatusofthelastfailed job.
ERROR 1
This error typically means a software corruption of some type and may require removing and reinstalling the soft-ware.
Itcanalsooccurifanillegalcharacter(suchasaspace)wasusedinthePRINTERNAMEwheninstallingviaIPSetup, or if anti-virus software is running on your computer that is interfering with ImagePrint’s printing processes. If you do have anti-virus software, try disabling it and see if the problem persists.
If there are spaces or non-alphanumeric characters printer name you used when installing via IP Setup, remove and reinstall the printer via the instructions earlier in this guide: Reinstalling your Imageprint Driver - A Basic Walkthrough making sure not to use spaces in the printer name.
If removing and reinstalling the driver via IP Setup fails to solve the problem, try removing ImagePrint completely and reinstalling according to the instructions in the ImagePrint Users guide.
ERROR 2 or ERROR 15 (Printer not found)
This indicates a problem communicating with the printer. Make sure the printer is on and online. Make sure that you specified the correct connection setting when installing ImagePrint (you can double-check this by launch-ing IP Setup and seeing what is listed in the Installed Printer’s area for your printer. The device selection will show up within the parenthesis in the printer line--it will either be the port the printer is connected to (i.e. USB001) or the nameoftheWindowsPrinterdriveryouchosewheninstalling(ImagePrint will use whatever port that driver is using when installed in this way)ortheIPADDRESSoftheprinter(ifconnectedviaEthernettotheprinter).If in doubt, try removing, then reinstalling printer using the instructions in the entry at the beginning of this guide: Reinstalling your Imageprint Driver - A Basic Walkthrough
If you’re sure the connection was specified correctly and you still get the error, you may have a device driver prob-lem. Try printing from the printer manufacturer’s driver via the Test Page option within the Printers and Faxes driver for that printer. If that also fails, switch connection cables to ensure there is no problem there, and make sure to reboot both the printer, and the computer to reset both interfaces.
ERROR 37
This indicates the dongle is not seen by the PC. No printing can take place without the dongle attached to a USB port on the computer or a USB hub.
Ifthedongleisattached,launchIPSetup(fromyourImagePrintfolder)andseeifthe6digitdonglenumberappears in the Dongle Number field. If the number shows up, then the dongle is being seen, and you should be able to print.
If the dongle number doesn’t appear in IP Setup, try unplugging the dongle and re-plugging it back in (or try anoth-er USB port) then close and re-open IP Setup to see if the dongle number shows up. If that fails, reboot the com-puter and check IP Setup again. If the number still fails to appear in IP Setup, run through the suggestions listed in the following entry of this guide: Dongle never shows up in IP Setup. Finally, try installing ImagePrint on another
T35 IMAGEPRINTTroubleshooting
ImagePrint Windows Troubleshooting Guide (Cont.) Back to Table of Contents
Back to Table of Contents
computer (no printer needs to be connected for the test). If the dongle number fails to show up on the sec-ond computer, the dongle may be malfunctioning. Contact ColorByte’s support dept. for information on replac-ing the dongle.
ERROR 97
This is a file access problem—the spooler is not able to access the file to be printed.
Make sure the file(s) to be printed is still accessible. Deleting a file or moving it from its folder after clicking PRINTinImagePrintbeforetheimagehasactuallyprintedcancausethisconditionastheSpoolerwillnotbe able to access the file. Having your files on a cd, and ejecting the cd before the printing takes place, will cause this as well. All the images on the page must remain in their original location while the page is printing.
If your images exist across the network, try moving it to a local directory and reprinting to confirm a network access issue is not the cause.
ERROR 163
This usually indicates some kind of connectivity problem with the printer.
- Make sure that the way you are connected to the printer corresponds to the connection type speci-fied in IP Setup. Try removing the printer via IP Setup, and reinstalling (follow the Re-installing the printerinstructionsearlierinthisTroubleShootingguide).IfusingUSBorFirewire,clickthe“ChoosePort”buttoninIPSetup,andtryusingthe“WindowsPrinterName”astheconnectiontype.
-Makesurethatyouhavespecifieda“MediaType”fortheprinter(forprintersthatsupportthisoption--most printers other than the Epson 2200 do). To specify the Media Type, choose OPTIONS in the Print dialog to have the Options window appear. If the Options button is grayed out on a sup-ported printer, consult this entry: Option button is grayed out in ImagePrint print dialog.
ERROR 609
This error is usually caused by one of the following:
* The image being printed no longer is accessible. This can occur if you’ve deleted or moved the actual images within a job before it begins to print, or, if images located across the network are no longer accessible across the network at print time. Loading images into ImagePrint from a CD, clicking PRINT, then ejecting the cd before printing occurs would also cause this error.
* There is a non-supported channel in the image file you are printing. (Masking channels are not support-ed by ImagePrint.) To check for extra channels, open the image in Photoshop, and choose Windows->Channels. In the channels window, make sure only the standard color channels are listed (i.e., R,G,B). Try deleting any extra one’s, save a copy of the image, and try printing again.
T36 IMAGEPRINTTroubleshooting
ImagePrint Windows Troubleshooting Guide (Cont.) Back to Table of Contents
Back to Table of Contents
ERROR 611 or 104 or 99 or “Out of Disk Space error”
Over 2 gig temp file: This error may occur if the dimensions of the print you are making causes a temporary file to be made that exceeds the ImagePrint 2 gigabyte limitation.
You may also see an error in Spoolface that indicates there is not enough disk space to process the image when you know there is plenty--this incorrectly reported error condition can be caused by the temporary file exceeding the 2 gig limit.
Ifyouareprintingaverylarge,bannertypeofimageandareseeingthiserror,trysettingtheResolutionset-ting(locatedintheImagePrintPrintdialogbox)to180ratherthanthedefault360.Thiswillreducethetotalamount of data sent to the computer, with a slight reduction in quality (This very slight loss in resolution is not visible from more than a few inches away, which is typically fine for banners and large posters.)
You may also be able to avoid this error by preventing ImagePrint from needing to build a temporary image at all. Most jobs do not require a temp file be created, If possible, don’t rotate the image in ImagePrint (rotate itfirstinPhotoshop),andavoidtheusetheStepandRepeatfeaturewhenmakingextremelylargeprints.Rotatedimageswillalwaysgenerateatemporaryfile,aswillStepandRepeatedimagesandanyprintsthatuse the Tiling Across Pages feature.
Out of disk spaceAnothercauseoftheproblemmaybethatyouarerunningoutofdiskspacetoprocessthe images. Large temporary files may be created if images on the page have been rotated 90 degrees, or you are using the step and repeat function. If you encounter this error, increase your disk space by deleting unnecessaryfiles.Rotatingtheimagesfirst,beforebringingthemintoImagePrint,canalsopreventtheneedfor the temp file to be built.
Changing the temporary file location
Changing the location where ImagePrint stores its temporary files to a hard drive with more space is one solu-tion to storage problems. To change the directory in which ImagePrint writes temp files (needed when images arerotated90or270degrees),editthefile“ipbatch.bat”,locatedinthe...printers\”printer_name”directoryoffoftheImagePrintsoftwaredirectory,andaddtheline:“PRINT_TMP=directory”entrytotheendofthefiletoreflectthenewdirectory.(Forexample,setthePRINT_TMP=d:\temp)
Note that any new temporary file location should be on a local drive, not one located across the net-work!
T37 IMAGEPRINTTroubleshooting
ImagePrint Windows Troubleshooting Guide (Cont.) Back to Table of Contents
Back to Table of Contents
ERROR 653
AwrongsettingintheprintjobbeingsentfromImagePrintmostlikelycausesthiserror.CheckthattheselectedINKSET(whichisusuallydeterminedbyyourpaperprofilechoiceintheProfilesectionofthedash-board) is correct for what is loaded in your printer.
ERROR 768
This error can have a few causes
- MOST COMMON: In the Profile Section of the ImagePrint Dashboard a profile should be selected and APPLIEDthatiscorrectforyourprinterandink.
-CheckthePROFILESsectionoftheImagePrintPreferenceswindow(chosenfromtheFILEmenuatthetop of the screen) to, make sure that an appropriate source profile for your images is selected for each colorspacethatyourimagesusewithintheMissingProfile/UntaggedImagessection(RGB,CMYK,Grayscale).Forprintingsingle-channelgrayscaleimages,makesuretopickeither“graygamma1.8”,or“graygamma2.2”,intheGrayscalefield.ItisalmostalwaysrecommendedthatAPPLYbesetintheEmbedded Profile action field.
- Anincorrectinksetsettingcancausethiserrortooccuraswell.Normally,whenchoosingaPrinterprofile the proper ink set will be automatically selected. If using a profile that was not created by ColorByte, it will be necessary to manually choose the correct ink set prior to printing via the Setup win-dow, accessed from the Print Dialog box.
- Asub-folder,withinImagePrint’sCOLORfolder,canalsocauseerror768.MakesureonlycolorprofilesarepresentintheCOLORfolder,andthatnosub-folder’shavebeenplacedthere.
T38 IMAGEPRINTTroubleshooting
ImagePrint Windows Troubleshooting Guide (Cont.) Back to Table of Contents
Back to Table of Contents
ERROR 107############
Along(8digitormore)errornumber(usuallybeginningwith107)iswhathappenswhenanerrorcondi-tion took place that ImagePrint wasn’t able to generate a proper error code for. Usually this means that ImagePrint’s memory state was corrupted. The usual reasons for this are:
- Anemptypagehasbeensenttothespooler.Thisisoftentheresultofadditionalpagesinadvertantlyexisting in the layout window. Check in ImagePrint that you are on the expected page. That information islistedinthebottomoftheImagePrintwindow--forexample“Page2of2”. Remember that if AutoFlow is turned on, each time you add an image to the layout window, it will generate a new page if the image can’t fit on the current page. WhenyouchoosePRINT,all pages will be sent to the spooler if you don’t selectarangeofpagesintheprintdialog.ToturnoffAutoFlow(causingimagestostackontopofeachotherwhentheycan’tfitonthepage)de-selectthecheckbosintheAutomaticLayoutSettingssectionoftheDashboard(underADVANCED).
To delete an unwanted page from the Imageprint layout, move to that page via the page controls in the bottomlefthandcorneroftheImagePrintwindow,andclicktheRedscissorsiconintheFloatingtool-bar.
- Anothercauseofthiserrorisifoneoftheprofilesyouareusing(usuallythePrinter/Paperprofile)hasa filename that is too long if you are using a custom profile (one you made yourself--not supplied by ColorByte). This is especially a problem on Macintosh computers. Make sure that the full name of the profile(includingthe“.”andextension)isnomorethan31characters.Unsupportednon-alphanumericcharacters,like“&”,orcommas,intheprofileorimagefilename,canalsocausethisproblem.
- If printing with templates, a corrupt template can cause this problem. Try printing without a template applied to see if it corrects the problem.
- Corruptimages,imageswithextrachannels(asseeninPhotoshop’sCHANNELSwindow),imagessavedwithcompression,orimagessavedwiththePixelOrdersetto“PerChannel”allmaycausethiserror to be generated.
- Too many images on a page:AlthoughitcanbehighlydependentonRAM,processorandimagetype, its recommended that you limit the number of images to 40 or so per page to avoid overly taxing system resources. If you need to print more than that, split them up between pages (you can use the AutoFlowfunctiontohaveimagesautomatically“flow”toanewpagewhenthecurrentoneisfull).
- CLIENT/HOST printing: If printing from an ImagePrint networked Client to a Host, make sure that any profiles you’ve selected on the Client computer are available on the Host computer (within ImagePrint’s COLORfolder)aswell.Otherwise,whentheHostattemptstoprintthejob,itwon’thaveaccesstothespecified profile and will cause this error.
T39 IMAGEPRINTTroubleshooting
ImagePrint Windows Troubleshooting Guide (Cont.) Back to Table of Contents
Back to Table of Contents
Output Quality IssuesLook in this section if you are able to print, but you have questions regarding the quality of the output.
My output is darker than it appears on screen
If colors are correct, but the overall print seems dark compared to the ImagePrint or Photoshop display, it is most likely caused by your LCD monitor being too bright.
Many LCD monitors are factory calibrated overly bright in order to compensate for the typical LCD’s problems with rendering shadow detail. Even if you have custom calibrated your monitor, it is very likely that it is brighter than the “standard” CRT monitor of the past.
Simply physically dialing down the brightness of the monitor, using it’s on screen controls, is usually the solution to this issue.
Color cast in prints
Nozzles:Aswithanycolorissue,makesureyouhavedoneanozzlecheckontheprinter,andthatallnozzlesareclean.Nozzleissuesarethechiefcauseofcastproblems.
Profile temperature:ThetwomostcommoncolortemperaturestouseareEDAY(daylight)andECWF2orF3(mixedlighting).WehaveseenmanyusersusingtheEDAYprofilesandviewingunderfluorescentlight--thiswillcauseamagentacastmostnoticeableinblues.TheF2(ECWF2)and(ifavailable)F3profilesaremoreaccu-rate for viewing under mixed lighting conditions and most likely will remove the magenta cast you see with the daylight profiles.
Color Management settings: Check your ImagePrint Color Management settings.
n the ImagePrint Dashboard, in the PROFILES section (either the Profile Valet or the Choose by Profile Name section):
-Makesureacorrectprinter/paperprofileisselectedforyourpaperandapplied.
In ImagePrint Preferences (found by choosing File in the Main Menu) choose PROFILES and
-MakesureEmbeddedActionissettoApply
- Make sure that your normal Photoshop working spaces are selected in the Missing Profile section for each color type.
Color Management workflow: Images that have been incorrectly color managed can show a cast when printed. For more information on this, please see the Consistent Color Management Tips section in this guide.
T40 IMAGEPRINTTroubleshooting
ImagePrint Windows Troubleshooting Guide (Cont.) Back to Table of Contents
Back to Table of Contents
Images are not centered on page
In the following, orientation is always relative to the observer facing the front of the printer. For example, Top refers to the leading edge of the paper as it comes out of the printer, Left refers to the left edge of the paper as it comes out of the printer.
• Top/bottom differences on sheet paper: Most printers have different top and bottom margins when using sheet paper. This fact can cause images to appear off center vertically when printed. (The Epson 2200, 2400 and 3800/3880 are exceptions to this and allow equal top/bottom borders on sheet, but all other Epson printers have a 1/8th inch top and 5/8ths bottom margin on sheet).
To compensate for this limitation you can choose Center Margins from the Margin Styles section of the Dashboard. Thiswillcausethesizeofthesmallertopmargintoincreasetothatofthelargerbottommargin,reducingthetotalprintable area while compensating for the difference in margins. If you then choose to center your images, they should print with equal top and bottom borders. Make sure to readjust any existing images on the page after chang-ing this option, as the change in layout size will shift things. And be aware of the smaller page size--with Centered Margins turned on, there is 4/8th of an inch less vertical printable area available on the page for most Epson printers. TheCenteredMarginssettinghasnoeffectwhensettoROLLpaper.
• Paper Feed:AnotherpotentialcauseofTop/BottomcenteringissuesisanincorrectsettingintheMediaFeedsec-tion of the OPTIONS dialog (for printers that support it). Options is accessed via the Print Setup section of the ADVANCEDDashboardarea.Normally,theMediaTypeisselectedautomaticallywhenapaperprofileischosen,but you can override that setting if your paper is thicker than the standard thickness of the profiled paper. For thicker papers,selecttheclosestmatchtoyourpapertoensurethatpaperisfedcorrectly.UltraSmoothFineArtSheetistypically the thickest option available.
• Roll or sheet setting incorrect: Make sure you have made the right selection for roll or sheet in ImagePrint (via theRoll/SheetbuttonsintheMEDIAFEEDsectionoftheDashboard)orcenteringissuesmayresult.Also,makesurethatthecorrectTRAYoptionisselectedintheMEDIAFEEDsectionoftheDashboardwhenprintingonsheetpaper.(Typicaltrayoptionsare:ASF(AutomaticSheetFeeder),Manual,Front,orBack).
• White border on images: Creating an image with a white border around it is a common cause of centering prob-lems.Remember,ImagePrintwilltreattheimageinitsentirety,andhasnowayofknowingthatawhiteborderisnot part of the image. It will therefore place the image beginning at the edge of the white border, which may cause unexpected positioning results. It is usually recommended that images brought into ImagePrint not have any unnec-essary white borders.
• Paper size:MakesurethattheactualsizeofthepageyouareprintingonmatchesthepagesizespecifiedinImagePrint.Surprisingly,paperssometimesareshippedfromthemanufacturerwithslightsizedifferences.Thesecanresultinnon-centeredprinting.Measurethepapertoensureitisthecorrectsizeifyouseeanunwantedbor-der.YoucanthenuseImagePrint’sUserDefinedpagesizewindowtodefineapagesizethatexactlymatchesthephysical dimensions of your paper.
• Incorrect paper loading: How you load the paper in the printer can make a difference in the margins. Make sure that you are loading it according to the manufacturer’s instructions.
• Printer margin set incorrectly: Many printers allow you to set the margin for roll paper on their front control panel. ImagePrint assumes this margin is at the lowest setting (typically 3 mm). Make sure that your printer is currently settothelowestrollmarginsettingorincorrectmarginswillresult.(Typically,theRollMarginssettingisaccessedwithin the Printer Settings menu of the printer’s front panel. On Epson printers, the value with the asterisk is the one in use--consult your printer manual for details on setting the roll margins for your specific printer).
T41 IMAGEPRINTTroubleshooting
ImagePrint Windows Troubleshooting Guide (Cont.) Back to Table of Contents
Back to Table of Contents
I’m getting an unwanted margin on my prints
In the following, orientation is always relative to the observer facing the front of the printer. For example, Top refers to the leading edge of the paper as it comes out of the printer, Left refers to the left edge of the paper as it comes out of the printer.
Borderless not set: If you want to print without any margin at all, make sure that borderless mode is enabled intheMARGINSSTYLEsectionoftheDashboard.Remember--most printers only allow full borderless print-ing on roll paper, not sheet.Also,only certain paper widths will print with no borders. Check the Printer Specific section of the appendix of the ImagePrint User’s guide for information on the borderless capabilities ofyourprinter.Remember,ifyouseeapinkbordersurroundingthelayoutareawithinImagePrintthenfullborderless is not in effect. Full borderless mode will show no pink border.
1/8th inch margin on left or right side: Aborderontheleftorrightsidewhenattemptingtoprintinborderless mode is usually an indication that the image is incorrectly positioned on the page. This can hap-pen if you switched to borderless mode after you have positioned your image on the page. In that scenario, the layout area will have changed but the image will still be positioned at the edge of the original (bordered) area.Alwaysreposition(orremoveandreopen)yourimagesaftermakingchangestotheborderlesssetting.
1 to 2 mm “hairline”: Most inkjet printers can vary as much as 2 millimeters in the way they position the edgeofthepaper.Thiscancauseathinlinetoappearontheedgeofyourfullbleedprints.The“GlobalPrinterCompensation”controls,availableinthePreferenceswindowofImagePrint(foundundertheImagePrintmenu)cancorrectforthishardwarevariability.Settingapositive(right)ornegative(left)Xvaluewillmovetheentirelayoutatprinttimeandallowyoutocorrectforthese“hairline”issues.
Printer margin set incorrectly: Many printers allow you to set the margin for roll paper on their front control panel. ImagePrint assumes this margin is at the lowest setting (typically 3 mm). Make sure that your printer is currentlysettothelowestrollmarginsettingorincorrectmarginswillresult.(Typically,theRollMarginsset-ting is accessed within the Printer Settings menu of the printer. On Epson printers, the value with the asterisk is the one in use--consult your printer manual for details on setting the roll margins for your specific printer).
I’m getting a wasted strip of paper between each print
This usually means you are not set to the correct cut mode for your printer. Check in the Options window (accessedbyclickingOPTIONSintheADVANCED->PRINTSETUPsectionoftheDashboard)thatyouaresetto“Single”asthecutmethod(forprintersthatsupportthatoption)toensureyourborderlessprintsarecutwithout a strip of paper between prints. Look in the ImagePrint manual’s Printing chapter for more information onCutModes.(Someolderprinters,suchastheEpson4000,7600and9600,arenotsupportedforsingle-cut mode and will always have some wasted paper when printing in borderless mode).
T42 IMAGEPRINTTroubleshooting
ImagePrint Windows Troubleshooting Guide (Cont.) Back to Table of Contents
Back to Table of Contents
My print is too long or too short
Print-length issues are typically due to problems with the printer’s paper feeding controls. There are only two controls that ImagePrint has for paper feed:
Media Type: The Media Type menu within the Dashboard -> ADVANCED -> PRINT SETUP -> Options dialog (for printers that support it) allows you to choose a pre-set within the printer for different media types. For thicker papers, select the closest match to your paper to ensure that paper is fed cor-rectly.(UltraSmoothFineArtSheetistypicallythethickestoptionavailable.)
Media Feed Adjustment:Ifavailable,increasingtheMediaFeedAdjustmentsetting(alsointheDashboard -> ADVANCED -> PRINT SETUP -> Options dialog) can have the effect of lengthening the print by increasing the distance between printer passes. This slider rarely needs to be adjusted, but for very long prints on heavy papers (like canvas) it can help to compensate for problems with the printer’s paper feeding.
The last few lines of my prints fade or don’t print
Wrong paper size (length):Thisconditioncanbecausedbyanincorrectpagesizesetting.Ifthepagesizeyou have selected within ImagePrint is larger than the page loaded in the printer, the page may eject before the last bit of the image is printed. Measure the physical page to make sure it came from the manufacturer at thecorrectlength--papersareoftenslightlysmallerthanthespecifiedsize(inwhichcaseyoucanspecifyasmallerpagesizeinImagePrint’sUserDefinedpagesizedialogbox).
Epson Driver interference:ThiscanbecausedbyinterferencefromtheWindowsEpsonStylusdriver.Tocorrecttheproblem,getpropertiesontheStylusdriver(foundintheWindowsPrinterControlPanel--makesure to pick the printer with STYLUS in the name--NOT the ImagePrint installed driver) and, in its PORTS tab,disable“BidirectionalCommunication”. Note this will cause the Epson Status Monitor to not be able to see the printer. You will need to turn this setting back on to use that utility, then off again to use ImagePrint.
Jobs print distorted or as negatives
Color Management settings: Something very wrong in your ImagePrint Color Management window could cause files to print distorted. Check the following:
In the ImagePrint Dashboard, in the PROFILES section (either the Profile Valet or the Choose by Profile Name section):
-Makesureacorrectprinter/paperprofileisselectedforyourpaperandapplied.
In ImagePrint Preferences (found by choosing FILE in the Main Menu) choose PROFILES and
-MakesureEmbeddedActionissettoApply
- Make sure that your normal Photoshop working spaces are selected in the Missing Profile section for each color type.
Channels: Prints that appear reversed or negative may be due to extra channels in the image (open the image in Photoshop and check, in the Channels window, that only the normal color channels appear)
Compression: Prints that appear reversed or negative may be due to extra channels in the image (open the image in Photoshop and check, in the Channels window, that only the normal color channels appear)
T43 IMAGEPRINTTroubleshooting
ImagePrint Windows Troubleshooting Guide (Cont.) Back to Table of Contents
Back to Table of Contents
Pixel Order:ForTifffiles,makesurethePIXELORDERsettingisinterleaved(NOT“perchannel”).ThiscanbecheckedinthePhotoshopSAVEdialog.
Corrupt File:Rarely,acorruptedfilecanprintwithdistortedresults.Makesuretotryprintingadifferentfile,suchasoneofthesampleimageswithintheTESTIMAGESfolderwithinyourImagePrintfolder.
Nozzles:Youmayalsogetthisresultifthereisaseverelycloggednozzle.Doanozzlecheckontheprintertoensurethenozzlesareallclean.
Incorrect Printer/Paper profile: Choosinga“Phatteblack”profilewhenyouarenotusingthePhatteblackinksetcancausedistortedprints,ascandoingtheopposite(printingwithanon-phatteblackprofilewhenyouAREconfig-ured for Phatte black). .
Prints show banding (lines)
Nozzles:Thefirstthingtocheckifyouareexperiencingbandingissuesisthenozzlesoftheprinter.Thisisbyfarthemostcommoncauseofthisproblem.Evenonemissingorincorrectlyfiringnozzlecancauseunpredictablebanding.Runanozzlecheck,and,ifnozzlesaremissingorincorrectlyaligned,runprintercleaningsuntilitiscorrected.(NotethatImagePrint,duetoitsenhancedabilitytorenderdetail,mayshowbandingduetonozzleissuewhenthestandardmanufacturer’s driver doesn’t).
Speed: Giving the print more time to absorb the ink as it prints by setting the Speed to a higher number of passes maycurebandingissues.YoucanchangethespeedintheADVANCED->PrintSetupsectionoftheDashboard.You can change the passes in the ImagePrint Print dialog. Going from 4 pass to 8 pass will effectively double the printtime.Also,ifyouaresettoaHS(highspeed)qualitymode,tryanon-HSQualitytoallowtheprintmoretimetoabsorb the ink.
Media Type: The Media Type setting affects paper thickness controls on the printer--it is automatically selected when you prick a paper profile, but if your printer shows banding you may want to try a differetn Media Type to compensate forprinterfeedissues.TheMediaTypesettingisfoundbyclickingOPTIONSintheADVANCED->PRINTSETUPsection of the Dashboard.
What do Passes (4-pass, 8-pass, etc.) mean in the Speed listing?
Manyprintershavetheabilitytomovetheprintheadoverthesameareaofthepaper,firingdifferentnozzleseachtime. The higher the number of passes, the more times the head will pass over the same area of paper, firing fewer nozzleswitheachpass.Intheend,passesdon’tmakeadifferenceintermsofwhatgetsputonpaper--thesamedots will be put in the same place--they will just take a longer (or shorter) time to get there. But more passes will give the ink droplets more time to soak into the paper. This reduces the chances of droplets coalescing on the surface of the paper, which is a cause of inking problems on the print such as banding, artifacts, or smudges.
Higher pass settings make a very significant speed difference, though--doubling the passes (say, from 4-pass to 8-pass) doubles the print time. So you should use a lower pass setting as long as you don’t see inking issues.
For most printers, the default pass setting that ImagePrint uses is 4-pass.
T44 IMAGEPRINTTroubleshooting
ImagePrint Windows Troubleshooting Guide (Cont.) Back to Table of Contents
Back to Table of Contents
What does HS mean in the Speed Listing of the Print Setup area of the Dashboard?
HSinthequalitynamemeans“HighSpeed”orbi-directionalprinting.Inthismode,theprintheadwillputinkonpaper in both the directions that it moves across the page. (Non-HS mode printing only puts ink down as the print headmovesawayfromitsoriginalhomeposition).Theultimatepositionandsizeofthedropletsonthepagewillbethe same in the end--HS just puts them there more quickly.
Bi-directional (HS) mode does significantly improve speed (by a factor of 2), but on some papers (typically glossy ones) it may not provide enough time for the ink to settle into the paper before more ink is laid down, resulting in potentialbanding,smudgingorartifactsintheprint.Alsotheprintheadisn’tperfectlyregisteredyoumayseenalternating patterns of light and dark areas on the print. For slower computers or connections, you may find that the printer is more likely to pause when printing in HS mode as it waits for more data from the printer.
AswithmostQualitysettings,useofHSmodeisamatterofusingitifyouseenonegativeresults.Inmostcases,itis perfectly fine and will double your printing speed with no loss in quality.
What Quality value should I use when printing? (2880? 1440? Photo? Best?)
TheQualityvalues(whichwillbedeterminedbythePrinter/Paperprofileyouchoose)refertothedropletsizeusedby the printer. Typically, these are numeric values that refer to the number of droplets per inch, but for some printers the qualities modes have names instead (such as BEST, PHOTO, FINE, etc.)
Smallerdropletssizesaren’tnecessarilythebestmodetouse.Forexample,2880isaveryfinedot,butdoesn’tallowforvariationinthedropletsizeonmostprinters,so,itisn’tnecessarily“better”than1440(whichdoesallowforsizevariation)sincetheabilitytoproducevariabledotsizescanmakeasignificantdifferenceinthesmoothnessofthe dot pattern produced on the paper.
In most cases, ImagePrint’s profiles will be made for 1440 (on some printer’s, this is referred to as PHOTO qual-ity). 2880 profiles may also be available, but due to the much slower print speed and dubious improvement in quality at normal viewing distance, they are typically made only for some gloss papers (matte papers, with their large dot spread,tendtoloseanyadvantagethesmallerdropletsizemightprovide).
Lowerqualitymodes,like720,maybeavailableaswell.Generally,720qualityproducesoutputthat’sslightlygrain-ier and more susceptible to banding.
What Resolution (PPI) should my images be saved at for best results?
Every print driver takes all the images on a page and builds a large raster (dot) image that is sent to the printer. RegardlessofthePPI(pixelsperinch)oftheimagesonthepage,theinformationwillbeconvertedtotheoneoftheprinter’s“native”resolutionsatprinttime.YoucansetthisresolutionviatheDITHERINGDPIsettingavailableintheImagePrint Print dialog.
Note that this printer PPI is distinct from the quality that the printer is driven at. The quality setting for the printer speci-fies the size of the droplets (typically, specified in droplets per inch) that the printer will use to render the image on the page. Since the printer uses multiple droplets to present each pixel of the image, the quality that the printer is capable of doesn’t translate to the PPI of the image data that is sent to it. For example, a printer might print 1440 droplets per
inch,butwithinthatinch,only360pixelsofimagedataarerepresented.
ImagePrint can open images of any resolution, but it will interpolate them to the printer’s native resolution (the Dithering DPI) at print time. (ImagePrint uses bi-cubic interpolation when scaling images).
T45 IMAGEPRINTTroubleshooting
ImagePrint Windows Troubleshooting Guide (Cont.) Back to Table of Contents
Back to Table of Contents
SincetheRIPwillinterpolatetheimagestothenativeprinterPPI,there’snobenefitforyourimagestobeahigher PPI than that setting. In fact, anything above 240 PPI or so doesn’t show any improvement on ink jet printers.(Thisis240PPIattheprintedsize--ifyou’rescalingtheimage,ofcourse,you’llwanttostartwithahigher resolution.)
Therefore,aslongasyourimageis240PPIoraboveatitsprintedsize,yourprintswillbeattheirbestqual-ity. Giving us images at a higher PPI won’t hurt, but they won’t make a noticeable improvement on your out-put, either for photographic images. (The exception to this rule is when your images are vector (line work) images. Single pixel lines, when interpolated, may result in unwanted moire type patterning--therefore, it is often best to provide computer generated line work at the native resolution of the printer).
Formostprinters,360or300arethestandardPPIsused--you’llseeoneofthosebydefaultastheDitheringDPIintheImagePrintPrintDialog.Alowersetting(suchas180)mayresultinslightlyfasterprocessingspeeds,butcanshowaslight(althoughtypicallyverysmall)increasein“graininess”.Itisthereforeonly recommendedthatlarger(5feet+)imagesusethelowerPPIsettingsinsteadofthedefault360(or300).Atlargersizes,theslightlymoregrainyoutputtypicallyisn’tnoticeable,asprintsofthatsizeareusuallymeanttobe viewed at a distance.
Where should I scale my images--Photoshop, ImagePrint, or using a specialized program?
Because of the relatively low-resolution of an inkjet printer, it is doubtful you will see any difference between imagesscaledviaPhotoshop,ImagePrintoraspecializedprogramifyouaredoingnomorethandoublingthesizeoftheoriginalimage.(Youmaywanttotrysomesampleprintsutilizingdifferentmethodstofindwhatis best for your workflow.)
OnebenefitofscalingimagesinImagePrintisthatyouthenwon’thavetoproducea“printready”copyoftheimage.ImagePrintwillscaletheimage“onthefly”withnoneedtosavea2ndcopyatthedesiredprintsize.Also,whenscalingtheimages,ImagePrintusesbi-cubicinterpolationatthefinal(dithering)stageofrender-ing it for print. Doing the scaling late in the process is a benefit, as it allows all other image processing to be performed on the original (un-interpolated) data.
ImagePrint does -not- currently apply any sharpening to images during scaling, which may be a factor if you arescalingyourimagesmorethantwicetheiroriginalsize.Inthosecases,youmaywishtousePhotoshoporaspecializedprogramlikeGenuineFractalstoscaleyourimages.(Thisisespeciallytrueifyouareblow-ingtheimageup4or5timesit’soriginalsize.)
Again,itisoftenbesttoprintsomesamplesusingdifferentmethodsofscaling/sharpeningtoensureyou’renot doing more work then you have to to achieve the same print quality.
What is gloss differential?
Gloss differential is the effect of inked areas of a print having a different gloss (or shine) then non-inked por-tions. The problem is predominately seen on glossy papers, and is usually noticed as white areas of the page appearing more shiny then the non-inked areas when the paper is viewed at a slight angle. Matte paper does not show this effect to any noticeable degree.
Gloss differential has been reduced with newer ink sets on some printers (the inks maintain a gloss that more closely matches that of the paper).
Laminating, or spray coating, the print will eliminate gloss differential.
Continued
T46 IMAGEPRINTTroubleshooting
ImagePrint Windows Troubleshooting Guide (Cont.) Back to Table of Contents
Back to Table of Contents
What is bronzing?
Bronzingisoftendescribedasagoldenorbronze“sheen”seenonaprintwherethedarkareastakeonaflattened appearance when the media is held at an angle. It only occurs on papers with a gloss coating (not on matte) and is not visible when the print is viewed directly (straight on). It is strongest in the dark areas of the print and is most noticeable with black and white output, where heavy use of black ink occurs.
SomeEpsonprintersemployalite-liteblackinkthatgreatlyreducesthebronzingeffect.Becauseofthis,ImagePrint’sphatteblackoption(whichmakesnouseofthelite-liteblack)mayshowmorebronzingonblackand white prints on glossy papers than non-phatte black prints.
Laminatingorspraycoatingtheprintwilleliminatethebronzingeffect.
What is metamerism and color inconstancy?
Color inconstancy is the phenomenon of an object (in this case, an ink jet print) showing different color casts when moved from one light source to another. For instance, taking a print from daylight to fluorescent light will cause the print to often appear more warm. Metamerism is a similar concept, and the two terms are often used interchangeably, but metemerism is actually a reference to the amount of observable color difference between two objects, and how that difference changes under different lighting. Both phenomenon are much moreapparentincoloredinksthangray/blackinks,sotheeffectsaremoreprominentoncolorprintsthenblackandwhite.ImagePrint’sblackandwhiteprinting(usinga“gray”printerprofile),makesuseofverylittlecolor ink and shows virtually no metamerism or color inconstancy.
Forcolorprinting,ImagePrintprovidesprinterprofilesoptimizedfordifferentlightingconditions.Thiscanhelptooptimizeyouroutputfortheviewingenvironmentitwillbedisplayedin--youcanseewhichlightaprofileismadeforbylookingattheabbreviationattheendoftheprofilename,suchas“DAY”fordaylight,or“CWF”for“CoolWhiteFluorescent”.Moreinformationonprofilesnamescanbefoundlaterinthisguideintheentryentitled: What do the profile names mean?
Continued
T47 IMAGEPRINTTroubleshooting
ImagePrint Windows Troubleshooting Guide (Cont.) Back to Table of Contents
Back to Table of Contents
Profiles & Color Management/The Profile Manager utilityProblemsandquestionsrelatedtoICC/ICMcolormanagementandprofiles,andissueswiththeProfileManager utility are discussed here
My printed colors/tones don’t match my display
Printed output not matching the display on the monitor is one of the most common frustrations in any work-flow. Following are the most common causes of this problem and their solutions.
Remember---ImagePrint is always soft proofing, meaning it is passing its display through the printer profile. Your display in ImagePrint should look close to your print if you are using a calibrated monitor and your set-tings are correct. As a test, always look at the display in ImagePrint and compare it to the print--don’t just compare it to the display in Photoshop. For soft proofing issues within Photoshop, make sure to also consult the entry in this guide entitled: Photoshop doesn’t match my output (softproofing)).
• NOZZLES:Firstandforemost,makesureyouhaveperformedanozzlecheckontheprinterandthatnonozzlesareclogged.Cloggednozzlesarethenumber-onecauseofcolorissues.
• Incorrect ImagePrint Color Settings: Double-check your color management settings in the ImagePrint ColorManagementwindow(availableundertheImageMenu).Chapter6oftheImagePrintusersmanualdiscusses Color Management settings in detail, but here’s a check list:
In the ImagePrint Dashboard, in the PROFILES section (either the Profile Valet or the Choose by Profile Name section):
-Makesureacorrectprinter/paperprofileisselectedforyourpaperandapplied.
In ImagePrint Preferences (found by choosing FILE in the Main Menu) choose PROFILES and
-MakesureEmbeddedActionissettoApply
- Make sure that your normal Photoshop working spaces are selected in the Missing Profile section for each color type.
- The PRESS MATCH / SIMULATION profile should be NONE unless you are intention-ally trying to match your output to a PRESS. In almost all cases, when printing pho-tography, leave this setting at NONE.
- The Colorized B/W field is only used if you are printing an image with mostly neutral data, and some color portions you wish to use a color profile for. Otherwise, leave this setting at NONE.
• Uncalibrated Monitor: Make sure you have calibrated your monitor before attempting to match your screen to your prints.
• Two Monitors: If you are using a two monitor system, it is important to understand that ImagePrint will only recognizethemonitorprofileforyourSystemmonitor.Therefore,ifImagePrint’sdisplayisresidingonasecondary display, the monitor profile may be incorrect. It may be necessary to designate the secondary monitor profile as the System monitor profile to have ImagePrint show colors properly on the second moni-tor.
• Too Dark: If hues are fine, but overall darkness is the issue, it’s likely you are using an LCD monitor and the screen is too bright even if your monitor has been calibrated.WhenLCDsbecamethenorm,thisbecameacommonproblemasLCD’sarefactorysetinalmostallcasestobebrighterthanCRTs,andcali-
T48 IMAGEPRINTTroubleshooting
ImagePrint Windows Troubleshooting Guide (Cont.) Back to Table of Contents
Back to Table of Contents
brating doesn’t bring the gamma down enough. (This is chiefly due to LCDs having trouble rendering deep shadow detail--increasing the brightness opens up the shadow display at the expense of a too bright dis-play). The solution is to manually tone down the brightness with the monitor’s brightness controls to match the print.
• Incorrect Soft Proofing: ImagePrint’s display always soft proofs, so it should always match your print rea-sonably well on a calibrated monitor. Photoshop’s display only soft proofs when you have set Photoshop to do so--otherwise, it will display the image with absolutely no allowance made for the paper and inks you are using, displaying the image the same for a watercolor paper as it would for a high-gloss film. Check the sec-tion later in this guide entitled: Photoshop doesn’t match my output (softproofing) for details on soft proofing with Photoshop.
• Improper Color Management: If your images are not color managed correctly, your output will not be cor-rect. To avoid this, a basic understanding of color management principles is important, but often problems can be avoided by simply making sure you are aware of the color space the images are in at every step in your workflow, and that your images are never incorrectly assigned the wrong source profile. For example, if opening an image without an embedded profile in Photoshop, you will typically be prompted onhowyouwishtocolormanagetheimage.Ifyouchoose“Usemycurrentworkingspace”andyourcur-rent working space is not the one the image was created in, Photoshop will incorrectly assign the color space to the image, resulting in distorted colors. Sometimes, printing with the standard manufacturers driver willnotshowtheproblem,asthosedriversoften“dumb-down”theimagetoansRGBcolorspaceatprinttime,butcanshowupwhenprintinginaproperlycolormanagedRIPlikeImagePrint.MoreinformationonColorManagementisavailableinchapter6oftheImagePrintmanual.
• Wrong Lighting: The ink used in inkjet printers always exhibit some level of color inconstancy (the tendency to look different under different types of light). Make sure to use the right profile for the lighting you are view-ingyourcolorprintsin(forexample,aprintmadeusingaprofilewith“day”inthetitleisoptimizedforday-lightviewing).Formoreinformation,consultchapter6oftheImagePrintuser’sguide.Forinformationonthe profile names, check the entry entitled What do the profile names mean later in this guide. (Grayscale printingwithaColorByteGRAYprofileismuchlesssusceptibletoinconstancyduetothegreatlyreducedused of color inks).
• Wrong side of the paper: Sometimes it’s hard to tell which side of the paper to print on. Make sure you are printing on the coated side (as a test, touch a wet finger to each side of the paper--the stickier side is usually the coated (printable) one).
• Phatte or non-phatte:Forsomeprinters,ImagePrintsupplies“phatte”profiles,madeforprintinginourspecialphatte-blackmode.Theseprofileswillalwayshave“dk”inthetitleinsteadoftheusual“pk”(photoblack)or“mk”(matteblack).Ifyouarenotusingaphatteblackinkcartridgeinyourprinter,donotuseaprofilewith“dk”inthetitle.Alternatively,ifyouAREsetupforphatteblack,ONLYuseprofileswith“dk”inthe title.
• Older gray profile:IfusingImagePrintversions8,7of6,“gray”printerprofileswillhave“6”inthetitle.Oldergrayprinterprofiles(withoutthe“6”)weremadeforearlierversionsofthesoftwareandwillgiveincor-rectresultswithversionImagePrint8or7(or6.x).
• Somebody else’s printer profile:Printerprofilesdon’tjustcharacterizepaperandink.Theyareafin-gerprintofhowaRIPordriverlaysdownink.Therefore,neveruseaprofilemadeforanotherRIPorthemanufacturer’s driver with ImagePrint (or vice-a-versa) or incorrect colors will result. If you create your own profiles for use with ImagePrint, make sure to create them by printing an un-color managed profiling target from ImagePrint according to the instructions in the ImagePrint Manual’s Appendix.
T49 IMAGEPRINTTroubleshooting
ImagePrint Windows Troubleshooting Guide (Cont.) Back to Table of Contents
Back to Table of Contents
What do the profile names mean?
If using the new Profile Valet, you won’t usually need to be concerned with the profile name, but if using an older printer or if you don’t have an internet connection at your ImagePrint computer, you may need to use the Choose by Profile method of selecting your profile--the following information should be helpul in making sure you pick the right one.
ImagePrint’sprofilesstartwiththePRINTERNAME(abbreviated),followedbytheINKSETusedforthisprofile (mk is matte black, pk is photo black, dkfor“PhatteBlack”(dualblack)mode)).NextmaycometheVERSIONLETTERofthedriver(currently“b”)theyaremadefor,thenthePAPERTYPE(sometimesveryabbreviated)andtheQUALITYatwhichtheyweremade(ifnoqualityappearsinthename,assume1440 formostprinters.TheQualitysettingreferstothedropletsizetheprinterwilluse,aswellasthenumberofpassesandHS(highspeed)mode.).Youmayalsoseeanumber(i.e.“6”)indicatingwhichversionofourprofiling target (not which version of Imageprint) was used to generate the profile. The designations at the end of the name refer to the lighting temperature the print will be best suited for.
What are the LIGHTING designations within the profile filenames?
The designations at the endoftheprinter/paperprofilefilenamerefertothelighting temperature the print will be best suited to be displayed in.
Inkjet printers often exhibit color inconstancy (which is the characteristic of a print changing its appearance as it is moved to different lighting conditions) so ColorByte gives you a few choices to enable you to pick theconditionsthatmostcloselywillmatchwheretheprintwillbeviewed.(Althoughyoucan’talwaysknowwhere a print will be viewed, having the ability to choose the temperature can make a big difference. If you know your print is going to viewed in a museum that uses Tungston lighting, you can pick the profile that will show it best there. If you are planning on hanging your print near a window, the Daylight profile would show it best.).
Notalllightingtemperatureswillnecessarilybeavailableforeachprofilemade.And,formostprofiles,onlytheEDAY,F2andF3profilesareincludedonthecd.(TheETUNGandECWFprofilescanbedownloadedfrom the ColorByte profile repository at www.colorbytesoftware.com.)
The current temperature abbreviations are:
ETUNG Tungsten
EDAY Daylight (Most printer drivers only supply daylight optimized profiles, so this type may be best for an “apples to apples” comparison of ImagePrint prints to prints done via other methods).
ECWF Cool White Fluorescent
F2 Fluorescent, alternate version (this version is a bit less warm than our standard ECWF profile, some people, especially portrait photographers, prefer it). This tem-perature was previously abbreviated with “ECWF2”.
F3 Mixed lighting (daylight with fluorescent). This the best profile to use for general light-ing conditions, such as that found in offices. (NOT AVAILABLE FOR ALL PRINTERS and PAPERS)
Continued
T50 IMAGEPRINTTroubleshooting
ImagePrint Windows Troubleshooting Guide (Cont.) Back to Table of Contents
Back to Table of Contents
ImagePrint doesn’t match my Photoshop display! (SoftProofing)
This entry addresses the use of soft proofing within Photoshop to ensure the Photoshop display is compen-sating for the printer, ink and media being used when printing. For problems with the appearance of the prints themselves, consult the portion of this guide entitled My prints don’t match my display.
If Colored Images don’t show the same colors as Photoshop’s display...
By default, Photoshop does nothing to compensate for how an image can print on a given output device. It has no idea of the printer’s gamut, or the media (matte or gloss), or what inkyouareusing,oreventhecapabilitiesoftheRIP--even though all of those factors have a tremendous affect on what colors and densities you will be able to print. Photoshop just displays the image as best as it can within the gamut of the monitor. It’s therefore no won-der that Photoshop won’t automatically match the output of your printer, especially if you are usingaRIP(likeImagePrint)thatmaximizestheoutputcapabilitiesofthedeviceratherthanrestrict it to a monitor-like color space.
You can, however, tell Photoshop to use ImagePrint’s color profiles when creating its display, allowing you to work in a Photoshop environment that reflects more closely how ImagePrint willprintyourfiles.ThisiscalledSoftProofing,andisdoneviathePROOFSETUPfeatureof Photoshop.
To cause Photoshop to pass its display through ImagePrint’s printer profile, you must first copy the printer profile you are using in ImagePrint into the color profile folder used by Photoshop.
The ImagePrint Profile Managercandothisforyou.Justchoosetheprofileontheleftsideoftheprofilemanagerwindow,thenchoose“InstallprofileforPhotoshopsoftproofing”fromthe File menu. For information on the Profile Manager, check out the Color Management section of the ImagePrint Users manual.
If not using the Profile Manager, you can copy the profiles in to place manually by right-click-ingthem,andchoosing“Install”inthemenuthatappears(ormanuallycopytheprofileto:/winnt/system32/spool/drivers/color)
Once in place, this profile can be selected within Photoshop via Photoshop’s Proof Setup option.BychoosingView->ProofSetupinPhotoshop,thenclickingtheCUSTOMbutton,you can choose the Imageprint profile, causing Photoshop to bring it’s display within the gamutoftheprinter/paper/inkandRIP.
Note: There are other options within the Proof Setup window that may or may not have an effect on matching your output (such as simulate paper white). The best way to determine which features to turn on is to print a sample image from ImagePrint, then compare it to the screen display of Photoshop with Proof Setup in effect. Try the different options, and use the ones that cause the display to most closely match the print.
Note: If you find that ImagePrint shows more shadow detail than you are used to in Photoshop, you can increase the darkness of the prints, at the possible expense of losing some shadow detail via the Shadow Point Compensation slider, located in the Output section of the Color Management window. Note that set-tingtheINTENTforthecolorspaceofyourimagetoRELATIVECOLORIMETRIC(withintheBitmapsectionof the Color Management window) will make the Shadow Point Slider’s effects much more dramatic.
T51 IMAGEPRINTTroubleshooting
ImagePrint Windows Troubleshooting Guide (Cont.) Back to Table of Contents
Back to Table of Contents
If Grayscale images don’t look the same in Photoshop as in ImagePrint...
For grayscale printing, Photoshop’s Proof Setup cannot be used with ImagePrint’s current grayscaleprofiles,asPhotoshopdoesnotrecognizetheformatofthoseprofiles(thismaychangein the future). In that case, Photoshop Adjustment Layers can be used to simulate ImagePrint’s output in Photoshop. Here’s the procedure to follow:
• PrintanimagethroughImagePrint,thenopenthatimagewithinPhotoshop.
• ChooseImage->CurvesfromthePhotoshopmenu.
• AdjustthecurvetomatchyourImagePrintoutput.
• Onceyouhaveacurvethatcausestheonscreenimagetomatchtheprint,clicktheSavebutton within the Curves dialog box, and save the Photoshop curve as an adjustment layer (you may wish to give it the name of the media you are matching).
• Youcancreatemultipleadjustmentlayersinthisway,eachcharacterizingadifferentmedia output of ImagePrint.
• Toenable/disableaparticularadjustmentlayer,simplyclickthelayervisibilityicon(aneyesymbol) within the Layers palette of Photoshop. This will allow you to work in a Photoshop environment that simulates how ImagePrint will print for that particular media.
Important:Whensavingtheimage,youshouldmakesurethatnoneofthesecustomadjustmentlayersareenabledinthelayerswindow(the“eye”iconshouldnotbebesideany of them). This will ensure that the information in that layer is not saved with the image, which would be undesirable as the adjustment layer is used to adjust the Photoshop preview only, and should not be applied to the image data itself.
Where can I put profiles to have Photoshop see them (for use in Soft Proofing?)
Color profiles must be copied from the Color folder, which is located in the ImagePrint folder into the folder that Photoshop uses for 3rd party color profiles.
The ImagePrint Profile Managercandothisforyou.Justchoosetheprofileontheleftsideoftheprofilemanagerwindow,thenchoose“InstallprofileforPhotoshopsoftproofing”fromtheFilemenu.Forinforma-tion on the Profile Manager, check out the Color Management section of the ImagePrint Users manual, or consult the entries related to the Profile Manager elsewhere in this guide. If not using the Profile Manager, you can copy the profiles manually. The location they should be placed in is:
On Macintosh OSX the folder is:
/library/application support/adobe/color/profiles
On Windows the folder is:
/winnt/system32/spool/drivers/color
Continued
T52 IMAGEPRINTTroubleshooting
ImagePrint Windows Troubleshooting Guide (Cont.) Back to Table of Contents
Back to Table of Contents
How do I achieve consistent Color Management
ImagePrint is a tightly color managed application. If you observe proper color management techniques in your workflow, your results will be outstanding, but, by the same token, incorrect color management can lead to unsatis-factory output. In fact, you are more likely to see the negative results of incorrect color management in ImagePrint thaninlessadvancedRIPs—justascorrectcolormanagementwillgiveyousuperiorresultstothoseotherRIPs.
Following is a brief discussion of some color management issues that often come up when wrestling with a achieving proper output. For more details on ImagePrint’s use of profiles and color management, see chapter 6oftheImagePrintusersguide.Therearealsomanybooksonthesubject--BruceFraser’s“RealWorldColorManagement”isonethatmanyhavefoundinvaluable.
ICC (or ICM) color profiles define color spaces. Color spaces define the full range of color for an image or device.
In a color managed workflow, all an image’s potential colors (gamut) are defined by a color space determined when the image was created or edited. This is the source space of the image.
Your printing conditions will also be defined by a color space--one that specifies the range of colors that can be pro-duced by the printer on a given paper and ink. This is the output space.
Atitscore,ImagePrint’scolormanagementenginejobissimplytoconvertthecolorsinyourimagefromtheirsource space to the outputspaceoftheprinter/paper/ink.Doingthisinawaythatpreservestheoriginallookoftheimage is the goal. (Of course, results will be dependent on the original color space of the image, and the limitations of the printer, ink and paper in reproducing those colors.)
Therearemanyopinionsastowhichisthe“best”sourcecolorspaceforimagestogivethebestresultswhenprint-ing.CommonsourcespacesincludesRGB,Adobe1998,ColorMatchRGBandProPhotoRGB.Detaileddiscus-sion of which space is the correct one for your workflow is beyond the scope of a troubleshooting guide, but some basic things to consider are:
• Smallerspaces,likesRGB,havetheadvantageofhavingfewercolorsthatfalloutsidetheoutputspaceof the printer, so you are less likely to get surprised by colors that appear one way on the monitor printing differently--however, you are limiting the available gamut of colors within the images.
• Largespaces,likeAdobe1998andProPhotoRGB,arebiggerthantheprinter’sgamutinmoreareas,soits likely some colors will need to be altered more severely to bring them into printer gamut at print time. (In fact, because these color spaces are usually also bigger than your monitor’s gamut, you likely aren’t even seeing some colors as they really are when viewing them on screen.) Of course, you have the advantage of a wider range of colors in the original image when using a larger space, which is helpful when doing color processing and image editing, as well as potentially useful if you plan to use the image in other ways beside printing, or archive them for future use. In any case, because colors are likely to fall out of range of the printer more readily--when printing files from a wide gamut source space, make sure to soft proof the image within Photoshop and make use of Photoshop’sGAMUTWARNINGfeaturetocompensateforcolorsthatfalloutsideoftheprintablegamut.(More information on soft proofing in Photoshop is available elsewhere in this guide, in the Photoshop doesn’t match my prints entry.
T53 IMAGEPRINTTroubleshooting
ImagePrint Windows Troubleshooting Guide (Cont.) Back to Table of Contents
Back to Table of Contents
Perhaps more important than which color space your images use is that consistent color management is observed throughoutyourworkflow.Manycolor-managedworkflowsarebrokenwhenanimageisincorrectly“dumped”intothe wrong color space, resulting in undesirable color and gamut shifts.
This often occurs when an image is opened for the first time in Photoshop.
Whenyouopenanimage,Photoshopuseswhatitcalls“policies”todeterminethebestwaytohandlethecolorspace of the image if it doesn’t match the source color spaces Photoshop is currently using. (You can see Photoshop’s current color space settings in its Color Settings window). In most cases, Photoshop’s policies result in a dialog box appearing when you open an images that doesn’t match Photoshop’s current settings. This dialog will ask if you wish to 1.) Use the embedded profile in the image (if it exists), 2.) Use Photoshop’s current working space, 3.) Specify another working space, or 4.) Disable color management altogether (bad idea).
Someimagesalreadyhaveacolorprofileembeddedinthem.(An“embedded”profilejustmeanstheprofilethatwas used when the image was created or last edited is included within the data of the image file so programs like Photoshop and ImagePrint know right away what its source space is.) In those cases, its easy for Photoshop to open the image into the correct color space or even to convert it into another space, since it knows the color space the image came from it can handle things correctly.
It’s when there is no profile embedded in the image that things can go wrong. In those cases, Photoshop can’t tell whatsourcecolorspacetheimageisin,soitis“flyingblind”.Thisiswhereyouneedtoknowtheappropriatecolorspace to tell Photoshop to use when it opens the image.
Forexample,assumeyourcurrentworking(source)spaceinPhotoshopisAdobe1998.Ifyouopenanimagewith-out an embedded profile, Photoshop will display its usual prompt asking what you want to do with this mysterious image. If you choose “assignworkingRGB:Adobe1998”andthe image wasn’t originally created in that color space, you’ve just messed up its colors.
Thesamethingappliesifyouchoosethe“Specifyanotherprofile”option,butpickaprofilethattheimagewasn’tcre-ated in--Photoshop essentially dumps the image into that space, and colors get... messed up. This is probably the singlemostcommonpitfallofcolormanagedworkflows--openinganuntaggedimageintoPhotoshop’scurrentRGBworking space when the image wasn’t created in that space.
So...if the image doesn’t have an embedded profile, how do you know the appropriate color space?
Generally,DigitalcamerastendtouseSRGBtypecolorspaces,sothat’stheonetouseifindoubtforthosetypesofimages.ScannerimagesoftenarebestopenedintoColormatchRGBorAdobe1998.Ifneitherofthosegiveyou good results, you may have to find out from the manufacturer, or the person that provided the image, what color space it was created for.
Once you have the image in the correct working space within Photoshop, you can then, if desired, convert to another working space doing a profile to profile conversion (typically done under the Image -> Mode menu in Photoshop). Since Photoshop knows where the image is coming from (source space-wise) and where it is going to, it can do a proper conversion, and your image should not suffer (assuming you are converting it to an appropriate color space for the image’s ultimate destination).
Finally, to ensure consistent color management, it is a good idea to embed the profile when saving your image from Photoshop via the Embed profile checkbox in Photoshop’s Save File dialog. This will enable other applications, (like ImagePrint) to know the correct color space automatically for the image, and greatly reduces the risk of profile mis-matching.
T54 IMAGEPRINTTroubleshooting
ImagePrint Windows Troubleshooting Guide (Cont.) Back to Table of Contents
Back to Table of Contents
I want to make my own profiles
The appendix of the ImagePrint users manual gives full instructions on outputting your own uncolor managed color profiletargetsforprofilegenerationvia“offtheshelf”colorprofilingsoftwareandequipment.
How do I get new paper profiles?
With ImagePrint 10 and the Profile Valet, profiles are downloaded automatically as needed for most printers if you have an internet connection on your ImagePrint computer. If not using a printer supported by the Profile Valet, or if no internet connection is available, you’ll need to download profiles manually via the below instructions.
ColorByte maintains a large profile library on it’s web site. You can access the web site via the link on our support page, but the best way is via the Profile Manager. The Profile Manager is an easy to use utility that can be used to find and download profiles. It will download them directly to the ImagePrint color folder, so you don’t’ have to manually put them in place. It also can perform many extra functions, such as displaying the name of the paper the profile each profile is made for, putting the profiles in the right spot for Photoshop to use for soft proofing, and removing any unwanted profiles from your ImagePrint color folder. For more information on the Profile Manager, consultchapter6oftheImagePrintUser’sManual,consulttheProfileManager’sHELPmenus,orcheckoutthefollowing entries related to its use.
Where do I get the latest version of the Profile Manager?
The Profile Manager is included in all current installers and updaters and will be installed into your ImagePrint fold-er:
Default location: c:\program files(x86)\imageprint\profile manager.exe
WithImagePrint9and10,andtheProfileValet,theProfileManagerisnotneededtodownloadprofilesforMOSTprinters--profiles can simply be downloaded from within Imageprint itself. However, older printers still rely on the profile manager, and it has some other useful functions as well.
ThelatestversionisalwaysavailablefromourWebSite.Bygoingtowww.colorbytesoftware.com you will find a linkintheDOWNLOADSsectionofthepagefortheProfileManagerforboththeWindowsandMacversion.Clickthe link to have the Profile Manager downloaded to your computer (for Mac users, the file will be a disk image (dmg) file--double-click it to mount the disk image, then drag the Profile Manager application to the folder of your choice).
Downloading/accessing profiles is slow
ColorByte’s web site, installers, updaters, and profiles are constantly being downloaded, and at certain times the volume of traffic can cause access speeds to suffer. Try downloading at another time.
T55 IMAGEPRINTTroubleshooting
ImagePrint Windows Troubleshooting Guide (Cont.) Back to Table of Contents
Back to Table of Contents
The Profile Manager doesn’t launch at all!
Problems with the Profile Manager launching are rare--usually they are due to a file in your ImagePrint COLORfolderthatisnotsupposedtobethere--asub-folder,oranon-profile.OnlyICC/ICMprofilesshouldbeinyourImagePrintCOLORfolder,andanyotherfilescancausetheProfileManagerto“hang”atlaunch.To correct the problem, open the Color folder from its location in your ImagePrint folder and remove any non-profiles.
I downloaded a profile but don’t see it in ImagePrint’s printer/paper profile list
Restart ImagePrint: Make sure you have restarted ImagePrint since downloading the profiles--ImagePrint does not automatically detect newly added profiles until it is restarted.
Pick the right printer: ImagePrint only shows profiles that are valid for the currently selected printer--make sure, in ImagePrint, the printer you have selected at the top of the ImagePrint Dashboard is the right one for the profiles that you downloaded. Be careful that you download the right profiles, too--it is easy to accidently downloadprofilesforan“X880”printerinsteadofan“X800”printer,forexample.
Look for the description, not the profile file name:Whendownloadingprofiles,theProfileManagerdisplays the profile’s file name in its list. However, within ImagePrint’s Choose by Profile section of the Dashboard’s Profile area you will be seeing the internal description of the profile, which may differ significantly from the file name (the file name tends to be more abbreviated due to constraints in the number of allowed characters).Remember,theProfileManageralsoshowstheprofiledescriptionofthecurrentlyselectedpro-file at the bottom of the profile listing.
Windows “Virtual Store”:WindowsmayberedirectingtheprofiledownloadstoyourWindows“VirtualStore”folder--thishappensasasecuritymeasureonsomeVistaandWindows7systemswhenutilitiessuchastheProfile Manager are not granted permissions to download files to ImagePrint’s Color folder. The quick work-aroundistoalwayslaunchProfileManagerbyrightclickingitsiconandchoosing“Run as Administrator”.AnotherworkaroundwouldbetodisableyourUAC(UserAccountControls)viayour“UserAccounts”controlpanel,thoughthismaymakeyourWindowssystemlesssecure.
The Profile Manager launches, but is not working correctly
Can’t log in: If you can’t log on to the ColorByte Profile site, it may be due to a firewall or other network set-ting on your system. Disable any internet access related software and see if that corrects the problem.
No profiles shown: If the Profile Manager is not showing profiles on the right (remote) side of it’s interface, makesurethe“View All”profilescheckbuttonisselectedinthetopportionoftheProfileManagerwindow.Also,trydeselectingthe“Show Installed Printers Only”button.
Reset the Profile Manager preferences: Some problems can be corrected by resetting the Profile Manager preferencesfile.ProfileManager1.8andlaterhaveanoption“DeleteSettingsandRestartProfileManager”in its SETTINGS window (accessed from the File Menu) for this purpose.
No ImagePrint installed: If you don’t have ImagePrint installed on the system you are using the Profile Manageron,itmayfunctionalittledifferently--specifically,sincetherewillbenoImagePrintCOLORfolderonyour system in this case, the Profile Manager will prompt you for a default folder to download profiles to upon launch.Anyprofilesdownloadedfromoursitewillbeplacedintothisfolder.Youcanthencopythosepro-filesmanuallytothecomputerwithImagePrintinstalled(profilesshouldbeplacedintheCOLORfolderwithin

T56 IMAGEPRINTTroubleshooting
ImagePrint Windows Troubleshooting Guide (Cont.) Back to Table of Contents
Back to Table of Contents
your ImagePrint folder).
Reinstall: If all else fails, try re-downloading the Profile Manager via the instructions earlier in this guide: Where do I get the latest version of the Profile Manager? Overwrite the old profile manager with the newly downloaded one and see if the problems go away.
Use an FTP Client: You can download profiles via a standalone FTP client by using the hostname: ftp.colorbytesoftware.com.Atthetimeofthiswritingtheusernameis“profiles”andthepasswordisalso“pro-files”.WithoutusingtheProfileManager,theprofileswillonlybebrowsablebytheirfilenames,whichcanmake finding the correct profile more dificult.
I can’t find the paper profile I need
First,makesuretousetheProfileValet(ifapplicable)ortheProfileManagerutilitytocheckoursitefortheprofile.InstructionsonuseoftheProfileValetandtheProfileManagerarecontainedinchapter6oftheUser’s Guide, or within the Profile Manager’s HELP menus.
If you don’t see a profile for the paper you are using on the ColorByte Profile site, we may not have it. Send an email to the ColorByte Support dept at [email protected] with the exact paper name, the printer you plan to use the profile with, the black ink you are using if applicable (i.e. photo or matte black) andyour6-digitdonglenumber.Wewillchecktoseeifwehavetheprofileavailable(maybewejusthaven’tuploaded it yet)--if not, we may ask you to send us some of it so we can generate a profile.
ColorByte may generate profiles for free if:
We don’t already have a profile available
The media you wish to have profiled is a valid one for your printer
You can supply us with some of the paper (typically the equivalent of 3 11x14 sheets or larger per pro-file--6 if you need both gray and color profiles) in perfect condition to use for the generation of the pro-file.
IMPORTANT: Even if the above applies, we do not create profiles for uncoated papers, transparencies, or most“unusual”mediasuchasmetals.ProfilegenerationtimesvarygreatlydependingonColorByte’svol-ume, but typical turn around time is about two weeks.
In some cases, rather than get samples of the media, we will ask you to output our profiling target and send it to us--ColorByte will let you know exactly how to do that if it is necessary.

T57 IMAGEPRINTTroubleshooting
ImagePrint Windows Troubleshooting Guide (Cont.) Back to Table of Contents
Back to Table of Contents
AutoPrint IssuesSolutionstoproblemswithAutoPrint,thehotfolderutility,arelistedinthissection
AutoPrint lays out images, but they never go to the spooler
ChecktheTRIGGERsettings,intheGENERALSETTINGSsection.AutoPrintwillonlysendthecurrentlay-out to the spooler when the specified trigger(s) are met.
AutoPrint jobs print with the wrong colors
MakesurethatyouhavechosenyourColorProfilesettingscorrectlywithintheCOLORSETTINGSwindow.These settings follow the same rules as the Color Management window within ImagePrint itself, so make sure toconsultchapter6oftheImagePrintusersguidefordetailsonpropercolormanagementsettings.
AutoPrint jobs show an error in spoolface
Consult the entry earlier in this guide entitled SpoolFace error codes to track down the cause of the error. JustlikewithImagePrint,problemswithcolormanagement,orproblemswiththefilesbeingprinted(suchascompression being used when saving them) can cause errors at print time.
AutoPrint doesn’t show all my profiles in its Color Settings window
UnlikeImagePrint,AutoPrintwillonlyshowprofilesthathavean“.icm”or“.icc”extensionintheirfilename.RenametheprofilestohavethatextensiontohavethemshowupinAutoPrint.
AutoPrint won’t launch
• MakesurethatboththeAutoPrintfile,andtheTOOLSfolder,areintheImagePrintfolder.Theycannotbein a sub-folder within the Imageprint folder, but instead have to be directly in the ImagePrint folder.
• CorruptprofilesintheColorfoldermaymakeAutoPrintfailtolaunch.Removeanyrecentlyaddedprofilesand see if that corrects the problem.
• MakesureyourlaunchingAutoPrintfromyourImagePrintHOSTcomputer.AutoPrintonlycanberunfromtheImagePrintHOST(thecomputerwiththedongle)NOTaClient.(TouseAutoPrintacrossanetwork,simply run it on the HOST computer, and mount the Hot Folder(s) on the remote machines. Users on the remotemachinescansimplydragimagesintothemountedhotfolderstohaveAutoPrintaccessthemonthe Host.
• IfAutoPrint’spreferencefileshavegottencorruptedyoumayhavetroublelaunching.Youcandeletethesefilesfromtheirlocationinthe“/ProgramFiles/ImagePrint/TOOLS/AutoPrint”folder.Thesettingsfileiscalled“autoprint.txt”.Deletingitmaysolvetheproblem,butyouwillneedtomanuallyre-setyourAutoPrintsettings.
• IfyouhavebeendoingaLOTofprintingwithannotations,youmayhaveaccumalatedtoomanytempfilesin the TEMP folder, within the ImagePrint folder. If there are thousands of files in this folder, delete them and that may fix the problem.
T58 IMAGEPRINTTroubleshooting
ImagePrint Windows Troubleshooting Guide (Cont.) Back to Table of Contents
Back to Table of Contents
AutoPrint layouts show a border along the edge
ThisisusuallywhenyouaresettoBORDERLESSprintingmode.Wheninborderlessmode,theprinterwill“overprint”,causing1/8inchorsoofeachimagetofalloffthepage,whichcanresultinanunexpectedbor-derorcropping.Usingthe“OptimizeMarginsforBorderless”feature,intheMarginssectionoftheLayoutSettings window, should correct the problem by offsetting your layout to ride along the edge of the page.
I Can’t find AutoPrint
AutoPrintisincludedinallWindow’sinstallationcd’s,butisnotincludedinImagePrintinstallerdownloads(tokeepthesizeofthedownloadsmall).YoucanalwaysdownloadthelatestversionofAutoPrintfromColorByte’swebsitethough.BygoingtotheSUPPORTpageatwww.colorbytesoftware.com, and choosing the FTP link, you will access our general FTP site. The archive: AutoPrint for Windows will be listed within theAutoPrintFilesfolderthere.Downloadit,thenunzipthearchive.YouwillthenhaveafoldercontainingtheAutoPrintexecutable.PlacethatfileinyourImagePrintfolder,andyouarereadytodouble-clickAutoPrinttolaunchit.NotethatthefirstlaunchofAutoPrintmaytakeaminuteormoretoload,asitiscreatingsomenecessary files. Subsequent launches will be much quicker.
I found an AutoPrint feature that’s not in the Manual!
Asadynamic,scriptedapplication,AutoPrintisupdatedfrequently,andtheImagePrintdocumentationoftencan’tkeepupwithnewfeaturesthatareadded.VirtuallyallfeaturesinAutoprintdohave“balloonhelp”asso-ciated with them. By hovering your mouse over the feature for a few seconds, a window containing a brief descriptionwillappear(makesurethatballoonhelpisturnedonintheViewmenuofAutoPrint).Ifthatisn’tenough, please email colorbyte for a description of the feature.
How do I access different printers and/or hot folders with one copy of AutoPrint?
AutoPrint’sQUEUEfeatureallowsyoutohaveavirtuallyunlimitednumberofhotfolders,eachwithit’sowngroupofsettings.Remember,eachprinterand/orqueueshouldhaveauniquehotfolderchosenforit.
BylaunchingAutoPrintmultipletimes,andpickingdifferentprintersandqueues,youcanmonitordifferenthotfoldersatthesametime.Toautomatetheprocess,usethe“CreateAuto-LaunchShortcut”featureinAutoPrint’sFILEmenu.ThatwillcreateashortcutonyourdesktopthatwilllaunchAutoPrintandautomati-cally switch to the printer and queue that the shortcut was made for.


![Windows 10 Personalization - Windows 10 Troubleshooting …Windows 10 Personalization - Windows 10 Troubleshooting Guide 1/24/2019 1:06:36 PM]](https://img.pdfslide.us/doc/110x75/5f73ff735a50aa01df310daf/windows-10-personalization-windows-10-troubleshooting-windows-10-personalization.jpg)