Embed Size (px)
Citation preview

The Great Kapok Tree
unit by Celia and Ami printables by Jimmie and Ami
Social Studies Geography – Amazon Rain Forest: Explain to your student that a tropical rain forest is an environment that has lots of tall trees and receives lots of rain (160 to 400 inches each year!). Show him on a globe that tropical rain forests exist in Africa, Australia, Asia, and Central and South America. The Amazon Rain Forest is in South America. Show him the continent and the country of Brazil. The country of Brazil is slightly smaller than the entire USA. Point out the Amazon River. The Amazon River is the second longest river in the world, but has the most water flowing in it. Make a story disk and place on Brazil. Geography – Tropic of Cancer, Tropic of Capricorn, and the Equator: Discuss the imaginary lines that define the tropics. Have your child locate the three imaginary lines on the globe....help him to understand that the lines do not really exist (even though most globes will show them). Discuss why tropical forests are located within these lines. Because the earth’s axis is tilted, the Northern and Southern Hemispheres each spend part of the year tilted away from the sun. Because the Equator (and therefore the tropical forests) is around the middle of the earth, that area receives about the same amount of heat all year. So the climate is steady...rainy and warm. Activity map showing Tropic of Cancer/Capricorn, Equator, and Rainforests p. 147 Evan-Moor’s Giant Science Resource Book Social Studies – Indigenous Tribes: Yanomamo Indigenous people means native peoples, ones who have lived in a place for so long it’s as if they’ve lived their
forever. The Yanomamo tribe live in almost complete seclusion in the Amazon Rain Forests. They are perhaps the last culture to come in contact with the modern world. They were discovered only about 30 years ago. In 1988, there was a gold rush in the Yanomami area. The incoming people brought diseases to which the Yanomamo tribe have no resistance.....even the common cold is deadly to them. The Yanomamo tribe is a hunter-gatherer people. They live in small tribes. They use bow and arrows or blow guns to hunt. They also do some gardening. They are continually warring with other tribes or even among themselves.
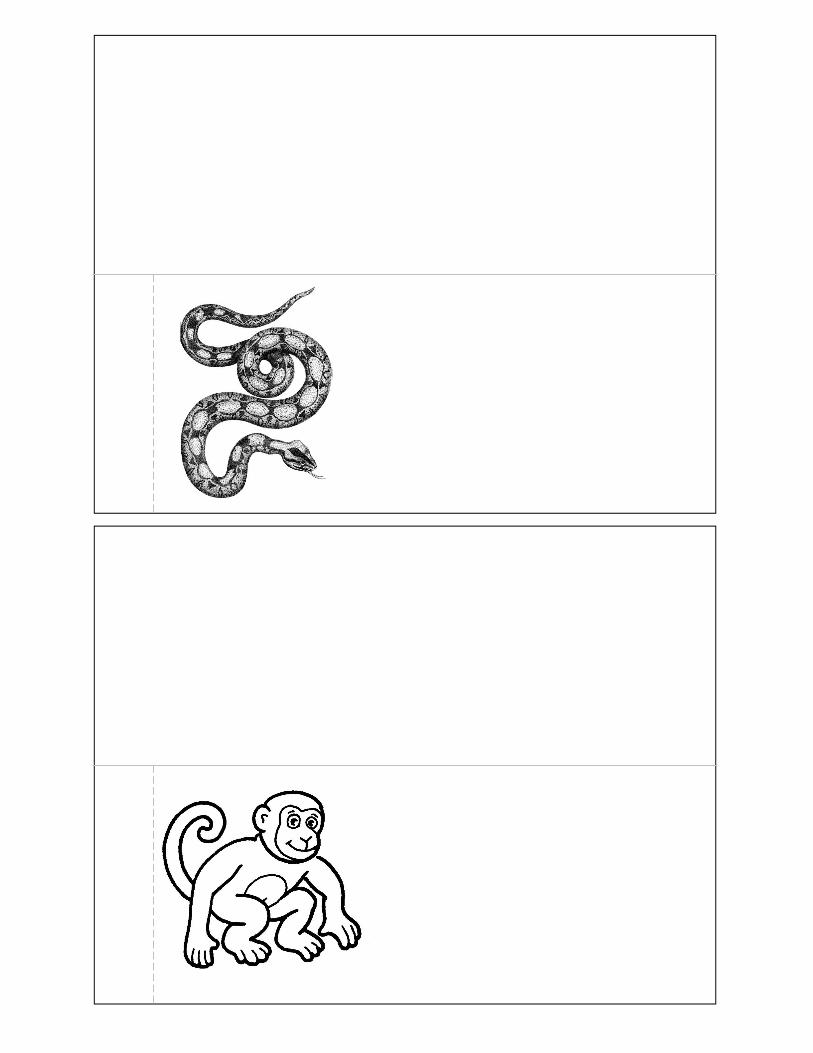
Language Arts Vocabulary: Senhor, the Brazilian spelling for the title of an adult man. Similar to when we say Mister or in Spanish it is Señor. Writing/Narration: Have your student choose a topic: “If Animals Could Talk, What Would They Say?” or “A World Without Trees” or “A Feast for the Eyes” Or have your student research one of the animals from the story and have them present what they have learned about that animal. You might ask an older child to pretend the story had ended differently, with the man cutting down the tree, and have the student write a story about what has happened to each of the animals since the tree was cut down. Speaker Tags: An author will use what is called a speaker tag to let the reader know who is talking. In the following sentence, “I’m going to the store,” said Mom, the speaker tag is “said Mom.” If the sentence is a question, for example “Do you want to go with me?” she asked, the speaker tag is “she asked.” A story would get pretty boring if we used the same speaker tags over and over. So an author will vary the speaker tags. Some examples might be “he shouted” or “she whispered” or “Ben yelled.” Speaker tags can not only tell us who is doing the talking, but also describe how the person is talking. This helps the reader to imagine the story more accurately and help them to properly read the story aloud. Notice in this story that author Lynne Cherry uses a variety of speaker tags, many of which match a characteristic of the animal speaking. Make a list of the animals who speak to the sleeping man. Beside each write the speaker tag. (Note: Keep this list handy and after the science lesson on the layers of a rain forest, add a third column to list which layer the animal lives in.)
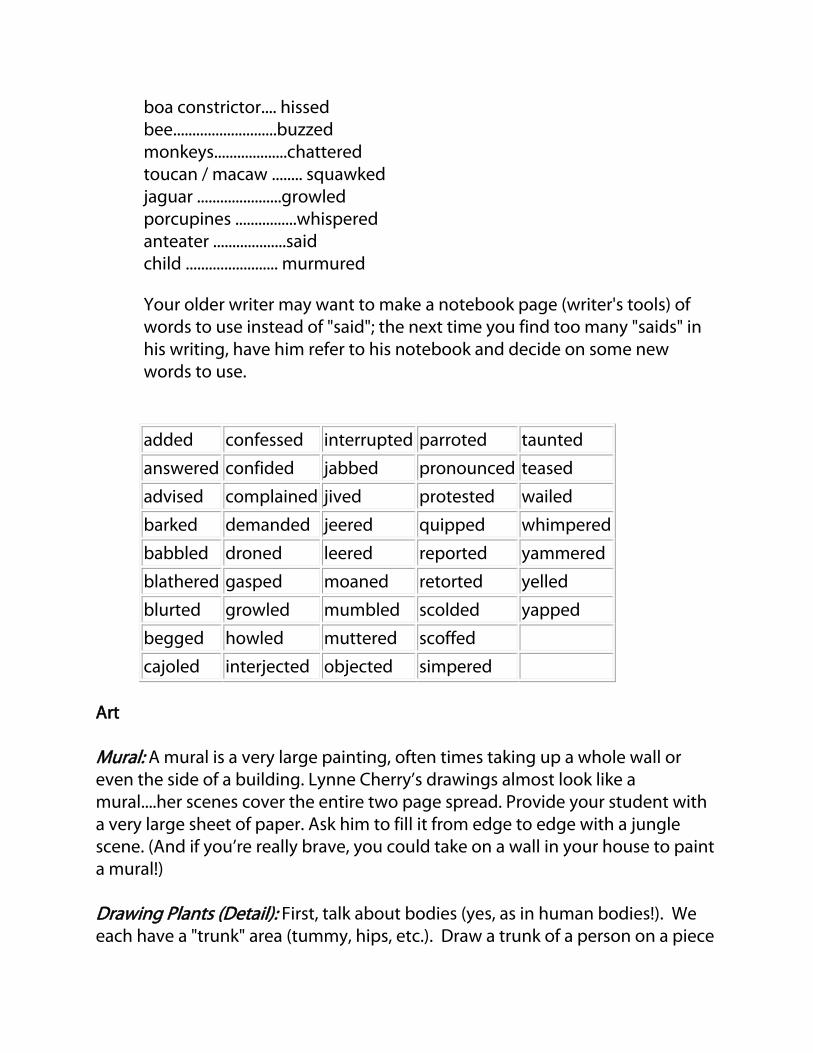
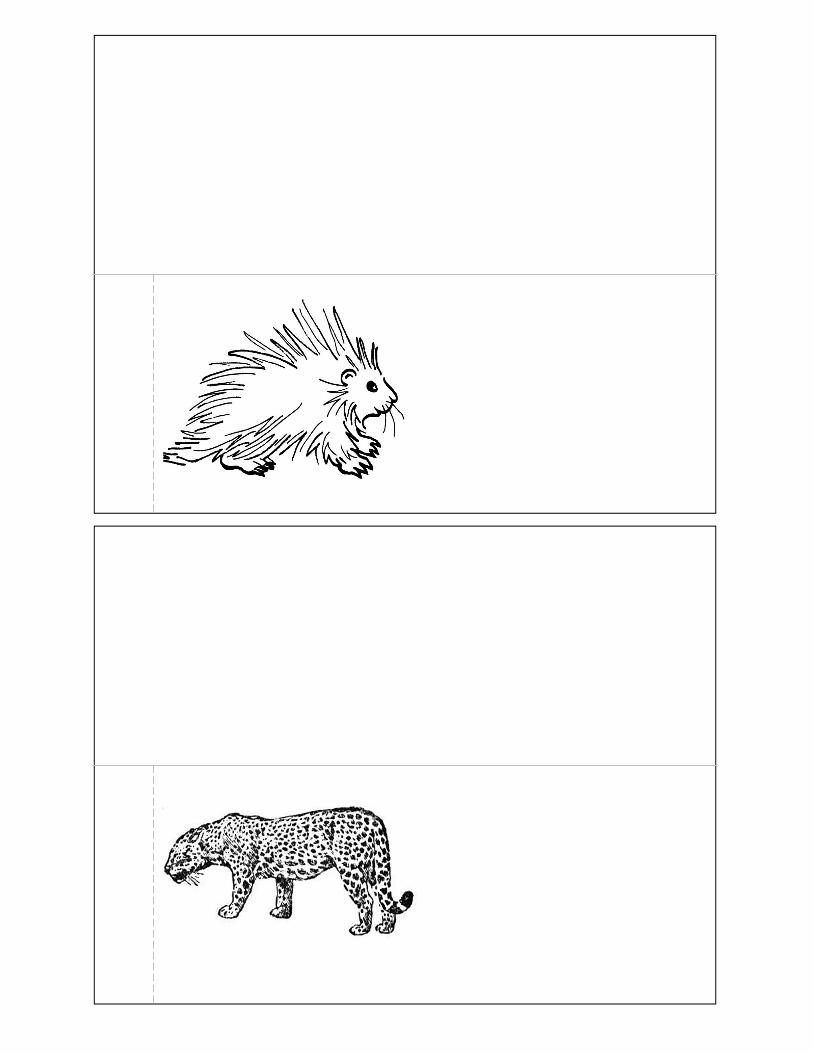
boa constrictor.... hissed bee...........................buzzed monkeys...................chattered toucan / macaw ........ squawked jaguar ......................growled porcupines ................whispered anteater ...................said child ........................ murmured
Your older writer may want to make a notebook page (writer's tools) of words to use instead of "said"; the next time you find too many "saids" in his writing, have him refer to his notebook and decide on some new words to use.
added confessed interrupted parroted taunted
answered confided jabbed pronounced teased
advised complained jived protested wailed
barked demanded jeered quipped whimpered
babbled droned leered reported yammered
blathered gasped moaned retorted yelled
blurted growled mumbled scolded yapped
begged howled muttered scoffed
cajoled interjected objected simpered
Art Mural: A mural is a very large painting, often times taking up a whole wall or even the side of a building. Lynne Cherry’s drawings almost look like a mural....her scenes cover the entire two page spread. Provide your student with a very large sheet of paper. Ask him to fill it from edge to edge with a jungle scene. (And if you’re really brave, you could take on a wall in your house to paint a mural!) Drawing Plants (Detail): First, talk about bodies (yes, as in human bodies!). We each have a "trunk" area (tummy, hips, etc.). Draw a trunk of a person on a piece

of paper. Now, note with your student that we have more than a trunk. We have limbs-- arms, legs (draw some). Our limbs branch down into even smaller parts-- fingers, toes (add these, too). God made plants in the same way. Trees start out biggest, bigger, big-- then move to small, smaller, smallest. Show your student some of the illustrations of plants in The Great Kapok Tree and determine where the biggest part is...all the way down to the smallest. Note the biggest part of a leaf and how it eventually comes to end points. This is something students need to be aware of as they attempt drawing plants. Once your student understands, let him try drawing a plant. You can go outside and draw a tree or a leaf, or you can stay inside and draw a house plant. When he is finished, you may want to give him some oil pastels to color in the sketch. The pastels will create a nice bright colors.
Line: If you have young students, simply let them trace the different lines in the illustrations with their fingers as you look at the illustrations. You may want to read through the lesson beforehand and mention what types of lines they are tracing. With your more advanced artist, discuss the following about line and types of line. In drawing, line is a mark drawn with a pointed moving tool. Your student can draw a line on a paper with a pen (marker, pencil, etc.) or scratch a line into the mud with a stick. Discuss other ways to create lines in art (other mediums like carving, painting, etc.). Artists use line to control the movement of the viewer's eye. Lines lead the viewer's eyes around, and in-out of a work. Five basic types of lines exist: vertical, horizontal, diagonal, curved, and zigzag. (You may wish to draw each type of line with your fingers in the air as you discuss -- or get some paper and the medium of you choice and demonstrate each type of line allowing your student to mimic) Vertical lines move straight up and down. Tell your student to stand up straight-- he is now forming a vertical line. Horizontal lines are parallel to the horizon (no slanting). Tell your student to lie down on the floor-- he is now forming a horizontal line. Diagonal lines are somewhere between horizontals and verticals. Tell your student to stand up straight again (and to become very stiff). Then, let him fall forward a bit (while you help hold him and his feet are still planted on the ground). Now he is a diagonal. Curved lines change directions gradually. Spirals, circles, and wiggly lines are

curved. Zigzag lines are made from diagonal lines that form angles and rapidly change directions. Look through the illustrations in The Great Kapok Tree. What examples of line can your student find? Can he identify all five?
Math Counting: Count the animals on each page. There are probably more than you think! How Tall?! If a Kapok Tree grows 150 feet tall and Daddy is 6 ft. tall, how many daddies would it take to be that tall? (Answer: 25) Go outside. If your child can count by 25s, use a 25 ft. tape measure to measure out 150 feet. (Could also count by 5s or 10s.) Stand at one end of the 150 ft. length and the student at another end....explain to him that this is how long the tree would be if the man had cut it down. Cut out the people included in the printables. Kapok trees are different sizes with the smallest being around 45 feet and the largest around 150 feet! Let each person in the file represent 5 feet. How many people to make a small kapok tree? How many people to make the largest kapok tree? Let your student use the people as manipulatives and stack them on each other (on the floor or table) to represent how tall kapok trees are. Store the people in the pocket (they stay put better when you lay them horizontally).
Science
Rain Forests: Does your child know what a habitat is? It is an environment in
which plant and animal life live together naturally, relying on each other for
sustenance.
The rainforests, found in Africa, Australia, Asia, and Central and South America,
receive 160 to 400 inches or rain each year! The rainforests are very special
habitats and the world would not be the same without them.
Rainforests have four different layers (refer to picture inside cover of book), each
layer being home to specific plants and animals. These plants and animals work

together to create a livable environment, providing each other with the food
and shelter. We will discuss each layer, and the plants and animals that live
within each. As you discuss each layer with your child add the plants and
animals to the appropriate pages in the layer book.
The very top layer of the rainforest is called the Emergent layer, or Penthouse.
This layer includes the tallest trees of the rainforest, such as the Kapok and Coco
de Mono, which can grow over 150 feet tall, peaking up over all the other
rainforest vegetation. The trees living in this top layer have very shallow root
systems, and depend on the lower growth to support their massive trunks. The
tops of Emergent trees are wide spreading (umbrella shaped), and have seeds
that hang in pods which explode and open when the time is right, scattering
the seeds to the wind. The trees rely on the fruit bats to pollinate them. Other
animals living in the Emergent layer of the rainforest include the Morpho
butterfly, hawk, Proboscis monkey, and the Harpy Eagle.
Further research on Emergent layer: fruit bat
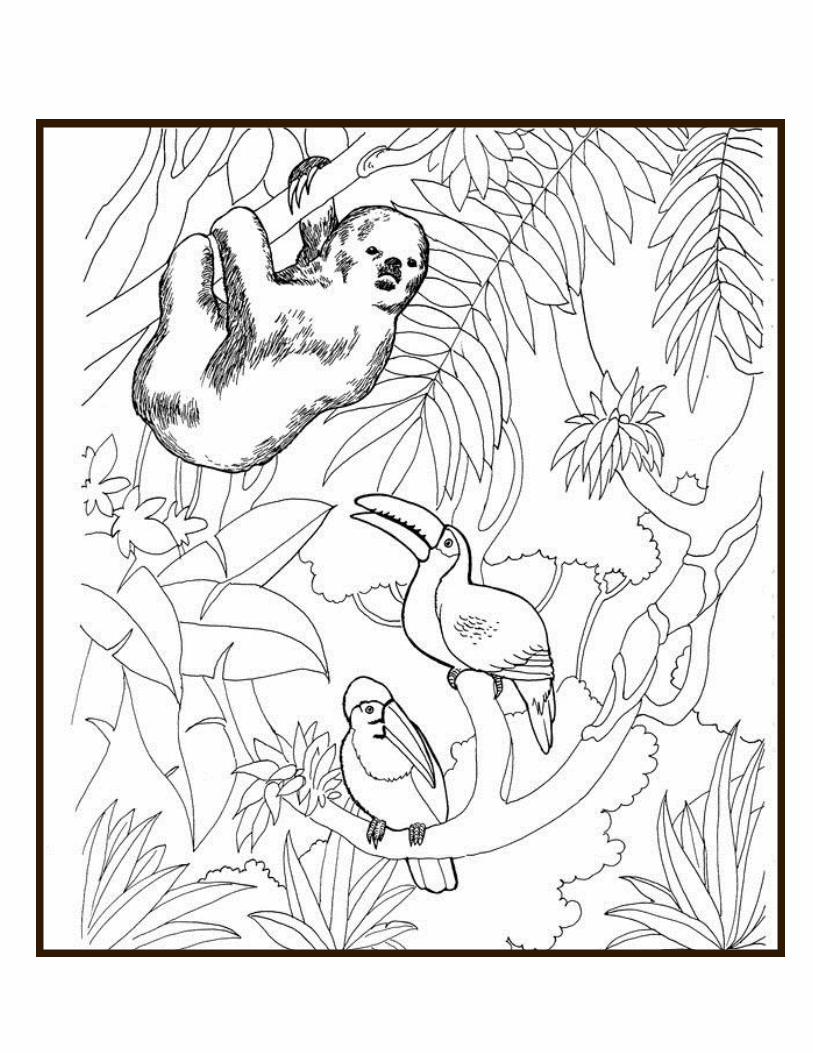
The next layer is the Canopy, or the Umbrella. This layer is almost a continuous sheet of green, with sunlight above and near darkness below. In addition to the tall trees, climbers and vines such as moss, lichen, and hundreds of different flowering plants, harmlessly attach themselves to the canopy trees, creating the canopy layer. The animals making this canopy layer their home include the three-toed sloth, toucan, spider monkey, and porcupine.
Further research on Canopy layer: toucan, macaw, cock-of-the-rock, three-toed sloth, tree porcupines
Underneath the Canopy layer you will find the Understory. The Understory receives sunlight that has filtered down through the Emergent and Canopy layers. The wind and temperature in the Understory stay consistent due to the protection of the upper layers. In the Understory live small trees such as the fig and palm, and shrubs, bushes, and climbers such as orchids and bromeliads. They give shelter and food to the jaguar, ocelot, boa, and various tree frogs.
Further research on Understory layer: boa constrictors, tree frogs, jaguar, bees
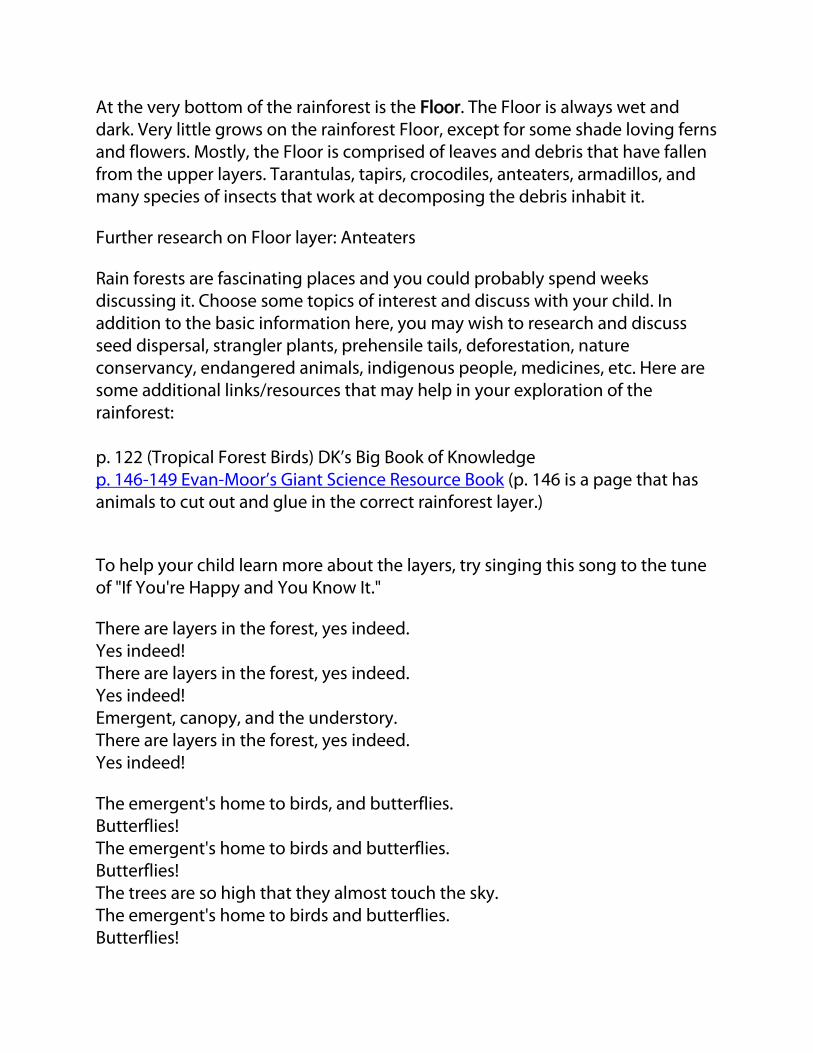
At the very bottom of the rainforest is the Floor. The Floor is always wet and dark. Very little grows on the rainforest Floor, except for some shade loving ferns and flowers. Mostly, the Floor is comprised of leaves and debris that have fallen from the upper layers. Tarantulas, tapirs, crocodiles, anteaters, armadillos, and many species of insects that work at decomposing the debris inhabit it.
Further research on Floor layer: Anteaters
Rain forests are fascinating places and you could probably spend weeks discussing it. Choose some topics of interest and discuss with your child. In addition to the basic information here, you may wish to research and discuss seed dispersal, strangler plants, prehensile tails, deforestation, nature conservancy, endangered animals, indigenous people, medicines, etc. Here are some additional links/resources that may help in your exploration of the rainforest: p. 122 (Tropical Forest Birds) DK’s Big Book of Knowledge p. 146-149 Evan-Moor’s Giant Science Resource Book (p. 146 is a page that has animals to cut out and glue in the correct rainforest layer.)
To help your child learn more about the layers, try singing this song to the tune of "If You're Happy and You Know It."
There are layers in the forest, yes indeed. Yes indeed! There are layers in the forest, yes indeed. Yes indeed! Emergent, canopy, and the understory. There are layers in the forest, yes indeed. Yes indeed!
The emergent's home to birds, and butterflies. Butterflies! The emergent's home to birds and butterflies. Butterflies! The trees are so high that they almost touch the sky. The emergent's home to birds and butterflies. Butterflies!
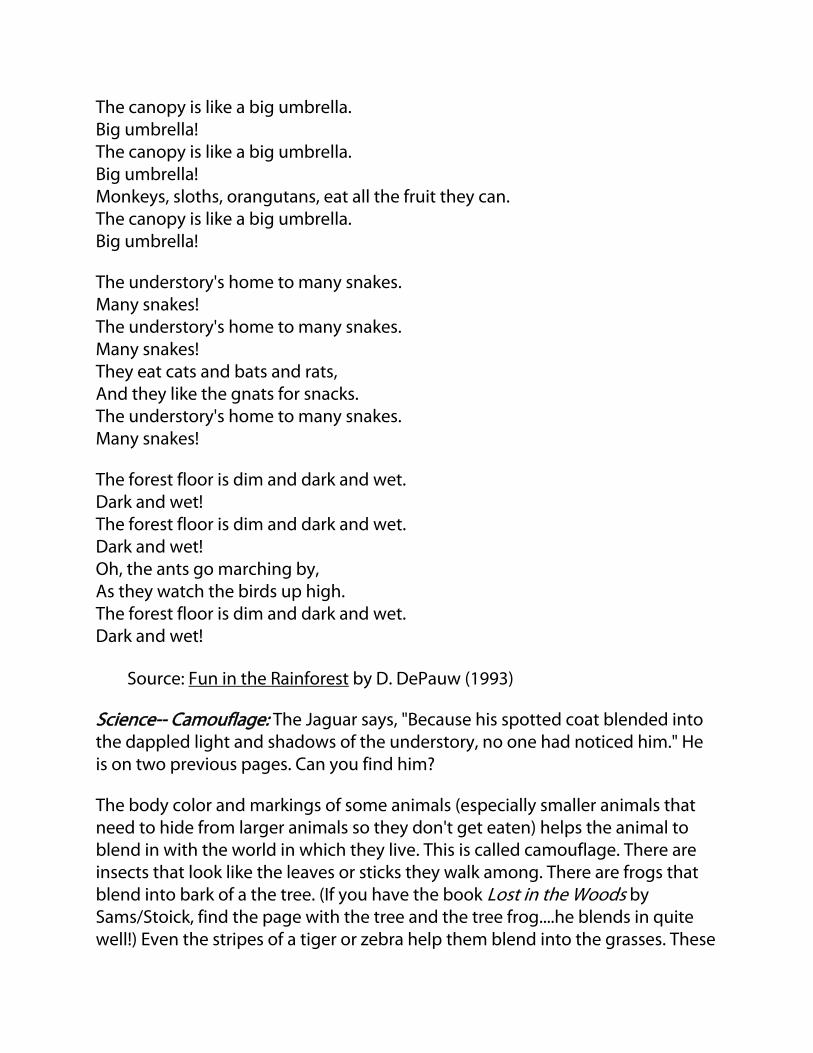
The canopy is like a big umbrella. Big umbrella! The canopy is like a big umbrella. Big umbrella! Monkeys, sloths, orangutans, eat all the fruit they can. The canopy is like a big umbrella. Big umbrella!
The understory's home to many snakes. Many snakes! The understory's home to many snakes. Many snakes! They eat cats and bats and rats, And they like the gnats for snacks. The understory's home to many snakes. Many snakes!
The forest floor is dim and dark and wet. Dark and wet! The forest floor is dim and dark and wet. Dark and wet! Oh, the ants go marching by, As they watch the birds up high. The forest floor is dim and dark and wet. Dark and wet!
Source: Fun in the Rainforest by D. DePauw (1993)
Science-- Camouflage: The Jaguar says, "Because his spotted coat blended into the dappled light and shadows of the understory, no one had noticed him." He is on two previous pages. Can you find him?
The body color and markings of some animals (especially smaller animals that need to hide from larger animals so they don't get eaten) helps the animal to blend in with the world in which they live. This is called camouflage. There are insects that look like the leaves or sticks they walk among. There are frogs that blend into bark of a the tree. (If you have the book Lost in the Woods by Sams/Stoick, find the page with the tree and the tree frog....he blends in quite well!) Even the stripes of a tiger or zebra help them blend into the grasses. These

are just a few examples of how God wonderfully designed animals for their environments! (If you have hunters in your family, you may wish to discuss the use of camouflaged clothing.) Here's an experiment to try: Hide and Seek Experiment Items needed: Green toothpicks (exactly 25) Red toothpicks (exactly 25) Watch or Stopwatch Your lawn or a park Note: This experiment works best if the lawn *needs* mowed instead of having just been mowed. You also don't want to do this experiment when drought has made your grass brown instead of green. Stake out a large area of the grass, like a 10 ft. square. Mix up the toothpicks and spread them over the marked area. Ask the child to find as many toothpicks as he or she can find in one minute. Ask your child which color was easier to find? Why? The green toothpicks more closely matched their surroundings than did the red ones. Being able to match their environment helps animals to survive....they are harder to find. Math: Sort the found toothpicks by color and count the number found of each color. Make a graph of the findings. [Be sure to collect all 50 of the toothpicks from the grass so no one in bare feet steps on any!!!] This idea was adapted from Anthony D. Fredericks' book Exploring the Rainforest: Science Activities for Kids and can be found in some of his other books as well. (This particular book is highly recommended for your rain forest units!!! There are experiments for each layer and lots of great info!) Bromeliads: Research these fascinating plants and make the mini book in the printables

section. Erosion: “A troupe of monkeys...chattered...The roots of these great trees will wither and die, and there will be nothing left to hold the earth in place. When the heavy rains come, the soil will be washed away....” Water causes erosion. In the rain forest, when the rain comes down it hits the trees and then some of it makes its way down to the forest floor. If there were no trees, the rain would directly fall onto the forest floor and this would gradually move the soil. Oxygen: “Four tree porcupines...whispered...do you know what we animals and humans need in order to live....Oxygen!” Experiment: Watching a plant release oxygen
Supplies Needed: A clear, glass bowl of water (or a small aquarium), a glass jar, a few water plants such as pondweed (purchase at your local pet store)
Procedure:
1. Place the pondweed in a deep bowl of water 2. Fill the glass jar with water by lowering it on its side into the bowl, letting all the trapped air bubbles escape. 3. Turn the glass upside down to cover the plant 4. Leave the plants in a sunny place and watch what happens. Oxygen bubbles from the plant will start rising toward the surface of the water! Eventually, a pocket of oxygen will collect at the top of the jar. 5. Explain to your student that plants and trees release oxygen into the air (we can't see it like we can with the water, but they really do!). During the process of making food from carbon dioxide and water, trees and plants release oxygen. Energy from the sun is used to change the carbon dioxide and water into food and release oxygen. This process is called photosynthesis. Conclusion: The porcupines are right! We need oxygen to live and cutting down too many trees could leave us breathless. Your older student may want to delve into further lessons on the respiratory

system and learn why the rainforest has been called the "lungs of the planet" Ecology: Rainforests are disappearing at an alarming rate. Discuss this quote with your student, "We do not inherit the earth from our ancestors, we borrow it from our children." ~Native American Proverb. Why is it important to preserve the rain forests? "Rain forests are essential to recycling water. Did you know that almost half of all the world's rain falls on rain forests? Plants trap water in the soil and then slowly release it into the air, where it evaporates. Clouds form and rain falls, filling rivers and streams. That water is later used for drinking and irrigating crops. When rain forests are cleared from the land, less rain falls. As a result, the land becomes hard and dry. The animals can not survive and many become extinct every year." The plant and animal life found in the rain forest is important! Plants from the rain forest provide us with food, spices, and many other important things. The rubber in tires comes from the rubber tree. Rope and baskets are made from rain-forest products. Some of the chemicals from rain-forest leaves, flowers, and seeds are used to make perfumes, soaps, polishes, and chewing gum. Other chemicals of the rain forests kill germs and fight diseases such as cancer. Here is a list of rainforest products. Read it over with your student and check-off items you use/have in your home. Food Products avocado banana grapefruit guava lemon lime mango orange papaya

pineapple plantain sweet potato allspice black pepper (whole and ground) cardamom cayenne (red pepper) chili pepper chocolate / cocoa (products) cinnamon cloves ginger (fresh and ground) mace nutmeg (whole and ground) paprika turmeric vanilla (liquid and whole bean) Brazil nuts cashew nuts coconut (whole and shredded) coffee (beans and ground) macadamia nuts tapioca tea Household Products (including house plants) African violet Begonia bird's-nest-fern bromeliads Christmas cactus Rosy Periwinkle rubber (balloons, erasers, balls, rubber bands, gloves, tires) chicle (chewing gum) copal (varnish, printing ink) dammar (varnish, lacquer)
Medicines ipecac quinine So much would be lost if we lost the rainforests.
Bible God told Adam to rule over all the animals. Read Genesis 1:26-30 with your student. If God gave man responsibilities regarding His creation, how should we then live to fulfill that responsibility? You may want to read the entire creation account as you study so many of God's wondrous creations as you read The Great Kapok Tree.
Just for Fun and Resources Rabbit Trails: Circle/Web of Life: “....all living things depend on one another.” Pollination: Bees and Fruit Bats. “A bee buzzed.....I fly from tree to tree and flower to flower....in this way I pollinate the trees and flowers throughout the rain forest.” DK’s Big Book of Knowledge p. 74-75 (Flowers and their pollinators) and p. 124-125 (Bees) Field Trip: A greenhouse that grows tropical plants, a zoo or pet store that has tropical birds, fish, animals. A trip to the Cleveland Rain Forest is a real-to-life experience! Hot, humid, steamy...colorful birds flying, sloths hanging, anteaters searching, etc. Rain Forest go-alongs: Books
If I Ran the Rain Forest (The Cat in the Hat’s Learning Library) by Bonnie Worth (Using classic Cat in the Hat style, the book describes the 3 kinds of Rain Forests and the 4 layers (“floors”) and discusses transpiration,

camouflage, plants and animals, and deforestation. ) Exploring the Rain Forest by Mattias Klum How Monkeys Make Chocolate: Foods and Medicines from the Rain Forest by Adrian Forsyth Journey Through a Tropical Jungle by Adrian Forsyth Life in the Rainforests: Animals, People, Plants by Lucy Baker Living in a Rainforest (several titles by different authors. The Rookie Read About series one is by Allan Fowler) Nature’s Green Umbrella–Tropical Rain Forests by Gail Gibbons Nature Search: Rain Forest by Paul Sterry Rain Forest (DK’s Look Closer series) by Barbara Taylor Chico Mendes: Defender of the Rain Forest by Joann Burch (Lynne Cherry dedicates The Great Kapok Tree to Chico Mendes. You may wish to learn more about the man.) Jaguar in the Rain Forest (Just for a Day Series) by Joanne Ryder – the author invites the reader to imagine you’re climbing a tree and then changing into a jaguar, and then spending a day as a jaguar would spend his day in the jungle. Author’s note includes info on jaguars. Jaguar by Roland Smith (older reader, 149 pgs.) Jungle Drum by Deanna Wundrow One Day in the Tropical Rain Forest by Jean Craighead George. Small chapter book– great for the child who has been wanting to read or is just starting to read chapter books. The Umbrella by Jan Brett. Enter the jungle as only Jan Brett can allow! And be sure to extend your lesson on speaker tags! A Walk in the Rainforest by Kristin Joy Pratt Welcome to the Green House by Jane Yolen – you can almost feel the steamy mists of the jungle come off the pages!
Videos
The Great Kapok Tree (Reading Rainbow) The Shaman’s Apprentice (Reading Rainbow) National Geographic’s Totally Tropical Rain Forests

Cut b
ook o
ut. F
old
on lin
es (m
atc
hbook s
tyle
). Let y
our s
tudent th
ink o
f diffe
rent w
ord
s fo
r said
and re
cord
them
in th
is b
ook.

Dire
ctions: C
ut o
ut th
e co
ver (o
n th
is page). C
ut o
ut e
ach re
c-tangle (so
lid black lin
es) o
n th
e fo
llowing pages. F
old lik
e a hot-
dog on ce
nter g
ray lin
e. C
ut d
otte
d gray lin
e. R
epeat ste
ps
with
each re
ctangle.
Stack re
ctangles to
gether (w
ith th
e co
ver o
n to
p) a
nd sta
ple on
the left sid
e where indica
ted. Y
ou will b
e able to
lift the fro
nt o
f each strip
up. Y
ou sh
ould also
be able to
flip in your b
ook fro
m
strip to
strip.
See below fo
r what th
e fro
nt o
f your b
ook will lo
ok lik
e.
Note: U
sing ca
rdsto
ck m
ay m
ake your b
ook to
o th
ick.
Let y
our stu
dent w
rite th
e name of th
e animal next to
its pictu
re. In
side
the strip
, let y
our stu
dent w
rite th
e se
ntence fro
m The Great K
apok T
ree
demonstra
ting th
e sp
eaker ta
g used by th
at p
articu
lar a
nimal.


���������������� ���������������������� ���������
���� ���������������� �� ���� ��� ���� �� �������� �� ��� ���
����������������������������
�
������ ���������������������������������������������������
�
������!�"�#� ���������������������� $� ��� �����%����
������������&������������������������� ������������������������������'
���������������������(�����������������������&��������������������)����
�%���������������������������� ����
�
����������������� ����$�����(�������� ���������������
��������*���� ��������������� ������
�
�� ���� ���� ��� ���� �����&� ��� � �&� ���� ���%���� ���
�����������������������������������������������������+��
��������*������������������������������������)�����
���� ����������� ���� %����� ����� ����� � ,)��������-����
�����������������%������ ����������������������������������
�������������&������������� ��%��� �������������%��-���
�������-���������������������������������
�
����%��-����������������������������������������%���� ���
�
������������%���-������)���������������
�
�� ���� ������&� ������� ���� ������ �� �� ���� ��� ��
���� $� ����� ��� �� ���� �� ��(��.������ ���� �%��&� ����� ����
���-�����������������������������%��-����������
/���������������0�
�
�
�� ���������
���� � ��� �� �����������������
����� �� ������������������� ����� ����������
��
�������������������
#������������������' �
����/�������
�����%��-������� ��


��������������1�,2,#�
������
������� ���
����� 34� )�
5�634 � ���
��������
� � ����
��� -��
�����
�����
��������

������������%�������)�������� �
�������� ��������������������
�����������������%�������)�
������� ��������� �����������
�������������
������
�������
���
�����
74�)�
5�634�
������
�����
������
���
-��
�����
�����
����'
����

*!8,�
�.���
��9��:�
:1,#
*!8,�
9� ;�
$�����(��
�:��
:��:'
���,��
���,�
�:��
��.���
��9�
�����������������
# ������������������������3�"�7&���������
����<������������������������=>4� ��
5�634������������%�����������

*!8,�
9� ;�
$�����(�
�:��
:��:'
���,��
���,�
�:��
��.���
��9�
*!8,�
�.���
��9��:�
:1,#
�����������������
!

����������������� �������
�� ���� � � �� ������ ��� ���
������� ���� ��� ���� ��������
��� � � �� � �� � ��� � � ������
���� � ��� � ����� � ��������
����� �� ��� ���� ��� ��
���� � ���� � ���������� �� �
���� ������������� ��������
������������� ��� ���� ��
����� ����� ������������ ���
������ ����� � �� �� � ���
� �� �� ������ �� ���� � ����
!���������� �������������
� � ��� � ���� � �� � ������
" ��� � �� ����� ��� ��� � �
�� ��� � ��� � ����� �����
�������" ������������� ���
������ � �� �������� � ��� �
� ��� ��� �� �� ���� ��
������ ������
#������������� �
���� � � � �� �� �� ��� � �� ����
������� � �� ����� ��� ��� � � �� ����
� ���������

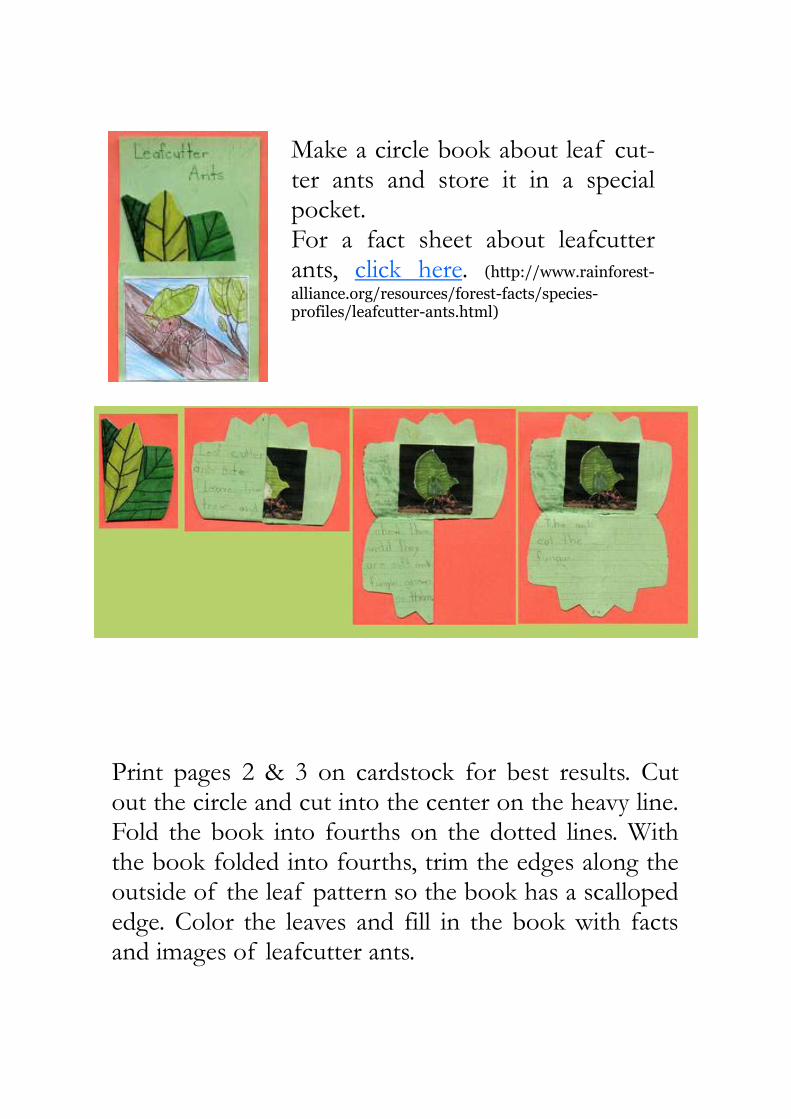
Make a circle book about leaf cut-ter ants and store it in a special pocket. For a fact sheet about leafcutter ants, click here. (http://www.rainforest-alliance.org/resources/forest-facts/species-profiles/leafcutter-ants.html)
Print pages 2 & 3 on cardstock for best results. Cut out the circle and cut into the center on the heavy line. Fold the book into fourths on the dotted lines. With the book folded into fourths, trim the edges along the outside of the leaf pattern so the book has a scalloped edge. Color the leaves and fill in the book with facts and images of leafcutter ants.
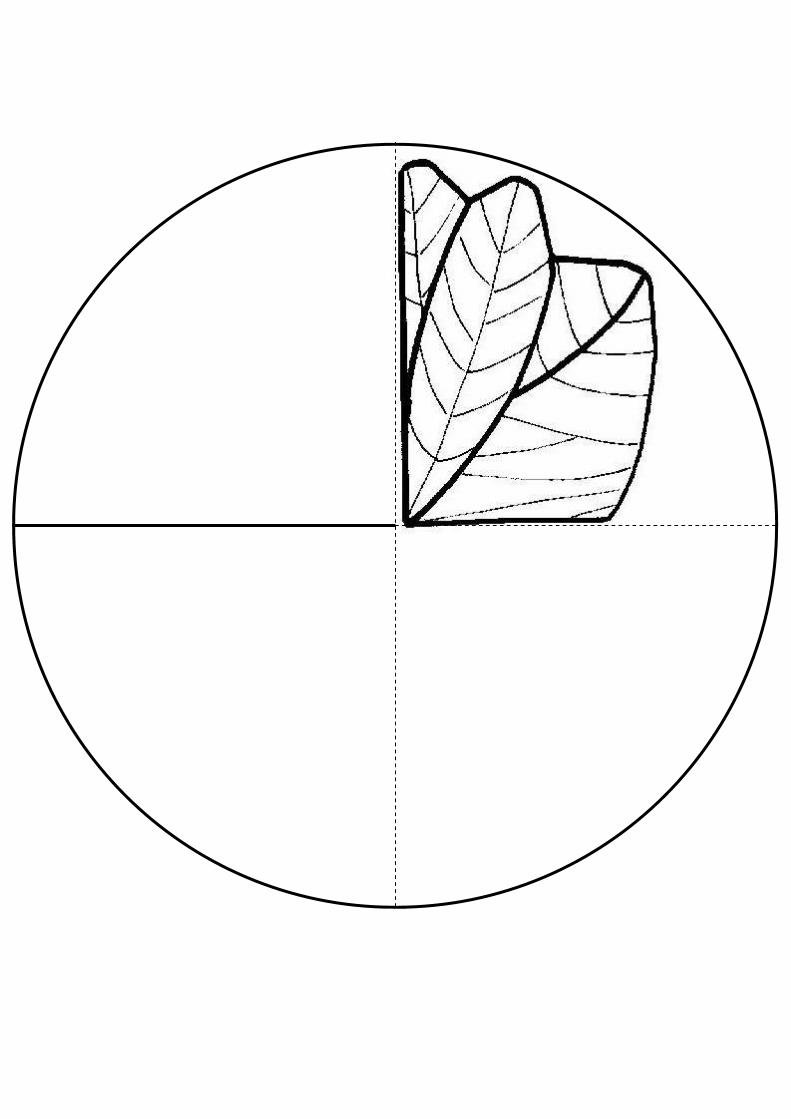

Leafcutter Ants Cut on heavy line.
Fold up on dotted line to create a pocket. Glue, staple, or use very narrow double sided tape to hold the pocket closed. On the pocket, draw a picture of a leafcutter ant carrying a leaf. Or use the image from this coloring page. (http://www.rainforest-alliance.org/programs/education/teachers/curriculum/resources/documents/leafcutter_ant.pdf)
Print it very small to fit on the pocket. Put your com-pleted circle book in the pocket.

Cut out four matchbooks
and fold. Color frogs on
the front the appropriate
colors. G
lue the pictures of
the frogs to the insides of
the matchbooks.
www.homeschoolshare.com

green frog red frog
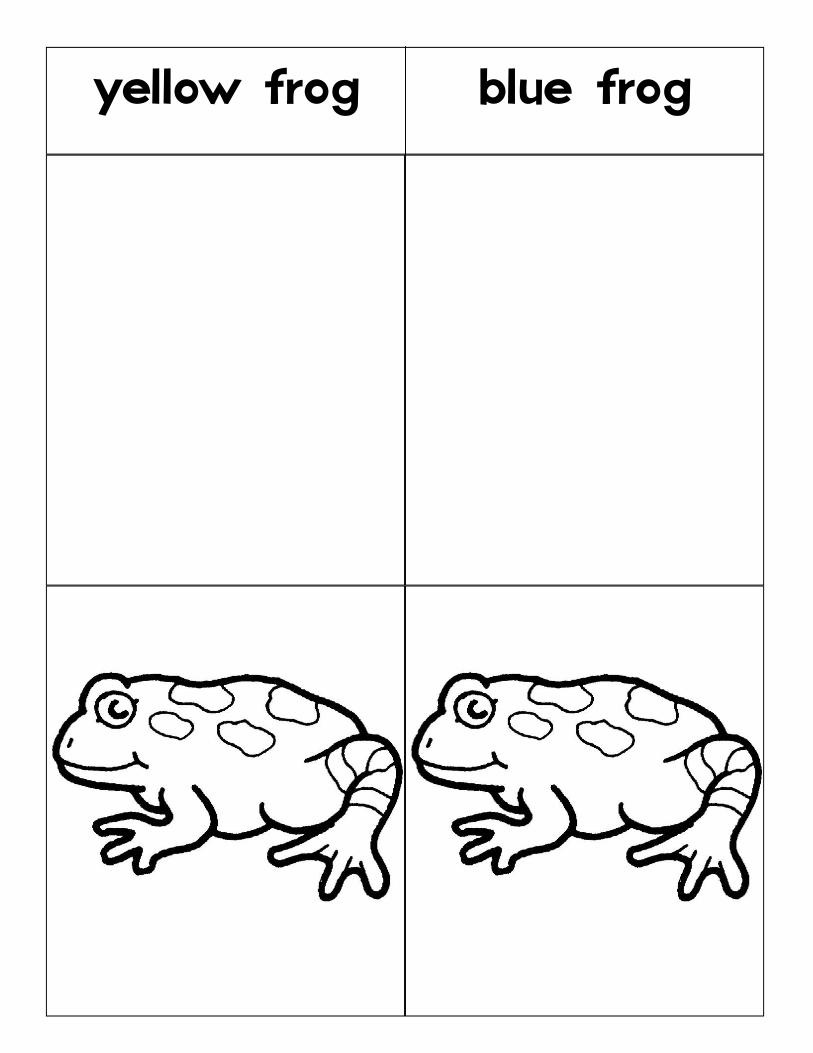
yellow frog blue frog
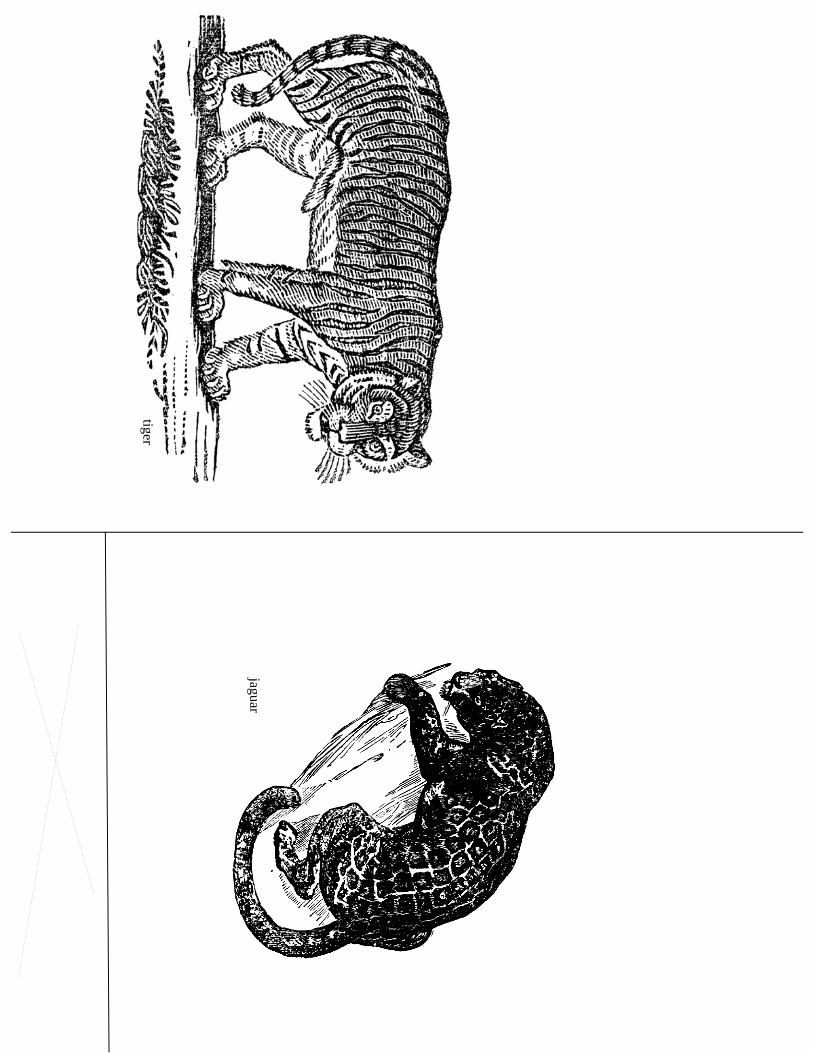
jaguar
tiger

leopard
ocelot

Here are three
options for the title page. Make
your own w
ith the blank cover or use one of the others for an easier start. L
ayer your pages from short-
est to longest. Write the anim
als’ names on
the tabs. (See com
pleted book picture to the right.)
All clip art is from
etc.usf.edu.
The
mini
book orders
the rainforest
cats from
smallest to largest. S
ize order of the big cats: #1 T
iger, #2 Lion, #3 Jaguar, #4 Leopard. The ocelot
is quite small. (A
nd the lion is not a rainforest animal at all.)
Big C
atsof the
Rainforest

When the two halves are put together and colored, the
flower will look like this.
DIRECTIONS
Print page 2; cut out each shape and fold in half with the
printed side outside. Place the two folded halves with their
folds matching in the center of the flower (see the picture
above). Tape them together neatly on the back. Now your
book will have a left-side opening flap and a right-side
opening flap. Use the space inside to draw more bromeli-
ads, write about these interesting plants, or draw some of
the animals that live on them.
Color and embellish the front of the mini-book as you
choose. Common colors for bromeliads are red, purple, and
orange. Draw insects and frogs living in the water pool of
the plant’s center.

LEFT SIDE
RIGHT SIDE

back back
Giant Amazon
Water Lily
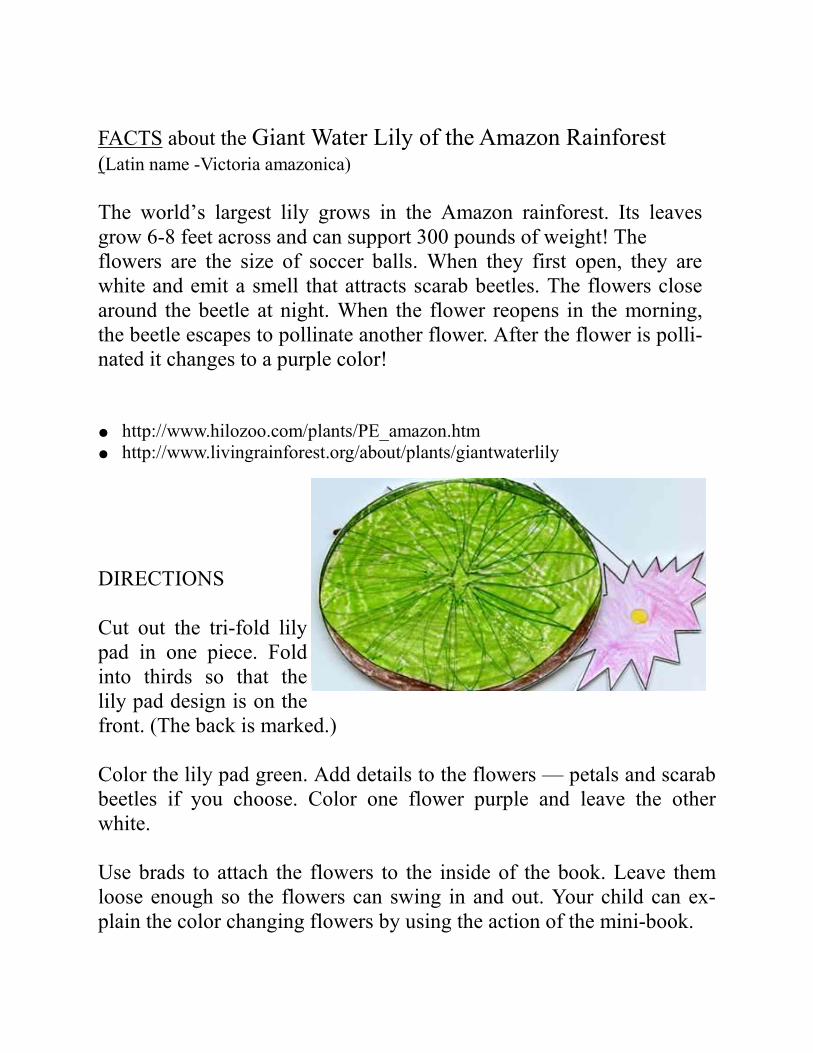
FACTS about the Giant Water Lily of the Amazon Rainforest (Latin name -Victoria amazonica)
The world’s largest lily grows in the Amazon rainforest. Its leaves
grow 6-8 feet across and can support 300 pounds of weight! The
flowers are the size of soccer balls. When they first open, they are
white and emit a smell that attracts scarab beetles. The flowers close
around the beetle at night. When the flower reopens in the morning,
the beetle escapes to pollinate another flower. After the flower is polli-
nated it changes to a purple color!
● http://www.hilozoo.com/plants/PE_amazon.htm
● http://www.livingrainforest.org/about/plants/giantwaterlily
DIRECTIONS
Cut out the tri-fold lily
pad in one piece. Fold
into thirds so that the
lily pad design is on the
front. (The back is marked.)
Color the lily pad green. Add details to the flowers — petals and scarab
beetles if you choose. Color one flower purple and leave the other
white.
Use brads to attach the flowers to the inside of the book. Leave them
loose enough so the flowers can swing in and out. Your child can ex-
plain the color changing flowers by using the action of the mini-book.

Where is Brazil?
Cut out cover piece (this page). Color Brazil on the map (next page). Label major cities and the Amazon River. Fold in half. Paste cover to the front.
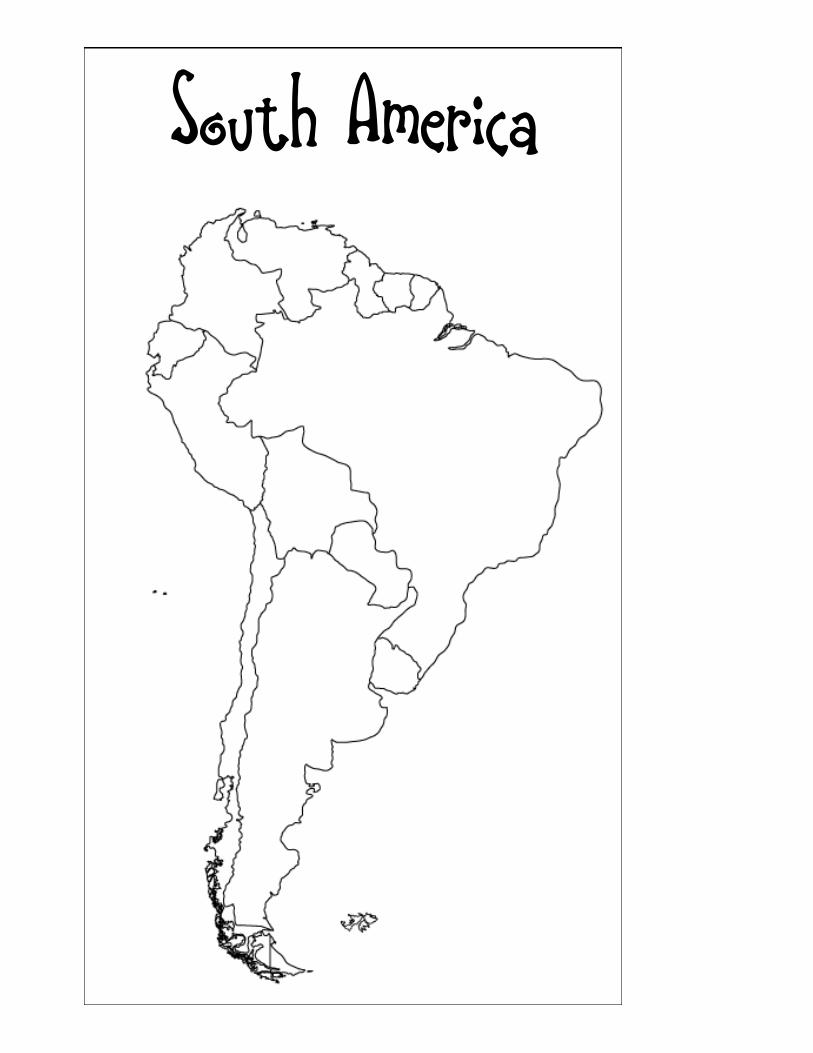
South America
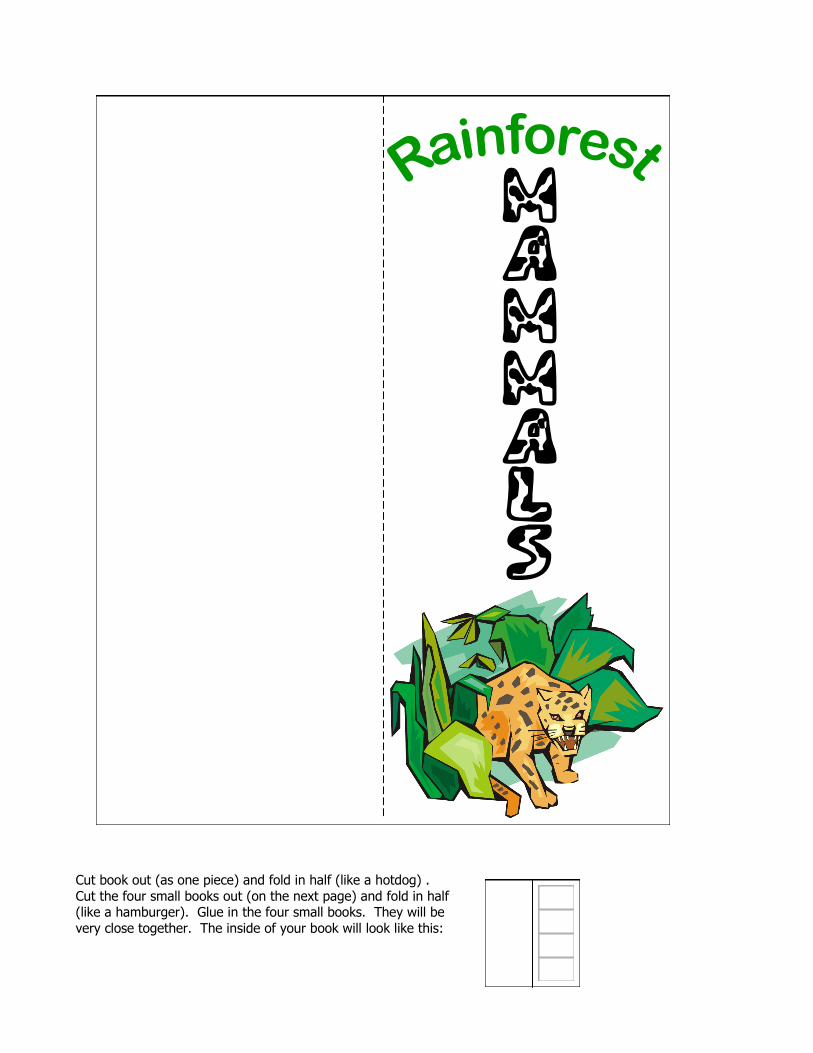
Cut book out (as one piece) and fold in half (like a hotdog) .
Cut the four small books out (on the next page) and fold in half (like a hamburger). Glue in the four small books. They will be
very close together. The inside of your book will look like this:
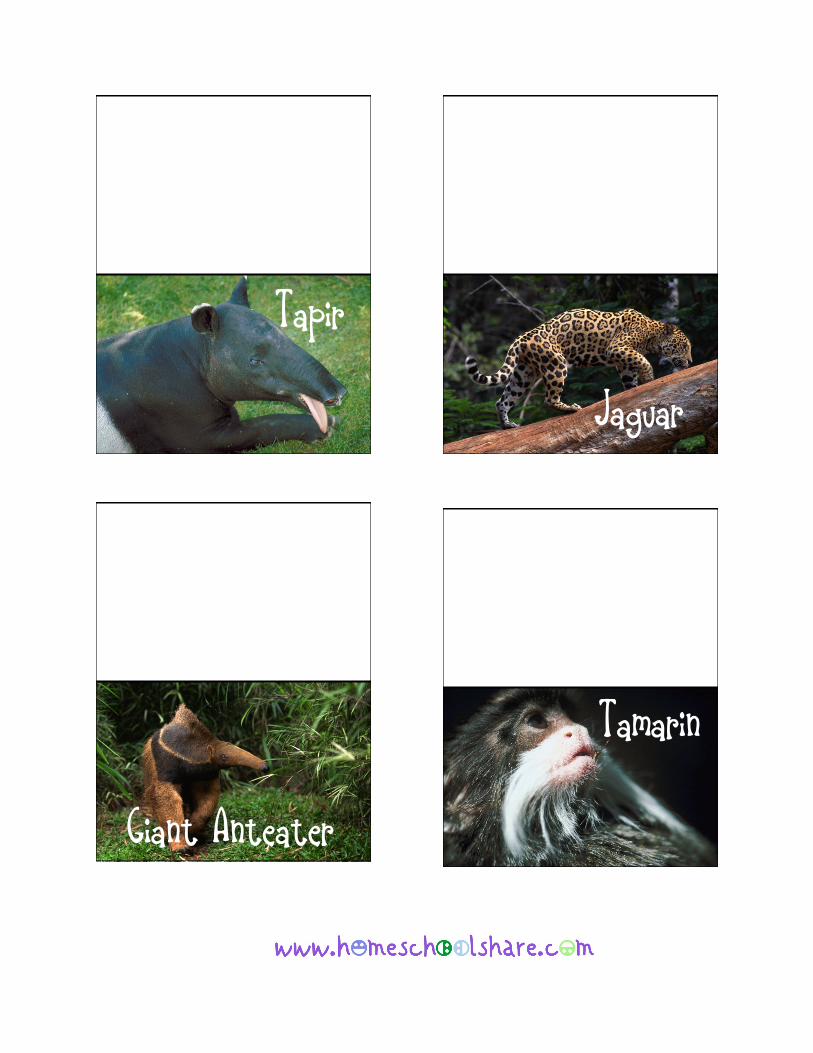
Tapir
Giant Anteater
Tamarin
Jaguar

Anatomy
____________________________
Diet
____________________________
Interesting Fact
____________________________
Anatomy
____________________________
Diet
____________________________
Interesting Fact
____________________________
Anatomy
____________________________
Diet
____________________________
Interesting Fact
____________________________
Anatomy
____________________________
Diet
____________________________
Interesting Fact
____________________________
Let your student research and report on each animal. Cut these out and glue inside the proper minit book.
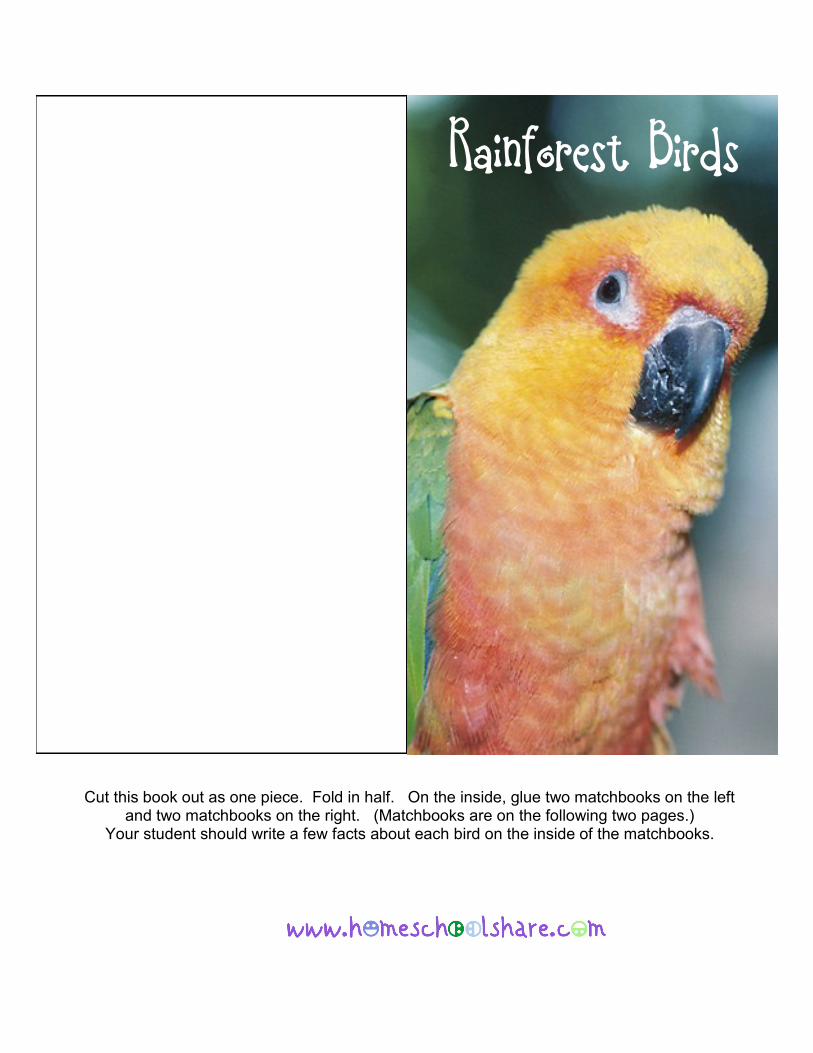
Cut this book out as one piece. Fold in half. On the inside, glue two matchbooks on the left and two matchbooks on the right. (Matchbooks are on the following two pages.)
Your student should write a few facts about each bird on the inside of the matchbooks.
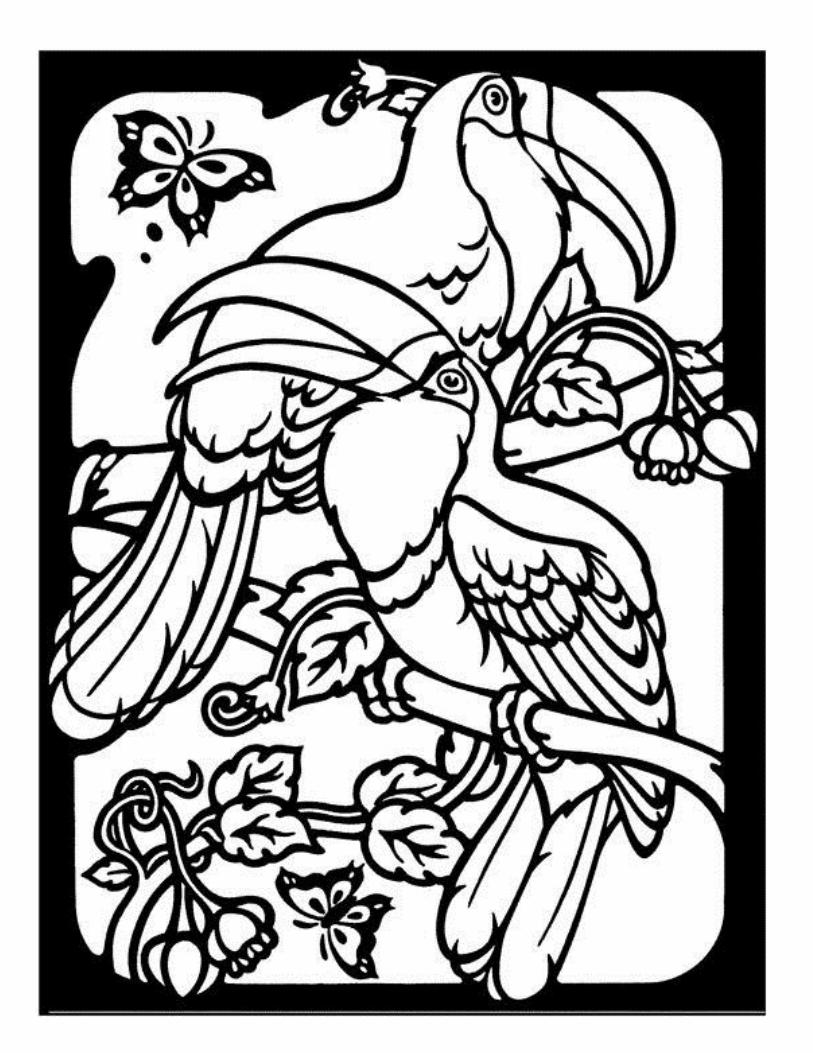
Rainforest Birds

Cut books out. Fold matchbook style.

Cut books out. Fold matchbook style.

Rainforest Reptiles Instructions The two rectangles side by side need to be cut out together as one piece (do not cut the middle line; that is where you will fold). When you finish cutting, you should have six pieces. I strongly recommend rubber cement for this project. Make sure you have your adhesive over the entire area— paying special attention to the four corners. Follow the instructions on the pieces as to what to glue where. After you have everything cemented together, it will look like one long line. You are going to make a series of folds so that the book will look like an accordi-on as it unfolds. Starting with the first piece (“reptiles”) make a mountain fold. On the next fold line, make a valley fold. Continue to alter (mountain, valley, mountain, valley) until all the pieces are folded. You can glue/tape a ribbon (or yarn) to the back of the book and bring both ends up to the front (and tie a bow) to keep it closed), or you can use the pock-et provided (in a separate file) and simply slip the book in and out.

Rubber
cem
ent
this
page t
o
the b
ack
of
the
“Gre
en T
ree P
yth
on”
page
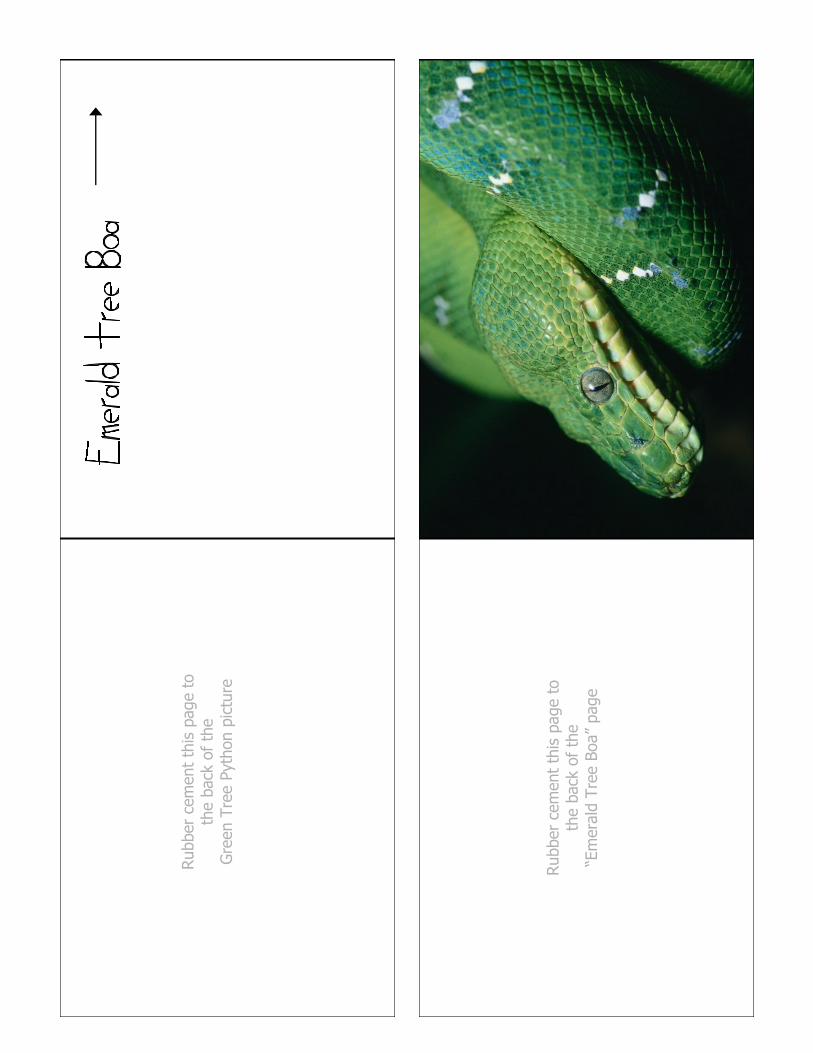
Rubber
cem
ent
this
page t
o
the b
ack
of
the
Gre
en T
ree P
yth
on p
ictu
re
Rubber
cem
ent
this
page t
o
the b
ack
of
the
“Em
era
ld T
ree B
oa”
page

Rubber
cem
ent
this
page t
o
the b
ack
of
the
Em
era
ld T
ree B
oa p
ictu
re
Rubber
cem
ent
this
page t
o
the b
ack
of
the
“Iguana”
page

Cut book out as one piece. Fold on the dotted lines (fold both sides under). Rubber cement (or glue) “amphibians” down to the book. Cut a slit between each frog. Let your student la-bel each frog by writing its name under the flap. Older students may want to add scientific names as well. Blue Poison Arrow Frog ~ Dendrobates azureus Red-eyed Tree Frog ~ Agalychnis callidryas Yellow-banded Dart Frog ~ Dendrobates leucomelas
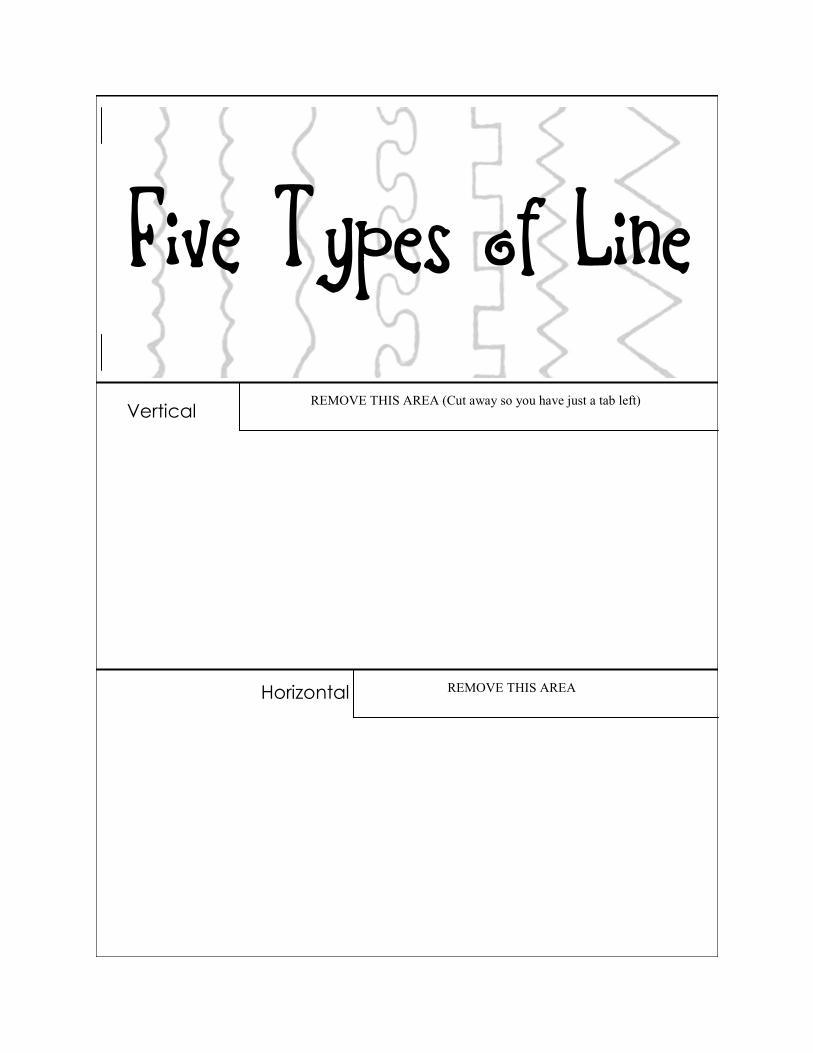
Vertical
Horizontal
REMOVE THIS AREA (Cut away so you have just a tab left)
REMOVE THIS AREA

REMOVE THIS AREA
REMOVE
Diagonal
Curved

Zigzag
Assembly Directions: Cut the six strips along the solid outer lines. If there is a rectangle piece in the right corner of the strip, cut it off as indicated (“remove this area”). Stack your strips in order and staple at the left side of the front page (“Five Types of Line”) where the marks are indicated. Let your student doodle each type of line on the appropriate page.


The Great
Kapok
Tree
Use this as a cover piece for your lapbook or notebook.


Layers of the Rainforest

Cut out each rectangle (five in all). Stack in order with the smallest (“Rainforest Layers”) on the top and the largest (“The Forest Floor”) on the bottom; staple where indicated. Let your student use the provid-ed area to write information about each layer of the rainforest.

Cut out each part of the
leaf. Stack in order (numbers indicated) ~
basically it’s small, medi-um, large, largest, medi-
um, small. Once you have
the pieces in order, secure with a brass fastener.
Have your student write
one fact about the Kapok Tree on each piece (you
may desire to leave the
two smallest pieces blank).
1
2
3
4
5
6
7

Cut out as one piece. Fold back side up behind front (“Kapok Tree Facts”). Fold flaps behind the back and glue down. Use this pocket to store your Kapok Leaf Fan book (previous page).
Kapok
Tree
Facts
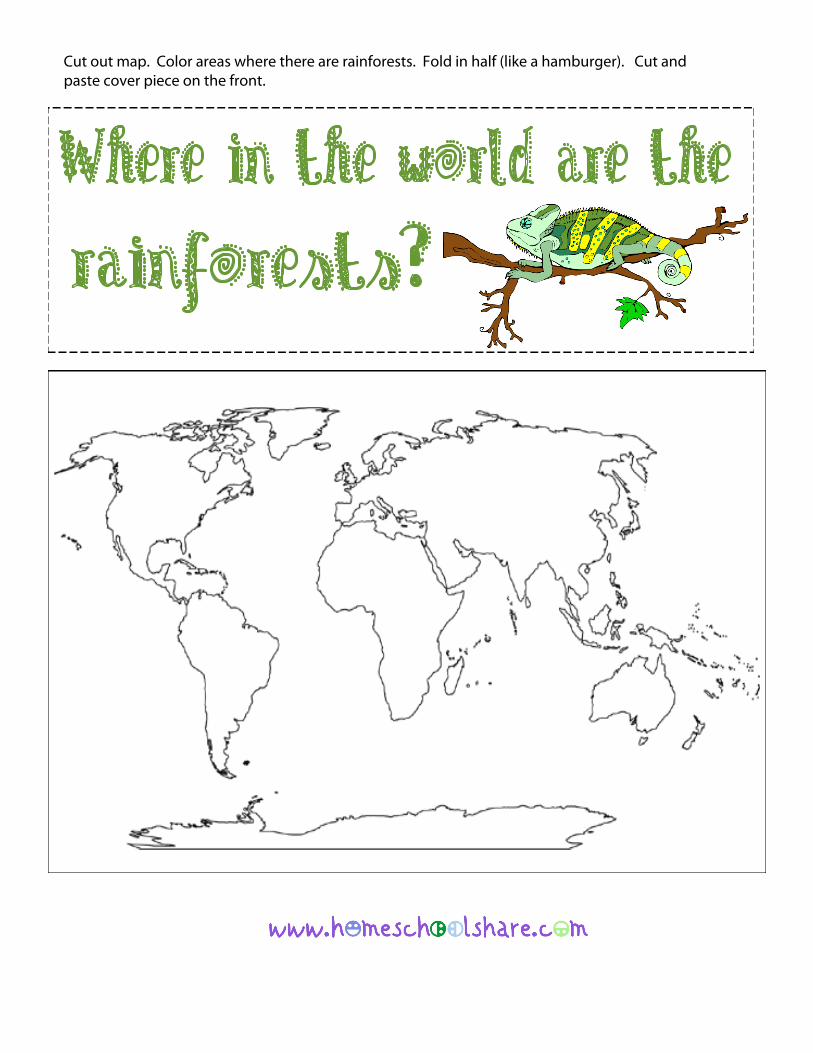
Cut out map. Color areas where there are rainforests. Fold in half (like a hamburger). Cut and paste cover piece on the front.
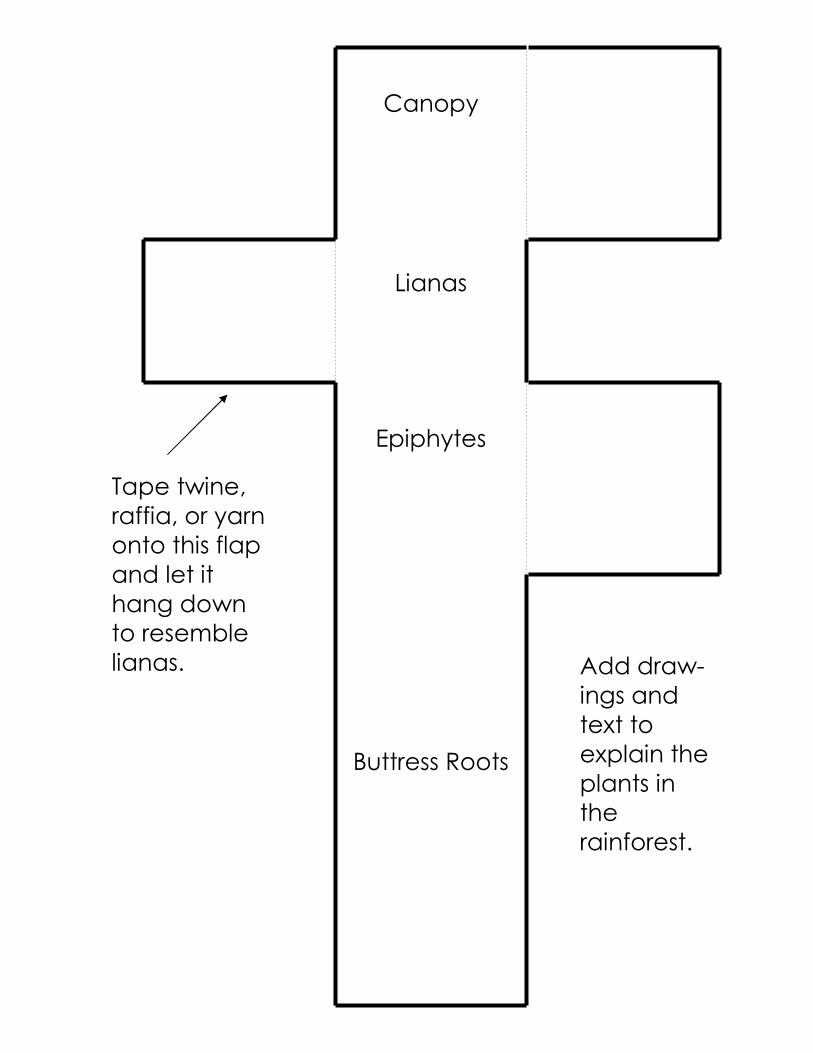
Buttress Roots
Lianas
Epiphytes
Canopy
Tape twine,
raffia, or yarn
onto this flap
and let it
hang down
to resemble
lianas. Add draw-
ings and
text to
explain the
plants in
the
rainforest.

Fold
canopy
approx.
here to
open the
flap.
Tape bottom of buttress to
bottom of trunk for a vertical
flap.
Affix canopy to top
horizontal flap. It will
overlap the next
flap.