Embed Size (px)
Citation preview

Pages 02-25: Downloading and Installing SeaSources TesTTaker software
Pages 26-41: The Basics of Taking a Quiz
Pages 42-48: Taking a “Random Quiz”
Pages 49-57: Creating a Study Guide
Pages 58-66: Practice Final Exams
Pages 67-69: Search Function
Pages 70-77: Installing more question modules
Pages 78-78: Score History
Pages 79-79: Bookmark Feature
The following pages will guide you through all of the features of SeaSources TesTTaker software and installation.
Return to top
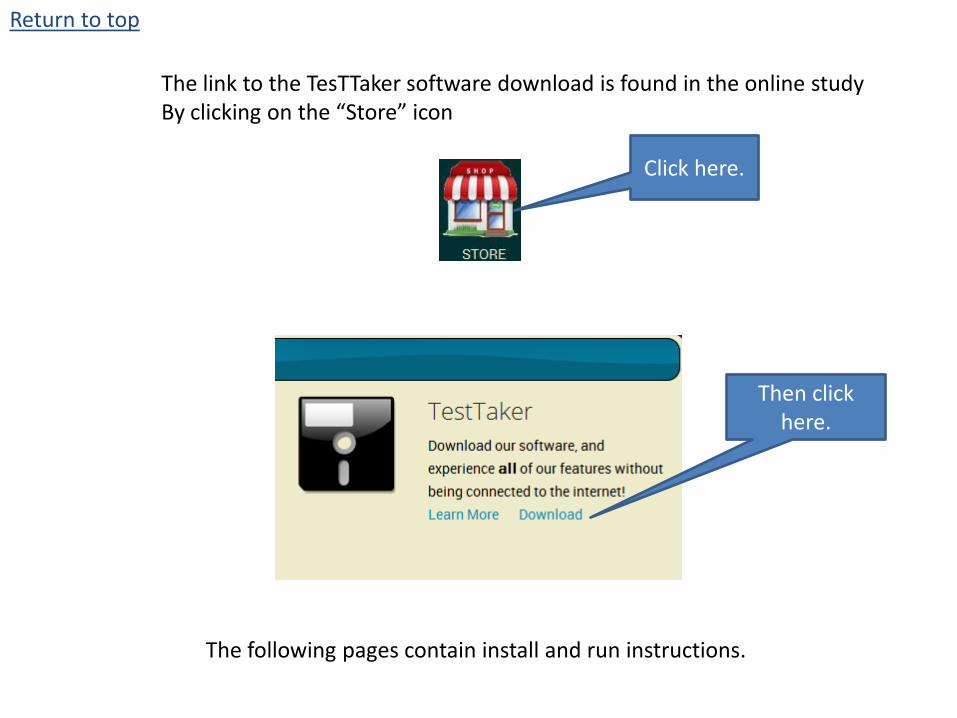
The link to the TesTTaker software download is found in the online study By clicking on the “Store” icon
Click here.
Then click here.
The following pages contain install and run instructions.

Remember: you MUST have an internet connection for these steps .
Return to top
From the link to the download click save
file when this prompt appears
After the download completes, open it
from your downloads folder

Return to top
Click on Run
Then click on Next
Return to top
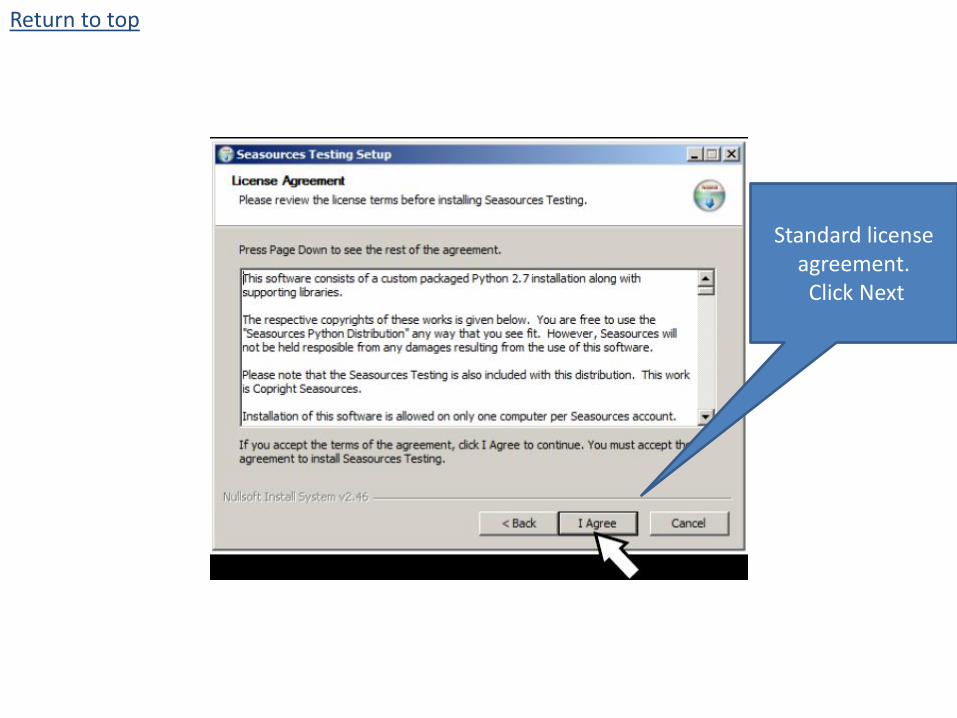
Standard license agreement. Click Next

Return to top
Then click Install. Leave the
destination folder as it is.

Return to top
Files are installing. Be sure you do not have any other previous versions up and running during this
installation or you will get errors.

Return to top
When you see this box appear you must enter your
login information from your online study account. Then click OK

Return to top
User configuration complete.
Click OK again
This step identifies you with the system so that when you download modules they are sure to go to the
right software account.

Return to top
Installation complete. Click Next.

Return to top
Then click Finish

Return to top
After installation is complete you have 3 places where you can open and run the software.
Desktop icon, Start Menu and Program files.

Return to top
Every time you start SeaSources Testing you
will see this window appear briefly then
disappear onto the tray at the bottom of your
screen. If you close this window your software will
stop running
After that, your browser will open and run the software as localhost. This means it is running on your machine and not connected to the internet.
Remember: you MUST have an internet connection for these steps . Return to top
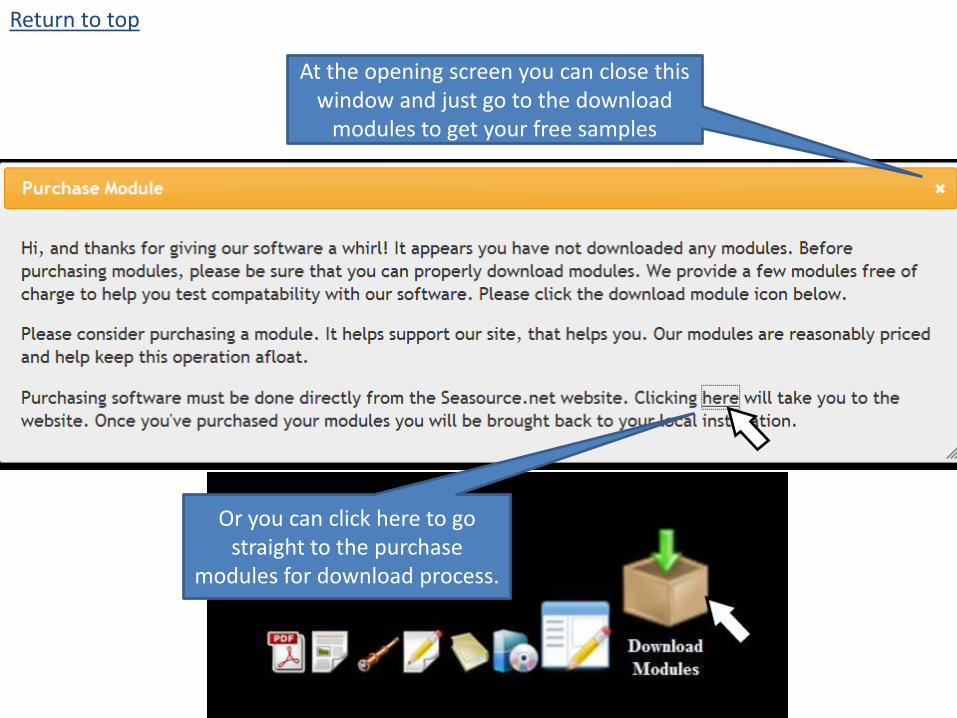
At the opening screen you can close this window and just go to the download
modules to get your free samples
Or you can click here to go straight to the purchase
modules for download process.
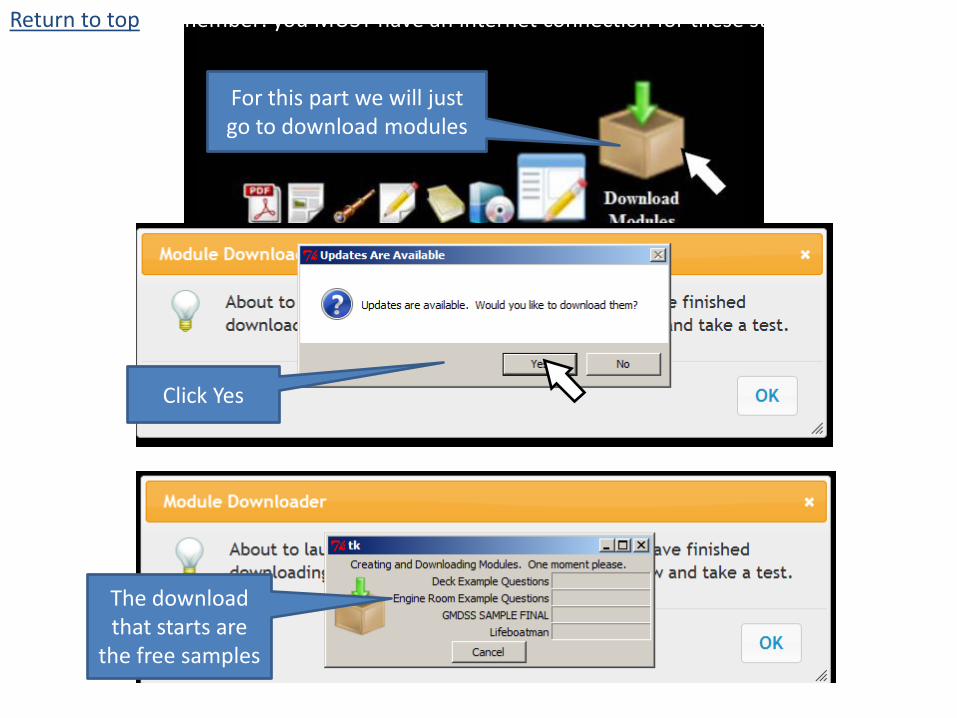
For this part we will just go to download modules
Click Yes
The download that starts are
the free samples
Remember: you MUST have an internet connection for these steps . Return to top

Remember: you MUST have an internet connection for these steps . Return to top
If you prefer to skip the free modules and go straight to the purchase process then
click here.
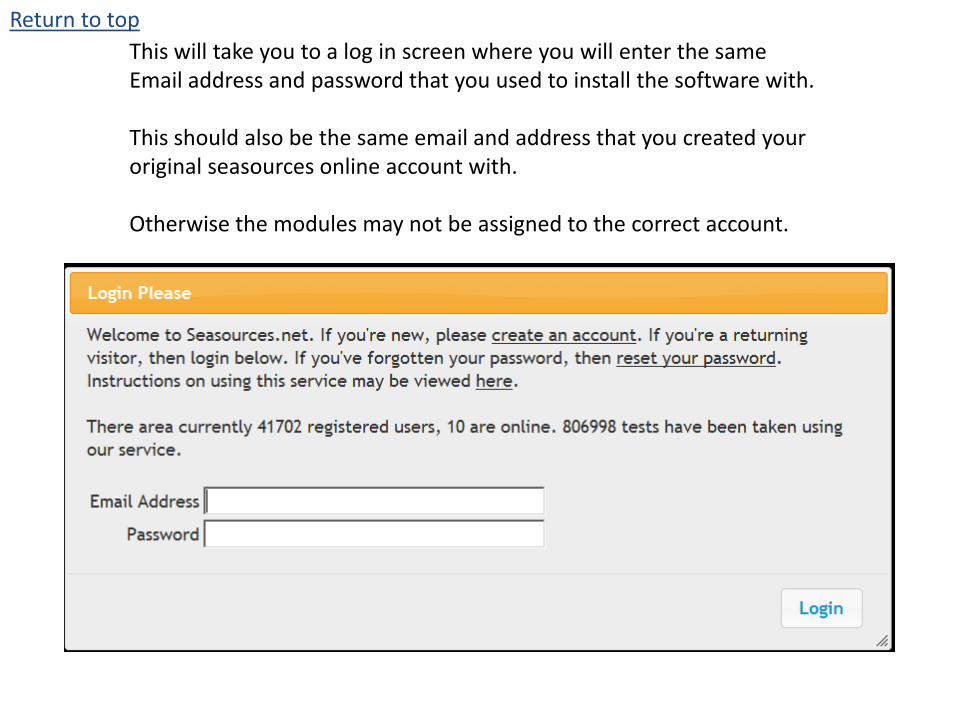
This will take you to a log in screen where you will enter the same Email address and password that you used to install the software with. This should also be the same email and address that you created your original seasources online account with. Otherwise the modules may not be assigned to the correct account.
Return to top

Check the modules you want to download
Return to top

Scroll to the bottom and Click on submit
Return to top

Clicking “Submit” will take you through the paypal payment process
Once you've purchased your modules you will be brought back to your local installation.
If you do not have a PayPal account you can
still process a credit card through paypal.
Return to top

Remember: you MUST have an internet connection for these steps .
Return to top

Remember: you MUST have an internet connection for these steps . Return to top

Remember: you MUST have an internet connection for these steps .
Return to top
These are the two that were just purchased. The others are the
free samples

Remember: you MUST have an internet connection for these steps . Return to top

After all of your questions and assets have completed installing, click on Home Page
The following section covers how to set up and take a test
Once all of the installations have completed you can now run the software WITHOUT a connection to the internet. The only time you will need to connect is to check for updates in the future.
Return to top

The Basics of Taking a Quiz Lets begin by clicking on “Take a Test”
Return to top

Return to top
Begin configuring your test through choosing from the 4 categories
and sub categories
Here we start by picking All Deck Questions

Here we will pick Rules of the Road
Then International &
Inland combined
Return to top

You can choose to take ALL 791 questions .
Or just one of the individual
subtopics.
Click Take Test to begin.
Return to top

If you click ok the test will generate a 20 question quiz of section 1
The other choice will give you all 283 questions
Return to top
For this demonstration we
will pick OK

Return to top

Clicking on this link will load the asset. It is already stored on your machine so an internet
connection is not needed.
Return to top

Return to top

Return to top

Return to top

Return to top

Return to top

Return to top

Return to top

Return to top

Return to top

In this section we will go over setting up a random test.
Begin by clicking on “Take a Test”.
Return to top

This time when the Quiz Configuration box comes up you will choose “Random Questions” instead of “Take a Quiz”.
Return to top

The configuration box for random quizzes is shown below. If you were to leave the configuration just the way it is presented when it first comes up In this case, it would give you a random cross section of everything under “Area Category” Which would be about 12,000 questions. In most cases you will want to break it down a little further as shown on the next page.
Return to top

So while taking a random on 12000 questions may be ok but it will probably Be preferred to take it down another level or maybe even two levels. Personally I prefer choosing an “Area” and leave’ Subject” set to “Any”.
So with that in mind we will choose “Deck General” as the “Area”.
Return to top

Then set “Subject to Cargo Equipment”.
Return to top

When you have the configuration the way you want click “Take”.
The quiz that comes up looks exactly like a regular quiz except the questions are now being randomly drawn from that configuration instead of in succession from the database.
Return to top

One of the best features of taking random tests is that when you get to the end and click “take another random quiz” it will take you right back to the same configuration without changing anything.
Same configuration, different random generation.
Return to top

In this section we will cover the process of creating a Study Guide.
A Study Guide is simply a printable, if you wish, pdf file of your selected configuration which includes the question with the “correct answer” only as well as the accompanying Graphics and references.
Return to top
Begin by clicking on “Create Study Guide”
Study Guides are not created by “Area Category” but you do use it in making your configuration. If you leave it as this and click “Next” you will receive a prompt as shown to select an “Area other than Any”

Return to top
For this Study Guide we will select “Area” Rules of the Road under all deck questions.
If we left the “Subject as “Any” we would generate a SG with all three choices under subject. For this one we will choose just “Inland”

Return to top
Once all settings are in place we click “Next” and generate the SG. It is not necessary to click “OK” it will open the library when finished
When creation is complete this window will appear. Click on “Studyguides”

Return to top
The Studyguide created is in 2 parts. The Studyguide and the accompanying graphics.
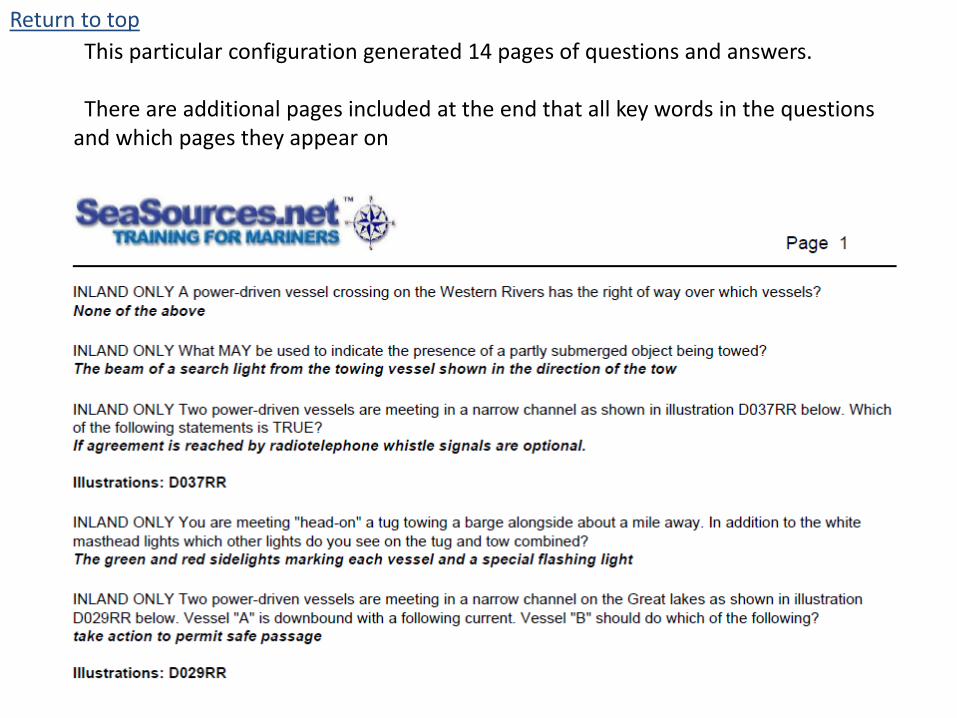
This particular configuration generated 14 pages of questions and answers. There are additional pages included at the end that all key words in the questions and which pages they appear on
Return to top

45 pages of illustrations were generated that go with the selected Study Guide.
Return to top

Returning to the Home Page you will now find that an Icon has been placed for your personal “Library”. You can create as many Study Guides as you want from your available question modules in any configuration that you like and they will be placed in your Library.
Return to top

Return to top

The following topic covers the creation of “Practice Final Exams”.
A Practice final exam is a tool you can use to see just how far you have come in your studies before you sit for the CG exam. There are two types of Practice final configurations.
Exams that you create and configure when you are setting it up.
Exams that are preconfigured by you in advance.
What makes a practice final different from a regular quiz is that they do not contain any of the extra illustrations, reference material, and have only assets that will be available in the exam room. All you see is just what is on the exam as you would see it in the exam room.
Return to top

To start, go to the “Home Page” and click on the “Create Final Exam” icon.
Set your configuration, the number of questions and your Passing Grade then click “Create Exam”.
Return to top
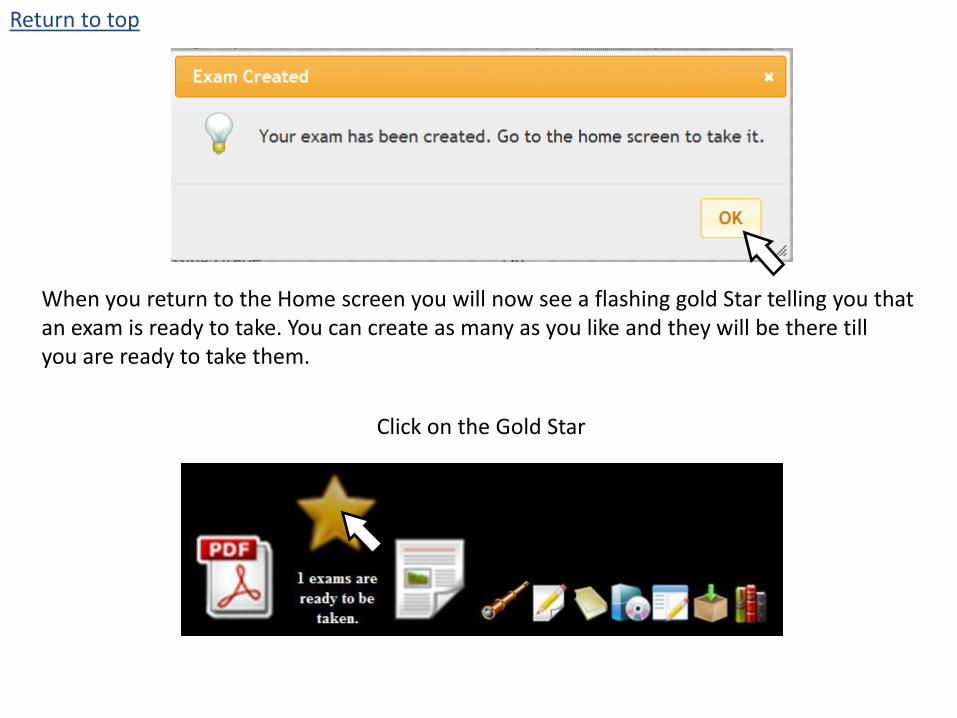
When you return to the Home screen you will now see a flashing gold Star telling you that an exam is ready to take. You can create as many as you like and they will be there till you are ready to take them.
Click on the Gold Star
Return to top

Next, click on “Take Exam”
Notice that the quiz that was generated is 50 questions and there are no extra tabs of Information. The only diagrams that will show are the ones issued by the NMC.
Return to top

I Know, this looks like a pretty poor score for the home team but I just did a quick click through to get to the end and show the screen that will appear next.
Clicking Ok will return you to the Home Page where we will now explain “Create Exam Configurations”
Return to top

All you have to do here is enter the values you want for a pre-configured test. Of course, the Categories depend entirely on what you have downloaded for modules.
Return to top

Click Ok and then return to the Home Page then click “Create A Final Exam” again.
Return to top
Return to top
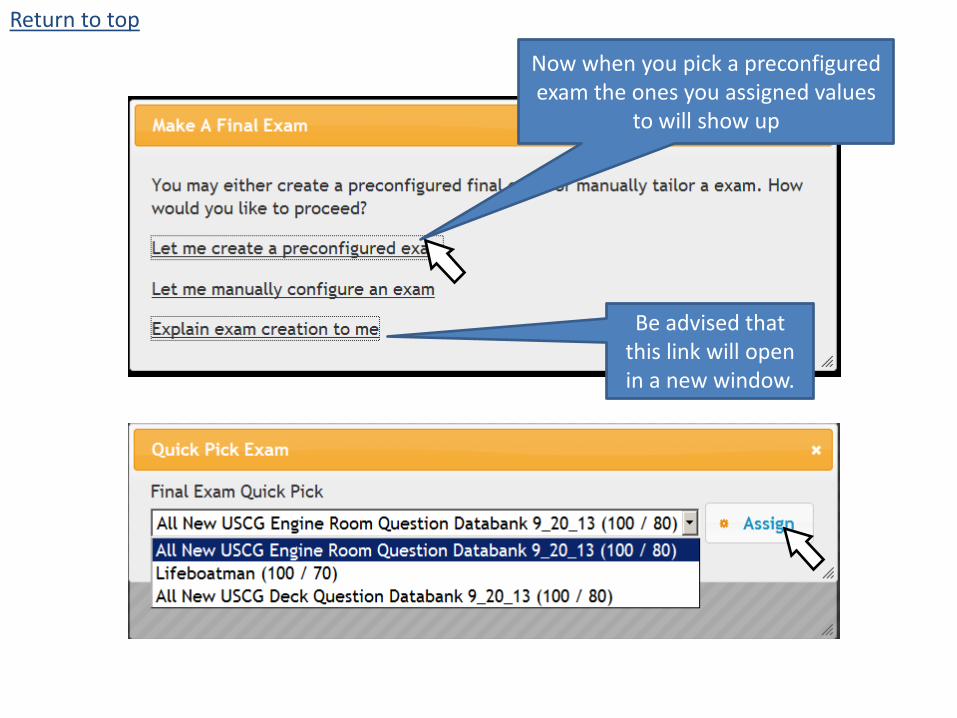
Be advised that this link will open in a new window.
Now when you pick a preconfigured exam the ones you assigned values
to will show up

Return to top
Return to the Home Page and your exam is
there waiting

This section covers a brief description of the “SeaSources Search “. All values returned are from data contained in your downloaded modules.
Type any value into the box and click “Search”
This feature was developed for people that were looking for answers to open book Renewal questions but it has many other uses.
Return to top

Anywhere in the database that those 3 words appear will come back as shown. The exact matches will show up first.
Clicking on any of the search results will show the question, correct answer, diagram And where it is located in the database.
Return to top

When you are finished, close it out and return to the “Home Page”
Return to top

If you wish to add more question modules to your database you start by clicking on “Purchase Modules” on the “Home Page” as shown here.
Then click on the link shown below by the arrow.
Remember: you MUST have an internet connection for these steps .
Return to top

This will take you to a log in screen where you will enter the same Email address and password that you used to install the software with. This should also be the same email and address that you created your original seasources online account with. Otherwise the modules may not be assigned to the correct account.
Enter email and password and click Login
Remember: you MUST have an internet connection for these steps .
Return to top

Check the modules you want to download
Scroll to the bottom and Click on submit
Remember: you MUST have an internet connection for these steps .
Return to top

Clicking “Submit” will take you through the paypal payment process
Once you've purchased your modules you will be brought back to your local installation.
If you do not have a PayPal account you can
still process a credit card through paypal.
Return to top

Remember: you MUST have an internet connection for these steps .
Return to top

Remember: you MUST have an internet connection for these steps . Return to top
Notice the one you just purchased is now in the list.

Remember: you MUST have an internet connection for these steps . Return to top
The new module had a few more
assets to add to your collection.

The new module is now installed and
ready to use offline.
Return to top
Return to the Home Page
Click Take A Test

The next feature to cover is the “Score History”
Clicking on the score history will bring up a list of all your previous scores To help you in tracking your progress.
Return to top

If you should close out seasources testing before completing a quiz it will take you back to where you left off when you start the software again.
The Bookmark Feature Return to top

The latest version of the software now allows users to toggle between the Standard view of testing or the new look which allows all diagrams, references and assets to be visible while testing instead of opening them up in a new window. Clicking on the icon below switches you to the new screen.
Return to top