Embed Size (px)
Citation preview
The DSLR Camera

The DSLR Camera
Basic Parts
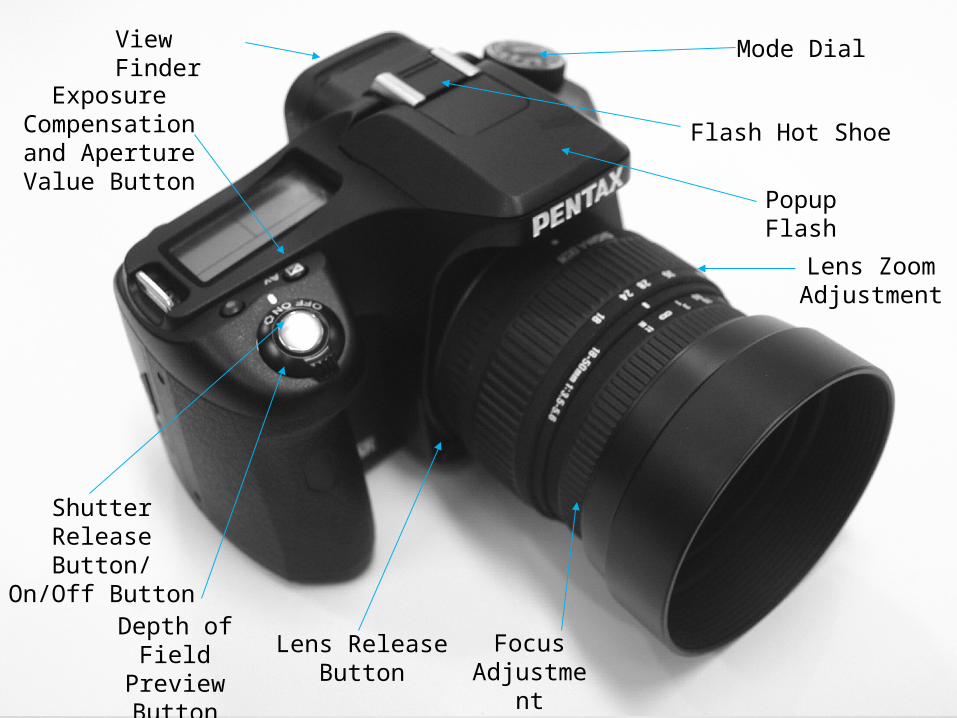
Shutter Release Button/ On/Off
Button
Lens Zoom Adjustment
Focus Adjustme
nt
Lens Release Button
Mode Dial
Flash Hot Shoe
View Finder
Depth of Field Preview Button
Exposure Compensation and Aperture Value Button
Popup Flash
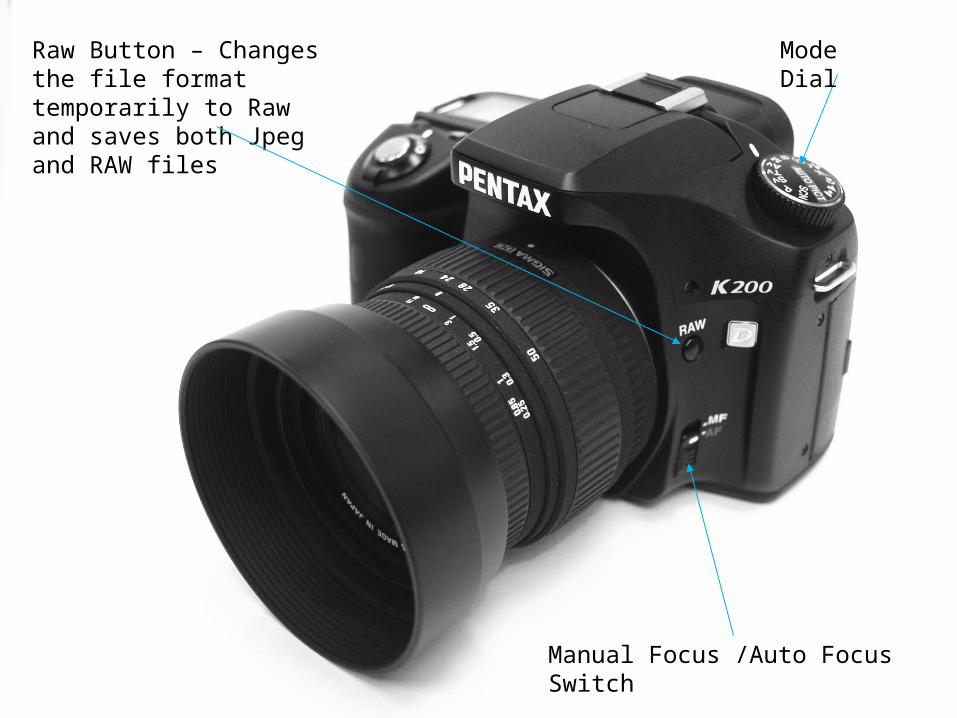
Manual Focus /Auto Focus Switch
Raw Button – Changes the file format temporarily to Raw and saves both Jpeg and RAW files
Mode Dial
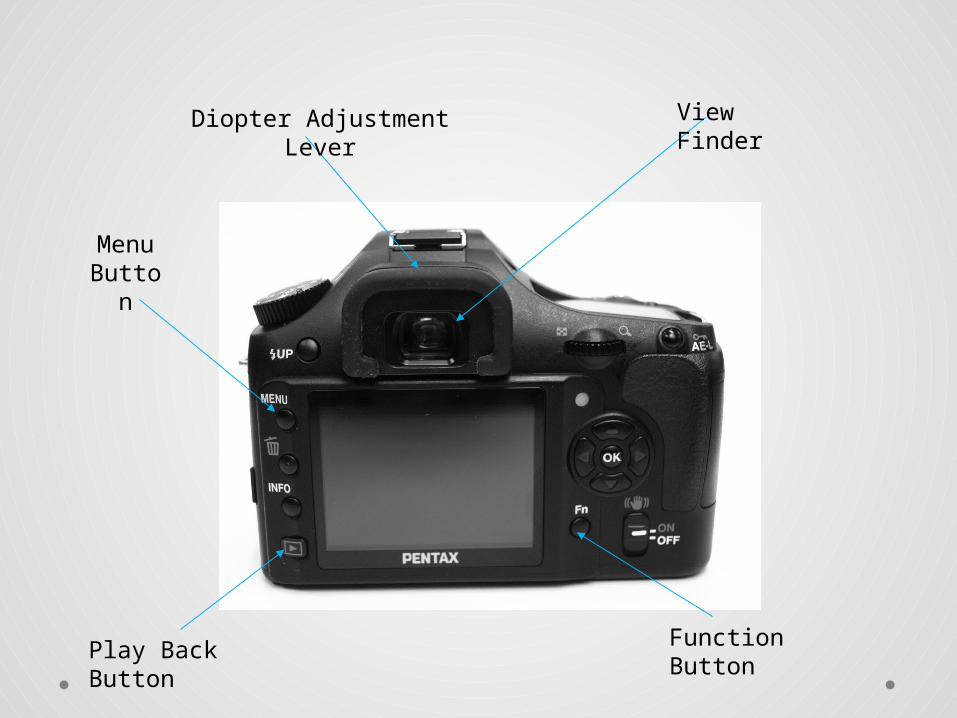
View Finder
Menu Butto
n
Function Button
Diopter Adjustment Lever
Play Back Button
Camera Setup
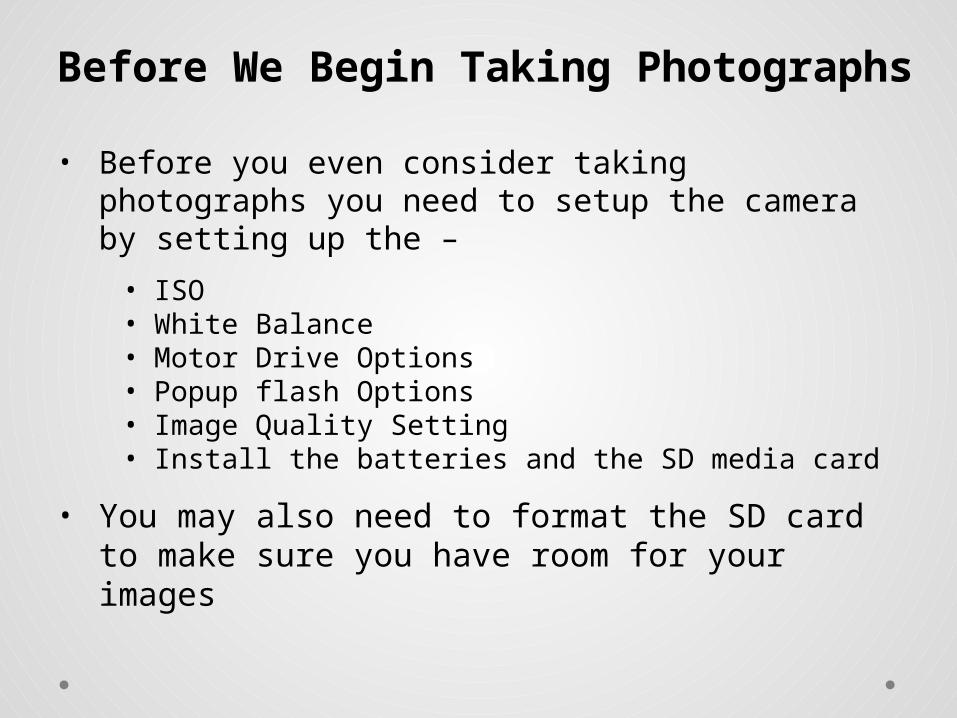
Before We Begin Taking Photographs
• Before you even consider taking photographs you need to setup the camera by setting up the –
• ISO• White Balance• Motor Drive Options• Popup flash Options• Image Quality Setting• Install the batteries and the SD media card
• You may also need to format the SD card to make sure you have room for your images
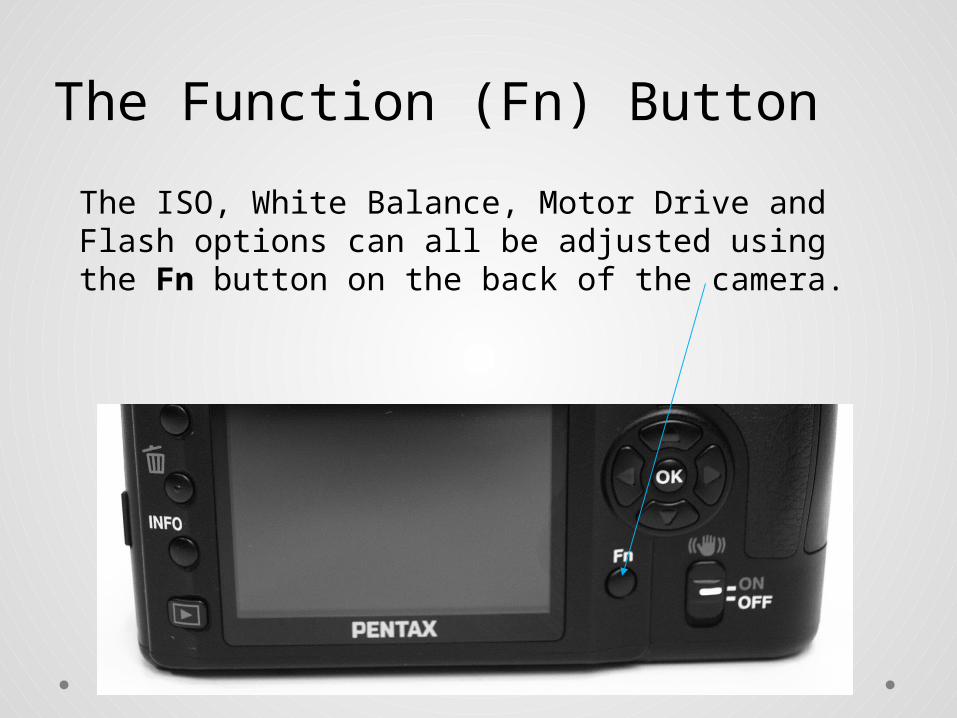
The Function (Fn) Button
The ISO, White Balance, Motor Drive and Flash options can all be adjusted using the Fn button on the back of the camera.
ISO (International Standards Organisation)
• The DSLR has the ability to have the sensitivity of the image sensor adjusted.
• The major advantage is that you can adjust it as often as you need to depending on the lighting conditions etc. This is a great feature to be aware of and make use of.
• ISO settings on most digital cameras range from 200iso to 1600 or 3400iso.
White Balance
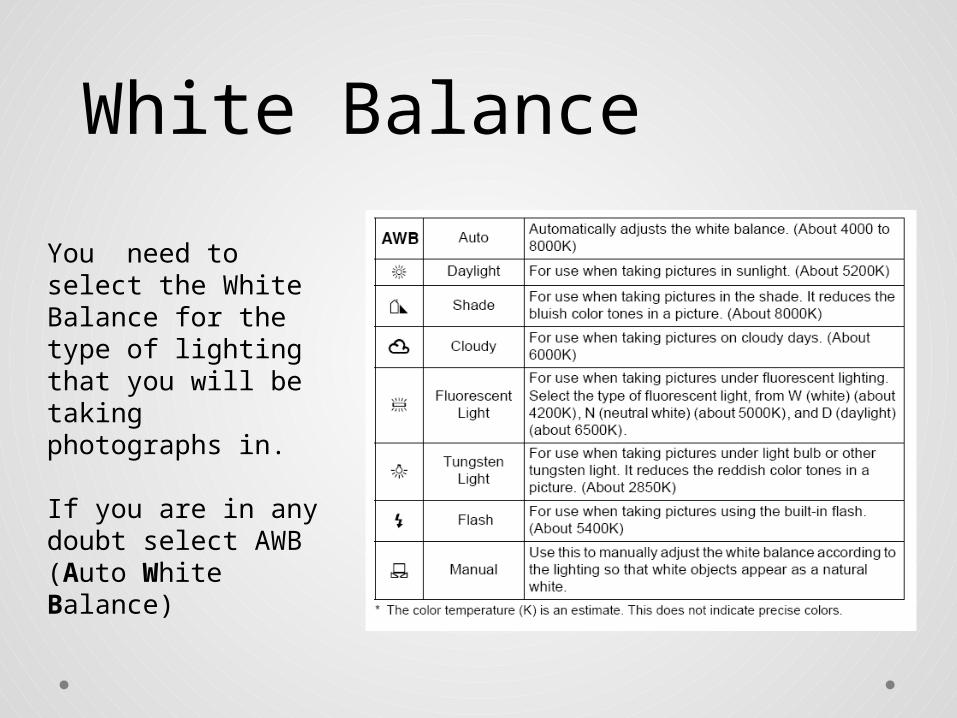
You need to select the White Balance for the type of lighting that you will be taking photographs in.
If you are in any doubt select AWB (Auto White Balance)

Motor Drive
Motor Drive options range from single frame, continuous shooting, time exposures, bracketed exposures and more.
In most cases the single frame option will be most desirable
Flash Options
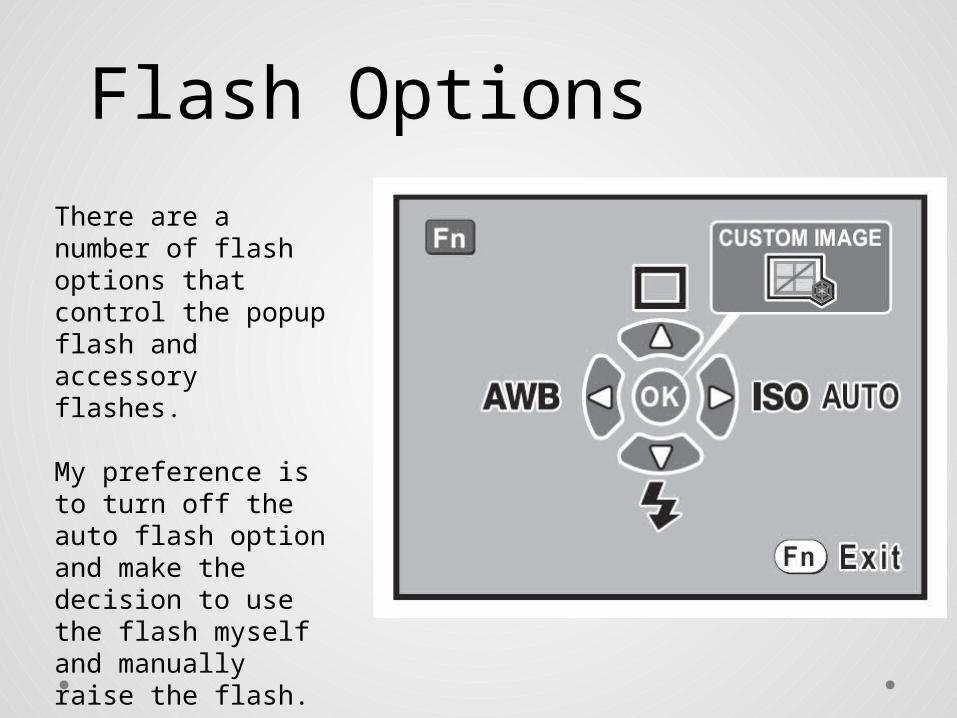
There are a number of flash options that control the popup flash and accessory flashes.
My preference is to turn off the auto flash option and make the decision to use the flash myself and manually raise the flash.
SD Cards
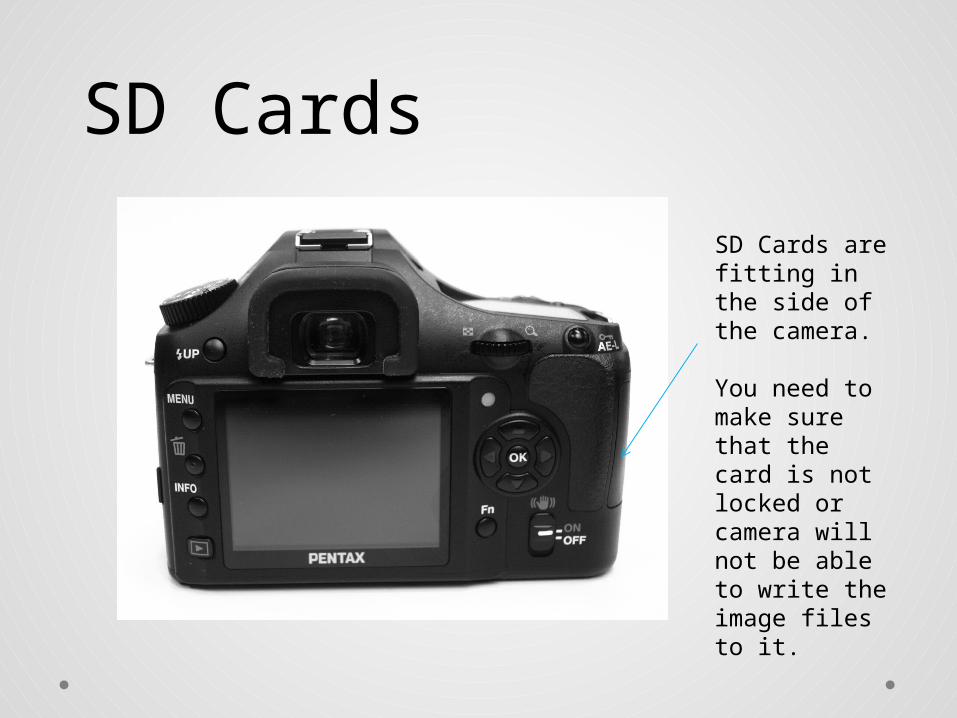
SD Cards are fitting in the side of the camera.
You need to make sure that the card is not locked or camera will not be able to write the image files to it.
So what happens when you take a photograph?
• At the moment that you press the shutter release button a series of events occur inside of the camera that ultimately result in an image being recorded.
• The mirror lifts, the aperture closes to the chosen settings and the shutter opens. At the end of the exposure time the actions take place in reverse.
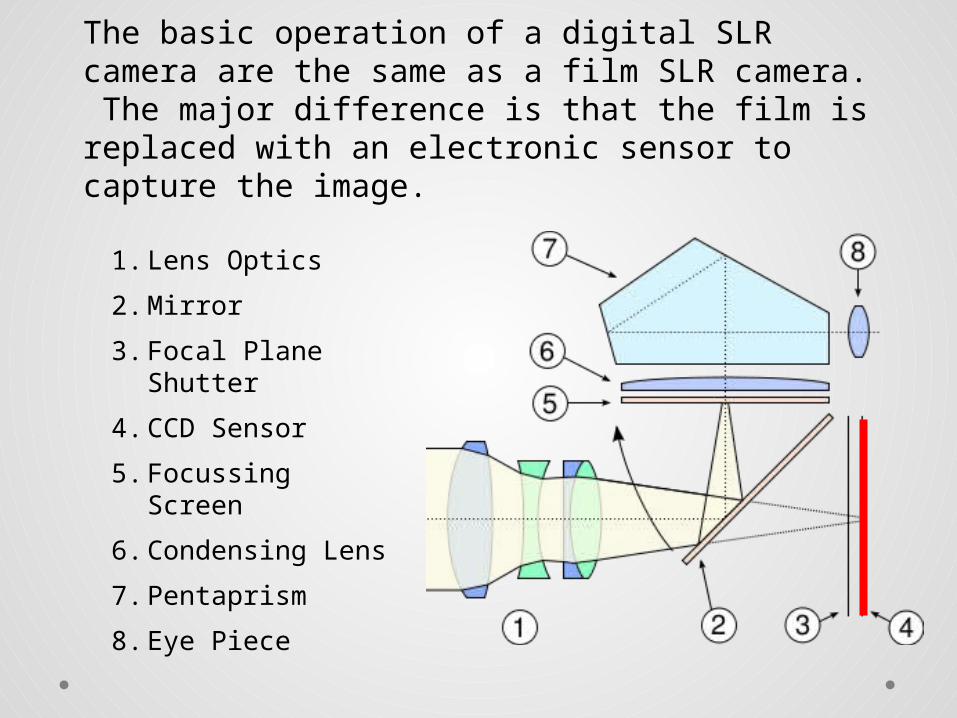
The basic operation of a digital SLR camera are the same as a film SLR camera. The major difference is that the film is replaced with an electronic sensor to capture the image.
1. Lens Optics
2. Mirror
3. Focal Plane Shutter
4. CCD Sensor
5. Focussing Screen
6. Condensing Lens
7. Pentaprism
8. Eye Piece
How Much Light Does the image sensor (CCD) Need?
• To produce a correctly exposed image, a measured amount of light is required to reach the cameras CCD sensor.
• Modern day cameras are designed to help us achieve this, by telling us when the settings we have chosen will create the correct exposure.
• However they do not take into account what we are photographing or when we are photographing.
• The information may be correct to expose the image properly but it may be the wrong information for what we are trying to photograph.
How much light does the CCD (Charge-
Coupled Device) need?
• There are many combinations of shutter speed and aperture setting that can be used that will produce a correct exposure.
• When one is found the camera light meter will let you know, or if you use the Av or Tv modes the camera will make some of the selections for you and try to automatically set the light meter.

This all sounds wonderful BUT!!
Shhhhhhh!! Cameras are quite Dumb
• A Camera is just a machine.• It does not have a logically thinking brain, therefore it’s
dumb.• It’s up to the photographer to interpret the information
that the camera gives us and know what is right and wrong.
• Teaching you this is one of my key goals.
How much light does the CCD need? - continued
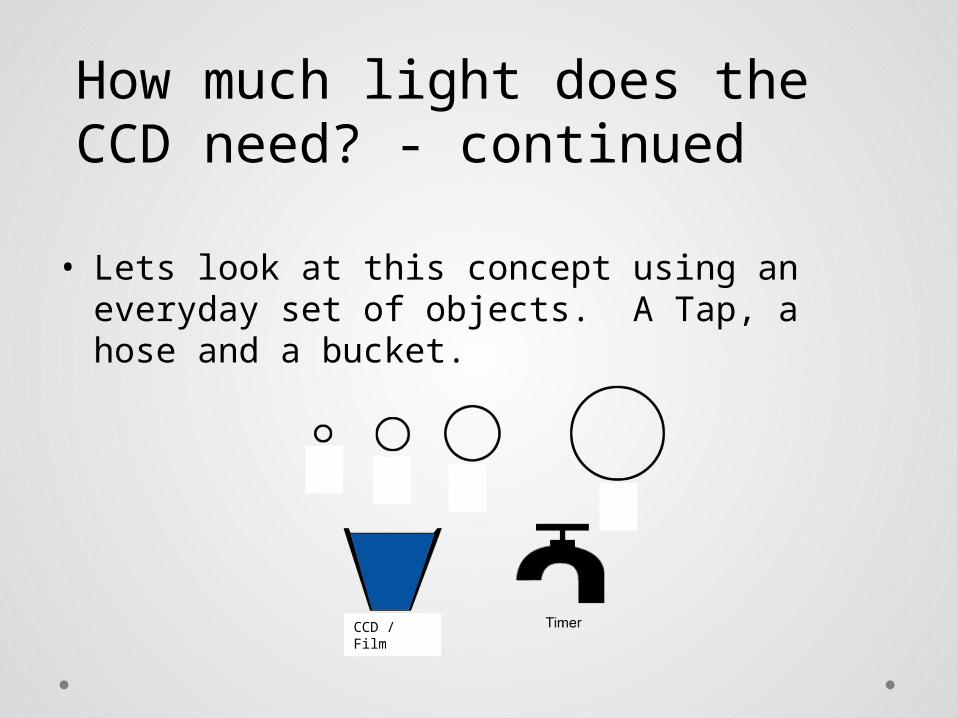
• Lets look at this concept using an everyday set of objects. A Tap, a hose and a bucket.
CCD / Film
How much light does the CCD need? - continued
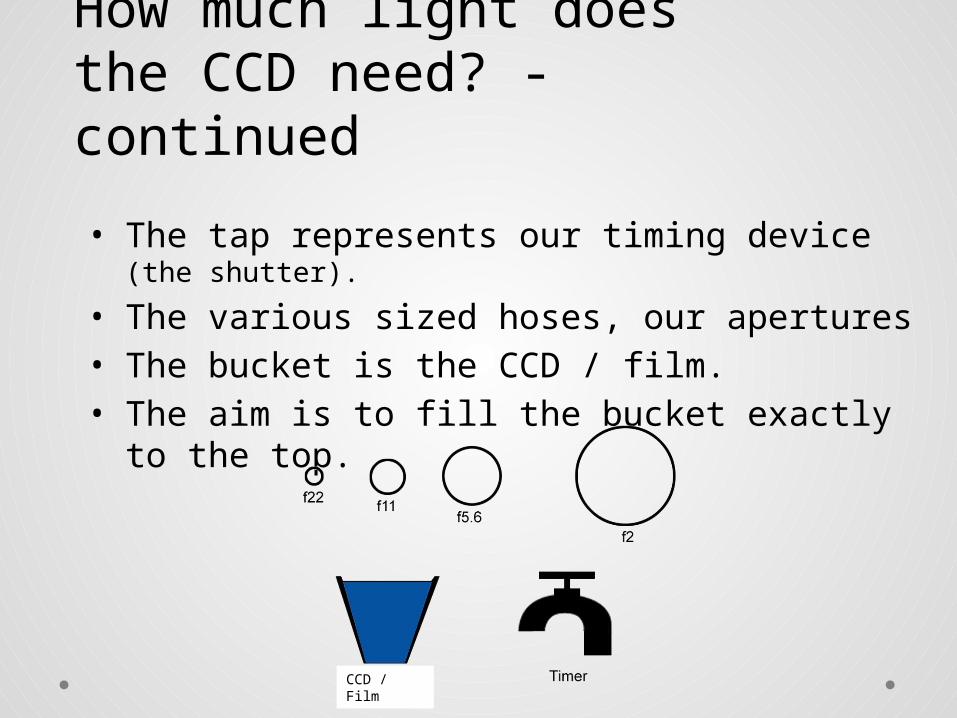
• The tap represents our timing device (the shutter).
• The various sized hoses, our apertures• The bucket is the CCD / film.• The aim is to fill the bucket exactly to the top.
CCD / Film
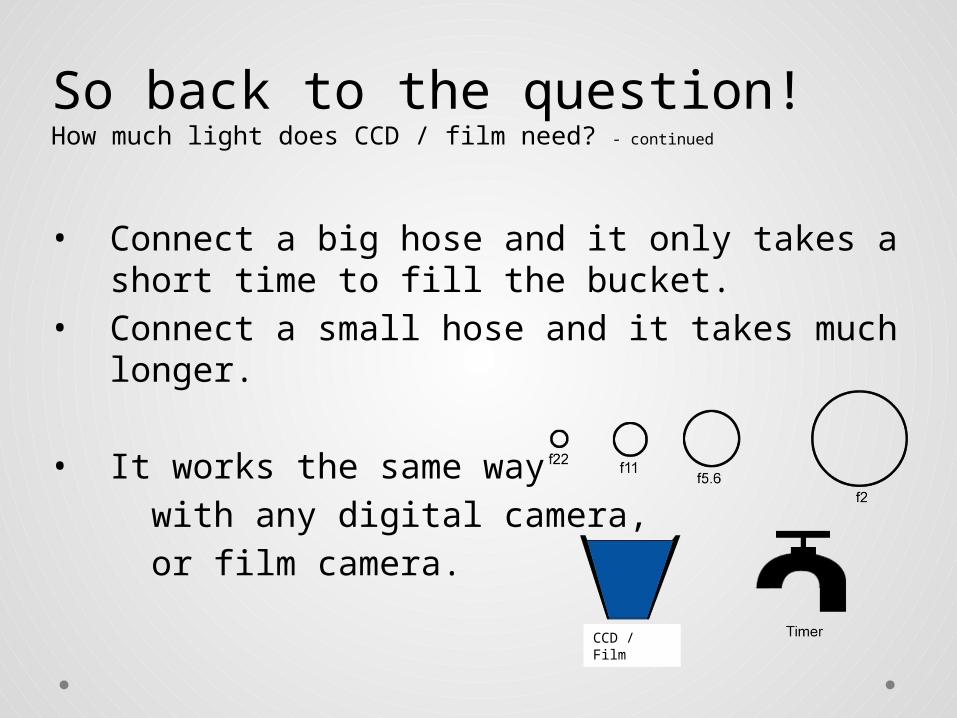
So back to the question!How much light does CCD / film need? - continued
• Connect a big hose and it only takes a short time to fill the bucket.
• Connect a small hose and it takes much longer.
• It works the same way
with any digital camera,
or film camera.
CCD / Film
How do we know when we get it right?
• Modern day cameras are fitted with a light measuring device called a light meter. There are various configurations but they all do the same job.
• The light meter indicates when your camera settings would achieve the correct exposure for the CCD / film.
• They also indicate when it would be incorrect.
Knowing What to Use
• Although there can be many combinations of Aperture and Shutter Speed that will produce a correct exposure, some will not be suitable to use.
• Getting it wrong can ruin your great photographs.
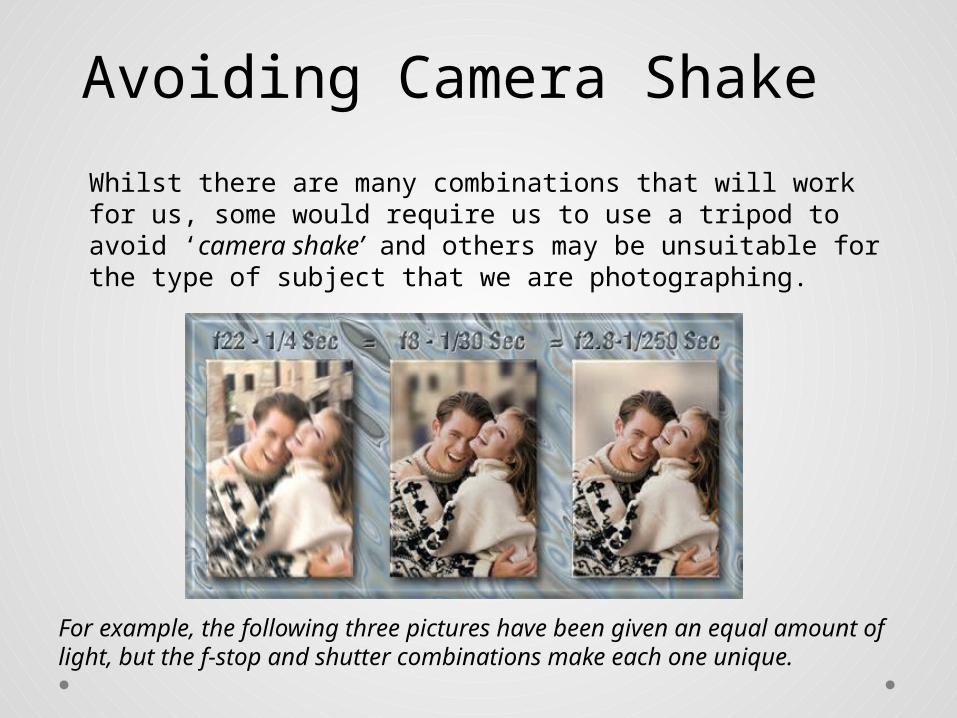
Whilst there are many combinations that will work for us, some would require us to use a tripod to avoid ‘camera shake’ and others may be unsuitable for the type of subject that we are photographing.
For example, the following three pictures have been given an equal amount of light, but the f-stop and shutter combinations make each one unique.
Avoiding Camera Shake
A Safe Shutter Speed Guide
• As a guide never use a shutter speed below 1/60 if you hand holding the camera.
• Where possible use Shutter Speeds higher than 1/60.
• 1/125 – 1/500 are ideal
• If you need to use shutter speeds below 1/60 always set the camera up on a tripod.
A Safe Shutter Speed GuideThe ideal settings
So Now What
• This isn’t the end but it is now your turn to practice and begin to understand how to get the best from the camera.
• It is absolutely vital that you have a good working knowledge about how to use the camera using the –
‘Tv’ (Time Value) mode and the ‘Av’ (Aperture Value) mode
• In time, understanding the ’M’(manual)mode will be your goal as well.


![[Key Custom Options] Menu (P.118-119) [AF Mode] · [Key Custom Options] Menu (P.118-119) [Set Fn1 Button] / [Set Fn2 Button] / [Effect Button Setting] [Conversion Lens] (p.134) is](https://img.pdfslide.us/doc/110x75/5e4aadf2688e5541ac5ab41f/key-custom-options-menu-p118-119-af-mode-key-custom-options-menu-p118-119.jpg)