Embed Size (px)
Citation preview
The Complete Guide toUPBLAST EXHAUST FANS
Your Quick Reference Guide Featuring:TYPES | CLEANING | MAINTENANCE & REPAIRS | ACCESSORIES | FAQs
[email protected] | 877.394.9731
[email protected] | 877.394.9731
1
What Is An Upblast Exhaust Fan?
An upblast exhaust fan (also called a rooftop ventilator or exhauster) is an essential part of any commercial kitchen ventilation system. In this guide we’ll cover everything you need to know to properly buy, maintain and troubleshoot an upblast fan.
The Basics
An upblast exhaust fan has one main purpose: remove smoke, steam, heat, grease, and other food-related vapors that would otherwise flood the kitchen and eventually leach into a restaurant’s dining room.
Commercial kitchen exhaust systems are typically comprised of three parts: an exhaust fan to get air moving; ducting to channel the air; and a hood to contain, protect and house the other pieces of equipment.
Depending on the size of a facility and its kitchen, there may be one fan and hood that connects to one duct, or there may be multiple fans in varied locations with an entire network of ducts.
Upblast Exhaust Fans 101
The exact configuration depends on the volume of cooking being done as well as the building’s architecture and design.
[email protected] | 877.394.9731
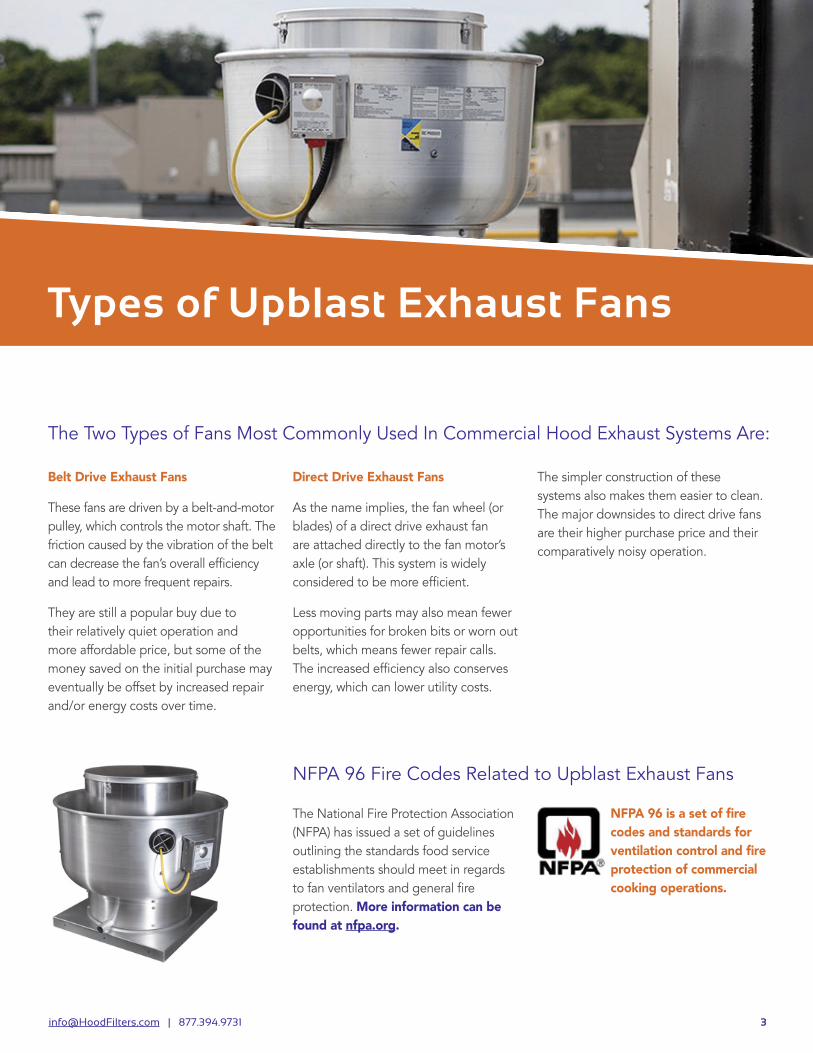
Types of Upblast Exhaust Fans
Belt Drive Exhaust Fans
These fans are driven by a belt-and-motor pulley, which controls the motor shaft. The friction caused by the vibration of the belt can decrease the fan’s overall efficiency and lead to more frequent repairs.
They are still a popular buy due to their relatively quiet operation and more affordable price, but some of the money saved on the initial purchase may eventually be offset by increased repair and/or energy costs over time.
Direct Drive Exhaust Fans
As the name implies, the fan wheel (or blades) of a direct drive exhaust fan are attached directly to the fan motor’s axle (or shaft). This system is widely considered to be more efficient.
Less moving parts may also mean fewer opportunities for broken bits or worn out belts, which means fewer repair calls. The increased efficiency also conserves energy, which can lower utility costs.
The simpler construction of these systems also makes them easier to clean. The major downsides to direct drive fans are their higher purchase price and their comparatively noisy operation.
The Two Types of Fans Most Commonly Used In Commercial Hood Exhaust Systems Are:
The National Fire Protection Association (NFPA) has issued a set of guidelines outlining the standards food service establishments should meet in regards to fan ventilators and general fire protection. More information can be found at nfpa.org.
NFPA 96 is a set of fire codes and standards for ventilation control and fire protection of commercial cooking operations.
NFPA 96 Fire Codes Related to Upblast Exhaust Fans
[email protected] | 877.394.9731
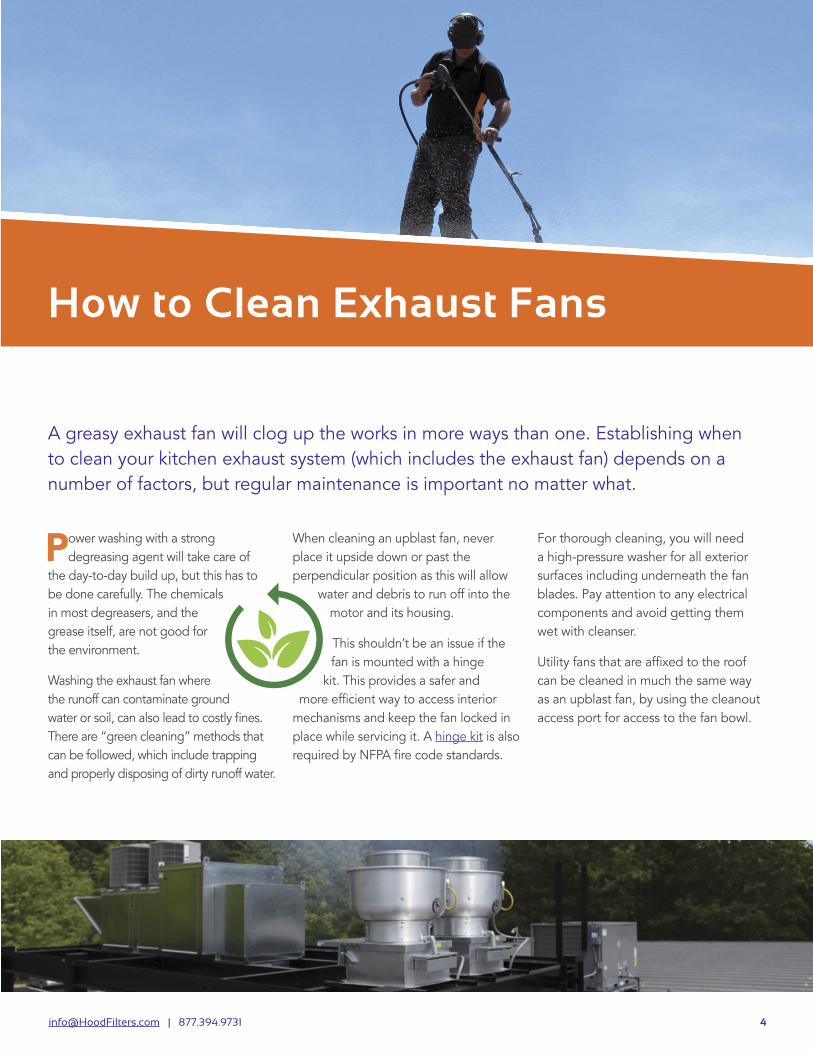
How to Clean Exhaust Fans
Power washing with a strong degreasing agent will take care of
the day-to-day build up, but this has to be done carefully. The chemicals in most degreasers, and the grease itself, are not good for the environment.
Washing the exhaust fan where the runoff can contaminate ground water or soil, can also lead to costly fines. There are “green cleaning” methods that can be followed, which include trapping and properly disposing of dirty runoff water.
When cleaning an upblast fan, never place it upside down or past the perpendicular position as this will allow
water and debris to run off into the motor and its housing.
This shouldn’t be an issue if the fan is mounted with a hinge
kit. This provides a safer and more efficient way to access interior
mechanisms and keep the fan locked in place while servicing it. A hinge kit is also required by NFPA fire code standards.
For thorough cleaning, you will need a high-pressure washer for all exterior surfaces including underneath the fan blades. Pay attention to any electrical components and avoid getting them wet with cleanser.
Utility fans that are affixed to the roof can be cleaned in much the same way as an upblast fan, by using the cleanout access port for access to the fan bowl.
A greasy exhaust fan will clog up the works in more ways than one. Establishing when to clean your kitchen exhaust system (which includes the exhaust fan) depends on a number of factors, but regular maintenance is important no matter what.
[email protected] | 877.394.9731
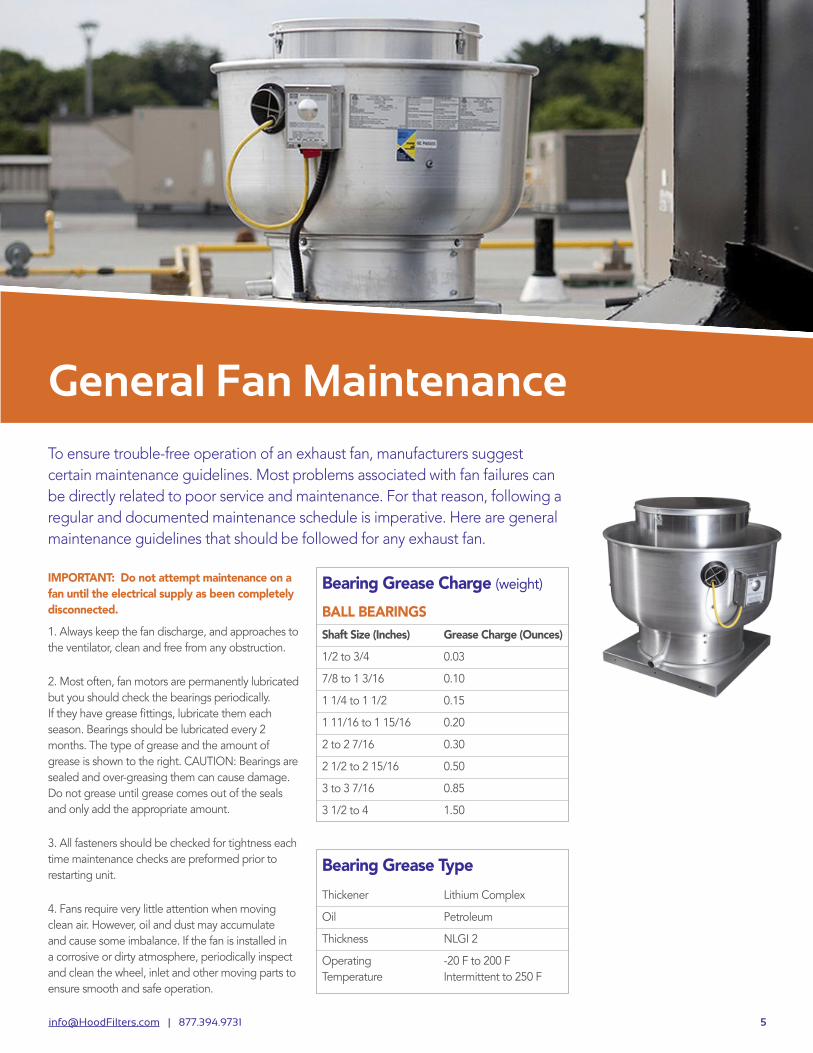
IMPORTANT: Do not attempt maintenance on a fan until the electrical supply as been completely disconnected.
1. Always keep the fan discharge, and approaches to the ventilator, clean and free from any obstruction.
2. Most often, fan motors are permanently lubricated but you should check the bearings periodically. If they have grease fittings, lubricate them each season. Bearings should be lubricated every 2 months. The type of grease and the amount of grease is shown to the right. CAUTION: Bearings are sealed and over-greasing them can cause damage. Do not grease until grease comes out of the seals and only add the appropriate amount.
3. All fasteners should be checked for tightness each time maintenance checks are preformed prior to restarting unit.
4. Fans require very little attention when moving clean air. However, oil and dust may accumulate and cause some imbalance. If the fan is installed in a corrosive or dirty atmosphere, periodically inspect and clean the wheel, inlet and other moving parts to ensure smooth and safe operation.
General Fan MaintenanceTo ensure trouble-free operation of an exhaust fan, manufacturers suggest certain maintenance guidelines. Most problems associated with fan failures can be directly related to poor service and maintenance. For that reason, following a regular and documented maintenance schedule is imperative. Here are general maintenance guidelines that should be followed for any exhaust fan.
Bearing Grease TypeThickener Lithium Complex
Oil Petroleum
Thickness NLGI 2
Operating -20 F to 200 F Temperature Intermittent to 250 F
Bearing Grease Charge (weight)
BALL BEARINGSShaft Size (Inches) Grease Charge (Ounces)
1/2 to 3/4 0.03
7/8 to 1 3/16 0.10
1 1/4 to 1 1/2 0.15
1 11/16 to 1 15/16 0.20
2 to 2 7/16 0.30
2 1/2 to 2 15/16 0.50
3 to 3 7/16 0.85
3 1/2 to 4 1.50
[email protected] | 877.394.9731
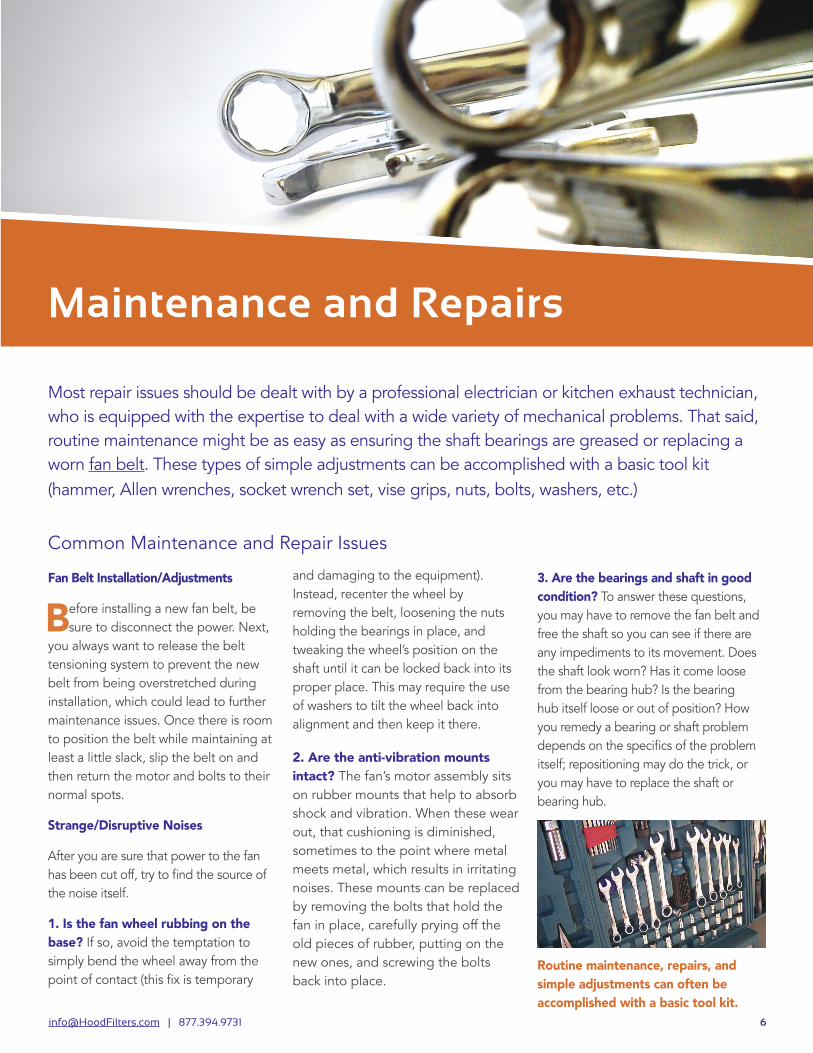
Maintenance and Repairs
Fan Belt Installation/Adjustments
Before installing a new fan belt, besure to disconnect the power. Next,
you always want to release the belt tensioning system to prevent the new belt from being overstretched during installation, which could lead to further maintenance issues. Once there is room to position the belt while maintaining at least a little slack, slip the belt on and then return the motor and bolts to their normal spots.
Strange/Disruptive Noises
After you are sure that power to the fan has been cut off, try to find the source of the noise itself.
1. Is the fan wheel rubbing on thebase? If so, avoid the temptation tosimply bend the wheel away from thepoint of contact (this fix is temporary
and damaging to the equipment). Instead, recenter the wheel by removing the belt, loosening the nuts holding the bearings in place, and tweaking the wheel’s position on the shaft until it can be locked back into its proper place. This may require the use of washers to tilt the wheel back into alignment and then keep it there.
2. Are the anti-vibration mountsintact? The fan’s motor assembly sitson rubber mounts that help to absorbshock and vibration. When these wearout, that cushioning is diminished,sometimes to the point where metalmeets metal, which results in irritatingnoises. These mounts can be replacedby removing the bolts that hold thefan in place, carefully prying off theold pieces of rubber, putting on thenew ones, and screwing the boltsback into place.
3. Are the bearings and shaft in good condition? To answer these questions,you may have to remove the fan belt andfree the shaft so you can see if there areany impediments to its movement. Doesthe shaft look worn? Has it come loosefrom the bearing hub? Is the bearinghub itself loose or out of position? Howyou remedy a bearing or shaft problemdepends on the specifics of the problemitself; repositioning may do the trick, oryou may have to replace the shaft orbearing hub.
Most repair issues should be dealt with by a professional electrician or kitchen exhaust technician, who is equipped with the expertise to deal with a wide variety of mechanical problems. That said, routine maintenance might be as easy as ensuring the shaft bearings are greased or replacing a worn fan belt. These types of simple adjustments can be accomplished with a basic tool kit (hammer, Allen wrenches, socket wrench set, vise grips, nuts, bolts, washers, etc.)
Common Maintenance and Repair Issues
Routine maintenance, repairs, and simple adjustments can often be accomplished with a basic tool kit.
[email protected] | 877.394.9731
Maintenance and Repairs
Shaft Replacement
The shaft should be checked regularly to gauge wear and tear. Shafts that
have worn down more than 25% should be replaced. To do so, you’ll want a three-jaw puller (4-inch models work well for this).
*When shopping for a replacement shaft you’ll need a complete set of measurements (length, width, diameter, and the key size of both the top and bottom of the shaft, which may be different).
1. Loosen the screws securing the shaft pulley and then pull it out. For hubbed pulleys, which are attached using two bolts at the top, you’ll need to remove the bolts and then screw them evenly into the predrilled holes. Tighten the bolts carefully (tightening them too far will damage the pulley) and they will push the hub free for you.
2. Prep the shaft prior to moving the bearing by using emery paper, emery tape, or similar to clean off debris and smooth out any dents or dings.
3. Loosen the bearing’s screws and free it from the shaft. If the bearing has a concentric locking collar, you’ll have to loosen the screws and then hold the shaft with a vise grip in one hand while using a vise grip in the other hand to turn the collar counterclockwise.
4. Lubricate the shaft with a light coating of oil.
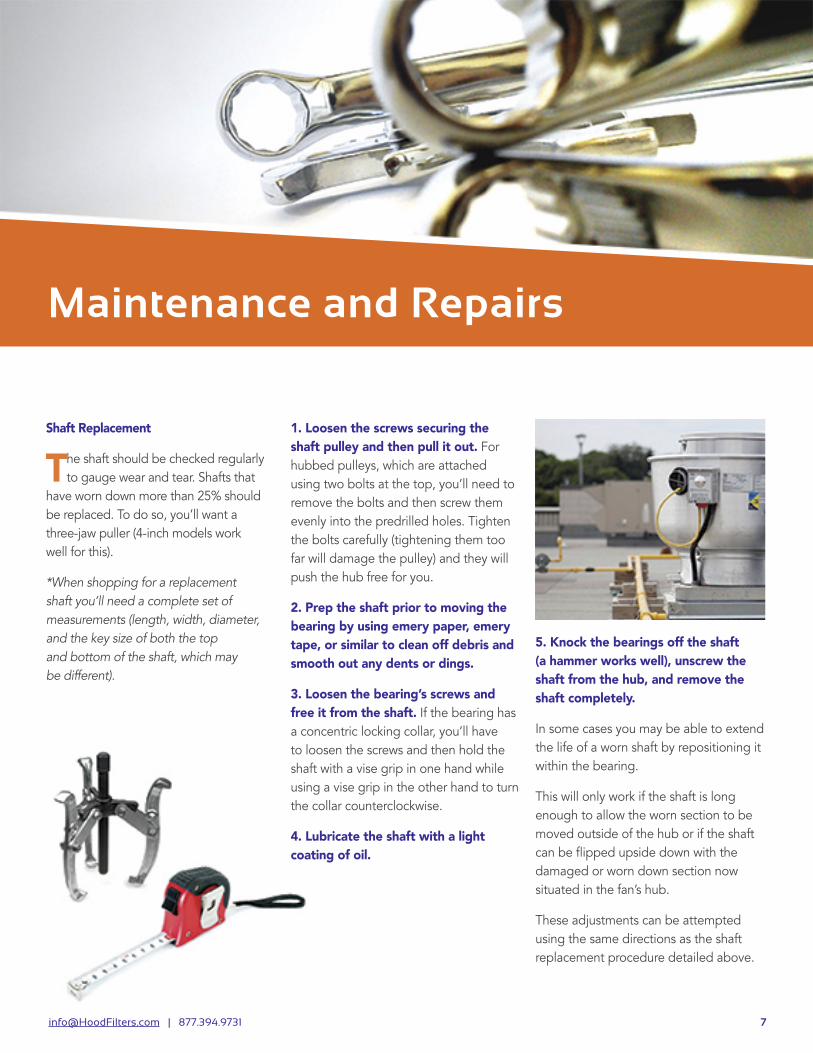
5. Knock the bearings off the shaft (a hammer works well), unscrew the shaft from the hub, and remove the shaft completely.
In some cases you may be able to extend the life of a worn shaft by repositioning it within the bearing.
This will only work if the shaft is long enough to allow the worn section to be moved outside of the hub or if the shaft can be flipped upside down with the damaged or worn down section now situated in the fan’s hub.
These adjustments can be attempted using the same directions as the shaft replacement procedure detailed above.
[email protected] | 877.394.9731
Troubleshooting
THE PROBLEM:The fan isn’t properly drawing air.
THE SOLUTION:There are 3 main reasons a fan doesn’t draw air correctly:
1. The fan is running backward. Fan blades are designed to cut air and scoop it forward, generating air flow.
If the blades have been mounted or are otherwise running in reverse, the air will be pushed around instead of being propelled.
The fan motor should have directions detailing how to change the blade rotation if necessary.
2. The fan is running too slow. Proper fan speed is determined by measuring the amps – the faster a fan spins, the harder the motor is working and the more resistance and heat that motor is emitting.
Clamp your amp meter to any of motor’s power lines, note the amps the motor is currently drawing, and then compare that number to number of amps that motor can safely handle (usually listed on the motor itself). If the motor can handle more speed – and therefore more amps – you can bolster fan speed by adjusting the motor’s pulley until it’s screwed closer together.
This shortened distance will result in increased rotation and, in turn, increased fan speed/air flow.
• No room left to adjust the pulley? Installing a larger pulley will solve that problem.
• Disappointed with the air flow and motor already running near maximum recommended amps? Don’t push the motor past the recommended max, as you’ll only get a burnt out motor in return. Consider upgrading to a motor with more horsepower instead.
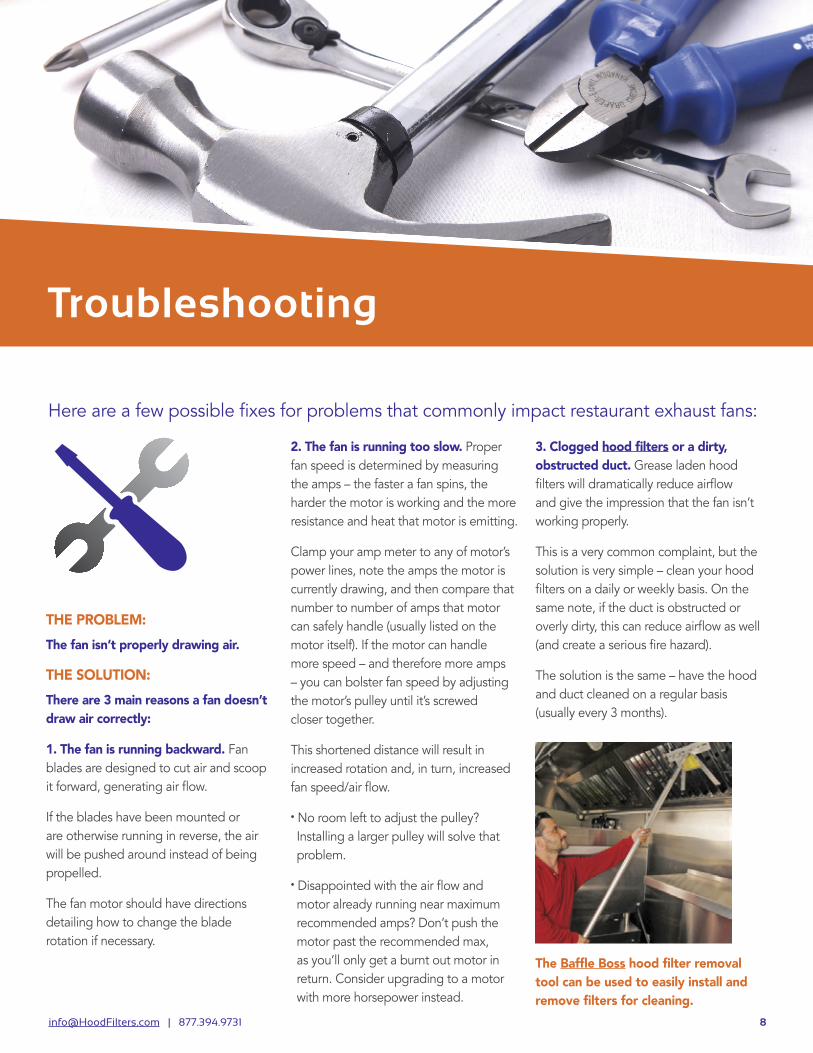
3. Clogged hood filters or a dirty, obstructed duct. Grease laden hood filters will dramatically reduce airflow and give the impression that the fan isn’t working properly.
This is a very common complaint, but the solution is very simple – clean your hood filters on a daily or weekly basis. On the same note, if the duct is obstructed or overly dirty, this can reduce airflow as well (and create a serious fire hazard).
The solution is the same – have the hood and duct cleaned on a regular basis (usually every 3 months).
Here are a few possible fixes for problems that commonly impact restaurant exhaust fans:
The Baffle Boss hood filter removal tool can be used to easily install and remove filters for cleaning.
[email protected] | 877.394.9731
Troubleshooting
THE PROBLEM:The fan motor won’t run.
THE SOLUTION:A motor that won’t run could indicate either a broken motor or a broken power supply.
1. The fan is running backward. Fan blades are designed to cut air and scoop it forward, generating air flow.
1. Start by testing the breaker. This is as easy as turning off the breaker, disconnecting the motor’s supply wires, and then turning the breaker back on. If the breaker trips, you have a short in the line.
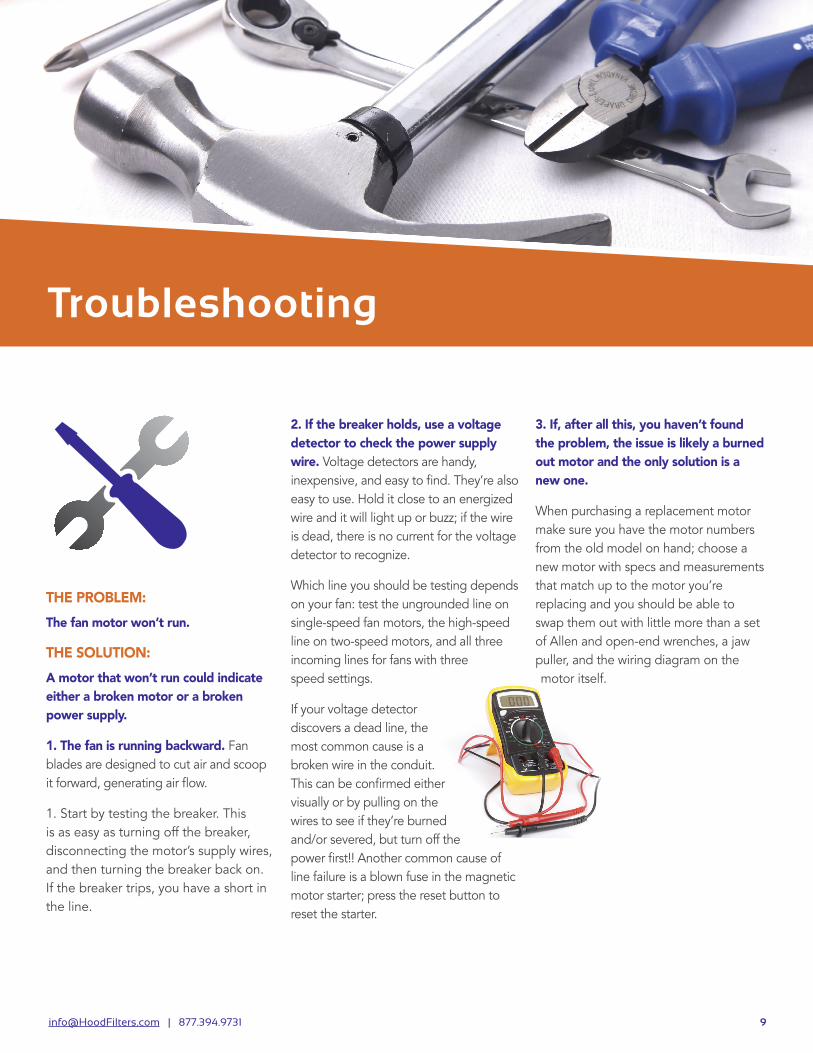
2. If the breaker holds, use a voltage detector to check the power supply wire. Voltage detectors are handy, inexpensive, and easy to find. They’re also easy to use. Hold it close to an energized wire and it will light up or buzz; if the wire is dead, there is no current for the voltage detector to recognize.
Which line you should be testing depends on your fan: test the ungrounded line on single-speed fan motors, the high-speed line on two-speed motors, and all three incoming lines for fans with three speed settings.
If your voltage detector discovers a dead line, the most common cause is a broken wire in the conduit.This can be confirmed either visually or by pulling on the wires to see if they’re burned and/or severed, but turn off the power first!! Another common cause of line failure is a blown fuse in the magnetic motor starter; press the reset button to reset the starter.
3. If, after all this, you haven’t found the problem, the issue is likely a burned out motor and the only solution is a new one.
When purchasing a replacement motor make sure you have the motor numbers from the old model on hand; choose a new motor with specs and measurements that match up to the motor you’re replacing and you should be able to swap them out with little more than a set of Allen and open-end wrenches, a jaw puller, and the wiring diagram on the motor itself.
[email protected] | 877.394.9731
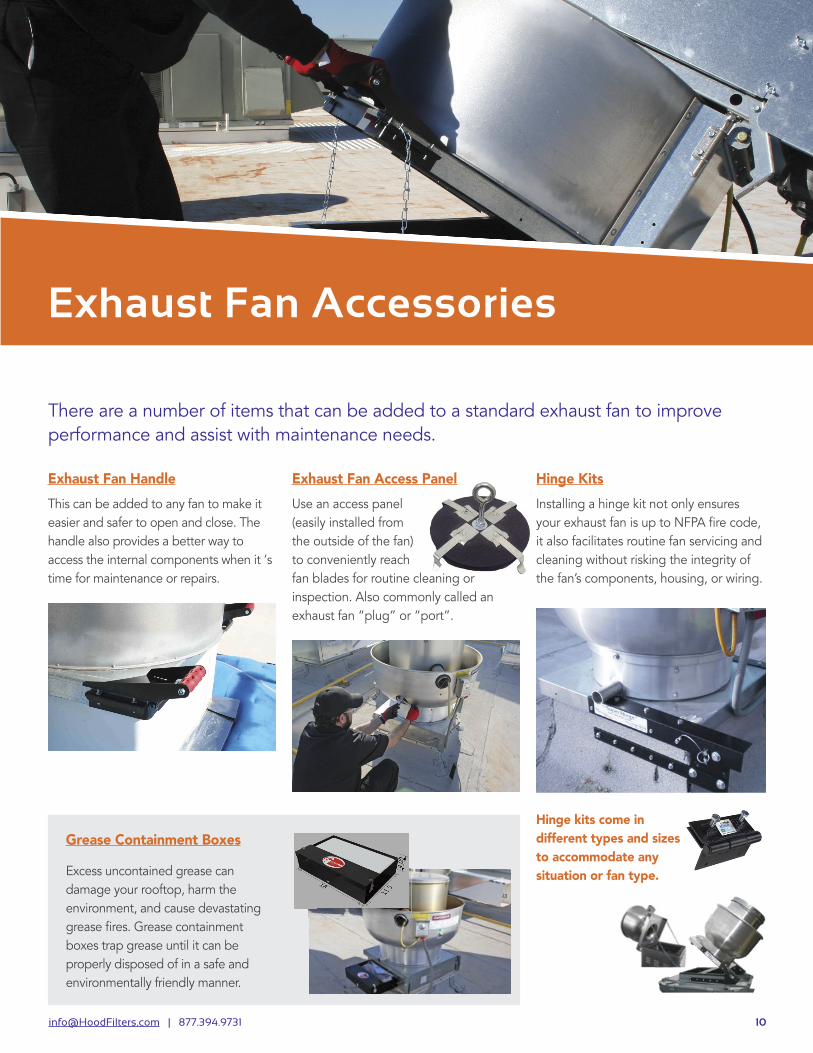
Exhaust Fan Handle This can be added to any fan to make it easier and safer to open and close. The handle also provides a better way to access the internal components when it ‘s time for maintenance or repairs.
Grease Containment Boxes
Excess uncontained grease can damage your rooftop, harm the environment, and cause devastating grease fires. Grease containment boxes trap grease until it can be properly disposed of in a safe and environmentally friendly manner.
Exhaust Fan Access PanelUse an access panel (easily installed from the outside of the fan) to conveniently reach fan blades for routine cleaning or inspection. Also commonly called an exhaust fan “plug” or “port”.
Hinge KitsInstalling a hinge kit not only ensures your exhaust fan is up to NFPA fire code, it also facilitates routine fan servicing and cleaning without risking the integrity of the fan’s components, housing, or wiring.
Hinge kits come in different types and sizes to accommodate any situation or fan type.
There are a number of items that can be added to a standard exhaust fan to improve performance and assist with maintenance needs.
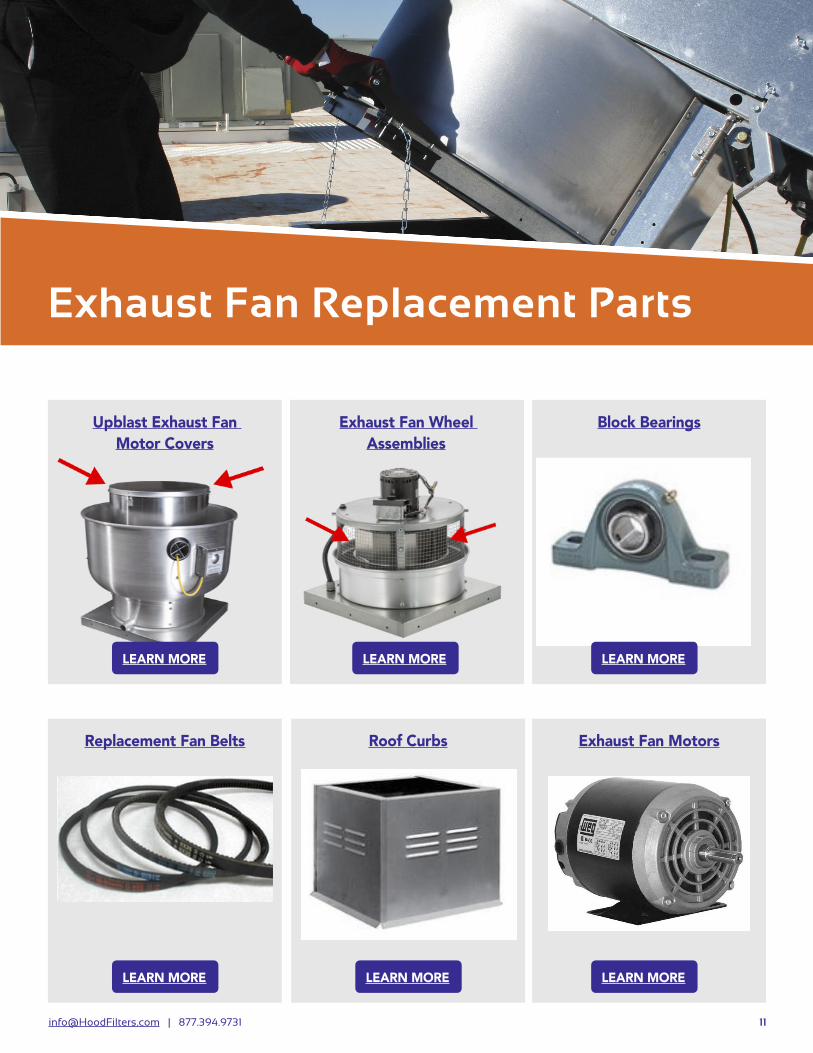
Exhaust Fan Accessories
[email protected] | 877.394.9731
Exhaust Fan Replacement Parts
Block Bearings
Exhaust Fan Motors
Exhaust Fan Wheel Assemblies
Upblast Exhaust Fan Motor Covers
Replacement Fan Belts Roof Curbs
LEARN MORE
LEARN MORE LEARN MORE
LEARN MORE LEARN MORE
LEARN MORE
[email protected] | 877.394.9731
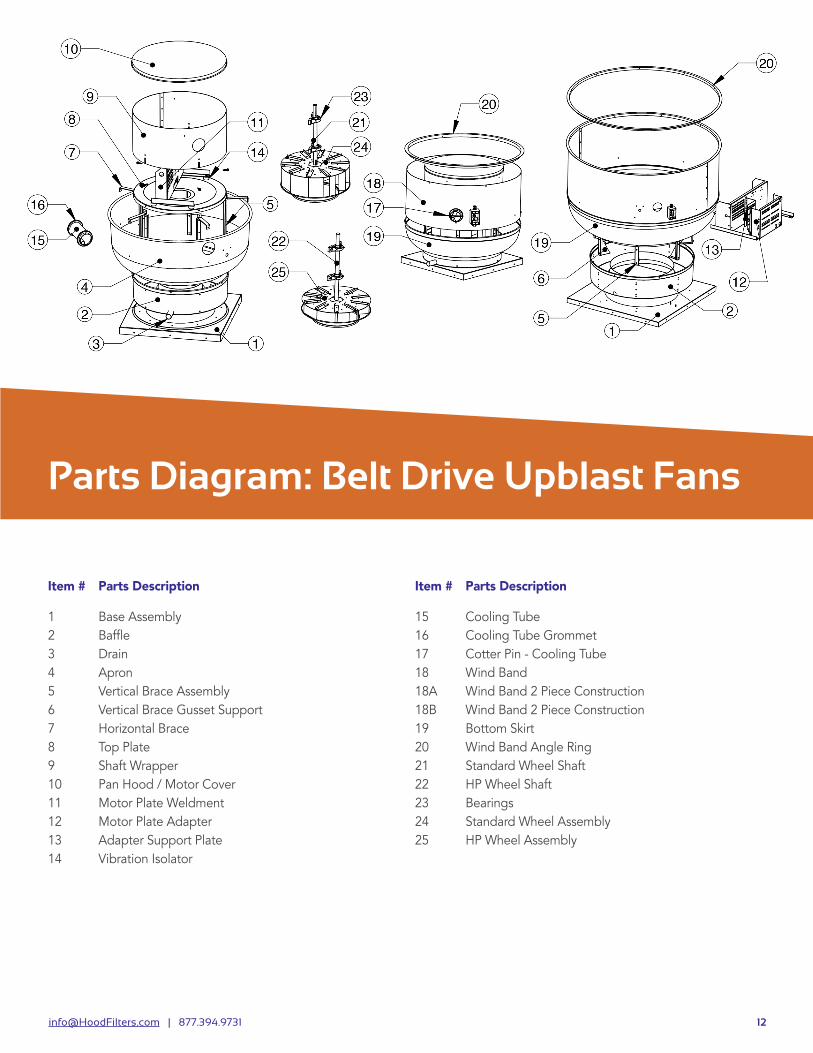
Parts Diagram: Belt Drive Upblast Fans
Item # Parts Description
1 Base Assembly2 Baffle3 Drain4 Apron5 Vertical Brace Assembly6 Vertical Brace Gusset Support7 Horizontal Brace8 Top Plate9 Shaft Wrapper10 Pan Hood / Motor Cover11 Motor Plate Weldment12 Motor Plate Adapter13 Adapter Support Plate14 Vibration Isolator
Item # Parts Description
15 Cooling Tube16 Cooling Tube Grommet17 Cotter Pin - Cooling Tube18 Wind Band18A Wind Band 2 Piece Construction18B Wind Band 2 Piece Construction19 Bottom Skirt20 Wind Band Angle Ring21 Standard Wheel Shaft22 HP Wheel Shaft23 Bearings24 Standard Wheel Assembly25 HP Wheel Assembly
[email protected] | 877.394.9731
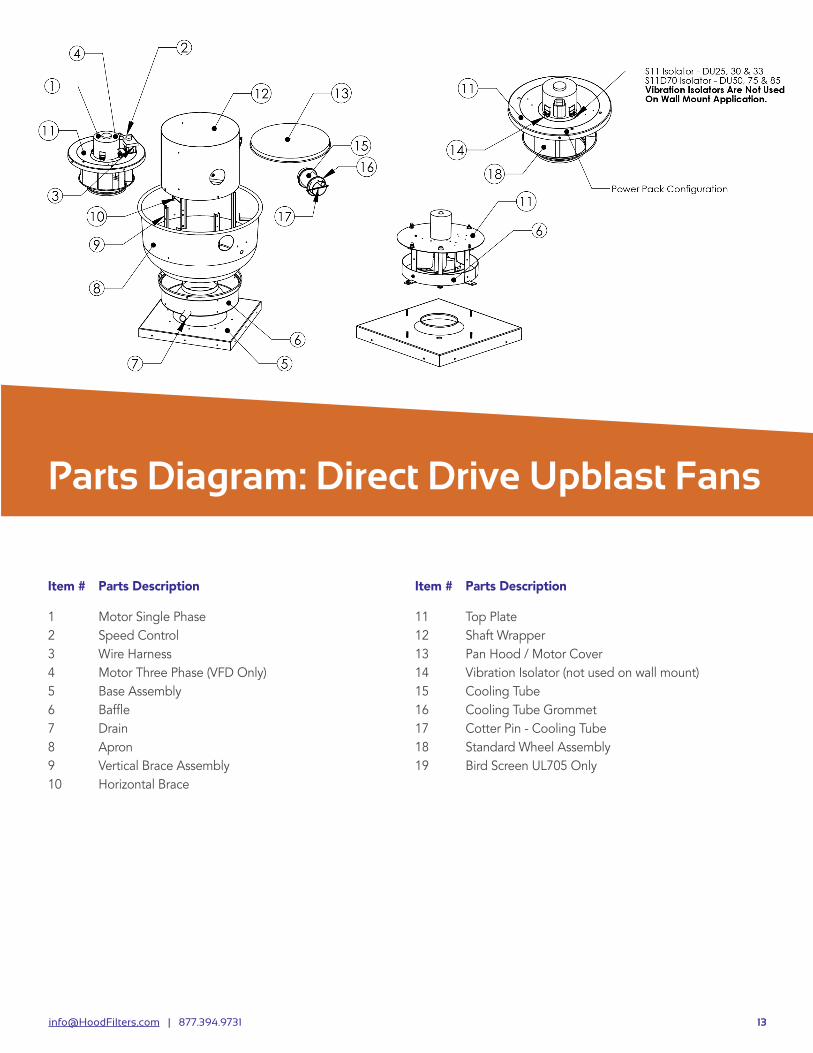
Parts Diagram: Direct Drive Upblast Fans
Item # Parts Description
1 Motor Single Phase2 Speed Control3 Wire Harness4 Motor Three Phase (VFD Only)5 Base Assembly6 Baffle7 Drain8 Apron9 Vertical Brace Assembly10 Horizontal Brace
Item # Parts Description
11 Top Plate12 Shaft Wrapper13 Pan Hood / Motor Cover14 Vibration Isolator (not used on wall mount)15 Cooling Tube16 Cooling Tube Grommet17 Cotter Pin - Cooling Tube18 Standard Wheel Assembly19 Bird Screen UL705 Only
[email protected] | 877.394.9731
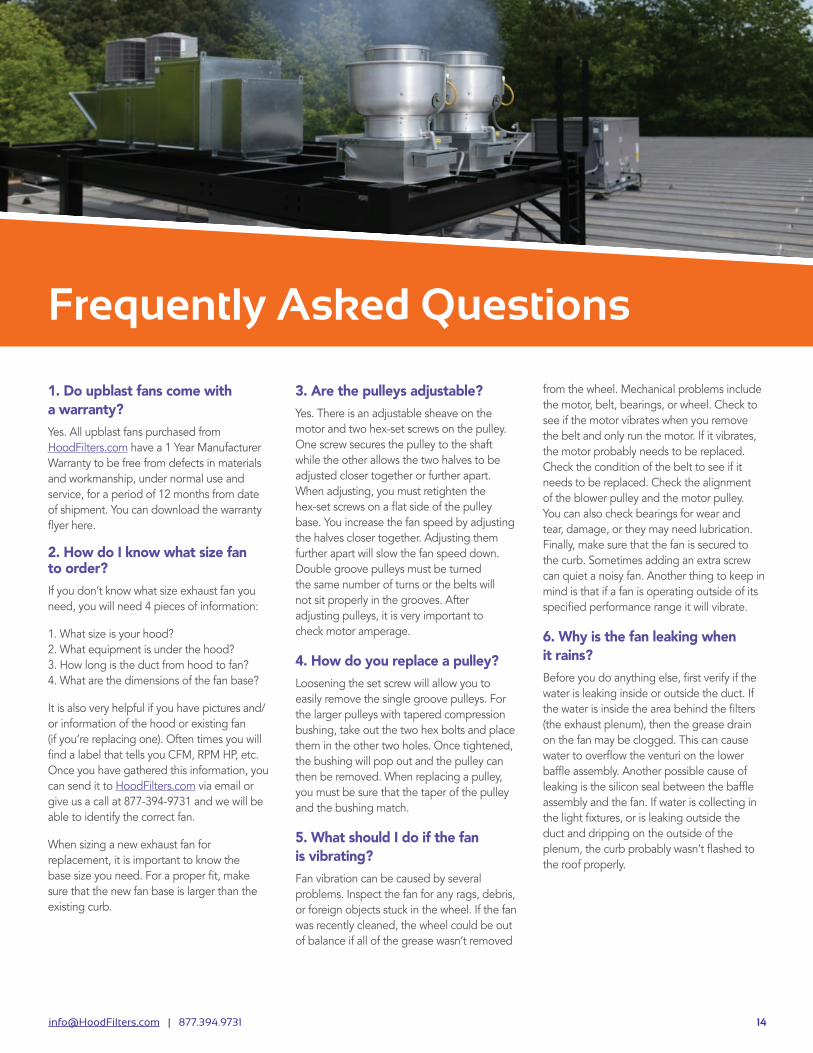
Frequently Asked Questions
1. Do upblast fans come with a warranty?Yes. All upblast fans purchased from HoodFilters.com have a 1 Year Manufacturer Warranty to be free from defects in materials and workmanship, under normal use and service, for a period of 12 months from date of shipment. You can download the warranty flyer here.
2. How do I know what size fan to order?If you don’t know what size exhaust fan you need, you will need 4 pieces of information:
1. What size is your hood?2. What equipment is under the hood?3. How long is the duct from hood to fan?4. What are the dimensions of the fan base?
It is also very helpful if you have pictures and/or information of the hood or existing fan (if you’re replacing one). Often times you will find a label that tells you CFM, RPM HP, etc. Once you have gathered this information, you can send it to HoodFilters.com via email or give us a call at 877-394-9731 and we will be able to identify the correct fan.
When sizing a new exhaust fan for replacement, it is important to know the base size you need. For a proper fit, make sure that the new fan base is larger than the existing curb.
3. Are the pulleys adjustable?Yes. There is an adjustable sheave on the motor and two hex-set screws on the pulley. One screw secures the pulley to the shaft while the other allows the two halves to be adjusted closer together or further apart. When adjusting, you must retighten the hex-set screws on a flat side of the pulley base. You increase the fan speed by adjusting the halves closer together. Adjusting them further apart will slow the fan speed down. Double groove pulleys must be turned the same number of turns or the belts will not sit properly in the grooves. After adjusting pulleys, it is very important to check motor amperage.
4. How do you replace a pulley?Loosening the set screw will allow you to easily remove the single groove pulleys. For the larger pulleys with tapered compression bushing, take out the two hex bolts and place them in the other two holes. Once tightened, the bushing will pop out and the pulley can then be removed. When replacing a pulley, you must be sure that the taper of the pulley and the bushing match.
5. What should I do if the fan is vibrating?Fan vibration can be caused by several problems. Inspect the fan for any rags, debris, or foreign objects stuck in the wheel. If the fan was recently cleaned, the wheel could be out of balance if all of the grease wasn’t removed
from the wheel. Mechanical problems include the motor, belt, bearings, or wheel. Check to see if the motor vibrates when you remove the belt and only run the motor. If it vibrates, the motor probably needs to be replaced. Check the condition of the belt to see if it needs to be replaced. Check the alignment of the blower pulley and the motor pulley. You can also check bearings for wear and tear, damage, or they may need lubrication. Finally, make sure that the fan is secured to the curb. Sometimes adding an extra screw can quiet a noisy fan. Another thing to keep in mind is that if a fan is operating outside of its specified performance range it will vibrate.
6. Why is the fan leaking when it rains?Before you do anything else, first verify if the water is leaking inside or outside the duct. If the water is inside the area behind the filters (the exhaust plenum), then the grease drain on the fan may be clogged. This can cause water to overflow the venturi on the lower baffle assembly. Another possible cause of leaking is the silicon seal between the baffle assembly and the fan. If water is collecting in the light fixtures, or is leaking outside the duct and dripping on the outside of the plenum, the curb probably wasn’t flashed to the roof properly.
[email protected] | 877.394.9731
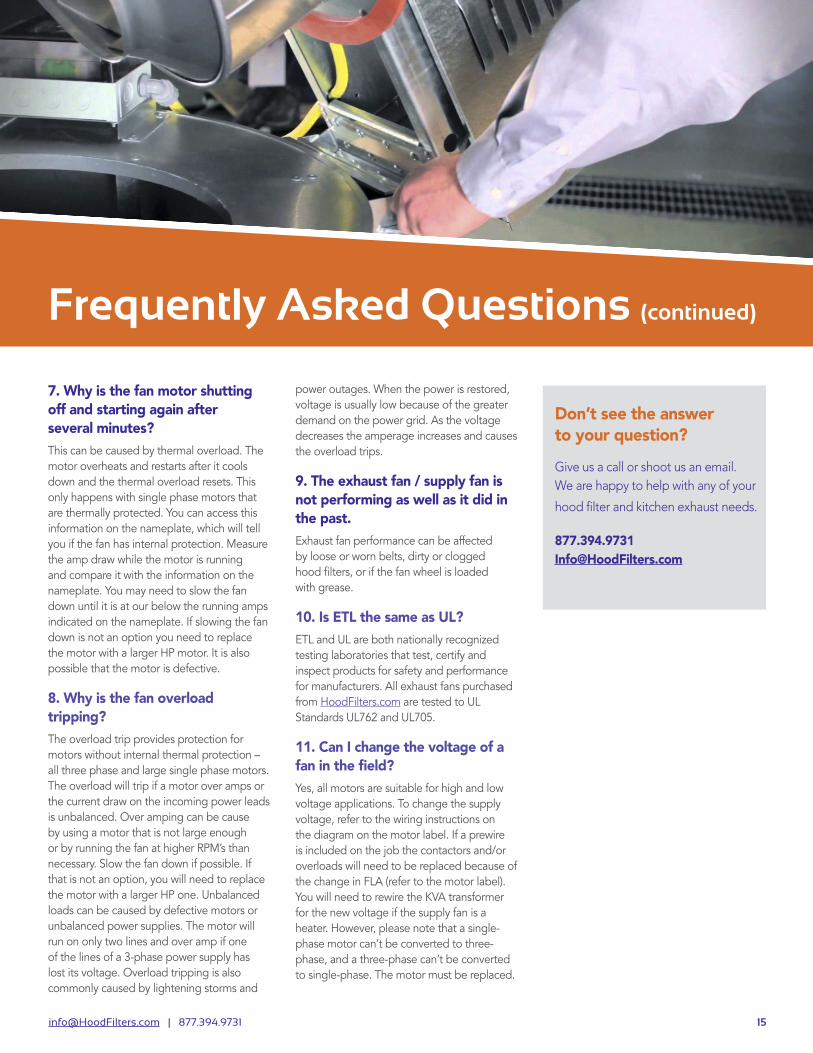
Frequently Asked Questions (continued)
7. Why is the fan motor shutting off and starting again after several minutes?This can be caused by thermal overload. The motor overheats and restarts after it cools down and the thermal overload resets. This only happens with single phase motors that are thermally protected. You can access this information on the nameplate, which will tell you if the fan has internal protection. Measure the amp draw while the motor is running and compare it with the information on the nameplate. You may need to slow the fan down until it is at our below the running amps indicated on the nameplate. If slowing the fan down is not an option you need to replace the motor with a larger HP motor. It is also possible that the motor is defective.
8. Why is the fan overload tripping?The overload trip provides protection for motors without internal thermal protection – all three phase and large single phase motors. The overload will trip if a motor over amps or the current draw on the incoming power leads is unbalanced. Over amping can be cause by using a motor that is not large enough or by running the fan at higher RPM’s than necessary. Slow the fan down if possible. If that is not an option, you will need to replace the motor with a larger HP one. Unbalanced loads can be caused by defective motors or unbalanced power supplies. The motor will run on only two lines and over amp if one of the lines of a 3-phase power supply has lost its voltage. Overload tripping is also commonly caused by lightening storms and
power outages. When the power is restored, voltage is usually low because of the greater demand on the power grid. As the voltage decreases the amperage increases and causes the overload trips.
9. The exhaust fan / supply fan is not performing as well as it did in the past.Exhaust fan performance can be affected by loose or worn belts, dirty or clogged hood filters, or if the fan wheel is loaded with grease.
10. Is ETL the same as UL?ETL and UL are both nationally recognized testing laboratories that test, certify and inspect products for safety and performance for manufacturers. All exhaust fans purchased from HoodFilters.com are tested to UL Standards UL762 and UL705.
11. Can I change the voltage of a fan in the field?Yes, all motors are suitable for high and low voltage applications. To change the supply voltage, refer to the wiring instructions on the diagram on the motor label. If a prewire is included on the job the contactors and/or overloads will need to be replaced because of the change in FLA (refer to the motor label). You will need to rewire the KVA transformer for the new voltage if the supply fan is a heater. However, please note that a single-phase motor can’t be converted to three-phase, and a three-phase can’t be converted to single-phase. The motor must be replaced.
Don’t see the answer to your question? Give us a call or shoot us an email. We are happy to help with any of your
hood filter and kitchen exhaust needs.
877.394.9731 [email protected]

[email protected] | 877.394.9731
About HoodFilters.com
North America’s #1 Choice for Commercial Kitchen Hood Filters and Ventilation Products
HoodFilters.com is is your trusted source for commercial kitchen ventilation products. Since 2005, we have served thousands of satisfied customers from
small restaurants and service providers to large chains and government facilities.
Connect with us!
Why do customers choose HoodFilters.com?
SERVICE: Commercial kitchen ventilation is all we do and our expert staff is here to help. If you need a unique product, we’ll find it. If you have a difficult question, we’ll get the answer. No matter what the situation, we’ll help you solve the problem.
SELECTION: With over 2000 items to choose from, you can be assured to find the product you need. And if you can’t, we’ll go to work and help you find it.
VALUE: Our 100% Lowest Price Guarantee ensures you never pay too much, while getting quality products and unmatched customer service.
“Experts with High Integrity”
Excellent company for hood filters and supplies. Excellent support as well.
Daniel Haigh – Hoodz of Greater Knoxville
Hood Filters Kitchen Exhaust
Make-Up Air & HVAC Rooftop Grease Containment
Hood Parts & Accessories
Hood Cleaning Supplies
MEMBER