Embed Size (px)
Citation preview

Texans strength and conditioning coach Dan Riley writes his popular Fitness Corner column for HoustonTexans.com. Riley and assistant strength and conditioning coach Ray Wright will continue to post selected answers to your questions throughout the year. A special thanks to Seth Payne for demonstrating the exercises in this installation of the Fitness Corner. Seth just finished his Monday workout the day after the Titans game and was willing to take some extra time to help us out.
I have heard from a couple of sources lately that it is not good to perform the lat pull-down behind the head. Is there any truth to this or is this just an opinion based on someone possibly injuring themselves while trying to lift too much weight and not maintaining proper form? I am currently doing it both ways and would like to know the advantage of each.
-- Jimmy Owens
During my tenure with the Redskins I received some negative information regarding exercises performed behind the neck, specifically the lat pull-down and the seated press. These were exercises we incorporated into most of our upper body Redskins routines.
I gathered as much information as I could find and then met with our medical staff. Everyone agreed that these exercises can cause structural damage to the rotator cuff and should be removed immediately from the program. The damage is accumulative over time. I posted this information for our players to read and apologized for my lack of awareness.
In their book “The 7-Minute Rotator Cuff Solution” Horrigan and Robinson explain the accumulative negative impact that can result from performing the following three exercises; seated press behind-the-neck, behind-the-neck pull-down, and upright row.
Performing the overhead press behind-the-neck and the pull-down behind-the-neck requires significant external rotation of your shoulders and full scapular adduction. You reach this position by pulling your shoulders backward similar to a soldier standing at the position of attention.
Horrigan and Robinson state, “Your external rotators have to work really hard, pulling against the tight internal rotators, just to get you in position for the exercise. This strain, plus the strain of having to work against the resistance imposed by the weight, is too much to ask of the rotator cuff – over time, it may strain, inflame, become fibrous, and weaken.”
How many shoulder injuries have already occurred on the playing field that might be traced to the gradual soft tissue and joint deterioration that is accumulative from performing the press and pull down behind-the-neck? I do not know, however I am not willing to jeopardize the short-term health of our players.
How many athletes after their playing days are long over, begin to experience shoulder problems that may be directly attributed to the strength training exercises

they performed when they were younger? Again I do not know the answer, but I am not willing to jeopardize the long-term health of our players.
After eliminating the behind-the-neck exercises from our program, I contacted our equipment manufacturers to discuss the modification of our overhead pressing equipment. Eventually this was accomplished.
In our facility the Texans have a variety of overhead pressing movements to choose from. Each of our overhead pressing movements is designed to perform the exercise in front of the body. Observe Seth demonstrating the Avenger Seated Press (1 | 2) and the Hammer Isolateral Seated Press (1 | 2).
In the past our players performed the overhead seated press with dumbbell at a ninety degree angle. Our players currently perform this exercise at less than ninety degrees.
We have a variety of lat pull-down machines for our players to choose from. Depending upon the equipment used, our players perform all lat pull-down exercises in front of the body using one of the following grips; underhand grip, overhand grip, parallel grip (1 | 2).
There is no advantage for performing the seated press, or the lat pull-down, behind the head (1 | 2). The potential risk of the structural integrity of the shoulder capsule far outweighs any advantage for performing either of these two behind-the-neck exercises. A disadvantage of the wide grip lat pull-down is a reduction in range of motion for the lats. Range of motion for the lats is increased as the grip is narrowed.
It is the responsibility of all coaches to eliminate any exercise that may compromise the physical well-being of an athlete during his/her playing days. We must be concerned for the well-being of our players when they compete as athletes and also during their adult life as a non-athlete.
While with the Redskins our players also performed the upright row (1 | 2). This exercise was performed in our neck sequence listed below:
1. neck flexion
2. neck extension
3. lateral flexion right
4. lateral flexion left
5. shrugs (followed immediately by the upright row)
6. upright row
The author’s of The 7-Minute Rotator Cuff Solution feel so strongly about the negative impact of the upright row, they post a “Training Alert” regarding this exercise in their book.

They state, “One exercise you should eliminate from your weight training program is the upright row. This exercise places the shoulder in internal rotation as the arm is raised, a position that does not allow sufficient space for the greater tubercle to clear the acromium.”
Proper form requires pulling the elbows high. According to the authors this simply increases the degree of internal rotation and magnifies the danger of impingement. The final word from Corrigan and Robinson regarding the upright row? “Upright rows accelerate rotator cuff degeneration.”
My number one responsibility to our players is injury prevention. I cannot incorporate an exercise(s) that contributes to gradual joint erosion. Our players do not perform the upright row, the behind-the-neck press, or the behind-the-neck pull-down.
Jimmy your concern must not be how you feel today, but how your shoulders will feel as you grow older. You may be doing gradual damage today that results in shoulder problems later in life. I suggest you begin performing all overhead pressing movements in front of the body, all lat pull-downs in front of the body, and eliminate the upright row.
Horrigan, Joseph, Robinson, Jerry, The 7-Minute Rotator Cuff Solution, Health For Life, Los Angeles, California, 1991
The number one strength training priority for a football player (or any athlete exposed to repetitive impact forces involving the head and shoulders) must be exercises for the muscles surrounding the neck and traps muscle.
My first concern when planning the Texans weight room was to provide adequate neck equipment to accommodate all of players based upon the amount of time allotted for lifting. We have sixty-one players on our team and we currently have six Four-Way neck machines. This amount of equipment will provide each player with enough time to train his neck regardless of the time of year (off-season, training camp, in-season).
The muscles of the neck and traps are the shock absorbers for the vertebrae and spinal cord. The first thing we ask our players to do when they enter our weight room is to perform five exercises for the neck and traps.
Sudden impact injuries are of grave concern, but we must also worry about the accumulative effects from the repetitive impact forces from any contact sport, especially football. Many former athletes develop chronic neck problems long after their careers are over. How many of these problems can be attributed to a lack of neck strength during their playing days? How many of these problems could have been prevented altogether if during their career as an athlete more emphasis would have been placed on strengthening the neck?
Neck equipment must have the highest priority. Do not cut corners or buy gadgets. Purchase the best neck equipment you can find.

Our players perform twelve reps of each exercise. We allow sixty-seconds per exercise (five seconds per rep). We have timers (right) on each neck machine set at sixty-seconds.
Remember, it is not the number of reps we are concerned about. The brain does not have a little rep counter. What is important is how long (how much time) a muscle is under load or exposed to an appropriate amount of resistance.
Why twelve reps? I was most fortunate to be employed at West Point during a period when multiple strength training studies were conducted (to include the muscles of the neck and traps).
The best cervical expert in the world was brought in to perform thermograms on the neck and traps while cadets performed neck strengthening exercises. The entire project was a fascinating and educational experience that made a long-lasting impression. It strongly influenced my career as a strength coach regarding the need to prioritize strength development for the muscles of the neck.
The best results were observed when cadets performed one set of twelve repetitions. Each repetition of every exercise was supervised to insure rep reproduction. Criteria were established regarding the technique to be used during the execution of each repetition.
This included the following guidelines:
1. Lift the weight in a very smooth and deliberate manner. There will be no sudden or jerky movements. Eliminate the use of any momentum and force the muscles to perform all of the work. Stabilize the upper body forcing the targeted neck muscles to raise the weight.
2. Pause for a count of 1001 in the contracted position.
3. Use the same speed to slowly lower the weight from the contracted position to the original starting position.
4. Pause momentarily in the starting position before initiating the next rep.
5. A set of twelve reps will average approximately sixty-seconds.
I have experimented with other set/rep ranges. It has been my experience that the one set of twelve reps protocol listed above produces the safest and most productive results.
It will take somewhere between five and six minutes to properly complete all five exercises.
Point: Purchase enough neck strengthening equipment to guarantee all of your players have ample opportunity to strengthen their neck twice a week. If you do not have enough neck equipment you must learn how to safely perform and teach manual resistance neck exercises.

Neck & Trap Exercise Sequence
1. Neck Flexion – 12 reps (60 seconds)
2. Neck Extension – 12 reps (60 seconds)
3. Lateral Flexion Right – 12 reps (60 seconds)
4. Lateral Flexion Left – 12 reps (60 seconds)
5. Shrugs – 12 reps (60 seconds) Seated or Standing (can be performed with dumbbells, barbell, or Smith Machine)
There is no reason to roll the shoulders when performing a shrug. Elevate the shoulders in a very smooth manner and pause for a count of 1001 and slowly return to the starting position (five seconds per rep). If perform the shrug standing do not bend your legs or arms.
If you do not have access to a neck machine a very productive alternative is manual resistance neck exercises. There are skills needed to safely spot and perform these exercises. Do not attempt these movements until you have been taught how to properly perform these exercises.
1. Manual Neck Flexion
2. Manual Neck Extension
We use the same lower body exercise sequence to organize our leg routine. The exercise sequence remains the same each time our players train the hips and legs.

To create variety our players can substitute different pieces of equipment into the same exercise sequence. The structural design of each piece of equipment is different and affects the recruitment sequence of the muscles involved.
Listed below is the exercise sequence our players use to perform a lower body workout. Our players perform one all out set of each exercise strictly adhering to the Texans four rep rules.
Rule # 1 – Raise and lower the weight through the muscles full range of motion.
Rule # 2 – Eliminate momentum during the raising phase of each exercise.
Rule # 3 - Pause momentarily (stop for a count of 1001) in the muscle’s contracted position and then make a smooth transition to the lowering of the weight (no sudden drop).
Rule # 4 – Emphasize the lowering of the weight (take longer to lower the weight). Our players perform 12 reps on all exercises for the hips and legs.
Texans Hips & Legs Exercise Sequence
1. Leg Press/Squat -12 reps
Rest 90 seconds
2. Leg Curl - 12 reps (followed immediately by Hip Extension)
3. Hip Extension – 12 reps (optional legs straight or legs bent)
Rest 90 seconds
4. Leg Extension – 8 reps (8-second reps)
Rest 90 seconds
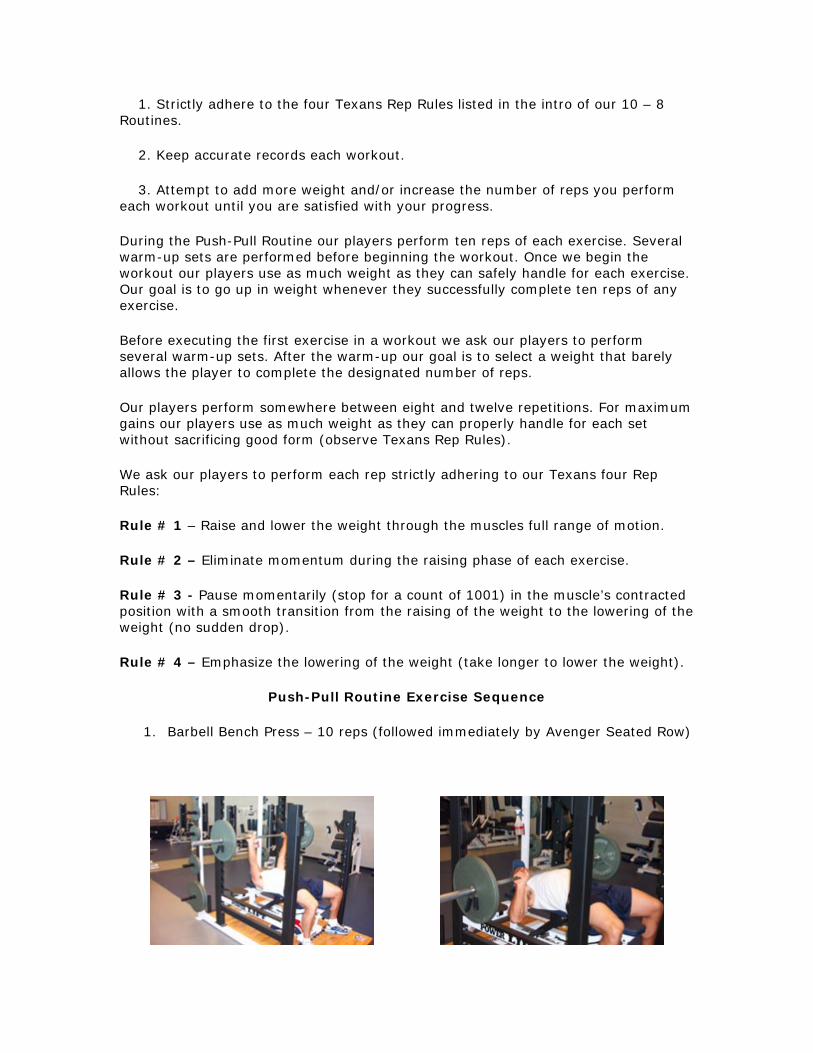
5. Hip Abduction 12 reps (followed immediately by second set of Leg Press)
6. Leg Press/Squat – 12 reps
Rest 90 seconds
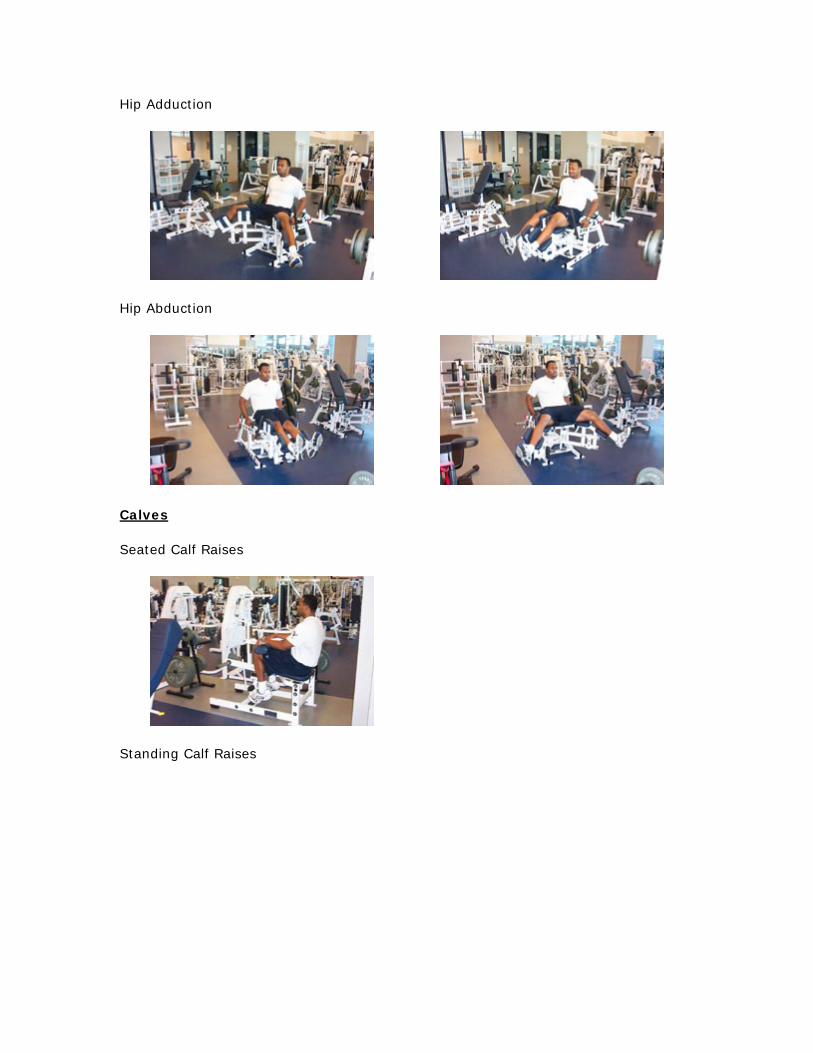
7. Hip Adduction – 12 reps
8. Hip Flexion – 12 reps
9. Calves – 12 reps (legs straight/legs bent)
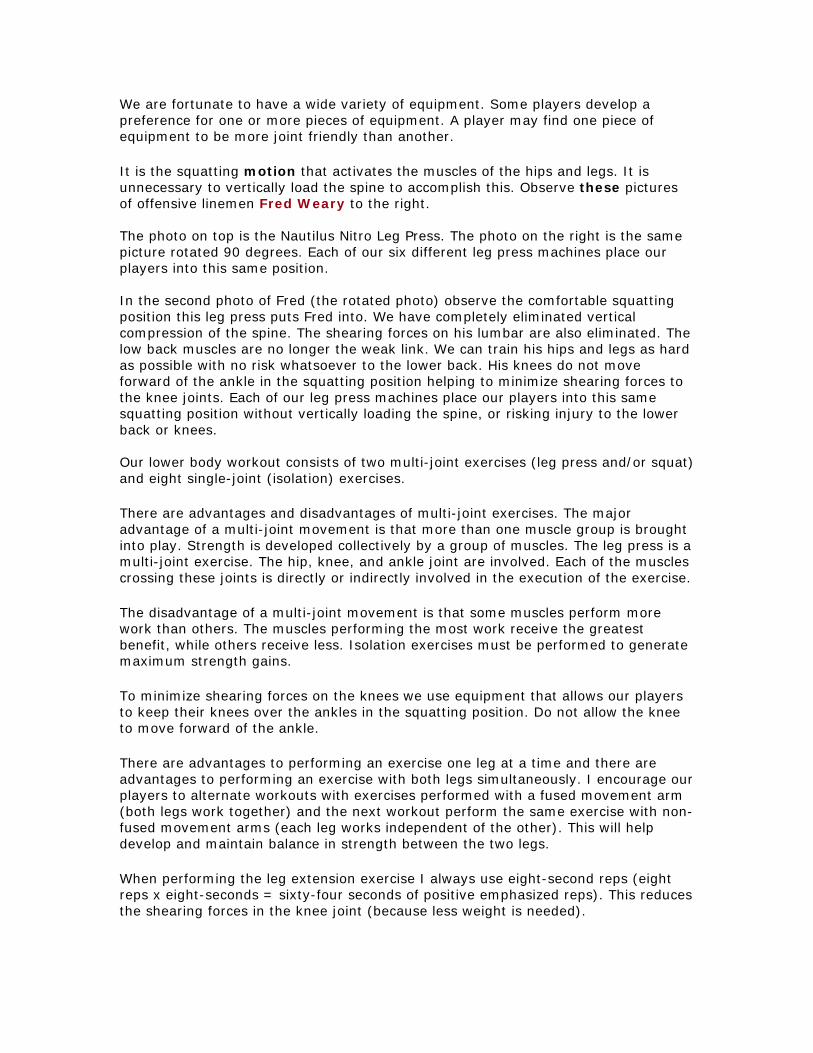
We are fortunate to have a wide variety of equipment. Some players develop a preference for one or more pieces of equipment. A player may find one piece of equipment to be more joint friendly than another.
It is the squatting motion that activates the muscles of the hips and legs. It is unnecessary to vertically load the spine to accomplish this. Observe these pictures of offensive linemen Fred Weary to the right. The photo on top is the Nautilus Nitro Leg Press. The photo on the right is the same picture rotated 90 degrees. Each of our six different leg press machines place our players into this same position. In the second photo of Fred (the rotated photo) observe the comfortable squatting position this leg press puts Fred into. We have completely eliminated vertical compression of the spine. The shearing forces on his lumbar are also eliminated. The low back muscles are no longer the weak link. We can train his hips and legs as hard as possible with no risk whatsoever to the lower back. His knees do not move forward of the ankle in the squatting position helping to minimize shearing forces to the knee joints. Each of our leg press machines place our players into this same squatting position without vertically loading the spine, or risking injury to the lower back or knees. Our lower body workout consists of two multi-joint exercises (leg press and/or squat) and eight single-joint (isolation) exercises.
There are advantages and disadvantages of multi-joint exercises. The major advantage of a multi-joint movement is that more than one muscle group is brought into play. Strength is developed collectively by a group of muscles. The leg press is a multi-joint exercise. The hip, knee, and ankle joint are involved. Each of the muscles crossing these joints is directly or indirectly involved in the execution of the exercise.
The disadvantage of a multi-joint movement is that some muscles perform more work than others. The muscles performing the most work receive the greatest benefit, while others receive less. Isolation exercises must be performed to generate maximum strength gains.
To minimize shearing forces on the knees we use equipment that allows our players to keep their knees over the ankles in the squatting position. Do not allow the knee to move forward of the ankle.
There are advantages to performing an exercise one leg at a time and there are advantages to performing an exercise with both legs simultaneously. I encourage our players to alternate workouts with exercises performed with a fused movement arm (both legs work together) and the next workout perform the same exercise with non-fused movement arms (each leg works independent of the other). This will help develop and maintain balance in strength between the two legs.
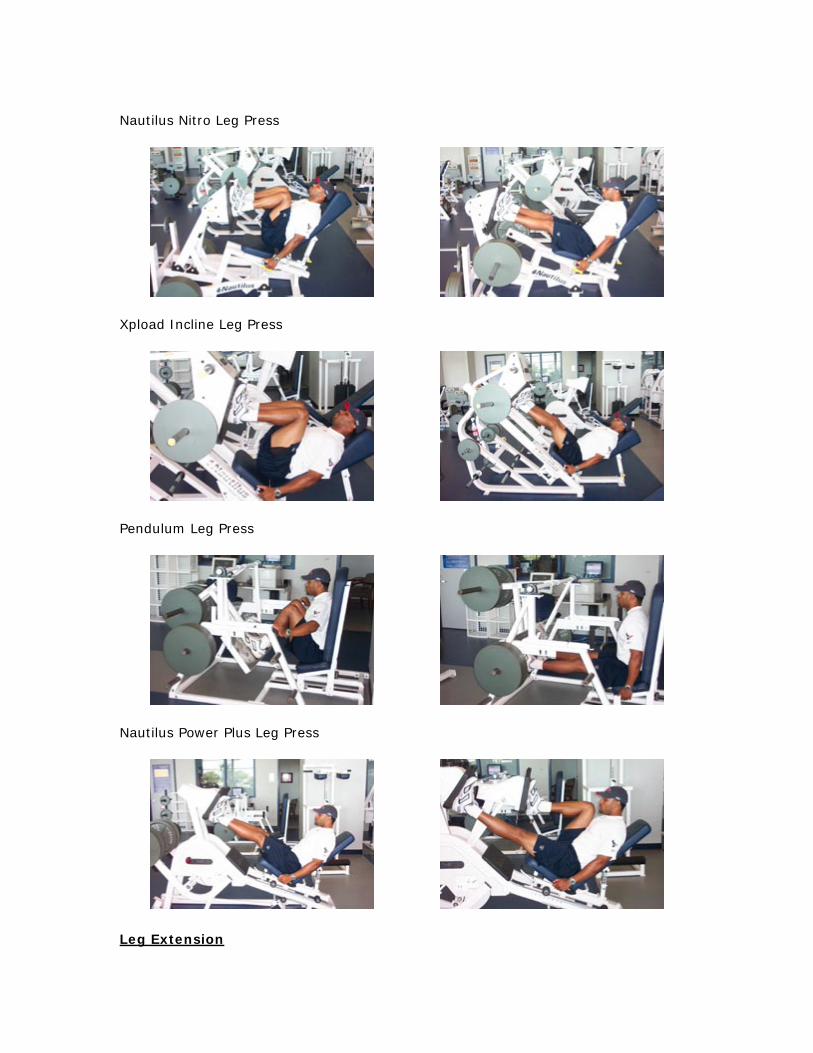
When performing the leg extension exercise I always use eight-second reps (eight reps x eight-seconds = sixty-four seconds of positive emphasized reps). This reduces the shearing forces in the knee joint (because less weight is needed).

All of the lower body exercises are listed on each player’s lower body computer sheet. All similar exercises are grouped together and listed from top to bottom in the following sequence:
Multi-joint Exercises
Hammer V-Squat
Pendulum Squat
Medx Leg Press
Avenger Leg Press
Nautilus Nitro Leg Press
Xpload Incline Leg Press
Pendulum Leg Press
Nautilus Power Plus Leg Press
Leg Extension
Nautilus 2st Leg Extension
Nautilus Nitro Leg Extension
Nautilus Xpload Leg Extension
Hammer Iso-Lateral Leg Extension
Avenger Leg Extension
Leg Curl
Nautilus 2ST Leg Curl
Nautilus Xpload Leg Curl
Hammer Kneeling Leg Curl
Hammer Iso-Lateral Leg Curl

Avenger Leg Curl
Hip Isolation Exercises
Hip Extension Legs Bent
Hip Extension Legs Straight
Hip Flexion
Hip Adduction
Hip Abduction
Calves
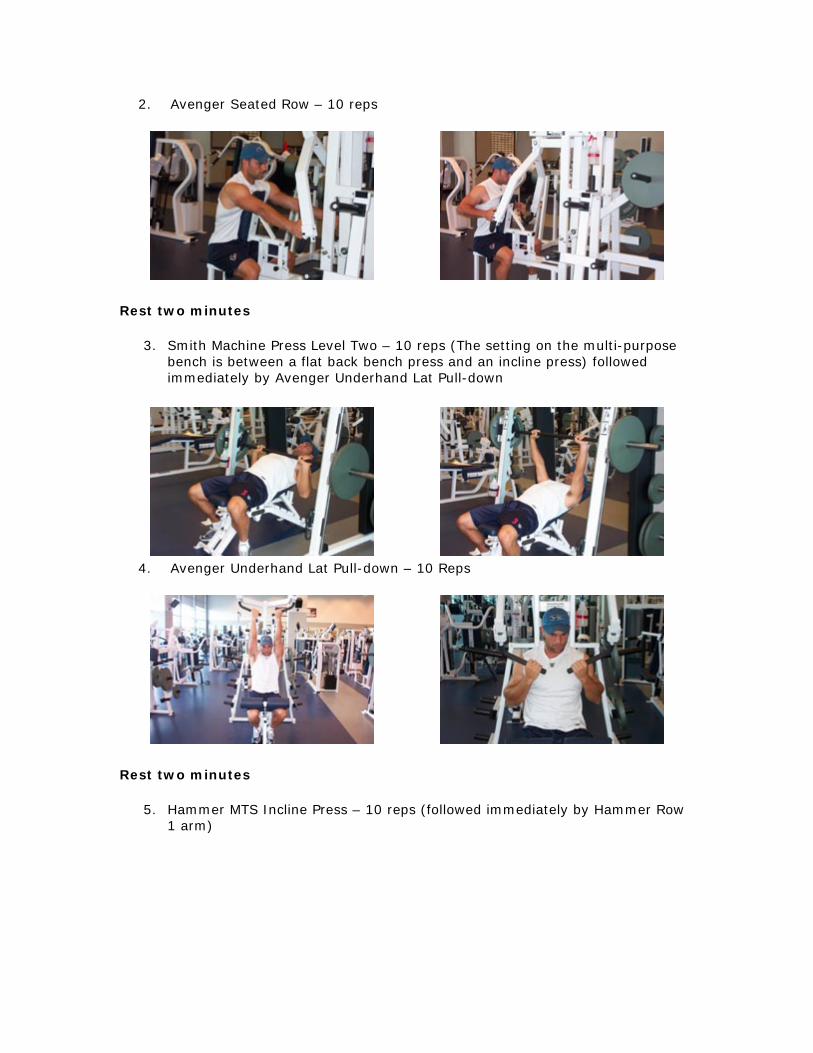
Seated Calf Raises
Standing Calf Raises

Our Push-Pull Routine is one of the most basic routines we have. It is the only upper body routine without any isolation exercises. All exercises are multi-joint. The purist will state that all muscles pull, they do not push. However, to simplify the process we state there are two types of upper body multi-joint movements:
• Pushing movement • Pulling movement
A pushing movement primarily incorporates the following major muscle groups:
1. Pectorals (chest)
2. Deltoids (shoulders)
3. Triceps (back of the upper arm) A pulling movement primarily incorporates the following major muscle groups:
1. Lats (upper back)
2. Biceps (front of the upper arm)
The basic multi-joint pushing movements we use in our program include the following:
1. Bench Press
2. Incline Press

3. Seated Press
4. Dips
Changing the exercising angle will place the body in a position to force a specific muscle group to contribute more than the others. The pectoral muscles are in a better position to perform more of the work while executing the supine bench press. The triceps and deltoids are working but they are not in a position to contribute as much work as the chest muscles.
Changing the exercising angle will place the emphasis on the deltoids. Pressing overhead (seated press) will place more emphasis on the deltoids and less on the pectorals.
The basic multi-joint pulling movements we use in our program include the following:
1. Lat pull-down
2. Seated Row
3. High-Row
4. Chin-up
The format for our Push-Pull Routine is pretty simple, alternate pushing and pulling movements. We utilize six pushing movements and five pulling movements. If you use strict form during the lowering of the weight, and pause momentarily in the muscles contracted position, your forearms will begin to fatigue.
Training tip: Do not over-grip or squeeze too hard while performing the pulling movements.
We change the angle of exercise and the type of equipment used. Some of the exercises are performed with equipment that provides a fused movement arm (both arms work together) and some of the exercises are performed with non-fused movement arms (each arm works independently).
For many years we allowed ninety seconds to recover between the completion of one exercise and the initiation of the next. After experimenting with our players and receiving good feedback, strength coach Ray Wright suggested that we modify the routine.
We now have our players perform a pushing movement and a pulling movement back to back without any rest. They move from a pushing movement to a pulling movement immediately. The recovery time has now been increased to two minutes followed by another push-pull sequence.
Remember that the key to generating maximum gains from the Push-Pull Routine or any of our Texans routines is:
1. Strictly adhere to the four Texans Rep Rules listed in the intro of our 10 – 8 Routines.
2. Keep accurate records each workout.
3. Attempt to add more weight and/or increase the number of reps you perform each workout until you are satisfied with your progress.
During the Push-Pull Routine our players perform ten reps of each exercise. Several warm-up sets are performed before beginning the workout. Once we begin the workout our players use as much weight as they can safely handle for each exercise. Our goal is to go up in weight whenever they successfully complete ten reps of any exercise.
Before executing the first exercise in a workout we ask our players to perform several warm-up sets. After the warm-up our goal is to select a weight that barely allows the player to complete the designated number of reps.
Our players perform somewhere between eight and twelve repetitions. For maximum gains our players use as much weight as they can properly handle for each set without sacrificing good form (observe Texans Rep Rules).
We ask our players to perform each rep strictly adhering to our Texans four Rep Rules:
Rule # 1 – Raise and lower the weight through the muscles full range of motion.
Rule # 2 – Eliminate momentum during the raising phase of each exercise.
Rule # 3 - Pause momentarily (stop for a count of 1001) in the muscle’s contracted position with a smooth transition from the raising of the weight to the lowering of the weight (no sudden drop).
Rule # 4 – Emphasize the lowering of the weight (take longer to lower the weight).
Push-Pull Routine Exercise Sequence
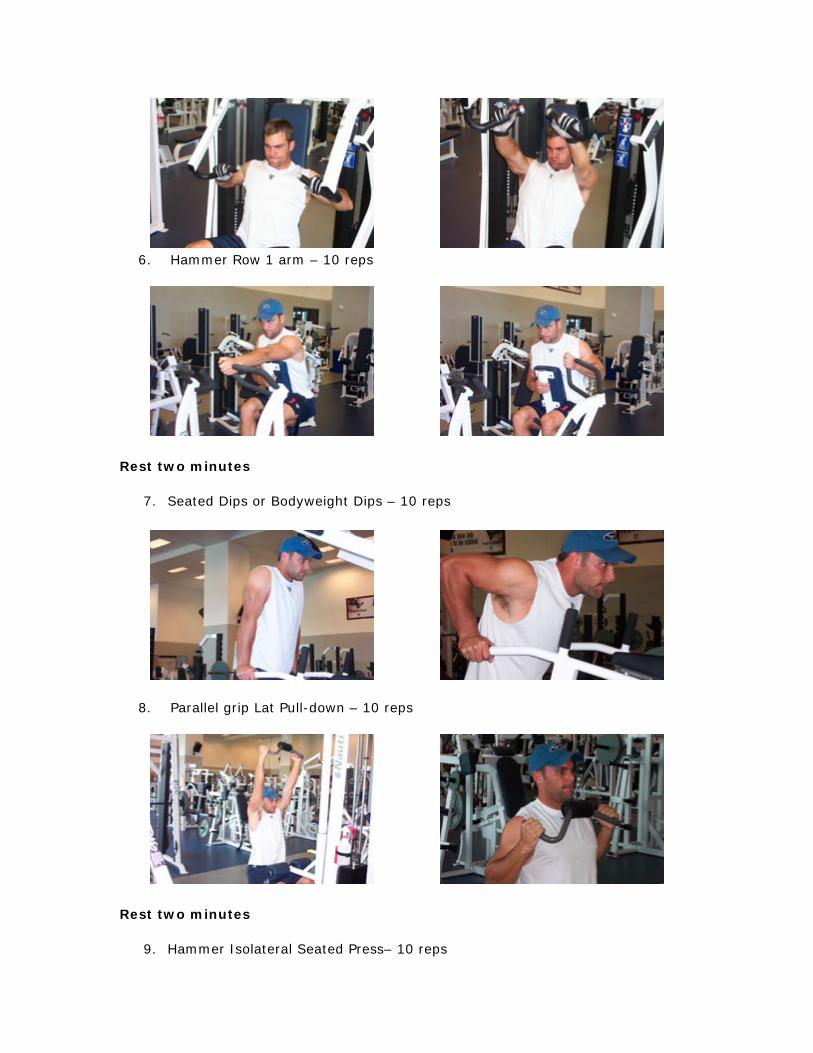
1. Barbell Bench Press – 10 reps (followed immediately by Avenger Seated Row)
2. Avenger Seated Row – 10 reps
Rest two minutes
3. Smith Machine Press Level Two – 10 reps (The setting on the multi-purpose bench is between a flat back bench press and an incline press) followed immediately by Avenger Underhand Lat Pull-down
4. Avenger Underhand Lat Pull-down – 10 Reps
Rest two minutes
5. Hammer MTS Incline Press – 10 reps (followed immediately by Hammer Row 1 arm)
6. Hammer Row 1 arm – 10 reps
Rest two minutes
7. Seated Dips or Bodyweight Dips – 10 reps
8. Parallel grip Lat Pull-down – 10 reps
Rest two minutes
9. Hammer Isolateral Seated Press– 10 reps

10. Nitro Seated Row – 10 reps
Rest two minutes
11. Avenger Seated Press – 10 reps
We periodically substitute different pushing and pulling movements to create new variety. There is no magical sequence to any push-pull routine. In our Push-Pull routine we begin the pushing movements in a supine (flat back) position and gradually increase the angle to a near vertical position (seated press). Our multi-purpose benches have six different settings ranging from zero degrees (flat) to ninety degrees. Our Smith Machine Elevator Routine is similar to the Dumbbell Elevator Routine. The exercise sequence is the same except for the following:
1. The Smith Machine is used for the pressing movements instead of dumbbells.
2. The Smith Machine is used for the first four Floors.

3. The Overhead Seated Press is a difficult movement to perform on the Smith Machine for our bigger players. Therefore on the Fifth Floor we substitute the Avenger Seated Press for the Smith Machine.
Each position is called a “Floor.” The workout begins on the First Floor with the Dumbbell Bench Press and ends on the Fifth Floor with the Dumbbell Seated Press. Our goal is to select a weight that barely allows the player to complete the last rep.
Before executing the first exercise in a workout we ask our players to perform several warm-up sets. After the warm-up our goal is to select a weight that barely allows the player to complete the designated number of reps.
Our players perform somewhere between eight and twelve repetitions. For maximum gains our players use as much weight as they can properly handle for each set without sacrificing good form (observe Texans Rep Rules).
We ask our players to perform each rep strictly adhering to our Texans four Rep Rules: Rule # 1 – Raise and lower the weight through the muscles full range of motion. Rule # 2 – Eliminate momentum during the raising phase of each exercise.
Rule # 3 - Pause momentarily (stop for a count of 1001) in the muscle’s contracted position with a smooth transition from the raising of the weight to the lowering of the weight (no sudden drop).
Rule # 4 – Emphasize the lowering of the weight (take longer to lower the weight).
Smith Machine Elevator Routine Exercise Sequence
Listed below is the exercise sequence of the Dumbbell Elevator Routine:
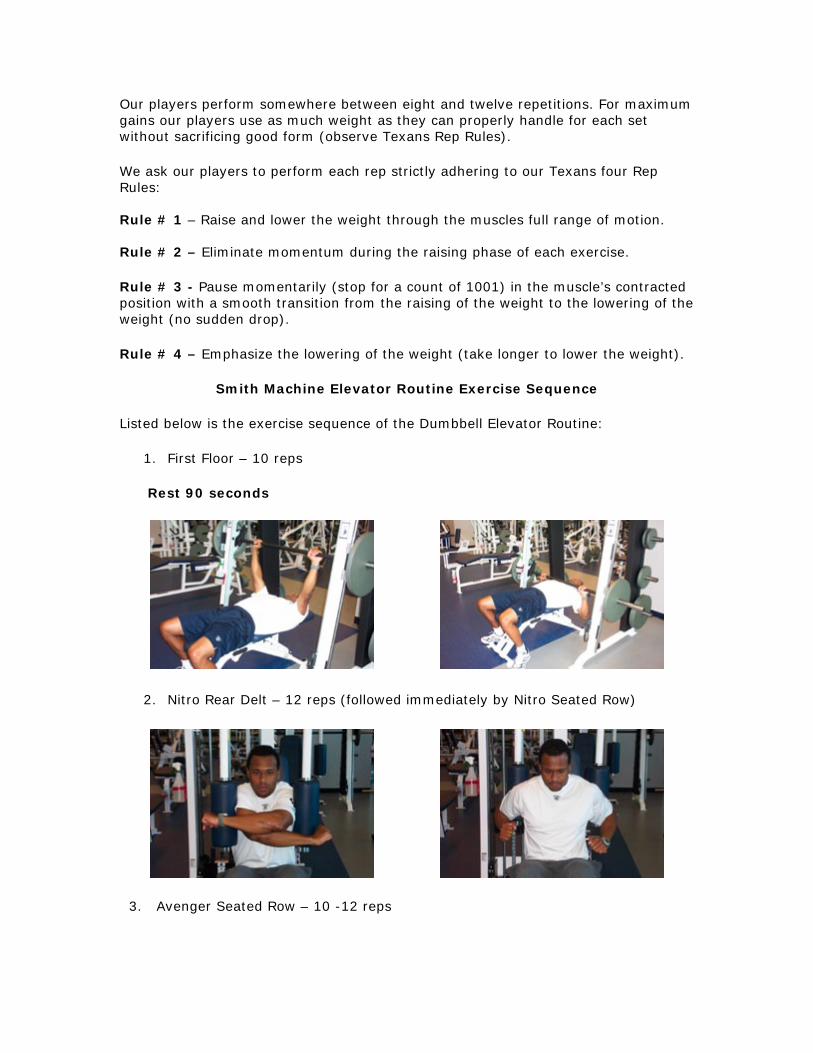
1. First Floor – 10 reps
Rest 90 seconds
2. Nitro Rear Delt – 12 reps (followed immediately by Nitro Seated Row)

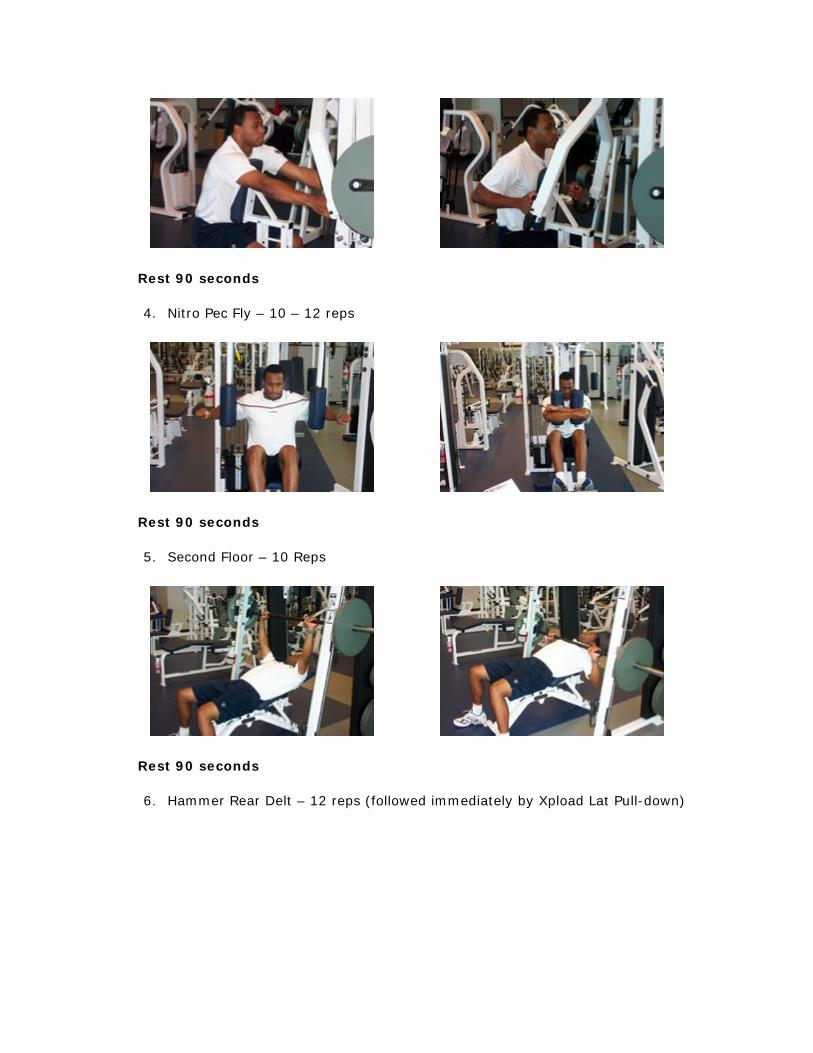
3. Avenger Seated Row – 10 -12 reps
Rest 90 seconds
4. Nitro Pec Fly – 10 – 12 reps
Rest 90 seconds
5. Second Floor – 10 Reps
Rest 90 seconds
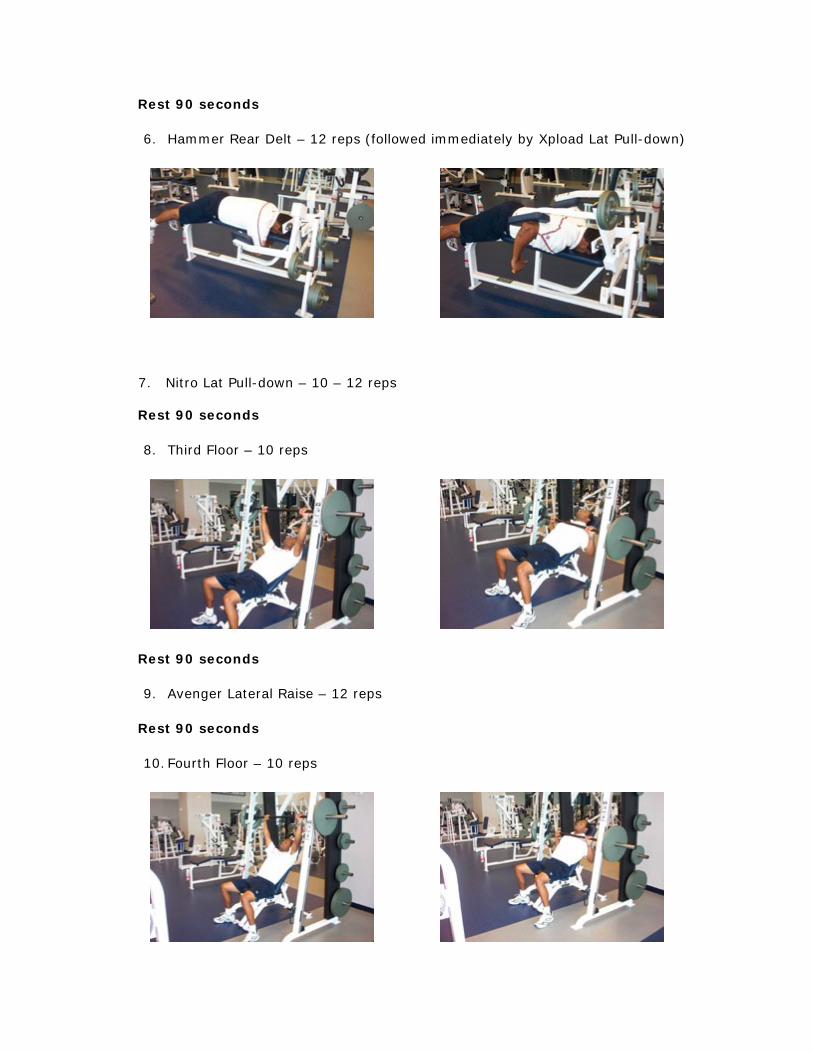
6. Hammer Rear Delt – 12 reps (followed immediately by Xpload Lat Pull-down)
7. Nitro Lat Pull-down – 10 – 12 reps Rest 90 seconds
8. Third Floor – 10 reps
Rest 90 seconds
9. Avenger Lateral Raise – 12 reps
Rest 90 seconds
10. Fourth Floor – 10 reps

Rest 90 seconds
11. Dumbbell Front Raise and/or Seated Front Raise with Plate – 10 reps
Rest 90 seconds
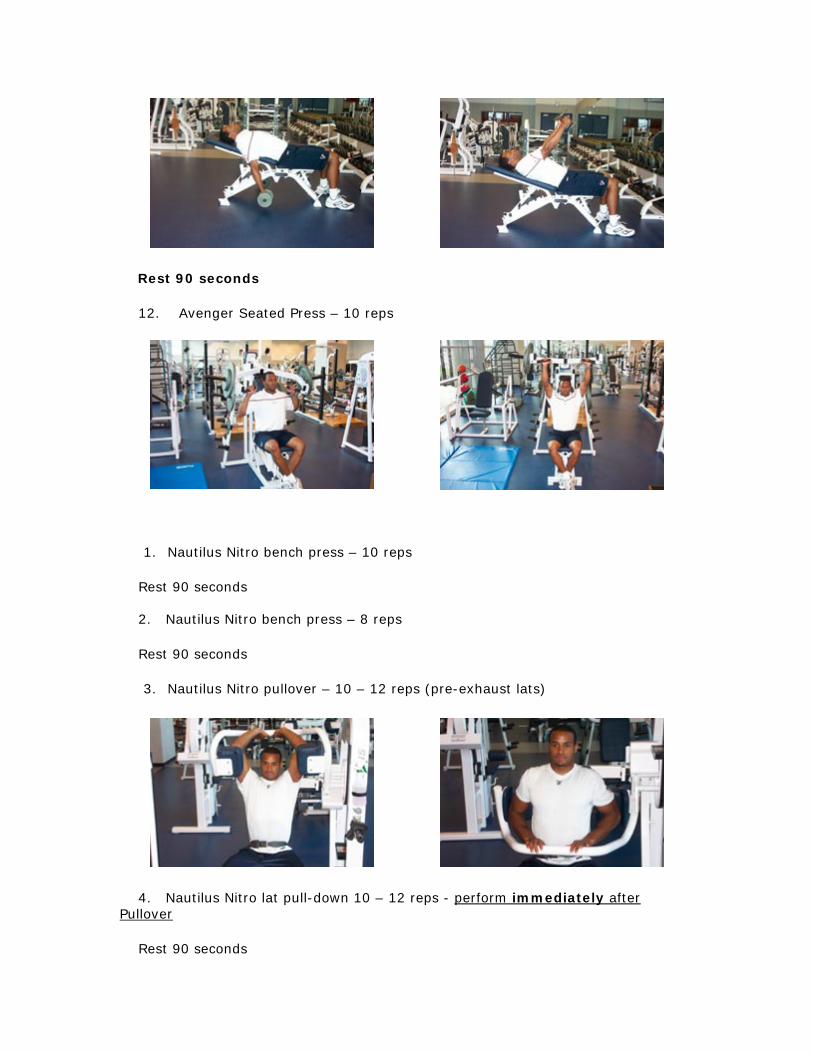
12. Avenger Seated Press – 10 reps
Our multi-purpose benches have six different settings ranging from zero degrees (flat) to ninety degrees. Our Smith Machine Elevator Routine is similar to the Dumbbell Elevator Routine. The exercise sequence is the same except for the following:
1. The Smith Machine is used for the pressing movements instead of dumbbells.
2. The Smith Machine is used for the first four Floors.
3. The Overhead Seated Press is a difficult movement to perform on the Smith Machine for our bigger players. Therefore on the Fifth Floor we substitute the Avenger Seated Press for the Smith Machine.
Each position is called a “Floor.” The workout begins on the First Floor with the Dumbbell Bench Press and ends on the Fifth Floor with the Dumbbell Seated Press. Our goal is to select a weight that barely allows the player to complete the last rep.
Before executing the first exercise in a workout we ask our players to perform several warm-up sets. After the warm-up our goal is to select a weight that barely allows the player to complete the designated number of reps.
Our players perform somewhere between eight and twelve repetitions. For maximum gains our players use as much weight as they can properly handle for each set without sacrificing good form (observe Texans Rep Rules).
We ask our players to perform each rep strictly adhering to our Texans four Rep Rules: Rule # 1 – Raise and lower the weight through the muscles full range of motion. Rule # 2 – Eliminate momentum during the raising phase of each exercise.
Rule # 3 - Pause momentarily (stop for a count of 1001) in the muscle’s contracted position with a smooth transition from the raising of the weight to the lowering of the weight (no sudden drop).
Rule # 4 – Emphasize the lowering of the weight (take longer to lower the weight).
Smith Machine Elevator Routine Exercise Sequence
Listed below is the exercise sequence of the Dumbbell Elevator Routine:
1. First Floor – 10 reps
Rest 90 seconds
2. Nitro Rear Delt – 12 reps (followed immediately by Nitro Seated Row)
3. Avenger Seated Row – 10 -12 reps
Rest 90 seconds
4. Nitro Pec Fly – 10 – 12 reps
Rest 90 seconds
5. Second Floor – 10 Reps
Rest 90 seconds
6. Hammer Rear Delt – 12 reps (followed immediately by Xpload Lat Pull-down)

7. Nitro Lat Pull-down – 10 – 12 reps Rest 90 seconds
8. Third Floor – 10 reps
Rest 90 seconds
9. Avenger Lateral Raise – 12 reps
Rest 90 seconds
10. Fourth Floor – 10 reps
Rest 90 seconds
11. Dumbbell Front Raise and/or Seated Front Raise with Plate – 10 reps
Rest 90 seconds
12. Avenger Seated Press – 10 reps
1. Nautilus Nitro bench press – 10 reps
Rest 90 seconds 2. Nautilus Nitro bench press – 8 reps
Rest 90 seconds
3. Nautilus Nitro pullover – 10 – 12 reps (pre-exhaust lats)
4. Nautilus Nitro lat pull-down 10 – 12 reps - perform immediately after Pullover
Rest 90 seconds

5. Nautilus Nitro incline press – 10 reps
Rest 90 seconds
6. Nautilus Nitro incline press – 8 reps
Rest 90 seconds
7. Nautilus Nitro Rear Delt – 12 reps (pre-exhaust rear delt & upper back)
8. Nautilus Nitro seated row 10 – 12 reps - perform immediately after Rear Delt
Rest 90 seconds
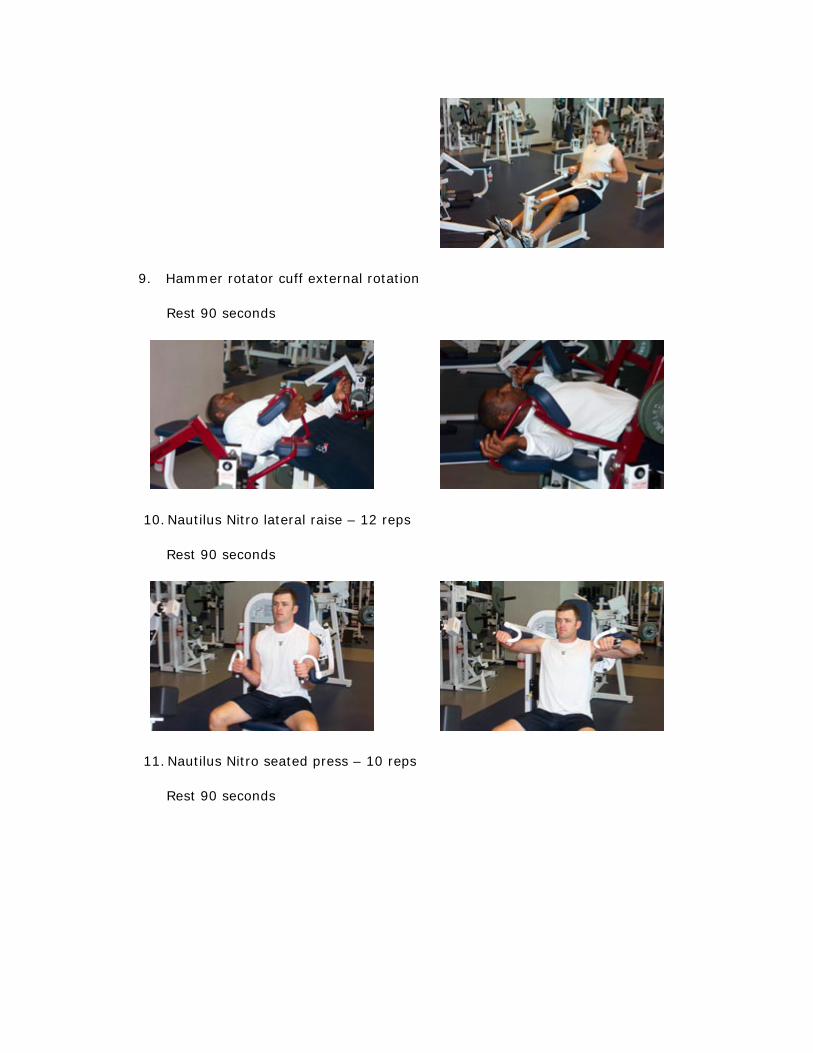
9. Hammer rotator cuff external rotation
Rest 90 seconds
10. Nautilus Nitro lateral raise – 12 reps
Rest 90 seconds
11. Nautilus Nitro seated press – 10 reps
Rest 90 seconds

12. Nautilus Nitro seated press – 8 reps
1. Hammer MTS decline press – 10 reps
Rest 90 seconds
2. Hammer MTS decline press – 8 reps
Rest 90 seconds
3. Nautilus Nitro Pullover – 10 – 12 reps (pre-exhaust lats)
4. Hammer MTS High Row 10 – 12 reps - perform immediately after Pullover
Rest 90 seconds

5. Hammer MTS incline press – 10 reps
Rest 90 seconds
6. Hammer MTS incline press – 8 reps
Rest 90 seconds
7. Nautilus Nitro Rear Delt – 12 reps (pre-exhaust rear delt & upper back)
8. Hammer MTS seated row 10 – 12 reps - perform immediately after Rear Delt
Rest 90 seconds
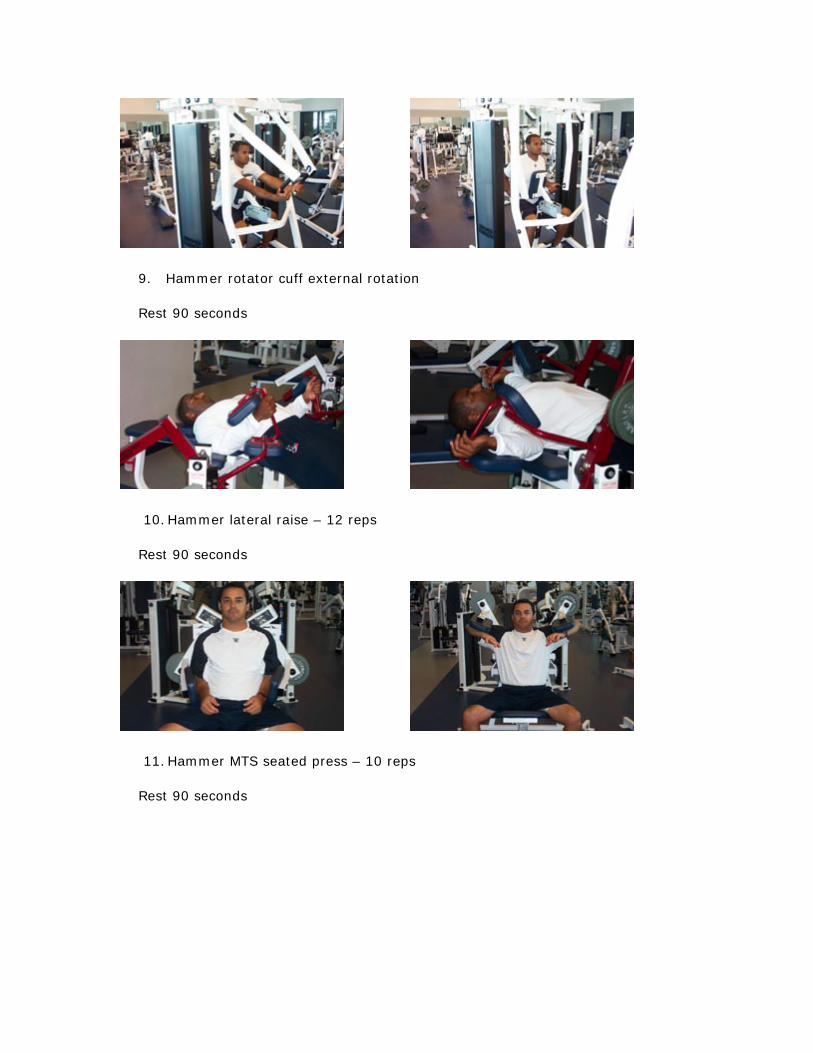
9. Hammer rotator cuff external rotation
Rest 90 seconds
10. Hammer lateral raise – 12 reps
Rest 90 seconds
11. Hammer MTS seated press – 10 reps
Rest 90 seconds

12. Hammer MTS seated press – 8 reps
1. Hammer Indy bench press – 10 reps
Rest 90 seconds
2. Hammer Indy bench press – 8 reps
Rest 90 seconds
3. Avenger Pullover – 10 – 12 reps (pre-exhaust lats)
4. Underhand lat pull-down 10 – 12 reps - perform immediately after Pullover
Rest 90 seconds
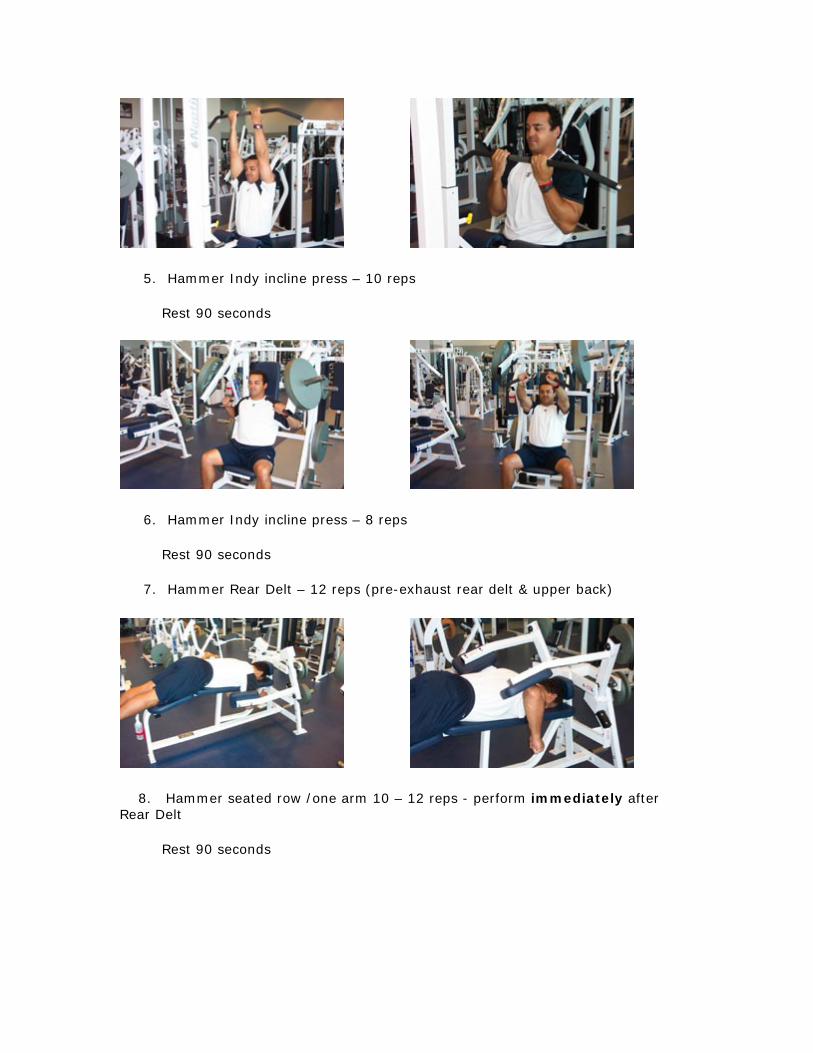
5. Hammer Indy incline press – 10 reps
Rest 90 seconds
6. Hammer Indy incline press – 8 reps
Rest 90 seconds
7. Hammer Rear Delt – 12 reps (pre-exhaust rear delt & upper back)
8. Hammer seated row /one arm 10 – 12 reps - perform immediately after Rear Delt
Rest 90 seconds

9. Hammer rotator cuff external rotation
Rest 90 seconds
10. Hammer lateral raise – 12 reps
Rest 90 seconds
11. Hammer Indy seated press – 10 reps
Rest 90 seconds

12. Hammer Indy seated press – 8 reps
1. Xpload bench press – 10 reps
Rest 90 seconds
2. Xpload bench press – 8 reps
Rest 90 seconds
3. Parallel grip lat pull-down/Underhand lat pull-down -- 10-12 reps
Rest 90 seconds
4. Xpload incline press – 10 reps
Rest 90 seconds

5. Xpload incline press – 8 reps
Rest 90 seconds
6. Xpload seated row 10 – 12 reps
Rest 90 seconds
7. Hammer rotator cuff external rotation
Rest 90 seconds
8. Xpload lat pull-down 10 -12 reps
Rest 90 seconds
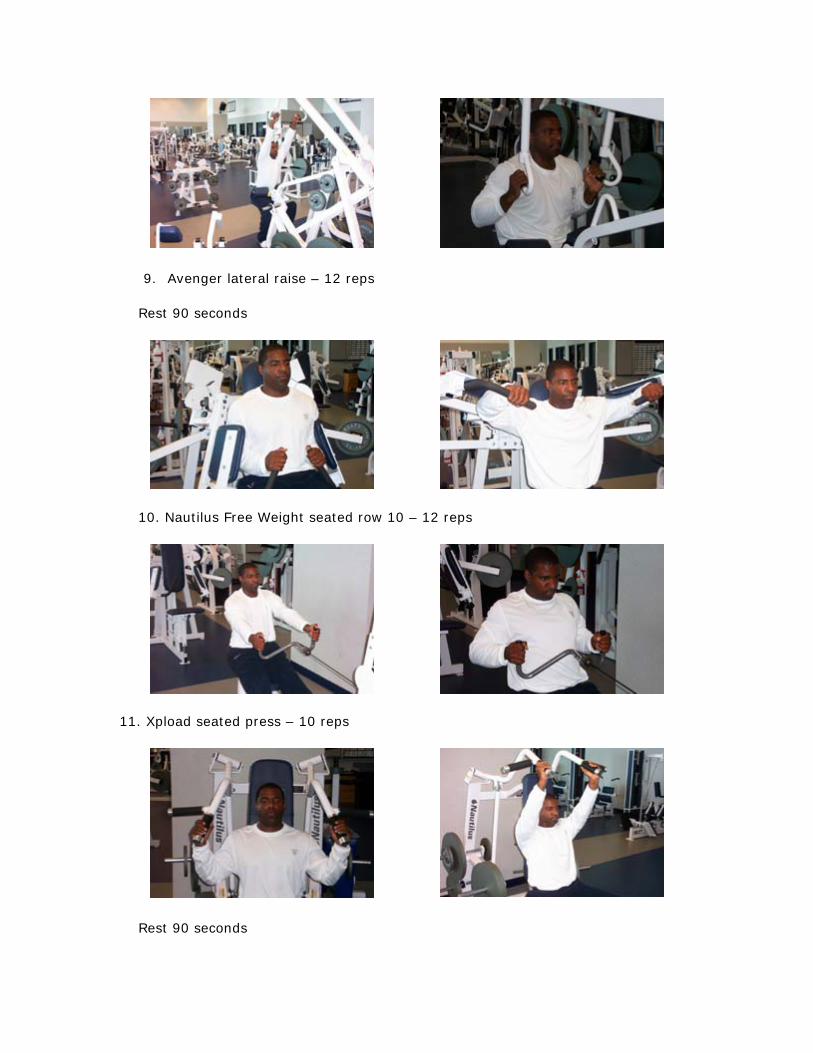
9. Avenger lateral raise – 12 reps
Rest 90 seconds
10. Nautilus Free Weight seated row 10 – 12 reps
11. Xpload seated press – 10 reps
Rest 90 seconds
12 Xpload seated press – 8 reps
The Xpload 10 – 8 routine is a little different than our standard 10 – 8 exercise sequence. This routine has the basic 10 – 8 format for the bench press, incline press, and seated press. It does not include the Pullover exercise or the Rear Delt exercise featured in each of the other 10 – 8 routines. Our standard 10 – 8 routines include two pulling movements (seated row and lat pull-down). The Xpload routine contains four pulling movements (two seated row, two lat-pulldown).
What is the reason for the variation in the 10 – 8 routine? Variety! Variety! Variety!
Lifting weights can become tedious (even for an NFL player). We encourage you to create variety in your routines.
Remember, there is no magical routine or exercise sequence. The key to maximum strength gains is how each rep is executed and the intensity of each set. Your genetic potential will ultimately determine how favorably you respond to properly performed strength training.
Players Kris Brown, Steve McKinney, Chad Stanley, Sloan Thomas, Glenn Earl, and strength coaches Ray Wright, Everett Coleman, and Virgil Campbell, demonstrated our 10-8 routines. We receive many requests for a program or a workout. There is nothing magical or special about our routines. Remember, there are no magical routines or exercise sequence. The key to maximum strength gains is how each rep is executed and the intensity of each set. Your genetic potential will ultimately determine how favorably you respond to properly performed strength training.
Our players have 12 upper body workouts to choose from. To create variety for our players we utilize a variety of equipment. Some routines feature a barbell (Barbell 3 x 6), a dumbbell (Dumbbell 10 – 8 or Dumbbell Elevator), a combination of equipment (Free Weight Combo Platter), a Smith Machine (Smith Machine 10 – 8, Smith Machine Elevator, Smith Machine Half Reps), or a variety of machines (Hammer Isolateral, Hammer MTS, Nautilus Nitro, Nautilus Xpload, Avenger).
Ten of the twelve routines incorporate both multi-joint and single joint exercises. One routine features only single-joint exercises (No Hands Routine) and one routine contains only multi-joint exercises (Push-Pull Routine).
There are three major muscle groups composing the upper body. The three major areas of the upper body include the following:
1. Chest (bench press, incline press, pec flyes) 2. Upper back (lat pull-down, seated row, chin-ups)
3. Shoulders (seated press, lateral raise, front raise, rear delt, rotator cuff external rotation)
If there is an area of priority for a football player it must be the shoulders. There are four major compartments composing the deltoids. The four areas of the deltoid include the following:
1. Anterior head (frontal deltoid) 2. Medial head (middle deltoid) 3. Posterior deltoid (rear deltoid) 4. Rotator cuff (four muscles that rotate the shoulder internally and externally)
If injury prevention is a priority an isolation exercise must be performed for each area of the deltoid. These exercises are a must for a football player.
1. Anterior head-front raise 2. Medial head-lateral raise 3. Posterior head-bent-over-raise 4. Rotator cuff-external rotation
Before executing the first exercise in a workout we ask our players to perform several warm-up sets. After the warm-up our goal is to select a weight that barely allows the player to complete the designated number of reps.
Our players perform somewhere between eight and twelve repetitions. For maximum gains our players use as much weight as they can properly handle for each set without sacrificing good form (observe Texans Rep Rules).
We ask our players to perform each rep strictly adhering to our Texans four Rep Rules:
Rule # 1 – Raise and lower the weight through the muscles full range of motion.
Rule # 2 – Eliminate momentum during the raising phase of each exercise.
Rule # 3 - Pause momentarily (stop for a count of 1001) in the muscle’s contracted position with a smooth transition from the raising of the weight to the lowering of the weight (no sudden drop).
Rule # 4 – Emphasize the lowering of the weight (take longer to lower the weight).
Our players currently have twelve upper body routines to choose from. Six of those upper body routines are listed on the player’s computer workout menu as “10 – 8 Routines.” Our 10 – 8 Routines include the following workouts:
1. Dumbbell 10 – 8 2. Hammer Indy 10 – 8

3. Hammer MTS 10 – 8 4. Smith Machine 10 – 8 5. Nautilus Nitro 10 – 8 6. Nautilus Xpload 10 – 8
Our players also have six additional upper body routines in their computer file. They include the following:
1. Barbell 3 x 6 2. Dumbbell Elevator 3. Smith Machine Elevator 4. Free Weight Combo Platter 5. Push – Pull 6. No Hands
During our 10-8 routines our player’s perform two sets (10 reps & 8 reps) of the following exercises:
Bench press
Incline press
Seated press
The remainder of the exercises composing the 10 – 8 Routines include the following exercises. Only one all out set (10 – 12 reps) is performed for each of the exercises listed below:
Pullover
Lat pull-down
Rear delt
Seated Row
Rotator cuff external rotation
Lateral raise
The exercise sequence for our 10 – 8 Routines is the same for each of the six 10 – 8 workouts listed above. The only difference in each of the 10 - 8 routines is the equipment used to perform the same exercises. To create variety we substitute different pieces of equipment.
10 – 8 Routine Exercise Sequence
1. Bench press – 10 reps
Rest 90-seconds

2. Bench press – 8 reps
Rest 90 seconds
3. Pullover – 10 – 12 reps (pre-exhaust lats) 4. Lat pull-down 10 – 12 reps (performed immediately after Pullovers)
Rest 90 seconds
5. Dumbbell incline press – 10 reps
Rest 90 seconds
6. Dumbbell incline press – 8 reps
Rest 90 seconds
7. Rear Delt – 12 reps (pre-exhaust rear delt & upper back) 8. Seated row 10 – 12 reps (performed immediately after rear delt)
Rest 90 seconds
9. Rotator cuff external rotation
Rest 90 seconds
10. Lateral raise – 12 reps (pre-exhaust deltoids)
Rest 90 seconds
11. Seated press – 10 reps
Rest 90 seconds
12. Seated press – 8 reps
Total number of reps = 126
Total workout time = 24 minutes
Total time spent exercising (average of five seconds/rep) = 10 minutes 30 seconds
Total time spent resting between exercises: 13 minutes 30 seconds
As soon as a player can complete ten good reps we increase the weight for his next workout. We use the same protocol for the second set (of eight reps). When eight good reps can be completed we increase the weight for his next workout. Our goal is to add weight on one, or both sets whenever possible.
A maximum effort on the first set will require a decrease in weight on the second set (if a near maximum effort is exerted on the first set and if no more than 90 seconds rest is taken between sets).
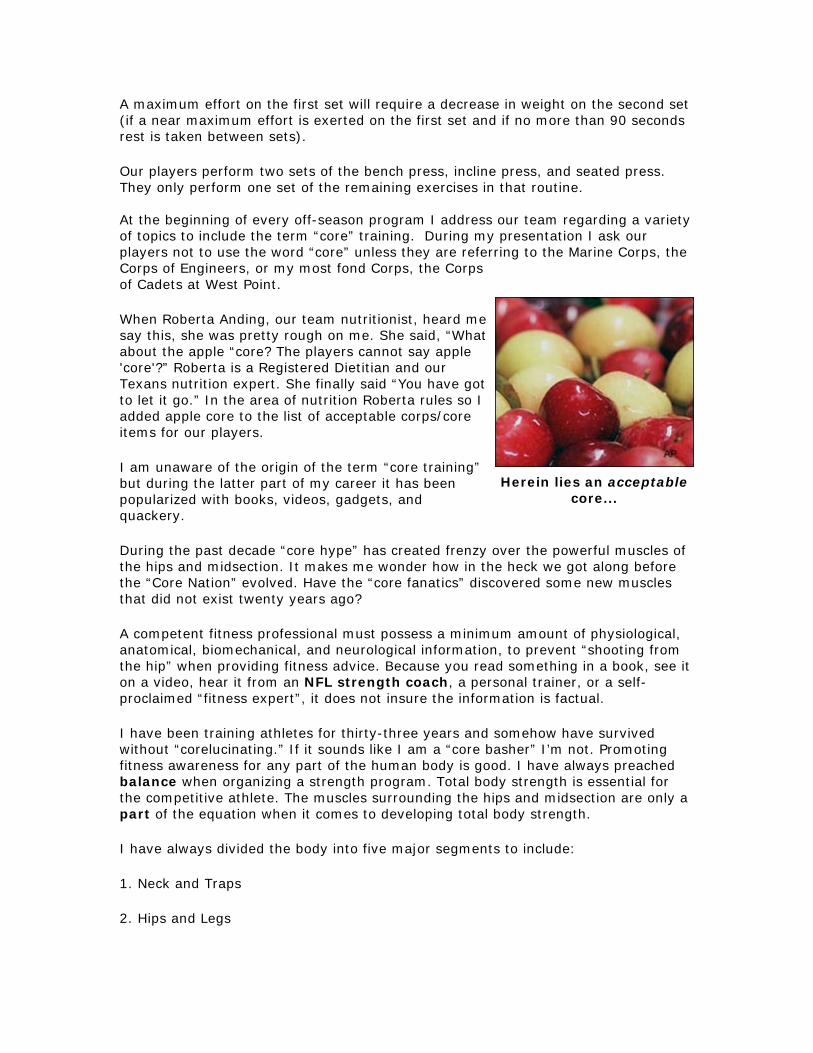
Our players perform two sets of the bench press, incline press, and seated press. They only perform one set of the remaining exercises in that routine. At the beginning of every off-season program I address our team regarding a variety of topics to include the term “core” training. During my presentation I ask our players not to use the word “core” unless they are referring to the Marine Corps, the Corps of Engineers, or my most fond Corps, the Corps of Cadets at West Point.
When Roberta Anding, our team nutritionist, heard me say this, she was pretty rough on me. She said, “What about the apple “core? The players cannot say apple 'core'?” Roberta is a Registered Dietitian and our Texans nutrition expert. She finally said “You have got to let it go.” In the area of nutrition Roberta rules so I added apple core to the list of acceptable corps/core items for our players.
I am unaware of the origin of the term “core training” but during the latter part of my career it has been popularized with books, videos, gadgets, and quackery.
During the past decade “core hype” has created frenzy over the powerful muscles of the hips and midsection. It makes me wonder how in the heck we got along before the “Core Nation” evolved. Have the “core fanatics” discovered some new muscles that did not exist twenty years ago?
A competent fitness professional must possess a minimum amount of physiological, anatomical, biomechanical, and neurological information, to prevent “shooting from the hip” when providing fitness advice. Because you read something in a book, see it on a video, hear it from an NFL strength coach, a personal trainer, or a self-proclaimed “fitness expert”, it does not insure the information is factual.
I have been training athletes for thirty-three years and somehow have survived without “corelucinating.” If it sounds like I am a “core basher” I’m not. Promoting fitness awareness for any part of the human body is good. I have always preached balance when organizing a strength program. Total body strength is essential for the competitive athlete. The muscles surrounding the hips and midsection are only a part of the equation when it comes to developing total body strength.
I have always divided the body into five major segments to include:
1. Neck and Traps
2. Hips and Legs
Herein lies an acceptable
core...
3. Midsection
4. Upper Body
5. Arms
In our program we teach our players that every muscle group and all exercises are equally important. As a strength coach, my number one priority is short-term and long-term injury prevention. In the area of injury prevention the muscles of the “core” are no more important than any other muscle group in the body.
If there is a priority, and protection is a concern, the muscles of the neck, traps, and muscles surrounding the shoulder capsule must have the highest priority for any athlete engaged in activities involving collisions and physical contact.
Most athletes and fitness enthusiasts understand the value of emphasizing the core (and that is good). What is perplexing is the lack of emphasis on more important areas of the body (and that is not good). We often inherit players with underdeveloped and ignored neck and shoulder muscles. Significant deficiencies exist. Isolation exercises must be performed to target these critical areas.
In this installation of the Fitness Corner we provide information regarding our player’s midsection routine. The midsection is primarily made up of three major muscle groups (the Thoracic muscles are primarily involved in breathing). They include the following:
1. Trunk flexors 2. Trunk rotators 3. Trunk extensors
In their text, Anatomy & Physiology, Seeley, Stephens, and Tate, list (p. 325 – 331 tables 11.8 – 11.10) the major muscle groups moving the vertebral column and the abdominal wall. Also listed are the major functions of each group. I do not want to bore anyone with the anatomical names of all the muscles involved but I have included those composing the abdominal wall. Muscle Function
Rectus Abdominus External abdominal oblique Internal abdominal oblique Transversus abdominis Quadratus lumborum
Flexes vertebral column, compresses abdomen Flexes and rotates vertebral column; compress abdomen; depresses thorax Flexes and rotates vertebral column; compresses abdomen; depresses thorax Compresses abdomen Laterally flexes vertebral column and depresses twelfth rib
Observe the function of the muscles composing the midsection. The muscles of the low back and abdominal region primarily flex, rotate, and extend the trunk.

The term “stabilizer” is another trendy “core” term used with reverence by many fitness professionals. Do the muscles of the core serve as stabilizers? Absolutely, however most muscles in the body serve as a stabilizer in some capacity. Almost every muscle in our body stabilizes to help keep us erect. If these muscles did not stabilize, the body would collapse to the floor.
In his book Primary Anatomy, Basmajian refers to these muscles as fixators or postural muscles. He states the following:
“A great many muscles that have nothing to do with the actual performance of the specific feat come into play to ‘fix’ the position of the body as a whole; these are known as fixators or postural muscles. In most, if not all, group movements, fixators play their part. When for example, the elbow is to be flexed, it becomes necessary to fix (stabilize) the shoulder joint in a suitable position, in order to steady the whole elbow region; the shoulder muscles, thus contributing to the efficient working of the elbow flexors, act as fixators.”
Do I consider elbow flexion a good exercise to strengthen the shoulder muscles due to their involvement as stabilizers? Common sense tells us the answer is no. Specific exercises designed to target each of the shoulder muscles must be performed. The shoulder strength gained is insignificant and only at one fixed point. Basmajian calls this additional exercise as “dubious at best.”
To generate maximum gains in strength throughout the entire muscle, the Sliding Filament Theory tells us a muscle must be shortened (concentrically) and lengthened (eccentrically) through its full range of motion.
Most muscles serving as stabilizers remain in a fixed position (static contraction). Many years ago isometric exercise became very popular until researchers determined strength was developed only at the specific angle the muscle was exercised at. Strength was unaffected throughout the full range of motion of the muscles involved. Full range exercise is not developed when a muscle is forced to exercise in a fixed position.
For example, when one of our players properly performs a set of negative only chin-ups for the first time (right), his abdominals are very sore the next day. The abs are forced to perform a significant amount of strenuous work stabilizing the abdominal wall during the execution of this very demanding exercise.
Are the abs working (stabilizing) exceptionally hard to stabilize the abdominal wall while performing a negative only chin-up? Absolutely.
Would I recommend negative only chin-ups to develop the abdominal muscles? Absolutely not. Performing any exercise at one fixed point violates the physiological requirements for full-range exercise.
Perform an Air Seat against the wall (right). Are the muscles of the hips and legs working hard at one fixed point? Absolutely. Is this a good exercise to develop strength throughout the full range of motion? Absolutely not. Because an exercise is hard does not necessarily mean it is the most productive alternative available.

Equipment manufacturers have recognized the anatomical and physiological needs of muscles by designing structurally sound equipment for single-joint (isolation) exercises. Fitness professionals must understand and recognize the need for direct resistance and rotary resistance when exercising the muscles of the core. Fitness professionals must also recognize the limitation of equipment that only provides straight-line resistance while performing a rotary movement.
We are fortunate to have a well-equipped facility. Whenever possible, when performing an isolation exercise, try to find equipment designed to provide direct and rotary resistance.
We teach our players to view the muscles of the midsection in the same manner as any other muscle group. We apply the same Rep Rules for exercises for the midsection as we do any other exercise.
1. Eliminate momentum during the raising phase. For example while performing sit-ups or ab crunches, some lifters perform what we call throw-ups and fall-downs. Instead of raising the weight in a very smooth manner the lifter snaps the elbows and head forward jerking the body (this will make the exercise easier). In the starting position of a sit-up (below) or crunch we ask our players to eliminate cheating (eliminate the use of the head and elbows to help raise the weight) by crossing the arms on the chest and gently tucking the head forward. This will also put tension on the abs in the starting position. Once you start the exercise do not allow the head to return to the ab board until you have finished the last rep. When the head returns to the ab board it allows the muscles to momentarily rest. It should be the goal to make all exercises harder, not easier.
2. Pause momentarily in the muscles fully contracted position (below). When it comes time to train the abs we sometimes see fitness enthusiasts strap on their
Direct and rotary resistance
Straight-line resistance
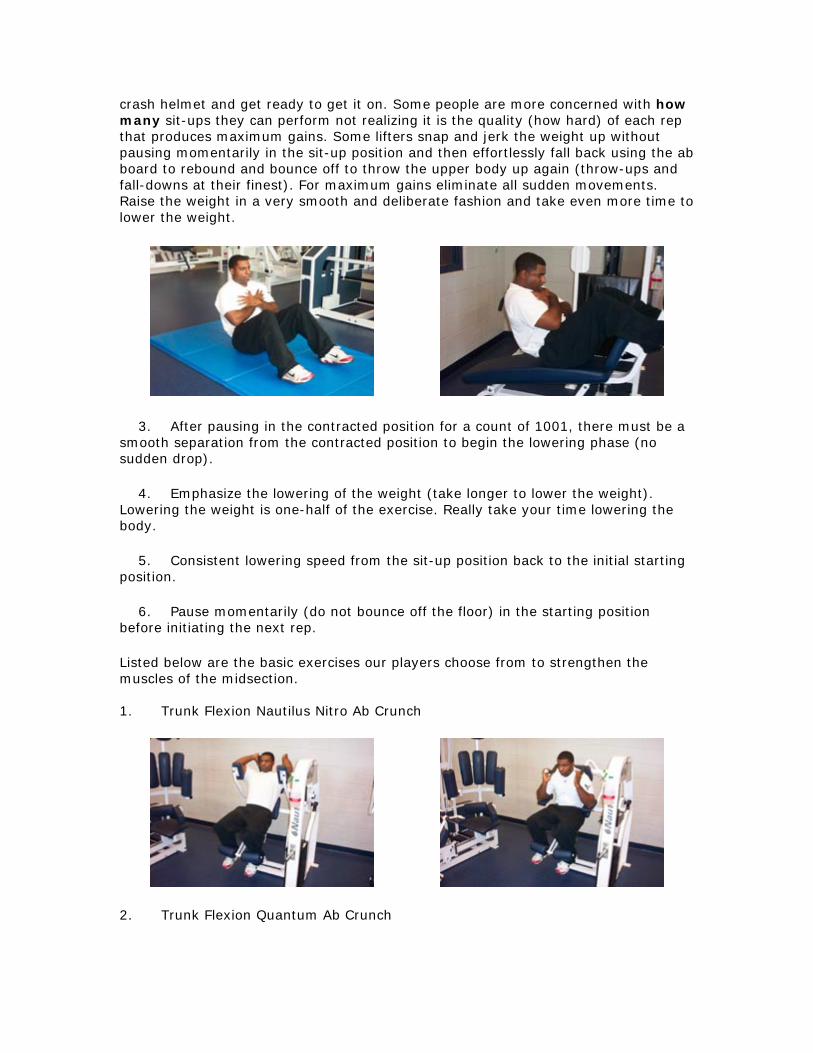
crash helmet and get ready to get it on. Some people are more concerned with how many sit-ups they can perform not realizing it is the quality (how hard) of each rep that produces maximum gains. Some lifters snap and jerk the weight up without pausing momentarily in the sit-up position and then effortlessly fall back using the ab board to rebound and bounce off to throw the upper body up again (throw-ups and fall-downs at their finest). For maximum gains eliminate all sudden movements. Raise the weight in a very smooth and deliberate fashion and take even more time to lower the weight.
3. After pausing in the contracted position for a count of 1001, there must be a smooth separation from the contracted position to begin the lowering phase (no sudden drop).
4. Emphasize the lowering of the weight (take longer to lower the weight). Lowering the weight is one-half of the exercise. Really take your time lowering the body.
5. Consistent lowering speed from the sit-up position back to the initial starting position.
6. Pause momentarily (do not bounce off the floor) in the starting position before initiating the next rep.
Listed below are the basic exercises our players choose from to strengthen the muscles of the midsection. 1. Trunk Flexion Nautilus Nitro Ab Crunch
2. Trunk Flexion Quantum Ab Crunch
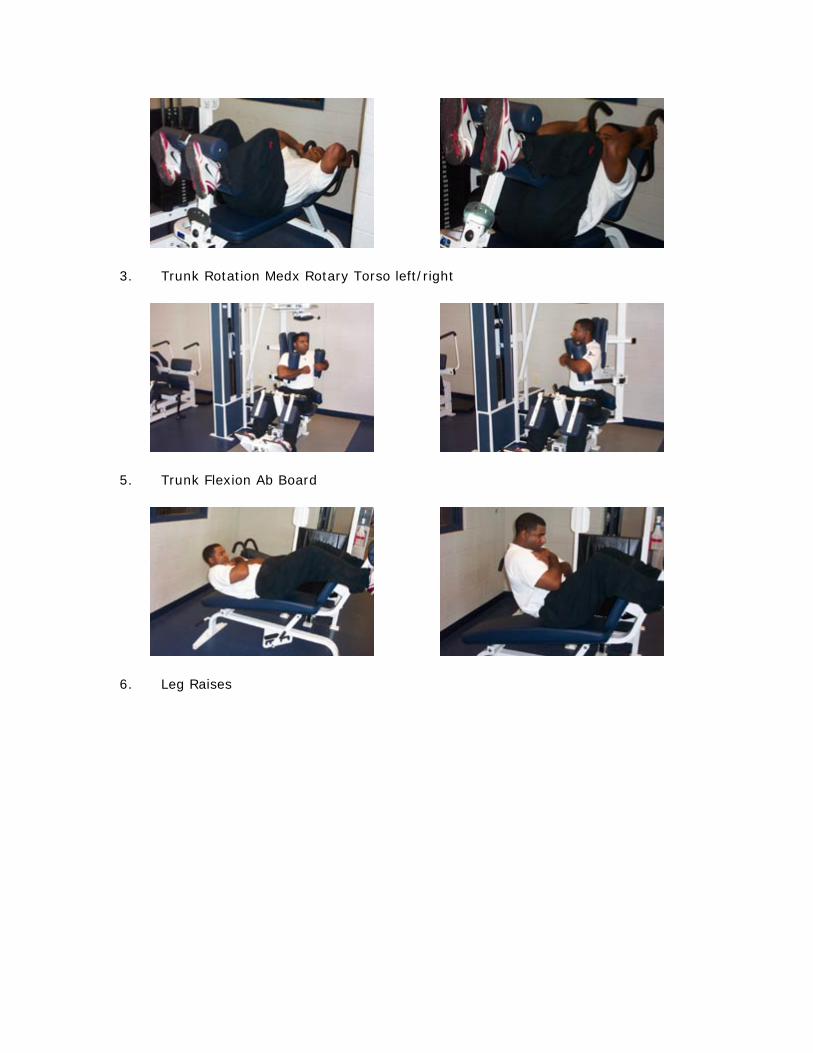
3. Trunk Rotation Medx Rotary Torso left/right
5. Trunk Flexion Ab Board
6. Leg Raises
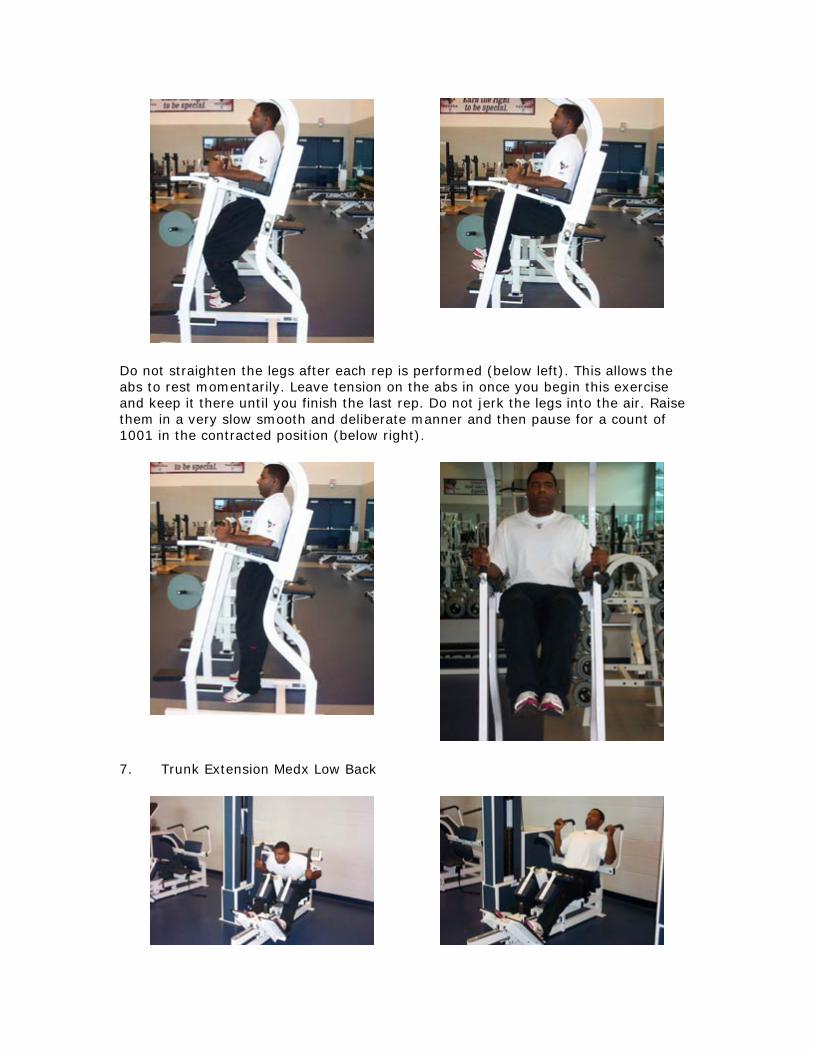
Do not straighten the legs after each rep is performed (below left). This allows the abs to rest momentarily. Leave tension on the abs in once you begin this exercise and keep it there until you finish the last rep. Do not jerk the legs into the air. Raise them in a very slow smooth and deliberate manner and then pause for a count of 1001 in the contracted position (below right).
7. Trunk Extension Medx Low Back

8. Trunk Extension Back Extension
Our standard midsection routine incorporates the following sequence. Any additional exercise (leg raises or more than one crunch) is optional.
1. Trunk Flexion – 12 – 15 reps
2. Trunk Rotation – 12 reps
3. Trunk Extension – 12 reps
In the past I over-trained the abdominals. I assumed that the abs needed hundreds of reps to reach their maximum potential. I have learned the hard way (after wasting significant time on non-productive exercise). To increase the strength of any muscle, overload must be provided (more weight/and/or more reps). Too many reps (time under load) and muscle endurance will improve but not the anaerobic strength and power.
If a person continues to use his/her bodyweight, the muscles of the midsection will eventually adapt to the weight of the torso. The abdominals (or low back muscles) will eventually stop gaining strength if more resistance is not applied.
Our players can increase the resistance for each of our ab and low back exercises by as little as one-pound increments.
I often observe fitness enthusiasts performing multiple sets of (throw-up and fall-downs) crunches and side crunches with their bodyweight. It burns every time but the weight of the torso has not changed. There is no additional overload and therefore no additional strength gain.
It does not guarantee improvement because an exercise burns or hurts. Hold your arm out in front of you with a very light dumbbell and perform small arm circles. Continue to do this each workout. It burns and hurts but eventually little benefits will be derived.
Like all exercises our players perform, we document the amount of weight used and the number of good reps completed. When a player can complete the designated number of good reps, we must add weight, if the goal is to continue to gain strength.

This was not easy. After getting blasted by our team nutritionist, I agreed to stop my “Ignore the Core” campaign. But I told Roberta if, and only if, the “Core Nation” agrees to place equal emphasis on the muscles of the neck, traps, and muscles crossing the shoulder capsule.
Gotta go. It is time to go work my core.