Embed Size (px)
Citation preview
—
© Copyright ABB. All rights reserved. Rev.:Document ID.:
AUGUST 2020
Terra AC: TerraConfig App & PortalIntroduction
2020
—
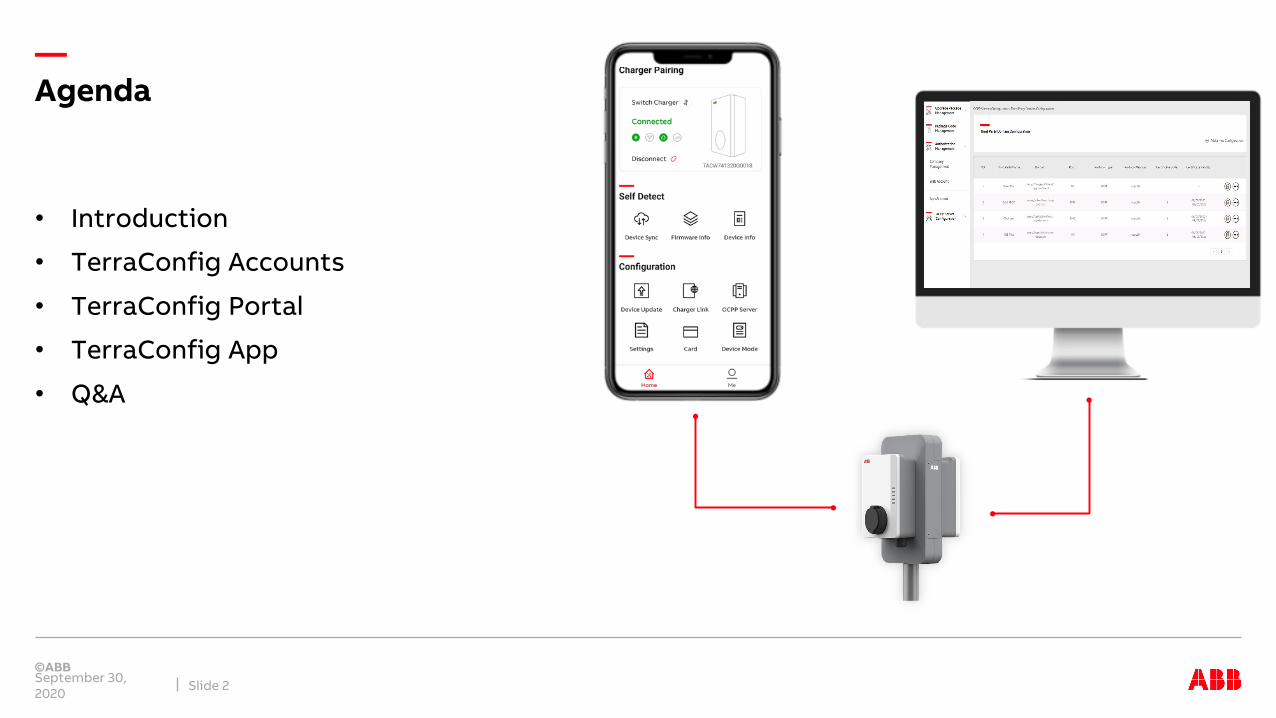
• Introduction
• TerraConfig Accounts
• TerraConfig Portal
• TerraConfig App
• Q&A
September 30, 2020 Slide 2
Agenda
—Introduction
September 30, 2020 Slide 3
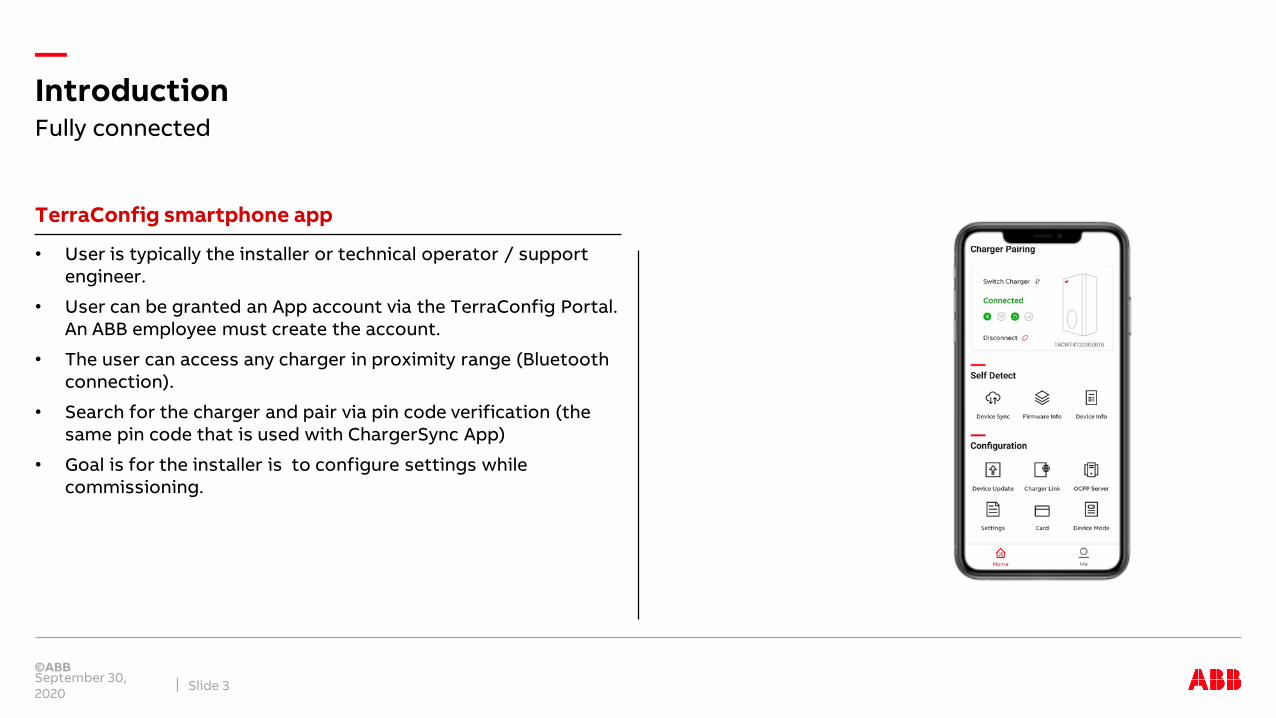
TerraConfig smartphone app
• User is typically the installer or technical operator / support engineer.
• User can be granted an App account via the TerraConfig Portal. An ABB employee must create the account.
• The user can access any charger in proximity range (Bluetooth connection).
• Search for the charger and pair via pin code verification (the same pin code that is used with ChargerSync App)
• Goal is for the installer is to configure settings while commissioning.
Fully connected
—Introduction
September 30, 2020 Slide 4
Fully connected
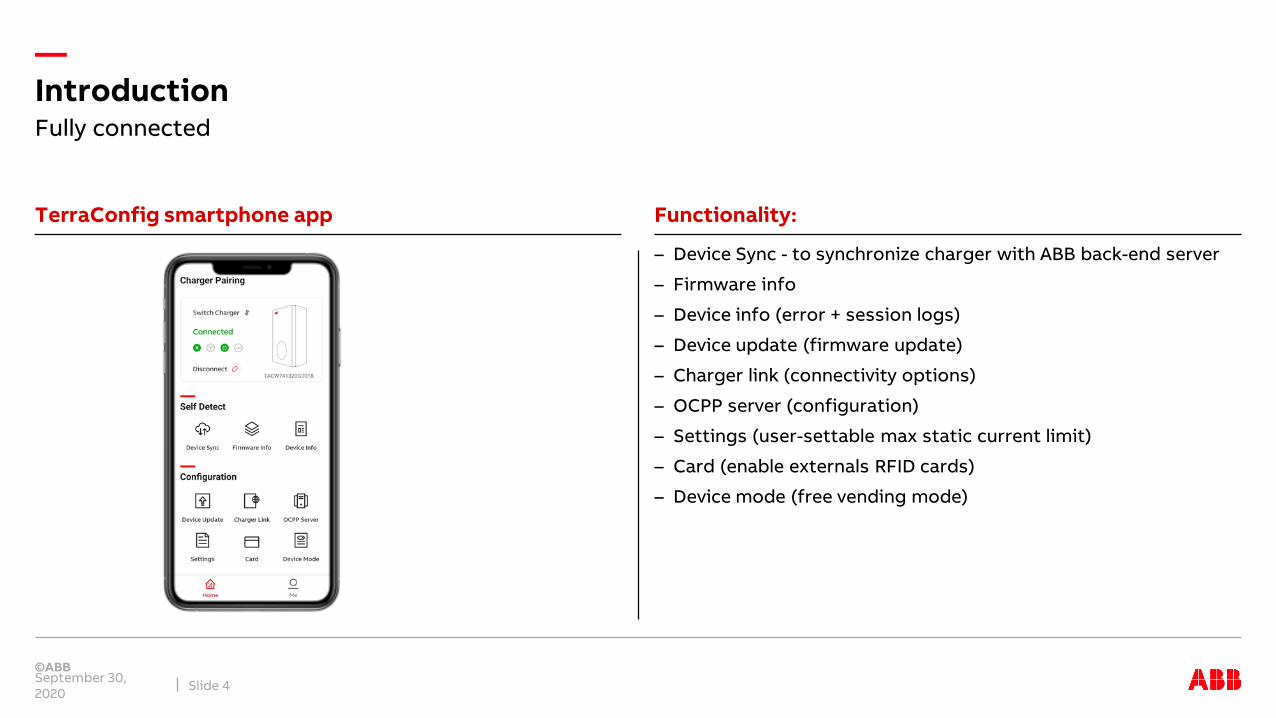
– Device Sync - to synchronize charger with ABB back-end server
– Firmware info
– Device info (error + session logs)
– Device update (firmware update)
– Charger link (connectivity options)
– OCPP server (configuration)
– Settings (user-settable max static current limit)
– Card (enable externals RFID cards)
– Device mode (free vending mode)
TerraConfig smartphone app Functionality:
—Introduction
September 30, 2020 Slide 5
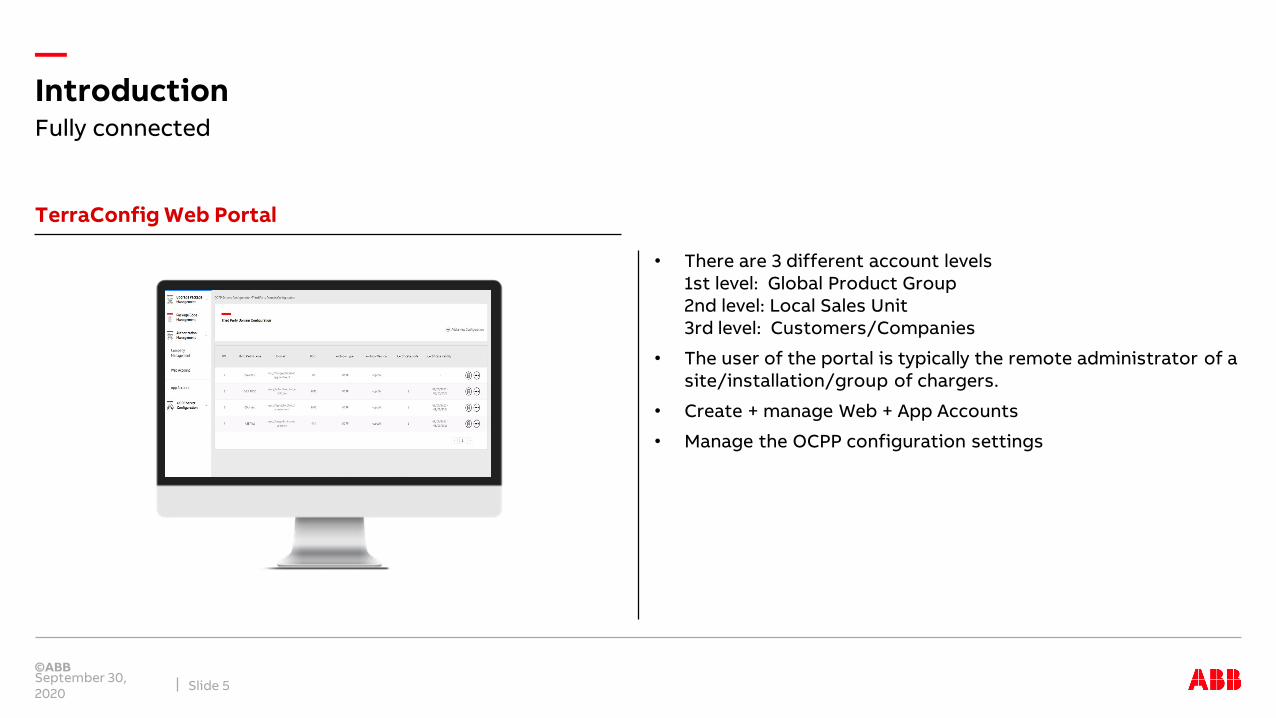
TerraConfig Web Portal
• There are 3 different account levels1st level: Global Product Group2nd level: Local Sales Unit3rd level: Customers/Companies
• The user of the portal is typically the remote administrator of a site/installation/group of chargers.
• Create + manage Web + App Accounts
• Manage the OCPP configuration settings
Fully connected
—Introduction
September 30, 2020 Slide 6
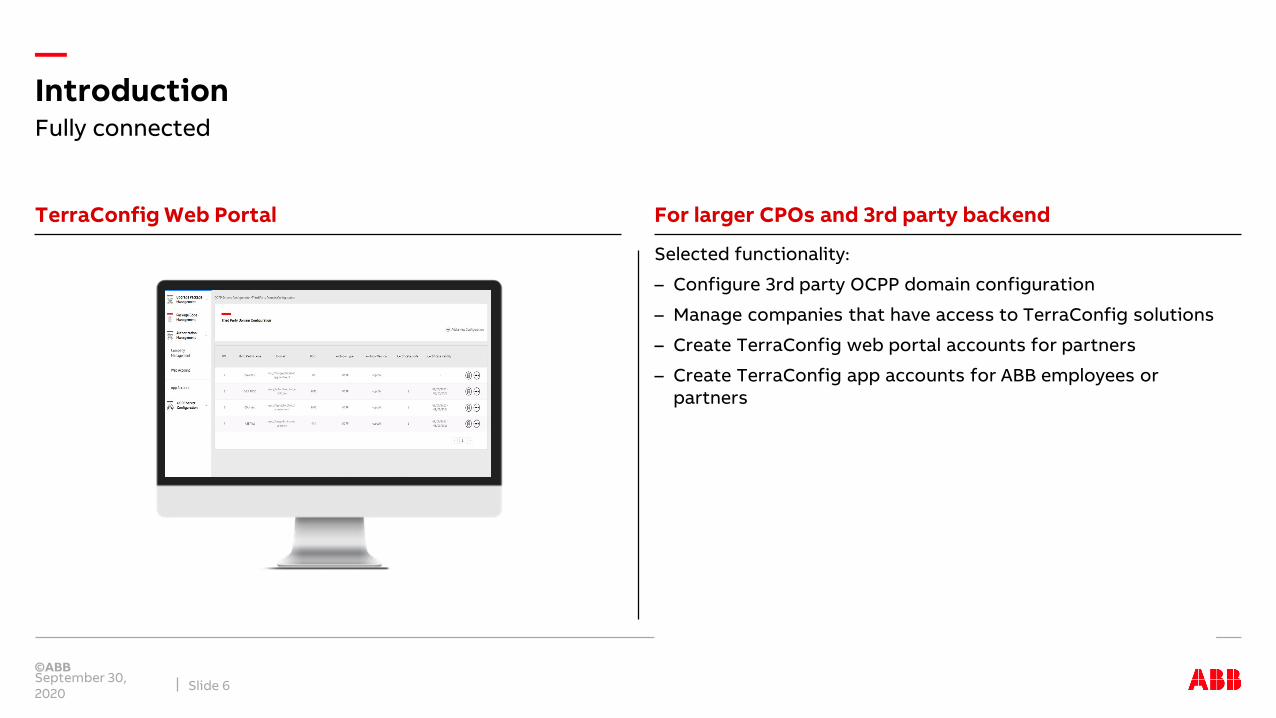
Selected functionality:
– Configure 3rd party OCPP domain configuration
– Manage companies that have access to TerraConfig solutions
– Create TerraConfig web portal accounts for partners
– Create TerraConfig app accounts for ABB employees or partners
Fully connected
TerraConfig Web Portal For larger CPOs and 3rd party backend

—Portal
—
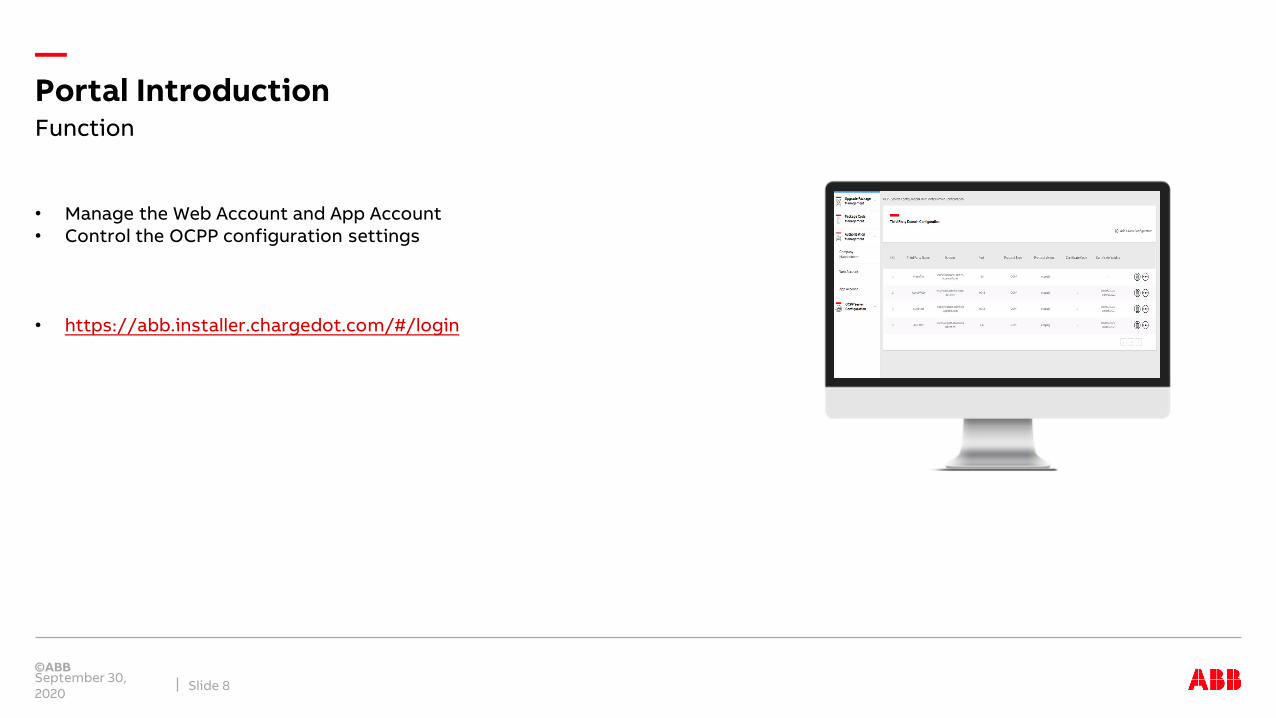
• Manage the Web Account and App Account• Control the OCPP configuration settings
• https://abb.installer.chargedot.com/#/login
Portal Introduction
September 30, 2020 Slide 8
Function
—
—
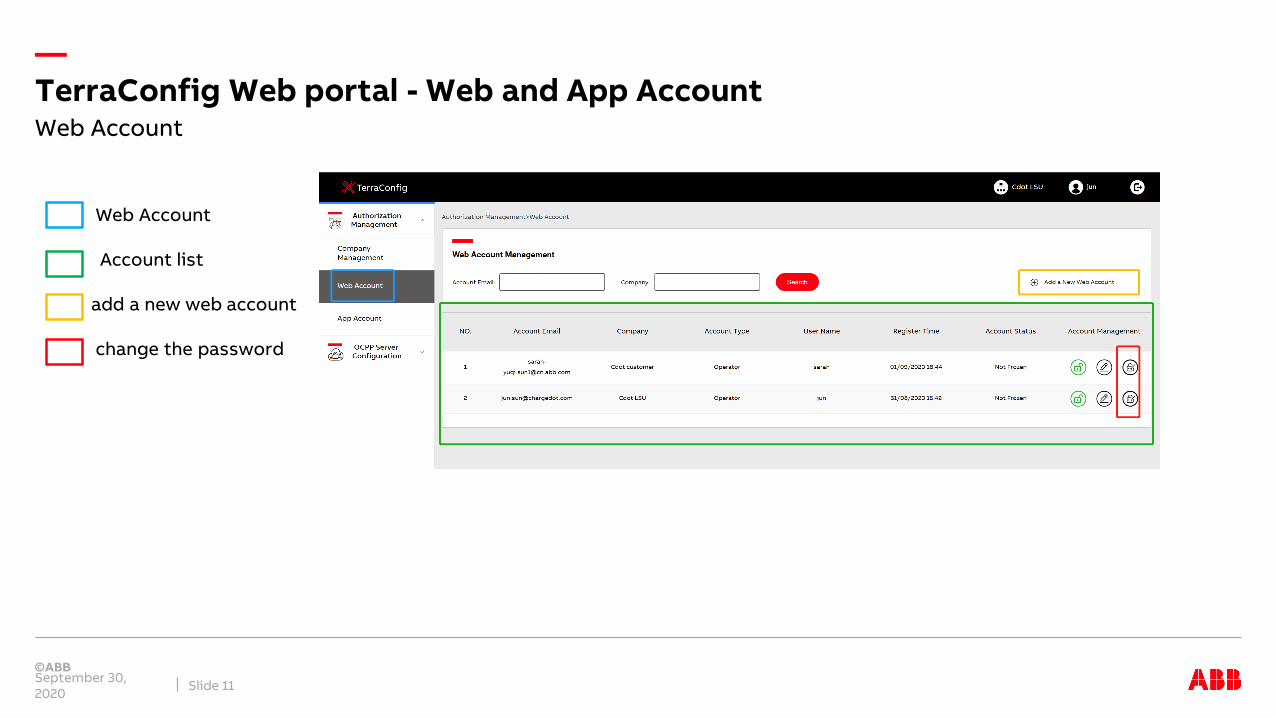
—TerraConfig Web portal - Web and App Account
September 30, 2020 Slide 11
Web Account
Web Account
Account list
add a new web account
change the password
c
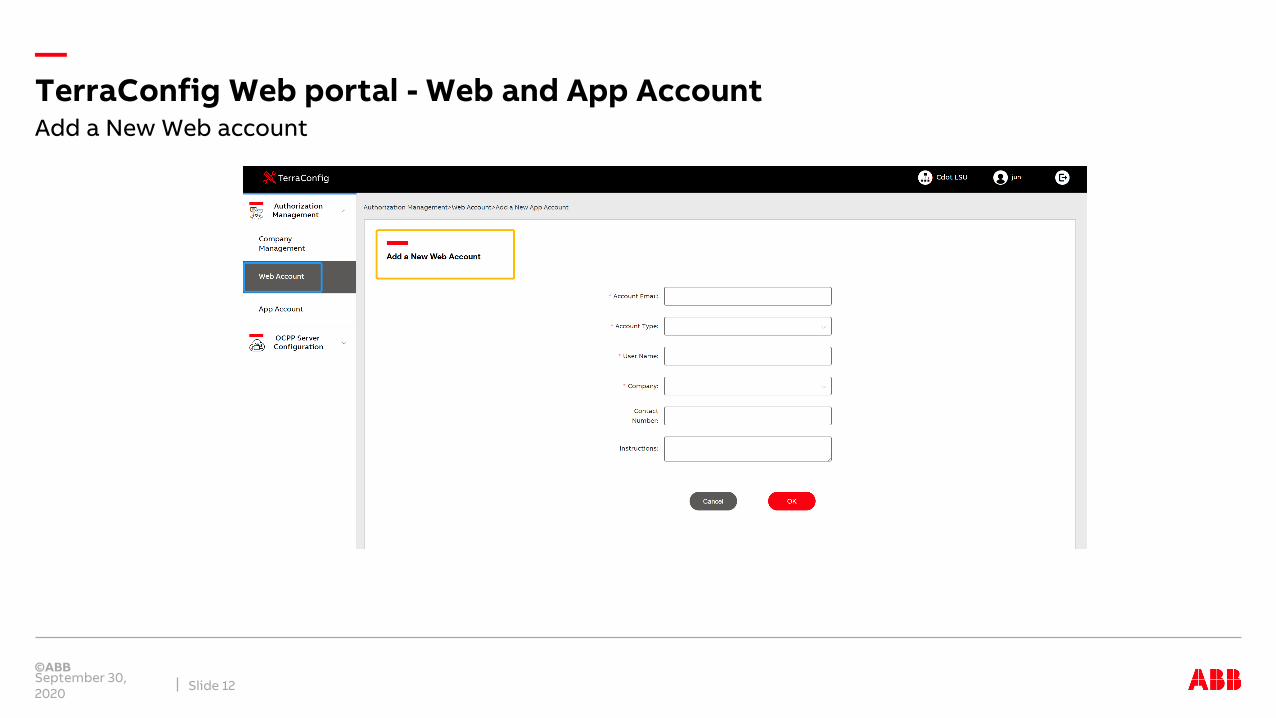
—TerraConfig Web portal - Web and App Account
September 30, 2020 Slide 12
Add a New Web account

—TerraConfig Web portal - Web and App Account
September 30, 2020 Slide 13
Web Account
App Account
Account list
add a new APP account
change the password
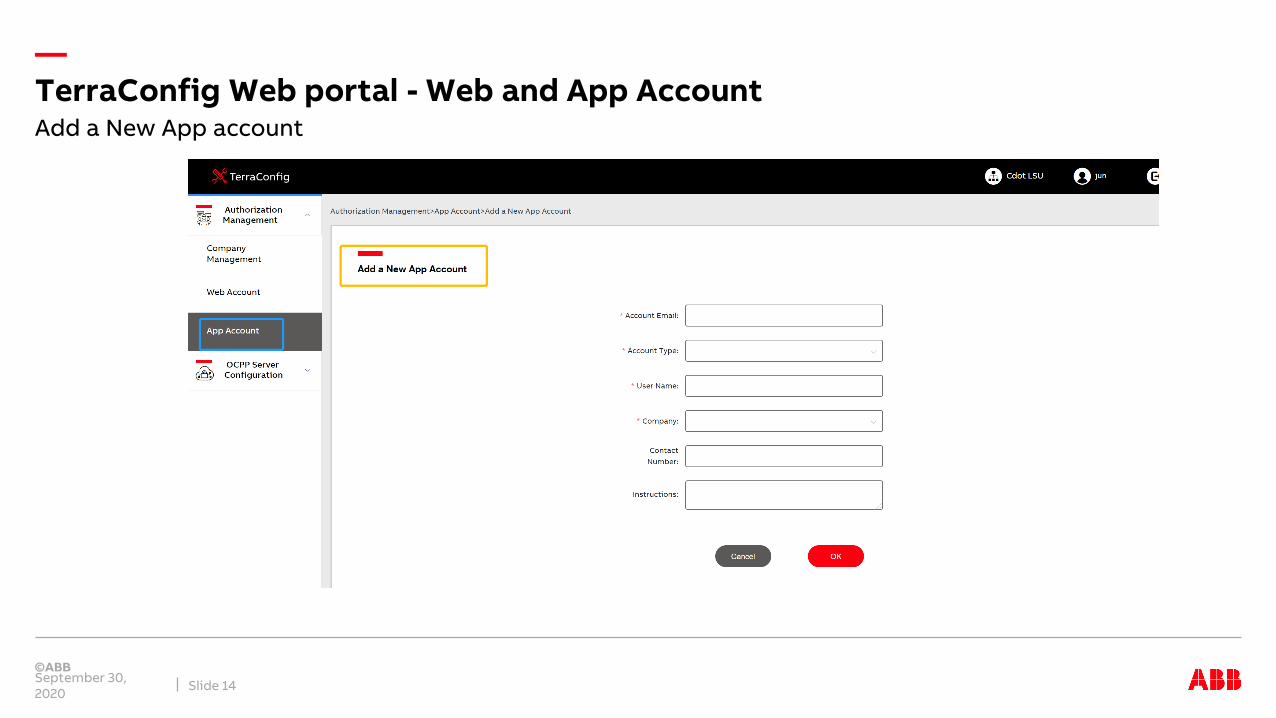
—TerraConfig Web portal - Web and App Account
September 30, 2020 Slide 14
Add a New App account
—
September 30, 2020 Slide 15
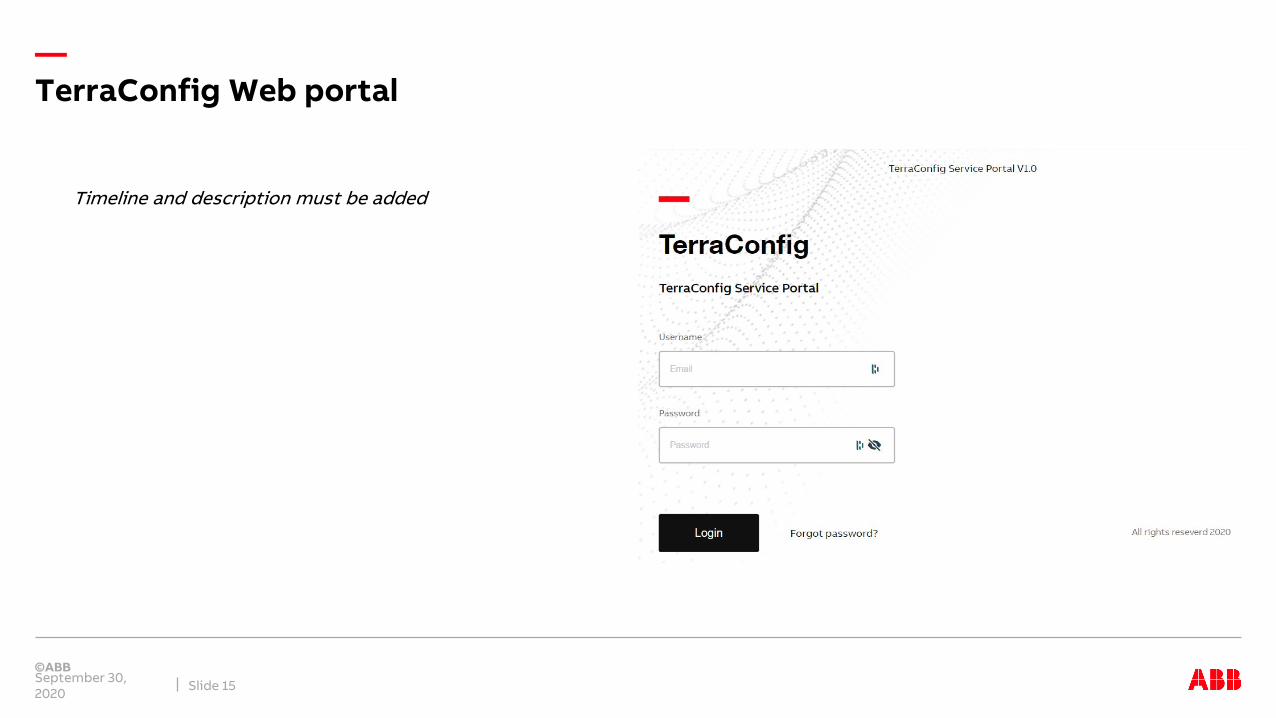
TerraConfig Web portal
Timeline and description must be added
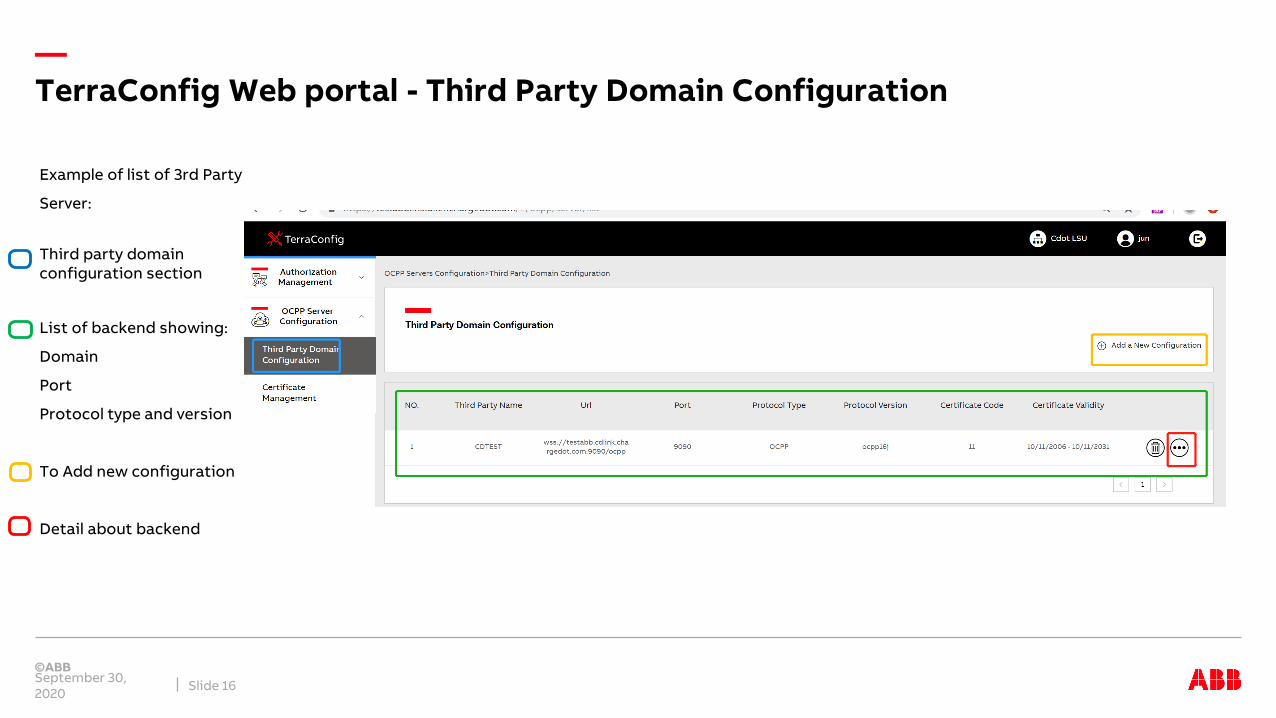
—TerraConfig Web portal - Third Party Domain Configuration
September 30, 2020 Slide 16
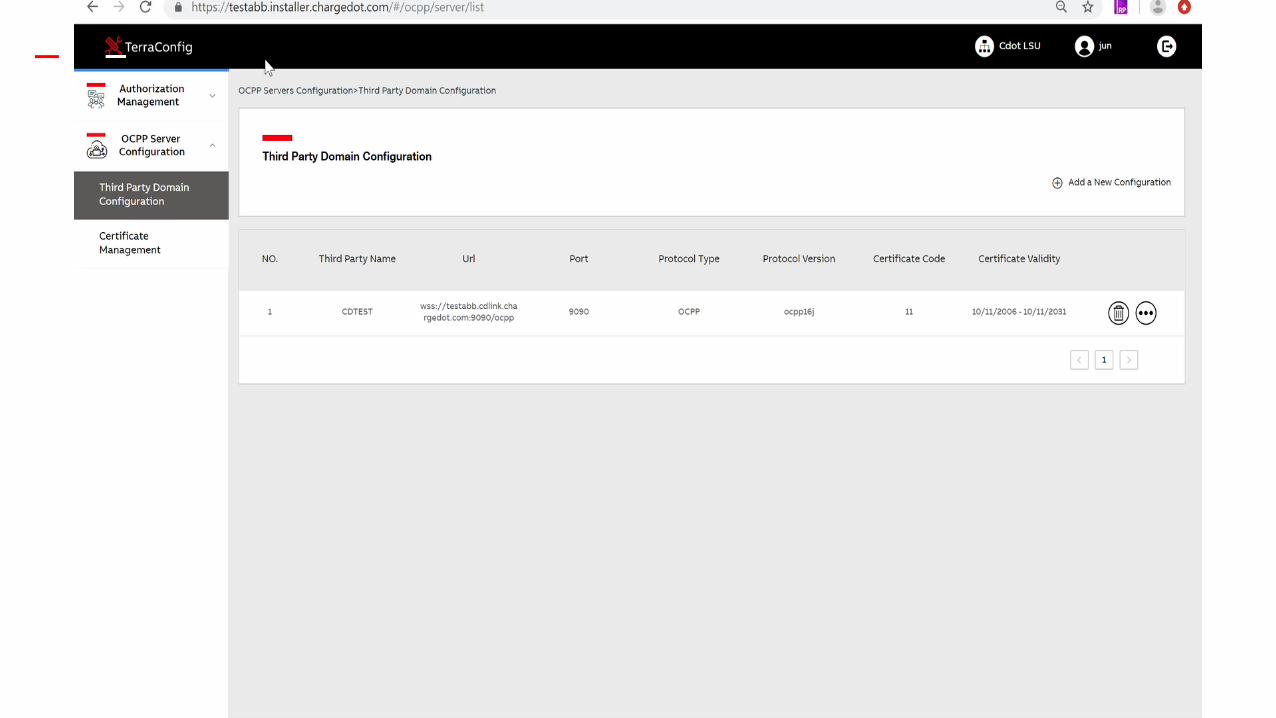
Example of list of 3rd Party
Server:
Third party domain configuration section
List of backend showing:
Domain
Port
Protocol type and version
To Add new configuration
Detail about backend
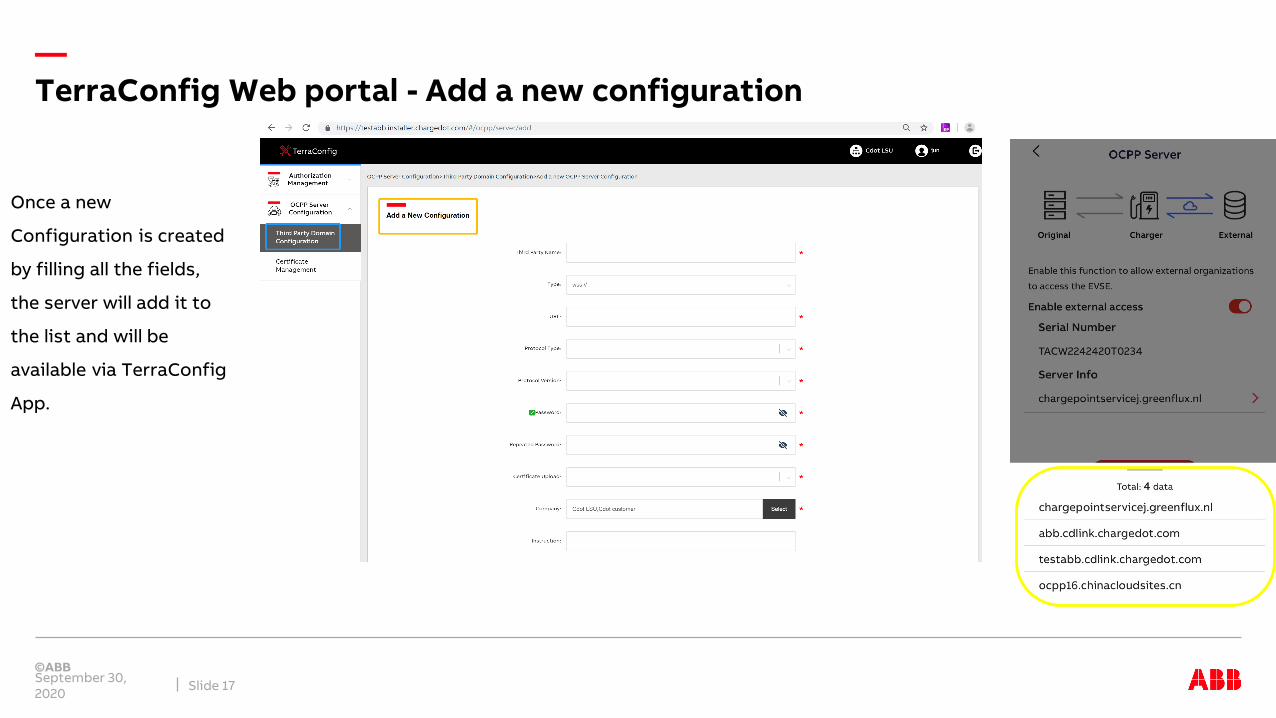
—TerraConfig Web portal - Add a new configuration
September 30, 2020 Slide 17
Once a new
Configuration is created
by filling all the fields,
the server will add it to
the list and will be
available via TerraConfig
App.

—TerraConfig App
—
September 30, 2020 Slide 19
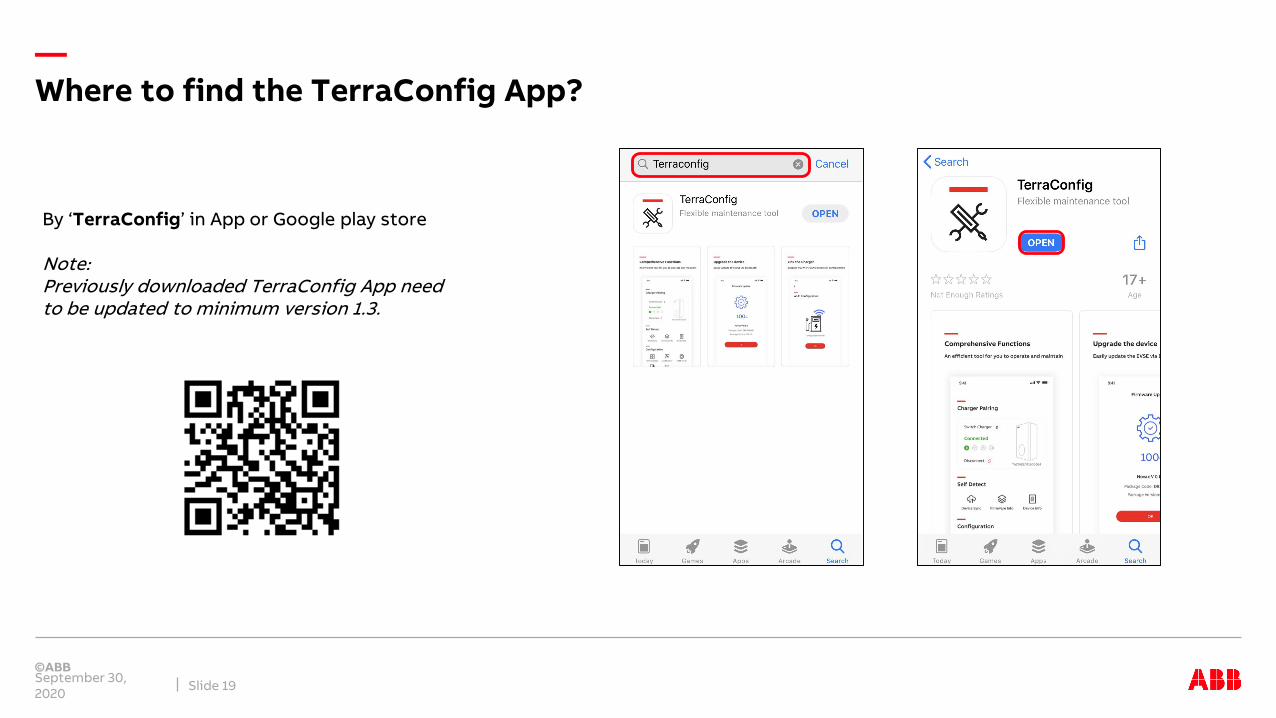
Where to find the TerraConfig App?
By ‘TerraConfig’ in App or Google play store
Note:Previously downloaded TerraConfig App needto be updated to minimum version 1.3.
—
September 30, 2020 Slide 20
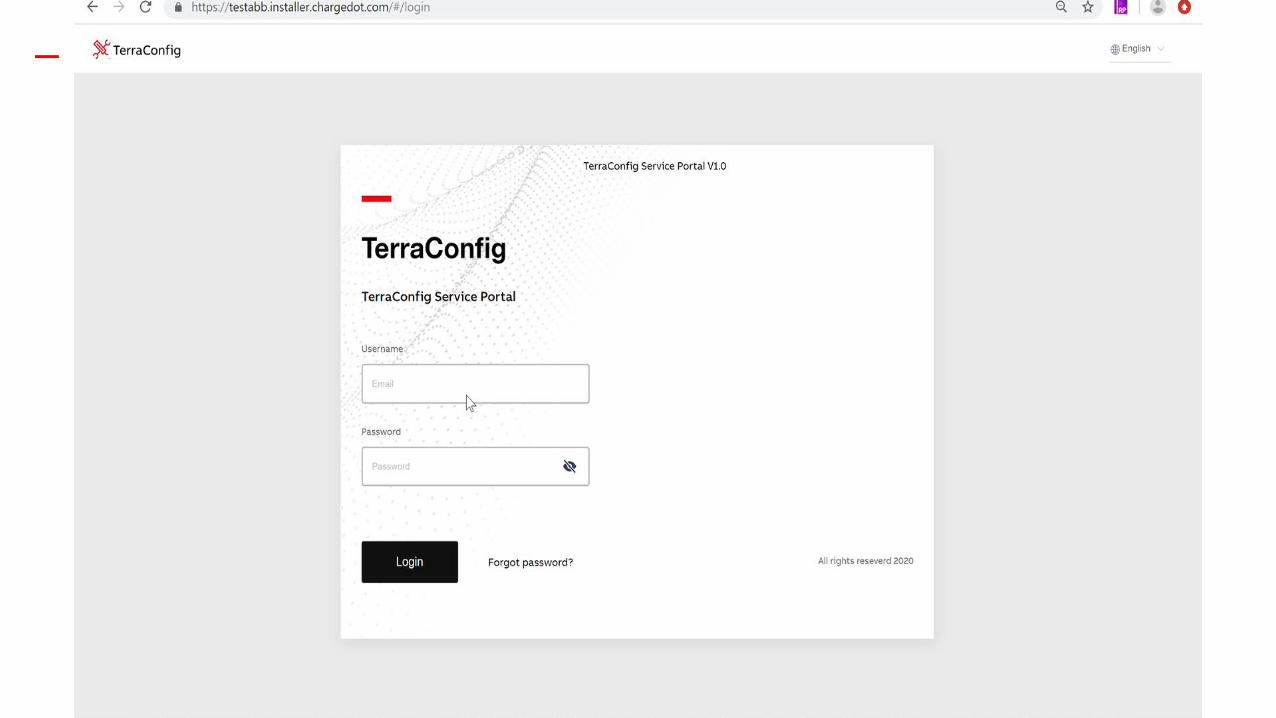
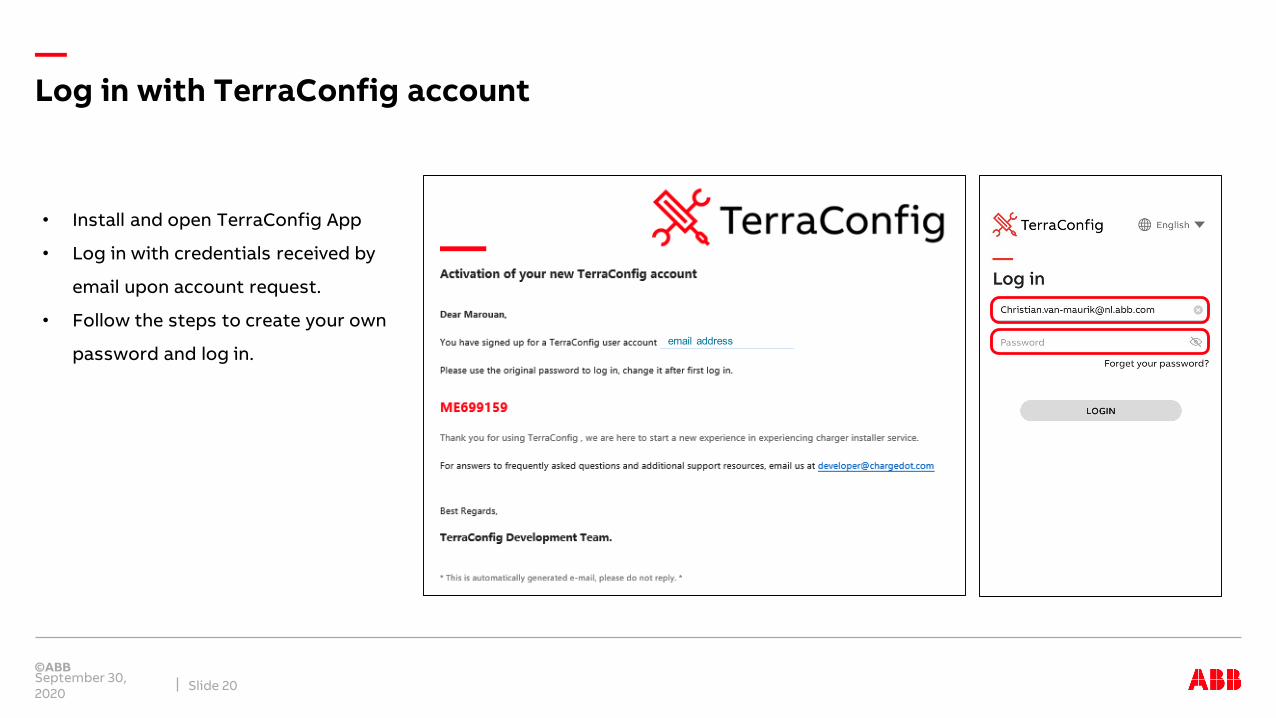
Log in with TerraConfig account
• Install and open TerraConfig App
• Log in with credentials received by
email upon account request.
• Follow the steps to create your own
password and log in.email address
—
September 30, 2020 Slide 21
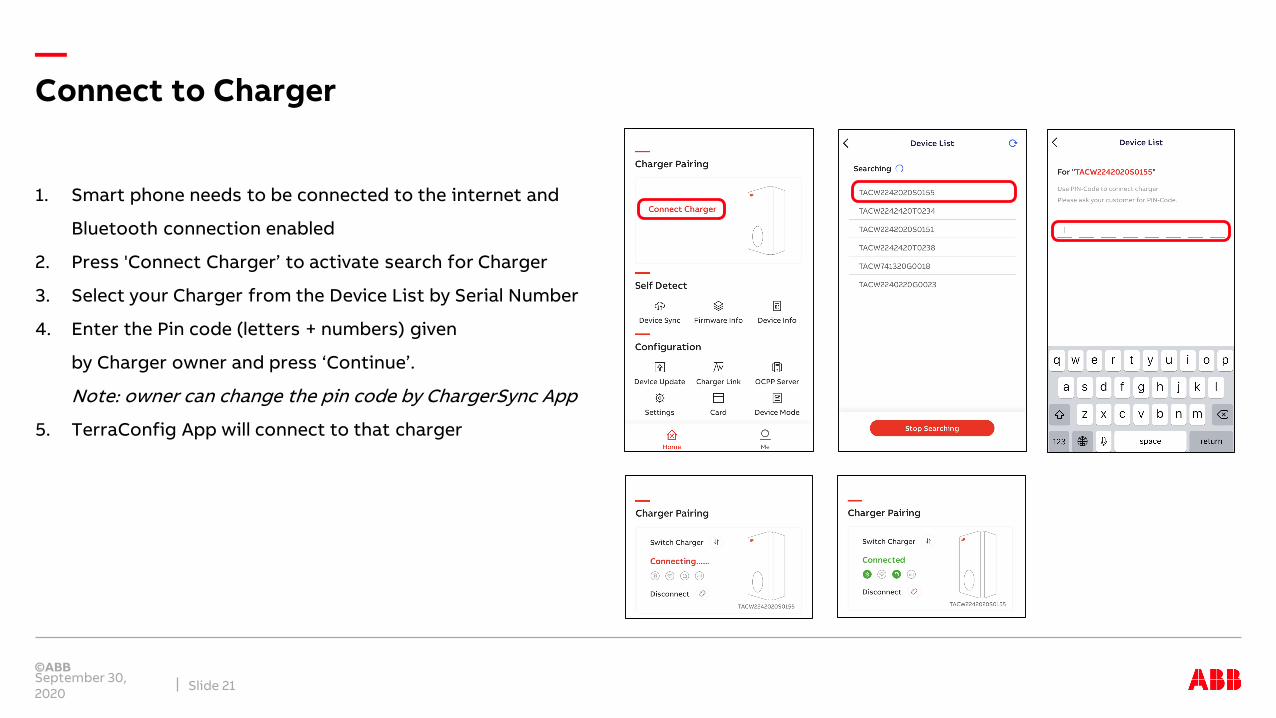
Connect to Charger
1. Smart phone needs to be connected to the internet and
Bluetooth connection enabled
2. Press 'Connect Charger’ to activate search for Charger
3. Select your Charger from the Device List by Serial Number
4. Enter the Pin code (letters + numbers) given
by Charger owner and press ‘Continue’.
Note: owner can change the pin code by ChargerSync App
5. TerraConfig App will connect to that charger
—Home screen
September 30, 2020 Slide 22
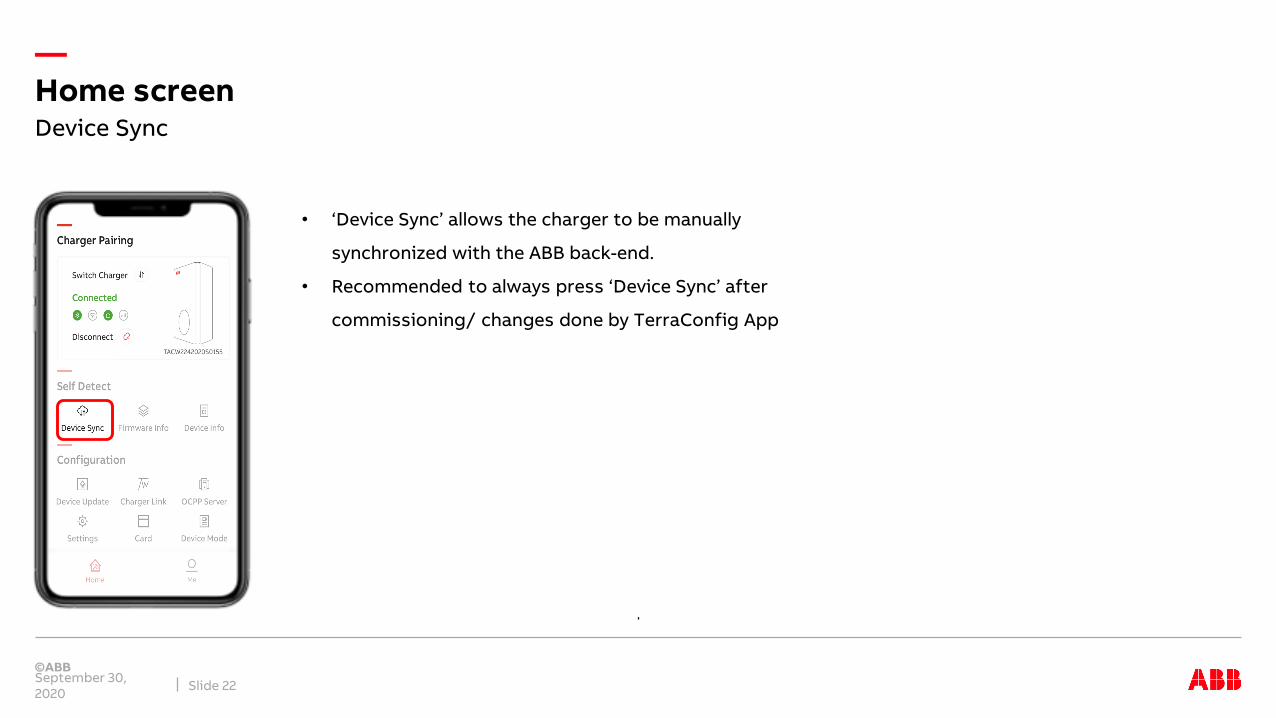
• ‘Device Sync’ allows the charger to be manually
synchronized with the ABB back-end.
• Recommended to always press ‘Device Sync’ after
commissioning/ changes done by TerraConfig App
Device Sync
—Home screen
September 30, 2020 Slide 23
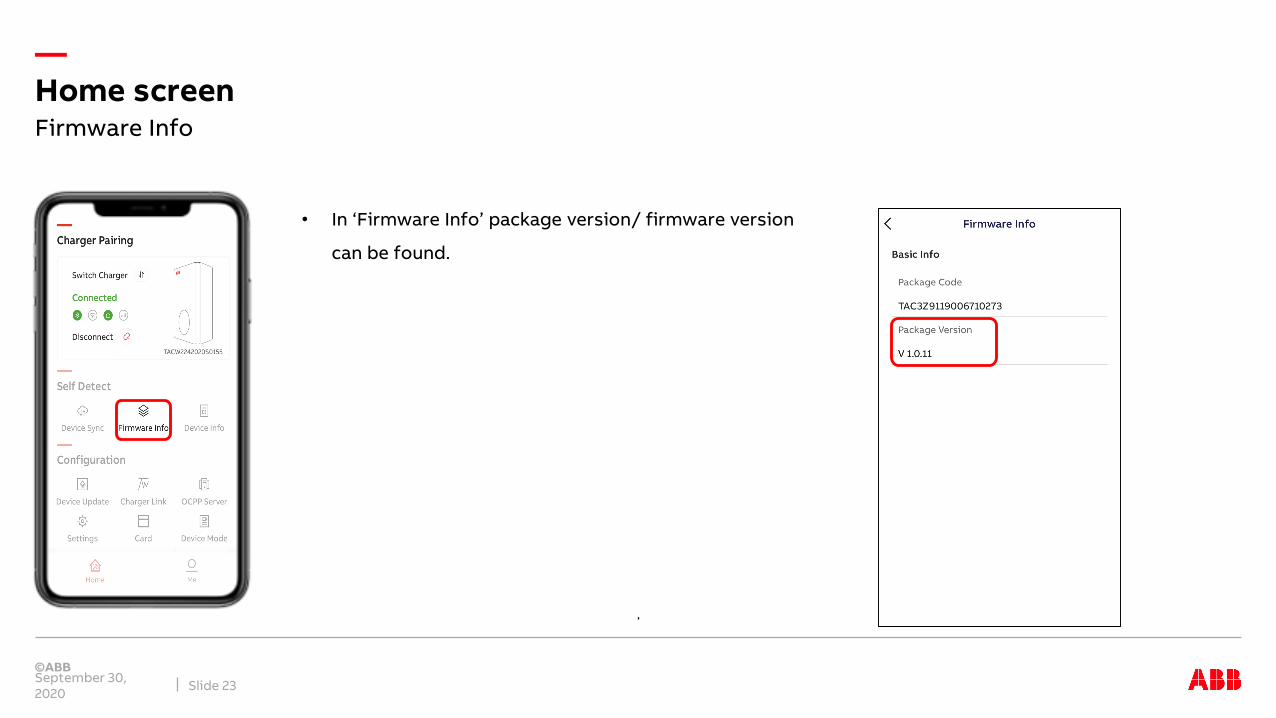
• In ‘Firmware Info’ package version/ firmware version
can be found.
Firmware Info
—Home screen
September 30, 2020 Slide 24
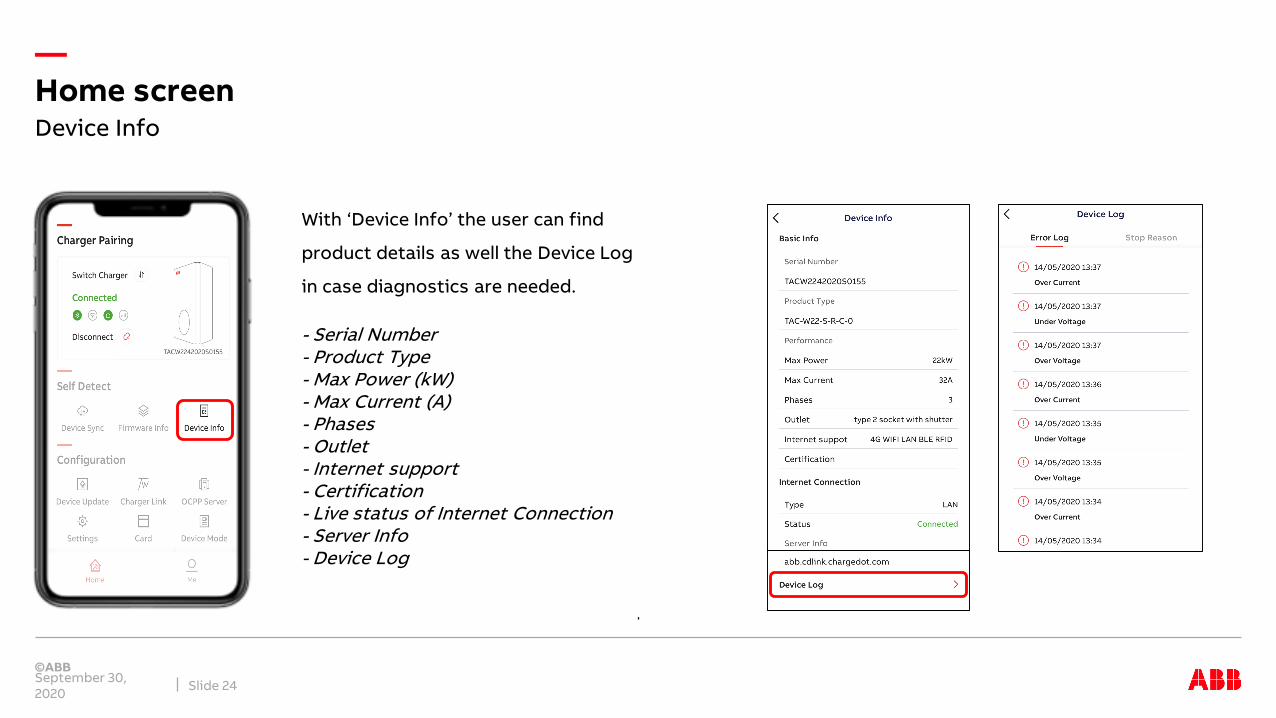
With ‘Device Info’ the user can find
product details as well the Device Log
in case diagnostics are needed.
- Serial Number- Product Type- Max Power (kW)- Max Current (A)- Phases- Outlet- Internet support- Certification- Live status of Internet Connection- Server Info- Device Log
Device Info
—Home screen
September 30, 2020 Slide 25
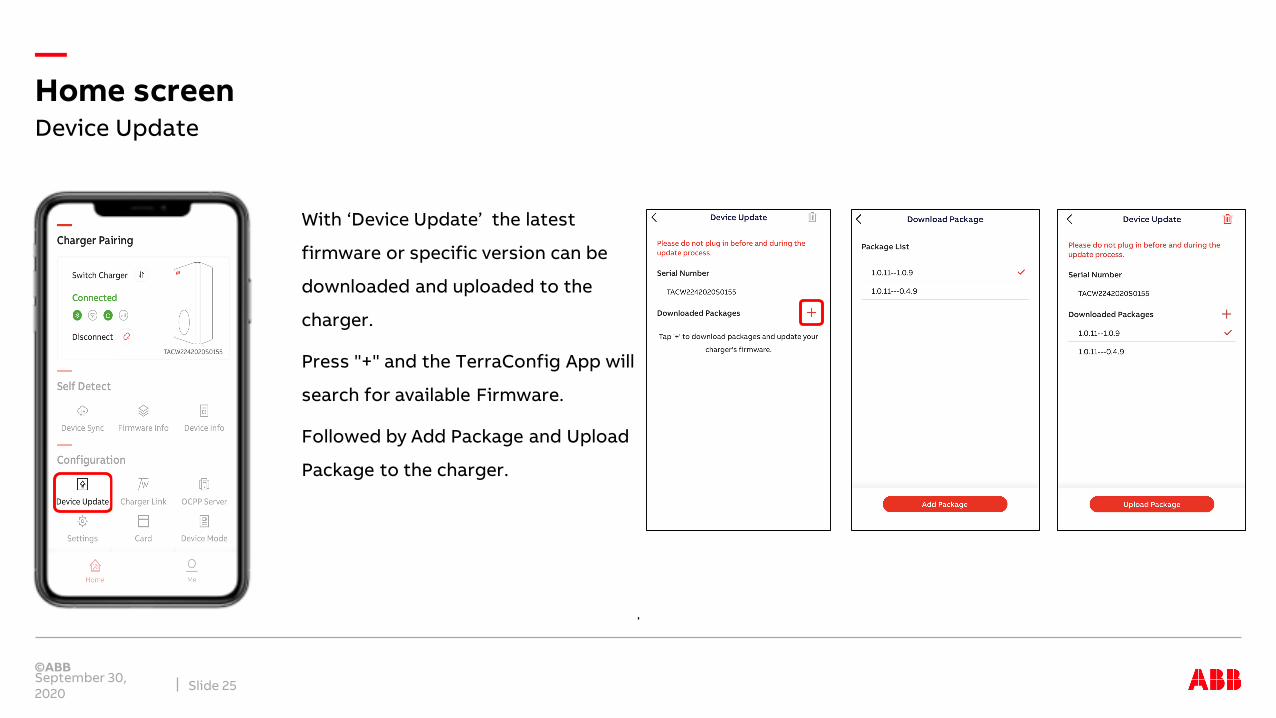
With ‘Device Update’ the latest
firmware or specific version can be
downloaded and uploaded to the
charger.
Press "+" and the TerraConfig App will
search for available Firmware.
Followed by Add Package and Upload
Package to the charger.
Device Update
—Home screen
September 30, 2020 Slide 26
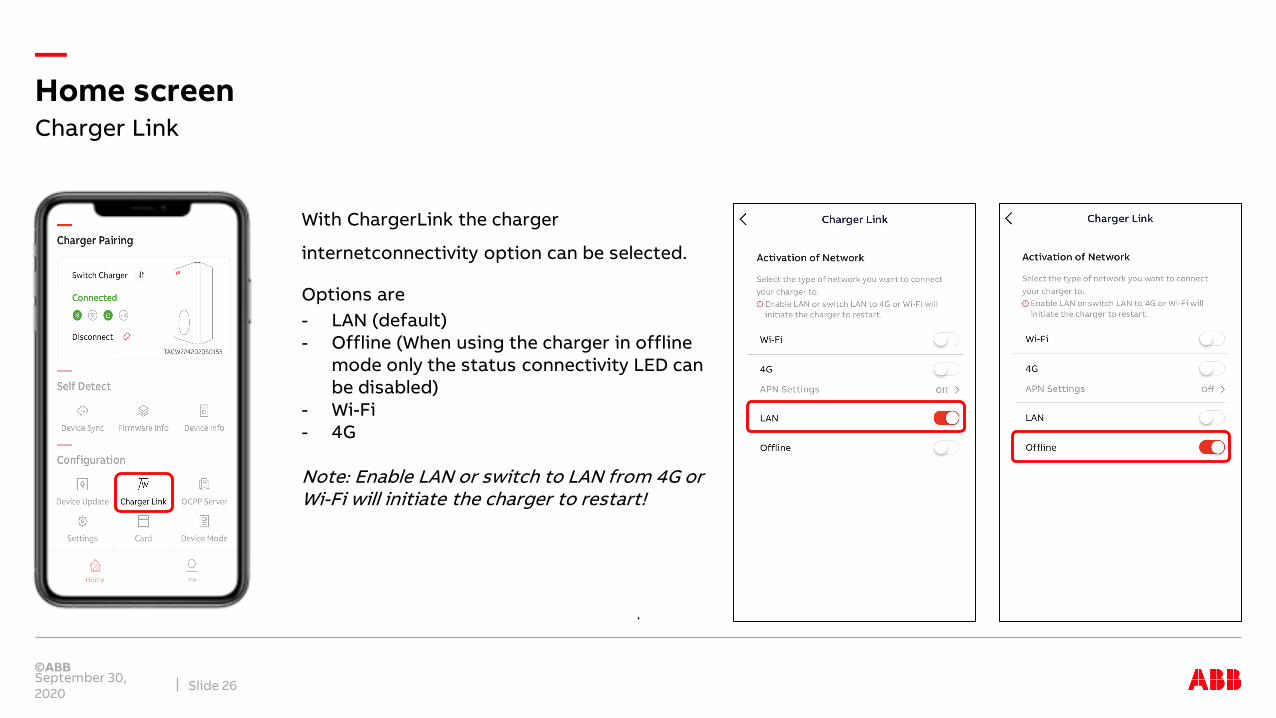
With ChargerLink the charger
internetconnectivity option can be selected.
Options are- LAN (default)- Offline (When using the charger in offline
mode only the status connectivity LED can be disabled)
- Wi-Fi- 4G
Note: Enable LAN or switch to LAN from 4G or Wi-Fi will initiate the charger to restart!
Charger Link

—Home screen
September 30, 2020 Slide 27
Charger Link – Wi-Fi
Before configuring the Charger Wi-Fi
connection the smart phone needs to be
connected to the selected Wi-Fi network
first.
1. enable Wi-Fi and press Wi-Fi Settings
2. SSID shows the connected Wi-Fi
network
3. Enter Wi-Fi password and press ‘Next’
4. Charger is connected to Wi-Fi network
—Home screen
September 30, 2020 Slide 28
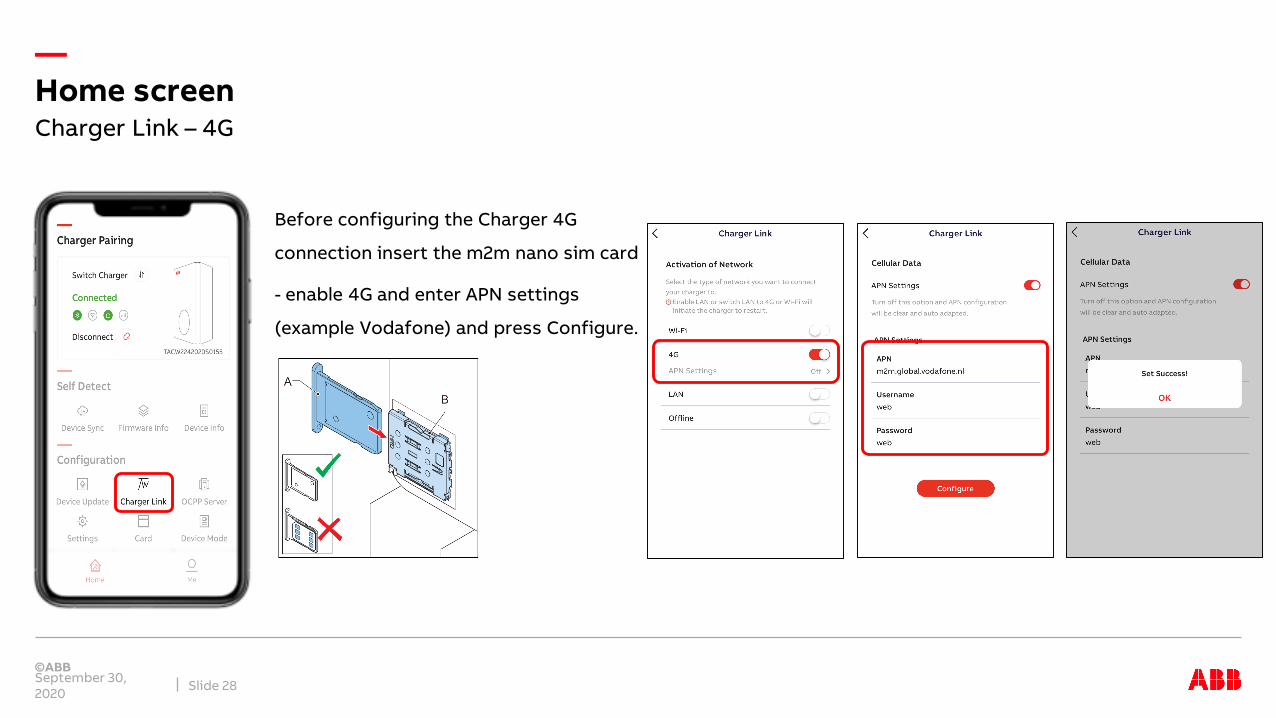
Before configuring the Charger 4G
connection insert the m2m nano sim card
- enable 4G and enter APN settings
(example Vodafone) and press Configure.
Charger Link – 4G
—Home screen
September 30, 2020 Slide 29
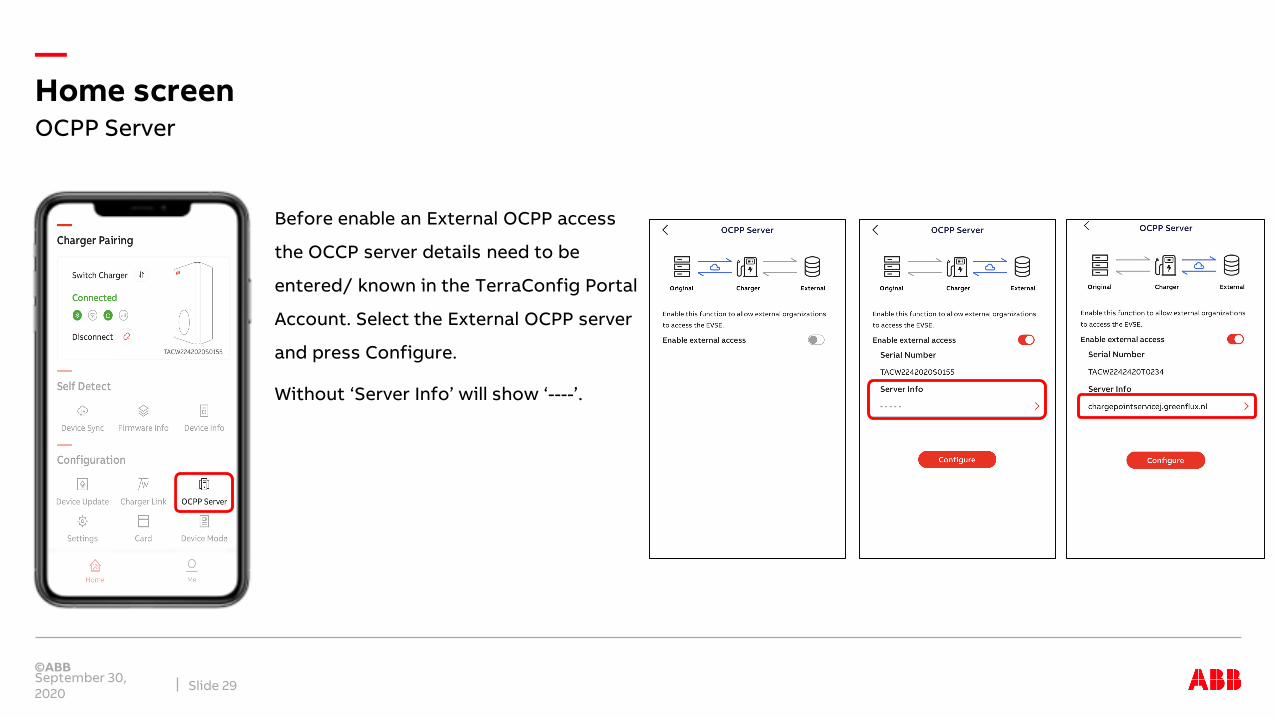
Before enable an External OCPP access
the OCCP server details need to be
entered/ known in the TerraConfig Portal
Account. Select the External OCPP server
and press Configure.
Without ‘Server Info’ will show ‘----’.
OCPP Server
—Home screen
September 30, 2020 Slide 30
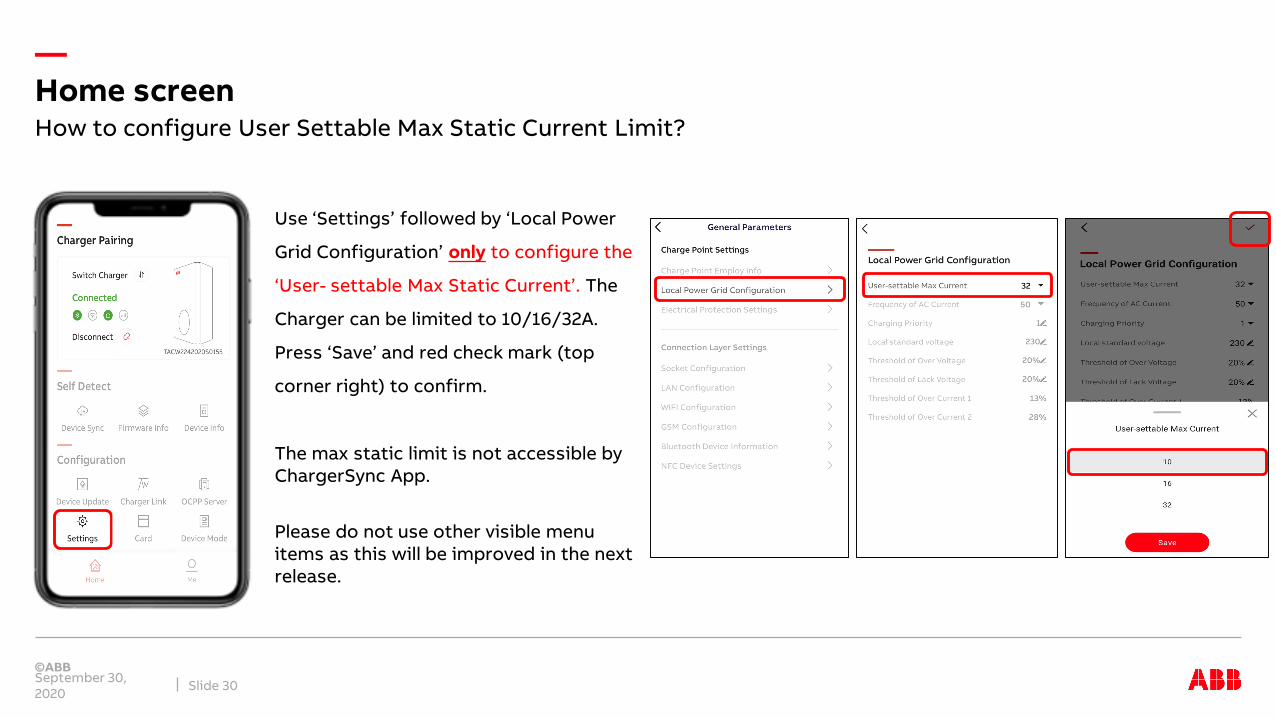
Use ‘Settings’ followed by ‘Local Power
Grid Configuration’ only to configure the
‘User- settable Max Static Current’. The
Charger can be limited to 10/16/32A.
Press ‘Save’ and red check mark (top
corner right) to confirm.
The max static limit is not accessible by ChargerSync App.
Please do not use other visible menu items as this will be improved in the next release.
How to configure User Settable Max Static Current Limit?
—Home screen
September 30, 2020 Slide 31
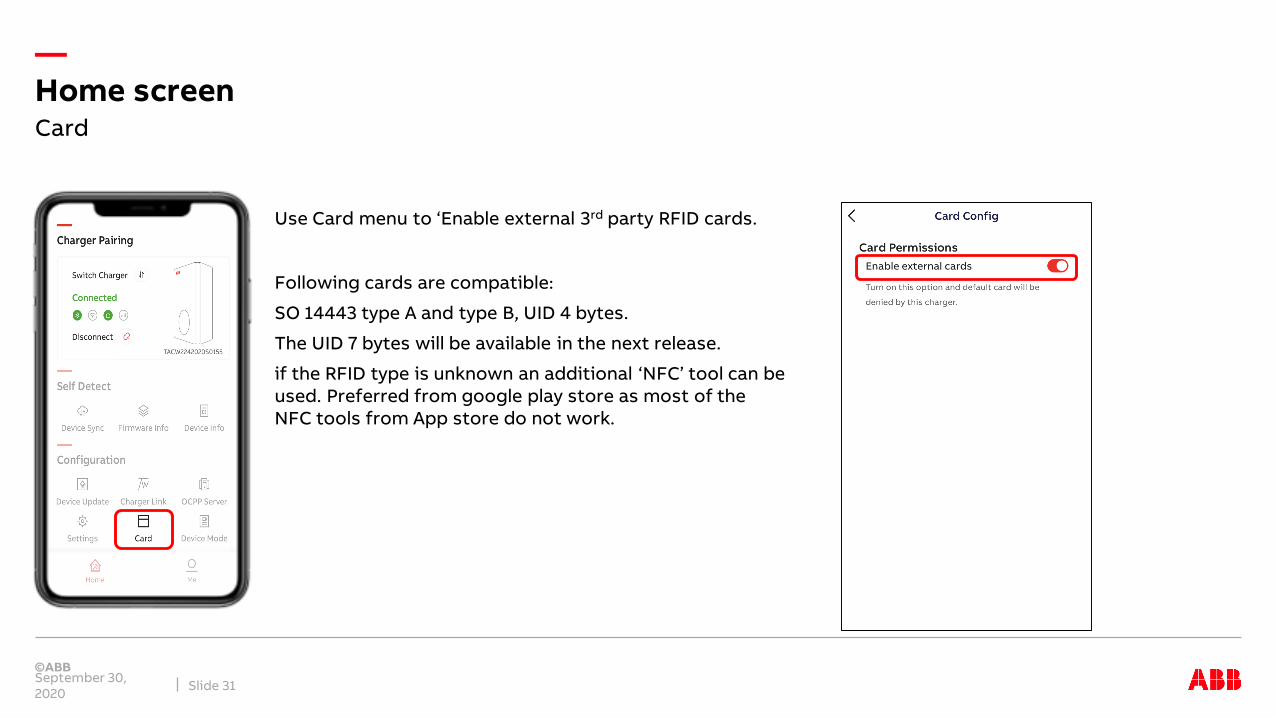
Use Card menu to ‘Enable external 3rd party RFID cards.
Following cards are compatible:
SO 14443 type A and type B, UID 4 bytes.
The UID 7 bytes will be available in the next release.
if the RFID type is unknown an additional ‘NFC’ tool can be used. Preferred from google play store as most of the NFC tools from App store do not work.
Card
—Home screen
September 30, 2020 Slide 32
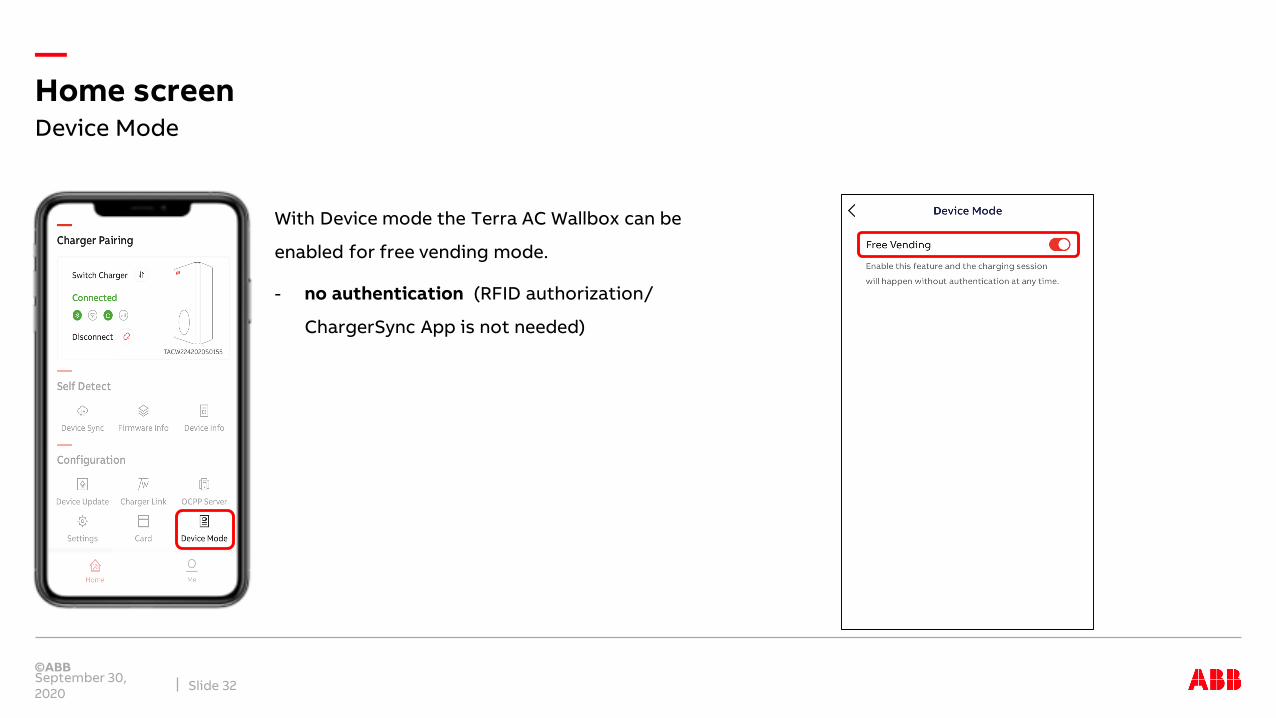
With Device mode the Terra AC Wallbox can be
enabled for free vending mode.
- no authentication (RFID authorization/
ChargerSync App is not needed)
Device Mode
—Me
September 30, 2020 Slide 33
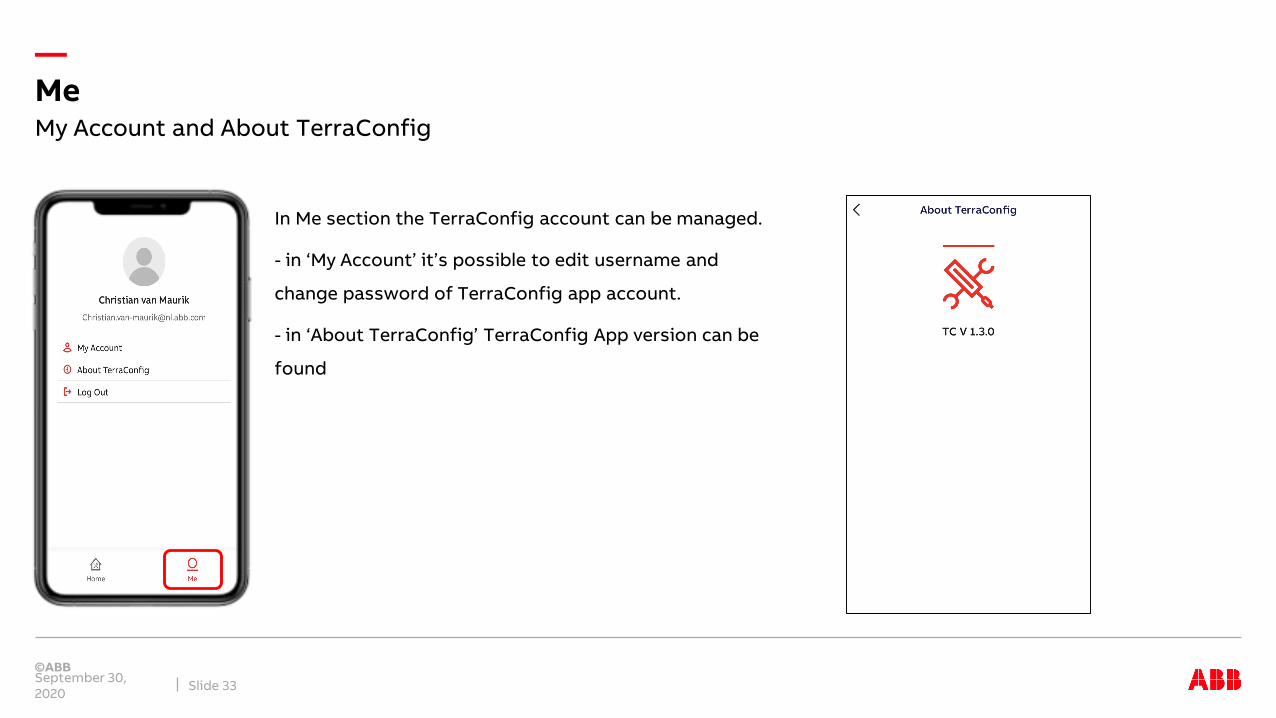
In Me section the TerraConfig account can be managed.
- in ‘My Account’ it’s possible to edit username and
change password of TerraConfig app account.
- in ‘About TerraConfig’ TerraConfig App version can be
found
My Account and About TerraConfig