Embed Size (px)
Citation preview

0004
9247
/05.
07
USB 2.0 Linkkabel Link CableCâble Link
C O M P U T E R
All listed brands are trademarks of the corresponding companies. Errors and omissions excepted, and subject to technical changes. Our general terms of delivery and payment are applied.
PO Box 80 · 86651 Monheim/GermanyPhone: +49 9091 502-0Fax: +49 9091 502-458
[email protected]://www.hama.com
00049247

2 3
Inhaltsverzeichnis: Seite
1. Installationshinweise 2 1.1. Unter Windows 2 1.2. Unter MAC OS X 32. Verwendung des EasySuite Datenübertragungsprogrammes unter Windows 3 2.1. Funktionsbeschreibung des EasySuite Programms 4 2.1.1. Funktionen der Symbolleiste 4 2.1.2. Erstellen eines neuen Ordners 5 2.1.3. Erklärung der Funktionen Ausschneiden, Kopieren, Einfügen, Löschen, 6 Öffnen und Unbenennen 2.1.4. Erklärung der Optionen Ansicht und Fenster im Hauptmenü 6 2.1.5. Erklärung der Funktion Schreibschutz 7 2.1.6. Datenaustausch 8 2.2. Beenden des Programms EasySuite und entfernen des Hama Linkkabels 93. Verwendung des EasySuite Datenübertragungsprogrammes unter Mac OS X 10 3.1. Funktionsbeschreibung des EasySuite Programms 11 3.1.1. Funktionen der Symbolleiste 11 3.1.2. Erstellen eines neuen Ordners 12 3.1.3. Die Funktionen Umbenennen, Aktualisieren, Löschen und Kopieren 12 3.1.4. Die Funktionen Ausschneiden, Kopieren, Einfügen, Löschen und alles markieren 13 3.1.5. Erklärung der Funktion Schreibschutz 13 3.1.6. Datenaustausch 14 3.2. Beenden des EasyMacCopy 144. Kontakt- und Supportinformationen 15
Inhalt:1x USB 2.0 Linkkabel1x Kurzanleitung1x Entsorgungshinweis
Sicherheitshinweise:Betreiben Sie das Produkt weder in feuchter, noch in extrem staubiger Umgebung, sowie auf Heizkörpern oder in der Nähe von Wärmequellen. Dieses Gerät ist nicht für den Einsatz im Freien bestimmt. Schützen Sie das Gerät vor Druck- und Stoßeinwirkung. Das Produkt darf während des Betriebes nicht geöffnet werden.
Vorraussetzung:Computer oder Notebook mit mindestens einer freien USB 1.1/2.0 Buchse.
Unterstützte Betriebssysteme:Windows 2000 / Windows XP / Windows XP x64bit Edition / Windows XP Media Center Edition 200X / Windows Vista / Windows Vista x64bit.MAC OS X 10.3.x / MAC OS X 10.4.x
1. Installationshinweise1.1 Unter WindowsBevor Sie das Hama Linkkabel an Ihrem Computer anschließen, überprüfen Sie bitte, ob Sie das aktuellste Service Pack von Microsoft bereits installiert haben. Hama empfi ehlt die Installation des Service Packs, da etliche Schwachstellen beseitigt und Optimierungen von Microsoft vorgenommen wurden, die sich unter Umständen auf die Geschwindigkeit des USB-Linkkabels auswirken könnte.
d Bedienungsanleitung
Da es sich bei dem Hama USB Linkkabel um eine Plug- and Play-Lösung handelt, ist eine vorherige Treiberinstallation nicht nötig. Starten Sie daher Ihr Betriebssystem und stecken Sie das USB Linkkabel an einer freien USB-Buchse ein. Daraufhin wird das Kabel von Ihrem System erkannt und installiert.
Wenn Sie das Linkkabel nicht mehr benötigen, stecken Sie das Kabel nicht einfach ab, sondern entfernen Sie dieses über den Menupunkt „Gerät auswerfen“. Diesen Menüpunkt erreichen Sie indem Sie mit der rechten Maustaste auf das Gerät EasySuite klicken und im Kontextmenü, dann den entsprechenden Menüpunkt auswählen. Warten Sie solange, bis Windows Ihnen mitteilt, das Sie das USB Gerät entfernen können.
1.2 MAC OS X Bevor Sie das Hama Linkkabel an Ihrem Computer anschließen, überprüfen Sie bitte, ob Sie das aktuellste Update Pack von Apple bereits installiert haben. Hama empfi ehlt die Installation des Update Packs, da etliche Schwachstellen beseitigt und Optimierungen von Apple vorgenommen wurden, die sich unter Umständen auf die Geschwindigkeit des USB- Linkkabels auswirken könnte.
Da es sich bei dem Hama USB Linkkabel um eine Plug- and Play-Lösung handelt, ist eine vorherige Treiberinstallation nicht nötig. Fahren Sie daher Ihr Betriebssystem hoch und stecken Sie das USB Linkkabel an eine freie USB-Buchse ein. Daraufhin wird das Kabel von Ihrem System erkannt und installiert.
Wenn Sie das Linkkabel nicht mehr benötigen, stecken Sie das Kabel nicht einfach ab, sondern entfernen Sie dieses Kabel, indem Sie das CD Icon mit der Beschriftung EasyShare mit der Maus auf den Papierkorb ziehen und loslassen. (Drag and Drop)
2. Verwendung des EasySuite Datenübertragungsprogrammes unter WindowsDas Programm EasySuite ist in dem Linkkabel gespeichert, so dass Sie keine zusätzliche Software installieren müssen.
Nachdem das USB Linkkabel an beide Computer angeschlossen und installiert wurde, wird das Programm automatisch an beiden Computer gestartet. Falls dies nicht der Fall sein sollte, öffnen Sie an beiden Computer den Arbeitsplatz und klicken doppelt auf das Gerät/Laufwerk mit der Bezeichnung EasySuite, dort können Sie dann das Programm auch manuell aufrufen.

4 5
Sobald das Programm auf beiden Rechnern gestartet wurde, wird gleichzeitig eine direkte Verbindung hergestellt. Dies erkennen Sie daran, dass das Programm EasySuite beide Inhalte der angeschlossenen Rechner darstellt.
2.1 Funktionsbeschreibung des EasySuite Programms
Hinweis:Bedeutung des Begriffs (entfernter Rechner und lokaler Rechner)
Also „lokaler Rechner“ wird immer der Computer benannt, an dem Sie gerade sitzen. Im weiteren Verlauf dieses Handbuchs wird der Computer auch Quellrechner genannt.
Der andere Computer wird im Programm als „entfernter Rechner“ bezeichnet der im Laufe dieses Handbuchs auch als Zielrechner genannt wird.
2.1.1 Funktionen der Symbolleiste
Lokaler volle Geschwindigkeit = Quellrechner überträgt Daten mit max. 12 Mbit/s (USB 1.1 Geschwindigkeit).Lokaler hohe Geschwindigkeit = Quellrechner überträgt Daten mit max. 480 Mbit/s (USB 2.0 Geschwindigkeit).Remote volle Geschwindigkeit = Zielrechner überträgt Daten mit max. 12 Mbit/s (USB 1.1 Geschwindigkeit).Remote hohe Geschwindigkeit = Zielrechner überträgt Daten mit max. 480 Mbit/s (USB 2.0 Geschwindigkeit).Schreibgeschützt = Schreibschutz am lokalen Computer ein-/ausgeschaltet.Datentransfer = Es werden zur Zeit Daten übertragen.
Aktualisieren = Aktualisiert die Darstellung der Datenträger.Ausschneiden = ausgewählte Datei ausschneiden.Kopieren = ausgewählte Datei kopieren.Einfügen = ausgewählte Datei einfügen.Löschen = ausgewählte Datei löschen.
2.1.2 Erstellen eines neuen OrdnersKlicken Sie mit der rechten Maustaste auf das rechte Feld des Programmfensters und wählen dann „Verzeichnis anlegen“ aus dem Kontext-Menü, um einen neuen Ordner anzuwählen.

6 7
2.1.3 Erklärung der Funktionen Ausschneiden, Kopieren, Einfügen, Löschen, Öffnen und UmbenennenSie können diese Funktionen verwenden, indem Sie die gewünschte Datei markieren und dann mit der rechten Maustaste das Kontext-Menü öffnen und diese entsprechend auswählen. Alternativ klicken Sie im Hauptmenü die Option „Bearbeiten“ an, um ebenfalls die Funktionen auswählen zu können.
2.1.4 Erklärung der Optionen Ansicht und Fenster im HauptmenüMit der Option Ansicht können Sie die Art der Dateianzeige nach Ihren Wünschen ändern. Die Option Fenster wird gebraucht, um die Fensteranordnung nach Ihren Vorstellungen zu ändern.
2.1.5 Erklärung der Funktion Schreibschutz:
Mit dieser Funktion können Sie einen der beiden angeschlossenen Computer mit einem Schreibschutz versehen, um ungewolltes Löschen von Dateien zu vermeiden.
Bitte beachten Sie, dass dieser Schutz nur bis zur Deaktivierung bzw. Beendigung des Programms aktiv ist!
Wollen Sie zum Beispiel den lokalen Rechner als Schreibgeschützt setzen, gehen Sie bitte wie folgt vor:
Wählen Sie im Hauptmenü die Option „System“ und den Punkt „Schreibgeschützt freigeben“. Dieser Punkt ist etwas irreführend bezeichnet, bedeutet aber nichts anderes, als dass dieser Rechner Schreibgeschützt ist, sobald Sie das Häkchen setzen.
Sollten Sie den Schreibschutz aufheben wollen, entfernen Sie den Haken und klicken dann auf OK.

8 9
d Bedienungsanleitung
2.1.6 Datenaustausch:
Methode 1: Wählen Sie die zu übertragende Datei aus und ziehen Sie direkt auf die Zielposition und legen Sie dort ab.
Methode 2: Wählen Sie die zu übertragende Datei aus klicken Sie mit der rechten Maustaste auf die Datei und verwenden dann in dem geöffneten Kontextmenü den Befehl „Kopieren“ und an der Zielposition den
Befehl „Einfügen“.
Methode 3: Wählen Sie die zu übertragende Datei aus und verwenden dann die Befehle „Kopieren“ bzw. „Einfügen“ im Hauptmenü „Bearbeiten“.
2.2 Beenden des Programms EasySuite und entfernen des Hama Linkkabels
1. Wählen Sie den Befehl „Beenden“ im Hauptmenü „System“ oder klicken Sie auf die „X-Schaltfl äche“ an der rechten oberen Fensterecke um das Programm zu beenden.
2. Klicken Sie auf das „Hardware sicher entfernen“ Symbol in der Taskleiste, wählen den entsprechenden Eintrag aus und klicken anschließend auf „Beenden/Deaktivieren“. Jetzt können Sie gefahrlos das Linkkabel von Ihrem Computer entfernen!

10 11
d Bedienungsanleitung
3. Verwendung des EasySuite Datenübertragungsprogrammes unter Mac OS X:
Das Programm EasySuite ist in dem Linkkabel gespeichert, so dass Sie keine zusätzliche Software installieren müssen.
Nachdem das USB Linkkabel an beide Computer angeschlossen und installiert wurde, wird das Programm automatisch an beiden Computer gestartet. Falls dies nicht der Fall sein sollte, öffnen Sie an beiden Computer den Arbeitsplatz und klicken doppelt auf das Gerät/Laufwerk mit der Bezeichnung EasySuite, dort können Sie dann das Programm „EasyMacCopy“ auch manuell aufrufen.
3.1 Funktionsbeschreibung des EasySuite Programms:
Hinweis:Bedeutung des Begriffs (entfernter Rechner und lokaler Rechner)
Also „lokaler Rechner“ wird immer der Computer benannt, an dem Sie gerade sitzen. Im weiteren Verlauf dieses Handbuchs wird der Computer auch Quellrechner genannt. Der andere Computer wird im Programm als „entfernter Rechner“ bezeichnet der im Laufe dieses Handbuchs auch als Zielrechner genannt wird.
3.1.1 Funktionen der Symbolleiste
Lokaler Bus bedeutet, dass der Quellcomputer Daten mit max. 480 Mbit/s (USB2.0 Geschwindigkeit) überträgt.Remote Bus bedeutet, dass der Zielrechner Daten mit max. 480 Mbit/s (USB2.0 Geschwindigkeit) überträgt.Datentransfer leuchtet auf wenn über das Linkkabel Daten bewegt werden.Neuer Order bedeutet, das durch das anklicken dieses Symbols ein neuer Ordner erstellt werden kann.Info bedeutet, dass Sie hier allgemeine Information über das EasyMacCopy Programm erhalten, z.B. welche Version momentan benutzt wird.

12 13
d Bedienungsanleitung
3.1.2. Erstellen eines neuen Ordners:Klicken Sie auf das „Neuer Ordner“ - Symbol in der Symbolleiste oder klicken Sie mit der „Ctrl“ -Taste gedrückt auf das rechte Feld des Fensters, um einen neuen Ordner zu erstellen.
3.1.3 Die Funktionen Umbenennen, Aktualisieren, Löschen und Kopieren Wählen Sie die gewünschte Datei aus und klicken Sie, dann mit der „Ctrl-„Taste darauf, um das Funktionsmenü zu öffnen.
3.1.4 Die Funktionen Ausschneiden, Kopieren, Einfügen, Löschen und Alles markierenWählen Sie die gewünschte Datei aus und klicken Sie auf die Option „Bearbeiten“ in der Funktionsleiste, um das Funktionsmenü zu öffnen.
3.1.5 Erklärung der Funktion Schreibschutz:
Mit dieser Funktion können Sie einen der beiden angeschlossenen Computer mit einem Schreibschutz versehen, um ungewolltes Löschen von Dateien zu vermeiden.
Bitte beachten Sie, dass dieser Schutz nur bis zur Deaktivierung bzw. Beendigung des Programms aktiv ist!
Wollen Sie zum Beispiel den lokalen Rechner (Quellrechner) als Schreibgeschützt setzen, gehen Sie bitte wie folgt vor:
Wählen Sie im Hauptmenü die Option „EasyMacCopy“ und im Untermenu „Setup“. Dieser Punkt ist etwas irreführend bezeichnet, bedeutet aber nichts anderes, als dass dieser Rechner Schreibgeschützt ist, sobald Sie das Häkchen setzen.
Um den Schreibschutz aufzuheben, klicken Sie im Hauptmenü auf die Option „EasyMacCopy“ und wählen dann „Setup“ im Untermenü aus. Das Setupfenster wird geöffnet. Entfernen Sie das Häkchen für die Option „Als schreibgeschützt teilen“, um den Schreibschutz aufzuheben.
14 15
3.1.6 Datenaustausch:
Methode 1: Wählen Sie die zu übertragende Datei aus und ziehen Sie direkt auf die Zielposition und legen Sie dort ab.
Methode 2: Wählen Sie die zu übertragende Datei aus, drücken Sie die „Ctrl-„ Taste und verwenden dann in dem geöffneten Kontext Menu den Befehl „Kopieren“ und an der Zielposition den Befehl „Einfügen“.
Methode 3: Wählen Sie die zu übertragende Datei aus und verwenden dann die Befehle „Kopieren“ bzw. „Einfügen“ im Hauptmenu „Bearbeiten“.
3.2 Beenden des EasyMacCopy
1. Klicken Sie auf EasyMacCopy in der oberen linken Ecke des Fensters oder wählen Sie EasyMacCopy beenden, um das Programm zu beenden.
2. Ziehen Sie das EasySuite CDROM-Symbol auf dem Desktop zu dem Papierkorb und trennen Sie das Datenübertragungskabel von dem Computer.
Hinweis:Ziehen Sie unbedingt vor dem Entfernen des Datenübertragungskabels von dem Computer das EasySuite CDROM-Symbol zu dem Papierkorb. Andernfalls kann der Computer abstürzen.
4. Kontakt- und Supportinformationen:
Bei defekten Produkten:Bitte wenden Sie sich bei Produktreklamationen an Ihren Händler oder an die Hama Produktberatung
Internet/World Wide Web:Produktunterstützung, Updates oder Produktinformationen bekommen Sie unter www.hama.com
Support Hotline – Hama Produktberatung:Tel. +49 (0) 9091 / 502-115Fax +49 (0) 9091 / 502-272e-mail: [email protected]

16 17
g Operating Instruction
Contents: Page
1. Installation Instructions 171.1. On Windows 171.2. On Mac OS X 17
2. Using the EasySuite Data Transfer Program on Windows 172.1. Functions of the EasySuite program 182.1.1. Functions of the toolbar 182.1.2. Creating a new folder 192.1.3. Explanation of the cut, copy, paste, delete, open and rename functions 202.1.4. Explanation of the View and Window menus on the menu bar 202.1.5. Explanation of the write-protect function 212.1.6. Data exchange 222.2. Exiting EasySuite and removing the Hama link cable 23
3. Using the EasySuite Data Transfer Program on Mac OS X 23 3.1. Functions of the EasySuite program 24 3.1.1. Functions of the toolbar 243.1.2. Creating a new folder 253.1.3. Rename, update, delete and copy functions 253.1.4. Cut, copy, paste, delete and select all functions 253.1.5. Explanation of the write-protect function 263.1.6. Data exchange 263.2. Exiting EasyMacCopy 27
4. Contact and Support Information 27
Contents:1 x USB 2.0 link cable1 x Quick guide1 x Disposal instructions Safety instructions:Do not use the product in moist or extremely dusty areas, on radiators or in the vicinity of heat sources. This device is not designed for use outdoors. Protect the device from pressure and impact. The product may not be opened during operation.
Requirements:Computer or laptop with at least one free USB 1.1/2.0 port.
Supported operating systems:Windows 2000 / Windows XP / Windows XP x64 Edition / Windows XP Media Center Edition 200X / Windows Vista / Windows Vista 64-bit.Mac OS X 10.3.x / Mac OS X 10.4.x
g User manual
1. Installation Instructions1.1 On Windows
Before connecting the Hama link cable to your computer, ensure that you have already installed the most up-to-date Service Pack from Microsoft. Hama recommends installing the Service Pack because Microsoft has eliminated a number of fl aws and implemented optimizations that could in certain circumstances affect the speed of the USB link cable.
Since the Hama USB link cable is a plug-and-play solution, installing a driver beforehand is not required. Start your operating system and plug the USB link cable into a free USB port. Your system then recognizes and installs the cable.
If the link cable is no longer required, do not simply unplug the cable. Instead, remove it via the “Eject device” option. You reach this menu item by right clicking the EasySuite device and selecting the corresponding menu item in the con-text menu. Wait until Windows notifi es you that it is safe to unplug the USB device.
1.2 Mac OS X
Before connecting the Hama link cable to your computer, make sure that you have already installed the most up-to-date Update Pack from Apple. Hama recommends installing the Update Pack because Apple has eliminated a number of fl aws and implemented optimizations that could in certain circumstances affect the speed of the USB link cable.
Since the Hama USB link cable is a plug-and-play solution, installing a driver beforehand is not required. Start your operating system and plug the USB link cable into a free USB port. Your system then recognizes and installs the cable.
If the link cable is no longer required, do not simply unplug the cable. Instead, remove this cable by dragging and dropping the CD icon labelled EasyShare onto the Trash.
2. Using the EasySuite Data Transfer Program on Windows
EasySuite is stored in the link cable so that you do not need to install any additional software.
After the USB link cable is connected to and installed on both computers, the program automatically starts on both computers. If this does not happen, open “My Computer” on both computers and double click the device/drive labelled “EasySuite”. Here you can manually run the program.

18 19
d Bedienungsanleitung g Operating Instruction
The program establishes a direct connection as soon as it is started. When this happens, EasySuite displays the contents of both connected computers.
2.1 Functions of the EasySuite program
Note: Term defi nition (remote computer and local computer)
The computer that you are sitting in front of is called the “Local Host”. This computer is also called the source computer later in this manual.
The other computer is referred to as the “Remote Host” in the program, which is also called the target computer later in this manual.
2.1.1 Functions of the toolbar
Local full speed = Source computer transfers data at a max. rate of 12 Mbit/s (USB 1.1 speed).Local high speed = Source computer transfers data at a max. rate of 480 Mbit/s (USB 2.0 speed).Remote full speed = Target computer transfers data at a max. rate of 12 Mbit/s (USB 1.1 speed).Remote high speed = Target computer transfers data at a max. rate of 480 Mbit/s (USB 2.0 speed).Read only = Write-protection on the local computer switched on/off.Tx/Rx = Data is transferring.
Refresh = Updates the disk display.Cut = Cuts the selected fi le.Copy = Copies the selected fi le.Paste = Pastes the selected fi le.Delete = Deletes the selected fi le.
2.1.2 Creating a new folderRight-click in the right area of the program window and select “Make directory” from the context menu to create a new folder.
20 21
d Bedienungsanleitung
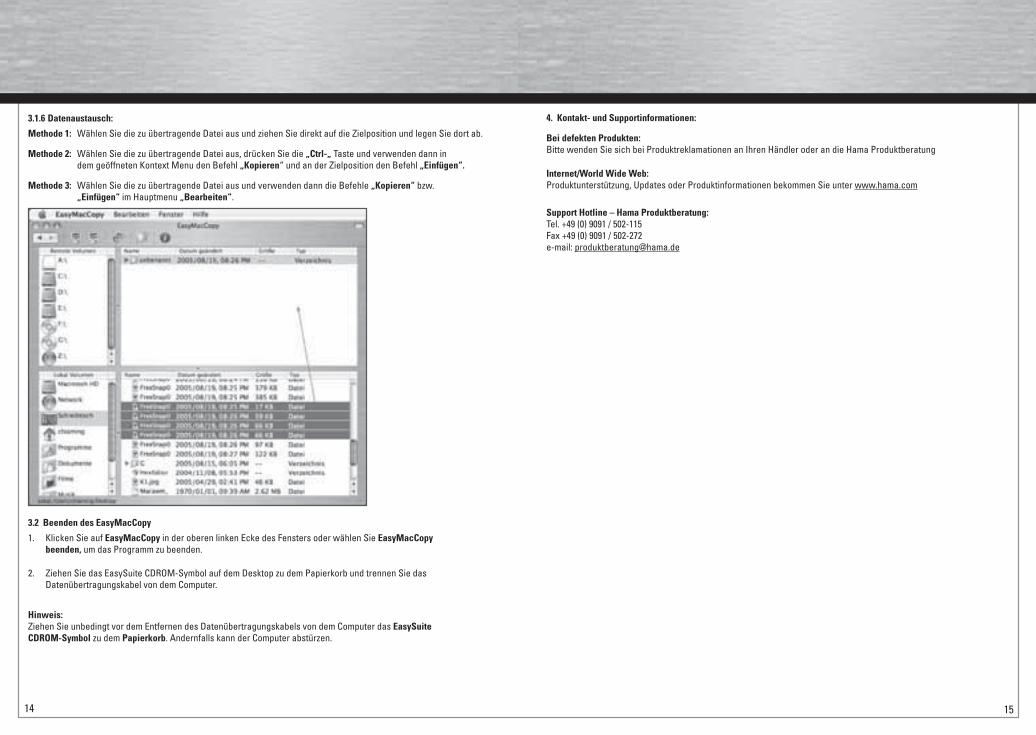
2.1.3 Explanation of the cut, copy, paste, delete, open and rename functions
You can use these functions by selecting the desired fi le, right-clicking it and selecting the corresponding function from the context menu. You can also choose “Edit” from the menu bar to select these functions.
2.1.4 Explanation of the View and Window menus on the menu bar
You can use the View menu to change the way fi les are display as required. You can use the Window menu to change the window assignment as required.
2.1.5 Explanation of the write-protect function: Using this function, you can write-protect one of the two connected computers to prevent fi les from being accidentally deleted.
Note that this protection is active only until it is deactivated or until the program is closed.
If you, for example, want to write-protect the local computer, proceed as follows:
Select the “System” menu from the menu bar and choose the menu item “Share as Read Only”. This item is somewhat misleadingly labelled but does not mean anything other than that this computer is write-protected as soon as you set the checkmark.
If you want to deactivate write-protection, remove the checkmark and click OK.

22 23
d Bedienungsanleitung
2.1.6 Data exchange:
Method 1: Select the fi le to be transferred and drag and drop it to the target position.
Method 2: Select the fi le to be transferred, right-click the fi le and choose the “Copy” command from the opened context menu and then choose “Paste” in the target position.
Method 3: Select the fi le to transfer and use the “Copy” or “Paste” commands from the main menu “Edit”.
2.2 Exiting EasySuite and removing the Hama link cable
1. Choose the “Exit” command from “System” on the main menu or click on the “X button” in the upper right corner of the window to exit the program.
2. Click on the “Safely Remove Hardware” icon in the task bar, select the relevant entry and then click “Stop”. You can now safely unplug the link cable from your computer.
3. Using the EasySuite Data Transfer Program on Mac OS X
EasySuite is stored in the link cable so that you do not need to install any additional software.
After the USB link cable is connected to and installed on both computers, the program automatically starts on both computers. If this does not happen, open the device/drive labelled EasySuite. Here you can manually run the program “EasyMacCopy”.

24 25
d Bedienungsanleitung
3.1 Functions of the EasySuite program:
Note:Term defi nition (remote computer and local computer)
The computer that you are sitting in front of is called the “local volumes”. This computer is also called the source computer later in this manual. The other computer is referred to as the “remote volumes” in the program, which is also called the target computer later in this manual.
3.1.1 Functions of the toolbar
The Local Bus icon here shows that the source computer transfers data at a max. rate of 480 Mbit/s (USB 2.0 speed).The Remote Bus icon here shows that the target computer transfers data at a max. rate of 480 Mbit/s (USB 2.0 speed).The Data Transfer icon lights up when data is travelling over the link cable.The New Folder icon lets you create a new folder by clicking.The About icon lets you view general information about EasyMacCopy (e.g. which version being used at the moment).
3.1.2 Creating a new folder:
Click the “New Folder” icon in the toolbar or click in the right area of the window while holding the “Ctrl” key to create a new folder.
3.1.3 Rename, update, delete and copy functions
Select the desired fi le and click while holding the “Ctrl” key to open the function menu.
3.1.4 Cut, copy, paste, delete and select all functions
Select the desired fi le and click the “Edit” menu on the menu bar to open the function menu.

26 27
d Bedienungsanleitung
3.1.5 Explanation of the write-protect function:
Using this function, you can write-protect one of the two connected computers to prevent fi les from being accidentally deleted.
Note that this protection is active only until it is deactivated or until the program is closed.
If you, for example, want to write-protect the local computer, proceed as follows:
On the menu bar, open the menu “EasyMacCopy” and then choose “Setup”. This item is somewhat misleadingly labelled but does not mean anything other than that this computer is write-protected as soon as you set the checkmark.
To deactivate write-protection, open the menu “EasyMacCopy” from the menu bar and choose “Setup”. The setup window opens. Remove the checkmark from the “Share as Read Only” box to deactivate the write-protection.
3.1.6 Data exchange:
Method 1: Select the fi le to be transferred and drag and drop it to the target position.
Method 2: Select the fi le to be transferred, press the “Ctrl” key and choose the “Copy” command from the opened context menu and then choose “Paste” in the target position.
Method 3: Select the fi le to transfer and use the “Copy” or “Paste” commands from the main menu “Edit”.
3.2 Exiting EasyMacCopy
1. Click EasyMacCopy in the upper left corner of the window or select Exit EasyMacCopy to exit the program.
2. Drag and drop the EasySuite CD-ROM icon from the desktop to the Trash and then unplug the data transfer cable from the computer.
Note:You must drag and drop the EasySuite CD-ROM icon onto the Trash before unplugging the data transfer cable from the computer. If you do not, the computer may crash.
4. Contact and Support Information:
If the product is defective:Please contact your dealer or Hama Product Consulting if you have any product claims.
Internet / World Wide Web:Product support, updates and product information can be found at www.hama.com
Support hotline – Hama product consultation:Tel. +49 (0) 9091 502 115Fax +49 (0) 9091 502 272E-mail: [email protected]

28 29
g Operating Instruction
Table des matières : Page
1. Notice d´installation 281.1. Sous Windows 281.2. Sous MAC OS X 29
2. Utilisation du programme de transmission des données EasySuite sous Windows 292.1. Description des fonctions du programme EasySuite 302.1.1. Fonctions de la barre des symboles 30 2.1.2. Création d´un nouveau répertoire 312.1.3. Explication des fonctions couper, copier, coller, effacer, ouvrir et renommer 322.1.4. Explication des options affi chage et fenêtre dans le menu principal 322.1.5. Explication de la fonction protection contre l´écriture 332.1.6. Echange des données 34 2.2. Achever le programme EasySuite et enlever le câble link Hama 35
3. Utilisation du programme de transmission des données EasySuite sous Mac OS X 353.1. Description des fonctions du programme EasySuite 36 3.1.1. Fonctions de la barre des symboles 363.1.2. Création d´un nouveau répertoire 373.1.3. Les fonctions renommer, actualiser, effacer et copier 373.1.4. Les fonctions couper, copier, insérer, effacer et tout sélectionner 38 3.1.5. Explication de la fonction protection contre l´écriture 383.1.6. Echange des données 393.2. Fin du EasyMacCopy 39
4. Informations de contact et de support 39
Contenu :1x Câble Link USB 2.0 1x Petit manuel d´utilisation1x Mesures d´élimination
Mesures de sécurité :N´utilisez le produit ni dans un endroit humide ou très poussiéreux, ni près de sources de chaleur ou de radiateurs. Cet appareil n´est pas conçu pour être utilisé à l´extérieur. Protégez votre appareil contre tout effet de choc et de pression. N´ouvrez pas l´appareil pendant son fonctionnement.
Condition :Micro-ordinateur ou ordinateur portable doté au moins d´une prise USB 1.1/2.0 disponible.
Systèmes d´exploitation supportés :
Windows 2000 / Windows XP / Windows XP x64bit Edition / Windows XP Media Center Edition 200X / Windows Vista / Windows Vista x64bit./MAC OS X 10.3.x / MAC OS X 10.4.x
1. Notice d´installation
1.1 Sous Windows
Avant de brancher le câble Link d´ Hama à votre micro-ordinateur, veuillez vérifi er que vous avez déjà installé le service pack actuel de Microsoft. Hama recommande l´installation du service pack car un grand nombre de points faibles ont été rémédiés et des optimisations ont été effectuées; ceci peut avoir un effet sur la vitesse du câble link USB.
Etant donné que le câble link USB d´Hama est une solution Plug and Play, il n´est pas nécessaire d´installer préalablement le pilote. Veuillez donc démarrer le système d´exploitation et raccordez le câble link USB à une prise USB disponible. Le câble va ensuite être détecté et installé par votre système.
Mode d‘emploi
Quand vous n´aurez plus besoin du câble link, ne débranchez pas tout simplement le câble mais enlevez-le via l´option „Jeter l´appareil“. Vous obtiendrez cette option en cliquant avec la touche droite de la souris sur l´appareil EasySuite et dans le menu de contexte puis en sélectionnant l´option correspondante. Attendez jusqu´à ce que Windows vous informe que vous pouvez enlever l´appareil USB.
1.2 MAC OS X Avant de brancher le câble Link d´ Hama à votre micro-ordinateur, veuillez vérifi er que vous avez déjà installé le update pack d´Apple. Hama recommande l´installation du service pack car un grand nombre de points faibles ont été rémédiés et des optimisations ont été effectuées par Apple; ceci peut avoir un effet sur la vitesse du câble link USB.
Etant donné que le câble link USB d´Hama est une solution Plug and Play, il n´est pas nécessaire d´installer préalable-ment le pilote. Veuillez donc démarrer le système d´exploitation et raccordez le câble link USB à une prise USB dispo-nible. Le câble va ensuite être ensuite détecté et installé par votre système.
Quand vous n´aurez plus besoin du câble link, ne débranchez pas tout simplement le câble mais enlevez-le en déplaçant à l´aide de la souris l´icône CD avec l´inscription EsayShare vers la corbeille puis en lâchant le doigt (Drag and Drop).
2. Utilisation du programme de transmission des données EasySuite sous Windows
Le programme EasySuite est enregistré dans le câble Link, de façon à ce que vous n´ayez pas besoin d´installer de logiciel supplémentaire.
Une fois le câble link USB raccordé et installé aux deux micro-ordinateurs, le programme va démarrer automatiquement sur les deux micro-ordinateurs. Si cela ne devait pas être le cas, ouvrez le poste travail des deux ordinateurs et double-cliquez sur l´appareil/le lecteur avec la description EasySuite, vous pouvez là-aussi appeler le programme manuellement.
Une fois que le programme démarre sur les deux micro-ordinateurs, une liaison directe va s´effectuer simultanément. Vous le reconnaîtrez au fait que le programme EasySuite indique les contenus des deux micro-ordinateurs raccordés.
f

30 31
2.1 Description des fonctions du programme EasySuite
Information :Signifi cation des notions (ordinateur distant et ordinateur local)
L´„Serveur local“ est toujours qualifi é comme l´ordinateur avec lequel vous travaillez. Au fi l de ce manuel d´utilisation, cet ordinateur sera également désigné comme Ordinateur source.
L´autre ordinateur est désigné „Serveur distant“ et sera désigné au fi l de ce manuel comme Ordinateur cible.
2.1.1 Fonctions de la barre des symboles
Locale Pleine Vitesse = L´ordinateur source transmet les données avec max. 12 Mbits/s (vitesse USB 1.1).Locale Vitesse Rapide = L´ordinateur source transmet les données avec max. 480 Mbits/s (vitesse USB 2.0).Distant Pleine Vitesse = L´ordinateur cible transmet les données avec max. 12 Mbits/s (vitesse USB 1.1).Distant Vitesse Rapide = L´ordinateur cible transmet les données avec max. 480 Mbits/s (vitesse USB 2.0).Lecteur Seulement = Protection contre l´écriture à l´ordinateur local allumée/éteinte.Tx/Rx = Des données sont transmises en ce moment.
Rafraîchir = actualiser la représentation des supports d´informations.Couper = couper le fi chier sélectionné.Copier = copier le fi chier sélectionné.Coller = insérer le fi chier sélectionné.Supprimer = effacer le fi chier sélectionné.
2.1.2 Créer un nouveau répertoire
Avec la touche droite de la souris, cliquez sur le champ droit de la fenêtre du programme et sélectionnez alors „Créer répertoire“ du menu pour sélectionner un nouveau répertoire.

32 33
d Bedienungsanleitung
2.1.3 Explication des fonctions couper, copier, insérer, effacer, ouvrir et renommer
Vous pouvez utiliser ces fonctions en double-cliquant le fi chier souhaité, en ouvrant le menu de contexte avec le bouton droit de la souris puis en le sélectionnant. Comme option, vous pouvez cliquer dans le menu principal sur l´option „Edition“ afi n de pouvoir également sélectionner les fonctions.
2.1.4 Explication des options affi chage et fenêtre dans le menu principal
Avec l´option Visualiser vous pouvez modifi er selon vos souhaits le modèle de l´affi chage du fi chier. La fenêtre Option est nécessaire afi n de modifi er la prescription de la fenêtre selon vos souhaits.
2.1.5 Explication de la fonction protection contre l´écriture :
Cette fonction vous permet de protéger contre l´écriture un des deux micro-ordinateurs branchés afi n d´éviter d´effacer des fi chiers par inadvertance.
Veuillez observer que cette protection est uniquement active jusqu‘ à la désactivation ou fi n du programme!
Par exemple, si vous souhaitez protéger votre ordinateur local contre l´écriture, procédez comme suit :
Dans le menu principal, sélectionnez l´option „Système“ et le point „Partager en lecture seulement“. Ce point est désigné d´une manière qui peut prêter à confusion mais ne signifi e pas autre chose que cet ordinateur est protégé contre l´écriture dès que vous y mettez un crochet.
Si vous souhaitez enlever la protection contre l´écriture, ôtez le crochet puis cliquez sur OK.
34 35
d Bedienungsanleitung
2.1.6 Echange des données :
Méthode 1 : Sélectionnez le fi chier à transmettre et déplacez le directement vers la position cible.
Méthode 2 : Sélectionnez le fi chier à transmettre, cliquez sur le fi chier avec le bouton droit de la souris et utilisez alors dans le menu contexte ouvert la commande ”Copier” et dans la position cible la commande “Insérer”.
Méthode 3 : Sélectionnez le fi chier à transmettre et utilisez ensuite les commandes “Copier” ou “Insérer” dans le menu principal Edition.
2.2 Achever le programme EasySuite et enlever le câble link Hama
1. Sélectionnez la commande „Achever“ dans le menu principal „Système“ ou cliquez dans le coin de la fenêtre en haut à droite sur le „bouton de commande X“ pour achever le programme.
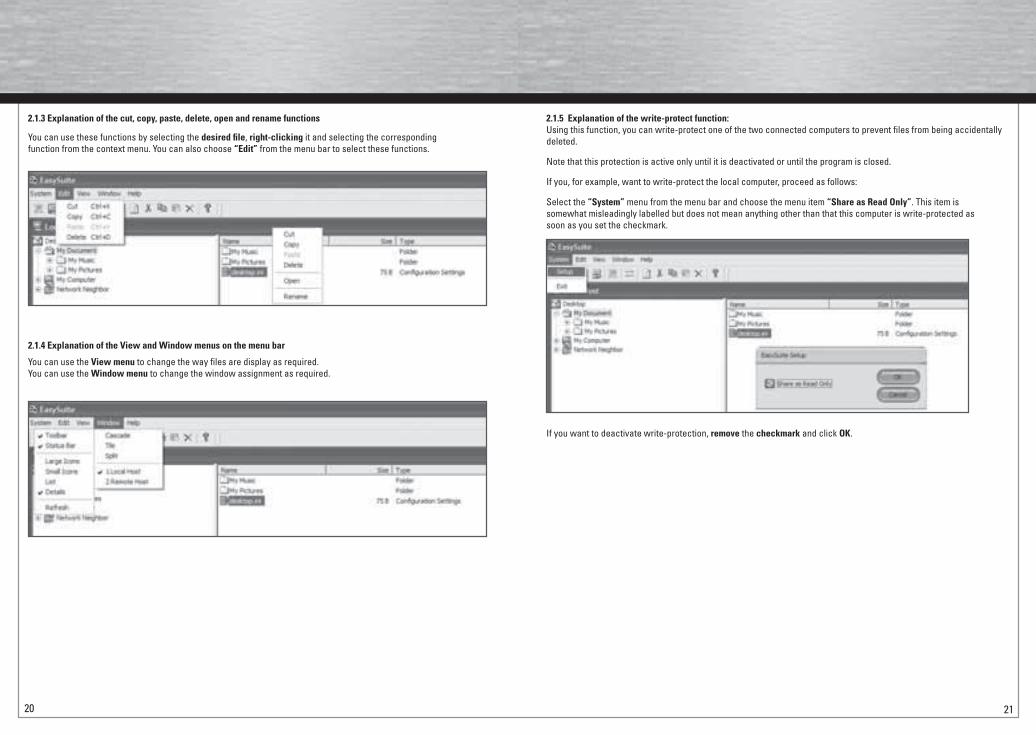
2. Cliquez dans la barre des tâches sur le symbole „Enlever d´une manière sûre le matériel“, sélectionnez l´inscription correspondante puis cliquez sur „Finir/Désactiver“. A présent, vous pouvez enlever sans risque le câble link de votre ordinateur! (cf. illustration ci-dessous)
3. Utilisation du programme de transmission des données EasySuite sous Mac OS X :
Le programme EasySuite est enregistré dans le câble Link, de façon à ce que vous n´ayez pas besoin d´installer de logiciel supplémentaire.
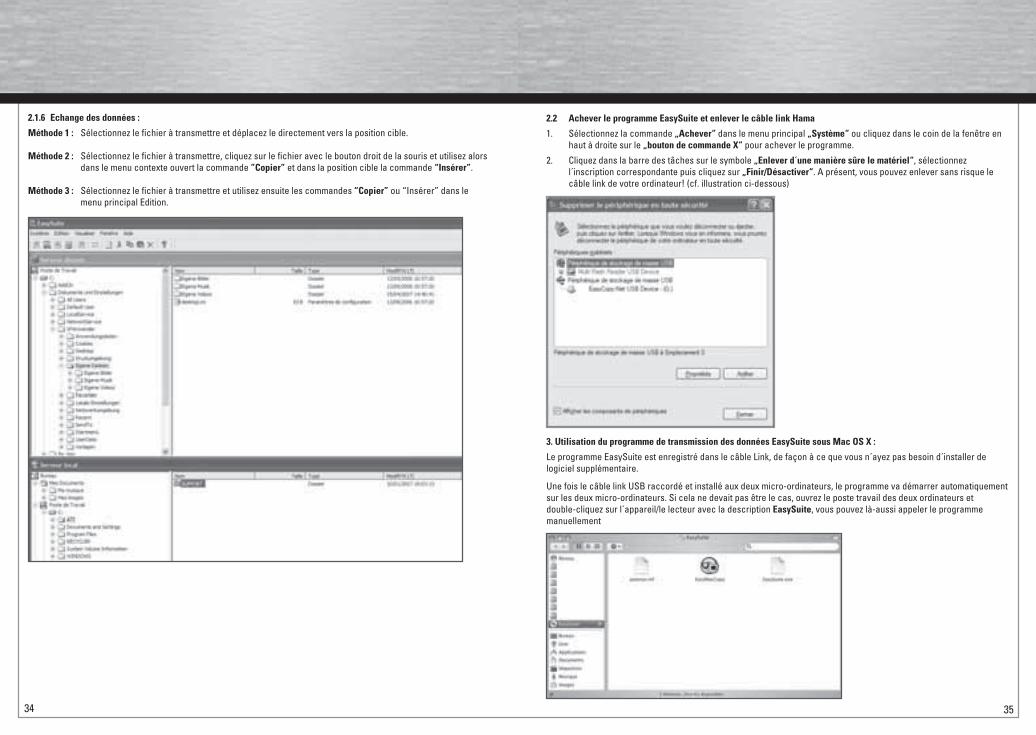
Une fois le câble link USB raccordé et installé aux deux micro-ordinateurs, le programme va démarrer automatiquement sur les deux micro-ordinateurs. Si cela ne devait pas être le cas, ouvrez le poste travail des deux ordinateurs et double-cliquez sur l´appareil/le lecteur avec la description EasySuite, vous pouvez là-aussi appeler le programme manuellement

36 37
d Bedienungsanleitung
3.1 Description du fonctionnement du programme EasySuite :
Information :Signifi cation des notions (ordinateur distant et ordinateur local)
L´„local volumes“ est toujours qualifi é comme l´ordinateur avec lequel vous travaillez. Au fi l de ce manuel d´utilisation, cet ordinateur sera également désigné comme Ordinateur cible.
L´autre ordinateur est désigné „remote volumes“ et sera désigné au fi l de ce manuel comme Ordinateur source.
3.1.1 Fonctions de la barre des symboles
Local Bus signifi e que l´ordinateur source transmet les données avec max. 480 Mbits/s (vitesse USB2.0).Remote Bus signifi e que l´ordinateur cible transmet les données avec max. 480 Mbits/s (vitesse USB2.0).Data Transfer s´allume quand des données sont déplacées via le câble link. New folder qu´en cliquant sur ce symbole, un nouveau répertoire va être créé. About que vous recevrez ici toutes les informations générales sur le programme EasyMacCopy, par ex. la version utilisée momentanément.
3.1.2 Créer un nouveau répertoire :
Cliquez dans la barre des tâches sur le symbole „New folder“ ou cliquez avec la touche „Ctrl“ sur le champ droit de la fenêtre afi n de créer un nouveau répertoire.
3.1.3 Les fonctions renommer, actualiser, effacer et copier
Sélectionnez le fi chier souhaité puis cliquez sur celui-ci avec la touche „Ctrl„ afi n d´ouvrir le menu de fonction.

38 39
d Bedienungsanleitung
3.1.4 Les fonctions couper, copier, insérer, effacer et tout sélectionner
Sélectionnez le fi chier souhaité et cliquez sur l´option „Edit“ dans la barre des fonctions afi n d´ouvrir le menu des fonctions.
3.1.5 Explication de la fonction protection contre l´écriture :
Cette fonction vous permet de protéger contre l´écriture un des deux micro-ordinateurs branchés afi n d´éviter d´effacer des fi chiers par inadvertance.
Veuillez observer, que cette protection est uniquement active jusqu‘ à la désactivation ou fi n du programme!
Par exemple, si vous souhaitez protéger votre ordinateur local contre l´écriture, procédez comme suit :
Dans le menu principal, sélectionnez l´option „EasyMacCopy“ et dans le sous-menu „Setup“. Ce point est désigné d´une manière qui peut prêter à confusion mais ne signifi e pas autre chose que cet ordinateur est protégé contre l´écriture dès que vous y mettez un crochet
Si vous souhaitez enlever la protection contre l´écriture, cliquez dans le menu principal sur l´option „EasyMacCopy“ et sélectionnez dans le sous-menu „Setup“. La fenêtre Setup va alors s´ouvrir. Enlevez le crochet devant l´option „Share as Read Only“.
3.1.6 Echange des données :
Méthode 1 : Sélectionnez le fi chier à transmettre et déplacez le directement vers la position cible.
Méthode 2 : Sélectionnez le fi chier à transmettre, cliquez sur la touche „Ctrl“, utilisez dans le menu contexte ouvert la commande Copy et dans la position cible la commande Paste.
Méthode 3 : Sélectionnez le fi chier à transmettre et utilisez ensuite les commandes Copy ou Paste dans le men principal Edition.
3.2 Achever EasyMacCopy
1. Cliquez sur EasyMacCopy dans le coin gauche en haut de la fenêtre ou sélectionnez Achever EasyMacCopy pour achever le programme.
2. Déplacez le symbole EasySuite CDROM vesr la corbeille puis enlevez le câble de transmission des données de l´ordinateur.
Remarque :Avant d´enlever le câble de transmission des données de votre ordinateur, mettez absolument auparavant le symbole EasySuite CDROM dans la corbeille. Sinon, l´ordinateur risque de tomber en panne.
4. Informations de support et de contact :
En cas de produits défectueux :En cas de réclamations de produits, veuillez vous adresser à votre revendeur ou au service de conseil des produits Hama.
Internet/World Wide Web :Vous trouverez des supports et des informations sur les produits ainsi que des mises à jour en consultant www.hama.com.
Support Hotline – Service du conseil des produits Hama :Tél. : 0049 9091 / 502-115Fax : 0049 9091 / 502-272e-mail: [email protected]