Embed Size (px)
Citation preview
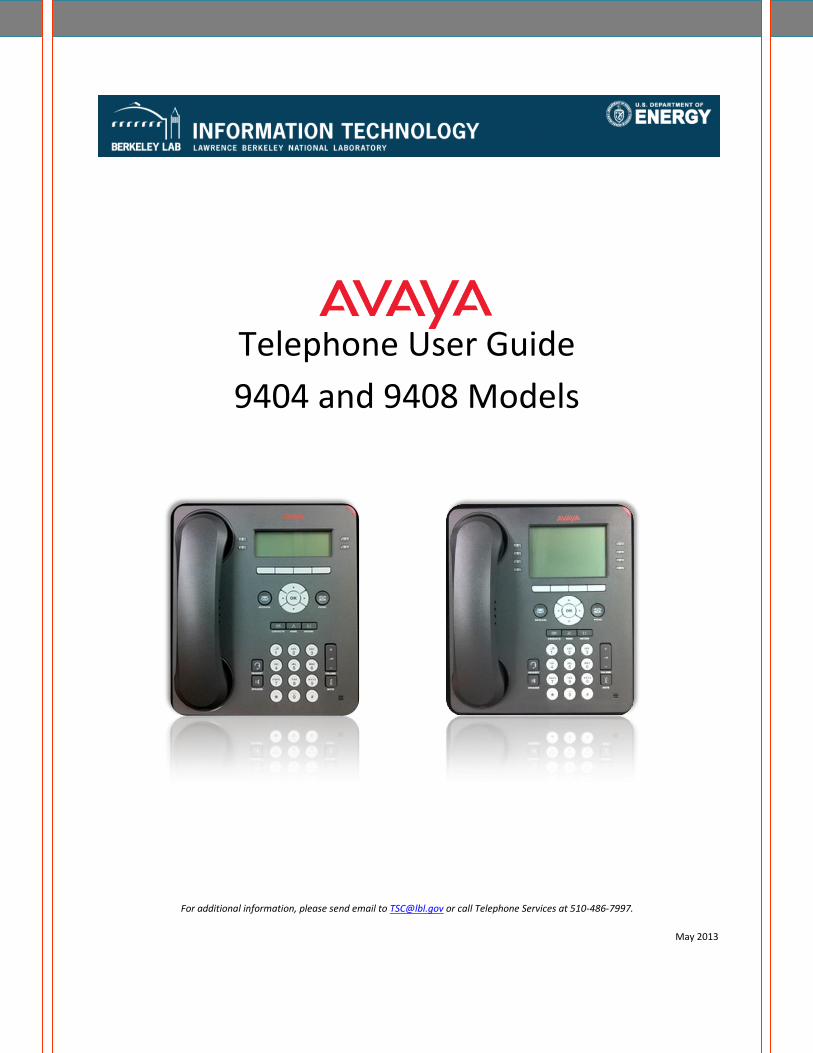
Telephone User Guide
9404 and 9408 Models
For additional information, please send email to [email protected] or call Telephone Services at 510-486-7997.
May 2013
For additional information, please send email to [email protected] or call Telephone Services at 510-486-7997.
Page 2
Introduction - the 9404 and 9408 Telephone
Your telephone provides many features, including a Phone screen for viewing and managing your calls, a History Log, a Contacts
list, a menu of options and settings, and access to your voice mail. Not all features included in this guide may be active on your
phone set. To learn more, or to inquire about a feature you are interested in, please send email to [email protected] or call x7997.
Description of Features and Buttons ______________________________________________ 3
Making and Receiving Phone Calls _______________________________________________ 7
Forwarding Calls ______________________________________________________________ 8
Conference Calls ______________________________________________________________ 9
The History Log ______________________________________________________________ 10
Contacts ___________________________________________________________________ 11
Options & Settings ___________________________________________________________ 12
Bridged Calls ________________________________________________________________ 15
Call Park ___________________________________________________________________ 15
Auto Dial ___________________________________________________________________ 16
Call Timer __________________________________________________________________ 16
Ringer Off __________________________________________________________________ 16
Voice Mail __________________________________________________________________ 17
For additional information, please send email to [email protected] or call Telephone Services at 510-486-7997.
Page 3
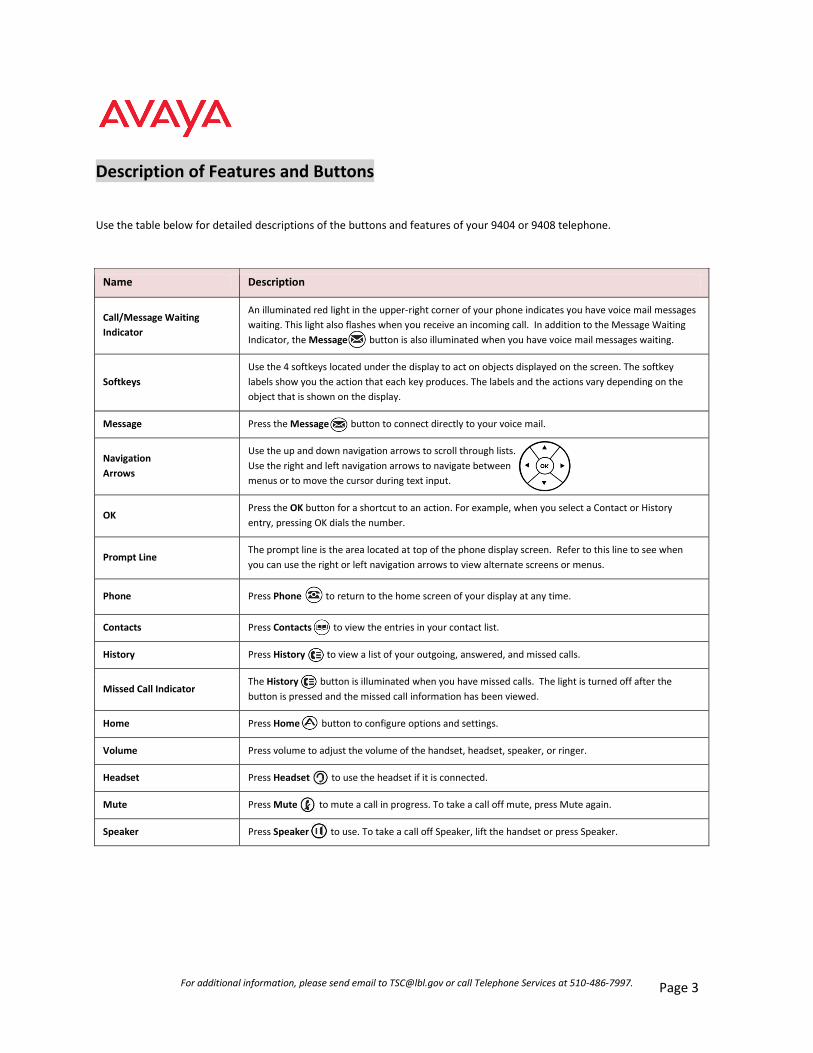
Description of Features and Buttons
Use the table below for detailed descriptions of the buttons and features of your 9404 or 9408 telephone.
Name Description
Call/Message Waiting
Indicator
An illuminated red light in the upper-right corner of your phone indicates you have voice mail messages
waiting. This light also flashes when you receive an incoming call. In addition to the Message Waiting
Indicator, the Message button is also illuminated when you have voice mail messages waiting.
Softkeys
Use the 4 softkeys located under the display to act on objects displayed on the screen. The softkey
labels show you the action that each key produces. The labels and the actions vary depending on the
object that is shown on the display.
Message Press the Message button to connect directly to your voice mail.
Navigation
Arrows
Use the up and down navigation arrows to scroll through lists.
Use the right and left navigation arrows to navigate between
menus or to move the cursor during text input.
OK Press the OK button for a shortcut to an action. For example, when you select a Contact or History
entry, pressing OK dials the number.
Prompt Line The prompt line is the area located at top of the phone display screen. Refer to this line to see when
you can use the right or left navigation arrows to view alternate screens or menus.
Phone Press Phone to return to the home screen of your display at any time.
Contacts Press Contacts to view the entries in your contact list.
History Press History to view a list of your outgoing, answered, and missed calls.
Missed Call Indicator The History button is illuminated when you have missed calls. The light is turned off after the
button is pressed and the missed call information has been viewed.
Home Press Home button to configure options and settings.
Volume Press volume to adjust the volume of the handset, headset, speaker, or ringer.
Headset Press Headset to use the headset if it is connected.
Mute Press Mute to mute a call in progress. To take a call off mute, press Mute again.
Speaker Press Speaker to use. To take a call off Speaker, lift the handset or press Speaker.
For additional information, please send email to [email protected] or call Telephone Services at 510-486-7997.
Page 4
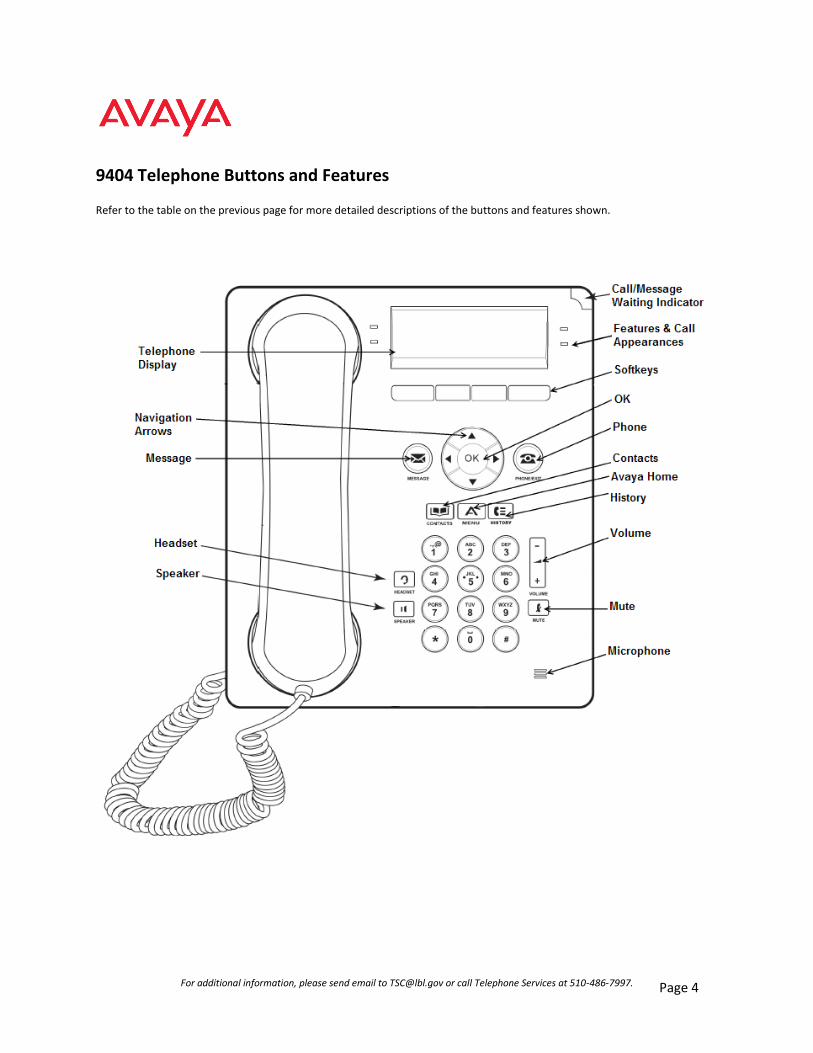
9404 Telephone Buttons and Features
Refer to the table on the previous page for more detailed descriptions of the buttons and features shown.
For additional information, please send email to [email protected] or call Telephone Services at 510-486-7997.
Page 5
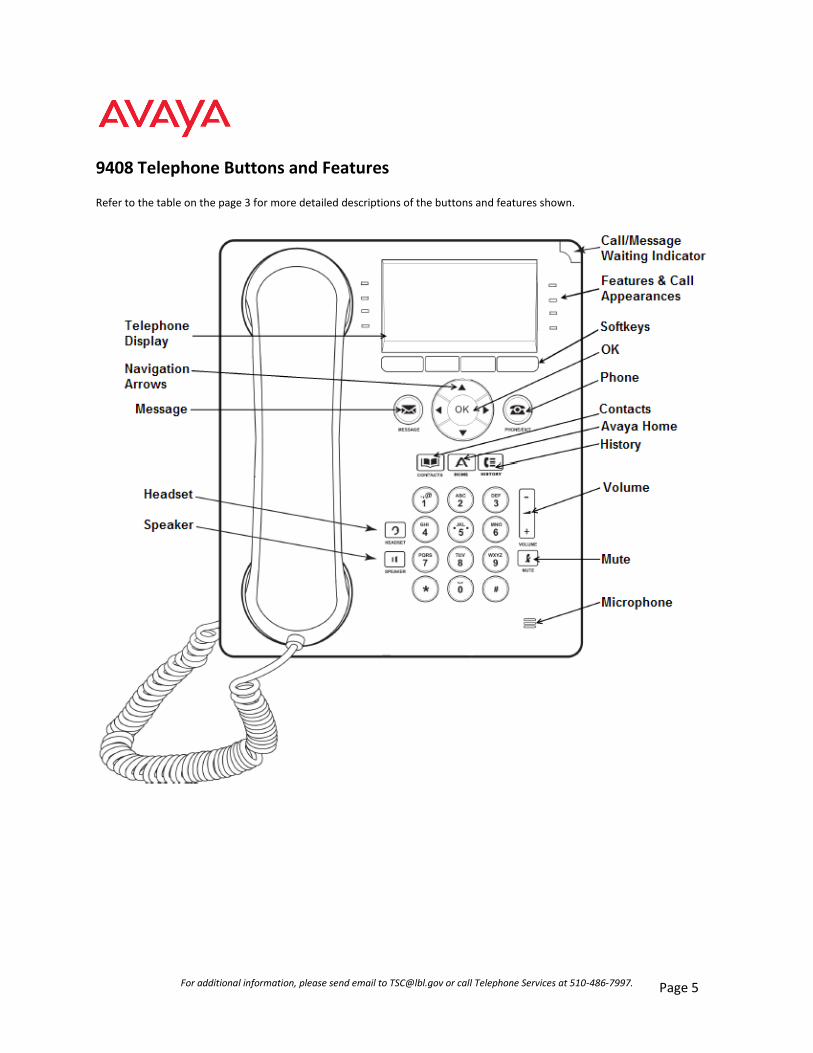
9408 Telephone Buttons and Features
Refer to the table on the page 3 for more detailed descriptions of the buttons and features shown.
For additional information, please send email to [email protected] or call Telephone Services at 510-486-7997.
Page 6
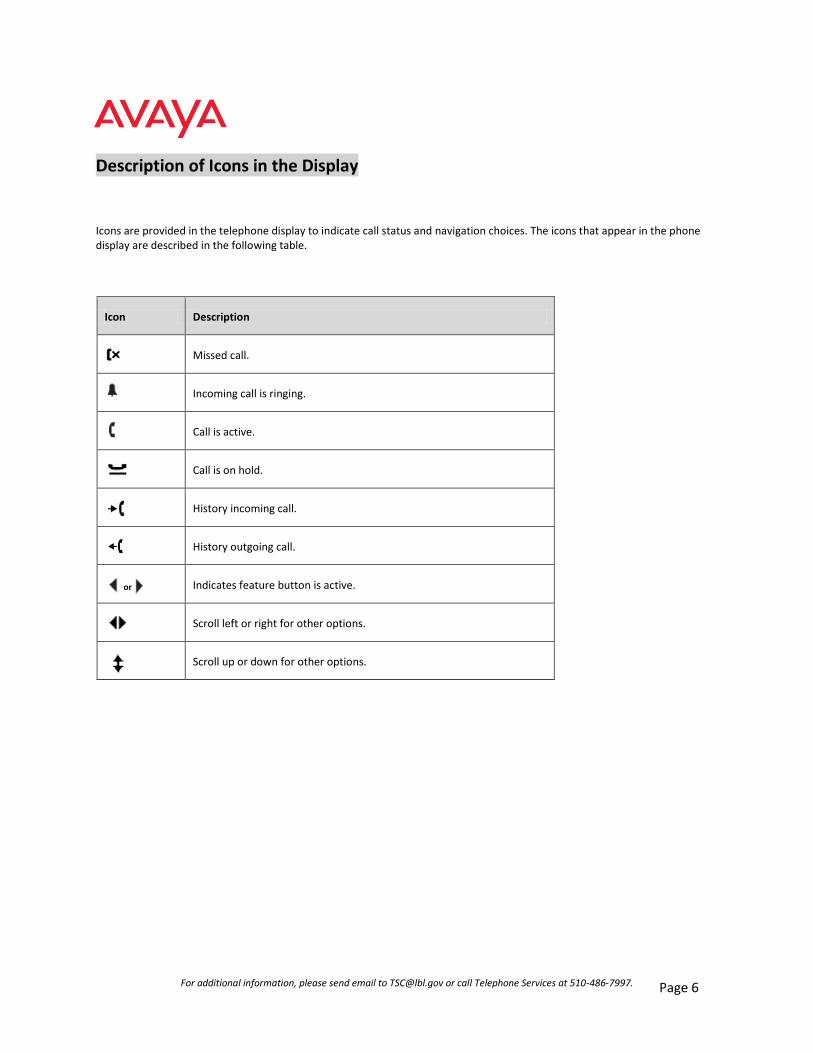
Description of Icons in the Display
Icons are provided in the telephone display to indicate call status and navigation choices. The icons that appear in the phone display are described in the following table.
Icon Description
Missed call.
Incoming call is ringing.
Call is active.
Call is on hold.
History incoming call.
History outgoing call.
or Indicates feature button is active.
Scroll left or right for other options.
Scroll up or down for other options.
For additional information, please send email to [email protected] or call Telephone Services at 510-486-7997.
Page 7
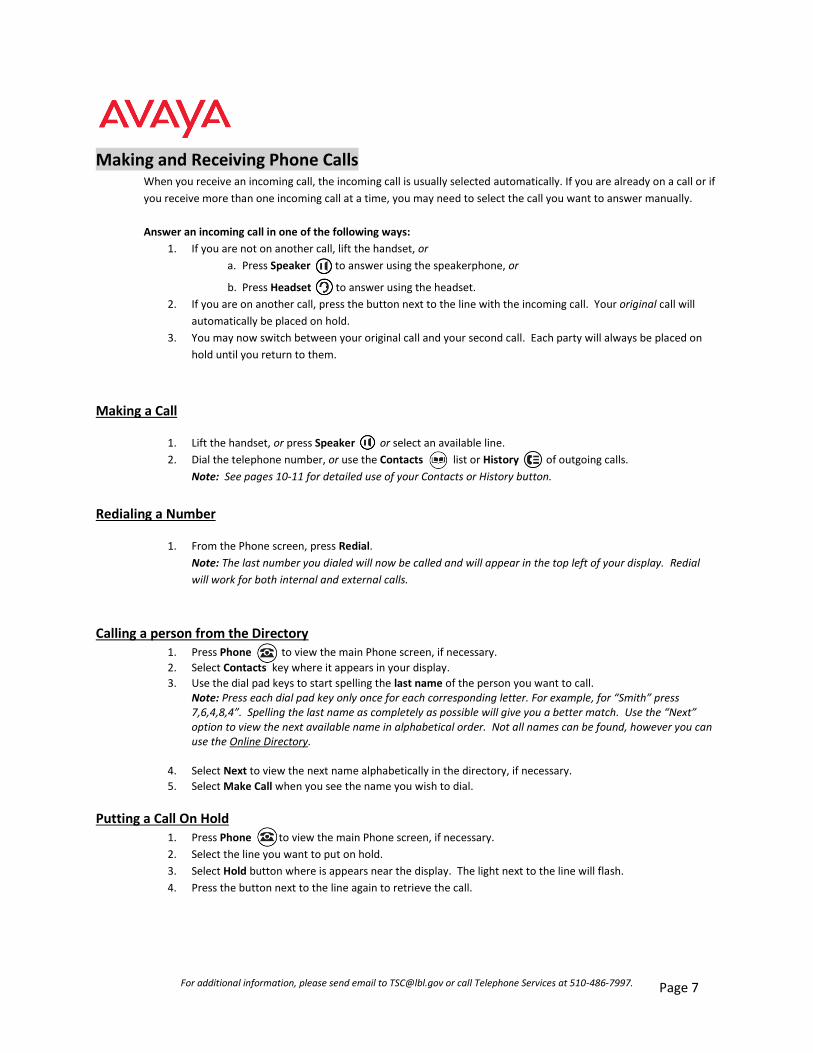
Making and Receiving Phone Calls When you receive an incoming call, the incoming call is usually selected automatically. If you are already on a call or if
you receive more than one incoming call at a time, you may need to select the call you want to answer manually.
Answer an incoming call in one of the following ways:
1. If you are not on another call, lift the handset, or
a. Press Speaker to answer using the speakerphone, or
b. Press Headset to answer using the headset.
2. If you are on another call, press the button next to the line with the incoming call. Your original call will
automatically be placed on hold.
3. You may now switch between your original call and your second call. Each party will always be placed on
hold until you return to them.
Making a Call
1. Lift the handset, or press Speaker , or select an available line.
2. Dial the telephone number, or use the Contacts list or History of outgoing calls.
Note: See pages 10-11 for detailed use of your Contacts or History button.
Redialing a Number
1. From the Phone screen, press Redial.
Note: The last number you dialed will now be called and will appear in the top left of your display. Redial
will work for both internal and external calls.
Calling a person from the Directory
1. Press Phone to view the main Phone screen, if necessary.
2. Select Contacts key where it appears in your display.
3. Use the dial pad keys to start spelling the last name of the person you want to call. Note: Press each dial pad key only once for each corresponding letter. For example, for “Smith” press 7,6,4,8,4”. Spelling the last name as completely as possible will give you a better match. Use the “Next” option to view the next available name in alphabetical order. Not all names can be found, however you can use the Online Directory.
4. Select Next to view the next name alphabetically in the directory, if necessary.
5. Select Make Call when you see the name you wish to dial.
Putting a Call On Hold 1. Press Phone to view the main Phone screen, if necessary.
2. Select the line you want to put on hold.
3. Select Hold button where is appears near the display. The light next to the line will flash.
4. Press the button next to the line again to retrieve the call.
For additional information, please send email to [email protected] or call Telephone Services at 510-486-7997.
Page 8
Transferring a Call 1. Press Phone to view the main Phone screen, if necessary.
2. Select the line with your active call that you wish to transfer.
3. Press Transfer. Your caller will be placed on hold.
4. As if dialing it directly yourself, dial the telephone number you will transfer your caller to. You may use your
Outgoing Call History or Contacts to dial the number all as well.
5. Press Transfer again or simply hang up to transfer the call.
Note: Prior to transfer, you may speak privately with your second dialed call if needed.
Muting a Call If a call is on mute and you switch between the handset, headset, or speakerphone, the mute will be turned off. When the Mute button light is on, the call is muted.
1. Press Mute during a call so that the other person cannot hear you.
2. Press Mute again to unmute the call.
Forwarding Calls
Forward your incoming calls to another number using Call Forward. When this feature is in use, the display will show
forwarding is active and the phone number where calls are forwarded to.
Call Forwarding
The Call Forward feature allows you to set a number to which your calls will be forwarded, or turn off call forwarding
if it is already on. You must enter the telephone number where the calls will be forwarded each time you use this
feature. As a reminder, the phone number where your calls are forwarded to will appear in your display when your
Call Forward feature is on.
Turning On Call Forwarding
1. Press Phone to view the main Phone screen, if necessary.
2. Scroll right or left to access the Call Forward feature.
3. Select Call Forward button.
4. You will hear dial tone. Dial as you normally would if calling the number directly. Note: Three short
tones will confirm it is on along with a light and triangle ►next to Call Forward.
Turning Off Call Forwarding
1. Press Phone to view the main Phone screen, if necessary.
2. Scroll right or left to access the Call Forward feature.
3. Select Call Forward button.
4. The light next to Call Forward will turn off and the triangle ► will no longer appear.
For additional information, please send email to [email protected] or call Telephone Services at 510-486-7997.
Page 9
Remote Access to Call Forwarding (available only on request)
Turn your Call Forwarding feature on or off from the convenience of any phone. Using a private pin code assigned to
you, follow the steps below to remotely control your Call Forwarding settings. You may set a number to which your
calls will be forwarded, or turn off call forwarding if it is already on. As a reminder, the phone number where your
calls are forwarded to will appear in your display when your Call Forward feature is on.
To Activate Call Forward Remotely
1. Dial the Remote Access number 510-486-7799.
2. You will hear dial tone. Enter *33 and you will hear dial tone.
3. Enter your 4-digit extension then press #. You will hear silence.
4. Enter your 8-digit remote pin code then press #. You will hear dial tone.
5. Enter the internal extension or 9+ for an external number to forward calls to.
6. Three short tones will confirm forwarding is ON.
7. You may now hang up.
To Deactivate Call Forward Remotely
1. Dial Remote Access number 510-486-7799.
2. You will hear dial tone. Enter #33# and you will hear dial tone.
3. Enter your 4-digit extension then press #. You will hear silence.
4. Enter your 8-digit remote pin code then press #.
5. Three short tones will confirm forwarding is OFF.
6. You may now hang up.
Conference Calls You can use conference calls to speak with up to five other people internal or external on the same call.
Making a Conference Call
1. Press Phone to view the main Phone screen, if necessary.
2. Select the line of your active call, then press Conf.
3. Dial the telephone number, or use the Contacts list or History of outgoing calls.
4. Press Conf to add the person to the existing call.
Note: See pages 10-11 for detailed use of your Contacts or History button.
Adding a Person On Hold to Your Conference Call
1. From the Phone screen, select your active call.
2. Press Conf.
3. Select the call on hold that you want to add to the conference.
4. Press Conf to take the call off hold.
5. Your person has now been added to the conference call.
For additional information, please send email to [email protected] or call Telephone Services at 510-486-7997.
Page 10
Placing a Conference Call On Hold
1. Press Hold during a conference call.
Note: When your conference call is on hold, the other parties can still talk to one another.
2. To resume the call, press the feature button next to the line that is conferenced.
Dropping a Person from a Conference Call
1. Press Phone to view the main Phone screen, if necessary.
2. Press Conf Display to view and scroll through the parties on the call.
3. Press Drop when you have scrolled to the name or number that you wish to drop from the call.
Note: Other parties on the call can also view and drop callers using the same steps 1-3 above.
Muting a Conference Call If a Conference Call is on mute and you switch between the handset, headset, or speakerphone, the mute will be turned off. When the Mute button light is on, the other parties can talk to one another, but you will not be heard.
1. Press Mute during a Conference Call so the other parties cannot hear you.
2. Press Mute again to unmute the call and allow other parties to hear you.
The History Log
You can use the History Log to view a list of your Missed, Answered, or Outgoing calls.
Viewing the History log 1. Press History button.
2. Scroll right or left to view separate lists of your Answered, Outgoing, or Missed calls.
3. Scroll up or down to view the numbers in a list.
4. Press Details to view details about the highlighted call.
Note: You can go to the top of the list by pressing History button again.
Calling a Person in the History log 1. Press History button.
2. Scroll right or left to the Outgoing history list.
3. Scroll up or down to the person or number to call from this list.
4. Press Call or OK to dial the highlighted selection.
Adding an Entry from the History Log to Your Contacts 1. Press History button.
2. Scroll right or left to view separate lists of your Answered, Outgoing, or Missed calls.
3. Scroll up or down to view the numbers in a list.
4. Press +Contact to add the highlighted selection.
5. Edit name and telephone number, as desired.
Note: When dialing externally you must dial a “9’ first. If it was an external number that dialed you, edit the
number in your call list by adding a “9” as the first digit.
6. Press Save.
For additional information, please send email to [email protected] or call Telephone Services at 510-486-7997.
Page 11
Removing an Entry from the History Log 1. Press History button.
2. Scroll right or left to view separate lists of your Answered, Outgoing, or Missed calls.
3. Scroll up or down to view the numbers in the selected list.
4. Stop at the number you want to delete and press More, then press Delete.
5. Press Delete again to confirm, or press Cancel if you do not want to delete it.
Clearing Entries from the History Log Clearing the “All Calls” list from the History log deletes all of the entries in all lists. If you are viewing only the
Outgoing Calls list, then only outgoing calls are deleted from the call log.
1. Press History button.
2. Scroll right or left to view separate lists of your Answered, Outgoing, or Missed calls.
3. Stop at the list you want to delete.
4. Press More, then Clear All to delete all of the entries in the list you are viewing.
5. Press Clear All again or OK to confirm.
Turning On/Off Call Logging
You can turn call logging on or off.
1. Press Home button.
2. Scroll to and then select Application Settings.
3. Scroll to select the logging type desired, then press OK or Change to switch on or off.
4. Press Save.
Contacts
You can save up to 100 names and telephone numbers in your list of Contacts.
Calling a person from the Contacts list
1. Press Contacts
2. Scroll down to browse all contacts or type the first letter of the contact's name.
3. Select the person or number.
4. Press Call or OK.
Viewing Contacts details
1. Press Contacts
2. Scroll down to browse all contacts or type the first letter of the contact's name.
3. Select the contact to view.
4. Press Details to see information for that contact.
For additional information, please send email to [email protected] or call Telephone Services at 510-486-7997.
Page 12
Adding a new contact
1. Press Contacts
2. Press More, then press New.
3. Enter the Name using the dial pad.
i. Press the number key that corresponds to the letter or number you want to enter until the letter
or number is displayed. The number zero is used as a space key.
ii. Pause before entering the next character if the characters are on the same key.
iii. To change between upper and lower case letters, press More, then press Abc.
iv. Press Bksp to delete the last character.
4. Scroll down to the Number field.
5. Enter the telephone number as if you were dialing it directly (dial 9 for outside calls, etc).
6. Press Save.
Editing a contact 1. Press Contacts
2. Scroll down to browse all contacts or type the first letter of the contact's name.
3. Select the contact to edit.
4. Press More, then press Edit.
5. Select the Name or Number field to edit it.
6. Use the dial pad and softkeys to make changes to the contact information.
7. Press Save.
Deleting a contact
1. Press Contacts
2. Scroll down to browse all contacts or type the first letter of the contact's name.
3. Select the contact to edit.
4. Press More, then press Delete.
5. Press Delete again to confirm.
Note: If you press Cancel prior to pressing Delete, your contact information will not be removed.
Options & Settings
Setting Phone Screen on Calling When the Show Phone Screen option is turned on, and an incoming call arrives, the display will exit the Contacts,
History, or any menu that is open. If you want to remain in the menu that is open when an incoming call arrives, turn
this option off.
1. Press Home button.
2. Scroll to Call Settings.
3. Press Select or OK.
4. Scroll to Show Phone Screen.
5. Press Change or OK to switch on or off.
6. Press Save.
For additional information, please send email to [email protected] or call Telephone Services at 510-486-7997.
Page 13
Setting Visual Alerts When the Visual Alerting option is turned on, incoming calls cause the LED in the top right corner of the phone to
flash. You can turn Visual Alerting on or off.
1. Press Home button.
2. Scroll to Call Settings.
3. Press Select or OK.
4. Scroll to Visual Alerting.
5. Press Change or OK to switch on or off.
6. Press Save.
Setting Audible Alerts When the Audible Alerting option is turned on, the telephone rings when an incoming call arrives. When turned off,
the telephone does not ring when a call arrives, and the Visual Alerting option is automatically turned on. You can
turn Audible Alerting on or off.
1. Press Home button.
2. Scroll to Call Settings.
3. Press Select or OK.
4. Scroll to Audible Alerting.
5. Press Change or OK to switch on or off.
6. Press Save.
Setting the Headset or Speaker for Calls You can set the audio path of your phone so that when you initiate a call, the speakerphone or your headset will
automatically be used.
1. Press Home button.
2. Scroll to Call Settings.
3. Press Select or OK.
4. Scroll to Audio Path.
5. Press Change or OK to switch on or off.
6. Press Save.
Staying in the Contacts List After Making a Call
When the Stay in Contacts option is turned on, and you make a call from your Contacts list, the display will stay in the Contacts
menu. If you want to exit the Contacts menu after you make a call from your Contacts list, turn this option off.
1. Press Home button.
2. Scroll to Call Settings.
3. Press Select or OK.
4. Scroll to Stay in Contacts.
5. Press Change or OK to switch between headset or speakerphone.
6. Press Save.
For additional information, please send email to [email protected] or call Telephone Services at 510-486-7997.
Page 14
Adjusting the brightness or contrast of the display
1. Press Home button.
2. Scroll to Screen & Sounds.
3. Press Select or OK.
4. Select Screen & Sound Options.
5. Select Brightness or Contrast.
6. Press Change or OK.
7. Scroll to the right or left to adjust the brightness or contrast.
8. Press Save or OK.
Turning button click sounds on and off
1. Press Home button.
2. Scroll to Screen & Sounds.
3. Press Select or OK.
4. Scroll to Button Clicks.
5. Press Change or OK to turn sounds on or off.
6. Press Save.
Turning error tones on or off
Your telephone beeps if you make a mistake or take an action that is not allowed. If you do not want to hear error
beeps, set your error tone to Off.
1. Press Home button.
2. Scroll to Screen & Sounds.
3. Press Select or OK.
4. Scroll to Error Tones.
5. Press Change or OK to turn error tones on or off.
6. Press Save.
Changing the ring pattern
1. Press Home button.
2. Scroll to Screen & Sounds, then press Select or OK.
3. Scroll to Personal Ringing.
4. Press Change or OK to hear the 8 available ring patterns.
5. Press Save to use the ringing pattern you are listening to.
Setting a Larger Display Font
1. Press Home button.
2. Scroll to Advanced Options, then press Select or OK.
3. Scroll to Language
4. Scroll to English – Large Font
5. Press Select or OK.

For additional information, please send email to [email protected] or call Telephone Services at 510-486-7997.
Page 15
Bridged Calls Your phone may show one or more bridged (shared) lines on the display in addition to your own lines. A bridged line
typically belongs to someone else, but bridging allows you to see if that line is in use, answer calls on that line, or join
a call in progress on that line from your telephone. Outgoing calls can be made on a bridged line when it is not in use.
Answering a Call on a Bridged Line 1. Select the bridged call that you want to answer.
Note: The button label of the bridged line with the incoming call is highlighted and its LED flashes to
identify which bridged line is ringing. The ringing line is selected automatically when there is no other
active call. If you are on another call when a call comes in to a bridged line, you must select the ringing
line (just as you would for an incoming call to a primary line).
2. Press Answer or press the flashing button.
Joining a Call on a Bridged Line Simply select the bridged call in progress that you want to join and press Bridge.
Making an Outgoing Call on a Bridged Line When you make a call on a bridged line, you are using another person’s line. The Caller ID may show the call as
coming from you or coming from the person whose line you are using.
1. Select the bridged line you want to use.
2. Press OK to get a dial tone.
3. Dial the telephone number, or use the Contacts list or History of outgoing calls.
Voicemail on a Bridged Line If a bridged line has messages, your display shows a light next to the words “Msg” along with the bridged number.
1. To retrieve messages, select one of the bridged lines and press the Message button or dial 7100.
2. You may be asked to enter your mailbox number and/or password, depending on your voice mail settings.
Call Park
The Call Park feature retrieves a call on hold from any other Avaya telephone within the system.
Parking a Call
1. Answer the call.
2. Scroll left or right to locate Call Park feature, then select it.
3. Use your 4-digit overhead paging number to announce the extension that has parked the call.
Retrieving a Parked Call
1. Press *81 and you will hear a confirmation tone.
2. Enter the extension number that has parked the call.
For additional information, please send email to [email protected] or call Telephone Services at 510-486-7997.
Page 16
Auto Dial
Use the Auto Dial button to store one number. The number of Auto Dial buttons available depends on your phone set
type and features.
Programming Auto Dial
1. Press Phone to view the main Phone screen, if necessary.
2. Scroll right or left to access the Abr Program feature.
3. Select Abr Program button, followed by any button labeled SD. The display screen shows: “Enter number:”.
4. Enter the number as you normally would if calling the number directly, using 9 or 9+area code if needed.
5. Press # key to save. Three short tones play as confirmation.
6. The number you entered now appears on that button.
Note: A number can be changed using the same steps above. To erase a number, contact TSC at
[email protected] or x7997.
Call Timer
Use the Call Timer to see how long you are on a call. You can keep this on at all times or use per phone call.
Activate Call Timer
1. Scroll to the right to Call Timer then select it. The light turns green.
2. To deactivate press the Call Timer button. The light goes out.
Ringer Off
Use the Ringer Off to turn off the ringer on your phone. Your call will flash on your phone and you will page the
calling party number at the top of the screen, when not private or blocked. If unanswered, the call will continue to
flash then forward to voice mail.
1. Press Phone to view the main Phone screen, if necessary.
2. Scroll right or left to access the Ringer Off feature.
3. Select the Ringer Off button.
4. The light next to Ringer Off is now on and a triangle ► also appears to show the feature is on.
5. To turn off Ringer Off, push the button again. The light and triangle ► will go away.
For additional information, please send email to [email protected] or call Telephone Services at 510-486-7997.
Page 17
Voice Mail
Press the Message button to connect directly to your voice mail system. The lighted Message button and a red light
on the upper right-hand corner of your telephone indicate when you have messages waiting.
Logging Into Voice Mail
3. To log in to your voice mail, press the Message button or dial 7100.
4. Follow the prompts.
Note: Depending on your specific voice mail settings, you may be asked to enter your mailbox number
and/or password.
Sending Calls Directly to Voice Mail
1. Press Phone to view the main Phone screen, if necessary.
2. Scroll left or right to view phone features.
3. Select SendAllCalls button to send all incoming calls directly to voice mail.
4. The light next to SendAllCalls is now on and a triangle ► also appears to show the feature is on.
5. To turn SendAllCalls off, push the button again. The light and triangle ► will go away.