Embed Size (px)
Citation preview


TECO New Zealand Pty Ltd. Auckland New Zealand
Unit 3, 477 Great South Road, Penrose Auckland, NZ Phone: 64 9-526-8480

Pierre Bonny Turning Goblets 22 July 2014
Pierre started his demonstration
with an overview of the ins and
outs of goblet making.
Starting with a brief discussion around “What is a Goblet?”…is it
also a Chalice. As it turns out a
Chalice is a Goblet that is used in church.
He then covered the basics of wood
selection and grain direction, commenting that the grain should
always run from top to bottom and
that the wood should be close grained hardwoods, which are best
for liquids.
Following this he covered the cut
directions for inside and outside when cutting around the goblet
cup; uphill/downhill Outside and bottom up/top down Inside. The
aim being to always cut with the grain.
Pierre also covered some design variations that might be employed.
Mixing wood with other materials such as glass along with making
other shapes like shot glasses.
Also discussed were the proportions for the Goblet;
1/3 � 1/3 � 1/3
Base Ø to Cup Ø
Of particular interest was the issue
of how to finish the foot. Once parted off how do you hold this to
complete the underside?...this question remained un-resolved.
Pierre then started the turning part of his demonstration. Initially he
turned the outside shape of the goblet cup; this was just roughed
out. At this point he kept the meat below the cup for support. The
roughing out was done with a bowl
gouge.
Next was to hollow out the cup.
Pierre first drilled a hole to make hollowing easier. He then used a
regular gouge to remove the bulk
timber.
Remember this is turning the end grain so gouge won’t like it. Next
he moved to a hollowing tool with the speed reduced to approx.
1000rpm. Using a Woodcut Cup
tool he started in the bottom and worked up. He then started from
top and worked down to meet the bottom work.
With the bulk of the inside material removed, Pierre then finalised the
outside shape before finishing the hollowing down to required wall
thickness. He tends to turn the outside first as
he finds it easier to gauge the
thickness when hollowing the inside.
For sanding inside Pierre will use a small Velcro sander disc using a
stick set to an angle. He has also used sanding sticks which have soft
ends with paper wrapped around.
It is not recommended to stick fingers down inside the hollowing.
To turn the stem Pierre started
from the cup end and removed the bulk.
He then worked toward the base,
gradually reducing the diameter to
the final stem diameter.
He finish cuts the stem as he works toward the base, watching for
vibration as the stem gets small.
As he nears the base he then defines the base position and size
before continuing working down the stem to the base, using a shorter
tool rest to get in close to stem. Pierre then finish shaped the stem
into the base before parting off the
base with a slight undercut.
During hollowing Pierre also
demonstrated some different hollowing tool and techniques: Rolly
Munroe, Woodcut, Woodcut Cup
and Bowl Gauge.
Thanks Pierre for a Great Demo.
Write up by Richard Bootten

Turned by John Pietersen from Totara finished with Wax.
Turned by Allan Cox from London Plane finished
with EEE.
Turned by Terry Denvers from Pohutukawa finished with Fishy’s, EEE and Kanubra.
Turned by Kerry Snell from Pohutukawa finished with Wax.
Turned by Terry Denvers from Kauri finished with Fishy’s, EEE and Kanubra.
Dick Veitch Thread Chasing 29 July 2014
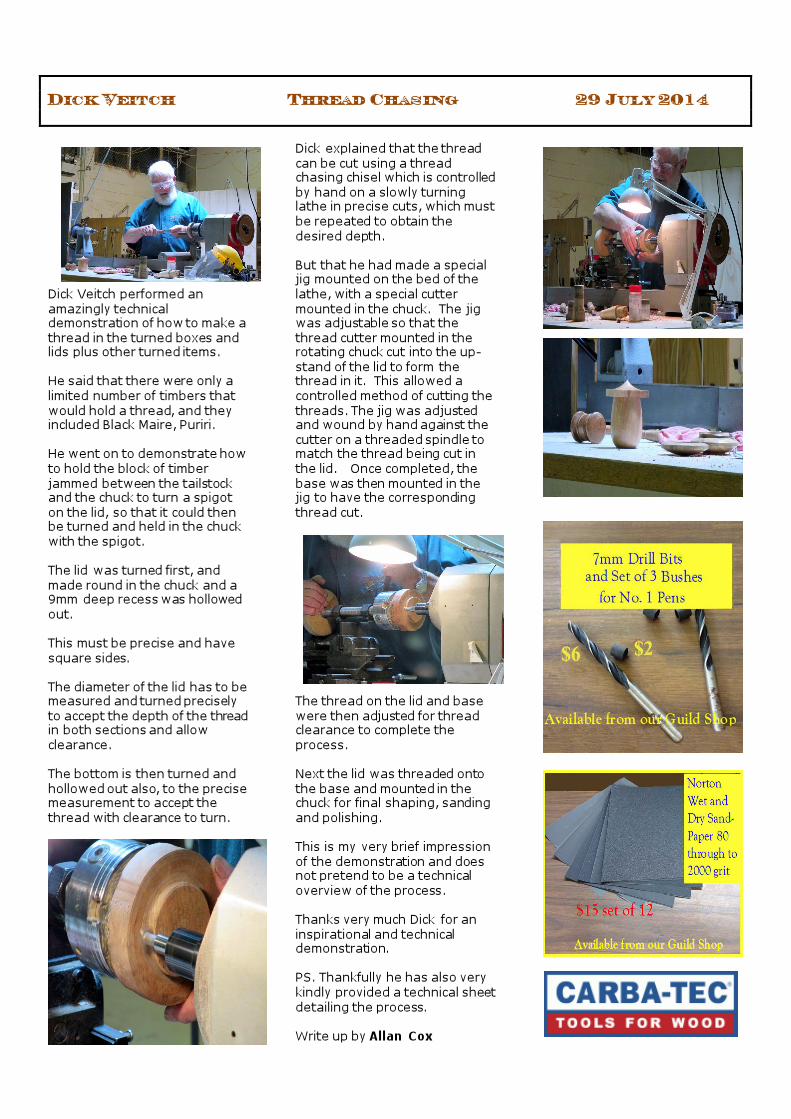
Dick Veitch performed an
amazingly technical demonstration of how to make a
thread in the turned boxes and lids plus other turned items.
He said that there were only a
limited number of timbers that
would hold a thread, and they included Black Maire, Puriri.
He went on to demonstrate how
to hold the block of timber
jammed between the tailstock and the chuck to turn a spigot
on the lid, so that it could then be turned and held in the chuck
with the spigot.
The lid was turned first, and
made round in the chuck and a 9mm deep recess was hollowed
out.
This must be precise and have
square sides.
The diameter of the lid has to be measured and turned precisely
to accept the depth of the thread in both sections and allow
clearance.
The bottom is then turned and
hollowed out also, to the precise measurement to accept the
thread with clearance to turn.
Dick explained that the thread
can be cut using a thread chasing chisel which is controlled
by hand on a slowly turning lathe in precise cuts, which must
be repeated to obtain the
desired depth.
But that he had made a special jig mounted on the bed of the
lathe, with a special cutter
mounted in the chuck. The jig was adjustable so that the
thread cutter mounted in the rotating chuck cut into the up-
stand of the lid to form the thread in it. This allowed a
controlled method of cutting the
threads. The jig was adjusted and wound by hand against the
cutter on a threaded spindle to match the thread being cut in the lid. Once completed, the
base was then mounted in the jig to have the corresponding
thread cut.
The thread on the lid and base
were then adjusted for thread clearance to complete the
process.
Next the lid was threaded onto
the base and mounted in the chuck for final shaping, sanding
and polishing.
This is my very brief impression
of the demonstration and does not pretend to be a technical
overview of the process.
Thanks very much Dick for an
inspirational and technical demonstration.
PS. Thankfully he has also very
kindly provided a technical sheet
detailing the process.
Write up by Allan Cox

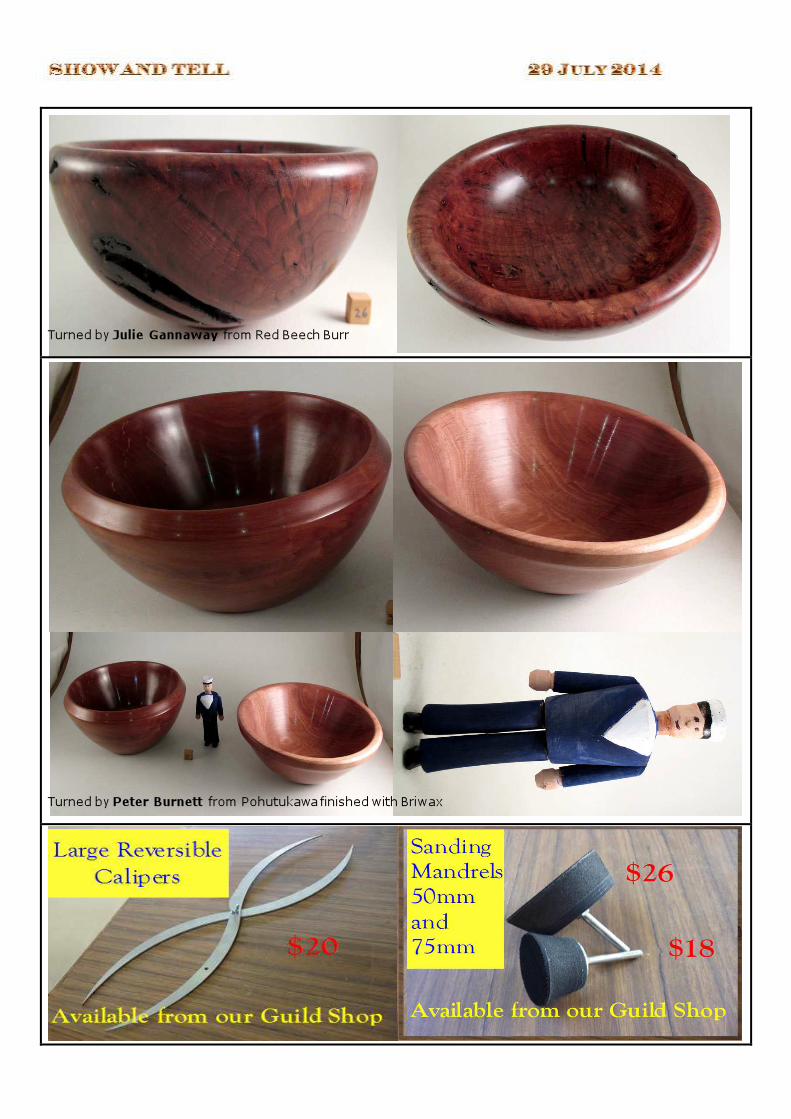
Turned by Julie Gannaway from Red Beech Burr
Turned by Peter Burnett from Pohutukawa finished with Briwax

John Moat Triangular Clocks 05 August 2014
This week we had our very own John demonstrate the art of
turning a triangular clock.
We started with a perfectly
triangular piece, finding the Centre by drawing lines from the
mid-point of the side length, to the opposite point. It is also a
good idea to ensure your two
faces are parallel.
After marking a line through the middle of the thickness, the back
edge was turned down and a spigot added. The face was then shaped back to the previously
marked half way point.
Held by the spigot, the front face is shaped back to meet the back
face, creating your three points.
A hole is drilled for the clock –
Handy hint, start with the
smallest size, so you can use the
next size up when you stuff it up!
Once you have your shaped
clock, sand it with a drill/foam pad arrangement – Note,
because of the points, hand sanding will hurt.
Changing to a 30mm pin jaw chuck, reverse and take the
spigot of the back, and sand.
John finished his with the three
stage buffing system, and would usually sand an angle onto the
bottom for premium clock- time viewing, a piece of foam under
the bottom helps avoid scratches
whilst doing this.
Clocks are available from the
shop in 27mm, 37mm and 45mm at a very competitive
price!
Write up by Laura Stapley

Turned by Lee Riding from Rimu finished with
Fishies.
Turned by Laura Stapley from NZ Oak finished with
Fishies, EEE & Beeswax.
Turned by Ian Outshoorn from Walnut finished with
Fishies.
Turned by Home Schooled from Silky Oak.
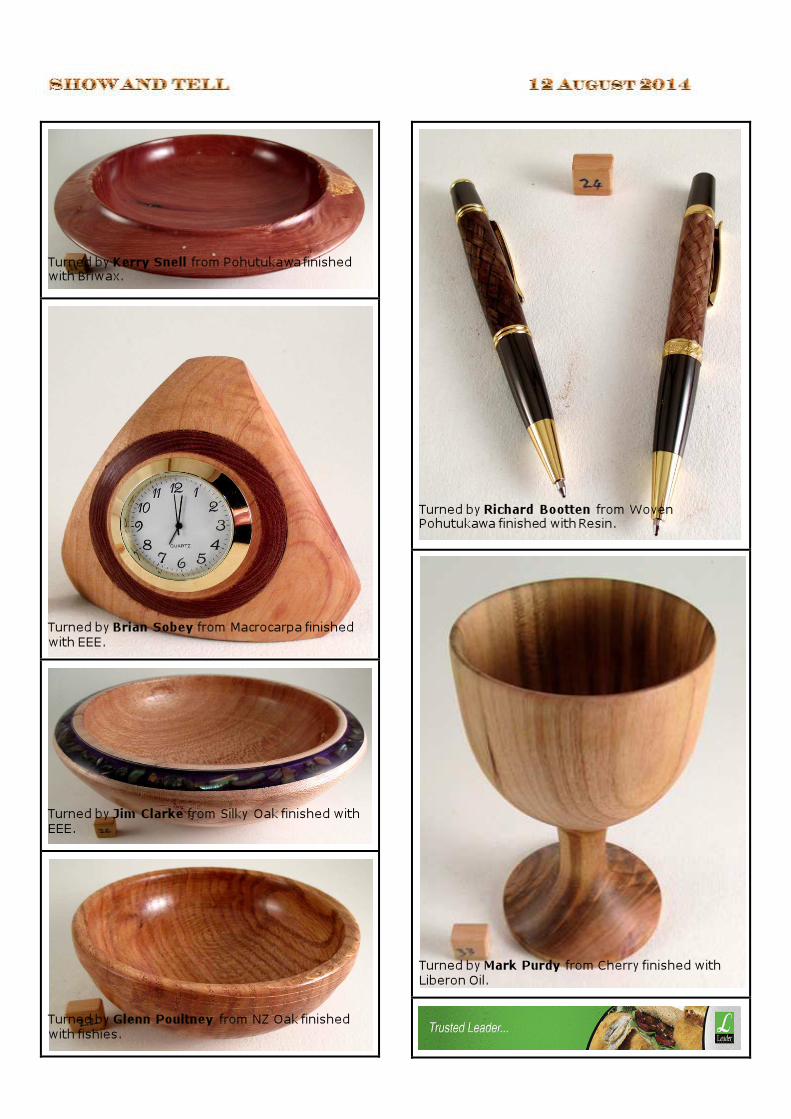
Turned by Kerry Snell from Pohutukawa finished with Briwax.
Turned by Brian Sobey from Macrocarpa finished
with EEE.
Turned by Jim Clarke from Silky Oak finished with
EEE.
Turned by Glenn Poultney from NZ Oak finished
with fishies.
Turned by Richard Bootten from Woven Pohutukawa finished with Resin.
Turned by Mark Purdy from Cherry finished with
Liberon Oil.

Dave Anderson 2 of a kind 19 August 2014
Dave presented 2 different ways of creating a pair of “similar objects.
A Pair of Tea Light Candle Holders
- The blank was roughed out to a cylinder big enough to make the 2 candle holders (end on
end) -
- The top end was squared off.
- - The diameter of the candle was marked onto
this end and the candle recess formed, taking care to ensure the sides were parallel
and would allow the tea light to be a comfortable (but not sloppy) fit.
-
- The sides of the candle holder were formed to an acceptable shape leaving a stub
connecting to the rest of the blank. -
- The candle holder was then sanded (didn’t
need much) and then parted off. One done. -
- Dave then took about 3 crucial measurements, marked them on the
remaining stock and started again. He commented that “he measures the minimum
and the rest is by eye.”
A Pair of Knitting Needles
- The wood is kauri and must be straight
grained.
- - The blank was positioned between centres
(pinjaws and tailstock) with not too much pressure on the piece to prevent bend or
whip. -
- The blank was roughed out at 1100 rpm.
- - Dave demonstrated using the fingers of his
left hand curled over, around and under the piece to support it to prevent whip, while
using the left thumb as a guide to position
the skew chisel on the piece. The piece was left thicker at the chuck end to form the
knob. -
- A gauge was used to achieve a constant diameter of the needle.
-
- A wide piece of sandpaper running along the length of the needle, both ways, was used to
take out any lumps and bumps. -
- The knob end was turned to a pleasing shape
and then sanded.
-
-
- The pointed end of the needle was cut down to about half the diameter of the needle – oh
no!- it broke off at the tail stock end – never mind hand carve the point and sand toward
the pointed end.
- - Dave measured length, diameter and knob
position onto the second blank and started again.
-
- He mentioned the second needle was a bit rounder than the first one, but to me they
were pretty identical. -
- His final comment was when forming the second piece was to stick to the measured
pencil lines.
- - I am quite confident Dave didn’t need any
pencil lines and both sets of objects would have turned out just the same without them.
Write up by Gavin Francis
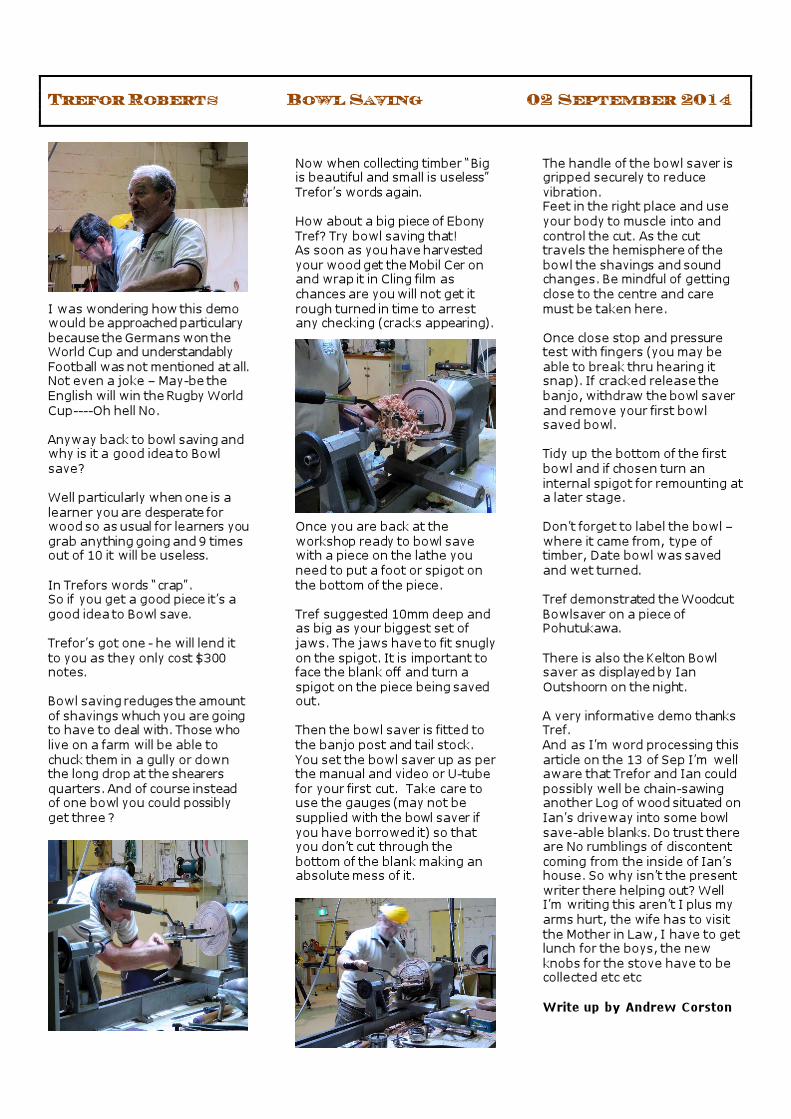
Trefor Roberts Bowl Saving 02 September 2014
I was wondering how this demo would be approached particulary
because the Germans won the World Cup and understandably
Football was not mentioned at all. Not even a joke – May-be the
English will win the Rugby World
Cup----Oh hell No.
Anyway back to bowl saving and why is it a good idea to Bowl
save?
Well particularly when one is a
learner you are desperate for wood so as usual for learners you
grab anything going and 9 times out of 10 it will be useless.
In Trefors words “crap”. So if you get a good piece it’s a
good idea to Bowl save.
Trefor’s got one - he will lend it
to you as they only cost $300 notes.
Bowl saving reduges the amount
of shavings whuch you are going to have to deal with. Those who
live on a farm will be able to
chuck them in a gully or down the long drop at the shearers
quarters. And of course instead of one bowl you could possibly
get three ?
Now when collecting timber “Big is beautiful and small is useless”
Trefor’s words again.
How about a big piece of Ebony
Tref? Try bowl saving that! As soon as you have harvested
your wood get the Mobil Cer on and wrap it in Cling film as
chances are you will not get it
rough turned in time to arrest any checking (cracks appearing).
Once you are back at the
workshop ready to bowl save with a piece on the lathe you
need to put a foot or spigot on
the bottom of the piece.
Tref suggested 10mm deep and as big as your biggest set of
jaws. The jaws have to fit snugly
on the spigot. It is important to face the blank off and turn a
spigot on the piece being saved out.
Then the bowl saver is fitted to
the banjo post and tail stock.
You set the bowl saver up as per the manual and video or U-tube
for your first cut. Take care to use the gauges (may not be
supplied with the bowl saver if
you have borrowed it) so that you don’t cut through the
bottom of the blank making an absolute mess of it.
The handle of the bowl saver is gripped securely to reduce
vibration. Feet in the right place and use
your body to muscle into and
control the cut. As the cut travels the hemisphere of the
bowl the shavings and sound changes. Be mindful of getting
close to the centre and care
must be taken here.
Once close stop and pressure test with fingers (you may be
able to break thru hearing it snap). If cracked release the
banjo, withdraw the bowl saver
and remove your first bowl saved bowl.
Tidy up the bottom of the first
bowl and if chosen turn an
internal spigot for remounting at a later stage.
Don’t forget to label the bowl –
where it came from, type of timber, Date bowl was saved
and wet turned.
Tref demonstrated the Woodcut
Bowlsaver on a piece of Pohutukawa.
There is also the Kelton Bowl saver as displayed by Ian
Outshoorn on the night.
A very informative demo thanks Tref.
And as I’m word processing this
article on the 13 of Sep I’m well aware that Trefor and Ian could
possibly well be chain-sawing another Log of wood situated on
Ian’s driveway into some bowl
save-able blanks. Do trust there are No rumblings of discontent
coming from the inside of Ian’s house. So why isn’t the present
writer there helping out? Well I’m writing this aren’t I plus my
arms hurt, the wife has to visit
the Mother in Law, I have to get lunch for the boys, the new
knobs for the stove have to be collected etc etc
Write up by Andrew Corston
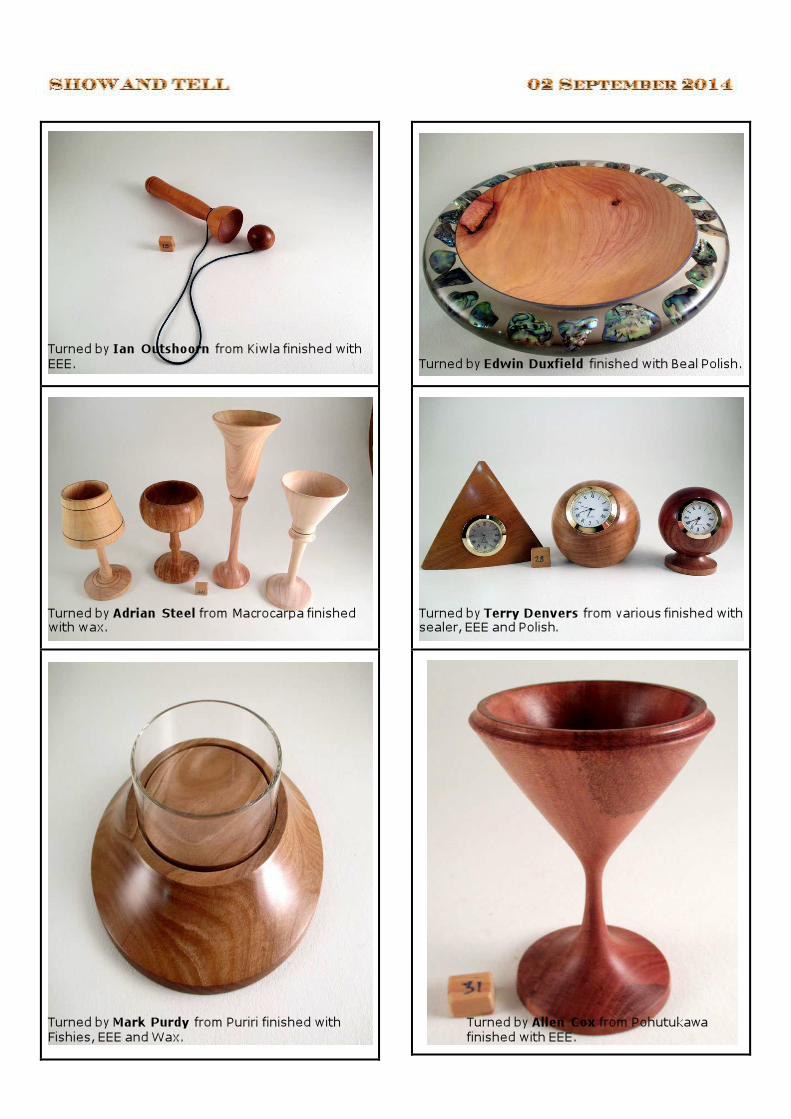
Turned by Ian Outshoorn from Kiwla finished with
EEE.
Turned by Adrian Steel from Macrocarpa finished with wax.
Turned by Mark Purdy from Puriri finished with
Fishies, EEE and Wax.
Turned by Edwin Duxfield finished with Beal Polish.
Turned by Terry Denvers from various finished with sealer, EEE and Polish.
Turned by Allen Cox from Pohutukawa
finished with EEE.
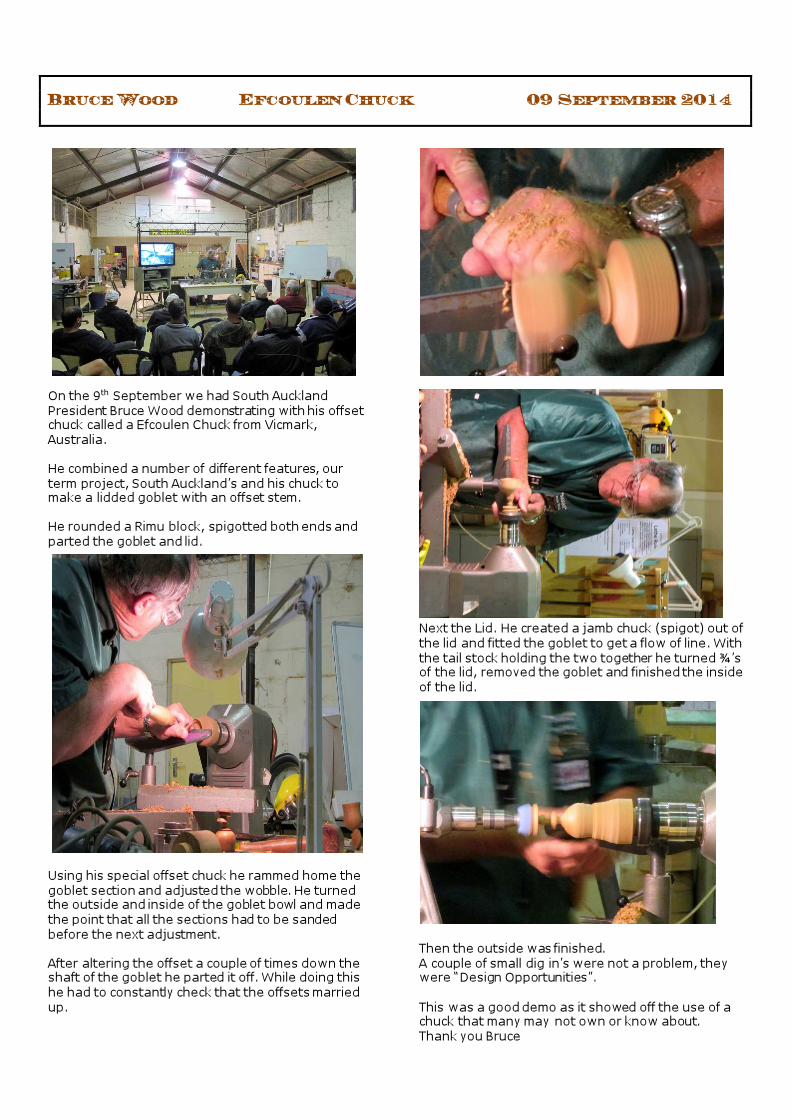
Bruce Wood Efcoulen Chuck 09 September 2014
On the 9th September we had South Auckland
President Bruce Wood demonstrating with his offset chuck called a Efcoulen Chuck from Vicmark,
Australia.
He combined a number of different features, our
term project, South Auckland’s and his chuck to make a lidded goblet with an offset stem.
He rounded a Rimu block, spigotted both ends and
parted the goblet and lid.
Using his special offset chuck he rammed home the
goblet section and adjusted the wobble. He turned the outside and inside of the goblet bowl and made
the point that all the sections had to be sanded
before the next adjustment.
After altering the offset a couple of times down the shaft of the goblet he parted it off. While doing this
he had to constantly check that the offsets married
up.
Next the Lid. He created a jamb chuck (spigot) out of
the lid and fitted the goblet to get a flow of line. With
the tail stock holding the two together he turned ¾’s of the lid, removed the goblet and finished the inside
of the lid.
Then the outside was finished.
A couple of small dig in’s were not a problem, they were “Design Opportunities”.
This was a good demo as it showed off the use of a chuck that many may not own or know about.
Thank you Bruce

Turned by Adrian Steel from Macrocarpa finished with homemade wax.
Turned by Robin Lane from Rimu finished with wax.
Turned by Ian Outshoorn from Eucalyptus finished
with beeswax.
Turned by Ian Outshoorn from Totara finished with homemade Fishies.
Turned by Ian Outshoorn from Totara finished with homemade Fishies.
Turned by Ian Outshoorn from Jacaranda.

A Sample of work from Thursday Sessions
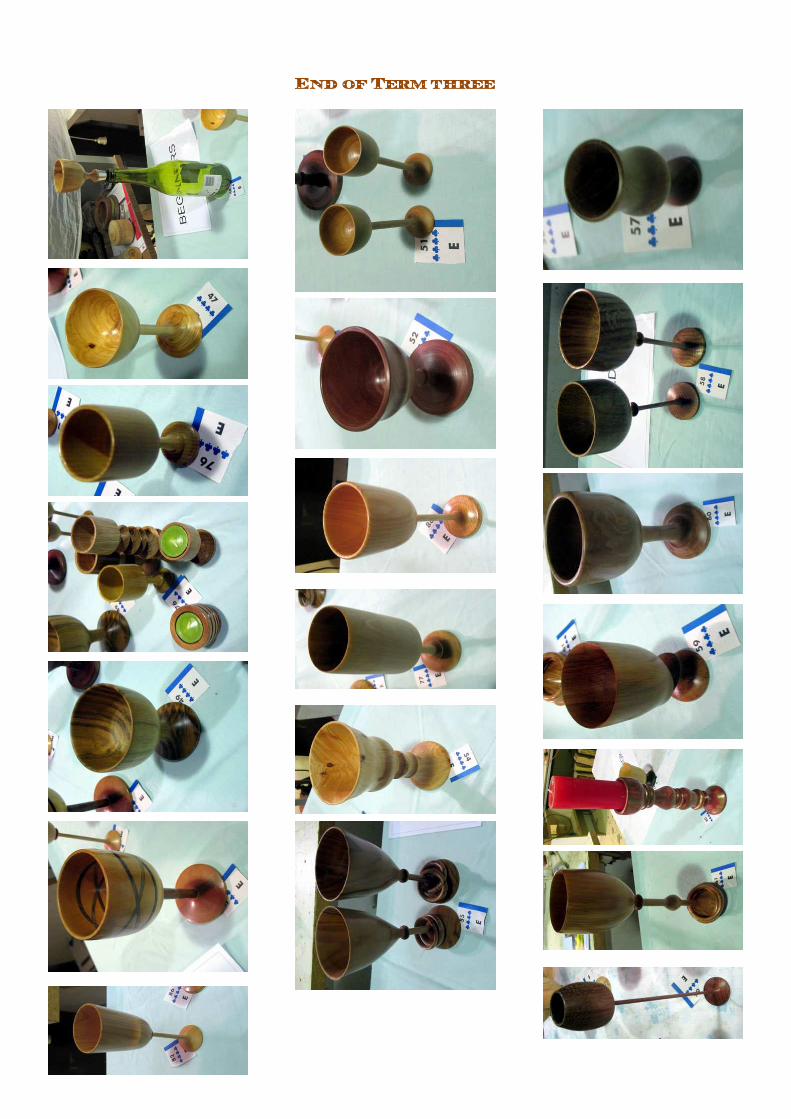
End of Term three
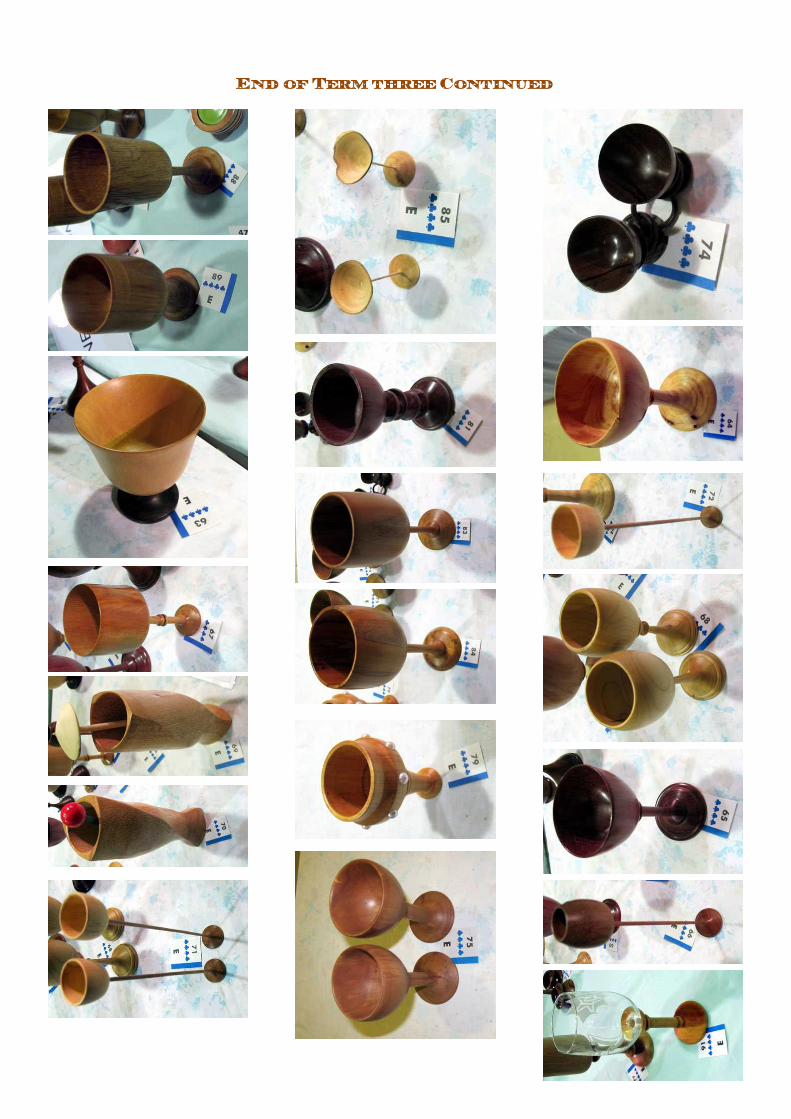
End of Term three Continued
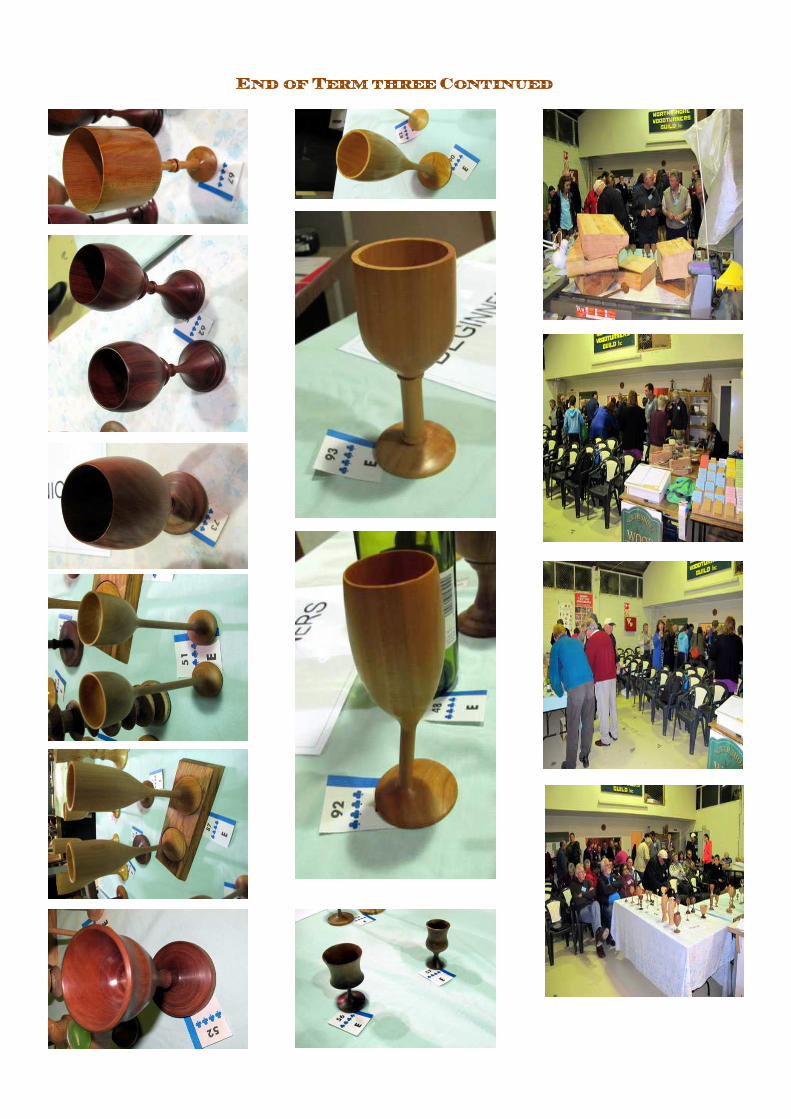
End of Term three Continued

Term Three Winners
Beginners Single Goblet
Doug Jones
Beginners Goblet Pairs
Adrian Steel
Intermediate Single Goblet
John Moat
Intermediate Goblet Pairs
John Moat
Seniors Single Goblet
Trefor Roberts
Seniors Goblet Pairs
Kevin Hodder

Term Four Theme
Wings or Feet or Legs /Christmas
Crackers
Term begins 14 October 2014
Day Date Demonstrator /
Activity Tuesday October 14 Ian Fish -First Steps Tuesday October 21 Ian Outshoorn Tuesday October 28 Pierre Bonny Tuesday November 04 Dave Dernie Tuesday November 11 Wood Swap Tuesday November 18 Michael Bernard Saturday November 22 Glenfield Christmas Parade Tuesday November 25 John Moat Saturday November 29 Toy making day Tuesday December 02 Training Night Tuesday December 09 Peter Williams Tuesday December 16 End of Term
All the Above events are at the Guild Hall, Agincourt Reserve, Agincourt Road, Glenfield.
Tuesday meetings start at 7.00 pm

Need Assistance
The following Guild members are available to help new members or anyone having wood turning problems.
Pierre Bonny 479 4031 Kevin Hodder 478 8646
Ian Outshoorn 443 1066 Lee Riding 479 4874
Trefor Roberts 475 9307 David Browne 410 9071
Committee:
President Ian Outshoorn 443 1066
Vice President Doug Cresswell 410 7866
Secretary Andrew Corston 443 1422
Treasurer John Green 416 9272
Committee Members: David Browne, Terry Denvers, Lee Riding, Trefor Roberts,
Vincent Lardeux, Pepi Waite, Grant Tattley.
Programme Trefor Roberts, Ian Outshoorn
Library Vincent Lardeux, Colin Crann
Refreshments Lee Riding
Raffle John & Mary Green
Building Pierre Bonny
Machinery Bruce Withers, Terry Denvers
Newsletter Grant Tattley
Webmaster Kris Mackintosh
Correspondence c/o Andrew Corston
4/8a, Target Road, Auckland 0629
email: [email protected]
Newsletter Contributions [email protected]


![IN THE HIGH COURT OF NEW ZEALAND AUCKLAND REGISTRY … · SKP INCORPORATED v AUCKLAND COUNCIL [2019] NZHC 900 [24 April 2019] IN THE HIGH COURT OF NEW ZEALAND AUCKLAND REGISTRY I](https://img.pdfslide.us/doc/110x75/5ea612508dc1ec5f595fe327/in-the-high-court-of-new-zealand-auckland-registry-skp-incorporated-v-auckland-council.jpg)