Embed Size (px)
Citation preview

1
TEACHER’S HANDBOOK
Homemade Heroes
Created by: Laurie Ryan
Supervisor: Dr. Peter E. Childs
This is a teacher’s guide to an 8 week transition year project developed under the Teaching
Enquiry with Mysteries Incorporated (TEMI) project.

2
Table of Contents
Safety procedures 3
Introduction 5
1. The disappearing act: 8
Hide and seek 10 Test for the best 13 How it works 16
2. Now you see it! Now you don’t! 18
Hidden message 20 Homemade heroes 22 Pentastic 26
3. Ice, Ice baby 28
Ice cold class 30 Melting time 32 I scream for….. 34
4. What floats your boat? 36
Egg-celent 38 Let’s get accurate 40 Does difference matter? 43
5. What’s going on? 45
What’s going on? 47 Make your own. 50 Where it all went wrong 53
6. Food for thought. 55
Elephant toothpaste 57 Its foaming up 59 What works best 61
7. Move your body. 63
Man V Woman 65 It’s a circus 67 Sports galore 71
8. Bubble Trouble: 73
Jumping pepper 75 Burst your bubble 77 World record 79

3
GENERAL LAB RULES:
• Nobody has permission to enter the lab without supervision of an appropriate teacher.
• No eating/drinking in the lab.
• Bags etc. must be kept tidy under desks at all times.
• PPE (goggles, lab coats, gloves etc.) must be used when carrying out experiments or
observing demonstrations.
• Equipment must be cleaned and returned to appropriate storage place after use.
• Carefully follow directions, both written and oral. Do only the steps described in the
procedure of the experiment or that are described and/or approved by the teacher. If you are
in doubt about any procedure, ask your teacher for help.
• Proceed with caution when in the lab. Do not carry materials around the classroom if at all
possible.
• Misbehaviour in the lab will not be tolerated.
• If an accident occurs e.g. glassware is broken, chemical spill etc., notify the teacher
immediately
• All students must familiarise themselves with the location of fire exits and eye wash facilities
in case of emergency.
• Do not taste, touch, or smell any reagents unless directed to do so by your teacher. When
smelling chemicals or gases, use a wafting motion to direct the odour toward your nose.
• Extreme caution should be used when using a Bunsen burner. Keep your head and clothing
away from the flame and turn off the burner when it is not in use. Long hair should be tied
back to avoid it catching fire. Before leaving the lab, check to see that all gas valves and hot
plates are turned off.
• Keep insoluble waste material out of the sink. Dispose of waste material as instructed by
your teacher.
• Wash hands thoroughly with soap and water before leaving the lab.

4
Science Safety Contract
This Transition year course offers a variety of laboratory exercises on current concepts in
biology, chemistry and physics often using various methods and equipment involving various
safety hazards. Various teaching techniques and materials will be employed to motivate
students and enhance their understanding. Numerous laboratory methods will be utilized in
demonstrations and student experiments. Safety instruction will be given and safe practices
will be stressed in all laboratory work.
STUDENT SAFETY CONTRACT
I, __________________________________________________, have thoroughly read the
Laboratory Safety Rules and agree to follow all safety rules and procedures. I will conduct
myself in a safe and cautious manner in the laboratory. I will not perform any unauthorized
lab procedure. I understand that misbehaviour in the lab or failure to follow safe lab
procedures could cause a serious accident. I further understand that a violation of these rules
could result in my not being allowed to participate in future lab exercises.
Student Signature_____________________________________ Date: ______________
EMERGENCY CONTACT NUMBERS:
Emergency services…………………………………………………………………999/112
Doctor…………………………………………………………………………………….._________
Hospital……………………………………………………………………………………_________
National Poisons Information Centre Dublin……………………………01-8092566

5

6
Introduction:
“Transition year is an opportunity for students to become familiar with a broad
range of science activities. Students should be encouraged to study areas of
science not typically encountered.” (Department of Education 1993c, p.27)
This module is based on the Teaching Enquiry with Mysteries incorporated
‘TEMI’ project. ‘TEMI’ is a science education project aimed at post-primary
school teachers, funded by the European Commission under the Seventh
Framework Programme for Research and Technological Development ‘FP7’
(TEMI 2012). The aim of the TEMI project is to transform science and
mathematics teaching by offering support to teachers to introduce enquiry
based teaching in to a classroom.
The lessons in this project were developed based on the 5 E’s model of Enquiry:
Engage, Explore, Explain, Extend and Evaluate. The opening to each module
begins with a discrepant event in that area which will engage the students.
Discrepant events are incidents which disobey our understanding of the world
by presenting surprising results. These occurrences can be used in science
demonstrations to seize the attention of students. When carried out effectively
it will encourage students to discuss what will happen before the experiment
takes place; allow them to convince themselves they know what will happen
before surprising them with a discrepant event. As stated in the Biological
Science Curriculum Study report to get a student engaged in a new concept a
teacher can use short activities that promote curiosity and elicit prior
knowledge.
Department of Education (1993). Transition Year programmes guidelines 1994 - '95, Dublin:
Department of Education.
Teaching Enquiry with Mystery Incorporated (2012). ‘Background Information’, available:
http://teachingmysteries.eu/about/ [accessed 12 June 2014]

7
Outline of how the module is ran:
UNITS
Tips for Teachers:
It is important that the teacher carries out the demonstration without
giving any background on the topic.
Make the class interactive by getting the students involved at every
opportunity.
Ask questions throughout the class and get the students make
observations as the demonstration is taken place.
Allow/encourage discussion on the topics this will get students thinking
about the topic.
Support students to attempt an answer.
Read both students and teacher handbooks to ensure you are prepared
for an answer.
Aims of the module:
1. To develop students communication skills.
2. To develop students understanding of the various topics covered.
3. To progress student’s skills of investigation, speculation and
interpretation of results.
4. To develop students’ knowledge from junior certificate science.
Single Class:
Use of Discrepant event to
engage the student. Get the
students thinking and asking
questions.
Double Class:
Build on the event from the
previous class. Use of
experiment and various hands
on techniques.
Optional Single Class:
Expand students’ knowledge
further with the aim of linking to
everyday live.
8
Disclaimer:
The authors take no responsibility for accidents or injuries that may occur during
activities listed in this module. It is the teacher’s responsibility to ensure the
safety of the pupils.
The teacher should carry out the experiments, investigations and activities prior
to the class, in order to ensure they understand what is happening and they are
prepared for whatever eventualities that may occur.
Pupils must be provided with personal protection equipment for all
investigations and the safety notes must be read out and enforced.

9
UNIT 1:
The Disappearing Act

10
Introduction: The aim of this units is to introduce the students to hydrogels.
Objectives: Students will be able to explain how hydrogels work and their function.
Students will become competent in experimental procedures ensuring a fair and accurate
test.
Teachers Background: In this unit we will look at the varying level of absorbance in nappies
and discuss similar materials that are used. Students will all be familiar with nappies and their
function but not the material present in them. Hydrogels are polymers that can absorb water
but also contain hydrophilic groups. Polymers are known as a large molecule made up of
chains or rings of linked monomer units. Hydrogel is often polymers containing carboxylic acid
groups with the most common being poly sodium propenoate which is shown below.
The polymer chains are normally coiled up. If you take away all the Na particles,
the chains uncoil. This is due to the negative charges on the oxide ions along the polymer
chain all repelling each other as shown in the picture below. Water molecules are then
attracted to the uncoiled chains, and the hydrogel absorbs up to 500 times its own weight of
water. One of the main uses of this polymer is in nappies.
Water molecules are attracted to the negative charges by hydrogen bonding. When salt is
added to the hydrogel, the chains start to change their shape and water is lost from the gel.
Urine does contain salt, and these salts impede the performance of the sodium polyacrylate.
Scientists have modified the polymer to counteract the effects of the salts in urine. Hydrogen
bonds are what hold the water molecules to the polymer.
Hydrogels are used to make:
Soft contact lenses
Nappies
Wound dressings
Drug delivery systems

11
Single Lesson: Hide and Seek Aim: To introduce the topic of polymers- hydrogels to the students.
Discrepant event:
Engagement:
Materials:
3 clear plastic cups
3 white polystyrene cups
Hydrogel from a nappy approx. 1Tbsp*
Water 100 mL
Plastic zip lock bag
*To remove the hydrogel:
Place a new nappy on the piece of newspaper. Carefully cut through the inside lining
and remove all the cotton-like material. Put all the stuffing material and plastic lining
into a clean, zipper-lock bag.
Scoop up any of the powdery material that may have spilled onto the paper and pour
it into the bag with the stuffing. Blow a little air into the bag to make it puff up like a
pillow and then seal the bag.
Shake the bag for a few minutes to remove the powdery hydrogel polymer from the
stuffing. Notice how much powder falls to the bottom of the bag.
Carefully remove the stuffing and the plastic lining from the bag and check out the
powdery polymer left in the bag. Repeat steps 1-4 with another diaper, if needed, to
get 15 mL of the hydrogel powder.
Now it’s time to mix the powder with water to see what happens. Pour 15 mL (1 Tbsp.)
of hydrogel powder into a 266 mL plastic cup. Measure 100 mL of water and pour it
into the cup along with the powder.
This should be tested before trialling with students as tap water will also affect the
absorbance level due to ions present.
Method:
1 cup contains hydrogel and 2 contain nothing.
1. Use the white cup first so students can’t see what is happening.
2. Place 15mL approx. of hydrogel in a cup.
3. This is the cup that the water will be added to. 100mL will be added by the teacher.
12
4. Teacher will then switch the places of the cup with the other two that will be present
(that contain no water and no hydrogel.) numerous times so the students will have to
follow the cup.
5. Teacher will then ask students to pick the cup containing water.
6. When the teacher pours over all 3 cups no water comes out.
Exploration:
Get the students to come up with the idea of where the liquid is gone, listen to the ideas
put forward.
Repeat the same procedure with the clear plastic cups.
Have a class discussion on the material used:
Get the students talking about what the material
might be?
What could it contain? Where might something like it
be used?
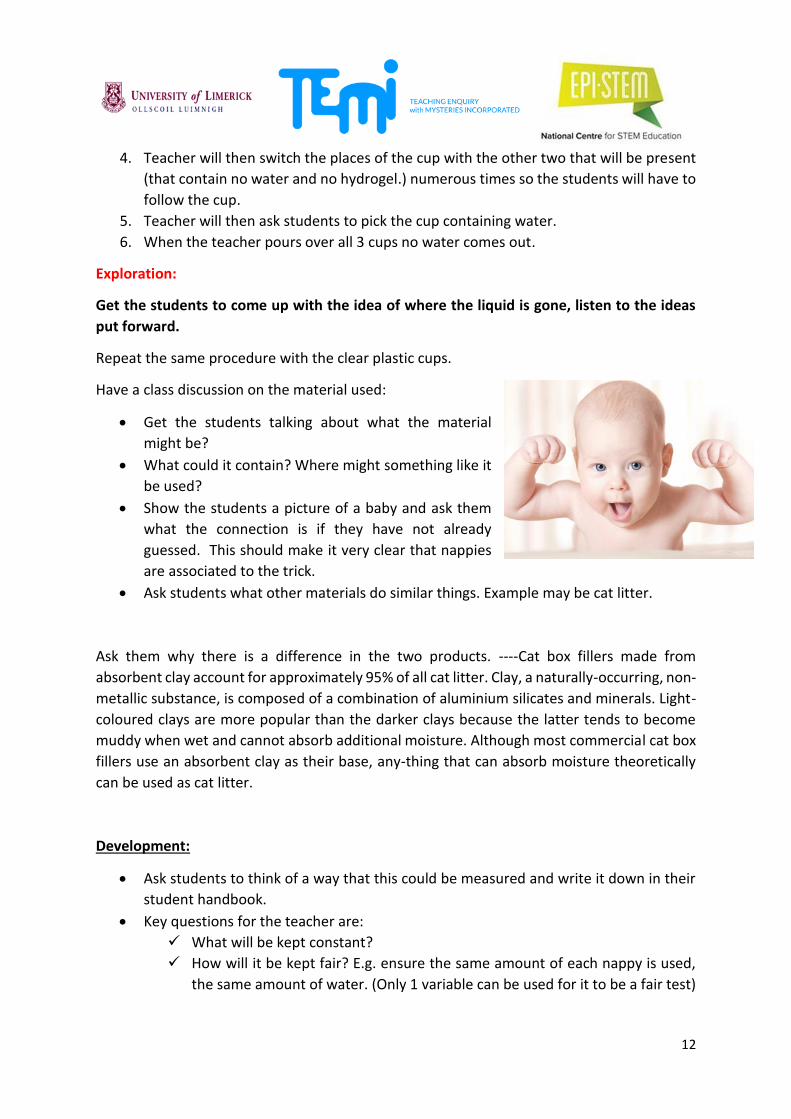
Show the students a picture of a baby and ask them
what the connection is if they have not already
guessed. This should make it very clear that nappies
are associated to the trick.
Ask students what other materials do similar things. Example may be cat litter.
Ask them why there is a difference in the two products. ----Cat box fillers made from
absorbent clay account for approximately 95% of all cat litter. Clay, a naturally-occurring, non-
metallic substance, is composed of a combination of aluminium silicates and minerals. Light-
coloured clays are more popular than the darker clays because the latter tends to become
muddy when wet and cannot absorb additional moisture. Although most commercial cat box
fillers use an absorbent clay as their base, any-thing that can absorb moisture theoretically
can be used as cat litter.
Development:
Ask students to think of a way that this could be measured and write it down in their
student handbook.
Key questions for the teacher are:
What will be kept constant?
How will it be kept fair? E.g. ensure the same amount of each nappy is used,
the same amount of water. (Only 1 variable can be used for it to be a fair test)

13
What different brands will be used?
*Teacher needs to facilitate students as they come up with a fair test rather than telling
them how to carry out.
Explanation:
The material used is that used in nappies. This material is known as a hydrogel polymer.
Polymers are long chained monomers (Showing the students an example of this will be more
effective than just stating it. Use the analogy of people e.g. 1 person =monomer 5= polymer).
The hydrogel attracts water as it holds a slightly negative charge and a hydrogen bond then
holds the water to the hydrogel.
A video to show this: https://www.youtube.com/watch?v=lZTQ97JndIo
Additional Links:
How Nappies work: http://imaginationstationtoledo.org/content/2011/03/how-do-diapers-
work/
Video of experiment being carried out: https://www.youtube.com/watch?v=sqgq7dIeVsE
https://www.youtube.com/watch?v=dYjNHtF8A1M

14
Double Lesson: Test for the best Expansion:
Aim: To find out how much water various nappies can absorb.
Introduction:
Follow up on the previous lesson discussing the action of hydrogels, and their uses in
everyday life. Ask students if they thought of any more similar materials.
Students also decided on a method to test nappies of different age groups against
each other.
This looks at whether the nappy has more hydrogel present or is it just bigger
for example a new-born versus a 3 year olds.
Testing two different brands for absorbency.
Allow students to develop their ideas in this class. Note that they may also need
guidance.
Materials Needed:
Nappies – 2 brands e.g. pampers and Tesco + 2 different age
groups e.g. new born and 3+
Timer
Graduated cylinder 100mL
large beakers
Ruler
Scissors
Pad of sticky notes
Pen or pencil
Distilled water 6L
Methods: Guidelines
Testing absorbency of two different brands:
1. Take the first nappy, and measure the central part with a ruler drawing a square 7cm
by 7cm, with the pen.
2. Cut it out so that you end up with a 7cm square of that nappy.

15
3. Take out one of the beakers, and label it with a sticky label that has the name of the
nappy that will be used in that beaker
4. Measure 500 ml of water in a graduated cylinder. Pour the 500 ml. of water into the
beaker.
5. Place the nappy square in the appropriate beaker.
6. Repeat steps 1-6 for the other nappy.
7. Wait 2 minutes for water to absorb into the nappy.
8. Remove nappy from water but allow it to drip back into the beaker for 15 seconds.
Place the nappy piece to the side.
9. Pour the water in the first beaker into the graduated cylinder.
10. Measure the amount of water in the cylinder.
11. Subtract the amount of water that was in the graduated cylinder after the nappy was
thrown away (step11) from 500 (The original amount.)
12. Record the amount of water that was absorbed in the nappy.
When testing the different age groups:
1. Measure the length and width of both nappies being tested.
2. Weigh both nappies being tested.
3. Once this is completed both nappies will be tested on absorbance levels.
4. Keep adding water to the point of saturation using a graduated cylinder. When the
water can drop out of the nappy.
5. Note how much water has been added.
Development:
Students should complete a graph of their choice which will show the results as to how much
water each nappy they trialled was able to absorb.
16
This should be completed for homework if not finished within the class.
Development:
The class should then discuss if the price has anything to with the performance of the
nappy.
The teacher will give the students the various prices paid for the nappies and ask them
in their groups to discuss if price has had an impact on the results.
In the long run which will be more cost effective?
Is the nappy less effective due to less polymer present?
Follow up ideas:
If time permits students can also test if the material is reusable by drying the hydrogel
out and adding water again. The students can dry their material using an oven and
test does it absorb the same amount as it did the first time around.
Is this effective and could it be something used in the future?
If this effective how would it effect waste disposal? Nappies are said to make up ¼ of
the yearly waste is there any more effective way this can prevented?
Cloth washable nappies why not use them?
Additional Links:
Explanations on nappies:
http://www.coolscience.org/CoolScience/KidScientists/babydiaper.htm
Experiment involving nappies and hair gel: http://www.nuffieldfoundation.org/practical-
chemistry/experiments-hydrogels-hair-gel-and-disposable-nappies
http://www.chemistryexplained.com/Di-Fa/Disposable-Diapers.html
http://chemistry.about.com/od/howthingsworkfaqs/f/diapers.htm

17
Optional Single Lesson: how it works. Introduction:
Teacher can then expand on this by asking students what the link between a nappy and
garden centre is.
Answer: the polymers used in nappies are also used in soils to keep them moist Rather than
having to water them.
Have a class discussion on whether it is effective.
Development:
The students could do a project exercise on different materials that have the same properties
as nappies/ function in the same way.
List of topics that could be given to ensure the same area isn’t used more than once.
Hydrogels used in soil
What is the main hydrogel used?
The importance of them/benefits
Are there drawbacks
How do they work?
Is there a way they can be improved?
Hair gel
How does it work?
What is the main hydrogel used?
How could you show it consist of a hydrogel? Experiment (add salt)
Uses today and other uses that it may have?
How could you test its effectiveness?
Are all brands the same?
Contact lenses
Main hydrogel used?

18
What is the importance of these in everyday life?
Survey how many people use them in the class? Year? School? At home?
How do they work?
What could affect the way they work?
Hydrogel importance in medicine
Main uses in medicine
Main hydrogel used in medicine
Other uses that you found
Any uses that shocked you
How does this hydrogel work?
Are there any uses that you can think of that could be looked in to in the
future?
This pdf. Is very useful for this area:
http://www.campoly.com/files/6113/7304/9645/GB_Hydrogels_polymers_and_plas
tics_in_medical_devices_2013.pdf
Conclusion:
The project can be presented in either a PowerPoint or a poster format. The students
should be given the weekend to research and complete the project and should divide
the work evenly.
The students can begin discussing how they will approach the project and divide the
work in this class.
The teacher should ask the students to give them there outline before leaving this
class so they have an idea of how it will be undergone.
Ideas they have
How will they divide the work
Will it be in PowerPoint or poster
Do they have any questions regarding the topic they were given
Additional Links:
Polymers in soil:
http://www.soilmoist.com/products/soil-moist.php
http://davesgarden.com/guides/articles/view/1092/#b

19
UNIT 2
Now you see it! Now you don’t!
20
Introduction:
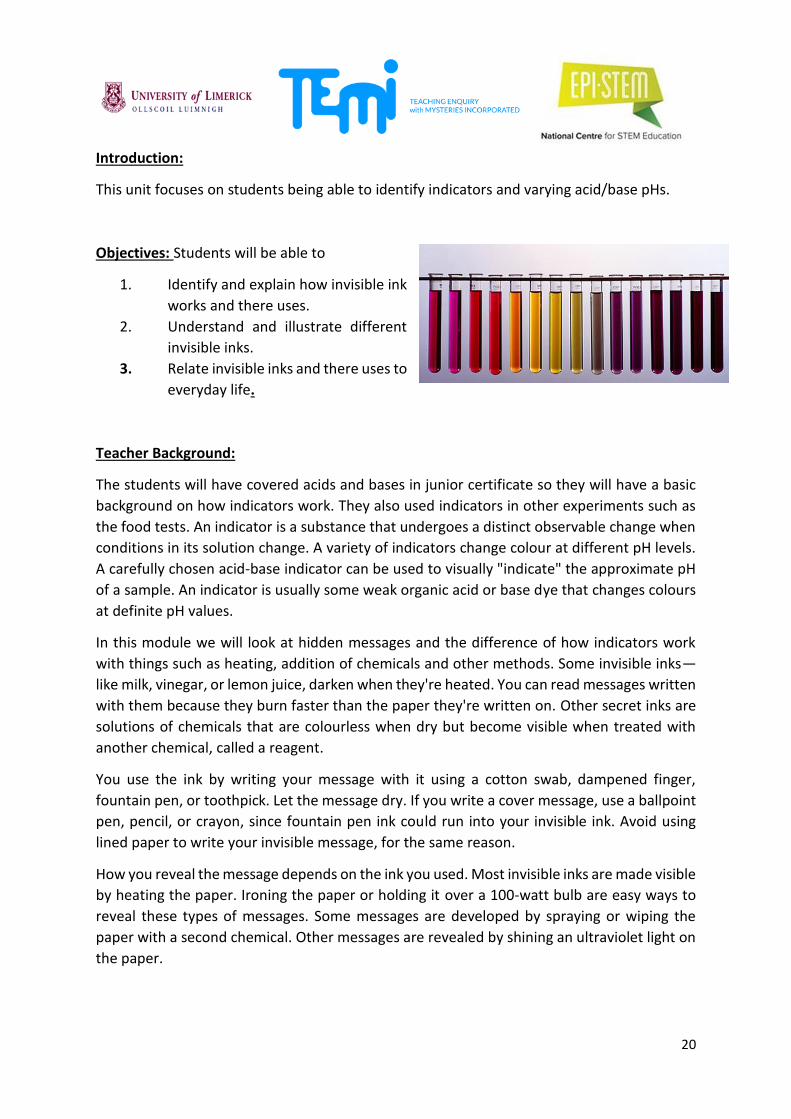
This unit focuses on students being able to identify indicators and varying acid/base pHs.
Objectives: Students will be able to
1. Identify and explain how invisible ink
works and there uses.
2. Understand and illustrate different
invisible inks.
3. Relate invisible inks and there uses to
everyday life.
Teacher Background:
The students will have covered acids and bases in junior certificate so they will have a basic
background on how indicators work. They also used indicators in other experiments such as
the food tests. An indicator is a substance that undergoes a distinct observable change when
conditions in its solution change. A variety of indicators change colour at different pH levels.
A carefully chosen acid-base indicator can be used to visually "indicate" the approximate pH
of a sample. An indicator is usually some weak organic acid or base dye that changes colours
at definite pH values.
In this module we will look at hidden messages and the difference of how indicators work
with things such as heating, addition of chemicals and other methods. Some invisible inks—
like milk, vinegar, or lemon juice, darken when they're heated. You can read messages written
with them because they burn faster than the paper they're written on. Other secret inks are
solutions of chemicals that are colourless when dry but become visible when treated with
another chemical, called a reagent.
You use the ink by writing your message with it using a cotton swab, dampened finger,
fountain pen, or toothpick. Let the message dry. If you write a cover message, use a ballpoint
pen, pencil, or crayon, since fountain pen ink could run into your invisible ink. Avoid using
lined paper to write your invisible message, for the same reason.
How you reveal the message depends on the ink you used. Most invisible inks are made visible
by heating the paper. Ironing the paper or holding it over a 100-watt bulb are easy ways to
reveal these types of messages. Some messages are developed by spraying or wiping the
paper with a second chemical. Other messages are revealed by shining an ultraviolet light on
the paper.

21
Single Lesson 1: Hidden Message Introduction: Introduce the topic of acid- base and indicators while building on information
covered in the junior certificate regarding this area.
Discrepant event:
Engagement:
Materials:
0.1M NaOH or dilute ammonia solution
Phenolphthalein
Lab coat and goggles/paper
Acid solution (HCl)
Method:
1. Get a student wearing their PPE up to the front of the class and then on a white lab
coat squirt a clear liquid (indictaor) phenolphthalein all over the back of it or an
alternative would be to write a message.
2. Follow this up by spraying the coat with a colourless base solution (0.1M NaOH or
dilute ammonia solution). A pink colour becomes visible where sprayed.
3. When left for a while the message will disappear.
4. Or spray with an acid to do it faster.
Exploration:
Get the students asking questions on what has happened?
Once they figure out what caused the hidden message get them questioning why it
disappeared after a while. This can be speed up by spraying with an acid.
Allow students the opportunity to try this activity on a piece of paper with indicator
and a base.
Will this work for any solution?
Will all indicators respond the same?
What happens if u spray acid over the solution?
What are hidden messages
Development:
Students can carry out the reaction in a test tube.

22
Once they experience the colour change they can blow in with a straw. The carbon dioxide
should change the colour back colourless due to being slightly acidic.
Explanation:
The message was wrote in phenolphthalein solution. When the NaOH or dilute
ammonia is sprayed on the coat the indicator changed from colourless to pink. Air
contains a small amount of CO2 which slowly reacts with the alkali to neutralise the
solutions which thus removes the pink colour. (This is a slow process.). To clear the
solution quicker spray acid on the solution.
Additional Links:
Experiment:
http://www.nce-
mstl.ie/_fileupload/Science%20resources/Chemistry%20resources/Class%20Activity-
%20Secret%20Writing.pdf

23
Double lesson: Homemade Hero’s Expansion:
In the previous class we looked at the effectiveness of the indicators in hidden messages.
Today we will further the knowledge on hidden messages in the class and test many different
sources that can be found in the house and discover how to uncover them. Students will be
given different materials that can be used for invisible ink and they will be given time to test
these. It is up to the student to decide and discover methods that they think will be suitable.
Uses of hidden messages:
In the wars
In letter Writing
In top secret missions
CIA
Love Letters
Ask the students to think of any reasons/ideas of when invisible ink and hidden messages can
be used.
Materials:
Heat source – lamp
Lemons
Corn starch – mix it with water
Iodine – mixed with water
Vinegar
Baking Soda
Cola
Milk
Sugar- mix with water
Red cabbage water
Copper sulphate
Numerous sheets of paper – cutting them in half or thirds will reduce waste paper
Cotton buds/ toothpick/ paint brushes
Weigh boats to put the materials in

24
Method:
1. Students should all decide on the first 3 recipes they are going to try out.
2. The students will the in their groups test the first method.
3. Following on with the next two ideas.
4. Students will take note in their work sheet if these recipes work or not.
5. They will then alter and trial 3 new recipes.
6. Students will write down all the methods that got trialled and weather they worked
or not.
Sample Results Table:
Recipe Pass Fail
Lemon juice, with heating
Discuss the results the groups in a class discussion.
Discuss what worked and what didn’t.
Was it fun testing without knowing the results.
Development:
Get students to come up with other things that may be used to write invisible messages:
This can be given as homework- ask them to go home and see can they find anything.
White crayon and colour over it with a marker
Banana and a toothpick

25
Egg, alum and vinegar message:
This requires a teacher to have boiled eggs in the class room with them. The students will
then write a message on the egg and test the next day to see if it works or not.
Teacher boils the egg before the class:
Materials:
1 hard-cooked egg (see instructions for hard-cooking an egg below)
Alum (1 tbsp. or 15 mL) (Alum is commonly found at most grocery stores where spices
are found.)
White vinegar (2 cups or 500 mL)
Fine-tipped paintbrush, toothpick or cotton bud
Method:
1. Dissolve alum 2 tsp in 500 ml vinegar by stirring it with a spoon
2. Dip a fine-tipped brush, toothpick or cotton bud into the solution and write your
secret message on the shell of the boiled egg
3. Place your trick egg under high intensity light (200 watts) for 10 mins. This method
make the reaction of alum darker on the egg or else leave it under a lamp overnight.
How it works:
The vinegar dissolves the calcium carbonate in the eggshell, allowing the alum to go through
(or permeate) the shell and discolour the egg white. The egg white is where the colour change
will be seen when the shell is removed.
** Tell students to bring a felt tip pen to the next class. **
Additional Links:
Egg Tricks: http://bizarrelabs.com/egg.htm

26
Making Invisible Ink for the teacher:
Heat-Activated Invisible Inks:
Iron the paper, set it on a radiator, place it in an oven (set lower than 450° F), or hold it up to
a hot light bulb.
any acidic fruit juice (e.g., lemon, apple, or orange juice)
onion juice
baking soda (sodium bicarbonate)
vinegar
dilute cola
diluted honey
milk
soapy water
sucrose (table sugar) solution
urine
Inks Developed by Chemical Reactions:
These inks are sneakier, because you have to know how to reveal them. Most of them work
using pH indicators, so when it doubt, paint or spray a suspected message with a base (like
sodium carbonate solution) or an acid (like lemon juice). Some of these inks will reveal their
message when heated (e.g., vinegar).
phenolphthalein (pH indicator), developed by ammonia fumes or sodium carbonate (or another base)
vinegar or dilute acetic acid, developed by red cabbage water
sodium bicarbonate (baking soda), developed by grape juice
copper sulphate, developed by sodium iodide, sodium carbonate
iron sulphate, developed by sodium carbonate, sodium sulphide,
starch (e.g., corn starch or potato starch), developed by iodine solution
lemon juice, developed by iodine solution
Inks Developed by Ultraviolet Light (Black Light):
Most of the inks that become visible when you shine a black light on them also would become
visible if you heated the paper. Glow-in-the-dark stuff is still cool. Here are some chemicals
to try:
dilute laundry detergent (the bluing agent glows)
body fluids
tonic water (quinine glows)
vitamin B-12 dissolved in vinegar

27
Single Lesson Optional: Pentastic Students get there eggs back if time permitted them to carry out activity in the class.
Each student will pick up an egg and take the shell off.
They will have 2 minutes to find the owner of the egg.
Development:
Ask students to take out there felt tip pens-
Discuss the use of invisible pens how do they work?
Have you owned one when you were younger?
What did you use it for?
Materials:
Felt-tipped pen
Knife
Scissors
Marker
Paper
Starch
Water
Sponge – ½ large sponges
Light source
Grape juice
Method:
1. Open up a felt-tipped pen or marker and remove the ink capsule from inside. If your
felt tipped pen doesn't open easily, you can use a knife to pry it apart.
2. Soak the pen in water to remove any ink left-over from the tip and the body. Do this
several times until the water is clear.
3. Cut a piece of sponge the size of your pen capsule. It doesn't have to be exact, but it
should be able to fit inside.
4. Make a mixture of half baking soda and half water and dip the sponge in it. This will
be your invisible ink.

28
5. Put the sponge inside the pen and close the pen up. Write your invisible message on
a piece of paper.
6. Hold the message near a light bulb or other heat source to decode it. It will become
yellow or brownish.
Discuss all information covered in the past week.
Allow students ask any questions that they might have.
Additional Links:
Other ideas for a pen: http://www.instructables.com/id/25-Cent-Invisible-InkPen-UV-light-
visible/

29
Unit 3
Ice, Ice Baby
30
Introduction: The aim of this unit is for students to understand cooling mixtures and how
this is carried out.
Objectives: students will
Be able to explain how cooling mixtures occurs.
Understand salts effect on the freezing point of water.
Explain the uses of salt in relation to its effect on ice.
Teacher background:
Ice forms when the temperature of water reaches 0°C. When you add salt, the temperature
drops: A 10-percent salt solution freezes at -6°C, and a 20-percent solution freezes at 2 -16°C.
If you ever watch salt melting ice, you can see the dissolving process happen -- the ice
immediately around the grain of salt melts, and the melting spreads out from that point.
When you add salt to water, you introduce dissolved foreign particles into the water. The
freezing point of water becomes lower as more particles are added until the point where the
salt stops dissolving. For a solution of table salt (sodium chloride, NaCl) in water, this
temperature is -21°C under controlled lab conditions. In the real world, on a real sidewalk,
sodium chloride can melt ice only down to about -9°C.
You could use other types of salt instead of sodium chloride, but you couldn't substitute sugar
for the salt because
Sugar doesn't dissolve well in cold water and
Sugar doesn't dissolve into multiple particles, like an ionic material such as salt.
Compounds that break into two pieces upon dissolving, like NaCl breaks into Na+ and Cl-, are
better at lowering the freezing point than substances that don't separate into particles
because the added particles disrupt the ability of the water to form crystalline ice. The more
particles there are, the greater the disruption and the greater the impact on particle-
dependent properties like freezing point depression, boiling point elevation, and osmotic
pressure. The salt causes the ice to absorb more energy from the environment (becoming
colder), so although it lowers the point at which water will re-freeze into ice, you can't add
salt to very cold ice and expect it to freeze your ice cream or de-ice a snowy sidewalk (water
has to be present!). This is why NaCl isn't used to de-ice sidewalks in areas that are very cold.
This is known as an endothermic process: this is when the reaction absorbs energy in the
form of heat (endergonic processes or reactions absorb energy, not necessarily as heat).
Examples of endothermic processes include the melting of ice and the depressurization of a
pressurized can. In both processes, heat is absorbed from the environment. You could record
the temperature change using a thermometer or by feeling the reaction with your hand. The
reaction between citric acid and baking soda is a highly safe example of an endothermic
reaction, commonly used as a chemistry demonstration.

31
Single Lesson: Ice cold class Engagement:
Discrepant event:
Material:
Ice
Salt
Thermometer
Beaker
Method:
Just Before the class starts:
1. Place the ice in the beaker 1/3 filled.
2. Pour 3 to 4 tablespoons of salt on top of the ice.
3. Fill the beaker with another 1/3 of ice.
Now ask the students what temperatures will the ice start melting at.
4. Place thermometer in the beaker but don’t let it touch the bottom.
The temperature should be lower than 0°C.
Exploration:
Questions to ask the students:
What is going on?
What is the thermometer reading?
At what temperature does ice usually melt?
Do all liquids have the same freezing/melting point?
Tell students that you have added something to the ice let them think of possible solutions
Show students this photo and ask them what the
connection is.
32
Link to photo:
http://www.bing.com/images/search?q=salt+on+ice+roads&FORM=HDRSC2#view=detail&i
d=180D9EA2E6FA01ED50330F69EA29E5381D6EFD2C&selectedIndex=16
After seeing this photo ask the students how salt works to stop ice.
Is a reaction taking place if the temperature is going down?
How is that possible? What might be happening?
Development:
Let students work in pairs to come up with different uses and benefits of this.
Coolers
Roads
Keeping food cold
Does it only work for salt will sugar have the same effect on the ice? How can we test
this?
Explanation:
The freezing/melting point of water is lower than just water on its own. The addition of the
salt to the ice at 0°C causes tit to melt, because salt water cannot freeze at 0°C in the same
way pure water cant freeze at 10°C. The melting process decreases the temperature
because melting needs heat and as the heat was not supplied to the system of melting ice, it
withdraws heat from its own environment.
An endothermic process or reaction absorbs energy in the form of heat. With the melting of
ice and the heat is absorbed from the environment. You could record the temperature change
using a thermometer or by feeling the reaction with your hand. Another reaction that could
be used to show endothermic reactions is the reaction between citric acid and baking soda,
it is a highly safe example, commonly used.
Additional Links:
Links to how salt works on roads: http://sciencewithme.com/why-i-love-salt/
http://science.howstuffworks.com/nature/climate-
weather/atmospheric/road-salt.htm
http://chemistry.about.com/cs/howthingswork/a/aa120703a.htm

33
Double Lesson: Melting Time Expansion:
In this lesson we will test if the concentration of salt effects the melting time and also if the
temperature is lowered with a higher concentration.
Teacher should first ask students to write down their hypothesis on what they think will
happen when the experiment is carried out. Students should do this individually. Get them
discuss their hypothesis before the experiment.
Materials:
Beaker
spoon
1 scale (1g accuracy)
Graduated cylinder
Funnel/sieve
Thermometer
Weighing cups
Per Group:
1L tap water
500g ice
105g salt or sugar
Method:
1. Measure 200ml of tap water in a beaker.
2. Add 100g of ice to the beaker and stir vigorously.
3. Measure the temperature, but wait until it is steady (~10 sec) before you record the
lowest stable temperature on the results chart.
4. Wait 3 minutes before noting the temperature at the end. While waiting, the ice will
partially melt and cool the water until the solution reaches a low enough temperature
where the ice cannot melt further.
5. Pour the solution through the sieve/funnel with filter paper into the graduated
cylinder. Toss the ice. Record the new water volume on the results chart in the column
for “final volume of water”. This step is necessary because some of the ice will have
melted and this will tell if the different salt/sugar concentration affected the amount
of ice melted.
6. Next dissolve 15g of salt/sugar into 200 ml of tap water in a beaker.

34
7. Repeat steps 2/4 and record your measurements on the results chart.
8. Repeat for 20g, 30g, 40g and 50g of salt/sugar.
9. Using your measurements for the “final volume of water”, draw a graph of final water
volume versus the salt concentration.
10. You now have all the data you need to plot your own phase diagram with temperature
and salt concentration on the axes.
Follow up:
Students will then discuss as a class the hypothesis and if it has changed or stay
the same and explain the results that they got.
Students should be able to explain how and why the temperature is lowered.
Development:
*If time permits
Students can look at making an ice- pack and in there groups they should try come up with a
recipe to make the ice- pack. Have an ice pack in the class so that the student can look at
the different ingredients how do they work?
What happens in the one use ice packs?
You have to crack inside the bag what does this do?
Name the reaction type: endothermic
Did they find out anything interesting?
Different chemicals that can be used.
What is the difference between single use and reusable?
**If not student should research/ finish this at home as homework**
Additional Links:
How ice packs work and there uses: http://www.ehow.com/how-does_4925771_instant-
ice-packs-work.html
Recipe for ice pack: http://sustainableutopia.wordpress.com/2012/03/07/diy-unfreezing-
ice-packs/
TED-Ed interesting talk: http://ed.ted.com/lessons/how-do-cold-packs-get-cold-so-fast-
john-pollard#review

35
Single Lesson Optional: I scream for…….. Discuss the ice packs and ask students to share the
information that they gathered.
Did they answer the questions put to them?
Did they find out any interesting facts that haven’t been
covered in the class?
Making ice-cream
Materials:
1/2 cup milk
1/2 cup whipping cream (heavy cream)
1/4 cup sugar
1/4 teaspoon vanilla or vanilla flavouring
(vanillin)
1/2 to 3/4 cup sodium chloride (NaCl) as table salt or rock salt
2 cups ice
1-quart Ziploc bag
1-gallon Ziploc bag
Thermometer
Cups and spoons for eating your treat!
Method:
1. Add 1/4 cup sugar, 1/2 cup milk, 1/2 cup whipping cream, and 1/4 teaspoon vanilla
to the quart Ziploc bag. Seal the bag securely.
2. Put 2 cups of ice into the gallon Ziploc bag.
3. Use a thermometer to measure and record the temperature of the ice in the gallon
bag.
4. Add 1/2 to 3/4 cup salt (sodium chloride) to the bag of ice.
5. Place the sealed quart bag inside the gallon bag of ice and salt. Seal the gallon bag
securely.
6. Gently rock the gallon bag from side to side. It's best to hold it by the top seal or to
have gloves or a cloth between the bag and your hands because the bag will be cold
enough to damage your skin.
7. Continue to rock the bag for 10-15 minutes or until the contents of the quart bag
have solidified into ice cream.

36
8. Open the gallon bag and use the thermometer to measure and record the
temperature of the ice/salt mixture.
9. Remove the quart bag, open it, serve the contents into cups with spoons and ENJOY!
Explanation:
Ice has to absorb energy in order to melt, changing the phase of water from a solid to a liquid.
When you use ice to cool the ingredients for ice cream, the energy is absorbed from the
ingredients and from the outside environment (like your hands, if you are holding the bag of
ice!). When you add salt to the ice, it lowers the freezing point of the ice, so even more energy
has to be absorbed from the environment in order for the ice to melt. This makes the ice
colder than it was before, which is how your ice cream freezes. Ideally, you would make your
ice cream using 'ice cream salt', which is just salt sold as large crystals instead of the small
crystals you see in table salt. The larger crystals take more time to dissolve in the water around
the ice, which allows for even cooling of the ice cream.
Additional Links:
Steve Spangler making ice-cream:
http://www.stevespanglerscience.com/lab/experiments/homemade-ice-cream-sick-science
Explanation for salt in ice-cream: http://curiosity.discovery.com/question/why-there-salt-
ice-cream
Endothermic reaction example: http://www.sciencecompany.com/fast-freeze-experiment-
an-endothermic-reaction-W149.aspx

37
Unit 4:
What floats your boat?

38
Introduction: The aim of this unit is to build on student’s previous knowledge of density and
floatation and introduce the students to a hydrometer.
Objectives: the students will be able to –
Understand how a hydrometer works and calibrate it effectively.
Test the density of various solutions both known and unknowns
Explain how density works
Teacher Background: Density is defined as mass divided by volume.
Mass = how many atoms are in an object. Volume = how much space an object takes up.
For a pure substance the density has the same numerical value as its mass concentration. Different materials usually have different densities, and density may be relevant to buoyancy, purity and packaging
Sugar solutions: As you add sugar to the water, more and more sugar molecules will take over the space, making the water denser. The cup containing the 8 tablespoons of sugar will be the densest, the cup with 2 tablespoons will be least dense.
Supersaturated Solution: If you attempt to dissolve sugar in water, you reach a point where
you cannot dissolve any more sugar. This is called a saturated solution. However, if you heat
this solution, more sugar will dissolve. When the solution is cooled, the sugar will remain in
solution. This is called a supersaturated solution, which is very unstable and will crystallize
easily.
A hydrometer is a type of instrument that measures the density of liquids. Making a simple
hydrometer to measure the density of several types of liquids is a good science project for
students. Once you have your hydrometer, you can use it over and over again for various
projects. It will be easy for anyone to use, because if you know how to read a thermometer,
you can read a hydrometer. A hydrometer is a tool scientists use to measure the specific
gravity of liquids. Specific gravity is the ratio of the mass of a liquid to the mass of an equal
volume of pure water. Because the density of a liquid changes with temperature,
hydrometers are calibrated for different reference and sample temperatures.
Hydrometers may be calibrated for different uses, such as
lactometer for measuring the density (creaminess) of milk, a
Saccharometer for measuring the density of sugar in a liquid
Alcoholmeter for measuring higher levels of alcohol in spirits.
Hot and Cold water: Cold water is denser than room-temperature water. Hot water is less
dense than room-temperature water. Cold Water: The molecules of cold water move slower
and are a little closer together than the hot or room-temperature water. Also point out that
when the water is cooled, the water level falls slightly in the graduated cylinder. Hot water:

39
The molecules in the hot water are moving faster and are a little farther apart than the
molecules in room-temperature water. Make sure students notice that when the water is
heated, the water level rises slightly in the graduated cylinder.
Single class: What Floats?
Discrepant Event:
Engagement:
Materials:
2 beakers 500mL
Water 2 beakers full
Salt
Tray of eggs
Method:
1. Have two beakers filled with water
2. In one of these beakers there should be dissolved salt. (The amount required varies
depending on the water used)
3. When the teacher places the egg in the plain water it will sink
4. When placed in the salt water it will float.
Exploration:
The off colour solution is a hint for the students.
Teacher plays 20 Questions with the students - Where the students have to find out what
has happened they can continue to question why it happened.
Rules:
1. Each student can ask one question
2. Teacher can only answer Yes/No
3. When a student thinks the have the answer they raise their hand.
Aim is to find out salt is in the second solution and then continue to find out is due to
density of the solution.
Teacher can tell the students that something is added to the water if students don’t figure it
out-
What does this mean?
What could it be?

40
Development:
If the teacher adds water to the beaker containing salt what will happen? Will the egg stay
in the same position or move?
Students can trial this experiment to get the egg floating in the middle of the glass.
They can add spatulas full of salt until the egg will float in the middle of the glass as
in the 3rd cup above.
They will have to note how much salt they use to get this to happen.
Requires some accuracy as not enough they won’t float and too much it will float too
high.
Development: Introduce students to a hydrometer and explain what its use is. Only touch
on the topic as more detail will be provided in the next class.
Development: ask the students the equation for density from junior certificate
Give them 3 example to carry out:
1. If the mass of a stone is 20 g and the volume of the stone is
10 cm3, find the density of the stone.
Answer: Density of the stone = 20/10 = 2 g/cm3
2. A block of metal has the measurements shown on the right.
The mass of the metal block is 21 g.
i) Calculate the volume of the block.
ii) Calculate the density of the block.
Answer: (i) Volume = 5×1×2 = 10 cm3
(ii) Density = 21/10 = 2.1 g/cm3
Explanation:
Since density is defined as how much matter takes up a certain amount of volume, we can
take ordinary water, add salt to it, and make it denser. Yes, the volume increases a little bit
when we add the salt but the mass increases by a much bigger factor. This is because rather
than just floating around and taking up space, the salt dissolves into ions which are attracted
to the water molecules and bind very tightly to them, packing more matter into the space..
The salt water has the additional mass of the sodium and chlorine atoms that dissolve into
the water. In other words, the salt water that we create has more stuff in it and is much denser
than ordinary water.

41
Additional Links:
Video of the experiment being carried out:
https://www.youtube.com/watch?v=zszw6uCiQpc

42
Double Lesson: Let’s get accurate
This question will build on what the pupils learned in yesterday’s class.
Question: Is there a difference between swimming in an ocean and a pool?
This same principle applies to people swimming in oceans or salt water lakes. The average
person will sink in ordinary water but can float like a boat in saltwater. The Dead Sea is 33%
salt by mass. People find it very odd how “floaty” they are when they swim in the Dead Sea
You might not know this but muscular people are denser than people with less muscle and
fatter. Some championship swimmers for instance, will sink in salt water while heavier
people will still float.
Expansion:
In this lesson we will make a hydrometer and then continue on to use it to test different
solutions densities. The homemade hydrometer is just a simple straw and clay together and
will have to be calibrated to work to find the density of solution.
Students need to be introduced to a hydrometer:
Previous class we looked at density in liquids. To measure these
liquids a hydrometer is used. A hydrometer a very simple piece
of equipment to use and is an instrument used to measure the
specific gravity of a liquid solution and, therefore, its strength.
A simple (and common) hydrometer consists of a weighted
glass bulb with a graduated stem, looking similar to a large
glass thermometer. It is placed in the solution, spun (to remove
air bubbles that might cause it to float higher), then the column
is read at the waterline to give a number that can be compared
to a chart of known values for the particular solution being
measured. The device is dropped into a liquid, usually water in this case, and the device will
partially float, with the weighted end under water, and the rest of the device above the water
line. At the point of the water line, one can see the strip of paper, and read from the paper,
the metric. The metric will usually provide the specific gravity of the water, meaning, it will
describe the weight of dissolved materials in the water. The hydrometer is used in beer and
wine making to determine when the solution has reached the desired concentration of
alcohol

43
Hydrometer Construction and Calibration Lab:
*** have half the class trialling salt and the other class trialling sugar***
Materials:
Straws,
Plasticine (mala)
permanent markers of different colours
Graduated cylinders/ beakers
Water
Sugar
Salt
Electric balance
Ruler
Scissors
An unknown solution for the students to test
Ethanol
Olive oil
(Alternate materials: pipette instead of straw and modelling clay, small weights (copper
or lead shot, small nails or straightened paper clips) to insert into pipette bulb so that it
is bottom of hydrometer)
Method:
1. Take your straw and cut it to a length of 15 cm. Take
a small amount of plasticine and seal the bottom of
the straw. Keep the mala symmetric about the straw.
2. Place the straw with the clay at the bottom into the
beaker/graduated cylinder of distilled water. The
straw should float level in the water it may take
numerous goes to get it to float. If it sinks, remove
some excess clay. If it is not level, even out the clay.
Once you have it floating levelly, measure the distance from the top of the straw to
the water level by using your thumb and index finger just on the water level when
taking the straw out and then marking it with a permanent marker.
3. Your hydrometer will show if the liquid it is placed into is more dense, less dense or
the same density as pure water.
44
4. There are five different solutions going to be mixed. Using warm water in the beaker
add the sugar and mix until completely dissolved. The solutions are 20 g/L, 40 g/L, 60
g/L, 80 g/L, 100 g/L give students enough time to decide how much they will need for
100mL.
5. Place the hydrometer in the solution. Record the measurement from the top of the
straw in the appropriate row and column on the table.
6. Remove the hydrometer, replace the solution with a different one, and repeat step 6
for all five sugar solutions water solutions.
Take your hydrometer up to the front and place it in the “Unknown Solution.” Record your
hydrometer reading: _______________________
Development:
Using the various sugar solutions add a drop of food colouring to each one.
Start with the cup with the most sugar. Using a pipette, dropper or back of a spoon,
begin adding the first layer of sugar water.
After the first layer, things get challenging. Carefully drip the next dense layer onto
the surface of the first. The best technique is to place the pipette right above the
surface of the first layer and against the glass. Slowly drip the next colour onto the
first. This will take a lot of patience. Go slow.
The colours will begin to mix at first and then your original colour will start to show.
Repeat with the next dense colour and the least dense colour until you have stacked
all of the colours.
Additional Links:
Sugar Tower: http://www.stevespanglerscience.com/lab/experiments/colorful-sugar-density-
tower#sthash.yNl3Goqc.dpuf
List of Specific gravities: http://www.fao.org/docrep/017/ap815e/ap815e.pdf

45
Single Lesson Optional: Difference Matters
Students have now looked at the density of liquids and are aware of how not all liquids have
the same density. They have carried out the calibration and testing of a hydrometer and used
it test various sugar solutions.
In this lesson students will build on the knowledge they have acquired on density of
liquids and move on to how temperature effects it.
Key points for teacher:
Heating a substance causes molecules to speed up and spread slightly further apart,
occupying a larger volume that results in a decrease in density.
Cooling a substance causes molecules to slow down and get slightly closer together,
occupying a smaller volume that results in an increase in density.
Hot water is less dense and will float on room-temperature water.
Cold water is denser and will sink in room-
temperature water.
A good way to show this is the demonstration of hot
and cold water:
https://www.youtube.com/watch?v=AasKk3HRyOI
Ask students to make a prediction:
Do you think the hot and cold water will mix or stay separate?
Materials
Hot water (about 50 °C, coloured yellow)
Cold water (about 5 °C, coloured blue)
2 identical clear baby food jars/ bottles / wide top jar
Water-resistant card (from a deck of cards or laminated index card)
Paper towels
Method:
Hot water on top
1. Completely fill a baby food jar with hot tap water and add 2 drops of yellow food
colouring.

46
2. Completely fill another baby food jar with very cold water and add 2 drops of blue
food colouring. Stir the water in both jars so that the colouring is well-mixed in both.
Place the cold water jar on a paper towel.
3. Hold a water-resistant card over the top of the hot water jar.
4. While holding the card against the jar opening, carefully turn the jar upside down.
5. With the card still in place, position the jar of hot water directly over the jar of cold
water so that the tops line up exactly.
6. Slowly and carefully remove the card so that
the hot water jar sits directly on top of the cold
water jar.
Although removing the card may result in a little
mixing or spilling, the hot yellow water will remain in
the top jar and the cold blue water will remain in the
bottom jar.
Ask students:
Why do you think the hot water stayed on top of the cold water?
Ask students to make a prediction: What might happen if you placed the cold blue
water on top of the hot yellow water and then removed the card?
Cold water on top
Use the same procedure as above, but place the jar of cold water, upside down over
the jar of hot water.
The cold blue water will immediately fall into the hot yellow water causing mixing. The
water will quickly become green throughout.
Development:
Have you ever been in a very warm room on a very cold winter day and opened a door or
window leading to the outside for a short period of time?
What did you experience as you stood in the opened doorway or near the opened
window?
Did you experience a rush of cold air past you as you stood there?
What do you think might explain this rush of air into the room?
What if you were outside in a similar situation and opened a door in to a warm room
what would have happened?

47
Discuss all that has been covered in this unit and address any questions that the students
may have on the topic.
Additional Links:
A website with picture representations of how to carry out the experiment:
http://sciencewithkids.com/Experiments/Matter-experiments/Hot-and-cold-water-
density.html

48
UNIT 5
What’s going on? :

49
Introduction: The aim of this unit is to introduce students to the topic of fermentation.
Students may not be aware of what fermentation is or how it occurs but they should be
familiar with different foods and drinks that are created through the process of fermentation
such as wine and cheese. Students will have previous knowledge of what glucose is from
junior certificate so it is essential to build on this.
Objectives: Students will be able to identify what is required for alcohol fermentation.
Students will understand the concept of fermentation.
Teacher Background:
Fermentation is a metabolic process and natural process in which an organism converts a
carbohydrate, such as starch or a sugar, into an alcohol, gas or an acid. It occurs in yeast and
bacteria, but also in oxygen-starved muscle cells for example, yeast perform fermentation to
obtain energy by converting sugar into alcohol. Bacteria perform fermentation, converting
carbohydrates into lactic acid. Fermentation is used to make products such as wine, cheese
and beer e.g. converting juice into wine, grains into beer, carbohydrates into carbon dioxide
to leaven bread, and sugars in vegetables
This unit is based on ethanol fermentation (yeast). Fermentation must be carried out in the
absence of air to make alcohol. If air is present, ethanoic acid is made instead of alcohol. Yeast
and certain bacteria perform ethanol fermentation where pyruvate (from glucose
metabolism) is broken into ethanol and carbon dioxide.
The chemical equation for ethanol fermentation:
C6H12O6 (glucose) + Yeast 2 C2H5OH (ethanol) + 2 CO2 (carbon dioxide)
The word equation for ethanol fermentation is:
Glucose + yeast carbon dioxide + ethanol
Carbon dioxide gas bubbles out of the solution into the air leaving a mixture of ethanol and
water. Ethanol can be separated from the mixture by fractional distillation.
Yeasts ferment simple sugars (monosaccharides) into carbon dioxide and ethanol under
anaerobic conditions. Yeasts are single-celled fungi. The genus Saccharomyces is the one most
commonly used due to its efficient alcohol production and tolerance of high alcohol levels.
Some yeasts can live until the alcohol concentration reaches 18%.

50
Single lesson: What’s going on?
Discrepant event:
Engagement:
Teacher introduces the students to a case study where a man is suffering from high blood
alcohol levels even though he claims that he has not drank. Is this possible and how?
Hint: Students may not be aware as how alcohol is made so say that yogurts/ wine / cheese
undergo a similar process to be made. Fermentation
Case Study:
Students should take notes on this case study.
Link to story:
http://www.npr.org/blogs/thesalt/2013/09/17/223345977/auto-brewery-syndrome-
apparently-you-can-make-beer-in-your-gut?ft=1&f=1001
A 61-year-old man — with a history of home-brewing — stumbled into a Texas emergency room
complaining of dizziness. Nurses ran a Breathalyzer test. And sure enough, the man's blood alcohol
concentration was a whopping 0.37 percent, or almost five times the legal limit for driving in Texas.
There was just one hitch: The man said that he hadn't touched a drop of alcohol that day.
"He would get drunk out of the blue — on a Sunday morning after being at church, or really, just
anytime,"
Medical professionals chalked up the man's problem to "closet drinking".
So the team searched the man's belongings for liquor and then isolated him in a hospital room
for 24 hours. Throughout the day, he ate carbohydrate-rich foods, and the doctors periodically
checked his blood for alcohol. At one point, it rose 0.12 percent.
When he ate or drank a bunch of starch — a bagel, pasta or even a soda. The levels spiked.
Follow UP:
Other cases similar to the one in Texas: Some reports in Japan date back to the 1970s. In most
instances, the infections occurred after a person took antibiotics

51
Exploration:
Students will work in groups to figure out the secret behind the mystery. Students may ask
questions regarding certain areas but give them helpful hints rather than telling them the
answer.
These are some question the teacher might ask:
He has his own brewery
What is a home brewery?
How do they work?
Will this matter?
How is alcohol made? Guide them along this some students may already have an idea.
(Made through a process called fermentation = yeast breaking sugar down into ethanol
and carbon dioxide. This process is without any air present and once complete, the
carbon dioxide gas bubbles out into the air, leaving ethanol and water behind.)
He notices it happens more after eating high glucose foods. What could this mean?
What is glucose?
Is it found in all foods?
Which foods will contain high amounts of glucose?
In junior certificate you used glucose what were you testing for?
How was this carried out?
Get students to work in pairs after all this information has been covered and come up with
the solution to the mysteries.
Teacher should then ask students to explain the reason behind their answer.
Explanation:
The man from the case study, who was a devoted home brewer, had a large quantity
of brewer’s yeast in his stomach.
This made his intestines act as their own small brewery.
Thus explaining the peak in blood alcohol level.
Brewer's yeast is in a whole host of foods, including breads, wine and, of course, beer
(hence, the name). The critters usually don't do any harm. They just flow right through
us. Some people even take Saccharomyces as a probiotic supplement.
But it turns out that in rare cases, the yeast can indeed take up long-term residency in
the gut and possibly cause problems,

52
Follow on:
• Introduce Alcohol to the students e.g. Bulmer’s and ask them how cidona and
Bulmer’s differ? How is this possible?
Cidona sparkling apple juice is an Irish classic and a delicious alternative to
cider.
The fermented juice comes from a cider extract from which the alcohol has
been virtually eliminated giving it a real cider taste without the concerns over
alcohol.
Look at how alcohol could be made.
Additional Links:
• How it’s made: http://www.alcoholandyou.org.uk/facts/howisitmade.html
• Information on alcohol:
http://www.chemguide.co.uk/organicprops/alcohols/manufacture.html
• Fermentation information: http://chemistry.about.com/od/lecturenoteslab1/f/What-
Is-Fermentation.htm

53
Double Lesson: Try it yourself
Expansion:
Aim: To test different conditions required to make alcohol:
In this double lesson the students will follow on from the previous class in relation to the case
study and make their own alcohol.
Students should be aware that to make alcohol the following conditions are required:
Glucose + yeast carbon dioxide + ethanol
Students will test various properties to decide on a suitable and most effective way
to make alcohol.
Each group will be given the optimum conditions and then asked to make changes to
test if other conditions will work.
Change the temperature instead of 30°C
Room Temperature
35°C
Change glucose to sucrose/fructose
Add 10g of yeast instead of 5g
Materials:
Yeast
Glucose
Sucrose
Distilled water
Labels
2 Rubber bungs
2 Conical flasks (250 cm³)
2 Fermentation locks
Graduated cylinder (250 cm³)
Weigh boats
Weigh scales
2 Beakers (250 cm³)
incubator (25 C – 35C)
Funnel
54
Method:
To produce alcohol using yeast ideal situation: Each group will adjust this as necessary to what they are testing:
1. Prepare 400 ml of a 10% w/v glucose solution.
2. Into each of the two conical flasks, add 200 ml of the glucose solution.
3. To one of the conical flasks, add 5g of yeast and swirl. Label this ‘yeast + glucose’.
4. The second flask acts as a control – it has no yeast. Label this ‘control’.
5. Half fill two fermentation locks with water. Attach one fermentation lock to each flask.
6. Place both flasks in an incubator at 30OC overnight. *Tip: Boil water: removes all the dissolved oxygen. Place a thin layer of oil on the top of the water in each. (The oil keeps the water out of contact with the air and prevents re-oxygenation) The fermentation lock allows waste carbon dioxide to escape without the entry of air.
The Test for the alcohol will have to be completed in the following class.
Development
Now that students are aware as to how alcohol is made and what is required a fun idea to
keep students interested is to compile a business plan on how they will produce a new
alcohol business.
Students should be split in two teams and within those teams they should divide the jobs to
make a business plan.
What is a business plan?
A business plan is a written document that describes an idea for a product or service and
how it will make money. It includes your marketing plan as well as estimates for revenue,
expenses, and how to make a profit.
Questions to ask students:
What is your big idea?
What makes your idea unique?
What do existing products/services not offer that yours will?
Why will people buy it?

55
Marketing
Who will be your customers?
Are they adults? Men? Women? Where do they live?
What do they like and dislike?
Describe your target customer with as much detail as you know.
Idea:
Where will you sell your product or service?
Are you setting up a lemonade stand in your driveway? Selling apps online?
How will you get the word out about your business?
Will you email your friends? Put up signs? Put ads in the newspaper?
What is the name of your business?
What does this name say about your business?
Is it unique? Memorable? Easy to pronounce?
Design a logo.
Each group will be given this class to decide on all the details and they will present their idea
to the class in the next lesson after they test for alcohol or the teacher will collect it and
correct it. The task should be completed for homework.
56
Single Lesson Optional: how will I know?
Students could not complete the test for an alcohol on the same day as they had to wait for
the process to happen.
Testing for the results:
The students have created a homemade hydrometer in the previous unit on density. They are
also aware of the requirements on how it is calibrated. The students can use this technique
to see if they have created alcohol.
Method same as that in the previous unit:
1. Students will use the same hydrometer that they made in the previous unit.
2. They will have the mark for water and olive oil ethanol and various sugar solutions.
3. Students will be able to tell if the solution is alcohol from the reading of the alcohol
on the hydrometer.
4. The control should have a similar reading to the 2nd sugar solution in the previous
unit.
5. One group should have the ideal situation so all other groups should compare their
results to this.
Students should describe their results and be able to explain where it went wrong.
What did they change
Did it affect your overall production of alcohol?
Was there a big/small difference in your results and the ideal trial?
Development:
If time permits students can present their business plan to the class or teacher will collect it
and correct it.
If the students are presenting to the class it is a good opportunity to peer assess so aloud
the students to mark each other.

57
Mark on a scale of 1 – 10.
Peer Assessment Table:
GROUP IDEA MARKETING LOGO ORIGINALITY WOULD YOU LIKE IT?
TOTAL /50
1
2
3
4
5
Additional Links:
Bulmer’s marketing: http://bulmers.ie/marketing.html

58
Unit 6:
Food for thought:

59
Introduction: To introduce students to the topic of enzymes and the effect temperature has
on the source.
Objectives: students
Explain in their own words the effect of heating an enzyme
Develop their skills in the lab and ability to explain the results
Teacher Background:
Chances are your students have heard of enzymes previously, but they probably have no idea
what they actually are. Many cleaning products found in the marketplace use enzymatic
action, and this is what students might be familiar with. But this is not the true function of
enzymes. In our bodies, enzymes are essential. Without enzymes, most cellular reactions
would take too long for us to survive. Enzymes are folded in ways that allow them to function
correctly. Temperature effects enzymes in various ways. Each enzymes have a different range
at which they work best and when this is exceeded the enzymes become less effective and
often denatured.
Reaction: Hydrogen peroxide (H2O2) is commonly used as a hair bleach. It also has an
interesting property in that it decomposes over time producing oxygen and water.
2H2O2 → 2H2O + O2
The oxygen can be seen here as it is a gas which blows bubbles in the soapy water. This
decomposition is very slow and to watch it would be very boring so we add catalysts to speed
up the reaction. Vegetables contain biological catalysts called enzymes. In particular, celery
and potato contain catalase which speeds up the decomposition of hydrogen peroxide.
Enzymes such as these are often used in washing powders to break up some of the grime on
dirty clothes (hence “Biological” washing powder).
Enzymes are often added to washing powder a far better way to speed up the decomposition
of hydrogen peroxide is to react it with potassium iodide.
3H2O2 + 2KI → 2H2O + O2 + I2 + 2KOH
Denaturation: is the unfolding of the protein in a way that affects its ability to function.
When you cook food, you can watch proteins denature. Crack an egg into a hot frying pan or
grill a steak. The visual changes that occur due to the heat of the pan or the grill are
occurring because proteins in the food are denaturing.

60
Single lesson 1: Elephant Toothpaste
Discrepant Event:
Engagement:
Enzymes react differently depending on temperature and the iodine snake experiment is a
good way to introduce the topic to the students.
Materials:
2 - 250 cm3 measuring cylinders
A large tray to catch any foam that spills over the top
of the cylinders.
The quantities given are for one demonstration.
75 cm3 of 100 volume hydrogen peroxide solution.
A small piece (2 pieces about 1 cm3) of liver.
Add 75 cm3 of water to the 75 cm3 of 100 volume hydrogen
peroxide solution to make 150 cm3 of 50 volume solution.
Method:
To get cooked Liver:
1) Stand the cylinder and boiling tube in the water bath until the desired
temperature is reached. (This should be carried out just before students
enter the class)
For Demonstration:
Using an uncooked 0°C and cooked Liver piece 37°C
1) Place about 1 cm3 of washing up liquid into each of the measuring cylinders.
2) To each one add the amount of catalyst specified above.
3) Then add 25 cm3 of 50 volume hydrogen peroxide solution to each cylinder.
4) The addition of the catalyst to each cylinder should be done as nearly simultaneously
as possible.
Development:
Place a glowing splint in the foam; it will re-light confirming that the gas produced is oxygen.
Students should be aware of what gas is being produced from junior certificate.
This will help them to create an equation of what is happening.

61
Exploration:
Give students 2 minutes to write down as many ideas they can think of what might be
happening.
Questions:
What could be the difference between the two test tubes?
What was the liver there for? – enzyme source
Once they have carried this out allow them in pairs to discuss their idea and try work out
what is happening.
Teacher will then go through what has happened.
Knowing the chemicals used and gas produced students will make an equation on
what happened.
Teacher will then ask the students what will happen if the enzyme source had been heated
above 40. This is where the word denaturation is introduced.
Development:
When we are sick our temperature rises what happens our cells?
Is this why we feel sick? (Shape changes a bit) (denaturation)
Explanation:
A different volume of foam is produced at different temperature. 0°C enzyme action is low
because the movement of molecules is low. The collision frequency between enzyme and
substrate is therefore low. Increasing the temperature speeds up the movement of molecules
the collision frequency therefore increases. Enzyme action increases at 40°C - maximum
collision frequency between native enzymes and substrates.
Enzyme action begins to decrease above 40°C because
the enzymes are denaturing when all the enzymes are
denatured enzyme action stops.
Tips for the teacher:
Enzyme extracts lose activity very quickly and so
must always be prepared immediately before
use.

62
Double lesson: It’s foaming up!
Expansion:
In the previous class the teacher looked at the effect of temperature on enzymes.
In this class the students will test catalase found in different sources to see which is most
effective. Catalase is found in potatoes, celery and liver.
Give each group of students 2 different sources of catalase and get them to test the
difference.
Students will use the previous class in order to set a hypothesis:
What do you expect to happen?
Questions:
What do you expect will be the best source?
What will be the optimum temperature?
What are the variables?
What will be the least effective temperature?
When the enzyme is denatured what has happened? Can it be reversed?
Is denaturation both rising and lowering of temperature?
Materials:
Enzyme source: catalase
Hydrogen peroxide (20% or less)
Buffer solution – ensure pH isn’t a variable
Washing up liquid – trap oxygen and makes foam
Boiling tubes
Graduated cylinders (100cm3)
Water baths (0-70°C)
Thermometer
Knife
Chopping board
Dropper
Gloves
Ice

63
Method:
1. Add 20cm3 pH 7 buffer to a graduated cylinder
2. Using a dropper add 2 drops of washing up liquid
3. Add 5g of finely chopped liver/celery/potatoes
4. Add 2 cm3 hydrogen peroxide to the boiling tube
5. Stand both cylinder and boiling tube in water bath of desired choice. (0°C - 60°C)
6. Remove from water bath and add hydrogen peroxide to cylinder
7. Note the volume in the cylinder immediately and record
8. Read the volume again after 2 minutes and note final volume.
9. Repeat this with 3 more temperatures.
Students should graph the results that they got from carrying out the experiment.
Students should then discuss the results and compare them to other in the class room.
Questions:
• What temperature does the enzyme stop working?
• What is the optimum temperature?
• Which source of catalase is more effective?
• What is the least effective temperature?
• When the enzyme is denatured what has happened? Can it be reversed?
• Is denaturation both rising and lowering of temperature?
Tip for teacher:
There will be almost no catalytic effect above 40°C, confirming that the catalyst in these cases
is an enzyme that is denatured by heat. The optimum temperature is 37°C and this is when
the most amount of foam will be produced.
Potato will be much slower than celery and liver pieces.
Additional Links:
Similar experiment with instructions and information: http://www.nce-
mstl.ie/_fileupload/Science%20resources/Biology%20resources/Class%20Activity-
%20Enzymes%20in%20Action!.pdf

64
Single Lesson: Optional: What works best?
Students should have a debate with enzymes being the
focal point:
Cooked V uncooked food what works best?
(Students may not know the answer to this question but having some knowledge on enzymes they
can come up with an argument teacher can give each group a point that may be used in the class)
Raw:
• Enzymes - Digestibility and assimilation
Cooking:
• "denatures" protein molecules, so that their amino-acid chains unfold and
digestive enzymes can attack them more easily
Other factors that can be considered:
• Pathogens
• Beneficial bacteria
• Nutrients
• Denaturing of proteins
Set-up:
The class should be divide in half and then split in to smaller groups.
Smaller groups:
• Appoint a captain.
• Given 5 minutes to discuss their ideas and come up with at least 10 good points of
information.
Each half of the class:
• Team captains will come discuss the points that small groups decided on with the rest of
the group and get some feedback.
• Each group should also think about what he other groups might say.
All people in the group can be nominated to respond to the argument posed by the other team.
Questions:
Will the enzyme harm us if we eat it raw?
What will the benefits of eating enzymes be?
Teacher should allow all students to give an opinion.

65
They should try relate it to enzymes and weather they think enzymes effect the
human body.
Teacher can give helpful hints if required.
** As homework the students will have to research information to back up the argument
that they had. **
Additional Links:
Health Benefits of catalase: http://www.globalhealingcenter.com/natural-health/catalase/
Points of information on raw food:
http://www.healthy.net/Health/Article/Enzymes_The_Difference_Between_Raw_and_Cooked_Foo
ds/848
Raw V cooked food: http://jonbarron.org/article/food-raw-versus-cooked#.VA92uvldXRc
66
Unit 7
Move that Body!
67
Introduction: This unit is based on the centre of gravity in our body and how it changes and
reacts differently in a diverse situation.
Objectives: Students will
discover through experimentation what "centre of gravity" means
appreciate how science can explain events we encounter in our daily lives
develop a basic understanding of how the body reacts to changes in balance
Teacher Background:
Students will have some knowledge on this topic as it would be covered in the junior
certificate.
Centre of gravity: Is the point at which all of the weight of an object appears to be
concentrated the centre of gravity (centre of mass) is the point on an object that when
supported on that spot, the object will balance. If an object rotates when thrown, the centre
of gravity is also the centre of rotation. When an object is suspended so that it can move
freely, its centre of gravity is always directly below the point of suspension. An object can be
balanced on a sharp point placed directly beneath its centre of gravity.
Throw a ball in the air and gravity pulls it straight back down. Not everything moves like this
when gravity acts on it. Most objects are not nice, neat shapes like balls. That means gravity
acts on them in more complex ways. Even so, all objects behave as though their mass is
concentrated at a point called their centre of gravity. A simple object like a ball has its centre
of gravity in a very obvious place: right at its centre. But in a more complex object, like your
body, the centre of gravity is slightly higher than your waist because there's more weight in
the top half of your body than in the bottom half.
In the case of a single rigid body, the centre of gravity is fixed in relation to the body, and if
the body has uniform density, it will be located at the centroid. The centre of gravity may be
located outside the physical body, as is sometimes the case for hollow or open-shaped
objects, such as a horseshoe. In the case of a distribution of separate bodies, such as the
planets of the Solar System, the centre of gravity may not correspond to the position of any
individual member of the system.
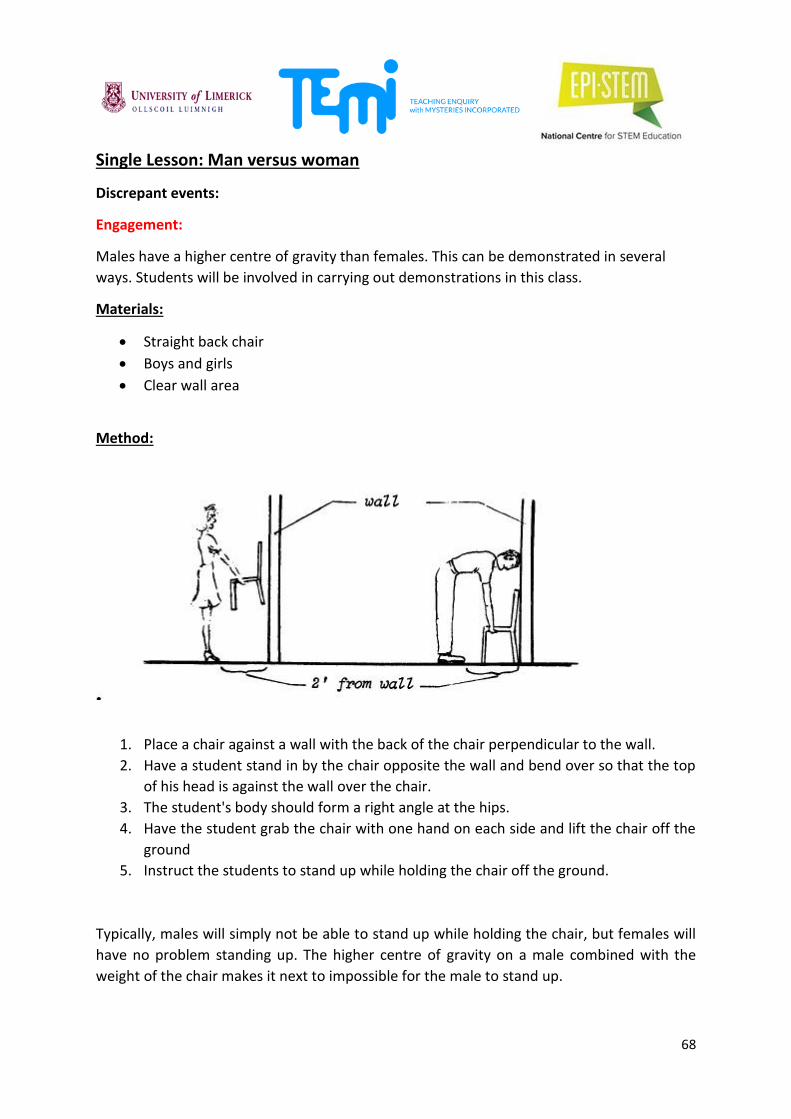
68
Single Lesson: Man versus woman
Discrepant events:
Engagement:
Males have a higher centre of gravity than females. This can be demonstrated in several
ways. Students will be involved in carrying out demonstrations in this class.
Materials:
Straight back chair
Boys and girls
Clear wall area
Method:
1. Place a chair against a wall with the back of the chair perpendicular to the wall.
2. Have a student stand in by the chair opposite the wall and bend over so that the top
of his head is against the wall over the chair.
3. The student's body should form a right angle at the hips.
4. Have the student grab the chair with one hand on each side and lift the chair off the
ground
5. Instruct the students to stand up while holding the chair off the ground.
Typically, males will simply not be able to stand up while holding the chair, but females will
have no problem standing up. The higher centre of gravity on a male combined with the
weight of the chair makes it next to impossible for the male to stand up.

69
Exploration:
Why can girls or women straighten up and boys or men, not?
Is the weaker sex really stronger? Explain.
What is the difference between how men are built and how women are built?
Where is the centre of gravity located in the above pictures?
How do you think shoe size might affect this experiment? (men vs. women's average
shoe size)
Development:
Stand with your heels against a wall and your feet together. Place a €5 bill on the floor about
a foot in front of your feet. Now ... try to pick up the dollar without moving your feet or
bending your knees.
All students will think they can do this as it sounds so easy.
Explanation:
The result of this event has nothing to do with strength. It lies in the difference of the
location of the centre of gravity of male and female bodies. Also important is the difference
in foot size. The centre of gravity of the female body is located much lower, in the hips, while
the male body is located up much higher, in the shoulders. The male foot size is also generally
much bigger than females, and so he will be forced to actually stand farther away from the
wall than the female. When he bends over, his centre of gravity gets shifted beyond his toes,
but the female’s centre of gravity stays over her feet, and straightening up is much easier for
her.
€5 Note: Is as safe as if it were in the bank. You can’t pick it up. Here’s why. When you stand
straight against the wall, your centre of gravity is over your feet (base) as it should be. When
you bend forward, you move your centre of gravity forward.
In order to keep your balance, you must move your feet forward too. This maintains the base
under the centre of gravity needed for stability. Since the rules of this trick don’t allow you to
move your feet, you’re money-less. And if you persist in trying to pick it up, you’ll fall flat on
your face! While you are standing there with your back to the wall, here are some more
wasted efforts.
Additional Links:
Link to experiment: http://www.csun.edu/~slb68113/comps/discrepant_event/index.htm
Man V woman different guidelines: https://www.youtube.com/watch?v=WO8DtsZO1nA

70
Double Lesson: It’s a circus
Expansion:
So how does someone learn to understand how balance effects their performance? The key
to balance is the centre of gravity. This is what determines how you balance. By shifting your
body weight, or your mass, around, you are also shifting the centre of that mass, and your
body has to compensate quickly.
This lesson is a couple of demonstrations to emphasize the relationship between the centre
of gravity and balance. Then the students will work in pairs to attempt to define for
themselves what "centre of gravity" means and how to locate it.
Materials:
Chair
Door
Handkerchief
Method 1: Pick it up
1. Squat down.
2. Place a broomstick under your bent
knees and crook your elbows around it.
3. Now put a handkerchief on the ground in front of you.
4. Lean forward, using your hands for balance, and try to pick up the handkerchief
with your teeth.
5. Try without the brush is it easier?
As you rotate forward toward the handkerchief, the centre of gravity is shifting away from
the stable position directly above your feet. Once it goes too far, yon become unstable and
you will fall on your nose.

71
Method 2: The Foot Lift
1. Stand sideways along a wall with your foot, hip, shoulder, and arm all touching the
wall.
2. Keeping all these parts on the wall, try to pick up your outside foot.
Can you do it? Why or why not?
Do you know any other ways to test the importance of the centre of gravity?
Where do you think your centre of gravity is?
Is this different when you are standing? When you are sitting?
Both of these stunts require you to shift your centre of gravity away from the support base.
The first can’t be done without falling over, and the second can’t be done without moving
the wall. The body maintains balance with
little adjustments so automatic that we never
think about them.
Method 3: On your Toes
1. Stand facing the edge of an open
door. Your nose and stomach
should just touch it.
2. Place your feet on either side of
the floor slightly forward of the
edge. Now try to rise onto your tiptoes.
3. It just won’t happen unless you want to face plant the door.
You’ll be caught flat-footed on this one. The reason you can’t do this trick is because it moves
your base of support out from under your centre of gravity. In order to stand on your toes,
you must transfer the centre of gravity forward. To transfer the centre forward, you must lean
over. The door prevents you from doing this.

72
Method 4: Sit down, Stand up
1. All you have to do to win is get up from a chair, Sit in a straight-backed armless
chair. Keep your back against the back of the chair and put your feet flat on the
floor.
2. Fold your arms across your chest.
3. Now, keeping your feet flat and your back straight, try to stand up.
4. Try to stand up again, bending a little forward at the waist, and keeping your
back straight. Keep leaning forward until you are able to stand up.
How far forward did you have to bend in order to stand up?
What does this have to do with the centre of gravity?
What did you find helped you to stand up without bending as much?
In the sitting position the centre of gravity is at the base of your spine. By trying to stand up
with your back straight, you prevent the centre of gravity from moving to a position above
the feet, which are your support base. Human thigh muscles simply aren’t strong enough to
compensate for the balance problem during the getting-up period. So you remain pitied to
your chair.
Method 5: Leap Ahead
1. Hold your toes with your hands.
2. Keep your knees slightly bent.
3. Try to jump forward in this position.
You can jump right around the block backward but you’ll not get one single bound forward. A
backward jump is possible because the support base moves first and the centre of gravity
maintains a balanced state. To jump forward, your centre of gravity must move ahead of your
base. Holding on to your toes prevents you from making the balance shift. Without shifting
your centre of gravity, your leg muscles would have to be strong enough not only to lift your
body off the ground but also to support the unbalanced position you would be in while
jumping.
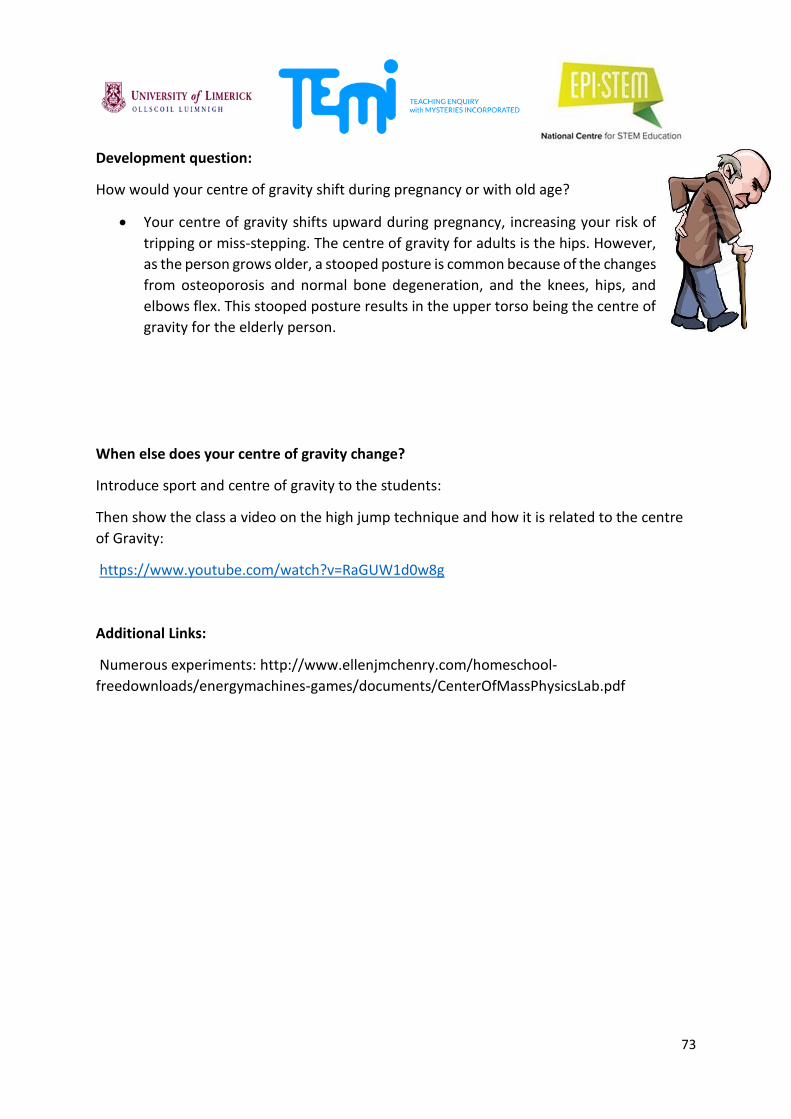
73
Development question:
How would your centre of gravity shift during pregnancy or with old age?
Your centre of gravity shifts upward during pregnancy, increasing your risk of
tripping or miss-stepping. The centre of gravity for adults is the hips. However,
as the person grows older, a stooped posture is common because of the changes
from osteoporosis and normal bone degeneration, and the knees, hips, and
elbows flex. This stooped posture results in the upper torso being the centre of
gravity for the elderly person.
When else does your centre of gravity change?
Introduce sport and centre of gravity to the students:
Then show the class a video on the high jump technique and how it is related to the centre
of Gravity:
https://www.youtube.com/watch?v=RaGUW1d0w8g
Additional Links:
Numerous experiments: http://www.ellenjmchenry.com/homeschool-
freedownloads/energymachines-games/documents/CenterOfMassPhysicsLab.pdf

74
Single Lesson optional: Sports galore
Engaging Question:
An interesting application of the centre of Gravity concept can be found in the sport of
athletics. Ask the students if they have ever watched how a runner begins a sprinting event
such as the 100 meter dash.
Perhaps the students will realize that the smart runners crouch
down on their hands and feet and lean forward so that their
centre of gravity is well beyond their feet. This extreme position
makes the runners feel as if they will fall. However, they
practice their start enough times to be able to time it perfectly
so that just when they think they cannot balance any longer,
the gun goes off, and the runner quickly brings their feet
forward. (Remember, the only way you can balance is if your
centre of gravity is above your base. In the activity above, the
centre of Gravity was the pencil or your index finger.) In this
case, the support base is the runner's feet. The fact that the
runners have to bring the feet forward quickly to keep from
falling enables them to push off with greater force and therefore gather speed more quickly
in the race.
Video of Usain Bolt:
Have a class discussion on the topic:
Have any of you ever tried this technique?
Will it not take longer to get up?
Set yourself up in a running position: how many of ye are leaning forward?
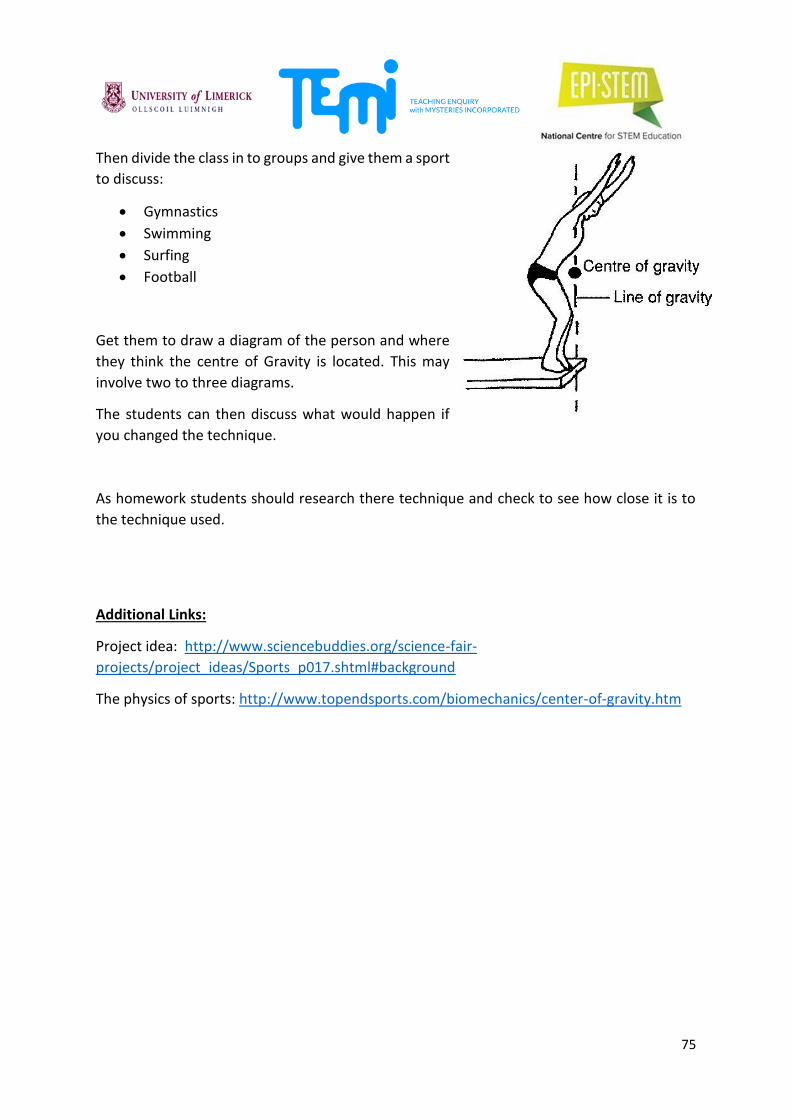
75
Then divide the class in to groups and give them a sport
to discuss:
Gymnastics
Swimming
Surfing
Football
Get them to draw a diagram of the person and where
they think the centre of Gravity is located. This may
involve two to three diagrams.
The students can then discuss what would happen if
you changed the technique.
As homework students should research there technique and check to see how close it is to
the technique used.
Additional Links:
Project idea: http://www.sciencebuddies.org/science-fair-
projects/project_ideas/Sports_p017.shtml#background
The physics of sports: http://www.topendsports.com/biomechanics/center-of-gravity.htm
76
UNIT 8
Bubble Trouble

77
Introduction: In this unit students will be introduced to the concept of surface tension and
how bubbles are formed.
Objectives: students will be able to:
1. Identify and explain the term surface tension.
2. Understand and illustrate the bonds between water molecules.
3. Describe what soap does to water.
4. Demonstrate the properties of bubble making.
Background information:
Students have covered the topic of water in junior certificate chemistry,
surface tension is often associated with cohesion and adhesion which is a
topic covered in leaving certificate biology. Water is a polar molecule and
when the two positively charged hydrogen atoms attach to the negatively
charged oxygen atom, a stable water molecule is created. Students will be aware that atoms
attach in a “bent” shape. This does not allow for an equal “pulling” or sharing of the electrons
between the three atoms, allowing the hydrogen atoms to develop a slight positive charge
and the oxygen atom to develop a slight negative charge. The difference in charge across the
molecule is called a “dipole”.
The slightly positive hydrogen side of one water molecule attracts the slightly negative oxygen
side of another water molecule, creating a natural “attraction” between the molecules. Water
molecules on the surface of a bowl of water are attracted to each other as well as to the water
below them, which creates a strong and flexible film on the water’s surface. This is the surface
tension that allows paperclips to float and a card to balance on the edge.
Thus, when you add soap to water the surface tension breaks. Soap molecules consist of
nonpolar, dipole-free bodies and a polar head like the phospholipid bilayer in the cell
membrane. When soap mixes with water, the polar heads attach to the surface of the water
and the nonpolar bodies tend to point upwards, away from the water, reducing the water’s
surface tension. Thus, the paper clips sink and it becomes difficult to float new clips and the
pepper moves to the edge.
Bubbles are made from a thin layer of water is sandwiched between two layers of soap
molecules. Each soap molecule is oriented so that its polar (hydrophilic) head faces the water,
while its hydrophobic hydrocarbon tail extends away from the water layer. No matter what
shape a bubble has initially, it will try to become a sphere. The sphere is the shape that
minimizes the surface area of the structure, which makes it the shape that requires the least
energy to achieve.
When two bubbles meet, they will merge walls to minimize their surface area. If bubbles that
are the same size meet, then the wall that separates them will be flat. Bubbles meet to form
walls at an angle of 120°. If enough bubbles meet, the cells will form hexagons.
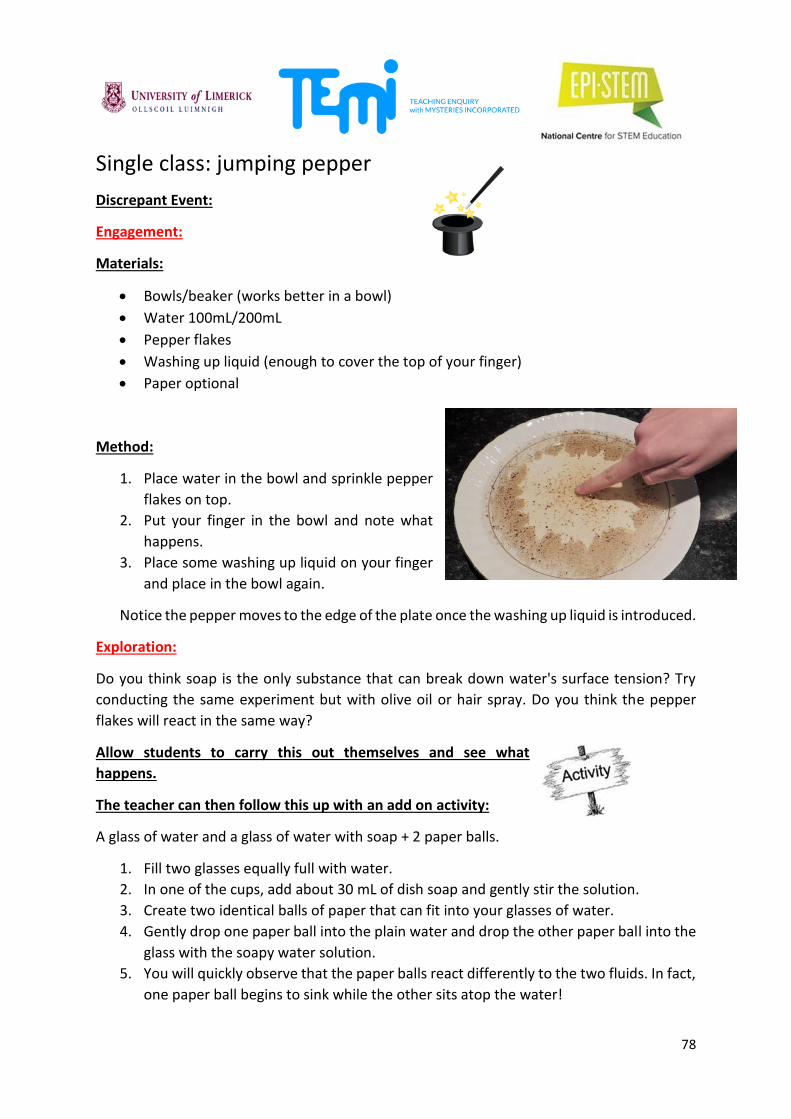
78
Single class: jumping pepper
Discrepant Event:
Engagement:
Materials:
Bowls/beaker (works better in a bowl)
Water 100mL/200mL
Pepper flakes
Washing up liquid (enough to cover the top of your finger)
Paper optional
Method:
1. Place water in the bowl and sprinkle pepper
flakes on top.
2. Put your finger in the bowl and note what
happens.
3. Place some washing up liquid on your finger
and place in the bowl again.
Notice the pepper moves to the edge of the plate once the washing up liquid is introduced.
Exploration:
Do you think soap is the only substance that can break down water's surface tension? Try
conducting the same experiment but with olive oil or hair spray. Do you think the pepper
flakes will react in the same way?
Allow students to carry this out themselves and see what
happens.
The teacher can then follow this up with an add on activity:
A glass of water and a glass of water with soap + 2 paper balls.
1. Fill two glasses equally full with water.
2. In one of the cups, add about 30 mL of dish soap and gently stir the solution.
3. Create two identical balls of paper that can fit into your glasses of water.
4. Gently drop one paper ball into the plain water and drop the other paper ball into the
glass with the soapy water solution.
5. You will quickly observe that the paper balls react differently to the two fluids. In fact,
one paper ball begins to sink while the other sits atop the water!
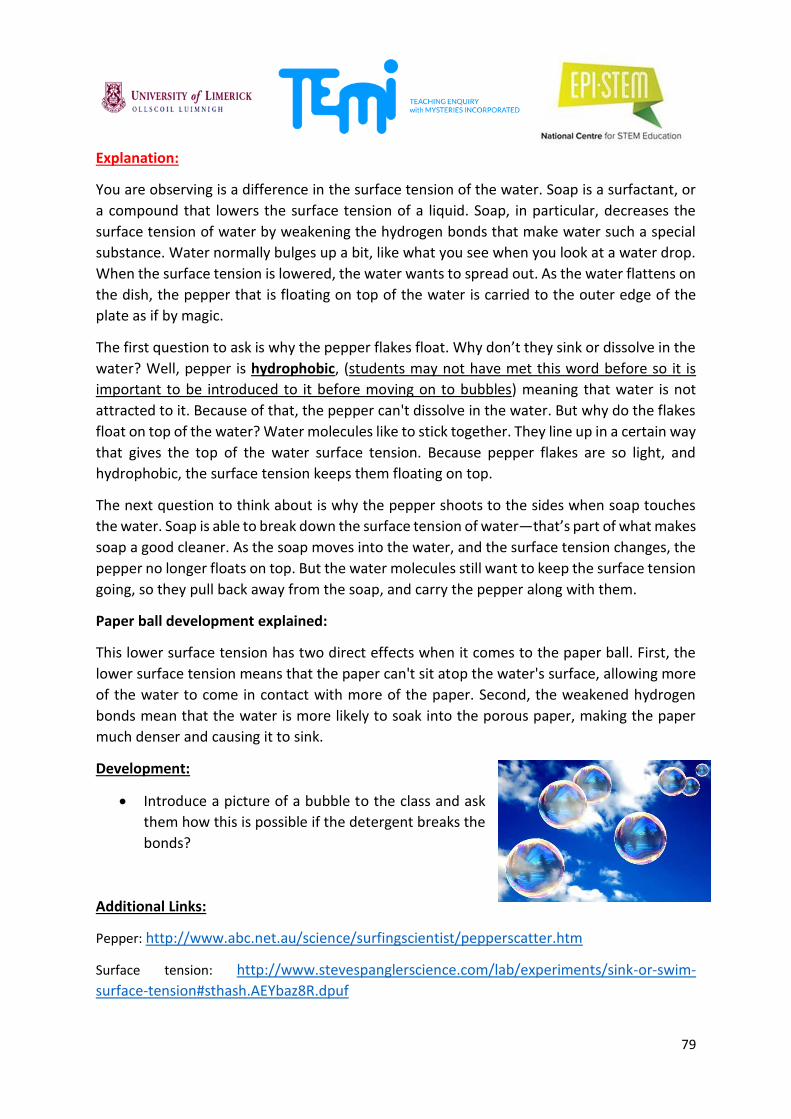
79
Explanation:
You are observing is a difference in the surface tension of the water. Soap is a surfactant, or
a compound that lowers the surface tension of a liquid. Soap, in particular, decreases the
surface tension of water by weakening the hydrogen bonds that make water such a special
substance. Water normally bulges up a bit, like what you see when you look at a water drop.
When the surface tension is lowered, the water wants to spread out. As the water flattens on
the dish, the pepper that is floating on top of the water is carried to the outer edge of the
plate as if by magic.
The first question to ask is why the pepper flakes float. Why don’t they sink or dissolve in the
water? Well, pepper is hydrophobic, (students may not have met this word before so it is
important to be introduced to it before moving on to bubbles) meaning that water is not
attracted to it. Because of that, the pepper can't dissolve in the water. But why do the flakes
float on top of the water? Water molecules like to stick together. They line up in a certain way
that gives the top of the water surface tension. Because pepper flakes are so light, and
hydrophobic, the surface tension keeps them floating on top.
The next question to think about is why the pepper shoots to the sides when soap touches
the water. Soap is able to break down the surface tension of water—that’s part of what makes
soap a good cleaner. As the soap moves into the water, and the surface tension changes, the
pepper no longer floats on top. But the water molecules still want to keep the surface tension
going, so they pull back away from the soap, and carry the pepper along with them.
Paper ball development explained:
This lower surface tension has two direct effects when it comes to the paper ball. First, the
lower surface tension means that the paper can't sit atop the water's surface, allowing more
of the water to come in contact with more of the paper. Second, the weakened hydrogen
bonds mean that the water is more likely to soak into the porous paper, making the paper
much denser and causing it to sink.
Development:
Introduce a picture of a bubble to the class and ask
them how this is possible if the detergent breaks the
bonds?
Additional Links:
Pepper: http://www.abc.net.au/science/surfingscientist/pepperscatter.htm
Surface tension: http://www.stevespanglerscience.com/lab/experiments/sink-or-swim-
surface-tension#sthash.AEYbaz8R.dpuf

80
Double Class: Burst your bubble
Expansion:
Who can make the strongest bubbles?
As stated above bubble are formed with 3 layers students
should be aware of this before moving on to the activity
outlined.
Many students will have blown a bubble before this class but
the majority of these will have been small bubble that pop.
Addition and use of different materials will allow for stronger
and bigger bubbles. Most people use water and washing up soap but this may not be the best
method as the ions in the tap water may affect the way the bubble turns out.
Materials:
For each group:
Water from the tap
Deionised water 200mL/300mL
Dishwashing liquid 30mL
Sugar 30g
Laundry detergent 30g
Glycerine 30
Corn syrup 30mL
Straws optional to make a wand (2)
Bubble wands
Ruler
Beaker for mixing
Paper (coloured)
Stopwatch
Method:
Students will be given the opportunity to trial six different recipes to make an effective
bubble.
Give each group a small amount of each ingredient and let them decide amongst
themselves what ingredients they would like to use. They can then alter the recipes as
they see fit.
Students will have to note that not all recipes will work and that they will have to be
careful of the ratio they use in when making the bubbles. For example you don’t place
2/3 washing up liquid 1/3 water when making them at home.
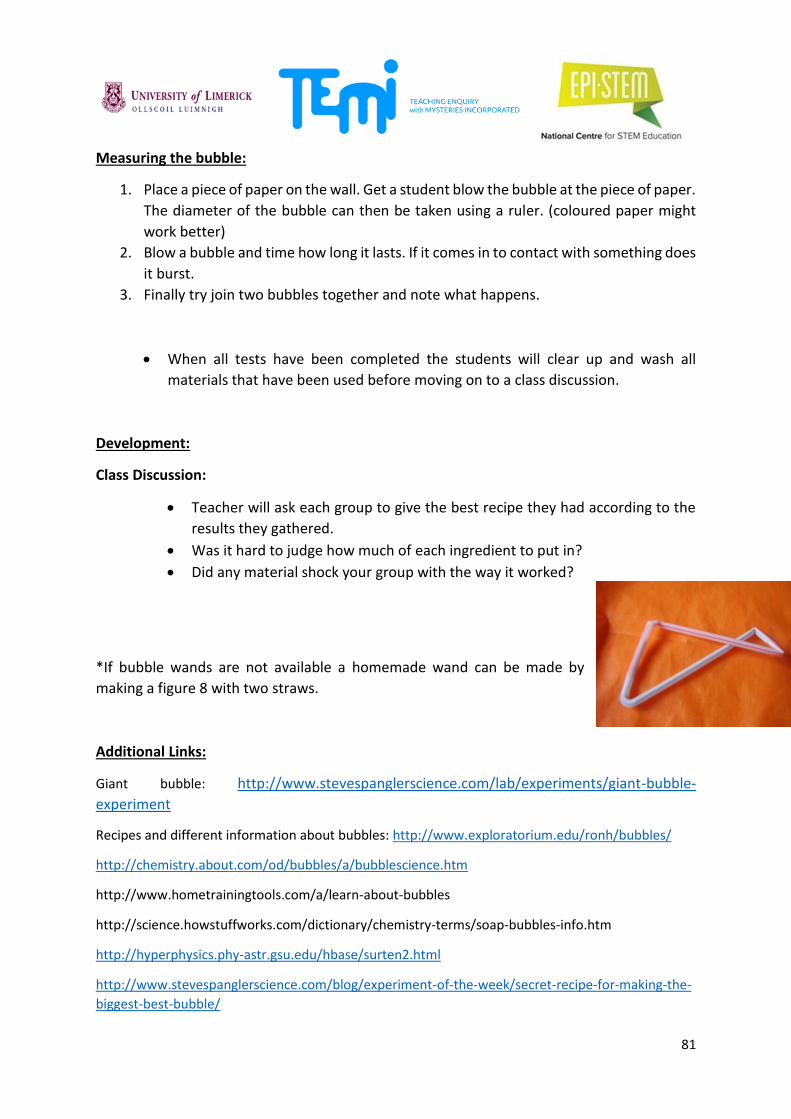
81
Measuring the bubble:
1. Place a piece of paper on the wall. Get a student blow the bubble at the piece of paper.
The diameter of the bubble can then be taken using a ruler. (coloured paper might
work better)
2. Blow a bubble and time how long it lasts. If it comes in to contact with something does
it burst.
3. Finally try join two bubbles together and note what happens.
When all tests have been completed the students will clear up and wash all
materials that have been used before moving on to a class discussion.
Development:
Class Discussion:
Teacher will ask each group to give the best recipe they had according to the
results they gathered.
Was it hard to judge how much of each ingredient to put in?
Did any material shock your group with the way it worked?
*If bubble wands are not available a homemade wand can be made by
making a figure 8 with two straws.
Additional Links:
Giant bubble: http://www.stevespanglerscience.com/lab/experiments/giant-bubble-
experiment
Recipes and different information about bubbles: http://www.exploratorium.edu/ronh/bubbles/
http://chemistry.about.com/od/bubbles/a/bubblescience.htm
http://www.hometrainingtools.com/a/learn-about-bubbles
http://science.howstuffworks.com/dictionary/chemistry-terms/soap-bubbles-info.htm
http://hyperphysics.phy-astr.gsu.edu/hbase/surten2.html
http://www.stevespanglerscience.com/blog/experiment-of-the-week/secret-recipe-for-making-the-
biggest-best-bubble/

82
Single Lesson optional: World Record
In the previous lesson students made bubbles using recipes that
they came up with themselves. In this lesson the teacher will
show students various uses of bubbles and interesting ideas
that have ended up as world records.
Development:
Teacher can then show the students a video of the World record
for people in a bubble:
https://www.youtube.com/watch?v=ZLXZ08_XHO8
Teacher can discuss what would be needed for this to happen.
Is it possible to carry out at a low cost?
How could you place ¾ people in a bubble? (hula hoop and kids pool)
The following link shows how to do this and other materials that can be used to make
bubbles. http://www.monkeysee.com/play/10550-how-to-make-giant-bubbles-for-
kids
Development:
Get the Students in their groups to come up with an idea involving bubbles for a world
record:
When doing this they will have to-
Decide on a title for the world record e.g. largest amount of bubbles in a bath at one
time
Decide a place where this can be carried out
Think of the equipment that they will need for this to work
How will it be advertised – posters, Facebook page, slogans, etc. (draw the slogan in
the worksheet)
s it something you can carry out at home?
Research
Has it been done before?
If so was it successful
Do you think you can do better with the right equipment?
Teacher will observe the groups as they discuss their ideas for 15 minutes.
Teacher will then allow each group 3 minutes to present their ideas to the class.
Conclusion

83
Teacher will ask students to in their own words write 5 things that they have learned in this
unit on a blank piece of paper and place it up the front of the class as they leave.
Additional Links:
A new Guinness world record:
http://www.guinnessworldrecords.com/news/2013/3/challengers-the-fun-and-fast-way-to-
attempt-a-world-record-today!-47701/
List of World Records involving bubbles:
1. The most soap bubble domes created inside one another is 15 and was achieved by Chung-
Tai Su (Taiwan) at Hold Enterprise Co. Ltd, Taipei, Taiwan, on 26 April 2012. 2. The most bounces of a soap bubble is 195, and was achieved by Kuo-Sheng Lin (Taiwan), at
Hold Enterprise Co. Ltd. in Taipei, Taiwan, on 17 April 2012. 3. The most soap bubbles successfully blown inside a larger soap bubble is 152, and was
achieved by Kuo- Sheng Lin (Taiwan) at the World Trade Centre, Taipei City, Taiwan, on 23
December 2011. 4. The largest free floating soap bubble has a volume of 20.65 m³ (729.25 ft³) and was made
using a wand. It was produced by Megan Colby Parker (USA) at Forges Field Recreational
Park, Plymouth, Massachusetts, United States, on 27 April 2013. 5. The most people inside a soap bubble is 214 and was achieved by Milka Bubbly and Matěj
Kodeš (both Czech Republic) at Trade Fair Palace, Prague, Czech Republic, on 1 March
2014. 6. The longest soap bubble wall measured 50.90 m (166 ft 11 in) long and was created by Fan
Yang (Canada) on the set of Zheng Da Zong Yi - Guinness World Records Special in Beijing,
China on 17 November 2009 7. The largest soap sculpture measures 2.19 x 2.07 x 2.68 m (7.19 x 6.79 x 8.80 ft) and was
created by Protex Soap (South Africa) in Johannesburg, South Africa, on 5 October 2010. 8. Sam Heath AKA Samsam Bubbleman (UK) created a frozen soap bubble with a volume of
4315.7 cubic cm at the Absolut Vodka Bar, London, UK, on 28 June 2010. 9. The largest exploding soap bubble was 25 cm (250mm) in diameter and was achieved by
Gennadij Kil (AKA 'Blub'- Germany) at the Centro de Crecion y Formacion Joven of Guia de
Isora, Tenerife, Spain on 13 January 2011.

84