Embed Size (px)
Citation preview
BP(A|S)
Taleo 10
Taleo Scheduling CenterUser Guide
March, 2010
User Guide Taleo Scheduling Center i
Confidential Information and Notices
Confidential InformationThe recipient of this document (hereafter referred to as "the recipient") agrees that the Confidential Information disclosed herein by Taleo shall be retained in confidence by the recipient, and its respective employees, affiliates and/or subsidiaries.
For the purpose herein, the term "Confidential Information" shall mean the following:
1. Any information, know-how, data, process, technique, design, drawing, program, formula or test data, work in process, business plan, sales, suppliers, customer, employee, investor or business information contained in a document, whether in written, graphic, or electronic form; or
2. Any document, diagram, or drawing which is either conspicuously marked as "Confidential", known or reasonably known by the other party to be confidential, or is of a proprietary nature, and is learned or disclosed in the course of discussions, demonstrations, or other collaboration undertaken between the parties.
Limited Rights Notice (Dec 2007)1. These data are submitted with limited rights under Subcontract No. 6896589. These data may
be reproduced and used by the Government with the express limitation that they will not, without written permission of the Contractor, be used for purposes of manufacture nor disclosed outside the Government; except that the Government may disclose these data outside the Government for the following purposes, if any; provided that the Government makes such disclosure subject to prohibition against further use and disclosure: None.
2. This notice shall be marked on any reproduction of these data, in whole or in part.
© 2010 Taleo Corporation. Do not reproduce without the written permission of Taleo Corporation.

User Guide Taleo Scheduling Center ii
Table of Contents
Confidential Information and Notices .................................................................. i
Getting StartedGetting Started ..............................................................................................1-1
Taleo Scheduling Center ............................................................................1-1Administrator User .....................................................................................1-2Scheduling Center User ..............................................................................1-2Candidate User .........................................................................................1-3Candidate Permission ...............................................................................1-3Read-Only User .........................................................................................1-4Mark Arrived/No Show User .......................................................................1-4Schedule Appointments User .......................................................................1-5Manage Timeslots User ..............................................................................1-6Administer Calendars User .........................................................................1-6Calendar Role ...........................................................................................1-7
CalendarsCalendar Roles ..............................................................................................2-1
Calendar Role ...........................................................................................2-1Granting Users a Calendar Role .................................................................2-1Editing Calendar Roles ...............................................................................2-2Removing Calendar Roles ...........................................................................2-2
Calendars .....................................................................................................2-4Calendar ..................................................................................................2-4Calendar List Filtering ................................................................................2-4Active Calendar .........................................................................................2-5
User Guide Taleo Scheduling Center iii
Inactive Calendar ......................................................................................2-5Changing Calendars ..................................................................................2-5Choosing the Display Language ..................................................................2-6Displaying Date Information .......................................................................2-6Moving Between Months in a Calendar .......................................................2-6Searching for Active Calendars ...................................................................2-7Searching for Inactive Calendars .................................................................2-7Displaying Active Calendars ........................................................................2-8Displaying Inactive Calendars .....................................................................2-8Multiple Calendars per Requisition .............................................................2-8Creating a New Calendar ..........................................................................2-9Modifying a Calendar ................................................................................2-9Modifying Calendar Languages ..................................................................2-9Activating a Calendar ...............................................................................2-10Inactivating a Calendar ............................................................................2-10Scheduling Horizon ..................................................................................2-11Modifying the Scheduling Horizon .............................................................2-11Marking and Tracking Candidate Appointment Attendance .........................2-11
Timeslots .....................................................................................................2-13Locked Timeslot .......................................................................................2-13Adding Timeslots .....................................................................................2-13Removing a Timeslot ................................................................................2-13Removing All Timeslots .............................................................................2-14Locking a Timeslot ...................................................................................2-14Unlocking a Timeslot ................................................................................2-14Selecting the Allowed Number of Appointments per Timeslot .......................2-15Editing a Timeslot ....................................................................................2-15Reschedule Locking Feature ......................................................................2-15Setting the Appointment Change Period .....................................................2-16Modifying the Appointment Change Period ................................................2-16
Days ...........................................................................................................2-18Locked Day .............................................................................................2-18Locking a Day .........................................................................................2-18Unlocking a Day ......................................................................................2-18
InvitationsCandidate Invitations .....................................................................................3-1
Appointment Management on Behalf of a Candidate ....................................3-1Accessing the Taleo Scheduling Center on Behalf of a Candidate ..................3-1Scheduling an Appointment on Behalf of a Candidate ..................................3-2Rescheduling an Appointment on Behalf of a Candidate ...............................3-2Cancelling a Scheduled Appointment on Behalf of a Candidate .....................3-3Declining an Invitation on Behalf of a Candidate ..........................................3-3
Invitations ......................................................................................................3-5Invitation Email ..........................................................................................3-5
User Guide Taleo Scheduling Center iv
Reminder Email .........................................................................................3-5Phase .......................................................................................................3-6Sending an Invitation Manually ...................................................................3-6Sending an Invitation by Changing the Status of a Candidate ........................3-7Sending an Invitation Automatically during the Workflow ...............................3-7Cancelling an Invitation ..............................................................................3-8Cancelling an Unscheduled Invitation ..........................................................3-8Blocking an Invitation .................................................................................3-9Assigning a Calendar to a Requisition .........................................................3-9
Scheduling StatusScheduling Statuses ........................................................................................4-1
Taleo Scheduling Center Candidate History Log ...........................................4-1Viewing the Scheduling Status of a Candidate in the Candidate File ...............4-1Viewing the Scheduling Status of a Candidate in the Candidates List ..............4-1Adding a Candidate List Column to view Taleo Scheduling Statuses ..............4-2Viewing the Scheduling Status of a Candidate in the Tracking History .............4-2
ReportsCalendar Data Report ....................................................................................5-1
Detailed Description ...................................................................................5-1Benefits .....................................................................................................5-1
Creating a Calendar Report ............................................................................5-2

BP(A|S)
Getting Started
• Getting Started . . . . . . . . . . . . . . . . . . . . . . . . . . . . . . . . . . . . . . . . . . . . . . 1-1
User Guide Taleo Scheduling Center 1-1
Getting Started Getting Started
Getting Started
Taleo Scheduling CenterThe Taleo Scheduling Center is a module used with Taleo Recruiting to handle automated and high volume scheduling of candidates.
Detailed Description
The Taleo Scheduling Center is a module used with Taleo Recruiting to handle automated and high volume scheduling of candidates. This add-on scheduling functionality allows users to schedule any number of screening functions for candidates, including but not limited to:
• Job Fair or Campus Appointments
• Mass Recruitment Events
• Interviews
The Taleo Scheduling Center facilitates the scheduling of these functions through the creation and management of calendars, which are populated with timeslots, into which candidates can schedule appointments. The Taleo Scheduling Center sends follow-up invitations (triggered through CSW) and reminder emails and records status messages in the candidate file each time a candidate performs a scheduling activity. The Taleo Scheduling Center displays a calendar view for users showing the resulting timetables of which invites are scheduled for each time slot on each day. The Taleo Scheduling Center sends email messages to candidates requesting them to schedule an appointment. It also sends emails confirming appointments and reminding candidates about their scheduled appointments.
The Taleo Scheduling Center screening service is available in two types of integration:
• Self-service: This integration type is supplied with all applications. In this type, an initial invitation email is sent to the candidate. Emails sent at the different phases of the workflow are controlled through candidate permissions set at the calendar level. The employer (recruiter) will be able to manage the appointments of a candidate only if the candidate has logged in to the Taleo Scheduling Center at least once.
• Proctored: This integration type is optional and must be activated by Taleo Support. In this type, no initial invitation email is sent to the candidate. Emails sent at the different phases of the workflow are controlled through candidate permissions set at the calendar level. The employer (recruiter) can manage the appointments of a candidate even if the candidate has not logged in to the Taleo Scheduling Center.
Although two types of integrations exist for the Taleo Scheduling Center, both types are configured, activated and used the same way.
Benefits
• The Taleo Scheduling Center eliminates significant amounts of manual work to schedule candidates for various purposes, including handling confirmations and reminders, and candidate rescheduling and cancellations. It can help to accelerate the recruiting process, allowing your most promising candidates to schedule themselves for the next step in the process. Its
User Guide Taleo Scheduling Center 1-2
Getting Started Getting Started
functionality can begin booking appointments for candidates even before your staff has had a chance to view all the submissions. It is ideal for volume recruiting activities such as job fairs, campus interviews and new location openings. Extensive features provide clarity on sourcing and hiring, thereby catalyzing continuous improvement in recruiting.
• The Taleo Scheduling Center eliminates the long and costly process of “Telephone Tag.” Recruiters and candidates communicate online efficiently and at their convenience through the application and invitation process. Because it automates so many parts of the recruitment process, the Taleo Scheduling Center can allow your staff to spend less time on clerical tasks and to devote more time to higher-value tasks.
Administrator UserA Taleo Scheduling Center Administrator is a user that has all permissions, for all calendars in the Taleo Scheduling Center.
Detailed Description
The Taleo Scheduling Center has an Administrator level of access which allows a user to create, manage or edit all calendars. The Administrator user can also grant permissions to other users for the ownership or access to calendars. A user that has been granted an Administrator user type permission has all the permissions of a Read-Only, Mark Arrived/No Show, Manage Timeslots and Administer Calendars user.
A Taleo Scheduling Center Administrator user does not necessarily have Administrator rights for the Recruiting Center.
The administrator is the only user that can assign ownership of a calendar to a user.
An Administrator is a user that was granted the Manage Scheduling Center user type permission by a Taleo 10 Administrator in SmartOrg Administration.
Benefits
• Allows a user to create calendars.
• Allows a user to grant permissions to users.
• Allows a user to grant calendar ownership.
• Allows a user to efficiently manage candidate appointments.
Scheduling Center UserA Scheduling Center user is a user that has been granted access to the Scheduling Center.
Detailed Description
Users can be granted one of two user type permissions by a Taleo 10 Administrator in SmartOrg Administration:
The Access Scheduling Center user type permission only gives users access to the Scheduling Center. The functions users will be allowed to perform in the Scheduling Center will depend on the Calendar Role they will be granted. Users can be granted the following Calendar Roles:
• Read-Only
User Guide Taleo Scheduling Center 1-3
Getting Started Getting Started
• Mark Show/No Show• Manage Timeslots• Schedule Appointments• Administer Calendars• Calendar Owner
The Create calendars and access Scheduling Center user type permission gives users the ability to create calendars via the Add New Calendar link in Scheduling Center. Users granted this permission will automatically be assigned the Calendar Owner calendar role (although the creator does not have to be the owner). Users with this user type permission will still need to be assigned calendar roles for other calendars they do not own or create.
Users granted the Create calendars and access Scheduling Center user type permission can choose another Calendar Owner or remain the Calendar Owner. However, the users granted the Create calendars and access Scheduling Center user type permission will always keep the Calendar Owner calendar role allowing them to go back to the calendar after creation.
The Create calendars and access Scheduling Center user type permission should be used to grant users the ability to create calendars without granting full Scheduling Center Administration rights.
Candidate UserA Taleo Scheduling Center Candidate User is a candidate that has received an invitation to book an appointment.
Detailed Description
During a requisition process, a candidate can receive an invitation to book an appointment. Candidates can access the Taleo Scheduling Center only if they have received an email with an invitation to book an appointment. Depending on the candiate permission set for the calendar, caniddates can perform several functions such as book an appointment, schedule later or decide they are no longer interested.
Candidate Permission The candidate permission set for the calendar determines what the candidate will be able to perform when signing in to the Taleo Scheduling Center.
Detailed Description
A Taleo Scheduling Center administrator can set for a calendar the access level candidates will have when accessing Taleo Scheduling Center. Permissions are linked to the calendar, not to the candidate. When a candidate signs in to the Taleo Scheduling Center, the candidate is granted the permission level set for the calendar being used to manage appointments.
There are three levels of candidate permission an administrator can set for a calendar:
• Full: When signing in to the Taleo Scheduling Center, the candidate will be able to fully manage his/her appointments that is, cancel, reschedule, book, decline.
User Guide Taleo Scheduling Center 1-4
Getting Started Getting Started
• None: For the self-service integration type, the candidate will only receive an initial invitation. When signing in to the Taleo Scheduling Center, the candidate will only be able to view his/her pending invitations. User will be unable to manage appointments. For the proctored integration type, no invitation email is sent to the candidate. The user with a Schedule Appointments or an Administer Calendars calendar role, the Calendar Owner or the Taleo Scheduling Center Administrator will need to manage candidate appointments. The candidate will receive a reminder email confirming the appointment booked by the user.
• Only Cancel Appointments: When signing in to the Taleo Scheduling Center, the candidate will only be able to cancel his/her appointments.The user with a Schedule Appointments or an Administer Calendars calendar role, the Calendar Owner or the Taleo Scheduling Center Administrator will need to manage candidate appointments.
Benefits
• Provides the ability for administrators to force recruiters to manage appointments for a specific requisition.
• Allows recruiters and employers to book appointments at their convenience.
Read-Only UserA Taleo Scheduling Center Read-Only User is a user that can only view information in the Taleo Scheduling Center.
Detailed Description
A Read-Only User can only view information on:
• calendars
• calendar roles
• timelslots
This type of user can access the system to track candidate attendance to interviews.
A user is granted a read-only calendar role by a Taleo Scheduling Center Administrator, a Calendar Owner or an Administer Calendars calendar role in the Scheduling Center for a specific calendar.
The same user can have different roles for different calendars.
Benefits
• Allows any employer to view system information.
Mark Arrived/No Show UserA Taleo Scheduling Center Mark Arrived/No Show User is a user that can only indicate if a candidate has arrived or not for an appointment.
User Guide Taleo Scheduling Center 1-5
Getting Started Getting Started
Detailed Description
The Taleo Scheduling Center has a level of access which allows a user to read data in the system and to record whether candidates reported for their appointments or were “no-shows.” These users may be greeters or reception desk workers who are employed by the recruiter’s company. A user that has been granted a Mark Arrived/No Show calendar role has all the permissions of a read-only user and can also mark in the calendar if a candidate has arrived or not shown to an interview.
A user is granted a Mark Arrived/No Show calendar role by a Taleo Scheduling Center Administrator, a Calendar Owner or an Administer Calendars user in the Taleo Scheduling Center.
The same user can have different permissions for different calendars.
Benefits
• Allows tracking if a candidate has arrived or not to an appointment.
Schedule Appointments UserA Taleo Scheduling Center Schedule Appointments User is a user that can manage appointments and decline invitations on behalf of a candidate.
Detailed Description
The Taleo Scheduling Center has a Schedule Appointments level of access which allows a user to:
• decline an invitation
• to schedule an appointment on behalf of a candidate
• to reschedule an appointment on behalf of a candidate
• to cancel an appointment on behalf of a candidate
A user that has been granted a Schedule Appointments calendar role has all the permissions of a Read-Only and Mark Arrived/No show user.
A user is granted a Schedule Appointments calendar role by a Taleo Scheduling Center Administrator, a Calendar Owner or an Administer Calendars user in the Taleo Scheduling Center.
To manage appointments on behalf of a candidate, the user granted a Schedule Appointments permission must have access to the Recruiting Center for a specific calendar.
For the self -service integration type, to be able to manage appointments on behalf of a candidate, the candidate must first log in to the Scheduling Center via the initial invitation email to activate communication between Scheduling Center and the Recruiting Center.
For the proctored integration type, the user can manage the appointments of the candidate, even if the candidate did not log in to a Career Section.
The same user can have different permissions for different calendars.
Benefits
• Allows a user to manage appointments and invitations on behalf of a candidate.
User Guide Taleo Scheduling Center 1-6
Getting Started Getting Started
Manage Timeslots UserA Taleo Scheduling Center Manage Timeslots User is a user that can manage timeslots, days and the number of appointments available per timeslots.
Detailed Description
The Taleo Scheduling Center has a Manage Timeslots level of access which allows a user to:
• lock and unlock days
• delete timeslots in a calendar
• setting the number of appointments available per timeslots
A user that has been granted a Manage Timeslots calendar role has all the permissions of a Read-Only, Mark Arrived/No show and Schedule Appointments user.
A user is granted a Manage Timeslots calendar role by a Scheduling Center Administrator, a Calendar Owner or an Administer Calendars user in the Scheduling Center.
The same user can have different permissions for different calendars.
Benefits
• Allows a user to manage days or timeslots in a calendar.
• Allows a user to manage the number of appointments available in a timeslot.
• Allows an administrator to delegate tasks to other users.
Administer Calendars UserA Taleo Scheduling Center Administer Calendars User is a user with all permissions for a specific calendar.
Detailed Description
A Taleo Scheduling Center Administer Calendars User is a user with managing rights for a specific calendar, that is:
• edit the calendar
• manage timeslots
• manage days
• grant and revoke calendar roles to other users.
However, an Administer Calendars user cannot create calendars, revoke the rights of a Calendar Owner or of a Scheduling Center Administrator.
A user is granted the Administer Calendars calendar role by a Taleo Scheduling Center Administrator or a Calendar Owner in the Scheduling Center.
Benefits
• Allows an administrator to delegate administrator tasks for specific calendars.
User Guide Taleo Scheduling Center 1-7
Getting Started Getting Started
• Allows a user to manage efficiently candidate appointments.
Calendar RoleA calendar role is the right of a user to perform a task in the Taleo Scheduling Center.
Detailed Description
Calendar roles are granted to users by a Scheduling Center Administrator or by a user granted the Create calendars and access Scheduling Center user type permission when the calendar is created or by the Calendar Owner or an Administer Calendars user. The role a user is granted is for a specific calendar. Before a role can be granted to a user, the user must first be granted access to the Taleo Scheduling Center by a Recruiting Center Administrator. The users must try (but will not succeed) at least once to connect to the Scheduling Center for the administrator to be able to grant them a role. A user will only be able to successfully connect to the Scheduling Center once he or she has been granted a Calendar Role.
A Calendar Owner, an Administer Calendar user and a Scheduling Center Administrator can grant the following types of Calendar Roles:
• Read-Only
• Mark Arrived/No Show
• Schedule Appointments
• Manage Timeslots
• Administer Calendars
Ownership of a calendar can only be granted and revoked by a Scheduling Center Administrator.
Roles are granted for a specific calendar.
Example: A user may have a Read-Only calendar role for one calendar and an Administer Calendars calendar role for another calendar.
Benefits
• An administrator can delegate tasks to other employees.

BP(A|S)
Calendars
• Calendar Roles . . . . . . . . . . . . . . . . . . . . . . . . . . . . . . . . . . . . . . . . . . . . . . 2-1
• Calendars . . . . . . . . . . . . . . . . . . . . . . . . . . . . . . . . . . . . . . . . . . . . . . . . . 2-4
• Timeslots . . . . . . . . . . . . . . . . . . . . . . . . . . . . . . . . . . . . . . . . . . . . . . . . . 2-13
• Days . . . . . . . . . . . . . . . . . . . . . . . . . . . . . . . . . . . . . . . . . . . . . . . . . . . . 2-18
User Guide Taleo Scheduling Center 2-1
Calendars Calendar Roles
Calendar Roles
Calendar RoleA calendar role is the right of a user to perform a task in the Taleo Scheduling Center.
Detailed Description
Calendar roles are granted to users by a Scheduling Center Administrator or by a user granted the Create calendars and access Scheduling Center user type permission when the calendar is created or by the Calendar Owner or an Administer Calendars user. The role a user is granted is for a specific calendar. Before a role can be granted to a user, the user must first be granted access to the Taleo Scheduling Center by a Recruiting Center Administrator. The users must try (but will not succeed) at least once to connect to the Scheduling Center for the administrator to be able to grant them a role. A user will only be able to successfully connect to the Scheduling Center once he or she has been granted a Calendar Role.
A Calendar Owner, an Administer Calendar user and a Scheduling Center Administrator can grant the following types of Calendar Roles:
• Read-Only
• Mark Arrived/No Show
• Schedule Appointments
• Manage Timeslots
• Administer Calendars
Ownership of a calendar can only be granted and revoked by a Scheduling Center Administrator.
Roles are granted for a specific calendar.
Example: A user may have a Read-Only calendar role for one calendar and an Administer Calendars calendar role for another calendar.
Benefits
• An administrator can delegate tasks to other employees.
Granting Users a Calendar RolePrerequisite
To user being granted a caledar role must have tried at least once to connect to the Scheduling Center, otherwise the name of the user will not appear in the zone user drop down list.
A user type permission grants users access to this fonction.
A calendar role grants users access to this fonction.
Configuration > Scheduling Center
Steps
1. In the Calendars page, click Modify next to the calendar name for which you wish to grant user permissions.
User Guide Taleo Scheduling Center 2-2
Calendars Calendar Roles
2. In the Update Calendar page, click Add/Modify Calendar Permissions.
3. In the Assign Users and Permissions to Calendars page, select a Zone User from the drop down list.
4. From the Calendar Role drop down list, select a permission for the Zone User.
5. Click Create Permission.
Result
The Update Calendar page will refresh and display currently assigned Calendar Roles, with the role newly created included in the listing.
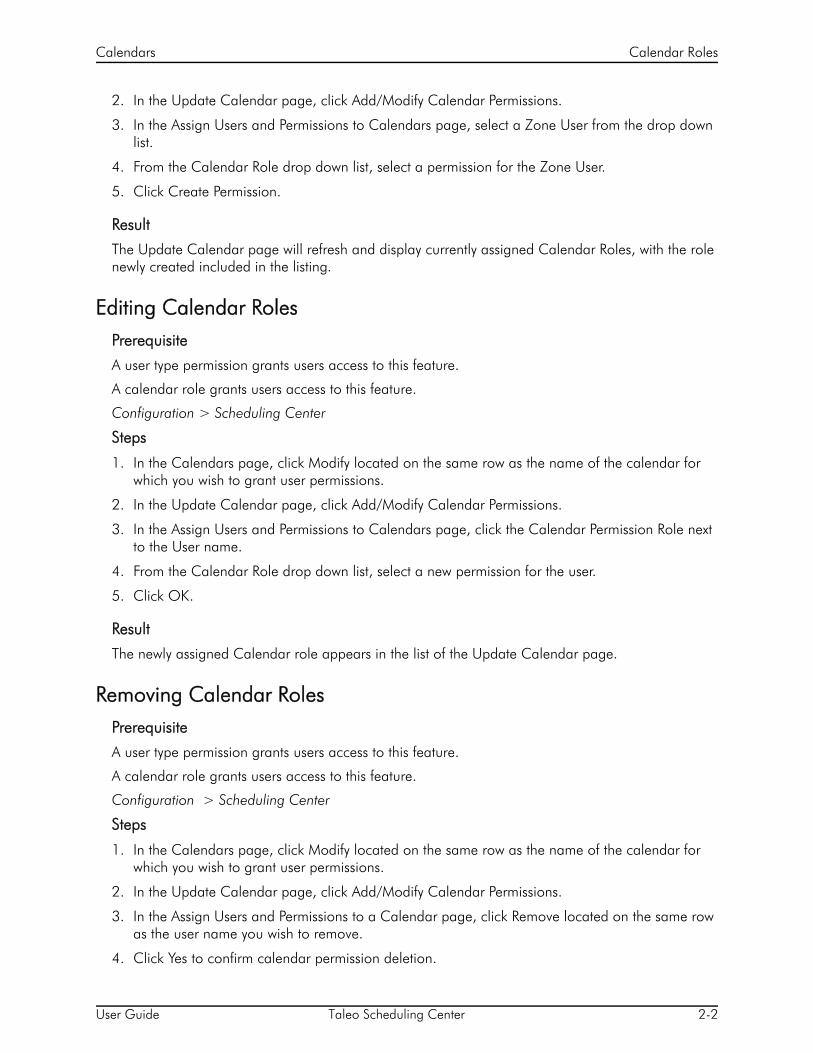
Editing Calendar RolesPrerequisite
A user type permission grants users access to this feature.
A calendar role grants users access to this feature.
Configuration > Scheduling Center
Steps
1. In the Calendars page, click Modify located on the same row as the name of the calendar for which you wish to grant user permissions.
2. In the Update Calendar page, click Add/Modify Calendar Permissions.
3. In the Assign Users and Permissions to Calendars page, click the Calendar Permission Role next to the User name.
4. From the Calendar Role drop down list, select a new permission for the user.
5. Click OK.
Result
The newly assigned Calendar role appears in the list of the Update Calendar page.
Removing Calendar RolesPrerequisite
A user type permission grants users access to this feature.
A calendar role grants users access to this feature.
Configuration > Scheduling Center
Steps
1. In the Calendars page, click Modify located on the same row as the name of the calendar for which you wish to grant user permissions.
2. In the Update Calendar page, click Add/Modify Calendar Permissions.
3. In the Assign Users and Permissions to a Calendar page, click Remove located on the same row as the user name you wish to remove.
4. Click Yes to confirm calendar permission deletion.

User Guide Taleo Scheduling Center 2-3
Calendars Calendar Roles
Result
The Currently Assigned Permissions page refreshes, with the name of the user previously deleted removed from the listing.
User Guide Taleo Scheduling Center 2-4
Calendars Calendars
Calendars
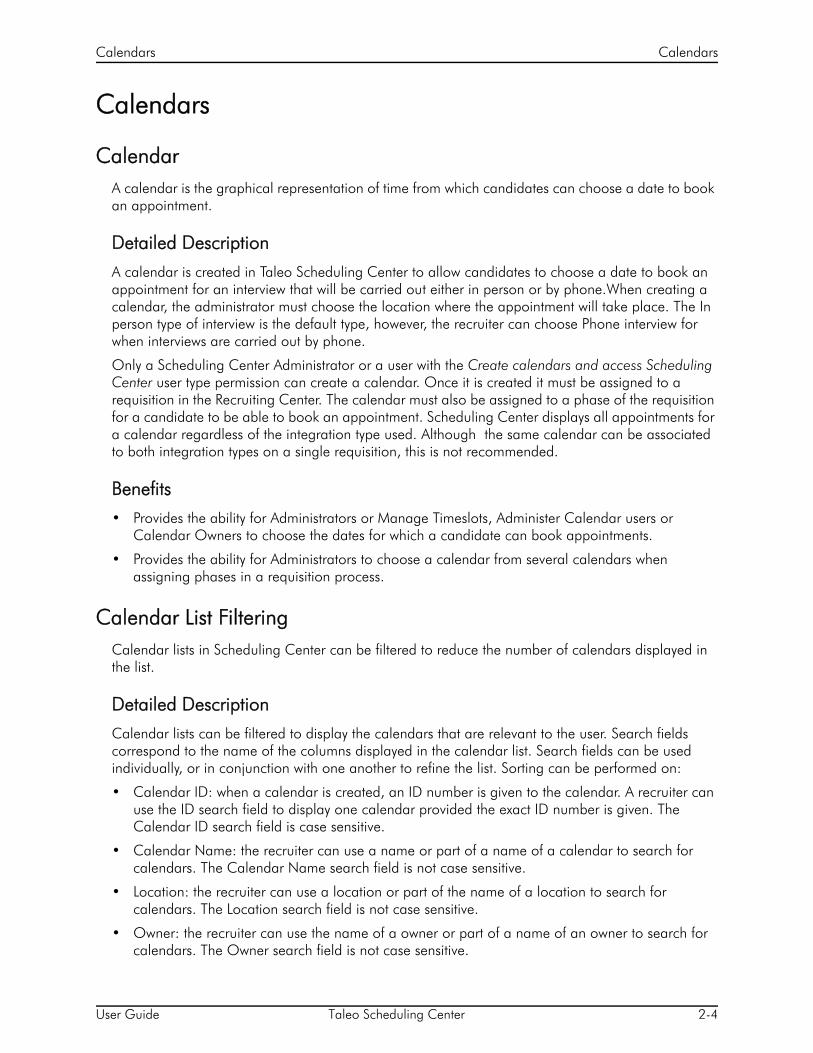
CalendarA calendar is the graphical representation of time from which candidates can choose a date to book an appointment.
Detailed Description
A calendar is created in Taleo Scheduling Center to allow candidates to choose a date to book an appointment for an interview that will be carried out either in person or by phone.When creating a calendar, the administrator must choose the location where the appointment will take place. The In person type of interview is the default type, however, the recruiter can choose Phone interview for when interviews are carried out by phone.
Only a Scheduling Center Administrator or a user with the Create calendars and access Scheduling Center user type permission can create a calendar. Once it is created it must be assigned to a requisition in the Recruiting Center. The calendar must also be assigned to a phase of the requisition for a candidate to be able to book an appointment. Scheduling Center displays all appointments for a calendar regardless of the integration type used. Although the same calendar can be associated to both integration types on a single requisition, this is not recommended.
Benefits
• Provides the ability for Administrators or Manage Timeslots, Administer Calendar users or Calendar Owners to choose the dates for which a candidate can book appointments.
• Provides the ability for Administrators to choose a calendar from several calendars when assigning phases in a requisition process.
Calendar List FilteringCalendar lists in Scheduling Center can be filtered to reduce the number of calendars displayed in the list.
Detailed Description
Calendar lists can be filtered to display the calendars that are relevant to the user. Search fields correspond to the name of the columns displayed in the calendar list. Search fields can be used individually, or in conjunction with one another to refine the list. Sorting can be performed on:
• Calendar ID: when a calendar is created, an ID number is given to the calendar. A recruiter can use the ID search field to display one calendar provided the exact ID number is given. The Calendar ID search field is case sensitive.
• Calendar Name: the recruiter can use a name or part of a name of a calendar to search for calendars. The Calendar Name search field is not case sensitive.
• Location: the recruiter can use a location or part of the name of a location to search for calendars. The Location search field is not case sensitive.
• Owner: the recruiter can use the name of a owner or part of a name of an owner to search for calendars. The Owner search field is not case sensitive.
User Guide Taleo Scheduling Center 2-5
Calendars Calendars
For more information on this feature, see the recording http://bit.ly/tfNwm.
Benefits
• The list of calendars is manageable for customers who have large lists of calendars.
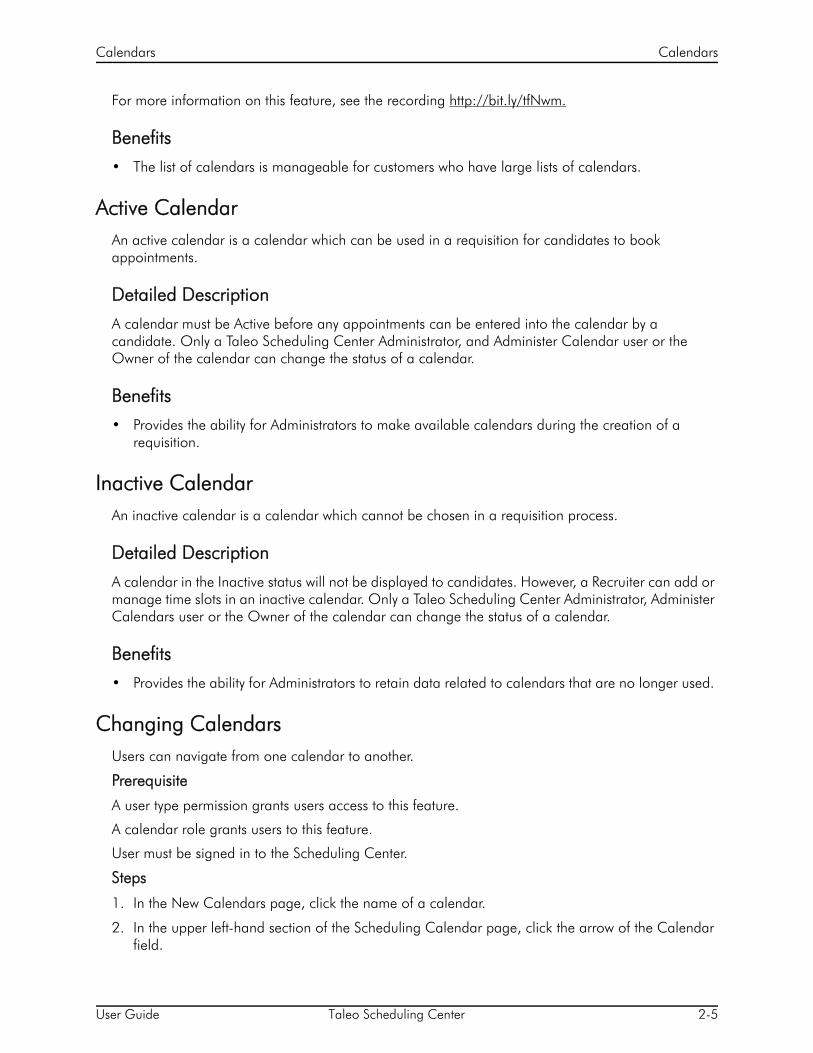
Active CalendarAn active calendar is a calendar which can be used in a requisition for candidates to book appointments.
Detailed Description
A calendar must be Active before any appointments can be entered into the calendar by a candidate. Only a Taleo Scheduling Center Administrator, and Administer Calendar user or the Owner of the calendar can change the status of a calendar.
Benefits
• Provides the ability for Administrators to make available calendars during the creation of a requisition.
Inactive CalendarAn inactive calendar is a calendar which cannot be chosen in a requisition process.
Detailed Description
A calendar in the Inactive status will not be displayed to candidates. However, a Recruiter can add or manage time slots in an inactive calendar. Only a Taleo Scheduling Center Administrator, Administer Calendars user or the Owner of the calendar can change the status of a calendar.
Benefits
• Provides the ability for Administrators to retain data related to calendars that are no longer used.
Changing CalendarsUsers can navigate from one calendar to another.
Prerequisite
A user type permission grants users access to this feature.
A calendar role grants users to this feature.
User must be signed in to the Scheduling Center.
Steps
1. In the New Calendars page, click the name of a calendar.
2. In the upper left-hand section of the Scheduling Calendar page, click the arrow of the Calendar field.
User Guide Taleo Scheduling Center 2-6
Calendars Calendars
The drop down box will not be displayed if the list contains 25 or more active calendars.
3. In the displayed drop down list, select a calendar.
Result
The selected calendar will be displayed.
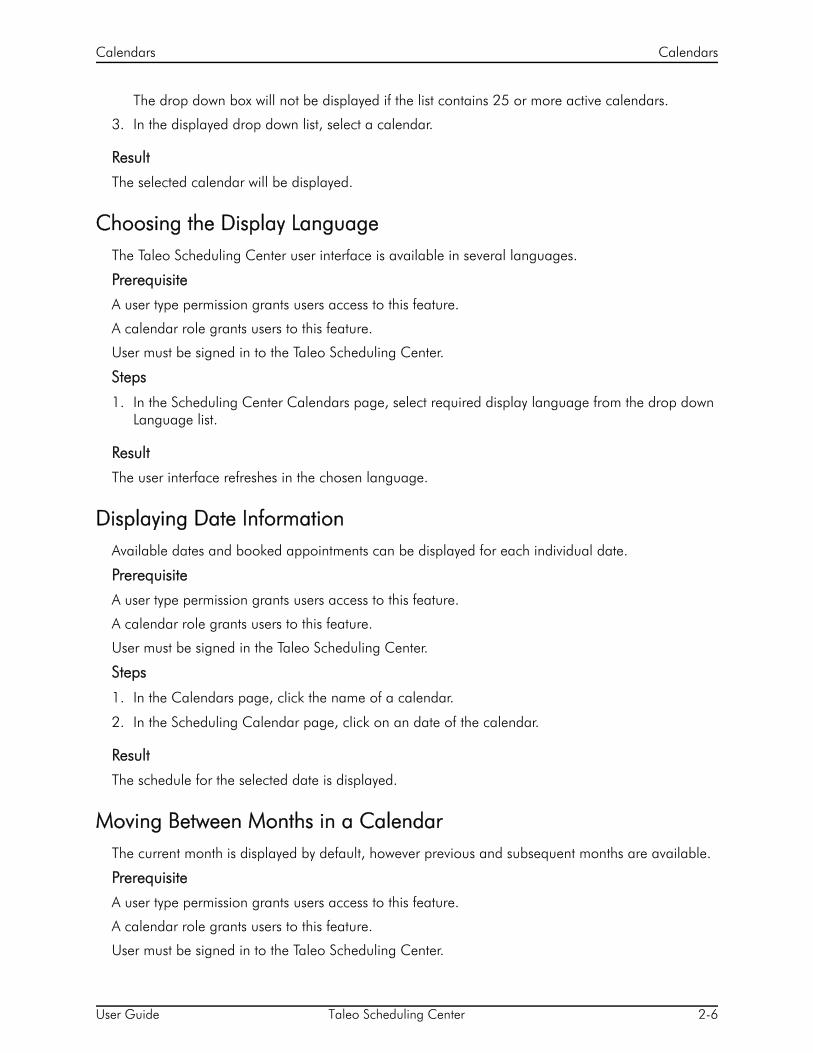
Choosing the Display LanguageThe Taleo Scheduling Center user interface is available in several languages.
Prerequisite
A user type permission grants users access to this feature.
A calendar role grants users to this feature.
User must be signed in to the Taleo Scheduling Center.
Steps
1. In the Scheduling Center Calendars page, select required display language from the drop down Language list.
Result
The user interface refreshes in the chosen language.
Displaying Date InformationAvailable dates and booked appointments can be displayed for each individual date.
Prerequisite
A user type permission grants users access to this feature.
A calendar role grants users to this feature.
User must be signed in the Taleo Scheduling Center.
Steps
1. In the Calendars page, click the name of a calendar.
2. In the Scheduling Calendar page, click on an date of the calendar.
Result
The schedule for the selected date is displayed.
Moving Between Months in a CalendarThe current month is displayed by default, however previous and subsequent months are available.
Prerequisite
A user type permission grants users access to this feature.
A calendar role grants users to this feature.
User must be signed in to the Taleo Scheduling Center.

User Guide Taleo Scheduling Center 2-7
Calendars Calendars
Steps
1. Click to display the next month.
2. Click to display the previous month.
Result
The next or previous month is displayed.
Searching for Active CalendarsPrerequisite
A user type permission grants users access to this feature.
A calendar role grants users to this feature.
User must be logged in to the Taleo Scheduling Center.
Active Calendars must be displayed in the Calendars page.
Steps
1. In the Calendars page, type a keyword or the name of a calendar in the Search for active calendars field.
The search is performed only on the Calendar Name column.
2. Click Go.
Result
Active calendars containing the keyword or the name will be displayed.
Searching for Inactive CalendarsPrerequisite
A user type permission grants users access to this feature.
A calendar role grants users to this feature.
User must be logged in to the Taleo Scheduling Center.
Inactive Calendars must be displayed in the Calendars page.
Steps
1. In the Calendars page, type a keyword or the name of a calendar in the Search for inactive calendars field.
2. Click Go.
Result
Inactive calendars containing the keyword or the name will be displayed.
User Guide Taleo Scheduling Center 2-8
Calendars Calendars
Displaying Active CalendarsActive calendars are displayed by default in the Calendars page. However, only the active calendars for which the user has been granted a calendar role are displayed.
Prerequisite
A user type permission grants users access to this feature.
A calendar role grants users to this feature.
User must be signed in to the Taleo Scheduling Center.
Inactive Calendars must be displayed in the Calendars page.
Steps
1. In the Calendars page, click Show Active Calendars.
Result
All active calendars for which the employer has been granted a calendar role are displayed.
Displaying Inactive CalendarsActive calendars are displayed by default in the Calendars page. Only inactive calendars for which the user has been granted a calendar role will be displayed.
Prerequisite
A user type permission grants users access to this feature.
A calendar role grants users access to this feature.
User must be signed in to the Taleo Scheduling Center.
Active Calendars must be displayed in the Calendars page.
Steps
1. In the Calendars page, click Show Inactive Calendars.
Result
All inactive calendars for which the user has been granted a calendar role are displayed.
Multiple Calendars per Requisition Multiple calendars can be assigned to a requisition.
Detailed Description
When a user adds invitation phases in a requisition and assigns a calendar to the phase, it is possible to choose from more than one calendar. Therefore, several invitations can be sent during the requisition process each with a different calendar. Although it is not recommended, calendars can be associated to both integration types on a single requisition.
User Guide Taleo Scheduling Center 2-9
Calendars Calendars
Benefits
• Provides the ability for Recruiting Center users with the appropriate user type permissions to assign different calendars to different invitation phases.
Creating a New CalendarCalendars can be created for phone or in person interviews.
Prerequisite
A user type permission grants users access to this feature.
Steps
1. In the Calendars page, click Add New Calendar.
2. In the top section of the Create Calendar page complete the fields as required.
3. In the bottom section of the Create Calendar page choose the required languages.
4. Complete each set of field boxes for each selected language.
5. Choose which language will be the primary locale.
6. Click Save.
Result
The new calendar will appear in the calendar drop down list of the Calendars page of the Taleo Scheduling Center.
Next Step
Adding a calendar to a requisition.
Modifying a CalendarOnce created, a calendar can be edited.
Prerequisite
A user type permission grants users access to this feature.
A calendar role grants users access to this feature.
Steps
1. In the Calendars page, click Modify located on the same row as the calendar you wish to modify.
2. In the Update Calendar page, modify the fields as required.
3. Click Save.
Result
The calendar will appear in the calendar drop down list of the Calendars page of the Scheduling Center.
Modifying Calendar LanguagesCalendars can be created to be displayed in different languages.

User Guide Taleo Scheduling Center 2-10
Calendars Calendars
Prerequisite
A user type permission grants users access to this feature.
A calendar role grants users access to this feature.
Calendar must be created.
Steps
1. In the Calendar page click Modify next to the calendar name you wish to modify.
2. In the Update Calendar page, scroll down to the listings of languages.
3. Select the check boxes of the languages in which you wish to display the calendars.
4. Complete each set of field boxes for each selected language.
5. Click Update.
Result
The language drop-down list of the calendar will include all selected languages.
Activating a CalendarA calendar can be activated i.e. it will appear in the Calendar page for active calendars.
Prerequisite
A user type permission grants users access to this feature.
A calendar role grants users access to this feature.
Steps
1. In the Calendars page, click Modify located on the same row as the calendar you wish to activate.
2. In the Update Calendar page, select the Active Calendar check box.
3. Click Update.
Result
The Calendar will be active, therefore available to be used to book an appointment in both types or integrations.
Inactivating a CalendarA calendar can be inactivated i.e. it will no longer appear in the Calendar page displaying active calendars.
Prerequisite
A user type permission grants users access to this feature.
A calendar role grants users access to this feature.
Steps
1. In the Calendars page, click Modify located on the same row as the calendar you wish to activate.
User Guide Taleo Scheduling Center 2-11
Calendars Calendars
2. In the Update Calendar page, select the Inactive Calendar check box.
3. Click Update.
Result
The Calendar will be inactive, therefore unavailable to be assigned to a requisition.
Scheduling HorizonThe scheduling horizon represents how long in advance the candidate may book an appointment on a calendar.
Detailed Description
When creating a calendar or when editing a calendar, the Scheduling Center Administrator can choose how long in advance the candidate may book an appointment on a calendar. The default scheduling horizon value is 14 days in advance. The scheduling horizon can be set to 60, 90 or to a maximum interval of 180 days.The scheduling horizon can be edited once appointments have been made on the calendar.
The Scheduling Horizon is applied to every locale version of the calendar.
Benefits
• Allows users to create one single calendar for a requisition that will have multiple hiring events occurring over time.
Modifying the Scheduling HorizonAllows administrators to select how long in advance a candidate can schedule an appointment.
Prerequisite
A user type permission grants users access to this fonction.
A calendar role grants users access to this fonction.
Steps
1. In the Calendars page, select Modify from the Settings column.
2. In the Update Calendar page, select a value for the Scheduling Horizon dropdown.
3. Click Update.
Result
The Scheduling Horizon i.e. how long in advance candidates can book appointments for this calendar, is modified to the selected value.
Marking and Tracking Candidate Appointment AttendanceA user with the appropriate calendar role can add to a calendar if the candidate has arrived or not shown up to an interview.
User Guide Taleo Scheduling Center 2-12
Calendars Calendars
Prerequisite
A calendar role grants users access to this feature.
A user type permission grants users access to this feature.
Steps
1. In the Calendars page, click Modify located on the same row as the name of the calendar you wish to perform tracking.
2. In the Scheduling Calendar page, double click the date of the interview you wish to track
3. In the list of appointments, select the check box next to the candidate you wish to track.
4. Click Mark Arrived or Mark No Show accordingly.
5. Click Done.
Result
The attendance of a candidate is marked in the calendar. The user can view if a candidate has arrived or not for an appointment.
The attendance of the candidate is indicated in the Candidate list in Taleo Recruiting, provided the Appointment Status column is configured. The appointment status is also indicated in the candidates profile.

User Guide Taleo Scheduling Center 2-13
Calendars Timeslots
Timeslots
Locked TimeslotA locked timeslot is a period of the day candidates are unable to book appointments.
Detailed Description
Locked timeslots are identified in the Scheduling Calendar page by a padlock. The owner of a calendar, the Taleo Scheduling Center administrator or a user with a Manage Timeslots calendar role has the option to lock a timeslot. This means that the system will not allow candidates to make appointments in that timeslot. Existing appointments already scheduled remain unchanged. Candidates may cancel or reschedule out of them, but no one can schedule an appointment into a locked timeslot.
Benefits
• Provides the ability to choose at what time of the day they wish to have appointments.
Adding TimeslotsTimeslots must be added in a calendar for candidates to book appointments.
Prerequisite
A calendar role grants users access to this feature.
A user type permission grants users access to this feature.
Steps
1. In the Calendars page, under the Calendar Name column, click the name of a calendar.
2. Click Add Timeslot.
3. In the Add Timeslot page complete the fields as required.
4. Click Add Timeslot.
Result
A new timeslot is added in the calendar for the chosen date.
Removing a TimeslotA recruiter can remove a timeslot for a given day.
Prerequisite
A calendar role grants users access to this feature.
A user type permission grants users access to this feature.
Timeslots must be free of any scheduled appointments.
Steps
User Guide Taleo Scheduling Center 2-14
Calendars Timeslots
1. In the Scheduling Calendar page, click on the Appointments link.
2. Click Remove next to a timeslot.
Result
Application refreshes and the timeslot is removed from the calendar. Timeslot will no longer be available to candidates to book appointments.
Removing All TimeslotsA recruiter can remove all timeslots for a given day.
Prerequisite
A calendar role grants users access to this feature.
A user type permission grants users access to this feature.
Timeslots must be free of any scheduled appointments.
Steps
1. In the Scheduling Calendar page, click on the Appointments link.
2. Click Remove All Timeslots.
Result
Application refreshes and all timeslots are removed from the calendar. Timeslots will no longer be available to candidates to book appointments.
Locking a TimeslotLocking a timeslot will avoid having candidates booking appointments during that time of the day.
Prerequisite
A calendar role grants users access to this feature.
A user type permission grants users access to this feature.
The timeslot must be created and unlocked.
Steps
1. In the Calendars page, select a calendar name from the Calendar List.
2. In the Scheduling Calendar page, click a date in the calendar (the same day or in the future).
3. Click Lock above the timeslot you wish to lock.
Result
A small padlock will be displayed beside the locked timeslot. Candidates will no longer be able to book appointments for that timeslot. However, any appointments that have been previously scheduled for that timeslot will remain.
Unlocking a TimeslotUnlocking a timeslot will allow candidates to book appointments during that time of the day.

User Guide Taleo Scheduling Center 2-15
Calendars Timeslots
Prerequisite
A calendar role grants users access to this feature.
A user type permission grants users access to this feature.
The timeslot must be created and locked.
Steps
1. In the Calendar page, select a calendar name from the Calendar List.
2. In the Scheduling Calendar page, click a date in the calendar with a padlock (the same day or in the future).
3. Click Unlock above the timeslot you wish to unlock.
Result
The padlock icon will disappear. Candidates will able to book appointments in that timeslot.
Selecting the Allowed Number of Appointments per TimeslotSelecting the number of appointments per timeslot will allow the user to manage how many appointments can be booked during a given time.
Prerequisite
A calendar role grants users access to this feature.
A user type permission grants users access to this feature.
Steps
1. In the Calendars page, click the name of a calendar.
2. In the Scheduling Calendar page, click a date (the same day or in the future).
3. Click the appointments link of a timeslot.
4. From the drop down list, select the number of appointments that may be scheduled within this timeslot.
5. Click OK.
Result
The selected number of appointments available for the timeslot will be displayed.
Editing a TimeslotTimeslots cannot be modified once they have been created. To modify a timeslot, remove the timeslot and add a new one.
Reschedule Locking FeatureUsers can prevent candidates from rescheduling a confirmed appointment.
User Guide Taleo Scheduling Center 2-16
Calendars Timeslots
Detailed Description
Users can determine for a calendar how close to the time of a confirmed appointment a candidate will be allowed to reschedule.This prevents the candidate from rescheduling an appointment too close to the already confirmed appointment time. If the user activates this option for a calendar, the user will be requested to create a message that will be displayed to candidates trying to reschedule a confirmed appointment during the locked down period.
The Reschedule Locking feature can be set when the calendar is created or it can be edited later. The reschedule locking feature will be applied to all appointments, even for appointments booked and confirmed before the activation of the feature for a specific calendar.
If the candidate accesses Taleo Scheduling Center during the appointment lock down period, the Reschedule message created by the user will be displayed and the candidate will not be allowed to reschedule.
A calendar permission or user type permissions grant users access to this feature.
Benefits
• Increased appointment management capability
• Improved schedule organization.
Setting the Appointment Change PeriodPrerequisite
User type permissions or Calendar roles grant users access to this feature.
Steps
1. In the Create Calendars page, select the Appointment Change (lock down) option.
2. Choose how many minutes and/or hours in advance a candidate will be allowed to change a previously booked appointment.
3. Complete a the text that will be displayed to candidates rescheduling a booked appointment to close to the appointment.
4. Click Save an Done
Result
Candidate will not be allowed to reschedule a confirmed appointment during the period set for the calendar.
Modifying the Appointment Change PeriodPrerequisite
User type permissions or Calendar roles grant users access to this feature.
Steps
1. In the update Calendar page, select the Appointment Change (lock down) option.
2. Choose how many minutes and/or hours in advance a candidate will be allowed to change a previously booked appointment.

User Guide Taleo Scheduling Center 2-17
Calendars Timeslots
3. Complete a the text that will be displayed to candidates rescheduling a booked appointment to close to the appointment.
4. Click Save an Done
Result
Candidate will no longer be allowed to reschedule a confirmed appointment during the lock down period set for the calendar.
User Guide Taleo Scheduling Center 2-18
Calendars Days
Days
Locked DayA locked day is a day during which candidates cannot book appointments.
Detailed Description
Locked days are identified in the Scheduling Calendar page by a padlock. In the calendar display, locked days are displayed in red. The owner of a calendar, a Taleo Scheduling Center Administrator or a user with a Manage Timeslots calendar role has the option to Lock an entire day, inclusive of all the timeslots within a specific day. This means that the system will not allow candidates to make appointments. Existing appointments already scheduled remain unchanged. Candidates may cancel or reschedule out of them, but no one can schedule an appointment into a locked day.
Benefits
• Provides the ability for administrators to choose the dates for which a candidate can book appointments.
Locking a DayLocking a day will allow a user to choose on which days they do not wish to have candidates booking appointments.
Prerequisite
A calendar role grants users access to this feature.
A user type permission grants users access to this feature.
Steps
1. In the Calendars page, select a calendar name from the Calendar List.
2. In the Scheduling Calendar page, click a date in the calendar (the same day or in the future).
3. Click Lock Day to lock the displayed day.
Result
A padlock will appear beside the date in the Scheduling Calendar page.The day will be displayed in red in the calendar. Candidates will no longer be able to book appointments on that day. However, any appointments that have been scheduled on that day will remain.
Unlocking a DayUnlocking a day in a calendar will allow candidates to book appointments on that day.
Prerequisite
A calendar role grants users access to this feature.
A user type permission grants users access to this feature.
Steps
User Guide Taleo Scheduling Center 2-19
Calendars Days
1. In the Calendar page, select a calendar name from the Calendar List.
2. In the Scheduling Calendar page, click a date appearing in red in the calendar (the same day or in the future).
3. Click Unlock Day to unlock the displayed day.
Result
Date will no longer appear in red in the calendar display. Padlock will be removed. Candidates will be able to book appointments on that day.

BP(A|S)
Invitations
• Candidate Invitations . . . . . . . . . . . . . . . . . . . . . . . . . . . . . . . . . . . . . . . . . 3-1
• Invitations. . . . . . . . . . . . . . . . . . . . . . . . . . . . . . . . . . . . . . . . . . . . . . . . . . 3-5
User Guide Taleo Scheduling Center 3-1
Invitations Candidate Invitations
Candidate Invitations
Appointment Management on Behalf of a CandidateAn appointment can be scheduled, canceled or rescheduled by a user on behalf of the candidate. An invitation to book an appointment can also be declined on behalf of the candidate.
Detailed Description
Schedule Appointments and Administer Calendars users, Owners or Taleo Scheduling Center Administrators can book, reschedule or cancel appointments on behalf of a candidate through the candidate user interface of the Taleo Scheduling Center.
If using the self-service integration type of the Taleo Scheduling Service, the candidate must have logged in to the Careers Section at least once and created a Profile before a user granted with the appropriate role can manage the appointments of the candidate.
If using the proctored integration type of the Taleo Scheduling Service, appointments can be scheduled for candidates that did not log in to the Career site.
User must manage the appointments of candidates granted with the None or Only Cancel Appointments permission.
Users can also manage the appointments of candidates granted the Full permission.
Benefits
• Provides the ability for employers and recruiters to manage appointments for candidates at their convenience.
Accessing the Taleo Scheduling Center on Behalf of a CandidateA user must first access the Taleo Scheduling Center on behalf of a candidate to be able to manage the appointments of a candidate.
Prerequisite
A user type permission grants users access to this feature.
A calendar role grants users access to this feature.
For the self-service integration type, the candidate must first log in to the Taleo Scheduling via the initial invitation e-mail to activate communication between the Taleo Scheduling Center and the Taleo Recruiting Center. The candidate must have a profile in a careers section.
Configuration > Recruiting > Candidates
Steps
1. In the Candidate list, select the name of a candidate.
2. In the Job Submission tab, click Edit.
3. In the Screening Section of the candidate file, click Details next to the Taleo Scheduling Center.
4. In the Results section, click More Details.

User Guide Taleo Scheduling Center 3-2
Invitations Candidate Invitations
Result
The Invite History page is displayed.
Scheduling an Appointment on Behalf of a CandidateA user can schedule an appointment on behalf of a candidate.
Prerequisite
User must first access the Taleo Scheduling Center on behalf of the candidate.
A user type permission grants users access to this feature.
Steps
1. In the Invite History page of the candidate, click Schedule or Decline Invitation.
2. In the Open Invitations page of the Taleo Scheduling Center, click Schedule Appointment next to the appointment to book.
The name of the candidate and the name of the user logging in on behalf of the candidate is displayed in the Open Invitations page.
3. In the Schedule your appointment page, select an appointment.
4. Click Schedule Selected Time.
5. In the Appointment Confirmed page, click continue.
6. Click Done.
Result
An appointment is scheduled and the candidate will receive a reminder e-mail confirming the appointment only if the candidate permission for the calendar is Full.
The Link under the Actions list in the Invite History page in the Recruiting Center will change to Reschedule or Cancel Invitation.
Rescheduling an Appointment on Behalf of a CandidateA user can reschedule an invitation to book an appointment on behalf of a candidate.
Prerequisite
The user must first access the Taleo Scheduling Center on behalf of the candidate.
A user type permission grants users access to this feature.
Steps
1. In the Invite History page of the candidate, click Schedule or Decline Invitation.
The name of the candidate and the name of the user logging in on behalf of the candidate is displayed in the Open Invitations page.
2. In the Open Invitations page of the Taleo Scheduling Center, click No longer Interested next to the appointment to book.
3. In the Cancel Appointment confirmation page, click Yes.
4. Click Done.
User Guide Taleo Scheduling Center 3-3
Invitations Candidate Invitations
Result
The appointment is scheduled and the candidate will receive a reminder e-mail confirming the appointment only if the candidate permission for the calendar is Full.
Declined is indicated in the Actions list of the Invite History page of the candidate file in the Recruiting Center.
Cancelling a Scheduled Appointment on Behalf of a CandidateA user can cancel, on behalf of a candidate, an appointment scheduled by the candidate or on behalf of the candidate.
Prerequisite
The user must first access the Taleo Scheduling Center on behalf of the candidate.
A user type permission grants users access to this feature.
Steps
1. In the Invite History page of the candidate, click Reschedule or Cancel Invitation.
The name of the candidate and the name of the user logging in on behalf of the candidate is displayed in the Open Invitations page.
2. In the Open Invitations page of the Taleo Scheduling Center, click Cancel Appointment next to the appointment to cancel.
3. In the Cancel Appointment confirmation page, click Yes.
4. Click Done.
Result
The Link under the Actions list in the Invite History page in Recruiting Center will change to Reschedule or Cancel Invitation.
Declining an Invitation on Behalf of a CandidateA user can decline an invitation to book an appointment on behalf of a candidate.
Prerequisite
A user type permission grants users access to this feature.
Candidate must first log in to the Taleo Scheduling via the initial invitation e-mail to activate communication between the Taleo Scheduling Center and Taleo 10.
Candidate must have a profile in the Careers section of Taleo 10.
User must first access the Taleo Scheduling Center on behalf of the candidate.
Steps
1. In the Invite History page of the candidate, click Schedule or Decline Invitation.
The name of the candidate and the name of the user logging in on behalf of the candidate is displayed in the Open Invitations page.
2. In the Open Invitations page of the Taleo Scheduling Center, click No longer Interested next to the appointment to book.

User Guide Taleo Scheduling Center 3-4
Invitations Candidate Invitations
3. In the Decline Invitation confirmation page, click Yes.
4. Click Done.
Result
The scheduling process for this candidate is ended.
Declined is indicated in the Actions list of the Invite History page of the candidate file in the Recruiting Center.
User Guide Taleo Scheduling Center 3-5
Invitations Invitations
Invitations
Invitation EmailAn invitation email is an email sent to a candidate during a hiring process.
Detailed Description
An administrator can add invitation phases to the Candidate Selection Workflow in Recruiting Administration. When a candidate reaches these invitation phases during the hiring process, an email is sent to the candidate with an invitation to book an appointment. An Administrator or a user logged to the Recruiting Center can also send invitation emails manually provided they have been granted the proper user type permissions.
Benefits
• Provides the ability for an administrator or a recruiter logged in Recruiting Center to send automatically an invitation to a candidate during the requisition process. The administrator must configure the candidate selection workflow in the Recruiting Administration and then an invitation is automatically distributed when a recruiter (or employer) selects the appropriate step/status.
• Provides the ability for users logged in to the Recruiting Center to manually send, at any time, an invitation to book an appointment to a candidate.
Reminder EmailA reminder email is sent to a candidate when an appointment is scheduled or rescheduled.
Detailed Description
Reminder emails are sent to candidates a few days prior to an appointment booked either by the candidate or on behalf of the candidate. Reminder emails are sent automatically by the system.
Depending on the access level granted to the candidate for the calendar being used for the appointment management, the reminder email will not display the same information.
• Full: reminder email will include information on scheduled appointments and will contain a link to access the Taleo Scheduling Center and allow candidates to manage their appointments.
• None: reminder email will only include information on scheduled appointments, but no link to the Taleo Scheduling Center will be displayed as the candidate is not allowed to manage his or her appointments.
• Only Cancel Appointments: reminder email will include information on scheduled appointment and a link to the Taleo Scheduling Center will be displayed allowing the candidate to cancel scheduled appointments.
Benefits
• Allows a candidate granted the permission Full to manage his or her appointments in the Taleo Scheduling Center.
User Guide Taleo Scheduling Center 3-6
Invitations Invitations
• Allows a candidate granted the permission None to view his or her appointments in The Taleo Scheduling Center and be reminded of appointments.
• Allows a candidate granted the permission Only Cancel Appointment to view and cancel his or her appointments in the Taleo Scheduling Center and be reminded of appointments.
PhaseA phase is a configured parameter for an action.
Detailed Description
Phases are used in a candidate selection workflow. They allow a system administrator to configure a parameter for an action that will be performed during the candidate selection workflow.
Phases are available in a candidate selection workflow only if phases are integrated to a service. Therefore, not all services have phases that can be configured in a candidate selection workflow.
If phases are available for a service, the system administrator will be able to create phases and configure them.
Example:
The phase allows the system administrator to associate the workflow, step and status that will trigger a follow-up appointment and further configure which appointment invitation will be distributed. A requisition can include up to ten phases. However, to avoid confusion, it is recommended to use only two or three phases per requisition. The appropriate invitation will be automatically sent based on the calendar ID association selected by the user in the requisition file Screening section.
Benefits
• Provides the ability for a system administrator to configure the parameters of an action performed during the candidate selection workflow.
Sending an Invitation ManuallyA user can send an invitation to a candidate by requesting the Taleo Scheduling Center screening service for this candidate.
Prerequisite
The candidate must be matched to a requisition.
A user type permission grants users access to this feature
A screening service must be requested for this candidate.
The Taleo Scheduling Center Screening Service integration type must be enabled for the requisition.
The candidate calendar permission must be Full.
Configuration > Recruiting > Candidates
Steps
1. In the Candidates list, select a candidate (or use Search to find the desired candidate).
2. In the More Actions drop down list, select Request a Screening Service.

User Guide Taleo Scheduling Center 3-7
Invitations Invitations
3. In the Request Screening Service dialog box, select from the Available Services drop down list the integration type of the Taleo Scheduling Center screening service you wish to trigger.
Only the integration types used in the requisition will be displayed.
4. Add a comment, if necessary.
5. Click Done.
Result
The candidate will receive an email with an invitation to book an appointment.
Sending an Invitation by Changing the Status of a CandidateA user can send an invitation to a candidate by changing the status of the candidate in a requisition. When changing manually the status of the candidate to a different phase of the requisition, the candidate will receive an invitation to book an appointment.
Prerequisite
A user type permission grants users access to this feature.
Step in which the candidate is must include the Change Status/step action.
Candidate must not be in a RSOffer step.
Phases must be created for this requisition in the Recruiting Center Administration.
Steps
1. In a candidate list, select a candidate file.
2. In the More Actions list, select Change status/step.
3. In the New Status list, select a new status.
4. Add a comment.
5. Click Save and Close.
Result
An invitation to book an appointment is sent when the candidate will reach for the chosen phase of the requisition.
Sending an Invitation Automatically during the WorkflowSystem administrators can automatically trigger Passport screening services such as Scheduling Center when a candidate reaches a certain step or status within a candidate selection workflow. Triggering automatically an invitation during the workflow process can be used to send an invitation to several candidates at a time, by changing the status of the candidate to a determined step or status triggering the invitation.
Prerequisite
The Taleo Scheduling Center screening service must be configured.
The Access Administration and the Access Screening Services configuration user type permissions grant users access to this feature.
Configuration > [Recruiting] Administration > Screening Services List
User Guide Taleo Scheduling Center 3-8
Invitations Invitations
Steps
1. In the Screening Services List, select the required integration type of Taleo Scheduling Center.
2. Click Create next to CSW Action.
3. In the New Candidate Selection Workflow Action, select the workflow, step and status combination that will automatically trigger the screening service. The workflows, steps and statuses available are the ones configured in the Taleo zone.
4. In the Action drop down list, select Send Scheduling Center Invitation.
5. Click Save.
6. Click Done.
Result
An invitation will be automatically sent to the candidate at the selected step of the requisition.
Cancelling an InvitationA user can cancel the invitation to book an appointment sent to a candidate.
Prerequisite
A user type permission grants users access to this feature.
The candidate must not have scheduled an appointment.
Configuration > Recruiting > Candidates
Steps
1. Click the name of a candidate.
2. In the Job submission tab, click Edit.
3. In the Screening section, click Details.
4. In the Results section, click More Details.
5. Click Cancel Invitation.
Result
Candidate can no longer book an appointment.
Next Step
Blocking invitations.
Cancelling an Unscheduled InvitationIt is possible to cancel an invitation to book an appointment if the appointment has not been booked yet.
Prerequisite
An appointment for the invitation must not be scheduled.
Steps
1. Access the Taleo Scheduling Center.
User Guide Taleo Scheduling Center 3-9
Invitations Invitations
2. Find the name of the candidate for which you wish to cancel an unscheduled invitation.
3. Log in to the Recruiting Center.
4. Under the Candidates tab, double-click on the candidate’s name.
5. In the Candidate File, click Edit.
6. In the Screening section, click Details for the Scheduling Center integration type.
7. In the Results section, click More Details.
8. In the Invite History page, click Request Cancellation.
Result
The candidate’s invitation to book an appointment will be cancelled.
Blocking an InvitationAn invitation to book an appointment can be prevented from being sent during the requisition process.
Prerequisite
A user type permission grants users access to this feature.
The candidate must not have scheduled an appointment for the invitation.
Configuration > Recruiting > Candidates tab
Steps
1. Click the name of a candidate.
2. In the Job Submission tab, click Edit.
3. In the Screening section, click Details.
4. In the Results section, click More Details.
5. Click Block.
Result
All invitation phases of the requisition are blocked and will no longer be sent to candidates.
Assigning a Calendar to a Requisition A requisition can use different calendars when sending invitations to candidates. Although the same calendar can be associated to both integration types on a single requisition, this is not recommended.
Prerequisite
The Taleo Scheduling Center must be enabled in the Recruiting Administration.
Calendars must be created in Taleo Scheduling Center.
Configuration > Recruiting > Requisition
Steps
1. Under the Requisitions, click Create Requisition.
User Guide Taleo Scheduling Center 3-10
Invitations Invitations
2. Follow the Wizard instructions.
3. In the Screening section selection a Taleo Scheduling Center Integration type.
4. For each Calendar ID, select a calendar from the drop down list.
5. Select the calendar to assign to the requisition.
6. Repeat steps 5 and 6 for each required calendar ID.
7. Click Save.
Result
The pop-up window closes and the Calendar ID field should display the name of the calendar previously selected.

BP(A|S)
Scheduling Status
• Scheduling Statuses. . . . . . . . . . . . . . . . . . . . . . . . . . . . . . . . . . . . . . . . . . . 4-1

User Guide Taleo Scheduling Center 4-1
Scheduling Status Scheduling Statuses
Scheduling Statuses
Taleo Scheduling Center Candidate History LogThe Candidate History Log is the Taleo Scheduling Center page where it is possible to view the scheduling status of a candidate.
Detailed Description
The Candidate History Log displays a list of the scheduling activities of a candidate.
Benefits
• Allows users to view the invitations of a candidate for a specific requisition.
Viewing the Scheduling Status of a Candidate in the Candidate FileAll the activities of a candidate can be viewed from the candidate file.
Prerequisite
To view the status of a candidate, the candidate must already be in a candidate selection process.
Configuration > Recruiting > Candidates tab
Steps
1. Click the name of a candidate.
2. In the job submission tab, click Edit.
3. In the Screening section, click Details under the integration type used to manage the appointments of the candidate.
4. In the Results section, click More Details.
5. Click View History.
Result
The Activity Log of the candidate is displayed.
Viewing the Scheduling Status of a Candidate in the Candidates ListAll the activities of a candidate can be viewed from the candidates list.
Prerequisite
The Scheduling Status column in the candidate list must have been added to the list format.
Configuration > Recruiting > Candidates
Result
The Scheduling Status of a candidate is displayed in the Scheduling Status column of the candidates list.
User Guide Taleo Scheduling Center 4-2
Scheduling Status Scheduling Statuses
Adding a Candidate List Column to view Taleo Scheduling StatusesTo view the scheduling status of a candidate in the candidates list, the Scheduling Status column must be added to the candidates list.
Prerequisite
The Scheduling Status column must have been added to a list format context by a Recruiting Administrator.
Configuration > Recruiting > Candidates tab
Steps
1. In the Candidates list, click .
2. In the List Format Selector page, choose from the List Format drop-down list, a list format including an Appointment Status column.
3. Click Done.
Result
A column displaying the Taleo Scheduling Center scheduling status will be displayed in the candidates list.
Viewing the Scheduling Status of a Candidate in the Tracking HistoryAll the activities of a candidate can be viewed from the tracking history of the Taleo Scheduling Center.
Prerequisite
User must be signed in to the Taleo Scheduling Center.
A user type permission grants users access to this feature.
A calendar role grants users access to this feature.
Steps
1. In the Scheduling Calendar page, select the name of a Calendar.
2. Click the name of a scheduled candidate.
Result
The Activity Log of the candidate is displayed. The information under the What column is the scheduling status.
BP(A|S)
Reports
• Calendar Data Report . . . . . . . . . . . . . . . . . . . . . . . . . . . . . . . . . . . . . . . . . 5-1
• Creating a Calendar Report. . . . . . . . . . . . . . . . . . . . . . . . . . . . . . . . . . . . . 5-2

User Guide Taleo Scheduling Center 5-1
Reports Calendar Data Report
Calendar Data Report
User can run a report on data contained in a calendar.
Detailed DescriptionTaleo Scheduling Center users can run a report on a specific calendar. The report contains a listing of upcoming appointments and can be used to track Arrive/No Show metrics.
Users can run reports on any calendar for which they have been granted a calendar role.
When the report is created and displayed, the user can choose to print or to export the report to Excel.
Users can create reports for active or inactive calendars.
Benefits• Report can be used to track Arrive/no Show metrics.
• Report contains the list of upcoming appointments
• The auto suggest feature is available to identify the name of the calendar for which to run a report.

User Guide Taleo Scheduling Center 5-2
Reports Creating a Calendar Report
Creating a Calendar Report
Prerequisite
A calendar role grants users access to this feature.
Steps
1. In the Taleo Scheduling Center, click Reports.
2. Select a calendar.
3. Select a date range.
4. Click submit.
Result
A list of all the appointments booked in the calendar for each requisition in which the calendar is used, is displayed. Information on if the candidate has arrived, or if the candidate has or not shown up for the appointment is also displayed.
Next Step
User can print or export the report to Excel.