Embed Size (px)
Citation preview

1 of 11888-24-249-G-00 rev E • 03/15
ENGLISHTablet Management Module
for iPad®
Table of Contents
Hazard Symbols Review ........................................................................................................................ 2
Components & Tools ............................................................................................................................. 2
Features ................................................................................................................................................ 2
Optional Security Mount ....................................................................................................................... 3
Charging Set-up .................................................................................................................................... 4
LED and Syncing .................................................................................................................................... 8
Cleaning and Maintenance.................................................................................................................... 10
Specifi cations ........................................................................................................................................ 11
Service and Warranty Information ........................................................................................................ 11
Apple, iPad, iPhone, iPod, iPod touch, iTunes, and Macintosh are trademarks of Apple Inc., registered in the U.S. and other countries.

2 of 11 888-24-249-G-00 rev E • 03/15
ENGL
ISH
Features
Safety Hazard Review
USB Port
Kensington Lock
Fan
Power Cord Inlet
LED Power Indicator
Individual Status Indicators (ISI)
Tablet Access Door
Keyed Lock
(Optional Feature)
These symbols alert users of a safety condition that demands attention. All Tablet Management Module users should be able to recognize and
understand the signifi cance of the following Safety Hazards if encountered on the Module or within Moudle documentation. Children who are
not able to recognize and respond appropriately to Safety Alerts should not use the Module without adult supervision!
Symbol Signal Word Level of Hazard
NOTEA NOTE indicates important information that helps you make better use
of your Cart.
CAUTIONA CAUTION indicates either potential damage to hardware or loss of data
and tells you how to avoid the problem.
WARNINGA WARNING indicates either potential for property damage, personal
injury, or death.
ELECTRICALAn Electrical indicates an impending electrical hazard which, if not
avoided, may result in personal injury, fi re and/or death.
ComponentsOne Tablet Management Module
Security Mounting Kit: M6 security screw (Quantity 2),
washer (Quantity 2), and security wrench
Electric Drill and 1/4” (6.5 mm) Drill Bit
Measuring Tool, Pencil
Tools

3 of 11
1/4” or 17/64”(6.5 mm)
888-24-249-G-00 rev E • 03/15
ENGLISH
Place Module on surface in desired location.
Remove the Module. Use a pencil to mark the mounting holes locations: 11.4 “ (29 mm) from the wall and 17.3” (44 mm) apart.
Drill two mounting holes using a 0.266 OD drill bit.
Use the security wrench to insert provided M6 screws and washers.
Security Mounting Kit OptionFor mounting the Module to a work surface (desktop, countertop, table, etc.)
1
2
3 4
CAUTION: mounting surface cannot exceed 1” (25.4 mm thick).
≤ 1” (25.4mm)
MountingHole
MountingHole
Wall
Wall
MountingHole
MountingHole17.32”
440 mm
11.5”292 mm

4 of 11
1 2 3
4
888-24-249-G-00 rev E • 03/15
ENGL
ISH
Make sure the Module power cord is
disconnected from wall power supply
before proceeding.
Unlock the module and open the doors.
Use a Phillips screwdriver to remove the two screws located on the interior sides of the module; save screws to reinsert later.
Charging Set-up
Partially slide out the module drawer. You’ll need to unplug two cables before sliding the drawer completely out. Open the strap to access the two cables.
1
2
3
NOTE: the Module power cord acts
as the connect/disconnect device
switching power off and on.

5 of 11
1 2 3
1 2 3
11
1
8
8
888-24-249-G-00 rev E • 03/15
ENGLISH
Unplug the USB and DC power cables (push up on the lever under the DC connector to release). The drawer can now be removed.
Place the drawer up-side-down on the module top. Line up a tablet USB cable along numbers 1 to 8 on the drawer as a way to measure out slack (represented by dashed line).
Route the tablet USB cable through the slots to the back of the drawer maintaining the slack measured in previous step.
Charging Set-up
4
5
6
Both the 30 pin and Lightning cable designs are compatible with the Tablet Management Desktop unit. Please use the cable which is appropriate for your Apple device.
6 of 11
1
1 2 3
4
5 6 7
8 9
10 1
1 12 13 14 15 16
1 2 3
4
5 6 7
8
9 10 1
1 12 13 14 15
1 2 3
4
5 6 7
8 9
10 1
1 12 13 14 15 16
1 2 3
4
5 6 7
8
9 10 1
1 12 13 14 15 16
888-24-249-G-00 rev E • 03/15
ENGL
ISH
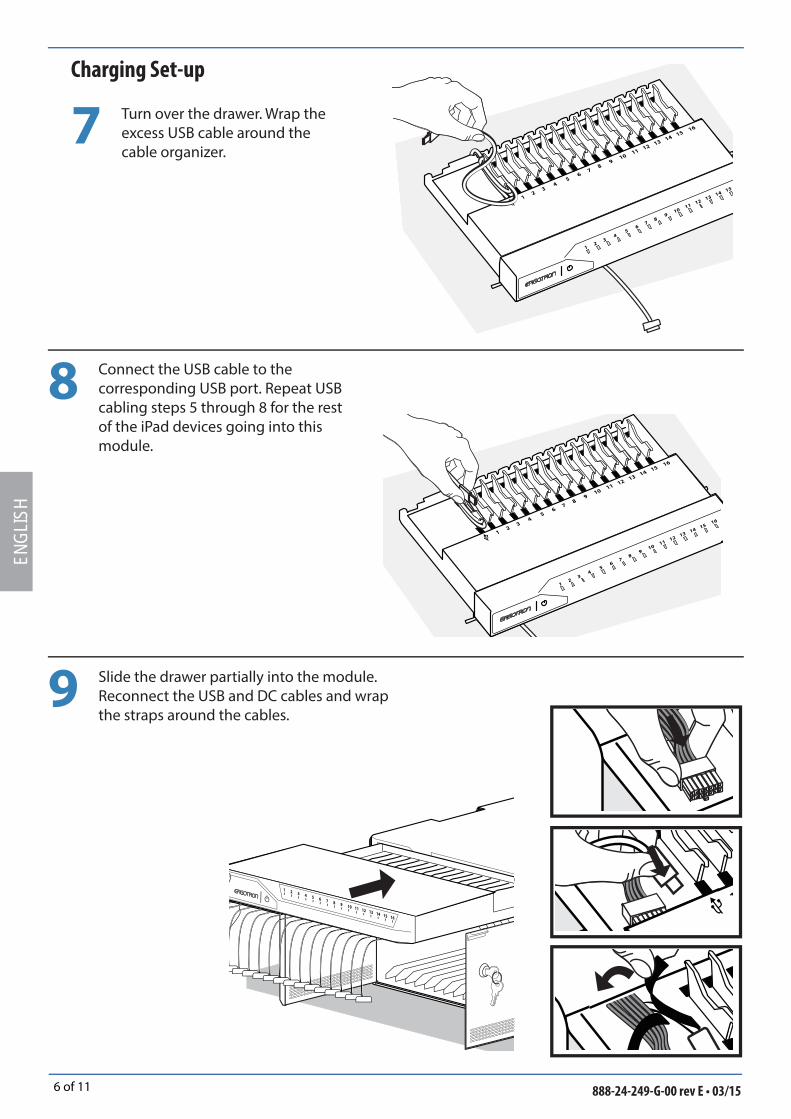
Turn over the drawer. Wrap the excess USB cable around the cable organizer.
Connect the USB cable to the corresponding USB port. Repeat USB cabling steps 5 through 8 for the rest of the iPad devices going into this module.
Slide the drawer partially into the module. Reconnect the USB and DC cables and wrap the straps around the cables.
Charging Set-up
7
8
9
7 of 11888-24-249-G-00 rev E • 03/15
ENGLISH
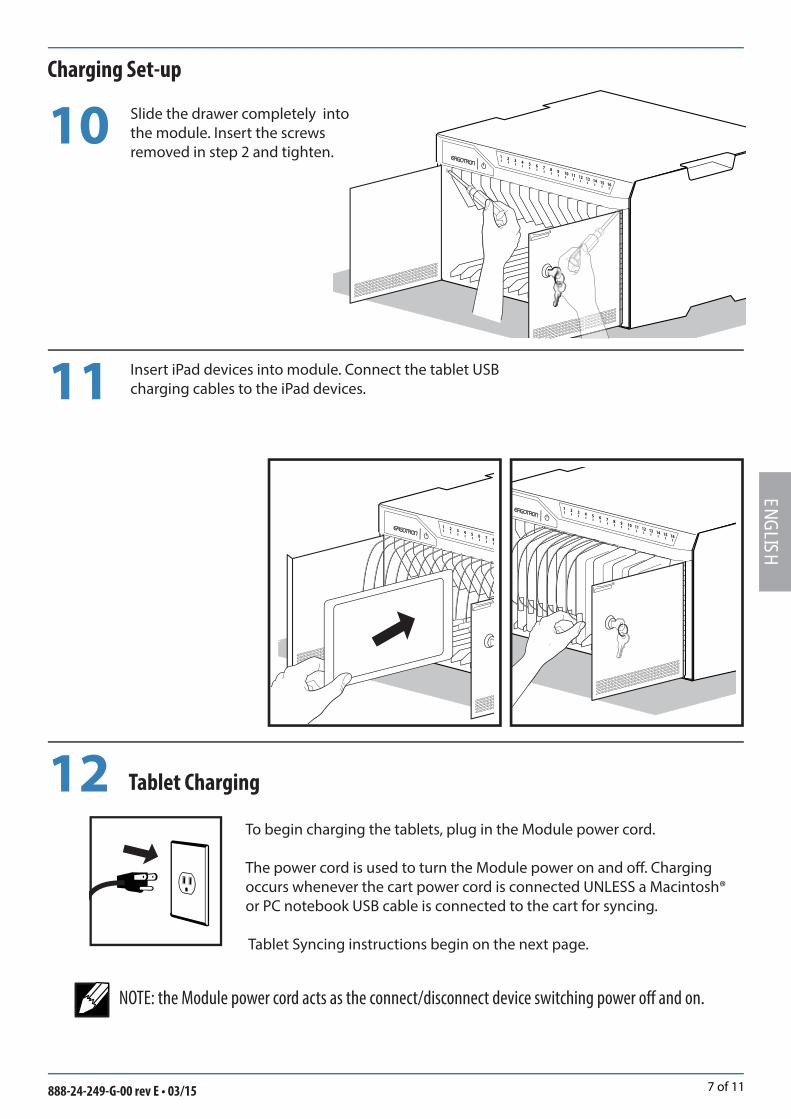
Tablet Charging
To begin charging the tablets, plug in the Module power cord.
The power cord is used to turn the Module power on and off . Charging occurs whenever the cart power cord is connected UNLESS a Macintosh® or PC notebook USB cable is connected to the cart for syncing.
Tablet Syncing instructions begin on the next page.
NOTE: the Module power cord acts as the connect/disconnect device switching power off and on.
Slide the drawer completely into the module. Insert the screws removed in step 2 and tighten.
Insert iPad devices into module. Connect the tablet USB charging cables to the iPad devices.
Charging Set-up
11
10
12

8 of 11 888-24-249-G-00 rev E • 03/15
ENGL
ISH
NOTE: complete the Tablet Charging instructions explained on the previous pagesbefore starting the Syncing Instructions. iPad devices should be charged at least 50% before starting the syncing process.
Power Indicator – communicates sync and charge status with the following signals:
Off = No power to the module.
On - solid = iPad devices are charging.
On - slow blink = Computer is plugged into auxillary USB outlet and iPad device
are ready to sync or are syncing.
On - fast blink = Fault Status. Please make sure all cables are seated correctly
within cable drawer and cart is operating within specifi ed
operating temperature. Contact Ergotron Customer Support
if problem continues.
The iPad devices will mount as USB devices when the included USB cable is connected to a host notebook via the USB port on the exterior of the module.
Apple iPad or iPod touch® devices will sync to a host notebook using iTunes®. If the Macintosh or PC notebook power is on, and the notebook is running iTunes or Apple Confi gurator, the devices will sync to the notebook automatically when the USB cable is connected from the notebook to the USB port on the exterior of the module.
Please see included separate instructions for specifi c setup of iTunes and your Apple devices.
LED - Indicators
Syncing
Optional FeatureIndividual Status Indicators (ISI) – sequentially numbered LEDs corresponding to each tablet in the module:
Green = Fully charged.
Amber = Charging in progress.
NOTE: if module is syncing all ISIs will be green.
When used with the iPad (1st generation) and iPad 2, the ISI lights will continue to stay lit showing
the color green indefi nitely after the unit is completely charged. When used with an iPad mini, an
iPad with Retina Display (4th generation), or an iPad 3 and iOS 6.0 or later, the ISI will stay lit for
approximately 15 minutes after the unit is completely charged. At this time, the iPad will turn off to
conserve battery life, so the ISI will turn off also.

9 of 11888-24-249-G-00 rev E • 03/15
ENGLISH
Plug the USB and power adaptor cables into the notebook.
Connect the notebook power cord to a wall outlet. Switch on the notebook power to begin syncing.
Syncing
4
3 Connect the notebook USB cable to the port on the side of the module.
1
2
Place your notebook, power adaptor and a USB cable on the module work top.
10 of 11 888-24-249-G-00 rev E • 03/15
ENGL
ISH
Cleaning and Maintenance
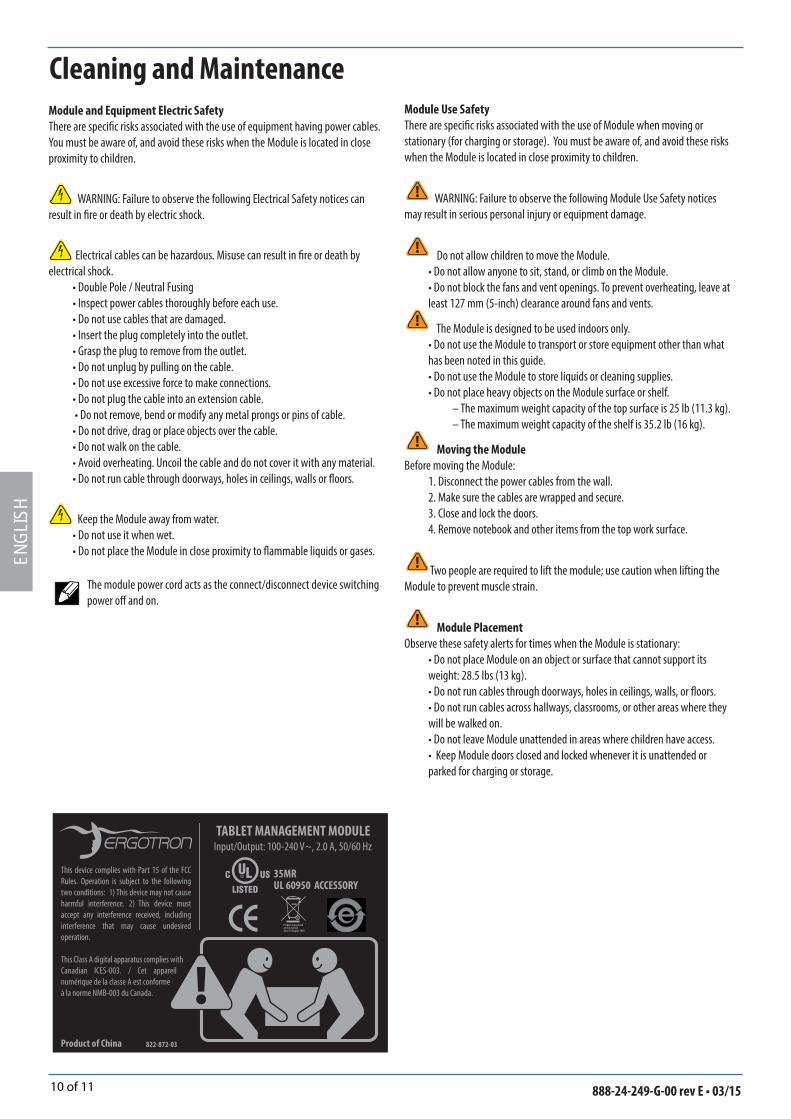
Input/Output: 100-240 V~, 2.0 A, 50/60 Hz
This device complies with Part 15 of the FCC
Rules. Operation is subject to the following
two conditions: 1) This device may not cause
harmful interference. 2) This device must
accept any interference received, including
interference that may cause undesired
operation.
This Class A digital apparatus complies with
Canadian ICES-003. / Cet appareil
numérique de la classe A est conforme
à la norme NMB-003 du Canada.
TABLET MANAGEMENT MODULE
35MRUL 60950 ACCESSORY
Product of China 822-872-03
Product was placed on the market after 13 August 2005
Module and Equipment Electric Safety
There are specifi c risks associated with the use of equipment having power cables.
You must be aware of, and avoid these risks when the Module is located in close
proximity to children.
WARNING: Failure to observe the following Electrical Safety notices can
result in fi re or death by electric shock.
Electrical cables can be hazardous. Misuse can result in fi re or death by
electrical shock.
• Double Pole / Neutral Fusing
• Inspect power cables thoroughly before each use.
• Do not use cables that are damaged.
• Insert the plug completely into the outlet.
• Grasp the plug to remove from the outlet.
• Do not unplug by pulling on the cable.
• Do not use excessive force to make connections.
• Do not plug the cable into an extension cable.
• Do not remove, bend or modify any metal prongs or pins of cable.
• Do not drive, drag or place objects over the cable.
• Do not walk on the cable.
• Avoid overheating. Uncoil the cable and do not cover it with any material.
• Do not run cable through doorways, holes in ceilings, walls or fl oors.
Keep the Module away from water.
• Do not use it when wet.
• Do not place the Module in close proximity to fl ammable liquids or gases.
Module Use Safety
There are specifi c risks associated with the use of Module when moving or
stationary (for charging or storage). You must be aware of, and avoid these risks
when the Module is located in close proximity to children.
WARNING: Failure to observe the following Module Use Safety notices
may result in serious personal injury or equipment damage.
Do not allow children to move the Module.
• Do not allow anyone to sit, stand, or climb on the Module.
• Do not block the fans and vent openings. To prevent overheating, leave at
least 127 mm (5-inch) clearance around fans and vents.
The Module is designed to be used indoors only.
• Do not use the Module to transport or store equipment other than what
has been noted in this guide.
• Do not use the Module to store liquids or cleaning supplies.
• Do not place heavy objects on the Module surface or shelf.
– The maximum weight capacity of the top surface is 25 lb (11.3 kg).
– The maximum weight capacity of the shelf is 35.2 lb (16 kg).
Moving the Module
Before moving the Module:
1. Disconnect the power cables from the wall.
2. Make sure the cables are wrapped and secure.
3. Close and lock the doors.
4. Remove notebook and other items from the top work surface.
Two people are required to lift the module; use caution when lifting the
Module to prevent muscle strain.
Module Placement
Observe these safety alerts for times when the Module is stationary:
• Do not place Module on an object or surface that cannot support its
weight: 28.5 lbs (13 kg).
• Do not run cables through doorways, holes in ceilings, walls, or fl oors.
• Do not run cables across hallways, classrooms, or other areas where they
will be walked on.
• Do not leave Module unattended in areas where children have access.
• Keep Module doors closed and locked whenever it is unattended or
parked for charging or storage.
The module power cord acts as the connect/disconnect device switching
power off and on.

11 of 11888-24-249-G-00 rev E • 03/15
ENGLISH
© 2015 Ergotron, Inc.
Specifi cations
This device complies with Part 15 of the FCC Rules. Operation is subject to the following two conditions: 1) This device may not cause harmful interference. 2) This device
must accept any interference received, including interference that may cause undesired operation. This Class A digital apparatus complies with Canadian ICES-003. / Cet
appareil numérique de la classe A est conforme à la norme NMB-003 du Canada.
Single Desktop Module dimensions
18.3 W x 16.2 D x 10.4 in H
(46.5 x 41 x 26.4 cm)
Single Desktop Module weight (w/o equipment)
28.5 lb (13 kg)
Single Desktop Module Rated weight capacity
Top Work Surface 25 lb (11.3 kg)
Accomodates maximum tablet size
Individual tablet dimensions (including cover):
up to 10.8 H x 7.7 W x 0.95 in D (27.4 x 19.6 x 1.3 cm)
Individual tablet weight: up to 2.2 lb (1 kg)
LED status indicators (ISI) - Optional feature
Lights indicate power status and syncing activity
16 Unit Desktop Module 16 LED lights
Cooling/ventilation
One 5-volt DC continuous operation fan in each module
Shipping dimensions
21.2 W x 18.6 D x 12.8 in H (53.8 x 47.3 x 32.5 cm)
Shipping weight
33.5 lb (15.0 kg)
Power System
100-240 V~, 2.0A, 50/60 Hz
Environmental
Temperature range:
Operating 0° to 30°C (32° to 86°F)
Storage -40° to 60°C (-40° to 140°F)
Relative humidity (maximum):
Operating 10%–90% (non condensing)
Storage 5%–95% (non condensing)
Altitude (maximum): 2000 m (6,562 ft)
Compatibility:
Made for
iPhone 5, iPhone 4S, iPhone 3GS, iPod touch (5th generation), iPod touch (4th
generation), iPod touch (3rd generation), iPad mini, iPad with Retina Display (4th
generation), iPad (3rd generation), iPad 2, iPad
For Service on the Ergotron Tablet Managing Module
for iPad
Visit www.ergotron.com
Service and Warranty
NOTE: When contacting customer
service, reference the serial number.
www.ergotron.com
MADE IN CN
12-345-678
1234567-1234