Embed Size (px)
Citation preview
Table of Contents
Page 1- Statement of Intent
Page 2-5- Preliminary Ideas
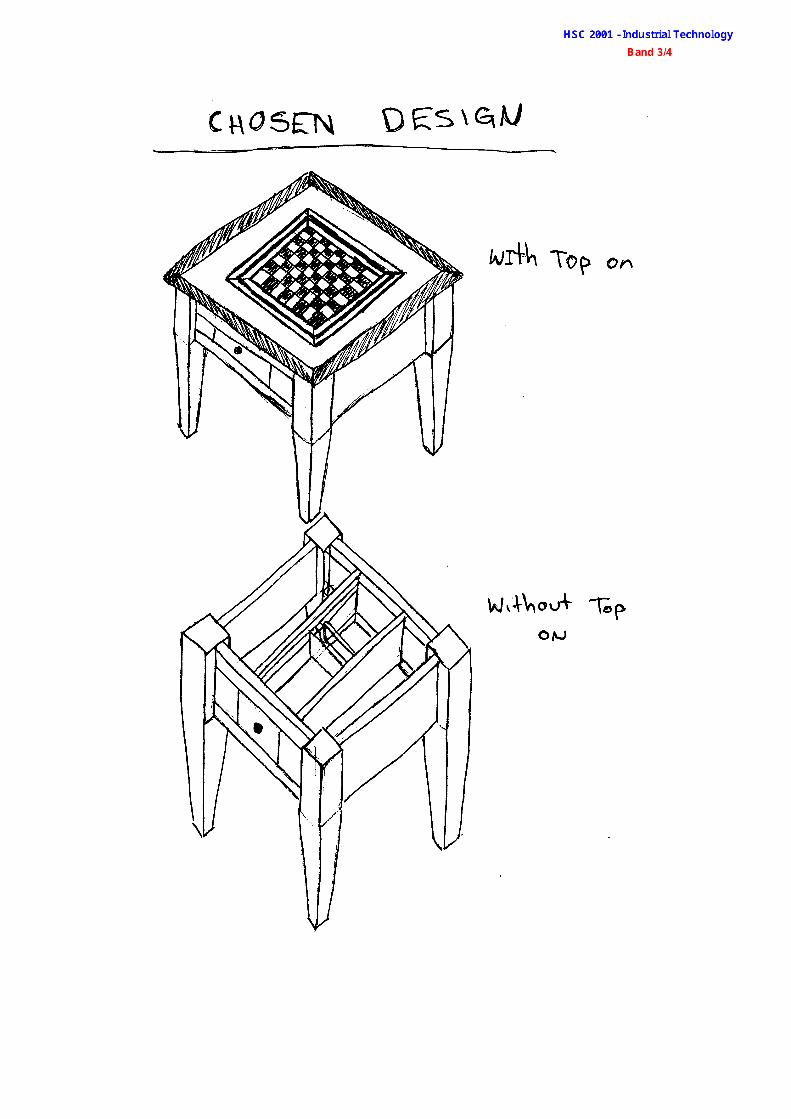
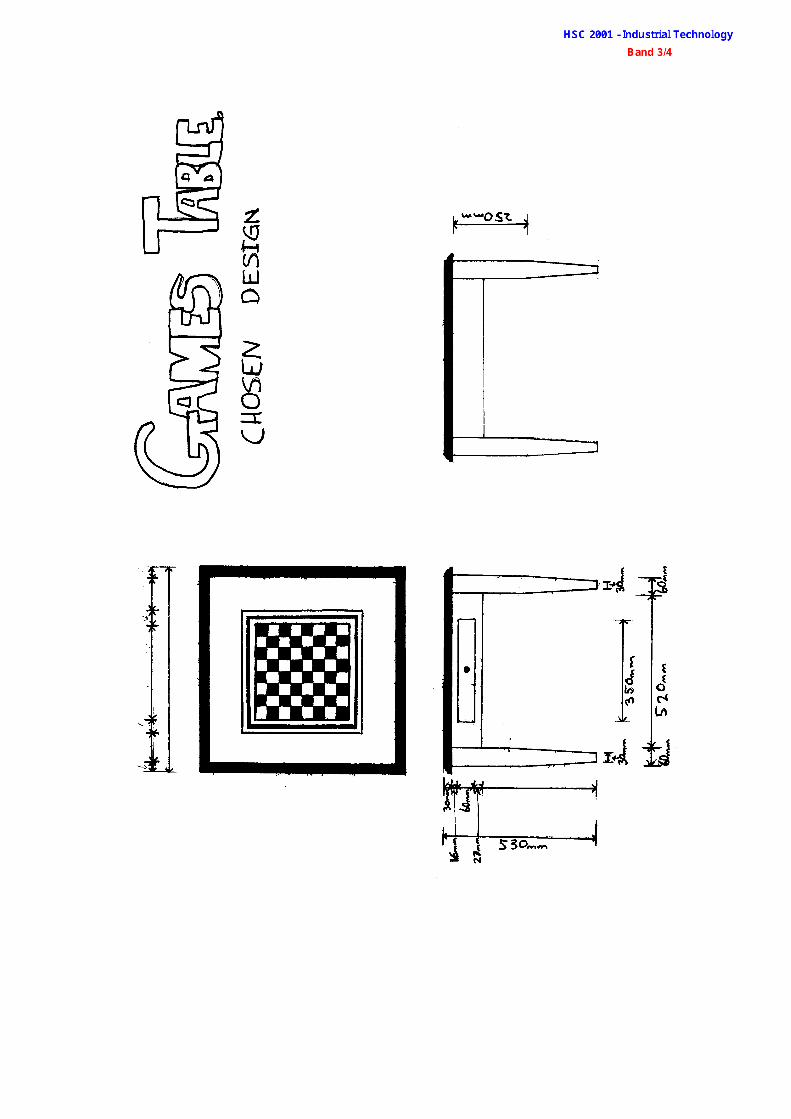
Page 6- Chosen Design
Page 7- Materials list and Costing
Page 8-18- Steps of Construction
Page 19- Finishing the Table
Page 20- Design Variations Page 21-25- Other Ideas Page 26- Joint detail
Statement of Intent I plan to design and construct a chess table that can be used for a number of
games.

Materials List and Costing
Item Quantity Length width Height Material proposed cost Costlegs 4 520mm 60mm 60mm radiata pine $5.00 $0.00
chessboard strips 9 40mm 40mm 7mm radiata pine $2.50 $0.00
chessboard strips 8 40mm 40mm 7mm meranti $2.50 $0.00
chess board 1 335mm 335mm 5mm plywood $2.00 $0.00 base
table top 1 630mm 630mm 19mm radiata pine $5.00 $0.00
chess board 2 2000mm 8mm 19mm meranti $5.00 $0.00 border strips 1 2000mm 12mm 19mm meranti $5.00 $0.00
2 2000mm 17mm 19mm radiata pine $5.00 $0.00
outside border 1 1500mm 140mm 19mm meranti $12.00 $12.50
side rails 4 640mm 116mm 19mm radiata pine $4.30/m $0.00
drawer sides 4 290mm 60mm 12mm meranti $7.00 $0.00
drawer base 2 300mm 334mm 3mm plywood $2.00 $0.00
drawer back 2 338mm 60mm 12mm meranti $3.00 $0.00
drawer rails 2 602mm 116mm 19mm radiata pine $5.00 $0.00
drawer runners 4 592mm 15mm 19mm radiata pine $1.00 $0.00
drawer inserts 10 328mm 22mm 19mm radiata pine $2.00 $0.00
king and queen 8 65mm 22mm 19mm radiata pine $1.00 $0.00 inserts
insert spacing 4 328mm 40mm 7mm meranti $2.00 $0.00
insert material 1 felt $2.00 $0.00
woodstop putty 1 $10.00 $6.05
screws 12 1.5 in 8g 4c/ea $0.00
teak oil 1 $18.05 $0.00
lacquer 1 $10.00 $0.00
thinners $26.25 $0.00
glue $2.00 $0.00
total $144.38 $18.55
Steps of construction (legs) 1) Firstly I cut 8 pieces of 35mm x 70mm radiata pine to 520mm lengths. 2) Then I glued the pieces of wood together in pairs to make 4 legs. 3) After that I cut with the circular saw to 62mm width and height, and then planed them smooth to 60 mm. 4) I then marked out from the top 250mm down the leg. Then from each corner on the bottom of the leg measure in 16mm and join the two marks, as shown below.
5) I then cut out on the lines with the band saw and plane smooth (on all 4 sides). 6) Finally I sanded them smooth.
Steps of construction (chess board)
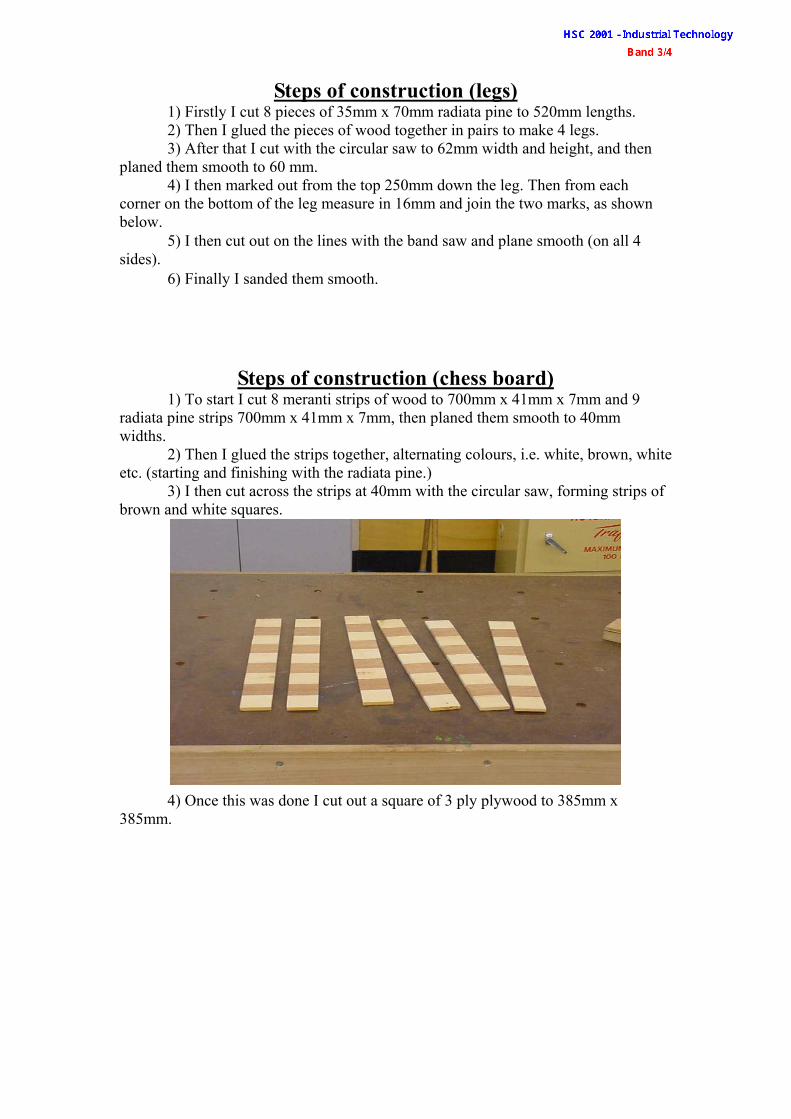
1) To start I cut 8 meranti strips of wood to 700mm x 41mm x 7mm and 9 radiata pine strips 700mm x 41mm x 7mm, then planed them smooth to 40mm widths. 2) Then I glued the strips together, alternating colours, i.e. white, brown, white etc. (starting and finishing with the radiata pine.) 3) I then cut across the strips at 40mm with the circular saw, forming strips of brown and white squares.
4) Once this was done I cut out a square of 3 ply plywood to 385mm x 385mm.
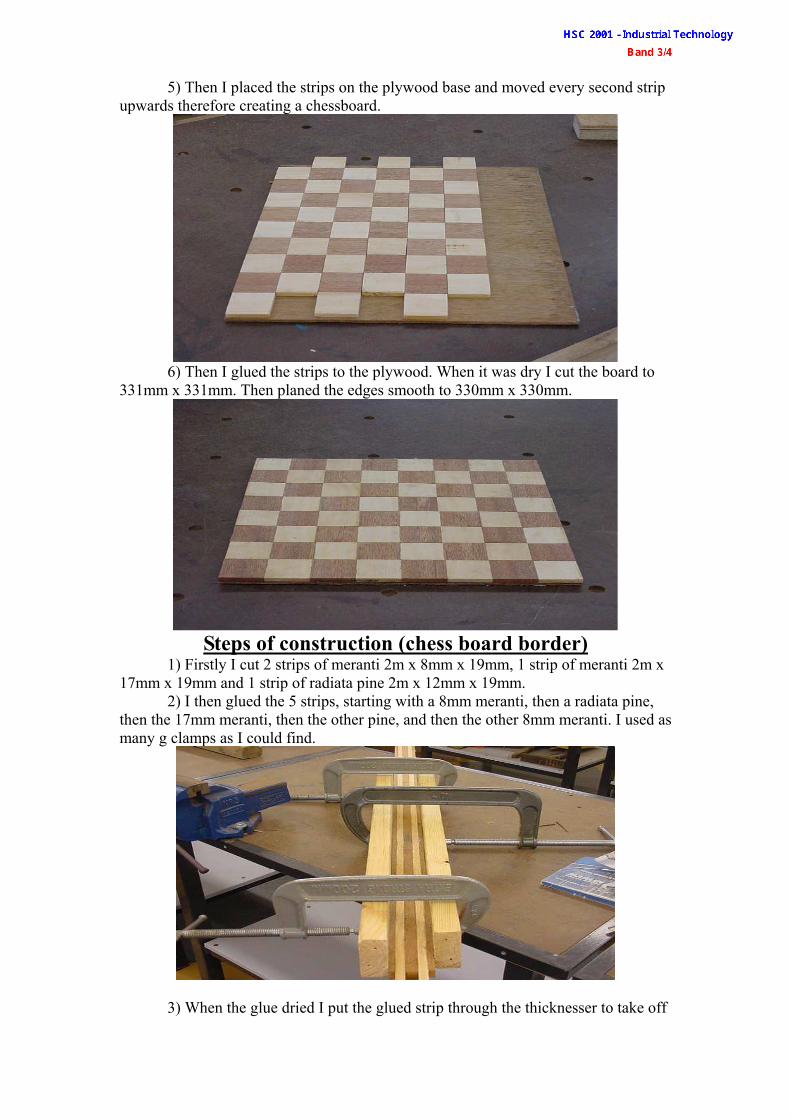
5) Then I placed the strips on the plywood base and moved every second strip upwards therefore creating a chessboard.
6) Then I glued the strips to the plywood. When it was dry I cut the board to 331mm x 331mm. Then planed the edges smooth to 330mm x 330mm.
Steps of construction (chess board border)
1) Firstly I cut 2 strips of meranti 2m x 8mm x 19mm, 1 strip of meranti 2m x 17mm x 19mm and 1 strip of radiata pine 2m x 12mm x 19mm.
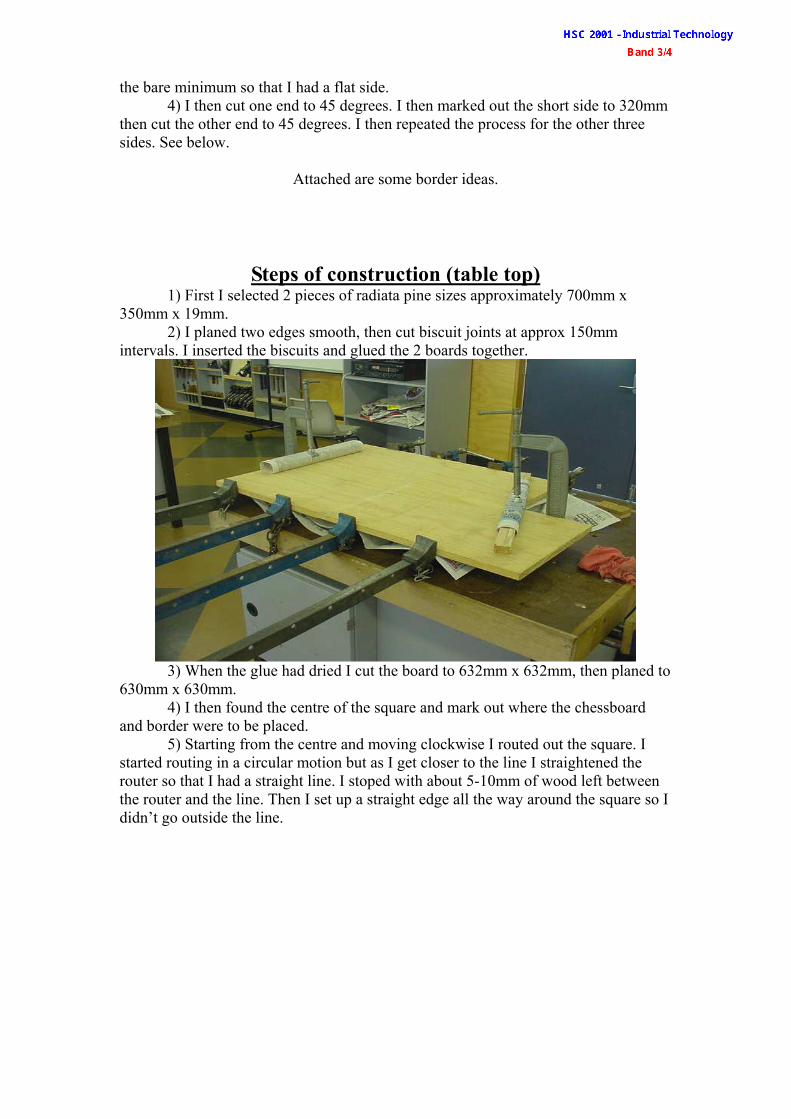
2) I then glued the 5 strips, starting with a 8mm meranti, then a radiata pine, then the 17mm meranti, then the other pine, and then the other 8mm meranti. I used as many g clamps as I could find.
3) When the glue dried I put the glued strip through the thicknesser to take off
the bare minimum so that I had a flat side. 4) I then cut one end to 45 degrees. I then marked out the short side to 320mm then cut the other end to 45 degrees. I then repeated the process for the other three sides. See below.
Attached are some border ideas.
Steps of construction (table top)
1) First I selected 2 pieces of radiata pine sizes approximately 700mm x 350mm x 19mm. 2) I planed two edges smooth, then cut biscuit joints at approx 150mm intervals. I inserted the biscuits and glued the 2 boards together.
3) When the glue had dried I cut the board to 632mm x 632mm, then planed to 630mm x 630mm. 4) I then found the centre of the square and mark out where the chessboard and border were to be placed. 5) Starting from the centre and moving clockwise I routed out the square. I started routing in a circular motion but as I get closer to the line I straightened the router so that I had a straight line. I stoped with about 5-10mm of wood left between the router and the line. Then I set up a straight edge all the way around the square so I didn’t go outside the line.
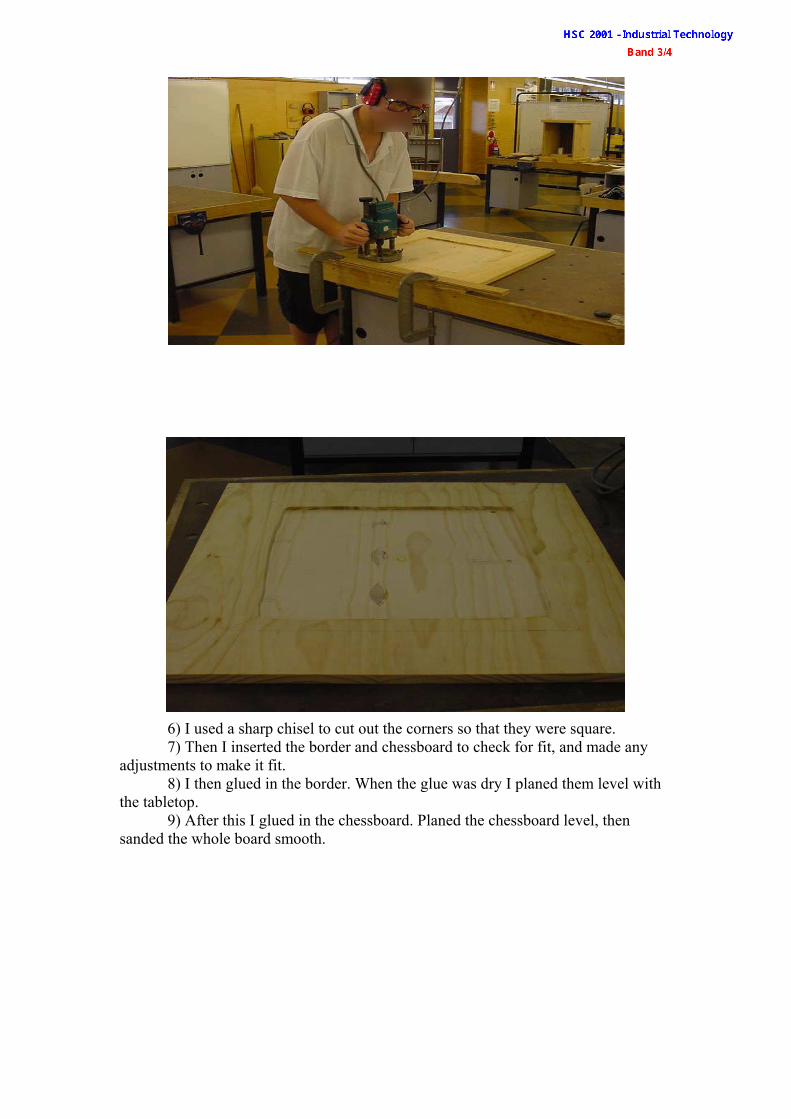
6) I used a sharp chisel to cut out the corners so that they were square. 7) Then I inserted the border and chessboard to check for fit, and made any adjustments to make it fit. 8) I then glued in the border. When the glue was dry I planed them level with the tabletop.
9) After this I glued in the chessboard. Planed the chessboard level, then sanded the whole board smooth.
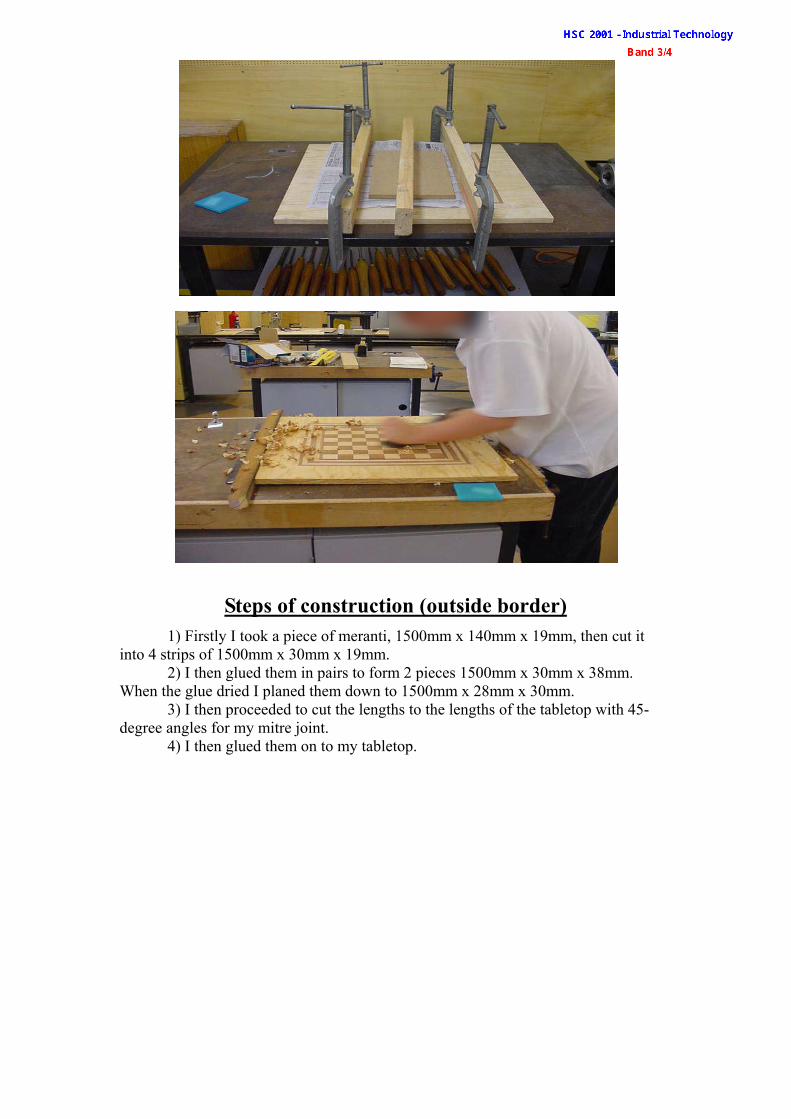
Steps of construction (outside border) 1) Firstly I took a piece of meranti, 1500mm x 140mm x 19mm, then cut it
into 4 strips of 1500mm x 30mm x 19mm. 2) I then glued them in pairs to form 2 pieces 1500mm x 30mm x 38mm.
When the glue dried I planed them down to 1500mm x 28mm x 30mm. 3) I then proceeded to cut the lengths to the lengths of the tabletop with 45-
degree angles for my mitre joint. 4) I then glued them on to my tabletop.
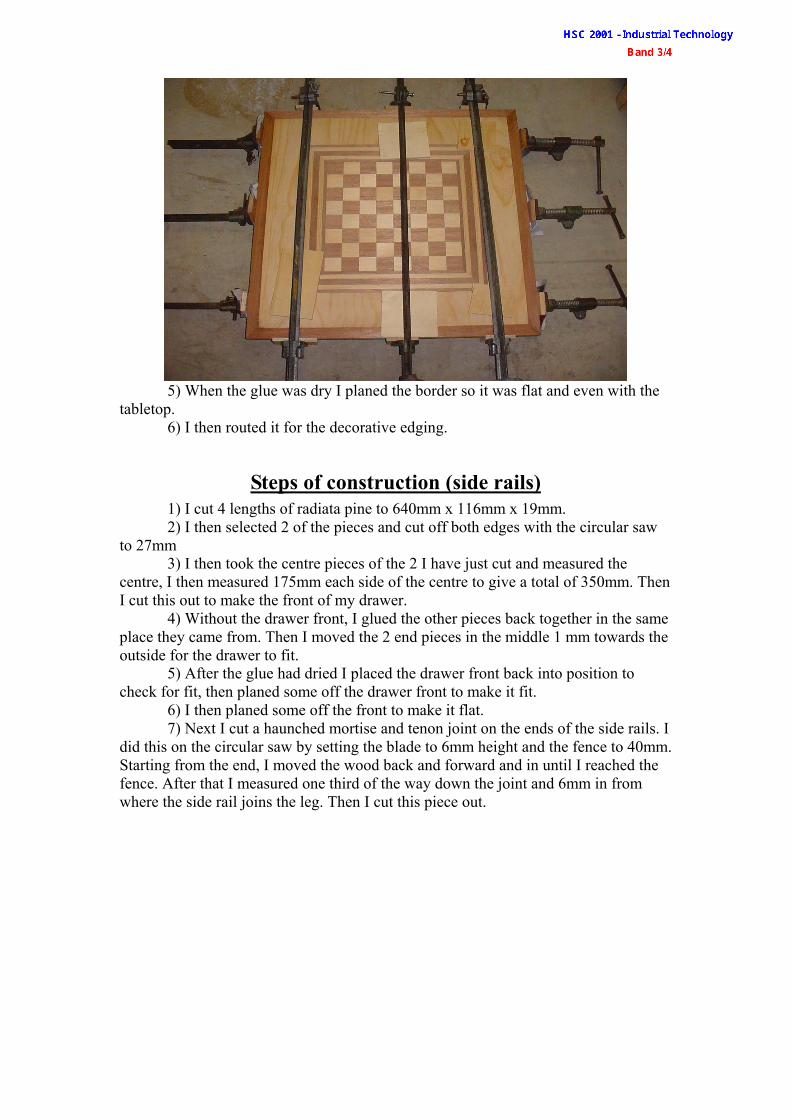
5) When the glue was dry I planed the border so it was flat and even with the tabletop. 6) I then routed it for the decorative edging.
Steps of construction (side rails) 1) I cut 4 lengths of radiata pine to 640mm x 116mm x 19mm. 2) I then selected 2 of the pieces and cut off both edges with the circular saw to 27mm
3) I then took the centre pieces of the 2 I have just cut and measured the centre, I then measured 175mm each side of the centre to give a total of 350mm. Then I cut this out to make the front of my drawer.
4) Without the drawer front, I glued the other pieces back together in the same place they came from. Then I moved the 2 end pieces in the middle 1 mm towards the outside for the drawer to fit.
5) After the glue had dried I placed the drawer front back into position to check for fit, then planed some off the drawer front to make it fit. 6) I then planed some off the front to make it flat. 7) Next I cut a haunched mortise and tenon joint on the ends of the side rails. I did this on the circular saw by setting the blade to 6mm height and the fence to 40mm. Starting from the end, I moved the wood back and forward and in until I reached the fence. After that I measured one third of the way down the joint and 6mm in from where the side rail joins the leg. Then I cut this piece out.

8) After cutting out the tenon part, I got a mortise gauge and marked on the legs 16mm in with a gap of 6mm between the 2 points. 6) I then measured from the top of the leg the one-third distance of the tenon and put a mark. 10) I used a 6mm drill bit to drill a hole in the middle of the two-thirds bit. 11) Then used a sharp 6mm chisel to cut out the mortise. 12) After this I used a tenon saw to cut down the one-third part of the line to 6mm deep, then used the 6mm chisel to cut out the haunched part. 13) Next I cut out two drawer rails. I measured the distance between the two rails which have the drawer fronts and added 5mm on each end for a housing joint. I used the circular saw to cut out the housing joint.
14) I then glued it all together.
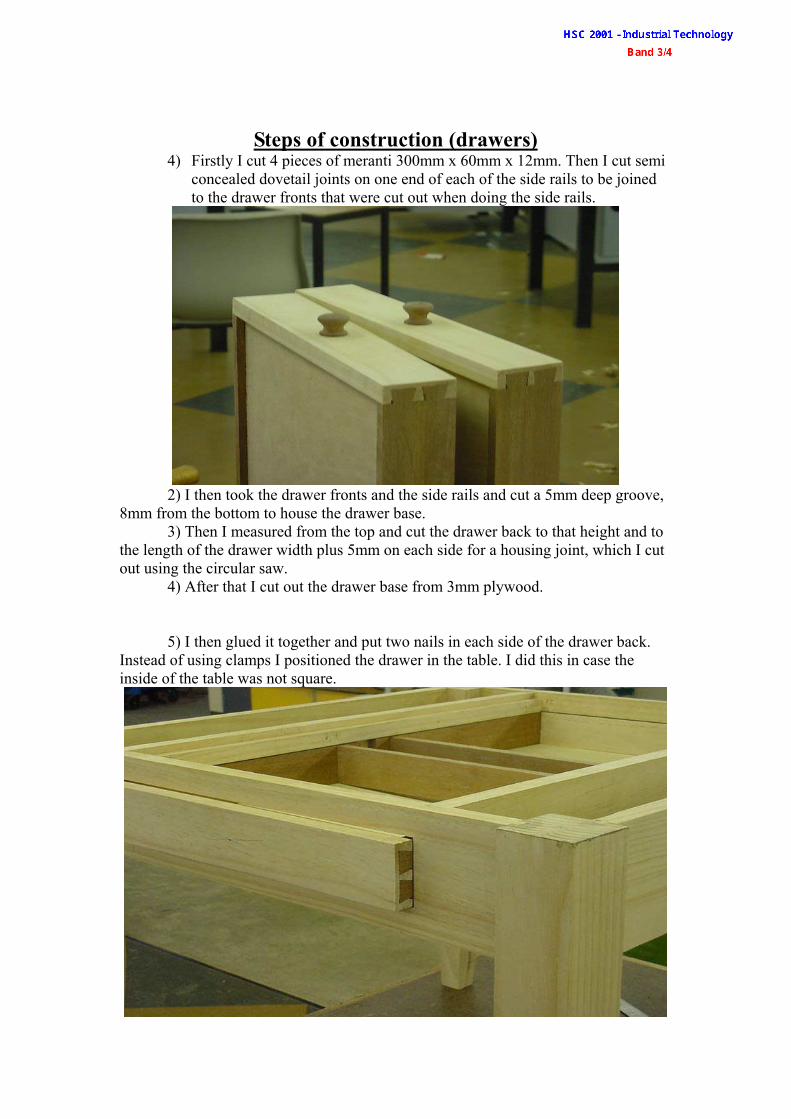
Steps of construction (drawers) 4) Firstly I cut 4 pieces of meranti 300mm x 60mm x 12mm. Then I cut semi
concealed dovetail joints on one end of each of the side rails to be joined to the drawer fronts that were cut out when doing the side rails.
2) I then took the drawer fronts and the side rails and cut a 5mm deep groove, 8mm from the bottom to house the drawer base. 3) Then I measured from the top and cut the drawer back to that height and to the length of the drawer width plus 5mm on each side for a housing joint, which I cut out using the circular saw. 4) After that I cut out the drawer base from 3mm plywood.
5) I then glued it together and put two nails in each side of the drawer back.
Instead of using clamps I positioned the drawer in the table. I did this in case the inside of the table was not square.
6) I then used the wood lathe to turn up some drawer handles using meranti to make them stand out against the pine drawer fronts. I made the end of the drawer handles 16mm in diameter so I could drill a hole in the drawer front using a 16mm spade drill bit. Then I glued them in.
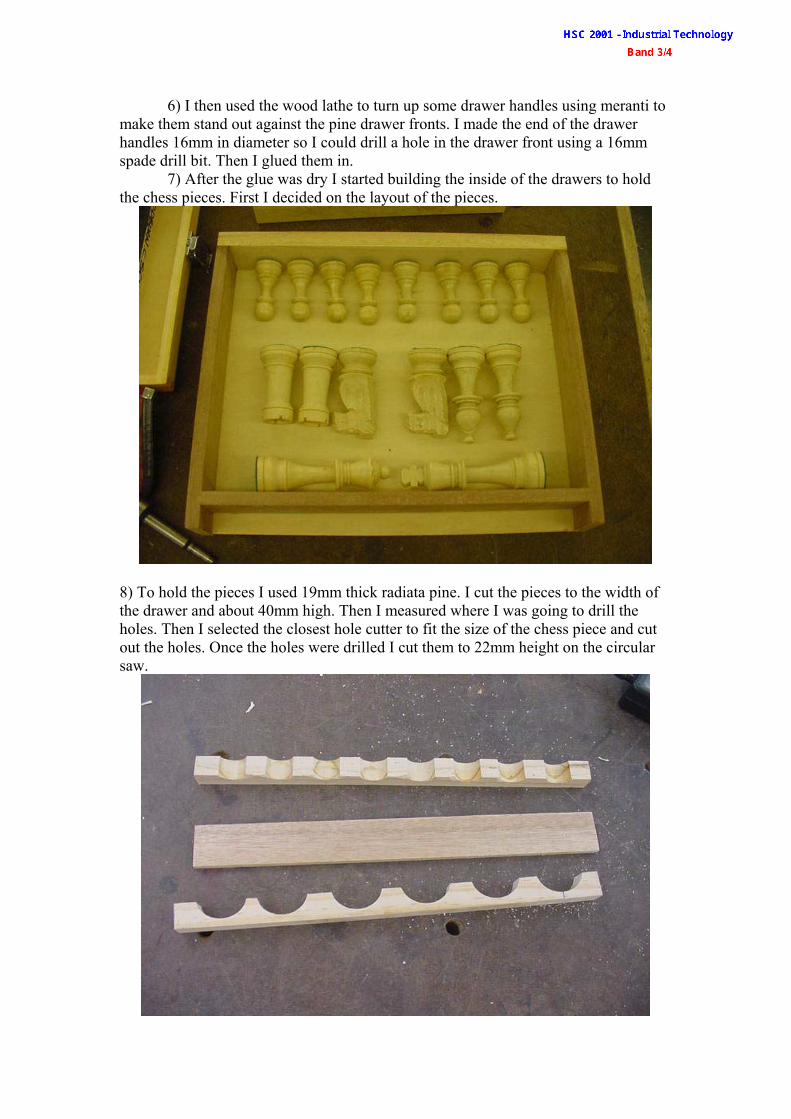
7) After the glue was dry I started building the inside of the drawers to hold the chess pieces. First I decided on the layout of the pieces.
8) To hold the pieces I used 19mm thick radiata pine. I cut the pieces to the width of the drawer and about 40mm high. Then I measured where I was going to drill the holes. Then I selected the closest hole cutter to fit the size of the chess piece and cut out the holes. Once the holes were drilled I cut them to 22mm height on the circular saw.

9) I used 7 mm thick meranti cut to the width of the drawer and to 40mm height for the spacing between the inserts. 10) For the king and the queen I inserted all of the other pieces and measured the distance between the back of the drawer and the back spacer. I had about 80mm of space between the king and queen so I cut up 4 pieces of meranti 75mm x 65mm x 19mm then glued 2 pieces together so there was 2 pieces 38mm thick. 11) When all the holes were drilled I cut out pieces of green felt to fit the holes and glued them in. 12) I then glued all of the pieces in.
Attaching the tabletop to the carcass. The tabletop was connected to the carcass using screws. Firstly I made a jig to use, so that I would drill on the correct angle.
The jig was used on the two sides that did not have the drawers on them, it was used by clamping the jig to the side and drilling with a 10mm drill bit to a determined depth. This was done so that the screw head would not be protruding. I then drilled the rest of the way through with a 5mm drill bit. For the other two sides I just used the 10mm drill bit to start off then drilled the rest of the way with the 5mm drill bit. After this was done I positioned the tabletop upside down with the carcass on top, then I used a 2-inch nail to start the hole for the screw and screwed it on using 1.5-inch screws.

Finishing the table.
To finish the table I firstly sanded the whole table with 80 grit garnet paper, the 120 grit, and then 240 grit, then 400 grit. After this I used a damp cloth to wipe over the table and raise the grain then sanded it with 400 grit paper again. After all the sanding was done I put two coats of lacquer on it using 50/50 lacquer and lacquer thinner. When the lacquer was dry I rubbed Scandinavian teak oil over the entire job using 400 grit garnet paper.
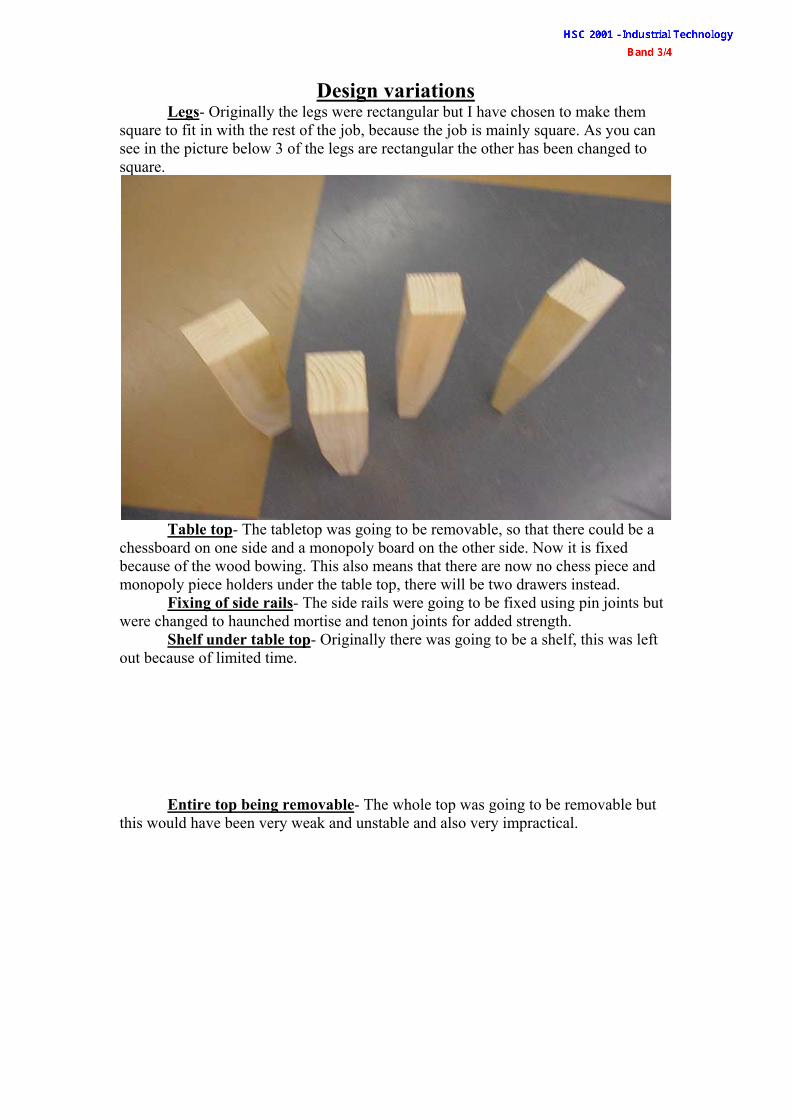
Design variations Legs- Originally the legs were rectangular but I have chosen to make them square to fit in with the rest of the job, because the job is mainly square. As you can see in the picture below 3 of the legs are rectangular the other has been changed to square.
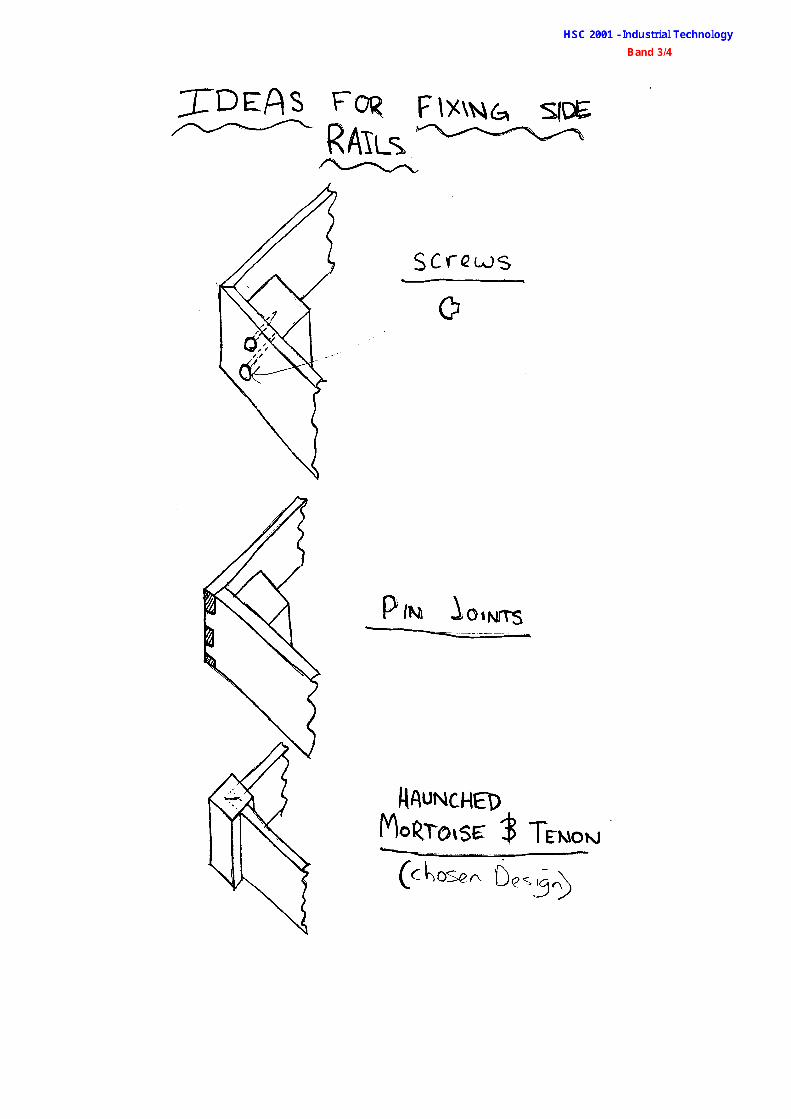
Table top- The tabletop was going to be removable, so that there could be a chessboard on one side and a monopoly board on the other side. Now it is fixed because of the wood bowing. This also means that there are now no chess piece and monopoly piece holders under the table top, there will be two drawers instead. Fixing of side rails- The side rails were going to be fixed using pin joints but were changed to haunched mortise and tenon joints for added strength. Shelf under table top- Originally there was going to be a shelf, this was left out because of limited time. Entire top being removable- The whole top was going to be removable but this would have been very weak and unstable and also very impractical.