Embed Size (px)
Citation preview
Table of Contents
Chapter 1: Perspective Drawing .................................................................................................3
Traveling to the Third Dimension............................................................................................3
Getting a Little Perspective on Things .....................................................................................5
Chapter 2: Perspective Drawing and Relative Size .....................................................................6
Chapter 3: Perspective Drawing and Overlapping ......................................................................8
Chapter 4: Light and Shadow ....................................................................................................11
Anatomy of the Form Shadow ..............................................................................................11
Anatomy of the Cast Shadow ................................................................................................13
Chapter 5: Atmospheric Perspective ........................................................................................15
Chapter 6: The Picture Plane ....................................................................................................17
Chapter 7: The Horizon Line and the Viewpoint .......................................................................19
Chapter 8: The Vanishing Point ................................................................................................22
About Deborah Mends .............................................................................................................24

Chapter 1: Perspective Drawing
Perspective drawing is about trying to create an illusion of depth; in other words, making a flat, two-dimensional drawing look like it is in fact three-dimensional. Most art historians credit the Italian Leon Battista Alberti with inventing the rules of perspective. In his very influential 15th century work Della Pittura (“On Painting”), this Renaissance theorist and artist set out to give an explication of how to paint, saying that the picture represented a bit of the world, as if the observer were looking at it through a window. This is a very important concept that will be useful to us later on in learning how to do a realistic drawing. This is also a good reason why the very word “perspective” means, approximately, to “see clearly” or to “see through”. Click the live links below in this article to find out more about perspective.
Traveling to the Third Dimension
There are several ways, in fact, to get to the Third Dimension. Scientist Michael Kalloniatis and Charles Luu identify 6 ways that we appreciate depth, even with only one eye: relative size, overlapping subjects, use of light and shadow, aerial perspective, linear perspective and...um...monocular movement parallax. 1. Relative size. This is the art of drawing shapes in such a way that they diminish in size as they get further away from us, also called diminuition.. 2. Overlapping subjects. This consists of drawing one subject partly overlapping another; the Overlapped will appear to be further back in space than the Overlapping. 3. By adroitly employing light and shadow. Draw a circle and it looks like a circle; but place shadow on and around it right, and you have a sphere. 4. Atmospheric perspective. Theoretically, in perspective drawing this means that things seen at a distance seem different because we are looking at them through the filter of the atmosphere itself. For color drawings, darker, warm colors and brilliant luminosities create high contrast in the foreground while muted cool colors keep contrast low in the background, a technique called chromatic perspective. Values also get in the game.
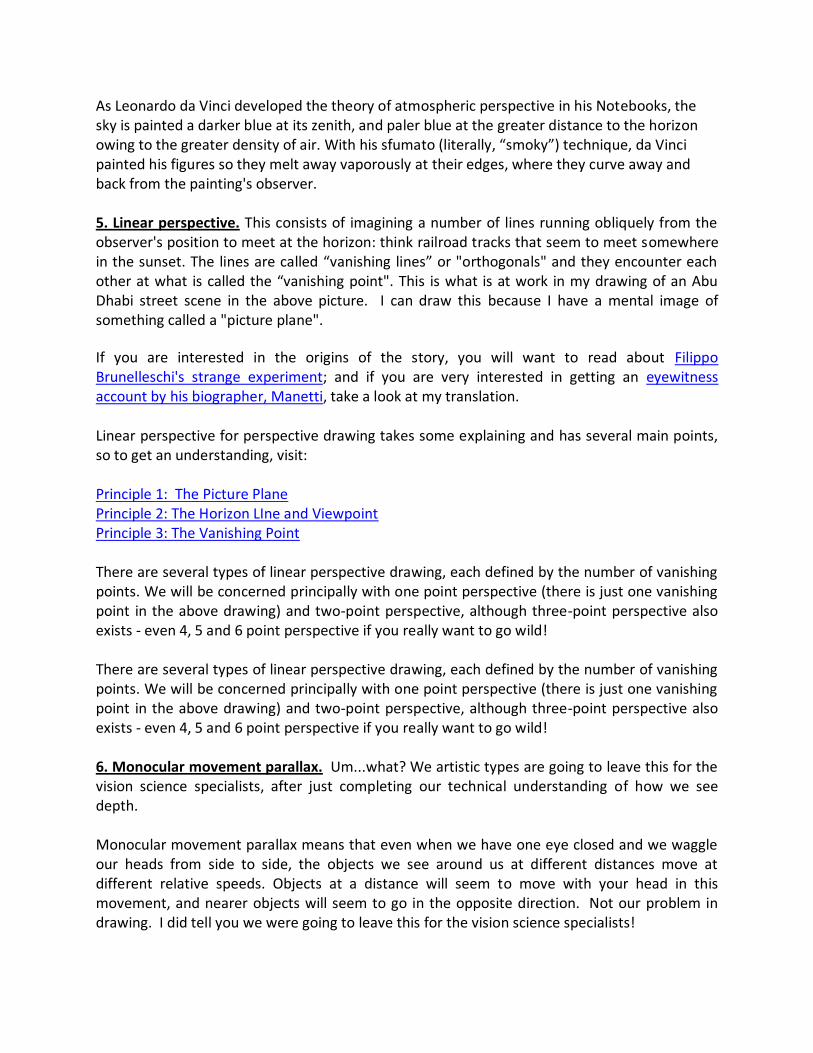
As Leonardo da Vinci developed the theory of atmospheric perspective in his Notebooks, the sky is painted a darker blue at its zenith, and paler blue at the greater distance to the horizon owing to the greater density of air. With his sfumato (literally, “smoky”) technique, da Vinci painted his figures so they melt away vaporously at their edges, where they curve away and back from the painting's observer. 5. Linear perspective. This consists of imagining a number of lines running obliquely from the observer's position to meet at the horizon: think railroad tracks that seem to meet somewhere in the sunset. The lines are called “vanishing lines” or "orthogonals" and they encounter each other at what is called the “vanishing point". This is what is at work in my drawing of an Abu Dhabi street scene in the above picture. I can draw this because I have a mental image of something called a "picture plane".
If you are interested in the origins of the story, you will want to read about Filippo Brunelleschi's strange experiment; and if you are very interested in getting an eyewitness account by his biographer, Manetti, take a look at my translation. Linear perspective for perspective drawing takes some explaining and has several main points, so to get an understanding, visit: Principle 1: The Picture Plane Principle 2: The Horizon LIne and Viewpoint Principle 3: The Vanishing Point There are several types of linear perspective drawing, each defined by the number of vanishing points. We will be concerned principally with one point perspective (there is just one vanishing point in the above drawing) and two-point perspective, although three-point perspective also exists - even 4, 5 and 6 point perspective if you really want to go wild! There are several types of linear perspective drawing, each defined by the number of vanishing points. We will be concerned principally with one point perspective (there is just one vanishing point in the above drawing) and two-point perspective, although three-point perspective also exists - even 4, 5 and 6 point perspective if you really want to go wild! 6. Monocular movement parallax. Um...what? We artistic types are going to leave this for the vision science specialists, after just completing our technical understanding of how we see depth. Monocular movement parallax means that even when we have one eye closed and we waggle our heads from side to side, the objects we see around us at different distances move at different relative speeds. Objects at a distance will seem to move with your head in this movement, and nearer objects will seem to go in the opposite direction. Not our problem in drawing. I did tell you we were going to leave this for the vision science specialists!

In this 1914 photo painters stand or sit on wires on New York's Brooklyn Bridge.
Getting a Little Perspective on Things
Rules of perspective weren't always so clear. Although the Greeks and Romans have an understanding of how to create visual depth for realistic drawing, for curious reasons the progress made was forgotten in medieval perspective. Then Giotto and the Italian Trecento came along, and the lost knowledge began to be found again, culminating in the triumph of classical perspective in the 15th century with Alberti. Then came conceits in perspective drawing such as the mind-boggling anamorphosis that certain street painters even today still fascinate us with.

Chapter 2: Perspective Drawing and Relative Size
One of the simplest and most effective ways to achieve an effect of perspective drawing is to employ the technique of relative size, or subjects that diminish in size the further away they are from the observer. This is something we are all familiar with, and that even children learn pretty early on to use in their own simple drawings. It works like this. When we look at the world around us, we judge the relative size of the objects we see or similar objects in terms of our prior or present experience of them. An example. You are sitting in an armchair looking at the cat and thinking you would like to pick him up. Since he is a cat, as soon as you bend over with your arms outstretched, he is going to yawn, stretch and start walking away from you with a snap of this tale and a backward slant to the ears. If you are allergic to felines he will do the contrary, and jump up on your lap and adore you, but that's another story. As you look at the cat walking away, you get an image on your retina that looks something like this:

And you think to yourself, there's the tail end of that cat. Then you get another retinal image that looks like this:
Since it looks familiar, you say to yourself, gee, that smaller, but is the same cat. And then you get this on your retina:
And you think, that's even smaller but it's still that same stupid cat that I didn't want to pick up anyway since it would have got hair all over me. The fact of you knowing that they all are the same cat is referred to as size constancy. Further, you interpret the series of three smaller and smaller images as meaning that the cat is moving further and further away from you into the distance. This is why, as well, if you see a very small cat, especially compared to a very large dog…
You will interpret the Is being distant (and of little interest to you) and the dog is being near (and of some concern to you) because of their relative size. And as we mentioned, this principle is so much a part of everyday experience that even children adopt technique early on. Just goes to show you that perspective can be child's play!

Chapter 3: Perspective Drawing and Overlapping
For both depth drawing and understanding our visual world, perspective drawing and overlapping is a pretty important concept. In fact it's actually difficult to avoid, since objects in parts of objects naturally block our site of something all the time. So how does it work? Let's begin by taking a look at the drawing below, in which the two parrots are on the same plane.
This birdseye view of where they are sitting shows their physical relationship to you, the observer, here to learn how to draw.
In the drawing below, however, are the parents on different planes, with one further away? We would think so, because we understand from the concept of relative size that bigger objects are nearer and smaller objects are further away
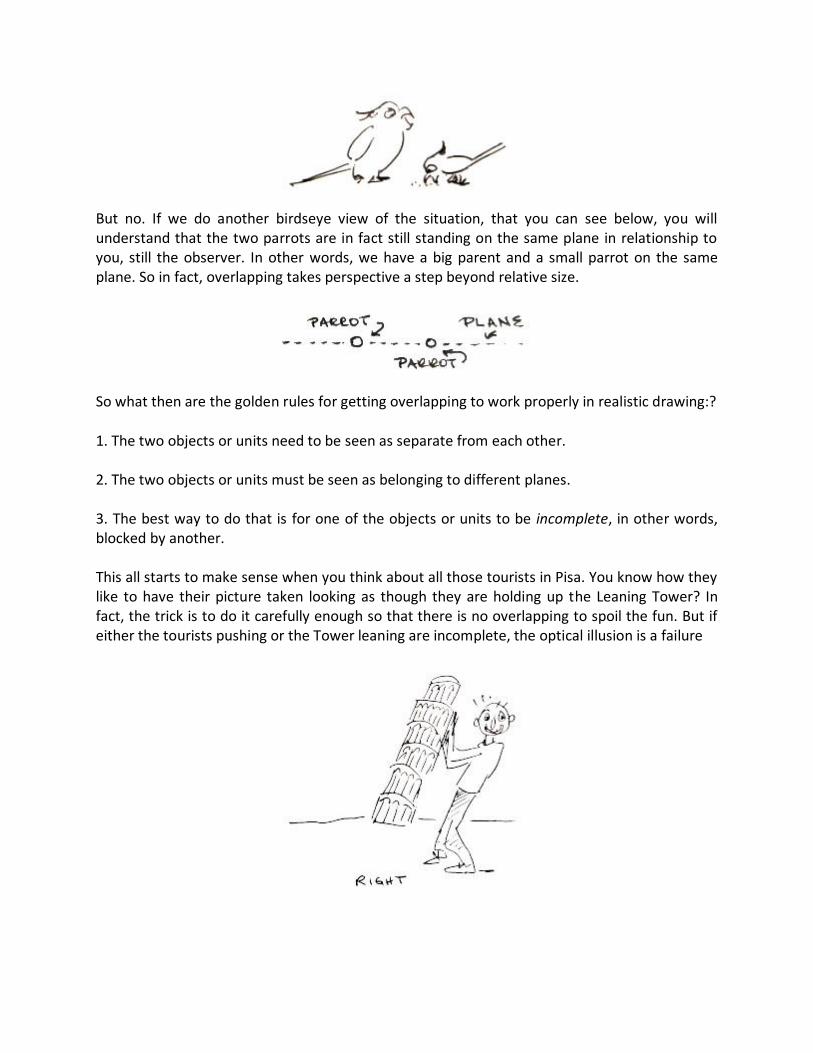
But no. If we do another birdseye view of the situation, that you can see below, you will understand that the two parrots are in fact still standing on the same plane in relationship to you, still the observer. In other words, we have a big parent and a small parrot on the same plane. So in fact, overlapping takes perspective a step beyond relative size.
So what then are the golden rules for getting overlapping to work properly in realistic drawing:? 1. The two objects or units need to be seen as separate from each other. 2. The two objects or units must be seen as belonging to different planes. 3. The best way to do that is for one of the objects or units to be incomplete, in other words, blocked by another. This all starts to make sense when you think about all those tourists in Pisa. You know how they like to have their picture taken looking as though they are holding up the Leaning Tower? In fact, the trick is to do it carefully enough so that there is no overlapping to spoil the fun. But if either the tourists pushing or the Tower leaning are incomplete, the optical illusion is a failure

I really do have to make it to Pisa so I can try this out for myself.
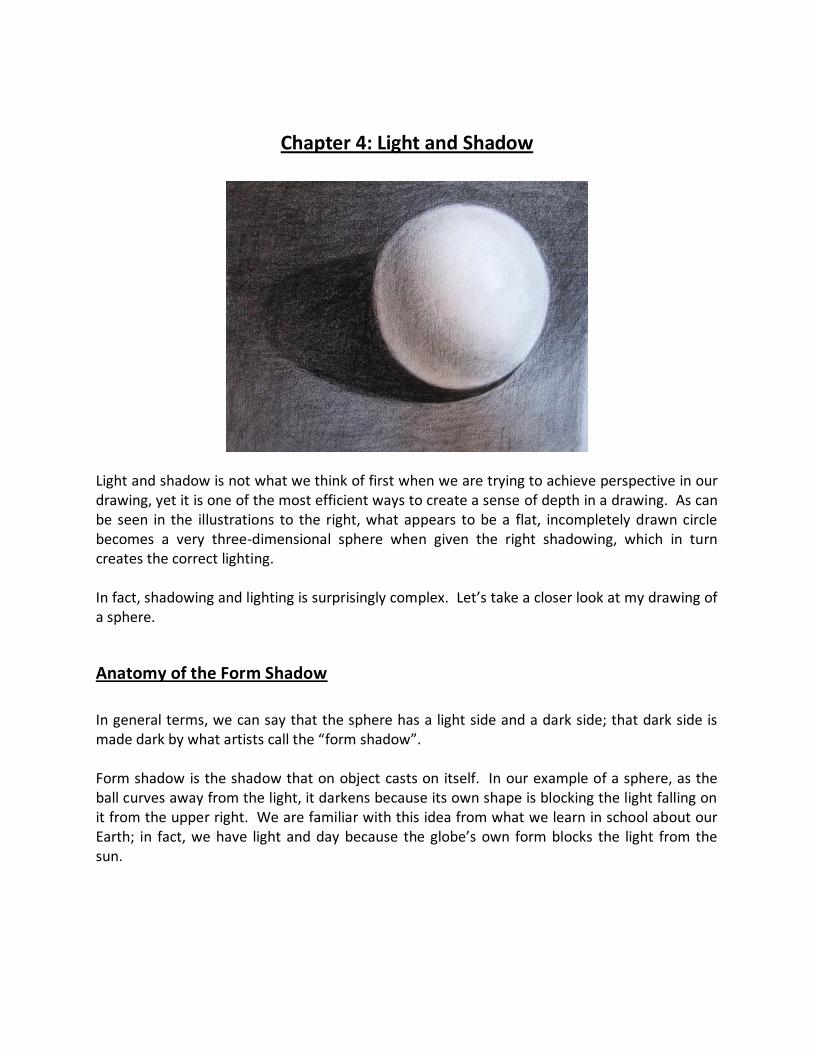
Chapter 4: Light and Shadow
Light and shadow is not what we think of first when we are trying to achieve perspective in our drawing, yet it is one of the most efficient ways to create a sense of depth in a drawing. As can be seen in the illustrations to the right, what appears to be a flat, incompletely drawn circle becomes a very three-dimensional sphere when given the right shadowing, which in turn creates the correct lighting. In fact, shadowing and lighting is surprisingly complex. Let’s take a closer look at my drawing of a sphere.
Anatomy of the Form Shadow
In general terms, we can say that the sphere has a light side and a dark side; that dark side is made dark by what artists call the “form shadow”. Form shadow is the shadow that on object casts on itself. In our example of a sphere, as the ball curves away from the light, it darkens because its own shape is blocking the light falling on it from the upper right. We are familiar with this idea from what we learn in school about our Earth; in fact, we have light and day because the globe’s own form blocks the light from the sun.

Let’s go back to the sphere. We see a shape because the form is created by four degrees of either light or shadow, that are called “values”: the highlight, the mid-tone (or halftone), the core shadow and the reflected light.
The highlight is where the light hits the object most directly, and in your drawing will look like a spot of white; as you work on your drawing, be careful to keep that place on the paper pristine clean from the beginning so that white will be as brilliant as you can make it. The mid-tone or halftone is where the light grades away from the highlight, and where the object is curving away from the light source. Then comes the core of the form shadow, the darkest dark on the sphere.

Last is the tricky bit: the reflected light. You will have a natural tendency to want to fill this area in with the same black as the core shadow, carrying the core shadow right to the edge of the object. However, there will be light bouncing from the tabletop back up into the shadow in most usual lighting conditions, and it’s your job to look carefully and see it. This is what will make your drawing look like one done by a professional, and really make the object have depth. It is key as you draw to make these four values of the light and shadow softly grade into each other, yet to create four distinctly different degrees of light and shadow; in order of light to dark, the highlight will be brightest, then the halftone of the lit side, then the area of the reflected light, then the core shadow; the halftone and the area of reflected light should be different values.
Anatomy of the Cast Shadow
Cast shadow is the shadow created when one object blocks the light to another. In our example of the sphere, the cast shadow is created on the tabletop by the sphere blocking the light to the tabletop. If we think about astronomy, the shadow created on the Earth during an eclipse by the moon blocking the sun’s light is one big cast shadow. Therefore, when drawing an object, bear in mind that the cast shadow will fall under the dark side of the object away from the light source. Like form shadow, cast shadow is not consistently black. It will be at its darkest where it meets the object, and grade away into a grey as it gets further from it.
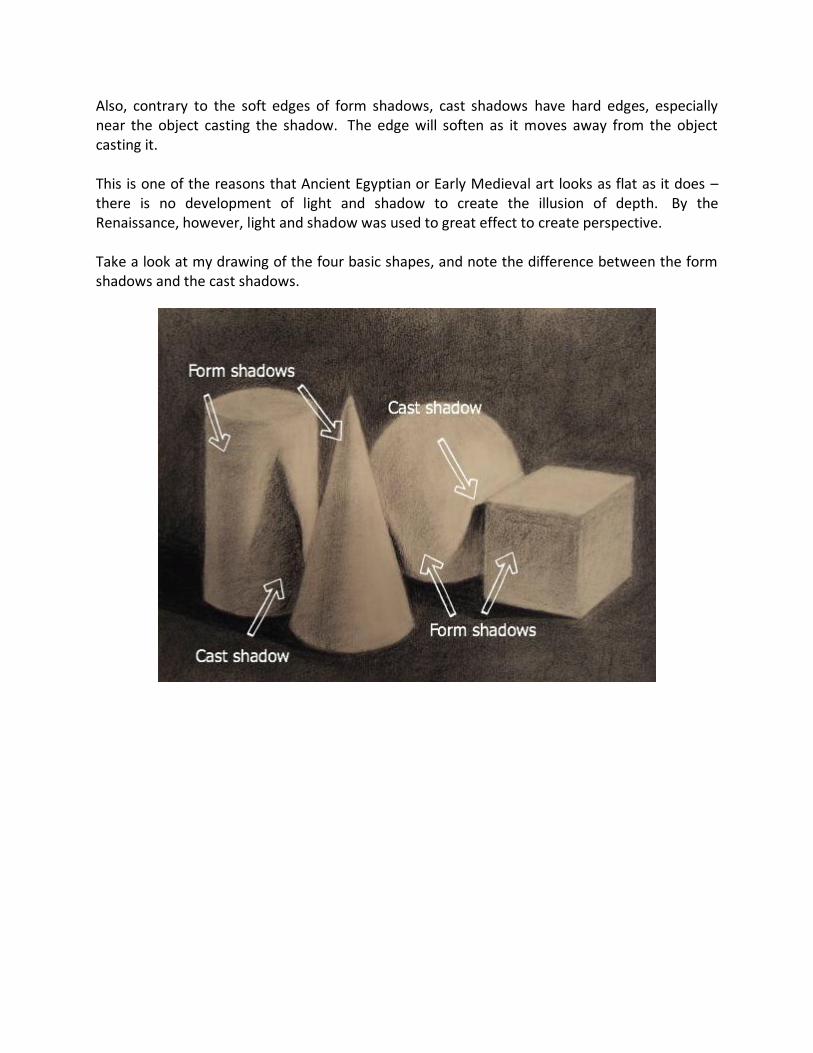
Also, contrary to the soft edges of form shadows, cast shadows have hard edges, especially near the object casting the shadow. The edge will soften as it moves away from the object casting it. This is one of the reasons that Ancient Egyptian or Early Medieval art looks as flat as it does – there is no development of light and shadow to create the illusion of depth. By the Renaissance, however, light and shadow was used to great effect to create perspective. Take a look at my drawing of the four basic shapes, and note the difference between the form shadows and the cast shadows.

Chapter 5: Atmospheric Perspective
What we call aerial or atmospheric perspective is generally thought to have been developed by Leonardo da Vinci, although artists before him already knew the principal very well. Important mostly for landscape drawing, it is based on the idea that there is an optical effect at work when we look at distant objects outdoors. Close to the Earth’s surface is a mix of dust and moisture that creates a kind of mist that sends light rebounding in all directions; this scattered light causes distant values to lose intensity, and therefore contrast. Therefore, in order to create an effect of depth in your landscape drawing, you need to make the objects close up have sharply defined outlines and a dark value. Distant objects, to the contrary, will need to be blurred and softened, and your values need to grade from the darks in the foreground to palest values at the horizon. Attention to this type of perspective will create a beautiful, mystical feel to your work. If you decide to wander into the realm of color or water-soluble pencils, you will need to know the second principle of atmospheric perspective, after values: color. Da Vinci noted that blue light penetrates the Earth’s atmospheric mist most easily, and indeed it is what gives us the impression that the sky is blue. It also serves to give objects in the distance a bluish look, which Leonardo observed and put to service in his paintings, to great effect.
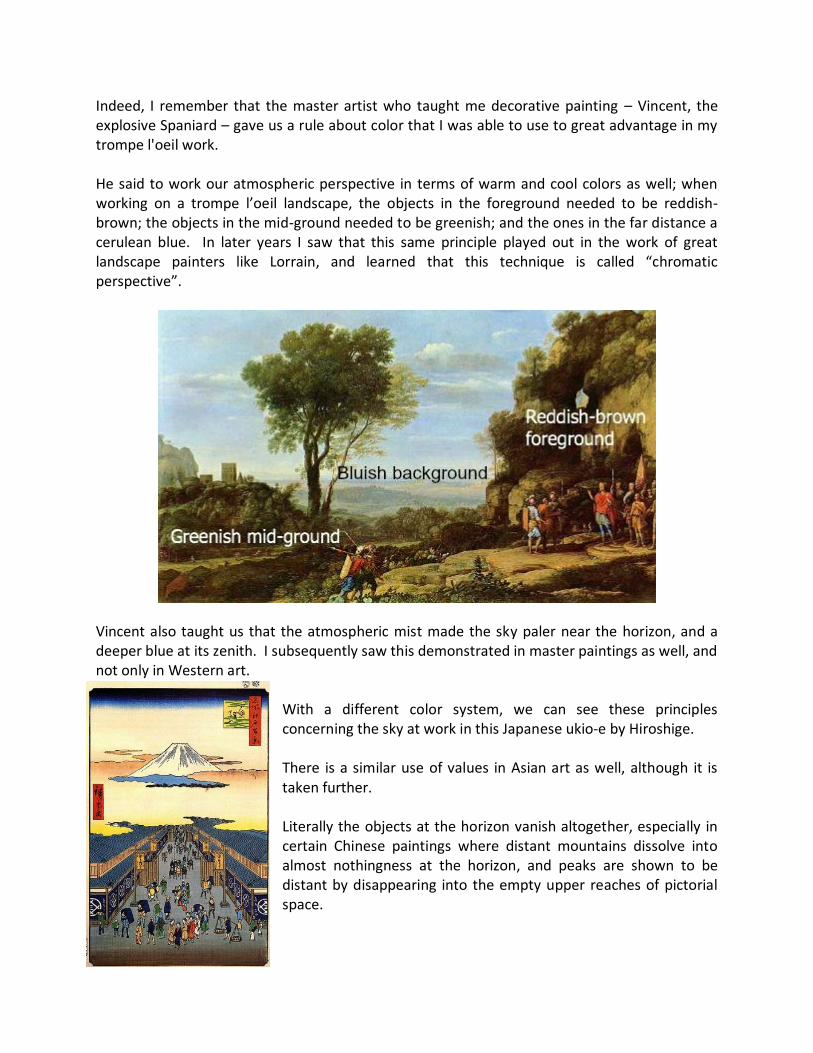
Indeed, I remember that the master artist who taught me decorative painting – Vincent, the explosive Spaniard – gave us a rule about color that I was able to use to great advantage in my trompe l'oeil work. He said to work our atmospheric perspective in terms of warm and cool colors as well; when working on a trompe l’oeil landscape, the objects in the foreground needed to be reddish-brown; the objects in the mid-ground needed to be greenish; and the ones in the far distance a cerulean blue. In later years I saw that this same principle played out in the work of great landscape painters like Lorrain, and learned that this technique is called “chromatic perspective”.
Vincent also taught us that the atmospheric mist made the sky paler near the horizon, and a deeper blue at its zenith. I subsequently saw this demonstrated in master paintings as well, and not only in Western art.
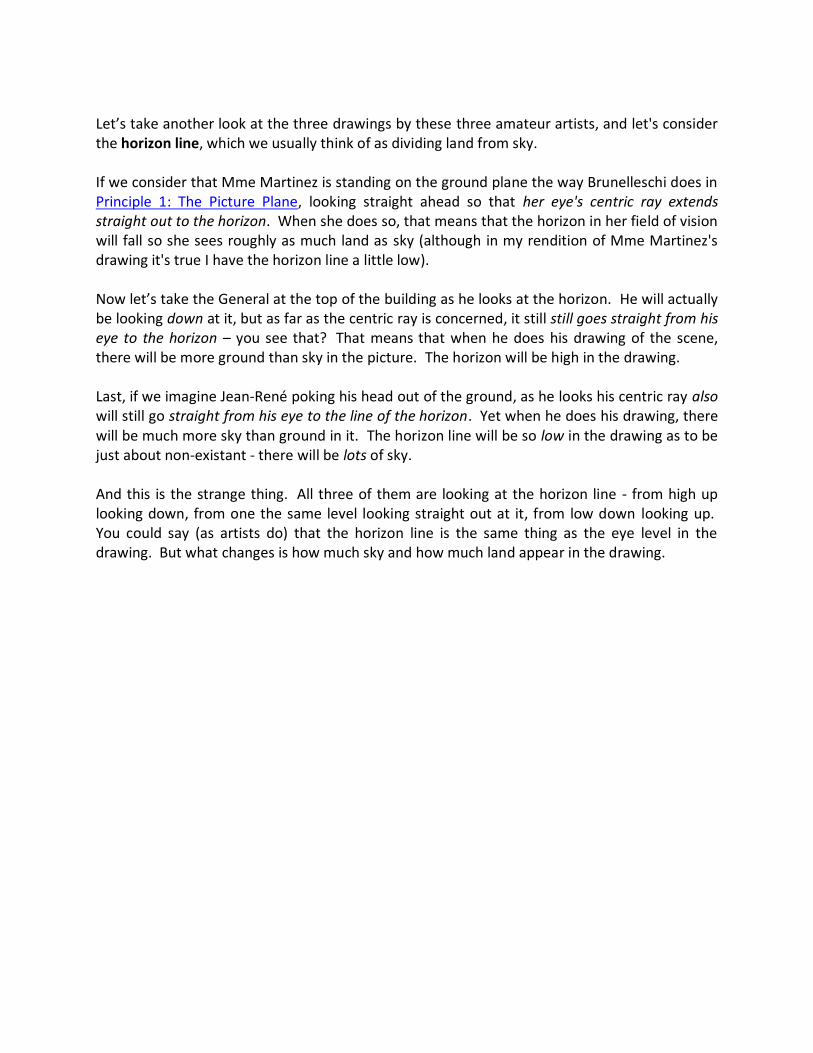
With a different color system, we can see these principles concerning the sky at work in this Japanese ukio-e by Hiroshige. There is a similar use of values in Asian art as well, although it is taken further. Literally the objects at the horizon vanish altogether, especially in certain Chinese paintings where distant mountains dissolve into almost nothingness at the horizon, and peaks are shown to be distant by disappearing into the empty upper reaches of pictorial space.

Chapter 6: The Picture Plane
The picture plane is the single most important principle of linear perspective, to my mind, and probably the one that is least referred to in most explanations of linear perspective. It all began in early 15th century Florence when an artist and architect called Filippo Brunelleschi came up with a bizarre experiment, probably to prove how much better he was than his rival Ghiberti. In so doing, he rediscovered long-lost rules of realistic drawing that an art theorist of the time, Leon Battista Alberti, developed into a full theory of how an artist should perceive his world to create realistic art: "On Painting". I have summarized the ideas in the drawing below.

Note the most important fact of the illustration: the artist is looking at his subject as if he were looking through a pane of glass. This “pane of glass” is called the “picture plane”. If we imagine a line going straight from the artist’s eye to his subject, that straight line is called the "centric ray”. He stands on what we call the “ground plane”. As the artist looks at his subject, its smaller, scale image is reflected by rays of light rebounding off the subject and appearing on the picture-plane, where he can mark it there, just like you can look out a window in your home and use a felt-tip pen to trace the outline of your neighbor's house on the glass. If you replace that sheet of glass with a sheet of transparent paper, you finish with – a realistic drawing. And that's precisely how an artist works. To complete our understanding of this illustration, note that where the picture-plane meets the ground plane is called the “ground line”, and that the artist's “field of vision” is usually thought to be about a 90° angle on either side of the centric ray. It is generally thought that a realistic picture can portray about a 30° angle on either side of the centric ray.

Chapter 7: The Horizon Line and the Viewpoint
The notion of the “horizon line” in relation to the “viewpoint” is a tricky thing to understand. I'm stealing from my free drawing lessons here to tell you about this. We're going to imagine we have three people, whom I have drawn above: from left to right, Mme Martinez, who is a concierge in an apartment building in Paris; retired General Bessaignet, who lives on the fifth floor of that building; and Jean-René, the bank thief, who is digging a tunnel under the building to the bank behind it. All three of them love to draw. We are going to imagine it's Bastille Day and the General looks at the window at the Eiffel Tower and decides to draw it; and his drawing looks like this:
Mme Martinez, the concierge, is admiring the fireworks display as she stands in the street before the building. She whips out a drawing pad and draws the Eiffel Tower like this:

Jean-René is digging his tunnel underground, but he enjoys a good fireworks show so he shoves a manhole cover aside, pokes his head out, and draws a picture of the Eiffel Tower too:
Why so different? Each person has a different viewpoint; the General is one the fifth floor and looks down on the Tower; Mme Martinez is standing on the ground, and Jean-René is looking up from ground level. Take a look at the picture below, in which you can see they each have a different field of vision; the middle arrow in each field of vision is the centric ray we talked about with regard to Principle 1: The Picture Plane.
Let’s take another look at the three drawings by these three amateur artists, and let's consider the horizon line, which we usually think of as dividing land from sky. If we consider that Mme Martinez is standing on the ground plane the way Brunelleschi does in Principle 1: The Picture Plane, looking straight ahead so that her eye's centric ray extends straight out to the horizon. When she does so, that means that the horizon in her field of vision will fall so she sees roughly as much land as sky (although in my rendition of Mme Martinez's drawing it's true I have the horizon line a little low). Now let’s take the General at the top of the building as he looks at the horizon. He will actually be looking down at it, but as far as the centric ray is concerned, it still still goes straight from his eye to the horizon – you see that? That means that when he does his drawing of the scene, there will be more ground than sky in the picture. The horizon will be high in the drawing. Last, if we imagine Jean-René poking his head out of the ground, as he looks his centric ray also will still go straight from his eye to the line of the horizon. Yet when he does his drawing, there will be much more sky than ground in it. The horizon line will be so low in the drawing as to be just about non-existant - there will be lots of sky. And this is the strange thing. All three of them are looking at the horizon line - from high up looking down, from one the same level looking straight out at it, from low down looking up. You could say (as artists do) that the horizon line is the same thing as the eye level in the drawing. But what changes is how much sky and how much land appear in the drawing.

Chapter 8: The Vanishing Point
For demonstration of the vanishing point, we are going to take one of my favorite artists in the world for an example, the one who, to my mind, first started seriously using linear perspective, thereby changing Western art and bringing it out of the Middle Ages and into the Renaissance. I’m talking about Giotto. In this beautiful painting, he has depicted a room that is basically a box, with us as spectators looking into the room as if the fourth wall were virtually not there. Indeed, that transparent fourth wall corresponds to the picture plane. Let’s see if we can figure out first where the horizon line falls.

We do that by extending the diagonal lines of the picture to see where they meet, as you can see in the picture above. These lines that converge are called "orthogonals", or, um, converging lines. From everywhere in the picture, they seem to meet in one place – this place is called the “vanishing point”. Now the important thing to know is that these converging lines always meet on the horizon line. Think about a classic drawing of a road going to a horizon, or railroad tracks going to the horizon. Just like with our orthogonals in the example above, they extend off into the distance to meet right on the horizon line, where they vanish. So now we have located that place where they vanish, we need only draw a horizontal line to mark the horizon, which Giotto places conveniently at the top of the garden wall; although to be a little more serious, he did that to greatly strengthen the composition of his painting. In Giotto's composition, note he also had the lines converge at their vanishing point on the saint's face, to powerfully make Francis the central focus.
And now we have this information, can you tell whether Giotto was standing, sitting, lying down or on a ladder when he did the picture? Do you need to take another look at Principle 2: The Horizon Line and Viewpoint to be sure? I would say he was standing on a ladder to have his eyes on the same level as that of the saint's, which as we have said, fall right on the horizon line!

About Deborah Mends
I'm Deborah Mends, an American-in-Paris (and Brittany) who has been living and loving art in France for thirty years.
I began by earning French State certification to paint faux marble, faux wood and trompe l'oeil. I worked for a time in London and Paris for private clients and interior designers. One day I was asked to design how to paint the walls of a church crypt to illustrate an ancient Biblical text. That project was a turning-point for me; I started wondering if I could improve my drawing skills to do more creative projects. What followed was years of training as intensive as my earning a living and raising two kids permitted. I was lucky enough to take classes in Paris at top schools for classical art training, like Boulle and Duperré. Then, I spent three full-time years studying perspective, life drawing, anatomy, composition, drawing and painting at the Ateliers de Beaux-Arts de Paris, each year completed by presentation of my portfolio to a jury to get into the next year. I also did a lot of “atelier” time with several different master artists, a peculiarly European learning method. This means that after presenting my portfolio, the master artists accepted my working independently under them in their own studios. I gravitated to master artists specialized in early painting and drawing techniques, a relatively small circle in Paris. The French learning system is not made for the faint of heart. I learned about humility and compassion the hard way. As a teacher, it means today I know the primordial importance of patience and caring in bringing out the qualities that lie in us all. Culture vulture, lover of academic research and freelance translator for major art museums in France and abroad, I not only burn to teach others how to draw, but also to share information on famous artists and their work. It's a scientific fact that everyone is creative, and I believe that the easiest and fastest route to opening it up is through drawing - because it's a skill that anyone can learn, just like anyone can learn to read.

Today, I offer drawing instruction in my Parisian art studio near rue Daguerre., as well as in Brittany and the UAE. Combining fifteen years of classical art techniques learned directly from masters in France with what we now know about how the mind learns, I can guarantee that my live instruction method will work to get you drawing realistically - and within a week of instruction - even if you are persuaded that you are not creative at all. Please visit the Deborah Mends Art website (www.howtodrawjourney.com), the Famous Artists Fan Club (www.famousartistsfanclub.com), Deborah’s Facebook page (www.facebook.com/deborahmends4art), or follow her on Pinterest (pinterest.com/deborahmends/) or Twitter ( @AtelierMends)