Embed Size (px)
Citation preview

SPARC Enterprise T3-2 Server Installation Guide
Node ID: 32852572
Document Revision: 6
Effective Date: September, 2011
When printed, this is NOT a controlled document

Oracle SPARC Enterprise T3-2 Server
Installation Guide
Statement of Manufacturer’s ResponsibilityThe manufacturer, installer or importer will be responsible for the safety, reliability, and performance of the equipment only if:
Installation, modifications, adjustments, changes, or repairs are performed by certified service personnel.
The electrical installation of the site in which the equipment is used is according to an applicable safety standard (UL, CSA, IDE/VDE).
The equipment is used according to the instructions provided in the appropriate User, Application, and Service Documentation Sets
Limitation of Remedies and Damages
In no event will Agfa-Gevaert N.V., its parents, subsidiaries or any of the licensors, directors, officers, employees or affiliates of any of the foregoing be liable to you for any consequential, incidental, indirect, or special damages whatsoever (including, without limitation, damages for loss of business profits, business interruption, loss of business information and the like), whether foreseeable or unforeseeable, arising out of the use or inability to use the hardware, software, or accompanying written materials, regardless of the basis of the claim and even if Agfa-Gevaert N.V. has been advised of the possibility of such damage.
Trademarks
Agfa™ and the Agfa-Rhombus are trademarks of Agfa-Gevaert AG, Germany. IMPAX is a trademark of Agfa-Gevaert N.V., Belgium. Other product and company names are trademarks or registered trademarks of their respective holders.
MS DOS®, MS Windows®, and Windows NT® are registered trademarks of Microsoft Corporation
Oracle® is a registered trademark of Oracle Corporation
Solaris® is a registered trademark of Sun Microsystems Inc.
UNIX® is a registered trademark of AT&T
Copyright Agfa 2011
This document or any part thereof may not be copied or reproduced in any form without express permission of Agfa Corporation.
Page 2 of 112

Oracle SPARC Enterprise T3-2 Server
Installation Guide
Revision Record
Title: Oracle SPARC Enterprise T3-2 Server Installation Guide
Node ID: 32852572
Rev. Date Author Approved Comments
1 February 2011 M.L D.B Initial SUN T3-2 installation guide edits by Dave Burton
2 March 2011 M.L. D.T. Added Appendix I for system fault review and clearing given by Dale Taylor
4 July 2011 M.L. Added ZFS Installations
5 July 2011 M.L. J.V.H Many updates and minor corrections given by Jack Van Ham
6 September 2011 M.L D.B Updated disk layout and OBP info
Page 3 of 112

Oracle SPARC Enterprise T3-2 Server
Installation Guide
Table of Contents
1. General Information..................................................................................................9
1.1. Scope................................................................................................................9
1.2. Contacts............................................................................................................9
1.3. Intended Use.....................................................................................................9
1.4. Who Should Perform This Procedure..............................................................10
1.5. Related Documents.........................................................................................10
1.6. Acronyms and Abbreviations...........................................................................10
1.7. Cautions and Warnings...................................................................................11
1.8. Supported IMPAX Versions.............................................................................11
1.9. Where to Obtain Software...............................................................................11
1.10. Tested In......................................................................................................12
1.11. Before You Start:.........................................................................................13
2. Product Overview...................................................................................................14
3. Electronic Prognostics software..............................................................................14
4. Front Panel Components........................................................................................15
5. Back Panel Components........................................................................................16
6. Rear Panel Connectors and Ports..........................................................................17
7. Before powering On the System for the First Time.................................................19
8. Hyper Terminal Settings and Serial Cable for Management Port...........................20
9. Connect the SC Serial Management Port..............................................................21
9.1. Connect the SC Network Management Port...................................................22
9.2. Connect the Ethernet Network Cables............................................................23
Page 4 of 112

Oracle SPARC Enterprise T3-2 Server
Installation Guide
9.3. USB Ports........................................................................................................23
10. Login to the System Controller Using the Serial Management Port....................24
11. Configure the System Controller Network Management Port.............................25
12. To assign a Static IP Address to the SP.............................................................26
13. Login to the System Controller Using the Network Management Port................29
14. ILOM Web Interface and Log In..........................................................................29
15. Connect to ILOM Using the Web Interface.........................................................30
15.1. Change ILOM Root Account Password Using the Web Interface................32
16. Power On the System for the First Time.............................................................34
16.1. Powering on the server................................................................................35
17. Change System Identifier Information.................................................................35
18. Power Cycling the T3-2.......................................................................................36
19. ZFS installations..................................................................................................38
19.1. Using Slices in a ZFS Storage Pool.............................................................38
19.2. Creating a ZFS Root Pool............................................................................38
19.3. Creation of the SMI label.............................................................................38
19.4. ZFS Installation Features.............................................................................39
20. UFS Solaris install...............................................................................................41
21. How to Mirror Boot Disks on the Sun T3-2..........................................................41
21.1. Important Notes and Cautions.....................................................................41
22. Mirroring the Boot Drive......................................................................................42
22.1. Using the Internal RAID Controller...............................................................42
22.2. RAID1: Mirroring..........................................................................................42
22.3. RAID0: Striping............................................................................................42
Page 5 of 112

Oracle SPARC Enterprise T3-2 Server
Installation Guide
22.4. Operations Summary...................................................................................42
22.5. Disk Slot Numbers, Logical Device Names, and Physical Device Names. .43
23. Hardware RAID Support.....................................................................................44
23.1. FCode Utility Commands............................................................................44
23.2. Prepare to Use the FCode Utility................................................................45
23.3. To Configure and Label a Hardware RAID Volume for Use in the Solaris Operating System......................................................................................................47
23.4. Before installing Solaris re-enable the auto-boot.........................................49
24. Solaris 10 Installation 09/10 U9..........................................................................50
24.1. Overview......................................................................................................50
24.2. Solaris 10 Installation Using DVD and Network Connected PC...................51
24.3. ZFS installation detailed...............................................................................56
25. How to Configure a ZFS Root File System with Zone Roots on ZFS..................58
26. Local Graphics Monitor.......................................................................................59
26.1. Activate the Oracle Solaris OS GUI interface..............................................59
27. Configure ILOM Web Remote Control Video Redirection Settings.....................60
27.1. Configure ILOM Remote Control Video Redirection Settings......................60
27.2. Launch the Oracle ILOM Remote Console..................................................61
27.3. Xlaunch........................................................................................................64
28. Applying Patches from support.oracle.com.........................................................65
28.1. Install the SUN Recommended Cluster Patch.............................................65
28.2. Mandatory T3-2 Sun Patch Information.......................................................66
28.3. Mandatory System Firmware Patch.............................................................66
28.4. Hardware FLASHprom Sun Fire T3-2 Sun System Firmware Update.........67
Page 6 of 112

Oracle SPARC Enterprise T3-2 Server
Installation Guide
Detailed Patch Installation Instructions...................................................................68
Procedure...............................................................................................................71
29. SAS2 Integrated RAID™ Solution......................................................................75
29.1. How to Create a Hot Spare..........................................................................79
30. Appendix A, Using the Solaris Flash Feature.....................................................80
30.1. General Information.....................................................................................80
30.2. Assumptions and Dependencies.................................................................80
30.3. Command Syntax........................................................................................80
30.4. Applying a Flash Archive File.......................................................................81
31. Appendix B; JASS Command Syntax.................................................................82
32. Appendix C; SUN T3-2DB9 to RJ45 Serial Cable Pin-outs.................................83
33. Appendix D; MPXIO configuration......................................................................84
33.1. MPxIO Enabling and disabling commands..................................................84
33.2. Field example of setting up of IBM SAN with Qlogic HBAs..........................84
33.3. Recommended steps to activate MPXIO after possible incorrect settings:..86
34. Appendix E; Enable NFS after IMPAX Armoring................................................87
35. Appendix F; Features of the Sun SPARC Enterprise T3-2 Server......................88
36. Appendix G: Oracle Validation Test Suite (VTS)................................................90
36.1. Documentation.............................................................................................90
36.2. Packages and Patches................................................................................90
36.3. Testing With VTS 7.0 Software....................................................................92
36.4. Test Modes..................................................................................................92
36.5. System Exerciser.........................................................................................92
36.6. Online Mode.................................................................................................93
Page 7 of 112
Oracle SPARC Enterprise T3-2 Server
Installation Guide
36.7. Component Stress.......................................................................................93
36.8. Running the tests.........................................................................................94
36.9. Starting VTS GUI.........................................................................................94
36.10. System testing.............................................................................................95
37. Appendix H: Booting from external DVD or ISO file image.................................96
37.1. Redirect local DVD / ISO image...................................................................97
38. Appendix I ILOM fault review and clearing........................................................101
38.1. ILOM web interface....................................................................................101
38.2. ILOM command line...................................................................................102
38.3. Clearing faults through the OS...................................................................105
Page 8 of 112

Oracle SPARC Enterprise T3-2 Server
Installation Guide
1. General Information
1.1. Scope
This document provides information on building the Oracle T3-2 Server:
1. Serial connection to Integrated Lights Out Management (ILOM)
2. Network connection to enable ILOM access via SSH network
3. Mirroring the boot disk
4. Base Installation of Solaris 10 (09/10)
5. Solaris patch requirements and installation
1.2. Contacts
If you have questions or comments about this document, contact Mike Letherbarrow at [email protected].
All comments and suggestions for improving this procedure are most welcome.
1.3. Intended Use
This document will serve as a general reference, and as the foundation for future documents for in house staging and field installations.
1.4. Who Should Perform This Procedure
SIV, Technical Services, R&D personnel for evaluation and review
Staging Technicians and Field Service Engineers for implementation
1.5. Related DocumentsInstructions for installing, administering, and using the T3-2 servers are provided in theOracle SPARC Enterprise T3-2 server documentation sets (from which the content of this doc are derived from) from the following web site:
http://www.oracle.com/technetwork/documentation/sparc-tseries-servers-252697.html
All listed documentation can be downloaded from the Oracle URL
Page 9 of 112

Oracle SPARC Enterprise T3-2 Server
Installation Guide
http://download.oracle.com/docs/cd/E19166-01/index.html
Sun Fire T3-2 Server Product Notes Sun Fire T3-2 Server Topic set Sun Fire T3-2 Server Getting Started Guide Sun Fire T3-2 Server Installation Guide Sun Fire T3-2 Series Server Administration Guide Sun Integrated Lights out Manager 3.0 Documentation library Sun Fire T3-2 Server Service Manual Sun Fire T3-2 Server Safety and Compliance Guide
1.6. Acronyms and AbbreviationsILOM – Integrated Lights Out Management
CLI – Command Line Interface
CMT – Chip Multithreaded
IM – Integrated Mirroring
SAS – Serial Attached SCSI
SC – System Controller
VTOC – Virtual Table of Contents
GUI – Graphical User Interface
TTY – Terminal user interface
CLI – Command line interface
1.7. Cautions and Warnings
This document is intended for highly skilled and experienced Impax Service, Testing Services, and Support personnel. We have made every effort to provide an adequately detailed and efficient procedure. Read this entire procedure before you attempt to power up, install, and configure the T3-2 server.
Page 10 of 112

Oracle SPARC Enterprise T3-2 Server
Installation Guide
1.8. Supported IMPAX Versions
IMPAX 6.X / IDC 2.X and above may be installed on the Sun T3-2.
Software Requirements
Solaris 10 10/09 Build U8, is the minimum OS level supported on the T3-2(not bootable)
Solaris 10 version 09/10 U9 was used during the creation of this document and is the recommended version
IMPAX 6.3 .X AS3000 Server, available from MedNet or Agfa FTP
Sun Recommended Patch Set for Solaris 10
Sun Jumpstart and Security Services Package (JASS)
IMPAX customized JASS configuration script, which sets the armoring level
IMPAX software license keys
1.9. Where to Obtain Software
Solaris 10 is readily available via commercial channels
IMPAX 6.X and Oracle 10 are available through Agfa Service channels
Solaris 10 patch set from support.Oracle.com (with current Oracle service contract)
1.10. Tested In
Mike Letherbarrow home laboratory
Page 11 of 112

Oracle SPARC Enterprise T3-2 Server
Installation Guide
Planning and Preparation
1.11. Before You Start:
Read this entire document very carefully so you understand the environment in which the T3-2 is powered on, installed, and configured
The T3-2 does come with an onboard video card but must be configured before use after the Solaris install.
Make sure that the correct serial cable or adapter is available, and that the PC “Hyper Terminal” is correctly setup as per section Powering On the System for the First Time
It is highly advisable to immediately set up the SC Network Management Port so that the T3-2 may be built from anywhere on the network. Using another Sun server for remote access and terminal operations is highly recommended, as it provides the most user friendly terminal environment.
Mirror the boot drive using the procedure “How to mirror your boot disks on the Sun T3-2” The T3-2 uses a hardware RAID Controller and contains up to six 300GB disk drives. When you mirror, everything on the disks is erased, so we mirror first then install Solaris
Install Solaris 10 U9 (09/10 or higher). Note that the exact installation syntax can be slightly different depending upon the type of terminal session you are using. For example in a Sun terminal environment you frequently use the F2 (Function 2) key to accept changes on the Solaris install. If you use a PC with xterm window (cmd), then you press ESC first then ‘2’ or ‘4’ to accept most changes, navigate the menu by using either the Tab or arrow keys.
Install Oracle Recommended and required patches for the T3-2
This document will not account for unsupported IMPAX versions that have not been validated for Solaris 10.
The server supports the following Oracle Solaris OS releases:
■ Oracle Solaris 10 10/09 OS with the Oracle Solaris 10 9/10 Patch Bundle or futurecompatible patch bundles
■ Oracle Solaris 10 9/10 OS (preinstalled on the server) This is the only version supported for DVD boot
Page 12 of 112

Oracle SPARC Enterprise T3-2 Server
Installation Guide
2. Product OverviewAs the newest two-socket, three-rack unit (3U) server, the SPARC T3-2 is powered by the industry’s first 16-core SPARC T3 processor, and is the first 256-thread general-purpose server. It packs 16 cores and 128 simultaneous threads onto a single piece of silicon, together with the key functions of an entire system on a single chip – computing, networking, security, and IO.The SPARC T3-2 features six hard drives (HDDs), 32 DDR3 DIMM slots, and 10 PCIe Gen2 slots. When fully populated with 8GB DDR3 DIMMs, the system provides a total of 256 GB memory.
3. Electronic Prognostics software
The Electronic Prognostics software analyzes time series telemetry data from a variety of physical sensors such as temperatures, voltages, currents and fan speeds on the system. All received telemetry and health conditions are recorded into a Black Box Recorder file on the system for offline analysis by Oracle/Sun Service Personnel. There are no user interactions after installation. The installation is done via the command line
This package is installed by applying the SUNWephost package contained in the downloadable p10623118_110_SOLARIS64.zip which is covered in the patch application part of this doc.
Page 13 of 112

Oracle SPARC Enterprise T3-2 Server
Installation Guide
4. Front Panel Components
Figure Legend
1 Locator LED/Locator button: white 10 DB-15 video connector2 Service Action Required LED: amber 11 SATA DVD drive (optional)3 Main Power/OK LED: green 12 Drive 0 (optional)4 Power button 13 Drive 1 (optional)5 SP OK/Fault LED: green/amber 14 Drive 2 (optional)6 Service Action Required LEDs (3) for Fan Module(FAN), Processor (CPU) and Memory: amber
15 Drive 3 (optional)
7 Power Supply (PS) Fault (Service ActionRequired) LED: amber
16 Drive 4 (optional)
8 Over Temperature Warning LED: amber 17 Drive 5 (optional)9 USB 2.0 connectors (2)
Page 14 of 112

Oracle SPARC Enterprise T3-2 Server
Installation Guide
5. Back Panel Components
Use the illustration below to locate the connectors and power supplies on the rear panel of the Oracle T3-2 server.
Rear Panel Cable Connectors and LEDs on the SPARC Enterprise T3-2 Server
Figure Legend
1 Power supply unit 0 status indicator LEDs: • Service Action Required: amber • AC OK: green or amber
8 Network 10/100/1000 ports: NET0–NET3
2 Power supply unit 0 AC inlet 9 USB 2.0 connectors (2)3 Power supply unit 1 status indicator LEDs: • Service Action Required: amber • AC OK: green or amber
10 PCIe card slots 5–9
4 Power supply unit 1 AC inlet 11 DB-15 video connector5 System status LEDs: • Power/OK: green • Attention: amber • Locate: white
12 SP SER MGT RJ-45 serial port
6 PCIe2 card slots 0–4 13 SP NET MGT RJ-45 network port
7 Network module card slot
Page 15 of 112

Oracle SPARC Enterprise T3-2 Server
Installation Guide
6. Rear Panel Connectors and Ports
.
1. Power supply 0 AC inlet
2. Power supply 1 AC inlet
Note - Do not attach power cords to the power supplies until you have finished connecting the data cables and have connected the server to a serial terminal or a terminal emulator (PC or workstation).
3. SPARC T3-2 Server 10 Gb Network Module QSFD port
The SPARC T3-2 Server 10 Gb Network Module card’s QSFD port provides four 10 Gb connections when using a supported transceiver and cable.
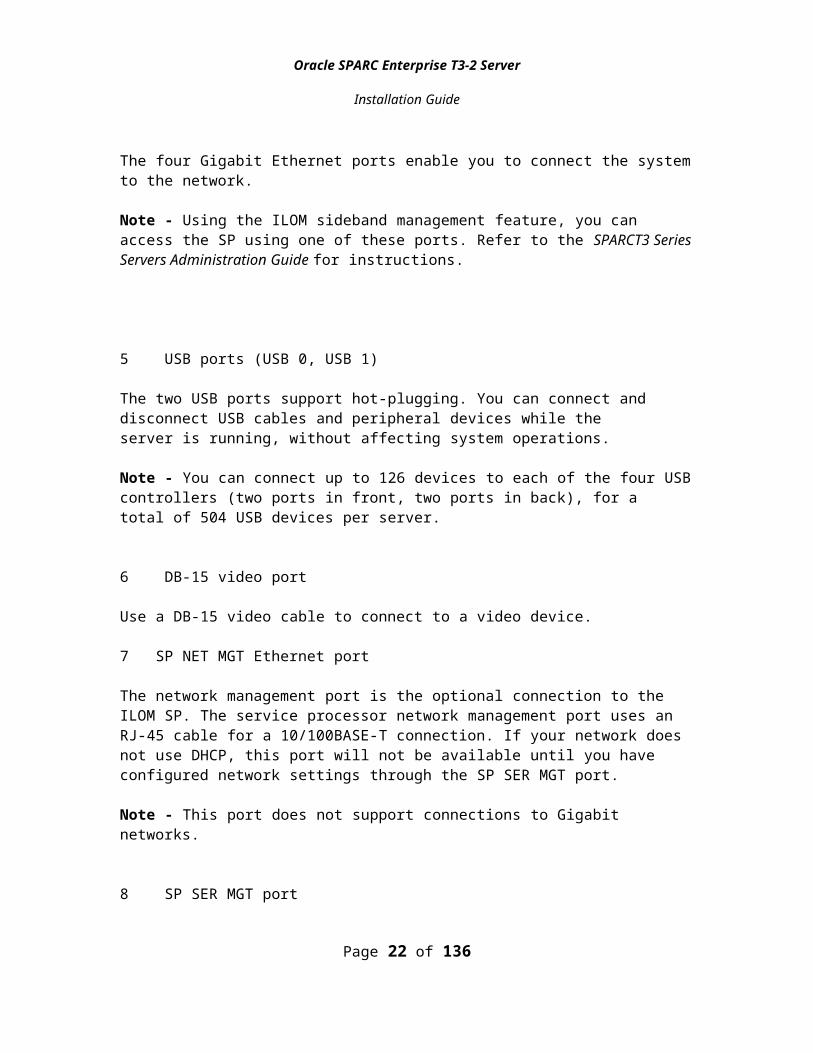
4 Network 10/100/1000 ports (NET0, NET1,NET2, and NET3)
The four Gigabit Ethernet ports enable you to connect the system to the network.
Note - Using the ILOM sideband management feature, you can access the SP using one of these ports. Refer to the SPARCT3 Series Servers Administration Guide for instructions.
Page 16 of 112

Oracle SPARC Enterprise T3-2 Server
Installation Guide
5 USB ports (USB 0, USB 1)
The two USB ports support hot-plugging. You can connect and disconnect USB cables and peripheral devices while theserver is running, without affecting system operations.
Note - You can connect up to 126 devices to each of the four USB controllers (two ports in front, two ports in back), for atotal of 504 USB devices per server.
6 DB-15 video port
Use a DB-15 video cable to connect to a video device.
7 SP NET MGT Ethernet port
The network management port is the optional connection to the ILOM SP. The service processor network management port uses an RJ-45 cable for a 10/100BASE-T connection. If your network does not use DHCP, this port will not be available until you have configured network settings through the SP SER MGT port.
Note - This port does not support connections to Gigabit networks.
8 SP SER MGT port
The serial management port uses an RJ-45 cable and is always available. This port is the default connection to the ILOM system controller.
Page 17 of 112

Oracle SPARC Enterprise T3-2 Server
Installation Guide
7. Before powering On the System for the First Time
Caution – Never attach the AC powers cable to the T3-2 until you have first connected the terminal server and network management connections as described in the subsequent sections.
Powering on the system for the first time requires special preparation and procedures. For example, if you have not prepared a display before connecting the AC power cables, system messages may be lost.
Caution - The server goes into standby mode and the system controller initializes as soon as the AC power cables are connected to the power source.
The serial terminal or a terminal emulator MUST be connected before you connect the power cables, or you will not see the system messages. The server goes into standby mode and the ILOM system controller initializes as soon as the AC power cables are connected to the power source.
Note - If you are not logged in, ILOM times out after 60 seconds and reverts to the system console. For more information, refer to the Sun™ Integrated Lights OutManager 3.0 User’s Guide
ILOM System Console
When you power on the system, the boot process begins under the control of theIntegrated Lights Out Manager (ILOM) system console. The system console displays status and error messages generated by firmware-based tests during system startup.
By default, the service processor configures the network management port automatically, retrieving network configuration settings using DHCP and allowing connections using SSH.
Page 18 of 112

Oracle SPARC Enterprise T3-2 Server
Installation Guide
8. Hyper Terminal Settings and Serial Cable for Management Port
If you have not already done so, connect a terminal or a terminal emulator (PC or workstation) to the SC serial management port.
Note that the T3-2 is supposed to be shipped with a serial cable adapter. If it is not present see Section (Appendix C) for cable connections: SUN T3-2 DB9 to RJ45 serial cable pinoutsA null modem configuration is needed, meaning the transmit and receive signalsare reversed (crossed over) for DTE to DTE communications. You can use thesupplied RJ-45 crossover adapters with a standard RJ-45 cable to achieve the nullmodem configuration.A PC with Windows XP Professional SP3 was used during the creation of this document. To access the Windows Hyper Terminal:
Start > Programs > Accessories > Communications > HyperTerminal
From the File menu, select New Connection, and assign it a name and COM device
Configure the terminal or terminal emulator with these port settings:
9600 baud
8 bits
No parity
One (1) stop bit
No handshaking
CAUTION - At this point the full power must not be applied. The T3-2 has a small fan that is running as a result of having connected the AC Power cord.
Page 19 of 112

Oracle SPARC Enterprise T3-2 Server
Installation Guide
9. Connect the SC Serial Management Port
Use this port for server management. This port is needed to set up the SC network management port, as detailed in Enabling the System Controller Network Management Port
The SC serial management port is marked SER MGT.
Service Processor Serial Management Port – Rear Panel
Note – Use the service processor serial management port only for server management. It is the default connection between the service processor and a terminal or a computer.
1. Connect a Category 5 cable from the SC serial management port to the terminal device (i.e. your laptop or PC).
2. The terminal emulator should already be running and configured per the instructions in the previous section
Page 20 of 112

Oracle SPARC Enterprise T3-2 Server
Installation Guide
9.1. Connect the SC Network Management Port
Note - This port is not operational until you configure the network settings (through the serial management port), as detailed in Section Configure the System Controller Network Management Port.
The service processor network management port is labeled NET MGT. After the initial server configuration, you can connect to the service processor via an Ethernet cable.
Page 21 of 112
Oracle SPARC Enterprise T3-2 Server
Installation Guide
9.2. Connect the Ethernet Network Cables
The Sun Fire T3-2 has four RJ-45 Gigabit Ethernet network connectors. They are marked NET0, NET1, NET2, and NET3 as indicated in the illustration below.
Ethernet Network Connections
Connect a Category 5 cable from your network switch or hub to Ethernet Port 0 (NET0) on the rear of the chassis.
Connect additional Category 5 cables (if needed) from your network switch or hub to the remaining Ethernet ports (NET1, NET2, NET3).
9.3. USB Ports
Four Universal Serial Bus (USB) ports are provided on the Sun Fire T3-2 server. USB ports 0 and 1 are located on the rear of the chassis Ports 2 and 3 on the front of the chassis. These are easily identifiable.
Page 22 of 112

Oracle SPARC Enterprise T3-2 Server
Installation Guide
10. Login to the System Controller Using the Serial Management Port After the service processor boots, access the ILOM CLI to configure and manage the system. The ILOM CLI prompt (->) is displayed at the first time the service processor is booted. The default configuration provides an ILOM CLI root user account. The default root password is changeme. Change the password using the service processor ILOM CLI password command.
If this is the first time the system has been powered on, use the password command to set the root password.
SUNSP-1050BDR4A8 login: root
Password:set
Oracle(R) Integrated Lights Out Manager
Version 3.0.12.2.d r60498
Copyright (c) 2010, Oracle and/or its affiliates. All rights reserved.
Warning: password is set to factory default.
->.-> set /SP/users/root passwordEnter new password: ********Enter new password again: ********->
After the root password has been set, on subsequent reboots, the ILOM CLI login prompt is displayed.
Enter root for the login name followed by your password.
...hostname login: rootPassword: password (nothing displayed)Waiting for daemons to initialize...Daemons readySun(TM) Integrated Lights Out ManagerVersion 2.0.0.0Copyright 2007 Sun Microsystems, Inc. All rights reserved.Use is subject to license terms.->
NOTE: Full diagnostics may be disabled in NVRAM. This will greatly speed ILOM startup but is not recommended.
Page 23 of 112

Oracle SPARC Enterprise T3-2 Server
Installation Guide
ILOM Service ProcessorAfter the system console finishes its low-level system diagnostics, the ILOM service processor initializes and runs a higher level of diagnostics. When you access theILOM service processor using a device connected to the serial management port, you see the output of the ILOM diagnostics.
By default, the network management port is configured to automatically retrieve network configuration using Dynamic Host Configuration Protocol (DHCP) and to allow connections using Secure Shell (SSH).
The ILOM service processor supports a total of ten concurrent sessions per server:nine SSH connections available through the network management port and one connection available through the serial management port.
11. Configure the System Controller Network Management Port To access the system controller using the network for the first time, you must first configure the SC network management port through the SC serial management port.
Note – If your network allows the use of DHCP and SSH, this configuration is performed automatically the first time you boot the system.
Set these network parameters according to the specific details of your network configuration:
/SP/network state – Specifies whether the service processor is on the network or not
/SP/network pendingipaddress – IP address of the service processor
/SP/network pendingipgateway – IP address of the gateway for the subnet /SP/network pendingipnetmask – Netmask for the service processor subnet /SP/network pindingipdiscovery - Specifies whether the service processor
uses DHCP or static IP address assignment /SP/network commitpending - Commits the service processor to use the
pending settings
Configure these parameters with the set command. The usage is as follows:set target property=value where /SP/network is the target and pendingipaddress=xx.x.xx.xxx, for example, is the property=value
The following example sets the pending service processor IP address:
-> set /SP/network pendingipaddress=xx.x.xx.xxxSet 'pendingipaddress' to 'xx.x.xx.xxx'
Page 24 of 112

Oracle SPARC Enterprise T3-2 Server
Installation Guide
Set the /SP/network state parameter to enabled.
-> set /SP/network state=enabledSet 'state' to 'enabled'
Enable and disable SSH connections as needed.
-> set /SP/services/ssh state=enabledSet 'state' to 'enabled'-> set /SP/services/ssh state=disabledSet 'state' to 'disabled'
If you choose to use DHCP, set pendingipdiscovery to dhcp.
-> set /SP/network pendingipdiscovery=dhcpSet 'pendingipdiscovery' to 'dhcp'
-> set /SP/network commitpending=trueSet ’commitpending’ to ’true’->
12. To assign a Static IP Address to the SPIf you choose to use a static IP configuration set the parameterspendingipdiscovery, pendingipaddress, pendingipgateway, and pendingipnetmask as follows.
1. Connect an Ethernet cable to the network management port.2. Log in to the ILOM service processor through the serial management port.3. Type one of the following commands:
Set the service processor to accept a static IP address.
-> set /SP/network pendingipdiscovery=staticSet ’pendingipdiscovery’ to ’static’
Set the IP address for the service processor.
Page 25 of 112

Oracle SPARC Enterprise T3-2 Server
Installation Guide
-> set /SP/network pendingipaddress=192.1.1.133Set ’pendingipaddress’ to ’192.1.1.133’
Set the netmask for the service processor.
-> set /SP/network pendingipnetmask=255.255.255.0Set ’pendingipnetmask’ to ’255.255.255.0’
This example uses 255.255.255.0 to set the netmask. Your network environment subnet might require a different netmask. Use a netmask number most appropriate to your environment.
Set the IP address for the service processor gateway.
-> set /SP/network pendingipgateway=192.1.1.133Set ’pendingipgateway’ to 192.1.1.133
Use the show /SP/network -display properties command to verify thatthe parameters were set correctly.
-> show /SP/network -display properties /SP/network Properties: commitpending = (Cannot show property) dhcp_server_ip = none ipaddress = (none) ipdiscovery = (none) ipgateway = (none) ipnetmask = (none) macaddress = 00:21:28:B1:23:A5 managementport = /SYS/MB/SP/NETMGMT outofbandmacaddress = 00:21:28:B1:23:A5 pendingipaddress = 192.1.1.133 pendingipdiscovery = static pendingipgateway = (none) pendingipnetmask = 255.255.255.0 pendingmanagementport = /SYS/MB/SP/NETMGMT sidebandmacaddress = 00:21:28:B1:23:A4 state = disabled
Note – After setting the configuration parameters, you must enter the set /SP/network commitpending=true command for the new values to take effect.
Commit the changes to the service processor network parameters.
Page 26 of 112

Oracle SPARC Enterprise T3-2 Server
Installation Guide
-> set /SP/network commitpending=trueset: Unable to get network management property
If one sees the above error plug in the network cord into the SC Network Management Port
Commit the changes to the service processor network parameters.
-> set /SP/network commitpending=trueSet 'commitpending' to 'true'
Note – You can run the show /SP/network -display properties command again (after performing the set /SP/network commitpending=true command) to verify that the parameters have been updated.
-> show /SP/network -display properties /SP/network Properties: commitpending = (Cannot show property) dhcp_server_ip = none ipaddress = 192.1.1.133 ipdiscovery = static ipgateway = 0.0.0.0 ipnetmask = 255.255.252.0 macaddress = 00:21:28:B1:23:A5 managementport = /SYS/MB/SP/NETMGMT outofbandmacaddress = 00:21:28:B1:23:A5 pendingipaddress = 192.1.1.133 pendingipdiscovery = static pendingipgateway = 0.0.0.0 pendingipnetmask = 255.255.255.0 pendingmanagementport = /SYS/MB/SP/NETMGMT sidebandmacaddress = 00:21:28:B1:23:A4 state = enabled
->
Page 27 of 112

Oracle SPARC Enterprise T3-2 Server
Installation Guide
It is not necessary to reset the service processor for new network values to take effect. To commit the changes to the service processor network parameters, use the set /SP/network commitpending=true command
13. Login to the System Controller Using the Network Management Port Open an SSH session and connect to the service processor by specifying its network address. Putty was used to log into the network management port.
login as: rootUsing keyboard-interactive authentication.Password:
Oracle(R) Integrated Lights Out Manager
Version 3.0.12.2.d r60498
Copyright (c) 2010, Oracle and/or its affiliates. All rights reserved.
->
14. ILOM Web Interface and Log InWeb Interface OverviewThe ILOM web interface is accessible through a browser and uses a Sun standard interface. The ILOM web interface enables you to monitor and manage local and remote systems. One of the most powerful features of ILOM is the ability to redirect the server's graphical console to a local workstation or laptop system. When you redirect the host console, you can configure the local system's keyboard and mouse to act as the server's mouse and keyboard. You can also configure the diskette drive or CD-ROM drive on the remote system as a device virtually connected to your Sun system. You can access these features using the ILOM Remote Console application.
Browser and Software RequirementsThe web interface has been tested successfully with recently released Mozilla™,Firefox, and Internet Explorer web browsers, and may be compatible with other web
Page 28 of 112

Oracle SPARC Enterprise T3-2 Server
Installation Guide
browsers.
Note – ILOM comes preinstalled on your Sun system and includes the Remote Console application. To run the ILOM Remote Console, you must have the Java 1.5 runtime environment (JRE 1.5) or later version of the JRE software installed on your local client.
15. Connect to ILOM Using the Web InterfaceNote – ILOM boots automatically when a Sun system is connected to an AC power supply or when a server module is inserted into a powered chassis. If the management Ethernet is not connected, or if ILOM's Dynamic Host Configuration Protocol (DHCP) process fails due to the absence of a DHCP server on the management network, ILOM might take longer to start.
Follow these steps to log in to the ILOM web interface:1. To log in to the web interface, type the IP address of ILOM into your webbrowser.The web interface Login page appears.
2. Type your user name and password.
Page 29 of 112

Oracle SPARC Enterprise T3-2 Server
Installation Guide
You can use the default user name and password. (If not already changed)
■ Default user name – root■ Default password – changeme
The default user name and password are lowercase characters.
One local user ID is predefined with the user name root assigned with the roleAdministrator. You cannot delete this user ID or change its role attributes. The initialpassword changeme is also provided. This password is required to log in to the command-line interface (CLI), Secure Shell (SSH), and the web interface.
3. Click Log In.The web interface Versions page appears.
After you have logged in to ILOM and established network connectivity to the system, you should reset the default password (changeme) that is associated with the ILOM root account to protect your system from unauthorized access.
Page 30 of 112

Oracle SPARC Enterprise T3-2 Server
Installation Guide
15.1. Change ILOM Root Account Password Using the Web InterfaceIn the ILOM web interface, click User Management --> User Accounts The User Account Settings page appears.
In the User Account Settings page, select the radio button next to root then
Page 31 of 112

Oracle SPARC Enterprise T3-2 Server
Installation Guide
click Edit.A security message appears.
Click OK to continue. The User Account Password dialog appears.
In the User Account password dialog, do the following:
a. In the New Password text box, type the new password.b. In the Confirm Password text box, type the new password again.c. Click Save.
Page 32 of 112

Oracle SPARC Enterprise T3-2 Server
Installation Guide
16. Power On the System for the First Time
The system controller runs on the 3.3v standby voltage. As soon as AC power is connected to the system, the system controller powers on, runs diagnostics, and initializes the ILOM-CMT firmware. Note that the T3-2 is NOT fully powered at this time. You initiate full power via command line later in this document
Figure: Front Panel Main Power and SP LEDs
Figure Legend
1 Main Power/OK LED
2 SP OK/Fault LED
After the ILOM firmware initializes, the SP OK/Fault LED remains lit, the main power OK/Fault LED slowly flashes, and the SP login prompt displays on the terminal device. The host is not initialized or powered on yet.
CLIs, User Accounts, and Passwords for Connecting to the ILOM Service ProcessorWhen connecting to the ILOM service processor for the first time using the serial ornetwork management ports, the default CLI is ILOM, the default user account is root, and the default password is changeme. Examples in this document use the default ILOM CLI.
Page 33 of 112

Oracle SPARC Enterprise T3-2 Server
Installation Guide
Note:- Advanced Lights Out Management (ALOM) is no longer used for the T3 series servers
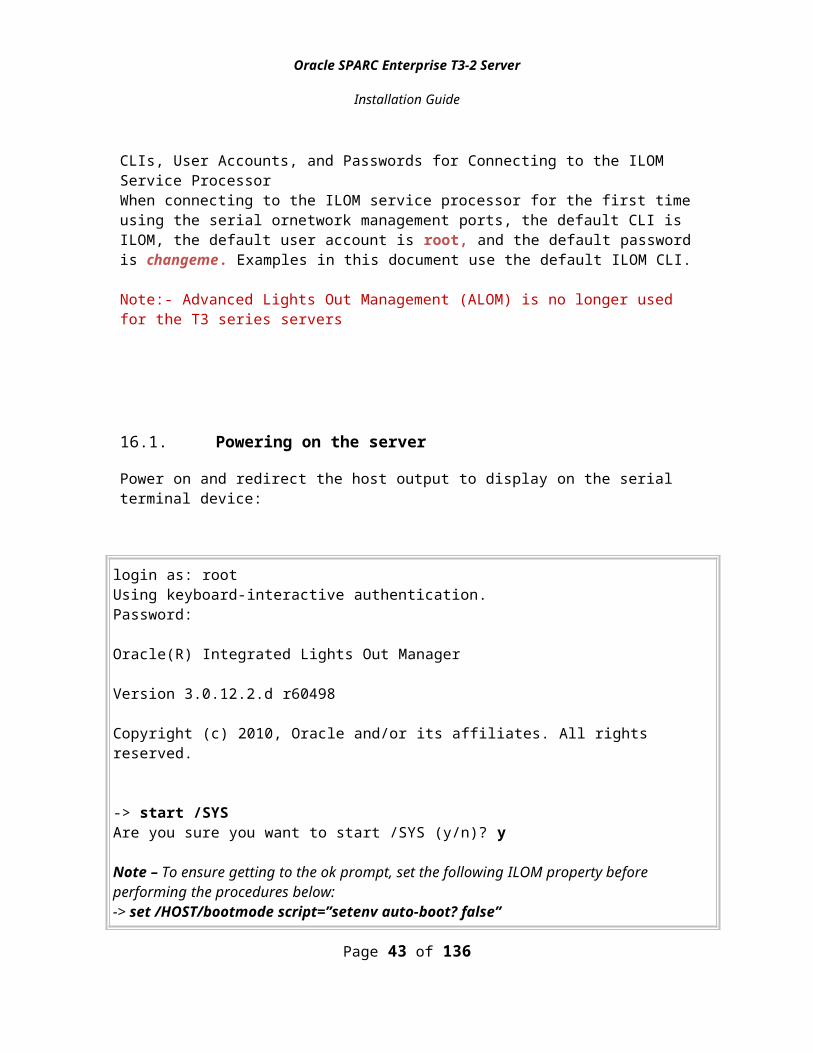
16.1. Powering on the server
Power on and redirect the host output to display on the serial terminal device:
login as: rootUsing keyboard-interactive authentication.Password:
Oracle(R) Integrated Lights Out Manager
Version 3.0.12.2.d r60498
Copyright (c) 2010, Oracle and/or its affiliates. All rights reserved.
-> start /SYSAre you sure you want to start /SYS (y/n)? y
Note – To ensure getting to the ok prompt, set the following ILOM property beforeperforming the procedures below:-> set /HOST/bootmode script=”setenv auto-boot? false”
-> start /SP/consoleAre you sure you want to start /SP/CONSOLE (y/n)? ySerial console started. To stop, type #.
After you start the SP host console, the server initialization takes approximately 20 minutes to complete.
17. Change System Identifier InformationUse the /SP system_identifier property to store customer identification information. This string is encoded in all trap messages generated by SNMP.Assigning a unique system identifier can be useful in distinguishing which system
Page 34 of 112

Oracle SPARC Enterprise T3-2 Server
Installation Guide
generates which SNMP message.
●At the ILOM -> prompt, type:
-> set /SP system_identifier=”data”
Note – The data string (data) must be enclosed in quote marks.
Page 35 of 112

Oracle SPARC Enterprise T3-2 Server
Installation Guide
18. Power Cycling the T3-2
Power Off in Advance of Mirroring Operation
Use the following commands to power the T3-2down, say if Solaris was already installed and you had brought the machine up.
Graceful shutdown of the Solaris OS.At the Solaris OS prompt, type the shutdown -g0 -i0 -y command and then type h when prompted to halt the Solaris OS and to return to the ok prompt.
# shutdown -g0 -i0 -y# svc.startd: The system is coming down. Please wait.svc.startd: 91 system services are now being stopped.Jun 12 19:46:57 wgs40-58 syslogd: going down on signal 15svc.startd: The system is down.syncing file systems... doneProgram terminatedr)eboot, o)k prompt, h)alt?
Switch from the system console prompt to the service processor console prompt by issuing the #. escape sequence.
ILOM commandsFrom the -> prompt, type set /HOST send_break_action=break,
start /SP/console Commands, or Break Key
Typing set /HOST send_break_action=break from the -> prompt forces a
running SPARC Enterprise T3-2 server to drop to a menu:
c)ontinue, s)ync, r)eboot, h)alt? from which you can type c to get OpenBoot firmware control.
If the operating system is already halted, you can use the start /SP/consolecommand instead of set /HOST send_break_action=break to reach the ok
prompt.
Page 36 of 112

Oracle SPARC Enterprise T3-2 Server
Installation Guide
To Avoid Booting the Solaris Operating System at Start Up
If you do not want to start the preinstalled OS, set the OBP parameter auto-boot? to false. For example:
-> set /HOST/bootmode script="setenv auto-boot? false"
This string of syntax will prevent the T3-2 from booting on subsequent power up, leaving the T3-2 at the ok prompt. We used this in our testing, but is not mandatory for general field use
-> start /SP/consoleAre you sure you want to start /SP/console (y/n)? y
Serial console started. To stop, type #.
Page 37 of 112

Oracle SPARC Enterprise T3-2 Server
Installation Guide
19. ZFS installations
Please read ‘Solaris ZFS’ doc Node ID # 30583114 for complete details on ZFS
19.1. Using Slices in a ZFS Storage Pool
Disks must be labeled with a traditional Solaris VTOC (SMI) label when you create a storage pool with a disk slice.
For a bootable ZFS root pool, the disks in the pool must contain slices and must be labeled with an SMI label. The simplest configuration would be to put the entire disk capacity minus 1GB in slice 0 and use that slice for the root pool.
19.2. Creating a ZFS Root PoolIn the current Solaris release (09/10 SU9) you can install and boot from a ZFS root file system.
Disks used for the root pool must have a VTOC (SMI) label and the pool must be created with disk slices
A root pool must be created as a mirrored three disk configuration. You cannot add additional disks to create multiple mirrored vdevs but you can expand a mirrored vdev by using the zpool attach command.
A RAID-Z or a striped configuration is not supported A root pool cannot have a separate log device
19.3. Creation of the SMI label
Boot Solaris DVD and run “format –e” and carry out the following procedure to all disks.# format -eSearching for disks...done
AVAILABLE DISK SELECTIONS: 0. c0t5000CCA01511EA4Cd0 <SUN300G cyl 46873 alt 2 hd 20 sec 625> /scsi_vhci/disk@g5000cca01511ea4c 1. c0t5000CCA015117A8Cd0 <SUN300G cyl 46873 alt 2 hd 20 sec 625> /scsi_vhci/disk@g5000cca015117a8c 2. c0t5000CCA0151222A4d0 <SUN300G cyl 46873 alt 2 hd 20 sec 625> /scsi_vhci/disk@g5000cca0151222a4
Page 38 of 112

Oracle SPARC Enterprise T3-2 Server
Installation Guide
Specify disk (enter its number): 0selecting c0t0d0[disk formatted]
FORMAT MENU: disk - select a disk type - select (define) a disk type partition - select (define) a partition table current - describe the current disk format - format and analyze the disk repair - repair a defective sector label - write label to the disk analyze - surface analysis defect - defect list management backup - search for backup labels verify - read and display labels inquiry - show vendor, product and revision scsi - independent SCSI mode selects cache - enable, disable or query SCSI disk cache volname - set 8-character volume name ! - execute , then return quitformat> label[0] SMI Label[1] EFI LabelSpecify Label type[1]: 0Warning: This disk has an EFI label. Changing to SMI label will erase all current partitions.
Continue? yAuto configuration via format.dat[no]? noAuto configuration via generic SCSI-2[no]? noformat>quit
Partition the disks so that slice 0 contains all of the disk minus 1 GB
19.4. ZFS Installation FeaturesThe following ZFS installation features are provided in this Solaris release:
Using the Solaris interactive text installer, you can install a ZFS root file system. The default file system is still UFS for this Solaris U9 release. You can access the interactive text installer option in the following way:
Use the following syntax from the Solaris installation DVD:
ok boot dvd - text
Page 39 of 112

Oracle SPARC Enterprise T3-2 Server
Installation Guide
Custom JumpStart provides the following features:
You can set up a profile to create a ZFS storage pool and designate a bootable ZFS file system.
You can set up a profile to identify a flash archive of a ZFS root pool.
You can set up an initial mirrored ZFS root pool by selecting optimal three disks during installation or you can create a mirrored ZFS pool after the installation by attaching additional disks at a later time.
The swap and dump devices are automatically created on ZFS volumes in the ZFS root pool.
The Solaris Flash installation feature for installing a ZFS root file system is not available during the initial installation option.
Proceed to the Solaris U9 Installation section 24 on page 50
Page 40 of 112

Oracle SPARC Enterprise T3-2 Server
Installation Guide
20. UFS Solaris install
21. How to Mirror Boot Disks on the Sun T3-2
NOTE - Not needed if using ZFS file system where the ZFS installation will also mirror the disks.
21.1. Important Notes and Cautions
Disk Drives
The T3-2 can come with up to six 300GB GB Serial Attached SCSI (SAS) internal drives.
The mirroring operation will erase all data on the boot drive
The T3-2 will come from the factory with Solaris 10 installed, so if you decide to mirror, you must re-install Solaris 10
SAS is serial attached SCSI; like SATA serial ATA. Parallel drives send data in parallel down the EIDE ribbon; while serial drives use a single data path which is much faster and more reliable.
SAS is more reliable and supports a much higher RPM drive than SATA
The utility for configuring the internal drives is only by the use of ‘Fcode’ which is done via the ILOM SP console
Further RAID configuration and maintenance will be done by the “RAID Management Utility for your SPARC T3 Series server” from LSI
Page 41 of 112

Oracle SPARC Enterprise T3-2 Server
Installation Guide
22. Mirroring the Boot Drive
Once it finishes its POST, you should be at the OBP ok prompt.
22.1. Using the Internal RAID Controller
22.2. RAID1: Mirroring
A two disk primary->secondary configuration is assumed
Upon creation, secondary is populated with primary’s data (sync)
All write I/Os are committed to both disks before returning to provide for data redundancy
Read I/Os may be serviced by either disk
When a single disk fails, data is still available, but the volume is in “DEGRADED” mode. The failed disk must be replaced and resync’ed
Once sync is complete, mirroring may be disabled/broken to provide two (2) separate drives with the same exact data
22.3. RAID0: Striping
A two or more disk configuration is assumed
No data is shared. Data is across all concatenated disks in exactly one (1) location.
Write I/Os are committed in a round-robin fashion across all member disks. Performance is increased in some workload scenarios.
Read I/Os are satisfied at their one location, performing as a single disk.
Upon a single disk failure, data is lost.
If a RAID0 volume is disabled / broken, data is lost.
22.4. Operations Summary
All of the information on the disks will be erased by using the Fcode utility then mirror the required drives. Then DVD boot action is required to rectify the ‘magic-number’ error before installing Solaris else the drives will not be recognized.
Page 42 of 112
Oracle SPARC Enterprise T3-2 Server
Installation Guide
22.5. Disk Slot Numbers, Logical Device Names, and Physical Device Names
Disk Slot Number Logical Device Name** The logical device names might appear differently on your system, depending on the number and type of add-on disk controllers installed.
Physical Device Name
Drive 0 c0t5000CCA00A524FE0d0 /pci@400/pci@2/pci@0/pci@e/scsi@0/disk@p0
Drive1 c0t5000CCA01511EA4Cd0 /pci@400/pci@2/pci@0/pci@e/scsi@0/disk@p1
Drive2 c0t5000CCA015117A8Cd0 /pci@400/pci@2/pci@0/pci@e/scsi@0/disk@p2
Drive3 c0t5000CCA0151222A4d0 /pci@400/pci@2/pci@0/pci@e/scsi@0/disk@p3
Drive4 c0t5000CCA0151231C0d0 /pci@400/pci@2/pci@0/pci@e/scsi@0/disk@p4
Drive5 c0t5000CCA01512214Cd0 /pci@400/pci@2/pci@0/pci@e/scsi@0/disk@p5
Determine which disk is the default boot deviceok printenv boot-deviceboot-device = disk
ok devalias diskdisk /pci@400/pci@2/pci@0/pci@e/scsi@0/disk@p0:a disk net
Page 43 of 112

Oracle SPARC Enterprise T3-2 Server
Installation Guide
23. Hardware RAID SupportRAID technology enables the construction of a logical volume, made up of several physical disks, in order to provide data redundancy, increased performance, or both.
The server on-board disk controller supports RAID 0 (striping), RAID 1 (mirroring)and RAID 1e volumes using the Fcode utility.
The Fcode utility is accessible through the OpenBoot PROM (OBP) environment.This utility consists of a set of special commands to display targets and managelogical volumes.
After Solaris has been installed you can manage RAID from Oracle Solaris by downloading and installing the RAID Management Utility for your SPARC T3 Series server from this location: http://www.lsi.com/support/sun.
23.1. FCode Utility Commands
FCode Command Description
show-children Lists all connected physical drives and logical volumes.
show-volumes Lists all connected logical volumes in detail.
create-raid0-volume Creates a RAID 0 volume (minimum two targets).
create-raid1-volume Creates a RAID 1 volume (exactly two targets).
create-raid1e-volume Creates a RAID 1e volume (minimum three targets).
delete-volume Deletes a RAID volume.
activate-volume Re-activate a RAID volume after disks have been replaced.
Page 44 of 112

Oracle SPARC Enterprise T3-2 Server
Installation Guide
23.2. Prepare to Use the FCode Utility
1. Open an xterm or gnome terminal window. In this example ‘Putty’ was used
-> start /SP/console
Are you sure you want to start /SP/console (y/n)? y
Serial console started. To stop, type #.
ok
2. Use the show-devs command to list the device paths on the server.
{0} ok devaliasscreen /pci@400/pci@1/pci@0/pci@0/pci@0/display@0mouse /pci@400/pci@1/pci@0/pci@b/pci@0/usb@0,2/hub@2/device@4/mouse@1net3 /pci@500/pci@1/pci@0/pci@5/network@0,1net2 /pci@500/pci@1/pci@0/pci@5/network@0dvd /pci@400/pci@2/pci@0/pci@e/scsi@0/disk@p7disk5 /pci@400/pci@2/pci@0/pci@e/scsi@0/disk@p5disk4 /pci@400/pci@2/pci@0/pci@e/scsi@0/disk@p4disk3 /pci@400/pci@2/pci@0/pci@e/scsi@0/disk@p3disk2 /pci@400/pci@2/pci@0/pci@e/scsi@0/disk@p2disk1 /pci@400/pci@2/pci@0/pci@e/scsi@0/disk@p1disk0 /pci@400/pci@2/pci@0/pci@e/scsi@0/disk@p0disk /pci@400/pci@2/pci@0/pci@e/scsi@0/disk@p0scsi0 /pci@400/pci@2/pci@0/pci@e/scsi@0scsi /pci@400/pci@2/pci@0/pci@e/scsi@0
As can be seen the disk drives are on controller :-
/pci@400/pci@2/pci@0/pci@e/scsi@0
3. Use the select command to choose the controller where you want to create a
hardware RAID volume.
ok select /pci@400/pci@2/pci@0/pci@4/scsi@0
or you can just use
ok select scsi0
Page 45 of 112

Oracle SPARC Enterprise T3-2 Server
Installation Guide
4. Use the show-children command to list the physical drives on the selected controller
{0} ok show-childrenFCode Version 1.00.54, MPT Version 2.00, Firmware Version 5.00.17.00
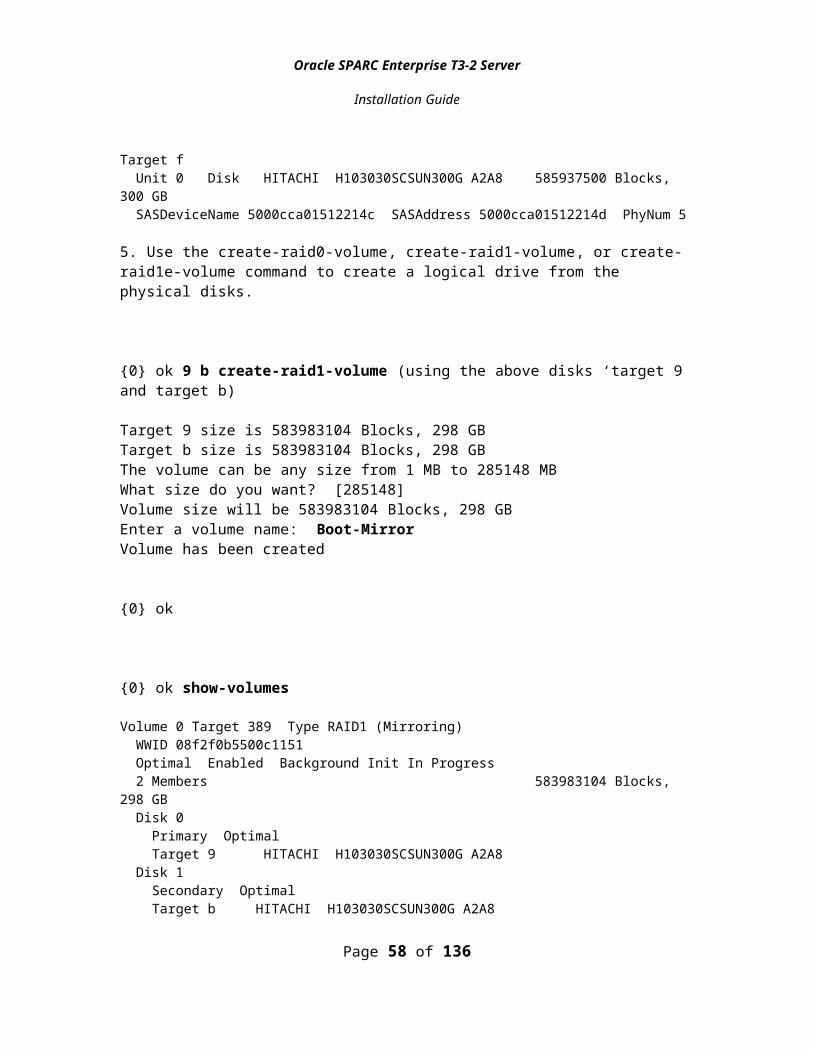
Target 9 Unit 0 Disk HITACHI H103030SCSUN300G A2A8 585937500 Blocks, 300 GB SASDeviceName 5000cca00a524fe0 SASAddress 5000cca00a524fe1 PhyNum 0Target a Unit 0 Removable Read Only device TEAC DV-W28SS-R 1.0C SATA device PhyNum 7Target b Unit 0 Disk HITACHI H103030SCSUN300G A2A8 585937500 Blocks, 300 GB SASDeviceName 5000cca0151231c0 SASAddress 5000cca0151231c1 PhyNum 1Target c Unit 0 Disk HITACHI H103030SCSUN300G A2A8 585937500 Blocks, 300 GB SASDeviceName 5000cca0151222a4 SASAddress 5000cca0151222a5 PhyNum 2Target d Unit 0 Disk HITACHI H103030SCSUN300G A2A8 585937500 Blocks, 300 GB SASDeviceName 5000cca01511ea4c SASAddress 5000cca01511ea4d PhyNum 3Target e Unit 0 Disk HITACHI H103030SCSUN300G A2A8 585937500 Blocks, 300 GB SASDeviceName 5000cca015117a8c SASAddress 5000cca015117a8d PhyNum 4Target f Unit 0 Disk HITACHI H103030SCSUN300G A2A8 585937500 Blocks, 300 GB SASDeviceName 5000cca01512214c SASAddress 5000cca01512214d PhyNum 5
5. Use the create-raid0-volume, create-raid1-volume, or create-raid1e-volume command to create a logical drive from the physical disks.
{0} ok 9 b create-raid1-volume (using the above disks ‘target 9 and target b)
Target 9 size is 583983104 Blocks, 298 GBTarget b size is 583983104 Blocks, 298 GBThe volume can be any size from 1 MB to 285148 MBWhat size do you want? [285148]Volume size will be 583983104 Blocks, 298 GBEnter a volume name: Boot-MirrorVolume has been created
{0} ok
Page 46 of 112

Oracle SPARC Enterprise T3-2 Server
Installation Guide
{0} ok show-volumes
Volume 0 Target 389 Type RAID1 (Mirroring) WWID 08f2f0b5500c1151 Optimal Enabled Background Init In Progress 2 Members 583983104 Blocks, 298 GB Disk 0 Primary Optimal Target 9 HITACHI H103030SCSUN300G A2A8 Disk 1 Secondary Optimal Target b HITACHI H103030SCSUN300G A2A8
{0} ok
5. Type the unselect-dev command to deselect the SAS controller device.
{0} ok unselect-dev
The select device-path command enters the device’s control and command mode and the unselect-dev command exits it. Without exiting the control and command mode properly, the system could experience future unexpected failures depending on what commands are issued.
23.3. To Configure and Label a Hardware RAID Volume for Use in the Solaris Operating System
After mirroring the boot drive, you must apply a volume label to it. Until this is done the system will not see the mirrored volume you just created.
Insert the Solaris 10 09/10 U9 DVD and boot the system into single user
{0} ok boot dvd –sw.
Run format, and apply a new label to the volume (It will complain about bad disk geometry, but this error may be ignored.
Note in our example, the T3-2 had six drives, so we see the mirrored volume as disk 4 only.
# formatSearching for disks... WARNING: /pci@400/pci@2/pci@0/pci@e/scsi@0/iport@v0/disk@w3d0fddccdce80206,0 (sd4): Corrupt label; wrong magic number
Page 47 of 112

Oracle SPARC Enterprise T3-2 Server
Installation Guide
WARNING: /pci@400/pci@2/pci@0/pci@e/scsi@0/iport@v0/disk@w3d0fddccdce80206,0 (sd4): Corrupt label; wrong magic number
done
c0t5000CCA01511EA4Cd0: configured with capacity of 279.38GBc0t5000CCA015117A8Cd0: configured with capacity of 279.38GBc0t5000CCA0151222A4d0: configured with capacity of 279.38GBc0t5000CCA01512214Cd0: configured with capacity of 279.38GBc3t3D0FDDCCDCE80206d0: configured with capacity of 277.99GB
AVAILABLE DISK SELECTIONS: 0. c0t5000CCA01511EA4Cd0 <SUN300G cyl 46873 alt 2 hd 20 sec 625> /scsi_vhci/disk@g5000cca01511ea4c 1. c0t5000CCA015117A8Cd0 <SUN300G cyl 46873 alt 2 hd 20 sec 625> /scsi_vhci/disk@g5000cca015117a8c 2. c0t5000CCA0151222A4d0 <SUN300G cyl 46873 alt 2 hd 20 sec 625> /scsi_vhci/disk@g5000cca0151222a4 3. c0t5000CCA01512214Cd0 <SUN300G cyl 46873 alt 2 hd 20 sec 625> /scsi_vhci/disk@g5000cca01512214c 4. c3t3D0FDDCCDCE80206d0 <LSI-LogicalVolume-3000 cyl 65533 alt 2 hd 64 sec 139> /pci@400/pci@2/pci@0/pci@e/scsi@0/iport@v0/disk@w3d0fddccdce80206,0
Specify disk (enter its number): 4selecting c3t3D0FDDCCDCE80206d0[disk formatted]WARNING: /pci@400/pci@2/pci@0/pci@e/scsi@0/iport@v0/disk@w3d0fddccdce80206,0 (sd4): Corrupt label; wrong magic number
Disk not labeled. Label it now? yWARNING: /pci@400/pci@2/pci@0/pci@e/scsi@0/iport@v0/disk@w3d0fddccdce80206,0 (sd4): Corrupt label; wrong magic number
WARNING: /pci@400/pci@2/pci@0/pci@e/scsi@0/iport@v0/disk@w3d0fddccdce80206,0 (sd4): Corrupt label; wrong magic number
Ignore the warning about bad geometryWARNING:/pci@400/pci@2/pci@0/pci@e/scsi@0/iport@v0/disk@w3d0fddccdce80206,0 (sd4): Corrupt label; wrong magic number
From the FORMAT MENU select the option type – select (define) a disk typeformat> type
Under AVAILABLE DRIVE TYPES: select option 0. Auto configurec3t3D0FDDCCDCE80206d0: configured with capacity of 277.99GB<LSI-LogicalVolume-3000 cyl 65533 alt 2 hd 64 sec 139>
Page 48 of 112

Oracle SPARC Enterprise T3-2 Server
Installation Guide
selecting c3t3D0FDDCCDCE80206d0[disk formatted]
Write the new label to the disk using the label command:
format> label
Ready to label disk, continue? Yes
Check to see if all disks are now available for the Solaris install
AVAILABLE DISK SELECTIONS: 0. c0t5000CCA01511EA4Cd0 <SUN300G cyl 46873 alt 2 hd 20 sec 625> /scsi_vhci/disk@g5000cca01511ea4c 1. c0t5000CCA015117A8Cd0 <SUN300G cyl 46873 alt 2 hd 20 sec 625> /scsi_vhci/disk@g5000cca015117a8c 2. c0t5000CCA0151222A4d0 <SUN300G cyl 46873 alt 2 hd 20 sec 625> /scsi_vhci/disk@g5000cca0151222a4 3. c0t5000CCA01512214Cd0 <SUN300G cyl 46873 alt 2 hd 20 sec 625> /scsi_vhci/disk@g5000cca01512214c 4. c3t3D0FDDCCDCE80206d0 <LSI-LogicalVolume-3000 cyl 65533 alt 2 hd 64 sec 139> /pci@400/pci@2/pci@0/pci@e/scsi@0/iport@v0/disk@w3d0fddccdce80206,0Specify disk (enter its number): 4selecting c3t3D0FDDCCDCE80206d0[disk formatted]
FORMAT MENU: disk - select a disk type - select (define) a disk type partition - select (define) a partition table current - describe the current disk format - format and analyze the disk repair - repair a defective sector label - write label to the disk analyze - surface analysis defect - defect list management backup - search for backup labels verify - read and display labels save - save new disk/partition definitions inquiry - show vendor, product and revision volname - set 8-character volume name !<cmd> - execute <cmd>, then return quitformat> q
23.4. Before installing Solaris re-enable the auto-boot
You now must set the OBP parameter auto-boot? back to the default setting true. example:
Page 49 of 112

Oracle SPARC Enterprise T3-2 Server
Installation Guide
-> set /HOST/bootmode script="setenv auto-boot? true"
Page 50 of 112

Oracle SPARC Enterprise T3-2 Server
Installation Guide
24. Solaris 10 Installation 09/10 U9
24.1. Overview
We have explored three terminal type options for installing Solaris 10 on the T3-2. Each has advantages and disadvantages. We have documented the Solaris 10 installation using the example of the Windows PC network connected terminal, as it is virtually guaranteed that Agfa personnel will have access to a laptop or PC.
In terms of the different syntax for the various terminals, you will use different key combinations to accept changes and move to the next menu. These are highlighted in the table below.
Where the Solaris installation menus present you with multiple check box options, use the keyboard arrow keys to navigate the selections, then press <Enter> to select.
Terminal Advantage Disadvantage Key
Serial connected PC
(ILOM)
Always available for Agfa people
Fairly easy to read GUI via terminal
GUI was somewhat unreliable during our evaluation. Selecting one option actually selected a different one
Mainly F2 and F4 function keys
Network connected PC
(SSH to ILOM)
Always available for Agfa people
GUI can be less than user friendly
Press Esc, release then press 2
Press Esc, release then press 4
Network connected Sun server
(SSH to ILOM)
Visually the best Solaris installation GUI. Most reliable
Definitely preferred if you have access to another Sun server
Not always available to Agfa people
Mainly F2 and F4 function keys
Page 51 of 112

Oracle SPARC Enterprise T3-2 Server
Installation Guide
24.2. Solaris 10 Installation Using DVD and Network Connected PC Open a SSH ILOM session to the T3-2 from your network connected PC
Note that the terms for <Enter> and <Return> keys are synonymous
You must have a valid network IP address for the T3-2. Do not enter the IP address of the System Controller or System Controller Gateway that you configured earlier
Ensure that no connected RAID devices are powered on, as Solaris will likely install on the RAID instead of the server’s internal boot disk
Ensure that the Solaris 10 DVD is inserted into the T3-2
We used Solaris 10 Build 09/10 for the evaluation.
From the ok prompt, boot off the DVD using boot dvd (or see Appendix H for other boot source)
Use either up and down arrows or the tab key to navigate through the selections.
Step Menu or Description Selection or Action Press
1 Select a Language 0. English Enter
2 What type of terminal are you using?
Select 12) xterm
For network PC in our example
Enter
3 Solaris Installation Program General install info Esc 2
4 Identify this system General info Esc 2
5 Networked Select Yes Esc 2
6 Network interfaces Select igb0 (or interface of primary NIC as appropriate)
Esc 2
7 Use DHCP Select No Esc 2
8 Host Name Type the name Esc 2
9 IP Address e.g. 192.1.1.200
Do NOT use the same IP as the ILOM – it will crash the Solaris install
Esc 2
10 System part of a subnet Select Yes Esc 2
Page 52 of 112

Oracle SPARC Enterprise T3-2 Server
Installation Guide
Solaris 10 Installation Using DVD and Network Connected PC (Continued)
Step Menu or Description Selection or Action Press
11 Netmask 255.255.255.0 is the default Esc 2
12 Enable IPv6 for igb0 Select No (unless Staging Build Sheet specifies otherwise, e.g. Government order)
Esc 2
12 Default Route for igb0 If you are connected to an active network, select Specify One
For Staging in-house, select Detect One or None
Esc 2
14 Confirmation Page Check information and use F4 to change
Esc 2
15 Configure Security Policy Select No default is NO Esc 2
16 Confirm NO Kerberos Security confirm Esc 2
17 Name Service Generally, select None unless the machine was previously connected to the Internet, or you have the names of the site’s DNS and WINS servers at the time of staging
Esc 2
18 Confirm Name Service Confirm settings Esc 2
19 NFSv4 Domain Name Use default derived by the system
Esc 2
20 NFSv4 Confirmation Confirm previous selection Esc 2
21 Time Zone Specify by Geographic Region
Select the appropriate region from the menu
Esc 2
22 Date and Time Set as appropriate Esc 2
Page 53 of 112

Oracle SPARC Enterprise T3-2 Server
Installation Guide
Solaris 10 Installation Using DVD and Network Connected PC (Continued)
Step Menu or Description Selection or Action Press
23 Date and time confirmation Set as appropriate Esc 2
24 Root password Set as appropriate Esc 2
25 Indentify your system confirm Esc 2
26 Enabling Remote Services Select YES as the installation of IMPAX will active and install the JASS security policy
Esc 2
27 Solaris registration Deselect “I would like to” Esc 2
28 Solaris registration continued No need to fill out information Esc 2
29 There are two ways to install your Solaris software: "Standard" installs your system from a standard Solaris Distribution. Selecting Standard allows you to choose between initial install and upgrade, if your system is up gradable. Flash installs your system from one or more Flash Archives
F2_Standard
See Appendix A for deploying a flar image
Esc 2
30 Installer Options Eject CD/DVD Automatically Yes
Esc 2
31 Installer Options Reboot Automatically Yes Esc 2
32 Installer Options Select F4_initial unless this is an upgrade
Esc 4
33 Please wait … After about one minute a new dialog begins
N/A
34 SOFTWARE LICENSE AGREEMENT
Accept License Esc 2
35 Select the geographic regions for which support should be installed
Select the appropriate region for the country where the machine will be installed In North America, then use arrow keys to navigate to
Esc 2
Page 54 of 112

Oracle SPARC Enterprise T3-2 Server
Installation Guide
en_US.ISO111159-1Press Enter to check this selection
36 Select the initial locale to be used after the system has been installed
Select as appropriate (e.g. for USA select en_US.ISO111159-1)
Esc 2
37 Select the products you would like to install
Make no selection here Esc 2
38 Choose files system type Select UFS or ZFS Esc 2
39 Select Solaris Software Group Select Entire Group Plus OEM
Esc 2
40 Disk Selection (see details below)
NOTE: ** denotes current boot disk
For UFS if the system has two internal drives and they have been mirrored using the internal controller then only c1t0d0 will be seen.
ZFS Select all 3 drives. The ZFS process will create a mirrored pair.
For ZFS Recommend 3 drives mirrored
Esc 2
41 Preserve existing data Esc-2_Continue Esc 2
42 Auto-layout to automatically layout file systems (UFS only)
F4_Manual Layout Esc 4
42b Configure ZFS Settings(See details below) Dataset name to current Solaris
version date e.g. zfsU9BE
Swap = RAM, min 32GB
All other settings leave as default
Esc 2
43 Auto-layout to automatically layout file systems (UFS Only)
F2_Continue Esc 2
44 File System and Disk Layout (UFS Only)
F4_Customize Esc 4
45 Lay Out File Systems (UFS Edit to match the partitioning Esc 2 at
Page 55 of 112

Oracle SPARC Enterprise T3-2 Server
Installation Guide
Only) table on the next page the end
Page 56 of 112

Oracle SPARC Enterprise T3-2 Server
Installation Guide
Partitioning Table for Boot Disk:T.B.D (UFS Only)
Slice Mount Point 300 GB Drive Units in MB (IDC / IMPAX 6.5 and above)
Mount Point 300 GB Drive Units in MB (IMPAX 6.4 and below) approx
0 / 60 GB / 50
1 swap 100 GB (110% for 6.5.2) swap = RAM (min 32GB)
2 Can’t change Can’t change Can’t change Can’t change
3 /liveupgrade 60 GB /var 20
4 /liveupgrade 50
5
6 /zoneroot 60 /usr 20
7 /agfa 20 /export 40
Solaris 10 Installation Using DVD and Network Connected PC (Continued)
Step Menu or Description Selection or Action Press
46 File System and Disk Layout (UFS Only)
Confirm disk layout is properly configured
Esc-2_Continue
Esc 2
47 Mount Remote Systems? Esc-2_Continue Esc 2
48 Profile Esc-2_Begin Installation
Esc-4_Change
Esc 2
49 WARNING: The following disk configuration condition(s) have been detected. (UFS Only)
WARNING: Unused disk space
F2_OK
Esc 2
Page 57 of 112
Oracle SPARC Enterprise T3-2 Server
Installation Guide
Solaris 10 Installation Using DVD and Network Connected PC (Continued)
Step Menu or Description Selection or Action Press
50 Solaris will be installed then reboot.
Configure Keyboard layout
Select the appropriate setting for your location
US – English was selected
Esc 2
24.3. ZFS installation detailedAfter you select the software to be installed, you are prompted to select the disks to create your ZFS storage pool. This screen is similar as in previous Solaris releases:
Select Disks
On this screen you must select the disks for installing Solaris software.Start by looking at the Suggested Minimum field; this value is the approximate space needed to install the software you’ve selected. For ZFS, multiple disks will be configured as mirrors, so the disk you choose, or the slice within the disk must exceed the Suggested Minimum value.
NOTE: ** denotes current boot disk
Disk Device Available Space=============================================================================[X] ** c0t5000CCA01511EA4Cd0 289989 MB (F4 to edit)[X] c0t5000CCA015117A8Cd0 289989 MB [X] c0t5000CCA015117A8Cd0 289989 MB
Maximum Root Size: 289989 MBSuggested Minimum: 8086 MB
If you select two disks, a mirrored two-disk configuration is set up for the root pool. Either a two-disk or three-disk mirrored pool is optimal.
Select three disks to create a mirrored root pool, Both disks must have an SMI label and a slice 0. If the disks are not labeled with an SMI label nor contain slices, then you
Page 58 of 112

Oracle SPARC Enterprise T3-2 Server
Installation Guide
must exit the installation program, use the format utility to re-label and repartition the disks, and then restart the installation program.
If the Available Space column identifies 0MB, this generally indicates that the disk has an EFI label.
After you have selected three disks for your ZFS storage pool, and selected Esc 2 to preserve data, a screen that looks similar to the following is displayed:-
Configure ZFS Settings
Specify the name of the pool to be created from the disk(s) you have chosen.
Also specify the name of the dataset to be created within the pool that is to be used as the root directory for the filesystem.
ZFS Pool Name: rpoolZFS Root Dataset Name: zfsU9BEZFS Pool Size (in MB): 289770Size of Swap Area (in MB): 32768Size of Dump Area (in MB): 1536(Pool size must be between 6038 MB and 139770 MB)
[] Keep / and /var combined
[X] Put /var on a separate dataset
From this screen, you can change the name of the ZFS pool, dataset name, pool size, swap and dump device. Adjust the Dataset name per Solaris version (1009) and swap = RAM (Min 32GB). In addition, you can modify the way the /var file system is created and mounted.
Profile :-
The information shown below is your profile for installing Solaris software. It reflects the choices you've made on previous screens.
==================================================================
Installation Option: Initial Boot Device: c0t5000CCA01511EA4Cd0 Root File System Type: ZFS Client Services: None
Locales: U.S.A. (en_US.ISO8859-1) System Locale: U.S.A. (en_US.ISO8859-1) ( en_US.IS
Page 59 of 112

Oracle SPARC Enterprise T3-2 Server
Installation Guide
Software: Solaris 10, Entire Distribution plus OEM su Pool Name: rpool Boot Environment Name: zfsU9BE Pool Size: 2839770 MB Devices in Pool: c0t5000CCA01511EA4Cd0 c0t5000CCA015117A8Cd0
c0t5000CCA015117A8Cd0
After the installation is complete, review the resulting ZFS storage pool and file system information. For example:
# zpool statuspool: rpoolstate: ONLINEscrub: none requestedconfig:
NAME STATE READ WRITE CKSUMrpool ONLINE 0 0 0mirror ONLINE 0 0 0
c0t5000CCA01511EA4Cd0 ONLINE 0 0 0 c0t5000CCA015117A8Cd0 ONLINE 0 0 0
c0t5000CCA015117A8Cd0 ONLINE 0 0 0
25. How to Configure a ZFS Root File System with Zone Roots on ZFS
Follow the steps below to set up a ZFS root file system and ZFS zone root configuration that can be upgraded or patched. In this configuration, the ZFS zone roots are created as ZFS datasets.
In the steps that follow the example pool name is rpool and the example name of the boot environment that is currently active is zfsU9BE.
Tasks:1. Install the system with a ZFS root, either by using the interactive initial
installation method or the Solaris JumpStart installation method.2. Boot the system from the newly-created root pool.3. Create a dataset for grouping the zone roots.
Example:-
# zfs create -o mountpoint=/zoneroot rpool/zoneroot
The name for the zones dataset can be any legal dataset name. In the steps that follow the example dataset name is zoneroot.
Page 60 of 112

Oracle SPARC Enterprise T3-2 Server
Installation Guide
4. Set compression on
# zfs set compression=on rpool/zoneroot
5. The dataset is mounted at /zoneroot
A dataset will be automatically created for each zone created
Create your IDC / IMPAX zones as per the installation instructions / automated installation scripts and have then fully installed and booted. (NWG and MVFDB)
26. Local Graphics MonitorYou can redirect the system console to a local graphic monitor. You cannot use a localgraphics monitor to perform the initial server installation, nor can you use it view POST messages. Carry out the following only if you are connecting external monitor & keyboard.
To use a local graphics monitor:
1. Connect the monitor video cable to a video port on the server.
2. Connect the monitor power cord to an AC outlet.
3. Connect the USB keyboard cable to one USB port.
4. Connect the USB mouse cable to another USB port on the server.
5. Display the ok prompt.
6. At the ok prompt, set the following OpenBoot PROM configuration variables:ok setenv input-device keyboardok setenv output-device screen
7. Make the changes take effect:ok reset-all
The server stores the parameter changes and boots automatically.
Page 61 of 112

Oracle SPARC Enterprise T3-2 Server
Installation Guide
26.1. Activate the Oracle Solaris OS GUI interface.
Once the Oracle Solaris OS is installed and booted, type the following commands to display the GUI login screen. This must be done for the above procedure to work and/or the Xming/XLaunch remote login utility will be used
# ln -s /dev/fbs/ast0 /dev/fb
# fbconfig -xserver Xorg
# reboot
27. Configure ILOM Web Remote Control Video Redirection SettingsBefore You BeginPrior to performing the procedures ensure that the following requirements are met.
■ The Oracle ILOM Remote Console supports two methods of redirection: videoand serial console. Video redirection is supported on all Oracle Sun x86 processor based servers, as well as some SPARC processor-based servers. Serial consoleredirection is supported on all SPARC servers but it is currently not supported onx86 servers.■ To run the Oracle ILOM Remote Console, you must have the JRE 1.5 or higher(Java 5.0 or higher) software installed on your local client. To download the Java1.5 runtime environment, go to: http://java.com.■ The Oracle ILOM Remote Console is supported on your local client with the operating systems, web browsers, and JVM listed in the following table:
Microsoft Windows (98, 2000, XP, Vista, and Windows 7)(Also tested on Win 2003)
• Internet Explorer 6.0 and above (IE9 not included)• Mozilla 1.7.5 and above• Firefox 1.0 and above• Opera 6.x and above
Oracle Solaris (9 and 10)
• Mozilla 1.7.5 and above• Firefox 1.0 and above
Page 62 of 112

Oracle SPARC Enterprise T3-2 Server
Installation Guide
27.1. Configure ILOM Remote Control Video Redirection Settings1. Log in to the ILOM SP web interface.2. Click Remote Control --> KVMS.
In the KVMS Settings page make sure the state is set to ‘enable’
27.2. Launch the Oracle ILOM Remote Console
If you are logged into the SP console the desktop login may now be suspended. Exit out to get back to the desktop login prompt.
******************************************************************************* Starting Desktop Login on display :0...** Wait for the Desktop Login screen before logging in.******************************************************************************rootPassword:Mar 2 14:53:04 t3 login: ROOT LOGIN /dev/consoleLast login: Wed Mar 2 14:46:41 on consoleOracle Corporation SunOS 5.10 Generic Patch January 2005####
******************************************************************************* Suspending Desktop Login...** If currently logged out, press [Enter] for a console login prompt.** Desktop Login will resume shortly after you exit console session.*
Page 63 of 112

Oracle SPARC Enterprise T3-2 Server
Installation Guide
*****************************************************************************Mar 2 14:54:16 t3 snmpXdmid: Registration with DMI failed. err = 831.
## exit
t3 console login:
******************************************************************************* Resuming Desktop Login...******************************************************************************
t3 console login:
Now one can use the ILOM Web interface to display the on board video output.
1. Log in to the ILOM web interface for the server SP.
2. Click Remote Control --> Redirection.
Select whether to use the video or serial redirection then click on “Launch Remote Console”. Your web browser may request that this site be unblocked.
Page 64 of 112

Oracle SPARC Enterprise T3-2 Server
Installation Guide
Use the “Java Desktop System” for your default desktop session then one will see the exported video from the T3-2
Page 65 of 112

Oracle SPARC Enterprise T3-2 Server
Installation Guide
27.3. Xlaunch
If preferred the Xlaunch utility (Doc node ID# 28643376) may still be used but the desktop login must be in a suspended state. Also it has been seen that when the procedure detailed in the mentioned document is carried out errors are seen in the SP console that can be ignored. It is advised that the system be reverted back to pre-gdm activation so that these errors are terminated. (ongoing investigation)
Example of possible console errors:-
bash-3.00#******************************************************************************* Suspending Desktop Login...** If currently logged out, press [Enter] for a console login prompt.** Desktop Login will resume shortly after you exit console session.******************************************************************************Mar 3 15:44:50 t3 gdm[2715]: gdm_slave_xioerror_handler: Fatal X error - Restarting :0Mar 3 15:44:54 t3 gdm[2718]: gdm_slave_xioerror_handler: Fatal X error - Restarting :0Mar 3 15:44:58 t3 gdm[2721]: gdm_slave_xioerror_handler: Fatal X error - Restarting :0
bash-3.00# Mar 3 15:44:58 t3 gdm[2714]: Failed to start X server several times in a short time period; disabling display :0bash-3.00#
Page 66 of 112

Oracle SPARC Enterprise T3-2 Server
Installation Guide
28. Applying Patches from support.oracle.com
Once you are logged into Oracle support to download a patch go to “Patches & Updates” then select “Oracle Solaris on SPARC (64bit) then enter the required patch number as shown
To download the “Electronic Prognostics” package select click on “(Advanced Search) then select “Electronic Prognostics” from the dropdown list
28.1. Install the SUN Recommended Cluster Patch
Download the latest Solaris 10 Recommended Cluster Patch from http://support.oracle.com and install.
Page 67 of 112

Oracle SPARC Enterprise T3-2 Server
Installation Guide
28.2. Mandatory T3-2 Sun Patch Information
Mandatory Patches for T3-2 Servers, For All Supported OS Versions
Follow the detailed install.info instructions contained in the patches from support.oracle.com on how to install these patches.
Many of these patches will need to be installed from the single user mode.
Patch IDs Description
145868-04 or later 11792212: SunOS 5.10: pcie patch
145098-04 or later 11791576: SunOS 5.10: emlxs driver patch
144567-02 or later 10273038: SunOS 5.10: ixgbe patch
143647-09 or later 11697204: SunOS 5.10: fp patch
p10623118_110_SOLARIS64.zip
10623118: Electronic Prognostics 1.1 - Solaris 10 64-bit SPARC
28.3. Mandatory System Firmware PatchInitial SPARC T3-2 servers shipped with system firmware that set the power supplyfan speed at a level that did not adequately cool the power supplies and front drives.System firmware version 8.0.1.e sets the fan speed at the correct level.
To display the firmware version of your system, type the following command at the
ILOM prompt (->):
-> show /HOST sysfw_version/HOSTProperties:
sysfw_version = Sun System Firmware 8.0.1.e 2010/11/23 16:42
Caution – If the system’s firmware revision is less than 8.0.1.e, you must install the latest compatible version of the 145667-02 or later patch:-
Page 68 of 112

Oracle SPARC Enterprise T3-2 Server
Installation Guide
28.4. Hardware FLASHprom Sun Fire T3-2 Sun System Firmware UpdateSummary of the SPARC T3-2 Sun System Firmware 8.0.1.e flashprom update
The installation of Patch 145667-02 is comprised of the following steps:1. Determine the system’s current revision of Sun System Firmware
2. Compare the current Sun System Firmware revision with the latest available revisions
3. Verify that the upgrade is NECESSARY!
4. If the current Sun System Firmware revision is lower than the latest available Sun System Firmware revision in this patch, then proceed to the next step. If NOT, STOP: DO NOT CONTINUE
5. Use the sysfwdownload utility to download the Sun System Firmware image to the System Controller.
6. Prepare the system for update of the Sun System Firmware
7. Run the System Controller flashupdate utility
8. Verify that the update was successful
9. Resume operations; power on the system and boot the operating system
10. Download patch from support.oracle.com:-
Page 69 of 112
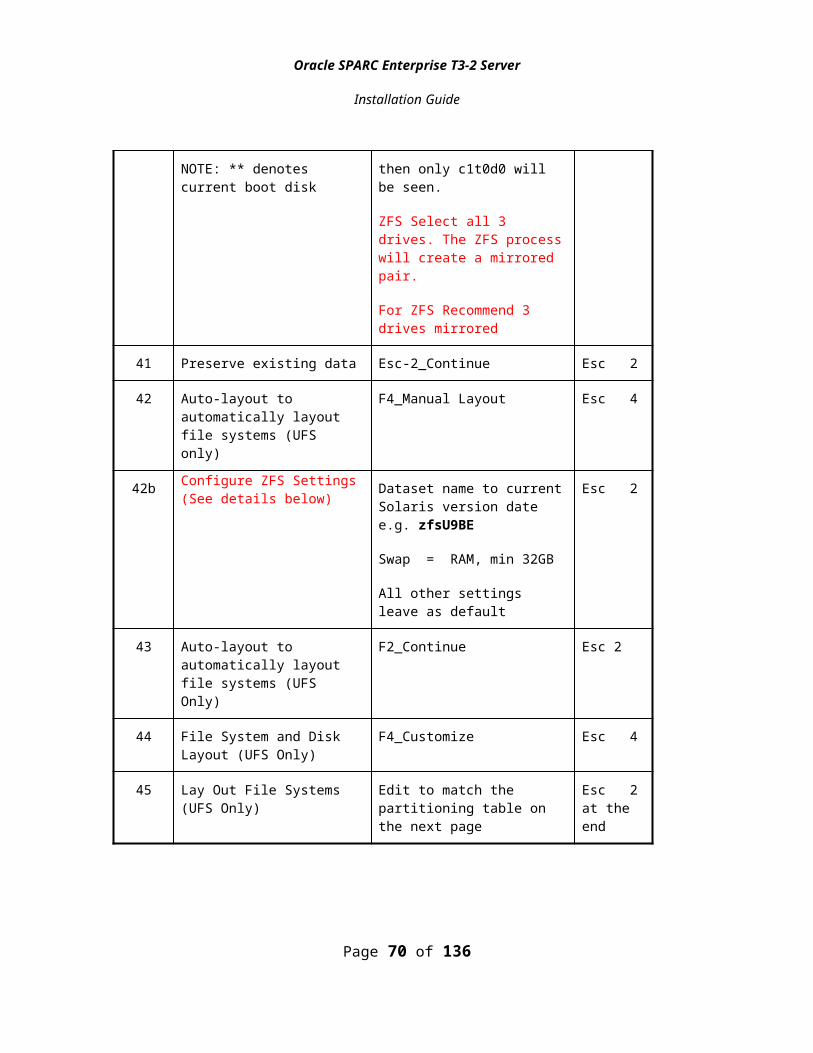
Oracle SPARC Enterprise T3-2 Server
Installation Guide
Detailed Patch Installation Instructions
Part 1, Determine the system’s current revision of Sun system firmware
Sun System firmware is composed of the following five individually versioned components:
Integrated Lights Out Manager (ILOM)
Sun System Firmware
Hypervisor
Openboot (OBP)
Power On Self Test (POST)
Each of these components may change from release to release of Sun System firmware, so you must inspect all of them to determine whether an upgrade is necessary.
From the System Processor ILOM CLI use the output from the following commands to determine the current system firmware revisions;
-> versionSP firmware 3.0.12.2.dSP firmware build number: 60498SP firmware date: Tue Nov 23 15:55:29 PST 2010SP filesystem version: 0.1.23
Then type
-> show /HOST
Properties: autorestart = reset autorunonerror = false bootfailrecovery = poweroff bootrestart = none boottimeout = 0 hypervisor_version = Hypervisor 1.9.1.a 2010/11/01 16:15 ioreconfigure = true macaddress = 00:21:28:b1:23:9c maxbootfail = 3 obp_version = OpenBoot 4.32.1 2010/10/13 18:23
Page 70 of 112

Oracle SPARC Enterprise T3-2 Server
Installation Guide
post_version = POST 4.32.1.b 2010/11/15 21:48 send_break_action = (Cannot show property) status = Solaris running sysfw_version = Sun System Firmware 8.0.1.e 2010/11/23 16:42
->Part 2, Compare the current Sun System firmware revision with the latest available versions
From the version -v output, find the versions of:
Integrated Lights Out Manager (ILOM)
From the show /HOST output, find the versions of:
Hypervisor
OBP
Integrated POST
Sun System Firmware
Compare with the versions in the entries below for latest Sun System firmware 8.0.1.e (145667-02) or above (147316-xx as of September 2011)
Firmware Component
Command to see version (sc>)
Example version
Current Version
Details
Integrated Lights Out Manager (ILOM)
version 3.0.12.2.d 3.0.12.2.d Nov 23 15:55:29 PST 2010
Sun System Firmware
show /HOST 8.0.1.e 8.0.1.e 2010/11/23 16:42
Hypervisor show /HOST 1.9.1.a 1.9.1.a 2010/11/01 16:15
OBP show /HOST 4.32.1 4.32.1 2010/10/13 18:23
Integrated POST
show /HOST 4.32.1.b 4.32.1.b 2010/11/15 21:48
Page 71 of 112

Oracle SPARC Enterprise T3-2 Server
Installation Guide
Page 72 of 112

Oracle SPARC Enterprise T3-2 Server
Installation Guide
Part 3, Verify whether the firmware upgrade is needed
If all of the current Sun System firmware component versions match the version numbers listed under the latest Sun System firmware, then stop here. A firmware upgrade is not necessary.
If any of the current Sun System Firmware component versions is lower than version numbers listed under the Latest Sun System Firmware, then proceed to the next step.
Part 4, Use the sysfwdownload utility to download the Sun System Firmware image to the System Controller.
Download and unzip the patch 145667-XX into a local directory, in this example /agfa/T3 is used.
Use the sysfwdownload utility to download the Sun System Firmware image to the System Controller.
Wait until the download completes successfully. This should take 2-5 mins.
./sysfwdownload Sun_System_Firmware-8_0_1_e-SPARC_T3-2.pkg
.......... (7%).......... (14%).......... (21%).......... (28%).......... (35%).......... (42%).......... (49%).......... (56%).......... (63%).......... (70%).......... (78%).......... (85%).......... (92%).......... (99%). (100%)
Download completed successfully.
Part 5, Prepare the system for update of the Sun System Firmware
To update the Sun System Firmware, the system must be powered off (i.e. in standby mode)
As root, exit the OS such that the system returns to the ok prompt: # shutdown -i0 -g0 -y{0} ok
Page 73 of 112

Oracle SPARC Enterprise T3-2 Server
Installation Guide
Access the System Controller ILOM command line interface (CLI). This is accomplished using the console escape characters. (normally #.)
{0} ok #.
->
From the System Controller CLI, issue the stop /SYS command (this sequence will take about 60 seconds to completely power the server off)
-> stop /SYS Are you sure you want to stop /SYS (y/n)? y Stopping /SYS
->
Part 6, Run the System Controller ‘load –source’ utility
Sun System Firmware is updated using the System Controller ‘load –source’ command, which accesses the Sun System Firmware image downloaded from SunSolve to the local machine.
Before running the ‘load –source’ utility, you must have already downloaded the new Sun System firmware image from the Oracle support site to the system controller using sysfwdownload.
Procedure
Make sure that your virtual keyswitch setting is not in the LOCKED position. You can check the setting from the System Controller CLI with the following command: -> show /SYS keyswitch_state /SYS
Properties: keyswitch_state = Normal
If the virtual key switch is in LOCKED position you can change that with the following command:-> set /SYS keyswitch_state=Normal Set 'keyswitch_state' to 'Normal'
Page 74 of 112

Oracle SPARC Enterprise T3-2 Server
Installation Guide
Verify the image is for the correct platform:
Through ILOM CLI /SP/firmware/localimage is the default location for the local image:
To verify the data of the Firmwware image you uploaded above run the ILOM show command on /SP/firmware/localimage.
-> show /SP/firmware/localimage
/SP/firmware/localimage Targets:
Properties: upload_date = Thu Nov 11 12:46:08 2010
version = 3.0.12.2
Flash update the downloaded Sun System Firmware image: -> load -source /SP/firmware/localimage
NOTE: An upgrade takes several minutes to complete. ILOM will enter a special mode to load new firmware. No other tasks can be performed in ILOM until the firmware upgrade is complete and ILOM is reset.
Are you sure you want to load the specified file (y/n)? yPreserve existing configuration (y/n)? y..........................................................................
Firmware update is complete.ILOM will now be restarted with the new firmware.
-> /sbin/reboot
The SP will now be reset so the communication utility (Putty) used to access the SP controller will be lost and will need to be restarted.
Page 75 of 112

Oracle SPARC Enterprise T3-2 Server
Installation Guide
Part 7, Verify that the update was successfulOnce the System Controller has reset, login (Putty) as the user root and verify the Sun System Firmware versions match those identified under the Latest Sun System Firmware: entry in Step 2 using the showsc version -v and showhost commands.
-> versionSP firmware 3.0.12.2.dSP firmware build number: 60498SP firmware date: Tue Nov 23 15:55:29 PST 2010SP filesystem version: 0.1.23
-> show /HOST
/HOST Targets: bootmode console diag domain tpm
Properties: autorestart = reset autorunonerror = false bootfailrecovery = poweroff bootrestart = none boottimeout = 0 hypervisor_version = Hypervisor 1.9.1.a 2010/11/01 16:15 ioreconfigure = true macaddress = 00:21:28:b1:23:9c maxbootfail = 3 obp_version = OpenBoot 4.32.1 2010/10/13 18:23 post_version = POST 4.32.1.b 2010/11/15 21:48 send_break_action = (Cannot show property) status = Powered Off sysfw_version = Sun System Firmware 8.0.1.e 2010/11/23 16:42
Commands: cd set show
Page 76 of 112

Oracle SPARC Enterprise T3-2 Server
Installation Guide
->
Page 77 of 112

Oracle SPARC Enterprise T3-2 Server
Installation Guide
Part 11, Resume operations; power on the system and boot the operating system From the System Controller CLI power on the system and start Solaris.
-> start /SYSAre you sure you want to start /SYS (y/n)? y
-> start /SP/consoleAre you sure you want to start /SP/CONSOLE (y/n)? ySerial console started. To stop, type #.
Page 78 of 112

Oracle SPARC Enterprise T3-2 Server
Installation Guide
29. SAS2 Integrated RAID™ Solution
After Solaris has been installed you can manage RAID from Oracle Solaris by down loading and installing the RAID Management Utility for your SPARC T3 Series server from this location: http://www.lsi.com/support/sun.
For the full description of the LSI raid utility please read the user’s guide downloadable from www.lsi.com under the T3-2 section
The following chapters will show the current configured raid completed before the Solaris OS was installed and the creation of a Hot Spare. Further required procedures can be obtained from the user’s guide.
Download and unzip the Sas2iru (Raid management) and the flash utility Sas2flash files into a working directory such as /aga/SAS_raid and make them executable with chmod.
Page 79 of 112

Oracle SPARC Enterprise T3-2 Server
Installation Guide
SASIRCU CommandsD
Commands DescriptionCREATE Creates Integrated RAID volumes on LSI SAS2 controllers
DELETE D all Integrated RAID volumes and hot spare drives from the specified LSI SAS2 controller. No other controller configuration parameters arechanged.
DISPLAY Displays information about LSI SAS2 controller configurations,including controller type, firmware version, BIOS version, volume information, physicaldrive information, and enclosure
HOTSPARE Adds a hot spare drive to spare pool 0 or deletes a hot spare drive.LIST Displays a listing of all controllers present in system, along with
each corresponding controller indexSTATUS Displays the current status of any existing Integrated RAID volumes and the
status of any operation that is currently in progress on the selected controllerCONSTCHK Sends requests to the Integrated RAID firmware to start a
consistency check operation on the specified volume.ACTIVATE Activates an inactive Integrated RAID volumeLOCATE Locates specific drives in a volume by turning on their location
indicator.LOGIR Uploads or clears the Integrated RAID log information.
Format commands as follows for the SAS2IRCU command-line interface:
sas2ircu <controller #> <command> <parameters>The commands are not case sensitive. The command descriptions use the followingconventions:
Enter the text in italics exactly as shown on the command line. Replace text enclosed in < > with a required parameter. Replace text enclosed in [ ] with an optional parameter. Enter parameters enclosed in { } one or more times, as required for the
command being executed. Do not enter the command-line definition characters < >, [ ], and { } on the
command line.
<controller #>The unique controller number that the program assigns to each PCI function foundon supported controller chips in the system, starting with controller # 0. Forexample, in a system containing two LSISAS2008 controllers, controller # 0references the first controller and controller # 1 references the other controller.Valid controller number values are 0 to 255 (decimal).
<Enclosure:Bay>The enclosure and bay/slot of a peripheral device attached to the bus. Theargument must use a colon (:) as a separator and must follow the enclosure:bayformat. Enclosure is a 16-bit EnclosureHandle value set by the IOC. A value of 0 isinvalid. Bay/Slot is a 16-bit slot value set by the IOC. Use the DISPLAY command to get the enclosure and slot numbers of a drive.
Page 80 of 112
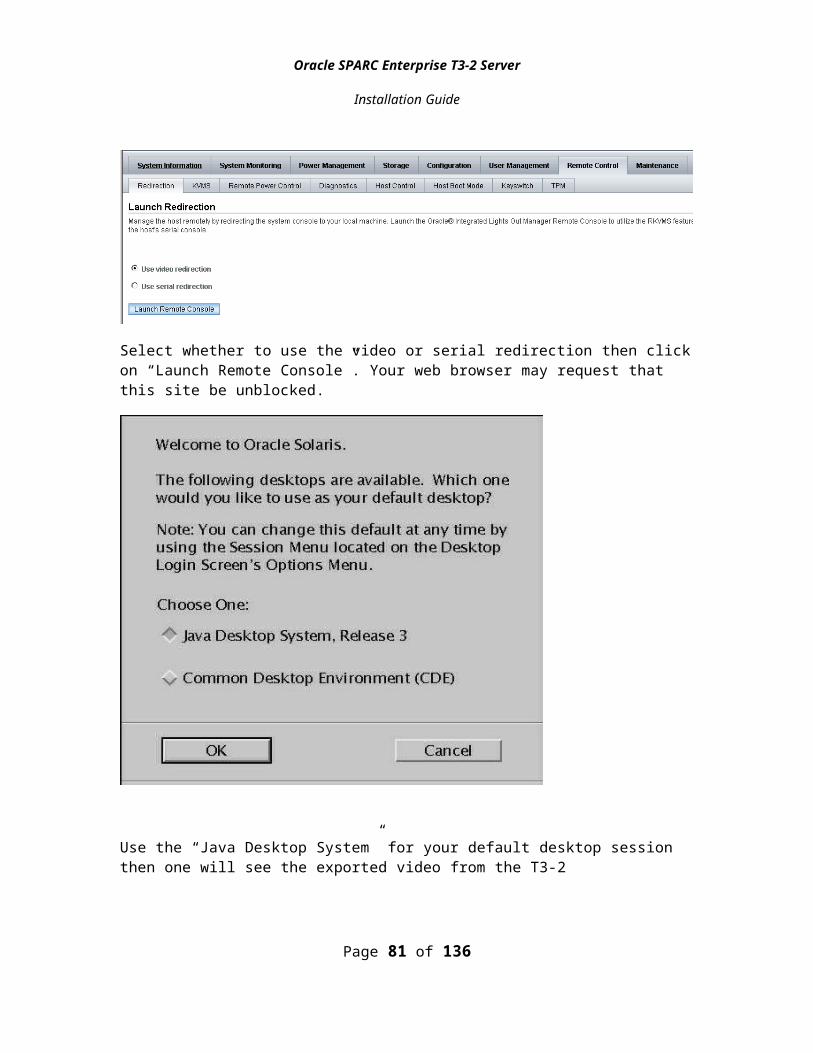
Oracle SPARC Enterprise T3-2 Server
Installation Guide
Examples :bash-3.00# ls -ltotal 660-rwxrwxrwx 1 root root 64816 Feb 23 14:53 sas2flash-6.00.00.00.zip-rwxrwxrwx 1 root root 198552 Oct 21 14:43 sas2ircu-rwxrwxrwx 1 root root 59386 Feb 23 14:53 sas2ircu-6.250.02.00.zip
The sas2ircu-6.250.02.00.zip file was unzipped and renamed to sas2ircu for ease of use.
bash-3.00# ./sas2ircu listLSI Corporation SAS2 IR Configuration Utility.Version 6.250.02.00 (2010.06.30)Copyright (c) 2009-2010 LSI Corporation. All rights reserved.
Adapter Vendor Device SubSys SubSys Index Type ID ID Pci Address Ven ID Dev ID ----- ------------ ------ ------ ----------------- ------ ------ 0 SAS2008 1000h 72h 00h:f00h:00h:00h 1000h 0072hSAS2IRCU: Utility Completed Successfully.bash-3.00#
bash-3.00# ./sas2ircu 0 displayLSI Corporation SAS2 IR Configuration Utility.Version 6.250.02.00 (2010.06.30)Copyright (c) 2009-2010 LSI Corporation. All rights reserved.
Read configuration has been initiated for controller 0------------------------------------------------------------------------Controller information------------------------------------------------------------------------ Controller type : SAS2008 BIOS version : 0.00.00.00 Firmware version : 5.00.17.00 Channel description : 1 Serial Attached SCSI Initiator ID : 0 Maximum physical devices : 831 Concurrent commands supported : 1871 Slot : Unknown Segment : 0 Bus : 3840 Device : 0 Function : 0 RAID Support : Yes------------------------------------------------------------------------IR Volume information (Previously created by the ‘Fcode’ utility)------------------------------------------------------------------------IR volume 1 Volume ID : 905
Page 81 of 112

Oracle SPARC Enterprise T3-2 Server
Installation Guide
Volume Name : Boot-Mirror Status of volume : Okay (OKY) RAID level : RAID1 Size (in MB) : 285148 Physical hard disks : PHY[0] Enclosure#/Slot# : 1:0 PHY[1] Enclosure#/Slot# : 1:1------------------------------------------------------------------------Physical device information------------------------------------------------------------------------Initiator at ID #0
Device is a Hard disk Enclosure # : 1 Slot # : 0 SAS Address : 5000cca-0-0a52-4fe1 State : Optimal (OPT) Size (in MB)/(in sectors) : 286102/585937499 Manufacturer : HITACHI Model Number : H103030SCSUN300G Firmware Revision : A2A8 Serial No : 000952GG8A7E Protocol : SAS Drive Type : SAS_HDD
Device is a Hard disk Enclosure # : 1 Slot # : 1 SAS Address : 5000cca-0-1512-31c1 State : Optimal (OPT) Size (in MB)/(in sectors) : 286102/585937499 Manufacturer : HITACHI Model Number : H103030SCSUN300G Firmware Revision : A2A8 Serial No : 001045GA060E Protocol : SAS Drive Type : SAS_HDD
Device is a Hard disk Enclosure # : 1 Slot # : 2 SAS Address : 5000cca-0-1512-22a5 State : Ready (RDY) Size (in MB)/(in sectors) : 286102/585937499 Manufacturer : HITACHI Model Number : H103030SCSUN300G Firmware Revision : A2A8 Serial No : 1045G9Z5UE Protocol : SAS Drive Type : SAS_HDD
Page 82 of 112

Oracle SPARC Enterprise T3-2 Server
Installation Guide
29.1. How to Create a Hot SpareCommand line syntax :
sas2ircu <controller #> hotspare [delete] <enclosure:bay>
Example using drive three which is Enclosure #1,Slot #2
bash-3.00# ./sas2ircu 0 hotspare 1:2LSI Corporation SAS2 IR Configuration Utility.Version 6.250.02.00 (2010.06.30)Copyright (c) 2009-2010 LSI Corporation. All rights reserved.
Please wait, may take up to a minute...SAS2IRCU: Hot Spare disk created successfully.SAS2IRCU: Command HOTSPARE Completed Successfully.SAS2IRCU: Utility Completed Successfully.bash-3.00#
To check to see if the command completed:-
bash-3.00# ./sas2ircu 0 displayLSI Corporation SAS2 IR Configuration Utility.Version 6.250.02.00 (2010.06.30)Copyright (c) 2009-2010 LSI Corporation. All rights reserved.
Device is a Hard disk Enclosure # : 1 Slot # : 2 SAS Address : 5000cca-0-1512-22a5 State : Hot Spare (HSP) Size (in MB)/(in sectors) : 286102/585937499 Manufacturer : HITACHI Model Number : H103030SCSUN300G Firmware Revision : A2A8 Serial No : 001045G9Z5UE Protocol : SAS Drive Type : SAS_HDD
NOTE:- Once the HS has been created it will no longer be visible when using the ‘format’ command
Page 83 of 112

Oracle SPARC Enterprise T3-2 Server
Installation Guide
30. Appendix A, Using the Solaris Flash Feature (UFS Only)
30.1. General Information
Flash Archiving is a feature of Solaris 10 that significantly reduces the time required to install and configure the operating system. A flash archive file is analogous to a Windows ‘ghost’ image, in that it provides a template for building the systems quickly and reliably.
Following successful upgrade including IMPAX software, Solaris patches, and disk configuration, you may use the flash archiving feature to capture a recovery image of the completed system. For example, you may create a flash image of the fully configured Oracle Server that includes the IMPAX software repository.
30.2. Assumptions and Dependencies The image files are quite large in size, depending on their contents. Expect
simple image files to average over one gigabyte, compressed.
The flash archive feature works best where you have a mounted file system to store the image files.
You know how to create and mount a network file system
The network is at least 100Mbsec, full duplex
30.3. Command Syntax
To create an image file that represents a completed Solaris 10 system:
1. Do a complete Solaris 10 installation including Solaris 10 patches
2. As user root, use the flar create syntax to create an image file
1. Example syntax
# flar create –n solaris10repos62 –c database10.flar
Command Component What it Means
flar create Command to create the image file
-n < name> A description of the system you are copying, in our example a Solaris 10 6.X software repository
-c Indicates compression is applied to the file
<filename>.flar This is the name of the flash image file
Page 84 of 112

Oracle SPARC Enterprise T3-2 Server
Installation Guide
30.4. Applying a Flash Archive File
1. Use only the Solaris Installation DVD following the system identification instructions in the Appendices this document for installing Solaris 10
2. At the Specify Media prompt, Select Network File System then press Next
3. Specify Network file system path (e.g. 192.1.1.104:/flarfiles) then press Next
4. The Select Flash Archives prompt provides a list of *.flar files; Select one then press Next
5. The Flash Archive Summary prompt shows the selected flash archive file. Ensure that this is the correct file then press Next
6. At the Additional Flash Archives prompt select None then press Next
7. At the Disk Selection menu, select and configure disks per the instructions in the Appendices for Solaris 10, then press Next
8. At the Ready to Install prompt, (confirms the flash archive location), press Install Now
It takes about 10 - 15 minutes to restore the flash archive file.
Page 85 of 112

Oracle SPARC Enterprise T3-2 Server
Installation Guide
31. Appendix B; JASS Command Syntax
As user root, navigate to the path:
[root@os1:] # cd /opt/SUNwjass/bin
To apply the toolkit
# jass-execute -d
To undo a previous application
# jass-execute -u
Display the history
# jass-execute -l
Display the JASS menu
# jass-execute -h or -?
Page 86 of 112

Oracle SPARC Enterprise T3-2 Server
Installation Guide
32. Appendix C; SUN T3-2DB9 to RJ45 Serial Cable Pin-outs
DB9 RJ45 1. DCD RTS
2. RxD DTR3. TxD TxD4. DTR GND5. GND GND 6. DSR RxD7. RTS DSR/DCD8. CTS CTS 9. RI
Page 87 of 112
T5611A Wiring Chart
Pin Color Signal
1 White-Green T3
2 Green R3
3 White-Orange T2
4 Blue R1
5 White-Blue T1
6 Orange R2
7 White-Brown T4
11 Brown R3
Connect DB9 2, 3, and 5 to RJ45 3, 6, and 4/5

Oracle SPARC Enterprise T3-2 Server
Installation Guide
33. Appendix D; MPXIO configuration.
In order for the correct MPXIO functionality one must insure that the following patches are installed. At the time of compiling this document these are included in the recommended cluster patch.
120629-06 or later124327-04 or later125100-10 or later
33.1. MPxIO Enabling and disabling commands
# stmsboot -e Turns on MPxIO for all fiber devices. It will also reboot and reconfigure devices. No other commands necessary.
# stmsboot -u Updates MPxIO for all fiber devices. Use it to add or if you remove fiber attached devices. System will reboot and reconfigure
# stmsboot -d Turns off MpxIO
33.2. Field example of setting up of IBM SAN with Qlogic HBAs
You will need to use only the Solaris 10 drivers for the Qlogic 2460. You get them from the SUNWqlc package from Solaris 10.THE QLOGIC DRIVER FROM QLOGIC WILL NOT WORK. It is a sparc1 version but the T3-2is a sparc9 and if you try to load the module by hand you will see it responds with "bad address" and obviously when you do a "modinfo | grep qlc" (OR qla) you won't see it running. The SUNWqlc loads fine and it lives in /kernel/drv/sparcv9. You can do a file command on it and see the version. You can also load and unload the module with out errors.
Do NOT add disk devices in the /kernel/drv/scsi_vhci.conf file! Leave them out. It is plug and play with Solaris 10 MPxIO. If you put an entry in there you will be causing weird behavior with some disks working and others not. You may edit the file to tell it "none" for load balance. You may change other setting defaults that already exist in the file (load-balance=”none”; and auto-failback=”enable”;). You should also NOT put mpxio-disable=”no”; in the /kernel/drv/scsi_vhci.conf file! This is automatically put into the /kernel/drv/fp.conf file when using MPxIO with Solaris 10. Again, Do NOT add disk devices in the /kernel/drv/scsi_vhci.conf file! If you do define Vendor ID and Product ID you will get all kinds of errors in format and when you try to mount.
They look like this:
AVAILABLE DISK SELECTIONS:
0. c0t0d0 <LSILOGIC-LogicalVolume-3000 cyl 65533 alt 2 hd 16 sec 136>
Page 88 of 112

Oracle SPARC Enterprise T3-2 Server
Installation Guide
/pci@7110/pci@0/pci@9/scsi@0/sd@0,0 1. c0t2d0 <LSILOGIC-LogicalVolume-3000 cyl 65533 alt 2 hd 16 sec 273> /pci@7110/pci@0/pci@9/scsi@0/sd@2,0
2. c5t200200A0B110F7A59d0 <IBM-1742-0520 cyl 65533 alt 2 hd 64 sec 159>
/pci@7c0/pci@0/pci@11/QLGC,qlc@0/fp@0,0/ssd@w200200a0b110f7a59,0
3. c5t200300A0B110F7A59d0 <IBM-1742-0520 cyl 65533 alt 2 hd 64 sec 159>
/pci@7c0/pci@0/pci@11/QLGC,qlc@0/fp@0,0/ssd@w200300a0b110f7a59,0
4. c6t200200A0B110F7A59d0 <IBM-1742-0520 cyl 65533 alt 2 hd 64 sec 159>
/pci@7c0/pci@0/pci@9/QLGC,qlc@0/fp@0,0/ssd@w200200a0b110f7a59,0
5. c6t200300A0B110F7A59d0 <IBM-1742-0520 cyl 65533 alt 2 hd 64 sec 159>
/pci@7c0/pci@0/pci@9/QLGC,qlc@0/fp@0,0/ssd@w200300a0b110f7a59,0
Specify disk (enter its number): 2
selecting c5t200200A0B110F7A59d0[disk unformatted]Disk not labeled. Label it now? yWarning: error writing VTOC.Illegal request during readASC: 0x94 ASCQ: 0x1Warning: error reading backup label.Illegal request during readASC: 0x94 ASCQ: 0x1Warning: error reading backup label.Illegal request during readASC: 0x94 ASCQ: 0x1Warning: error reading backup label.Illegal request during readASC: 0x94 ASCQ: 0x1Warning: error reading backup label.Illegal request during readASC: 0x94 ASCQ: 0x1Warning: error reading backup label.Warning: no backup labelsWrite label failed
The way this is supposed to look is:
1. With correct drivers and MPxIO disabled:
You will see 4 devices for each LUN presented.
The devices should all be indicated with ssd, NOT sd devices.
At this point your drivers would appear to be correct.
2. With correct drivers and AFTER issuing the stmsboot -e command:
You will now see 1 device for each LUN presented.
The /kernel/drv/fp.conf will automatically have the MPxIO entry set correctly.
Page 89 of 112

Oracle SPARC Enterprise T3-2 Server
Installation Guide
You will see the device name added as a "longer" per MPxIO device control and naming.
The only lines you should have in the scsi_vhci.conf file are:
load-balance=”none”;
auto-failback=”enable”;
33.3. Recommended steps to activate MPXIO after possible incorrect settings:
1. issue the stmsboot -d command (allow system to reboot)
2. look at the fp.conf file to verity mpxio-disable="yes";
3. Edit the scsi_vhci.conf file to remove vendor and product entries.
4. Issue the devfsadm -C to clear the device cache.
5. Go into format and verify that you see 4 devices for each lun. Verify that the devices show up as ssd devices.
6. issue the stmsboot -e command (allow system to reboot)
7. Look at the fp.conf file to verify that mpxio-disable="no"; was automatically put in effect by the system.
11. Go into format and verify that you see 1 device for each lun.
9. Still in "format" select your LUNs individually and see that they label correctly without VTOC and SCSI errors.
10. Try hand mounting LUNs to verify they mount without problems. If the file systems came from another machine and you are now attaching them to a new Solaris host, they should NOT request any fsck if they were in a proper file system state when they were on the other system.
Page 90 of 112

Oracle SPARC Enterprise T3-2 Server
Installation Guide
34. Appendix E; Enable NFS after IMPAX Armoring.
After the implementation of IMPAX the NFS services are shut down as part of the Armoring package (JASS). The following procedure will allow for NFS activation so that any NAS connection may be implemented.
[mvf@os1dg:/usr/mvf] $ svcs -a|grep nfsdisabled 0:11:11 svc:/network/nfs/server:defaultdisabled 0:11:19 svc:/network/nfs/client:defaultdisabled 0:11:19 svc:/network/nfs/status:defaultdisabled 0:11:19 svc:/network/nfs/nlockmgr:defaultdisabled 0:11:31 svc:/network/nfs/rquota:defaultonline 0:11:28 svc:/network/nfs/cbd:default
[mvf@os1dg:/usr/mvf] $ su -Password:
[root@os1dg:/] # svcadm enable -r nfs/server; must cinfigure share in /etc/dfs/dfstab, -r starts all dependant processes
[root@os1dg:/] # svcadm enable -r nfs/client; -r starts all dependant processes
[root@os1dg:/] # svcs -a|grep nfsonline 0:25:43 svc:/network/nfs/status:defaultonline 0:25:43 svc:/network/nfs/cbd:defaultonline 0:25:43 svc:/network/nfs/mapid:defaultonline 0:25:44 svc:/network/nfs/nlockmgr:defaultonline 0:28:46 svc:/network/nfs/client:defaultonline 0:30:28 svc:/network/nfs/server:default
online 0:30:29 svc:/network/nfs/rquota:default
Page 91 of 112

Oracle SPARC Enterprise T3-2 Server
Installation Guide
35. Appendix F; Features of the Sun SPARC Enterprise T3-2 Server
Feature Specifications
Operating system • Oracle Solaris 10 9/10 (U9)• Support for Solaris 10 10/09 (U8) + Oracle Solaris 10 9/10Patch Bundle
Chassis dimensions and rack mounting hardware
· Height: 129.85mm (5.11 in); 3RU· Width: 436.5 mm (17.185 in.)· Depth: 732 mm (28.81 in.)· Weight: Approx. 36.28kg (80 lbs.) max., without rackmount kit.
Processor· Sixteen-core 1.6 GHz SPARC T3 processors· Two processors per system, maximum 256 threads· Sixteen floating-point units· Dual multithreaded 10 GbE PCI integrated onto chip· On-board cryptography with new Kasumi Bulk algorithm, supporting 12 embeddedsecurity industry-standard ciphers: DES, 3DES, AES, RC4, SHA1, SHA256, SHA384,SHA512, MD5, RSA to 2048 key, ECC, CRC32
Memory Slots/Capacity · 32 DDR3 DIMM slots, system maximum of 256 GB· Support for 4 GB, and 8 GB DIMMs
Internal Hard Drives Up to six 300 GB 2.5 in. SAS drives. Optical Media Device One slimline SATA DVD+/-RW.
Power Supplies · Two hot-swappable AC 2,060W redundant (N+1) power supplies· Maximum operating input current: 12A @ 200 V AC· Maximum operating input power at 200 V AC: 1325W
Cooling 4361.9 Btu/hr, 230 cfm max
Ethernet Ports 4x 1Gb (10/100/1000MBs) integrated Ethernet ports. Option slot for 4x 10GbE
XAUI ports.
Feature Specifications
PCI Express Interfaces Ten total. Eight x8 PCIe Gen 2 slots, two
Page 92 of 112

Oracle SPARC Enterprise T3-2 Server
Installation Guide
x4 PCIe Gen2 slots
USB Ports Four USB 2.0 ports (2 forward, 2 rear facing)
Video ports Two VGA ports , one forward one rear
Additional PortsThe following connectors are located on the rear of the server:• One RJ-45 serial management port (SER MGT)—the defaultconnection to system controller• One 10/100 Mbps Ethernet network management port (NETMGT)—connection to the system controller• One DB-9 serial port—connection to the host
Remote Management On-board Integrated Lights Out Manager (ILOM) system controller.
Page 93 of 112

Oracle SPARC Enterprise T3-2 Server
Installation Guide
36. Appendix G: Oracle Validation Test Suite (VTS)Oracle Validation Test Suite (VTS) is a hardware validation test suite based on the Solaris operating system. The suite’s multiple hardware diagnostic tests validate the functionality of most hardware controllers and devices for Oracle's SPARC architecture based systems. VTS supports multiple user interfaces allowing a user to schedule and monitor multiple tests in order to fully stress the system
The tests and the infrastructure of the tool scales with the type and size of the system configuration. VTS automatically detects the type and configuration of the system it is running on and tailors test execution accordingly. The tool can be used for system or component validation during development, production, receiving inspection, troubleshooting, periodic maintenance, and general system exercising.
VTS software is installed by default when the operating system is loaded onto thesystem.
36.1. Documentation
SunVTS 7.0 Documentation can be found at:-
http://www.oracle.com/technetwork/documentation/sys-mgmt-networking-190072.html
36.2. Packages and Patches
SunVTS 7.0 PS10 (p10399841_7010_SOLARIS64.zip) is the current package. (Not usually required)
145111-01.zip is the latest patch for version 7.0 PS10 (Patch set) download and install
Page 94 of 112
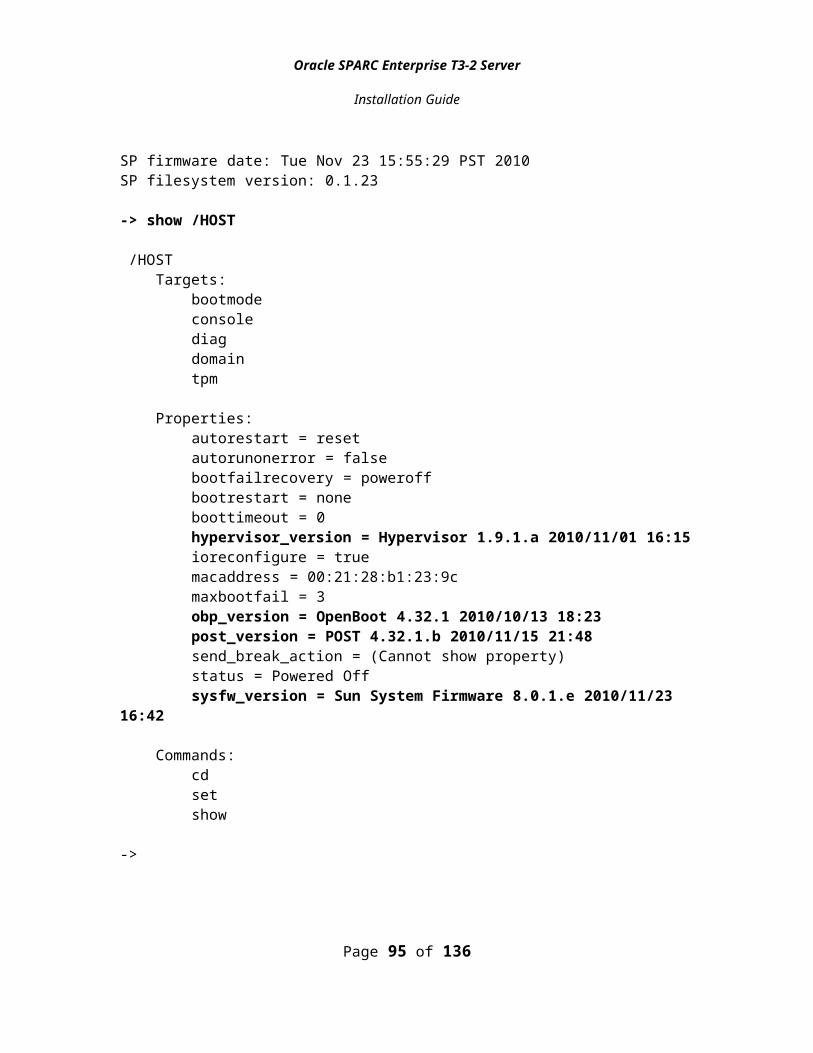
Oracle SPARC Enterprise T3-2 Server
Installation Guide
As usual patches can be downloaded from support.oracle.com
Client Layer – Consists of the user interfaces for the VTS tool. Three different userinterfaces are supported by VTS.
■ Graphical User Interface (GUI)■ Terminal user interface (TTY)■ Command line interface (CLI)
Agent layer – This layer consists of all the tests for testing the hardware and a harness, which manages the tests. The harness also handles chores like logging of messages, handling of commands coming from the different user interfaces, status updates, and hardware probing.
You must first log into the system under test. Then, you can use VTS with the CLI,TTY, or GUI interfaces.
Page 95 of 112

Oracle SPARC Enterprise T3-2 Server
Installation Guide
36.3. Testing With VTS 7.0 SoftwareThe VTS 7.0 software is an application level tool that is used for hardware testing and validation during development, production, receiving inspection, troubleshooting, periodic maintenance, and general system exercising. Testing capabilities are provided for all the major hardware in the system. You can use any of the three user interfaces.Test coverage is provided for most of the key components in the system. The VTS software provides a simple and user-friendly set of tests and test options, which can be catered towards different testing needs. The tests that you can use to test your system include the following
■ Processor■ Memory■ Disk■ Removable Disk■ Graphics■ Media■ IO ports■ Interconnects■ Network■ Environment■ HBA
36.4. Test ModesThe VTS tests can be tailored for different testing needs through a set of modes andtest options. These modes and test options determine how the tests are run on thesystem. You have the option of running the tests in three different modes:
■ System Exerciser■ Online Mode■ Component Stress
Each of the modes supports two levels of testing, low and high. These two levels of testing determine the degree of intensity of the test in terms of the resource usageand level of stress.
36.5. System ExerciserThis mode provides system exercising capability. It will test the system with all of its components. All tests are run in parallel. In this mode, no other application exceptVTS should be running on the system. The following are characteristics of the testsin this mode:
■ the tests can be intrusive in nature. No other application should be running on
Page 96 of 112

Oracle SPARC Enterprise T3-2 Server
Installation Guide
the system while these tests are running.
■ the tests are data safe by default.
■ the tests are aware that there could be other tests running. Accordingly, the testswill then allocate and lock resources.
36.6. Online ModeUse this mode for testing if you want to run other applications in addition to VTS simultaneously on the system. The goal of this mode is to validate hardware without having significant impact on the running of any other applications running on the system. In this mode the tests would not stress on the system and to provide coverage they might have to run for longer periods of time. If there are any latent faults in the system hardware, the tests in this level will try to stimulate those faults before the application is impacted by the fault. When the test stimulates the fault, the OS detects the fault and takes appropriate action.
The following are test characteristics in this mode:
■ Non-Intrusive – The tests running in this mode do not intrude on the applications that are running on the system. Nonintrusive mode does not change any system configuration that can have an effect on the applications.
■ Data Safe – The tests do not cause any kind of data corruption.
■ Test time – The time of completion for these tests could vary from milliseconds to days. There are no restrictions on the amount of time.
■ Resource Usage – The resource usage is designed so that the test does not have a distinguishable effect on the applications that are running on the system. The goal is to use as few resources as possible for a given instance of time.
36.7. Component StressThis mode performs targeted testing of system components and modules. In this mode the test puts the maximum stress on the component or module under test. The tests are not run simultaneously with other tests: all tests are run sequentially. No other user application should be running on the system. The following are characteristics of the tests in this mode:
■ the tests can be intrusive in nature and may need specific system configuration settings to run most efficiently.
■ the tests are data safe by default.
Page 97 of 112

Oracle SPARC Enterprise T3-2 Server
Installation Guide
■ All tests assume that the complete system resources are at their disposal and can use resources according to its needs.
36.8. Running the tests
The following example will only focus on testing the server in a staging environment prior to shipment. For additional testing please refer to the SunVTS documentation.
The VTS graphical user interface (GUI) is a Java-based standalone user interface. The Java GUI needs to be started on the same machine under test that has the VTS kernel is running.
36.9. Starting VTS GUI
Note: Xming/Xlaunch was used to direct the video console.
As root user:# cd /usr/sunvts/bin# ./startsunvts –g
Page 98 of 112

Oracle SPARC Enterprise T3-2 Server
Installation Guide
NOTE:- Disable the Graphics test before running any testing!!
36.10. System testing
The use of the ‘Mode Sequencer’ to run a series of tests may be used to test the system before shipment out of staging. The following is an idea that uses this functionality and may be adjusted in accordance with any time constraints that the order is under. Ideally the series of tests can be run over night for maximum testing.
One example could be to click on the ‘Mode Sequencer” and select the first , second and third pass with a “Online Stress” used for the second pass and “System Exerciser” used for the first and third pass.
Page 99 of 112

Oracle SPARC Enterprise T3-2 Server
Installation Guide
This is of course only one example to test a system. Please refer to the VTS guide for more details.
AND REMINDING NOTE: - Disable the Graphics test before running any testing!!
37. Appendix H: Booting from external DVD or ISO file image.
There are distinct ways to boot Solaris 10 for re-install other than using the internal DVD drive. These include booting from an ISO image that is being shared on external host system and DVD that is also in the host system.
Steps to be taken
Page 100 of 112

Oracle SPARC Enterprise T3-2 Server
Installation Guide
1. Using ILOM Web interface ‘redirect’ either the DVD drive or the sol-10-u9-ga-sparc-dvd.iso image that are on the system running the IE ILOM web browser.
2. Boot the redirected DVD or sol-10-u9-ga-sparc-dvd.iso ISO from the OK prompt on the T3-2 server.
Example :- Local PC/Laptop connected to T3-2 via SP Net Mgr port running IE 8. & Java 6U24.
DVD loaded and
ISO image on C drive.
Note: Redirection process only can have the DVD or the ISO imaged shared not both.
EXAMPLE
In the following example a PC is connected to the T3-2 via the Net Mgr port and the Web ILOM is being used. The PC has the Solaris 10 U9 DVD loaded and the sol-10-u9-ga-sparc-dvd.iso file in a shared folder. Through the IOLM web interface one or the other is redirected to the T3-2 which then can be booted.
The T3-2 is configured not to auto boot and is powered off but power is connected.
37.1. Redirect local DVD / ISO image
Page 101 of 112

Oracle SPARC Enterprise T3-2 Server
Installation Guide
Step1. Log into the ILOM web interface and navigate to the “Remote Control” tab. Select the “Use serial Redirection” then click on “Launch Remote Console”
One may see a security warning after attempting to launch the remote console. Right click on the warning message and download the file. Re- launch the remote console.
Page 102 of 112

Oracle SPARC Enterprise T3-2 Server
Installation Guide
Step2. One has the option to either redirect the local DVD or the ISO image whichever is available. One can only choose one or the other.
If you are going to use the ISO image navigate to where this file is situated on the local PC
Page 103 of 112

Oracle SPARC Enterprise T3-2 Server
Installation Guide
If using a Solaris 10 DVD navigate and select the drive in which it is loaded.
Once the DVD /ISO has been redirected check to see if the DVD/CDROM image is now highlighted at the bottom of the redirection console.
This console can now be closed unless one tends to use such to connect to the SP console.
I have found that either Putty or Kitty performs more reliable in accessing the SP console.
Once logged into the SP console power up the T3-2 and make sure it is at the OK prompt.
Note – To ensure getting to the ok prompt, set the following ILOM property beforeperforming the procedures below:-> set /HOST/bootmode script=”setenv auto-boot? false”
-> start /SYSAre you sure you want to start /SYS (y/n)? y
-> start /SP/consoleAre you sure you want to start /SP/CONSOLE (y/n)? ySerial console started. To stop, type #.
Page 104 of 112

Oracle SPARC Enterprise T3-2 Server
Installation Guide
At the OK prompt run “probe-scsi-all” to check that the T3-2 can now see the redirected DVD/ISO as can be seen in the above figure
/pci@400/pci@1/pci@0/pci@b/pci@0/usb@0,2/hub@2/hub@3/storage@2 Unit 0 Removable Read Only device AMI Virtual CDROM 1.00
Which is the same as rcdrom in devaliasOne now can boot from this redirected DVD/ISO
OK boot rcdrom
Page 105 of 112

Oracle SPARC Enterprise T3-2 Server
Installation Guide
38. Appendix I ILOM fault review and clearing
38.1. ILOM web interface
System faults can be seen and cleared via the ILOM web interface under ‘System Monitoring’ – ‘Event Logs’
It is advised that any faults be cleared and the system monitored for re-occurrence before shipment. Simply click on ‘Clear Log’ for the Filter you are examining.
Page 106 of 112

Oracle SPARC Enterprise T3-2 Server
Installation Guide
38.2. ILOM command line
Discover any faults using the ILOM CLI logging into the system via “Putty”
To view a list of components that have been faulted, type:
-> show /SP/faultmgmt
/SP/faultmgmt Targets: shell 0 (/SYS/MB) 1 (/SYS/PS1) 2 (/SYS/PS0)
Properties:
Commands: cd show
As can be seen there are three reported errors on the MB, PS0 and PS1 components..
To clear a fault on a component, type the following command:
->set component_path clear_fault_action=true
Where component_path is one of the following faulted components:
■ Processor■ Memory■ Motherboard■ Fan Module■ Power Supply■ NEM■ PCI card
For example, to clear a power supply fault, you would type the following:
-> show /SYS/PS0
/SYS/PS0 Targets: INPUT_POWER OUTPUT_POWER V_IN V_+12V V_+3V3 T_OUT
Page 107 of 112

Oracle SPARC Enterprise T3-2 Server
Installation Guide
V_OUT_OK V_IN_ERR V_IN_WARN V_OUT_ERR I_OUT_ERR I_OUT_WARN T_ERR T_WARN FAN_ERR FAN_WARN ERR
Properties: type = Power Supply ipmi_name = PS0 fru_name = PSU fru_description = A239C_Power_Supply fru_manufacturer = Power-One China,Gongming Town,Guangming District,518132 Shenzhen fru_version = 01_50 fru_part_number = 300-2344-01 fru_serial_number = 19080GM-1041B101GX fault_state = Faulted clear_fault_action = (none)
Commands: cd set show
-> set /SYS/PS0 clear_fault_action=trueAre you sure you want to clear /SYS/PS0 (y/n)? ySet 'clear_fault_action' to 'true'
-> show /SYS/PS0
/SYS/PS0 Targets: INPUT_POWER OUTPUT_POWER V_IN V_+12V V_+3V3 T_OUT V_OUT_OK V_IN_ERR V_IN_WARN V_OUT_ERR I_OUT_ERR I_OUT_WARN T_ERR
Page 108 of 112

Oracle SPARC Enterprise T3-2 Server
Installation Guide
T_WARN FAN_ERR FAN_WARN ERR
Properties: type = Power Supply ipmi_name = PS0 fru_name = PSU fru_description = A239C_Power_Supply fru_manufacturer = Power-One China,Gongming Town,Guangming District,518132 Shenzhen fru_version = 01_50 fru_part_number = 300-2344-01 fru_serial_number = 19080GM-1041B101GX fault_state = OK clear_fault_action = (none)
-> show /SP/faultmgmt
/SP/faultmgmt Targets: shell 0 (/SYS/MB) 1 (/SYS/PS1)
Properties:
Commands: cd show
As can be seen the PS0 fault is now cleared and subsequent monitoring the fault did not return.
Page 109 of 112

Oracle SPARC Enterprise T3-2 Server
Installation Guide
38.3. Clearing faults through the OS
It has been noted that not all system faults will be cleared by using the “fmadm” command therefore one should firstly clear all faults by the use of ILOM.
If you want to do right from the OS, here is a walkthrough using fmadm where 3 faults (you can do man fmadm for more information):
[root@emiagfaidcgbz:/] # fmadm faulty--------------- ------------------------------------ -------------- ---------TIME EVENT-ID MSG-ID SEVERITY--------------- ------------------------------------ -------------- ---------Nov 15 10:04:02 edea8394-f403-efc6-f6b3-d33145a83a26 FMD-8000-3F Minor
Host : EMIAGFAIDCGBZPlatform : SUNW,SPARC-Enterprise-T5120 Chassis_id :
Fault class : defect.sunos.fmd.configAffects : fmd:///module/syslog-msgs faulted but still in service
Description : A Solaris Fault Manager component could not load due to an erroroneous configuration file. Refer to http://sun.com/msg/FMD-8000-3F for more information.
Response : The module has been disabled. Events destined for the module will be saved for manual diagnosis.
Impact : Automated diagnosis and response for subsequent events associated with this module will not occur.
Action : Use fmdump -v -u <EVENT-ID> to locate the module. Use fmadm load <module> to load the module after repairing its configuration.
--------------- ------------------------------------ -------------- ---------TIME EVENT-ID MSG-ID SEVERITY--------------- ------------------------------------ -------------- ---------Nov 15 10:04:01 680f0742-5449-41ee-a749-99e1339803b6 FMD-8000-3F Minor
Host : EMIAGFAIDCGBZPlatform : SUNW,SPARC-Enterprise-T5120 Chassis_id :
Fault class : defect.sunos.fmd.configAffects : fmd:///module/sp-monitor faulted but still in service
Description : A Solaris Fault Manager component could not load due to an
Page 110 of 112

Oracle SPARC Enterprise T3-2 Server
Installation Guide
erroroneous configuration file. Refer to http://sun.com/msg/FMD-8000-3F for more information.
Response : The module has been disabled. Events destined for the module will be saved for manual diagnosis.
Impact : Automated diagnosis and response for subsequent events associated with this module will not occur.
Action : Use fmdump -v -u <EVENT-ID> to locate the module. Use fmadm load <module> to load the module after repairing its configuration.
--------------- ------------------------------------ -------------- ---------TIME EVENT-ID MSG-ID SEVERITY--------------- ------------------------------------ -------------- ---------Nov 15 10:04:01 bfbd7aa3-8cd5-63d1-84a1-9c6a1f043281 FMD-8000-3F Minor
Host : EMIAGFAIDCGBZPlatform : SUNW,SPARC-Enterprise-T5120 Chassis_id :
Fault class : defect.sunos.fmd.configAffects : fmd:///module/snmp-trapgen faulted but still in service
Description : A Solaris Fault Manager component could not load due to an erroroneous configuration file. Refer to http://sun.com/msg/FMD-8000-3F for more information.
Response : The module has been disabled. Events destined for the module will be saved for manual diagnosis.
Impact : Automated diagnosis and response for subsequent events associated with this module will not occur.
Action : Use fmdump -v -u <EVENT-ID> to locate the module. Use fmadm load <module> to load the module after repairing its configuration.
[root@emiagfaidcgbz:/] # fmdump -v -u edea8394-f403-efc6-f6b3-d33145a83a26TIME UUID SUNW-MSG-IDNov 15 10:04:02.0899 edea8394-f403-efc6-f6b3-d33145a83a26 FMD-8000-3F 100% defect.sunos.fmd.config
Problem in: - Affects: fmd:///module/syslog-msgs FRU: - Location: -
[root@emiagfaidcgbz:/] # fmadm repair edea8394-f403-efc6-f6b3-d33145a83a26fmadm: recorded repair to edea8394-f403-efc6-f6b3-d33145a83a26
Page 111 of 112

Oracle SPARC Enterprise T3-2 Server
Installation Guide
[root@emiagfaidcgbz:/] # fmdump -v -u 680f0742-5449-41ee-a749-99e1339803b6TIME UUID SUNW-MSG-IDNov 15 10:04:02.0216 680f0742-5449-41ee-a749-99e1339803b6 FMD-8000-3F 100% defect.sunos.fmd.config
Problem in: - Affects: fmd:///module/sp-monitor FRU: - Location: -
[root@emiagfaidcgbz:/] # fmadm repair 680f0742-5449-41ee-a749-99e1339803b6fmadm: recorded repair to 680f0742-5449-41ee-a749-99e1339803b6[root@emiagfaidcgbz:/] # fmdump -v -u bfbd7aa3-8cd5-63d1-84a1-9c6a1f043281TIME UUID SUNW-MSG-IDNov 15 10:04:01.9614 bfbd7aa3-8cd5-63d1-84a1-9c6a1f043281 FMD-8000-3F 100% defect.sunos.fmd.config
Problem in: - Affects: fmd:///module/snmp-trapgen FRU: - Location: -
[root@emiagfaidcgbz:/] # fmadm repair bfbd7aa3-8cd5-63d1-84a1-9c6a1f043281fmadm: recorded repair to bfbd7aa3-8cd5-63d1-84a1-9c6a1f043281[root@emiagfaidcgbz:/] # fmadm faulty[root@emiagfaidcgbz:/] #
Page 112 of 112


![0) · 2016. 7. 8. · x\hsp[`th`]hy`klwlukpunvu svjh[pvu ;opz^psshhlj[Äuhs lhkpunz ... pj /\tpjhjpk)sluk-sv^ly luohujly t3 t3 t3 t3 t3 t3 t3 t3 t3 t3 t3 t3 t3 t3 t3 t3 t3 t3 t3 t3](https://img.pdfslide.us/doc/110x75/60d98d4a31005a4c8d3c5fa4/0-2016-7-8-xhspthhyklwlukpunvu-svjhpvu-opzpsshhljuhs-lhkpunz-.jpg)