Embed Size (px)
Citation preview

T U T O R I A L
2009 Pearson Education, Inc. All rights reserved.
1
20Shipping Hub
ApplicationIntroducing Generic Collections, LINQ, For Each...Next and
Access Keys
2009 Pearson Education, Inc. All rights reserved.
2
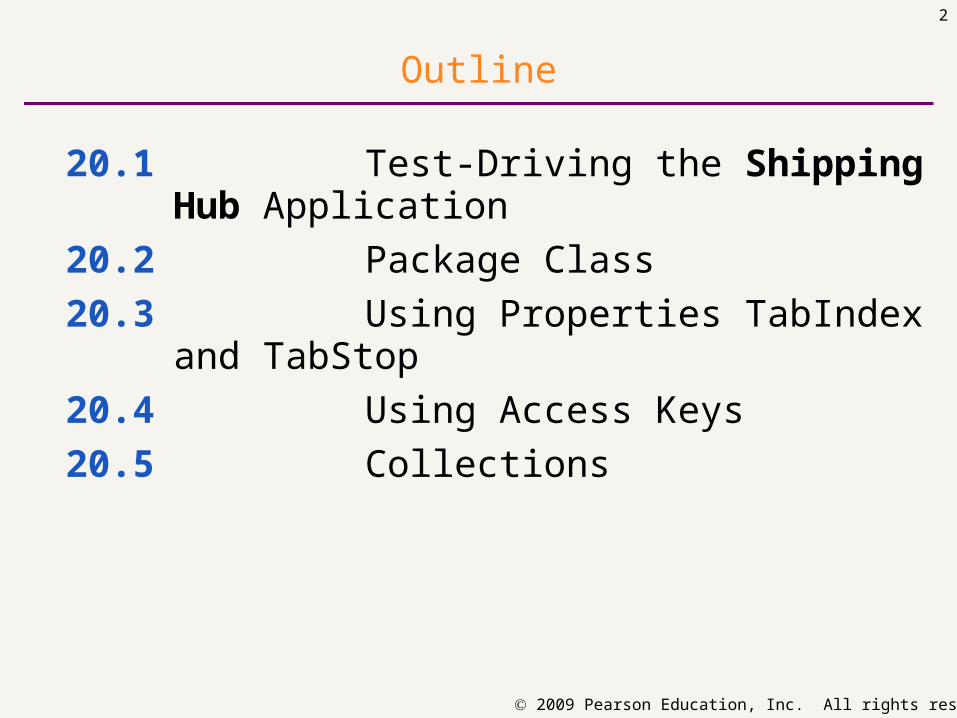
Outline
20.1 Test-Driving the Shipping Hub Application
20.2 Package Class
20.3 Using Properties TabIndex and TabStop20.4 Using Access Keys
20.5 Collections
2009 Pearson Education, Inc. All rights reserved.
3
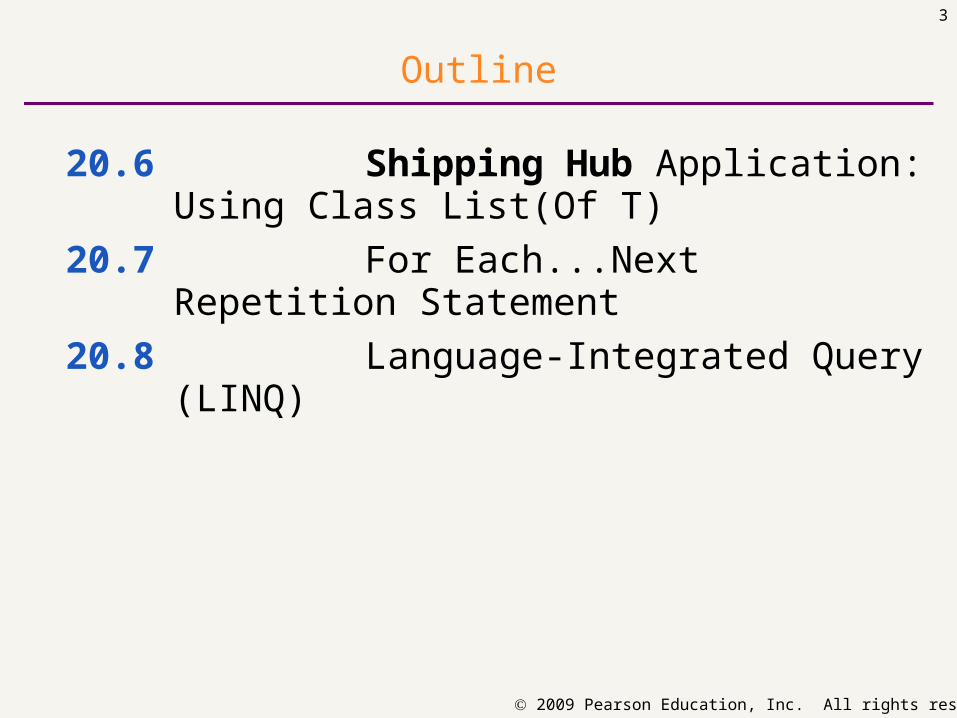
Outline
20.6 Shipping Hub Application: Using Class List(Of T)
20.7 For Each...Next Repetition Statement
20.8 Language-Integrated Query (LINQ)

2009 Pearson Education, Inc. All rights reserved.
4
In this tutorial you will learn: ■ Use generic collections.■ Create and manipulate a List(Of T) object.■ Use Language Integrated Query (LINQ) to select
elements from a collection.■ Set the MaxLength property of a TextBox.
Objectives

2009 Pearson Education, Inc. All rights reserved.
5
In this tutorial you will learn: ■ Specify the tab order in a GUI using the TabStop
and TabIndex properties of the controls.■ Create an access key for a control.■ Use a For Each...Next loop to iterate through
a collection.■ Obtain a String representation of an object.
Objectives

Application Requirements
2009 Pearson Education, Inc. All rights reserved.
6
20.1 Test-Driving the Shipping Hub Application
A shipping company receives packages at its headquarters, which functions as its shipping hub. After receiving the packages, the company ships them to one of the following states: Alabama, Florida, Georgia, Kentucky, Mississippi, North Carolina, South Carolina, Tennessee, West Virginia or Virginia. The company needs an application to track the packages that pass through its shipping hub. For each package that arrives at the hub, the user clicks the application’s Scan New Button, to generate a package ID number. Once a package has been scanned, the user should be able to enter the shipping address for it. The user should be able to navigate through the list of scanned packages by using < BACK or NEXT > Buttons and by viewing a list of all packages destined for a particular state.

2009 Pearson Education, Inc. All rights reserved.
7
Test-Driving the Shipping Hub Application
■ Run the completed application (Fig. 20.1).
Figure 20.1 | Shipping Hub application when first run.

2009 Pearson Education, Inc. All rights reserved.
8
Test-Driving the Shipping Hub Application (Cont.)
■ Click the Scan New Button.
■ The application displays a package ID number and the arrival time, enables the TextBoxes and allows the user to enter the package information (Fig. 20.2).
Figure 20.2 | Scanning a new package.

2009 Pearson Education, Inc. All rights reserved.
9
■ Type 318 Some Street in the Address: TextBox, then press the Tab key. Note that the cursor moves to the City: TextBox (Fig. 20.3).
■ Fill in other input values, then click the Add Button to add the package to the application’s List.
Test-Driving the Shipping Hub Application (Cont.)
Figure 20.3 | Pressing the Tab key moves the cursor to the next TextBox.
Cursor now appearsin the City: TextBox

2009 Pearson Education, Inc. All rights reserved.
10
GUI Design Tip
Using the Tab key is an efficient way for users to navigate through the controls in a GUI.
2009 Pearson Education, Inc. All rights reserved.
11
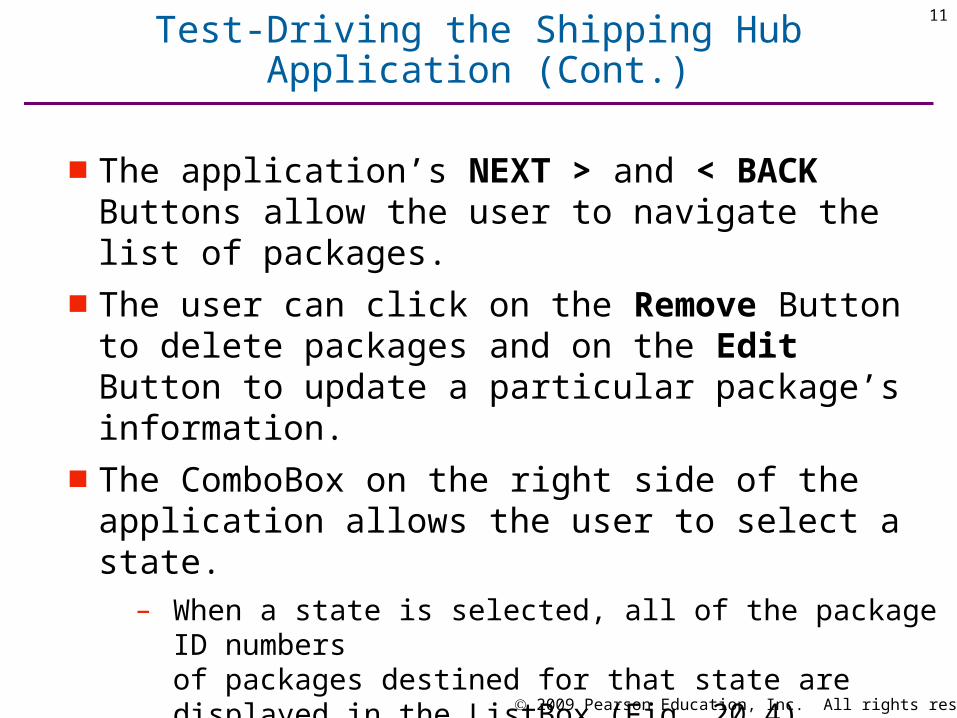
■ The application’s NEXT > and < BACK Buttons allow the user to navigate the list of packages.
■ The user can click on the Remove Button to delete packages and on the Edit Button to update a particular package’s information.
■ The ComboBox on the right side of the application allows the user to select a state.
– When a state is selected, all of the package ID numbersof packages destined for that state are displayed in the ListBox (Fig. 20.4).
Test-Driving the Shipping Hub Application (Cont.)

2009 Pearson Education, Inc. All rights reserved.
12
Figure 20.4 | Viewing all packages going to South Carolina.
Test-Driving the Shipping Hub Application (Cont.)

2009 Pearson Education, Inc. All rights reserved.
13
■ The table in Fig. 20.5 describes the properties for class Package.
Figure 20.5 | Properties of class Package.
20.2 Package Class
Property Description
Address Provides access to instance variable addressValue, which represents the package’s address as a String.
City Provides access to instance variable cityValue, which represents the package’s city as a String.
State Provides access to instance variable stateValue, which stores the package’s state as a String. It uses the standard two-letter state abbreviations. For example, NC is used for North Carolina.
Zip Provides access to instance variable zipValue. Represents the zip code as a String.
PackageNumber Provides access to instance variable packageNumberValue, which stores the package’s identification number as an Integer.
ArrivalTime Provides access to instance variable timeValue, which stores the package’s arrival time as a Date.

2009 Pearson Education, Inc. All rights reserved.
14
■ Open the template application.
■ In the Solution Explorer, right click the ShippingHub project.
– Select Add > Existing Item....
– When the Add Existing Item dialog appears, select the Package.vb file and click Add (Fig 20.6).
Adding a Class to an Application
Figure 20.6 | Solution Explorer with Package.vb added.
Package class added to the ShippingHub project

2009 Pearson Education, Inc. All rights reserved.
15
■ It is awkward for users to have to select each TextBox.
■ Most applications allow the user to press the Tab key to navigate between the controls on the Form.
■ The TabIndex property allows you to specify the order in which focus transfers between controls.
– Some controls, such as a read-only TextBox, should not be selected using the Tab key.
– The TabStop property specifies whether the user can select the control using the Tab key.
20.3 Using Properties TabIndex and TabStop

2009 Pearson Education, Inc. All rights reserved.
16
■ The TabStop property defaults to True for controls that receive user input.
■ The IDE provides a view called Tab Order. – Select the Form, then select View > Tab Order
(Fig. 20.7).
Setting Properties TabIndex and TabStop
Figure 20.7 | Setting the TabIndex properties using the Tab Orderview of the Shipping Hub application.
TabIndex box set to zero
TabIndex boxes (not modified)

2009 Pearson Education, Inc. All rights reserved.
17
■ Click the Package Information GroupBox, and note that its value becomes 0. Then click the Address: TextBox.
– Now the value changes to 0.0. The first zero refers to the TabIndex of the container, and the second zero refers to the TabIndex for that control within the container.
Setting Properties TabIndex and TabStop (Cont.)

2009 Pearson Education, Inc. All rights reserved.
18
GUI Design Tip
Use the TabIndex property to define the logical order in which the user should enter data. Usually the order transfers the focus of the application from top to bottom and left to right.

2009 Pearson Education, Inc. All rights reserved.
19
■ Continue setting the TabIndex properties by clicking the Scan New Button. Then click the remaining unchanged controls in the order indicated in Fig. 20.8.
■ Exit the Tab Order view by selecting View > Tab Order or by pressing the Esc key.
Figure 20.8 | Tab Order view of the Shipping Hub application.
Setting Properties TabIndex and TabStop (Cont.)

2009 Pearson Education, Inc. All rights reserved.
20
■ Access keys (or keyboard shortcuts) allow the user to perform an action on a control using the keyboard.
– Insert an & symbol in the control’s Text property before the letter you wish to use as an access key.
■ To display an ampersand character on a control, type &&.
20.4 Using Access Keys

2009 Pearson Education, Inc. All rights reserved.
21
■ Insert an & symbol before the letter S in the Text property of the Scan New Button (Fig. 20.9).
■ If the user presses Alt, then S, this has the same effect as “clicking” the Scan New Button.
■ Create access keys for the remaining Buttons.■ The access key does not have to be the first letter.
Figure 20.9 | Creating an access key.
Creating Access Keys
Using the & symbol to create
an access key (there is nospace between & and S)
Access key letters underlined (may need to
press the Alt key first)

2009 Pearson Education, Inc. All rights reserved.
22
GUI Design Tip
Use access keys to allow users to “click” a control using the keyboard.

2009 Pearson Education, Inc. All rights reserved.
23
■ The .NET Framework Class Library provides several collections.
– These classes provide methods that facilitate the storage and organization of your data.
– Collections simplify the details of how the objects are being stored.
■ List(Of T) provides a convenient alternative to arrays.
– The identifier T is a placeholder which you replace with an actual type.
Dim list As List(Of Integer)
Dim list2 As List(Of Package)
– Dynamic resizing enables the List object to change its size.
20.5 Collections

2009 Pearson Education, Inc. All rights reserved.
24
Software Design Tip
Use a List to store a group of values when the number of elements in the group varies during the running of an application.

2009 Pearson Education, Inc. All rights reserved.
25
When the Form loads:Generate a random initial package ID number and
arrival timeSet the SelectedIndex of the State ComboBox to 0Create an empty List of Packages
When the user clicks the Scan New Button:Generate the next package ID number Create a new Package objectDisplay the new Package’s package number and
arrival timeEnable the TextBoxes, the ComboBox and the Add
Button
20.6 Shipping Hub Application: UsingClass List(Of T)

2009 Pearson Education, Inc. All rights reserved.
26
When the user clicks the Add Button:Retrieve address, city, state and zip code values;
and disable input controlsAdd the package to the ListEnable the Package Information GroupBox and the
appropriate ButtonsDisable the Add ButtonAdd the package number to the ListBox Change the Packages by Destination ComboBox
value to the package’s destination stateEnable the New Button
20.6 Shipping Hub Application: UsingClass List(Of T) (Cont.)

2009 Pearson Education, Inc. All rights reserved.
27
When the user clicks the < BACK Button:Display the previous package in the List
When the user clicks the NEXT > Button:Display the next package in the List
When the user clicks the Remove Button:Remove the package from the Packages by Destination
ListBoxRemove the package from the List
20.6 Shipping Hub Application: UsingClass List(Of T) (Cont.)

2009 Pearson Education, Inc. All rights reserved.
28
When the user clicks the Edit Button:Change the Button to read UpdateAllow the user to modify package address
information
When the user clicks the Update Button:Update the package’s information in the ListDisable controls that allow user input, and change
the Update Button to read Edit
When the user chooses a different state in the Packages by Destination ComboBox:
Display the package number for each package destined for that state in the ListBox
20.6 Shipping Hub Application: UsingClass List(Of T) (Cont.)

2009 Pearson Education, Inc. All rights reserved.
29
Action Control/Object Event
Label the application’s controls informationGroupBox, listByGroupBox, arrivedLabel, packageIDLabel, addressLabel, cityLabel, stateLabel, zipLabel
Application is run
ShippingHubForm Load
Generate a random initial package ID
number and arrival time
randomObject
Set the SelectedIndex of the State
ComboBox to 0
stateComboBox
Create an empty List of Packages list
■ Use an ACE table to convert the pseudocodeto Visual Basic (Fig. 20.10).
Figure 20.10 | ACE table for the Shipping Hub application. (Part 1 of 5.)
Action/Control/Event (ACE) Table forthe Shipping Hub Application

2009 Pearson Education, Inc. All rights reserved.
30
Action Control/Object Event
newButton Click
Generate the next package ID number
Create a new Package object packageObject
Display the new Package’s package number
and arrival time
packageNumberLabel, arrivalTimeLabel
Enable the TextBoxes, the CboBox and the
Add Button
addButton, addressTextBox, cityTextBox, stateComboBox, zipTextBox
addButton Click
Enable the Package Information GroupBox
and the approptiate Buttons
informationGroupBox, (call SetButtons with True as an argument for the Buttons)
Disable the Add Button addButton
Figure 20.10 | ACE table for the Shipping Hub application. (Part 2 of 5.)
Action/Control/Event (ACE) Table forthe Shipping Hub Application (Cont.)

2009 Pearson Education, Inc. All rights reserved.
31
Action Control/Object Event
Add the package to the List list Click
Add the package number to the ListBox packagesListBox
Change the Packages by Destination
ComboBox value to the package’s
destination state
stateComboBox
Enable the New Button newButton
backButton Click
Display the previous package in the List list, packageNumberLabel, arrivalTimeLabel addressTextBox, cityTextBox, stateComboBox, zipTextBox
Figure 20.10 | ACE table for the Shipping Hub application. (Part 3 of 5.)
Action/Control/Event (ACE) Table forthe Shipping Hub Application (Cont.)

2009 Pearson Education, Inc. All rights reserved.
32
Action Control/Object Event
nextButton Click
Display the next package in the List list, packageNumberLabel, arrivalTimeLabel addressTextBox, cityTextBox, stateComboBox, zipTextBox
removeButton Click
Remove the package from the Packages by
Destination ListBox
packagesListBox
Remove the package from the List list
editUpdateButton Click
Change the Button to read Update editUpdateButton
Allow the user to modify package address
information
addressTextBox, cityTextBox, stateComboBox, zipTextBox
Figure 20.10 | ACE table for the Shipping Hub application. (Part 4 of 5.)
Action/Control/Event (ACE) Table forthe Shipping Hub Application (Cont.)

2009 Pearson Education, Inc. All rights reserved.
33
Action Control/Object Event
editUpdateButton Click
Update the package’s information in the
List
list
Disable controls that allow user input, and
change the Update Button to read Edit
addressTextBox, cityTextBox, stateComboBox, zipTextBox, editUpdateButton
viewPackagesComboBox SelectedIndex Changed
Display the package number for each
package destined for that state in the
ListBox
packagesListBox
Figure 20.10 | ACE table for the Shipping Hub application. (Part 5 of 5.)
Action/Control/Event (ACE) Table forthe Shipping Hub Application (Cont.)

2009 Pearson Education, Inc. All rights reserved.
34
■ Declare a List(Of Package) list (Fig. 20.11).
Figure 20.11 | Declaring the List(Of Package) reference.
Creating a List of Packages
Declaring a List(Of Package)
reference

2009 Pearson Education, Inc. All rights reserved.
35
■ Assign the reference of a new List(Of Package) to the instance variable list (Fig. 20.12).
Figure 20.12 | Creating a List(Of Package) object.
Creating a List of Packages (Cont.)
Initializing theList(Of Package)
reference

2009 Pearson Education, Inc. All rights reserved.
36
■ The user clicks the Scan New Button when a new package arrives at the shipping hub.
■ Line 28 (Fig. 20.13) increments packageID to ensure that all packages have a unique identification number.
Figure 20.13 | Creating a Package object.
Adding and Removing Packages
Create a new Package object with a unique ID

2009 Pearson Education, Inc. All rights reserved.
37
■ The application should display a scanned package’s arrival time and package number (Fig. 20.14).
■ The ToString method returns a String representation of an object.
– Date’s ToString method returns the date as a String.
– For some .NET classes, ToString merely returns the class name.
Adding and Removing Packages (Cont.)
Displaying arrival time and package ID number in Labels
Figure 20.14 | Displaying the package’s number and arrival time.

2009 Pearson Education, Inc. All rights reserved.
38
■ This code (Fig. 20.15) stores the package information by adding the Package object to list using the List’s Add method.
■ New Packages are added to the end of the List.
Figure 20.15 | Adding a package to the List.
Adding a Packageobject to a List
Adding and Removing Packages (Cont.)

2009 Pearson Education, Inc. All rights reserved.
39
■ An element’s location in the List is the element’s index.
■ The List class provides a simple way to remove elements from the List.
– The RemoveAt method removes a package from the List (Fig. 20.16).
– The argument passed to the method RemoveAt is the index of the Package in the List.
Adding and Removing Packages (Cont.)
Removing the current Package from the List
Figure 20.16 | Removing a Package from the List.

2009 Pearson Education, Inc. All rights reserved.
40
■ If a Package at index 3 is removed from the List, the Package that was previously at index 4 will then be located at index 3.
■ The Count property returns the number of elements currently stored in the List.
Adding and Removing Packages (Cont.)

2009 Pearson Education, Inc. All rights reserved.
41
■ When the Edit Button is clicked, line 135 (Fig. 20.17) changes the text on the Edit Button to &Update.
■ This indicates that the user should click the same Button to submit changes to the package information.
Figure 20.17 | Changing the Edit Button to display Update.
Using code to change thetext displayed on a Button
Updating Package Information
2009 Pearson Education, Inc. All rights reserved.
42
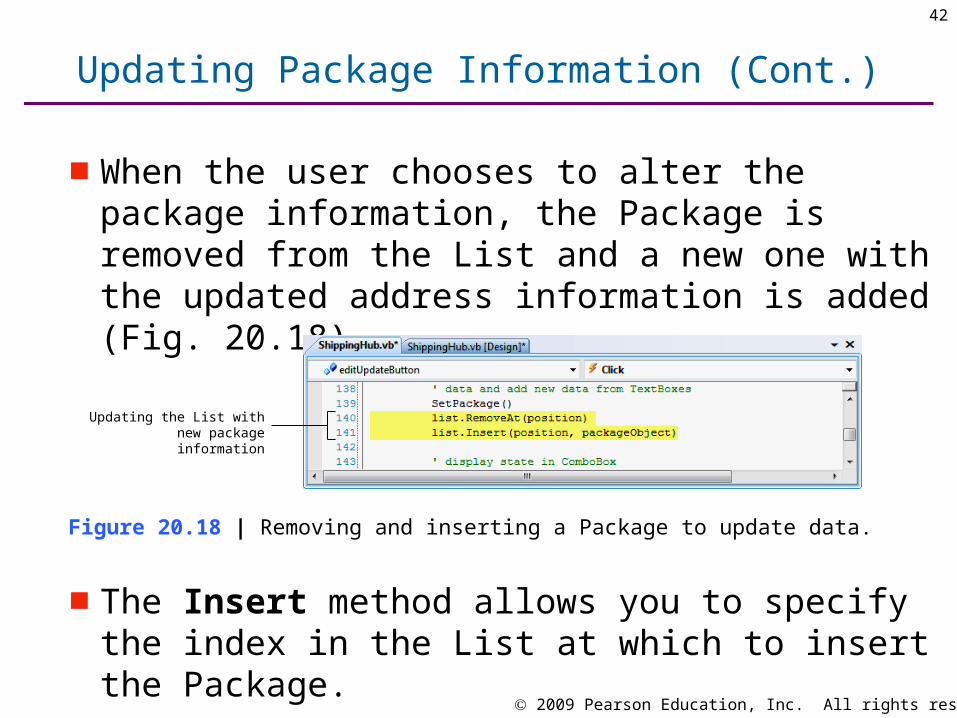
■ When the user chooses to alter the package information, the Package is removed from the List and a new one with the updated address information is added (Fig. 20.18).
Figure 20.18 | Removing and inserting a Package to update data.
Updating the List with new package information
Updating Package Information (Cont.)
■ The Insert method allows you to specify the index in the List at which to insert the Package.

2009 Pearson Education, Inc. All rights reserved.
43
■ After the user clicks the Update Button, the TextBoxes are disabled, and the text on the Update Button is reset to Edit (Fig. 20.19).
Figure 20.19 | Setting the Button’s Text property back to Edit.
Using code to display the text on the Button
Updating Package Information (Cont.)

2009 Pearson Education, Inc. All rights reserved.
44
■ Retrieve the data from the List using the elements index enclosed in parentheses (Fig. 20.20).
Figure 20.20 | Retrieving a Package from the List.
Retrieving a Package object from a List
Displaying a Package

2009 Pearson Education, Inc. All rights reserved.
45
■ These lines retrieve the package information from packageObject and display the data in the corresponding controls on the Form (Fig. 20.21).
Figure 20.21 | Displaying the package data in the Form’s controls.
Displaying data stored
in the Package object
Displaying a Package (Cont.)

2009 Pearson Education, Inc. All rights reserved.
46
■ The For Each...Next repetition statement iterates through all the elements in an array or a collection.
■ The statement uses a control variable that can be assigned each element in the collection:
For Each packageObject As Package In list
packagesListBox.Items.Add(packageObject. PackageNumber)
Next
20.7 For Each...Next Repetition Statement

2009 Pearson Education, Inc. All rights reserved.
47
■ The statement requires both a group and an element. – The group specifies the collection through which you wish
to iterate.
– The element is used to store a reference to an object in the group.
– The statement assigns the current element in the collection to the element variable.
20.7 For Each...Next Repetition Statement (Cont.)

2009 Pearson Education, Inc. All rights reserved.
48
Good Programming Practice
Use a For Each...Next repetition statement to iterate through values in an array or collection without using a counter variable.

2009 Pearson Education, Inc. All rights reserved.
49
Common Programming Error
If the element in a For Each...Next statement cannot be converted to the same type as the groups’s objects, a compilation error occurs. For example, if a List contained Date values, declaring a reference to a Package object as the element would cause a compilation error.
2009 Pearson Education, Inc. All rights reserved.
50
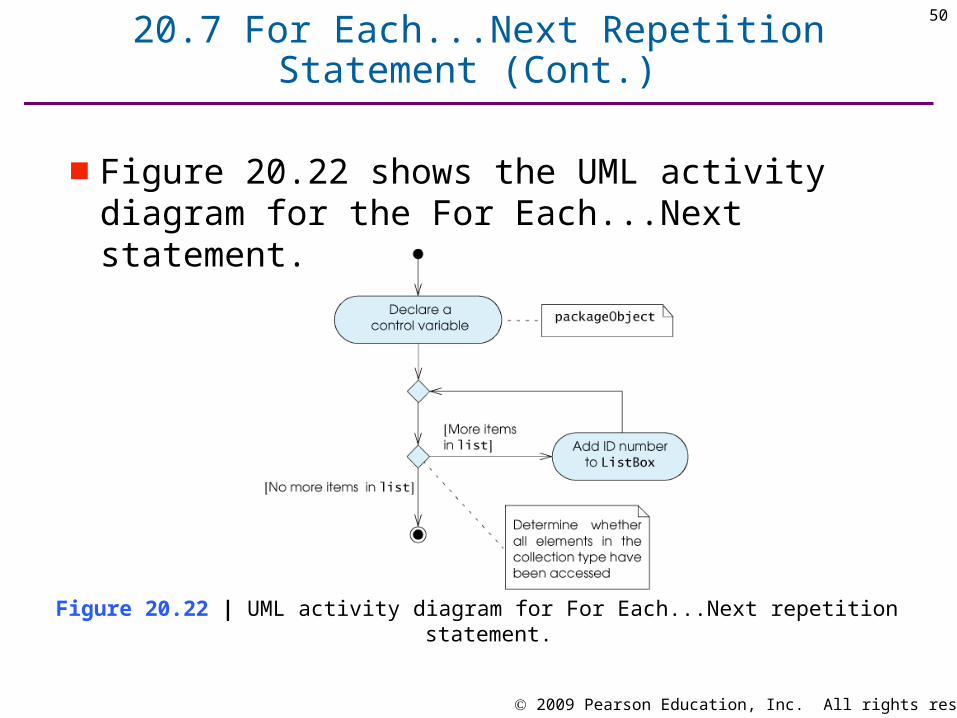
■ Figure 20.22 shows the UML activity diagram for the For Each...Next statement.
Figure 20.22 | UML activity diagram for For Each...Next repetition statement.
20.7 For Each...Next Repetition Statement (Cont.)

2009 Pearson Education, Inc. All rights reserved.
51
■ This loop (Fig. 20.23) iterates through list.
■ This code is added to a ComboBox’s SelectedIndexChanged event handler.
– The SelectedIndexChanged event occurs when the value selected in the ComboBox changes.
Inserting a For Each...Next Statement
For Each...Next header
Figure 20.23 | Writing a For Each...Next statement.

2009 Pearson Education, Inc. All rights reserved.
52
■ These lines contain an If...Then statement (Fig. 20.24) that tests each package’s destination state against the state name displayed in the Packages by Destination ComboBox.
Figure 20.24 | Displaying all packages going to selected state.
Inserting a For Each...Next Statement (Cont.)
Displaying package IDnumbers only for packages
destined for the specified state

2009 Pearson Education, Inc. All rights reserved.
53
■ Visual Basic 2008 and the .NET 3.5 framework introduce Language-Integrated Query (LINQ).
– A query retrieves specific information from a data source, such as a collection.
■ A typical LINQ query contains three clauses:– The From clause specifies a range variable and the data
source to query.
– The Where clause specifies the conditions that must be met for the item to be included in the results.
– The Select clause specifies the value(s) placed in the results.
20.8 Language-Integrated Query (LINQ)

2009 Pearson Education, Inc. All rights reserved.
54
■ The following LINQ to Objects query selects all the Packages in list that are destined for Boston:
Dim cityQuery = From p In list _ Where p.City = "Boston" _ Select p
■ If the expression in the Where clause evaluates to True, the Select clause includes the corresponding Package in the result.
■ LINQ uses deferred execution—the query does not execute until you attempt to iterate through the query results.
20.8 Language-Integrated Query (LINQ) (Cont.)

2009 Pearson Education, Inc. All rights reserved.
55
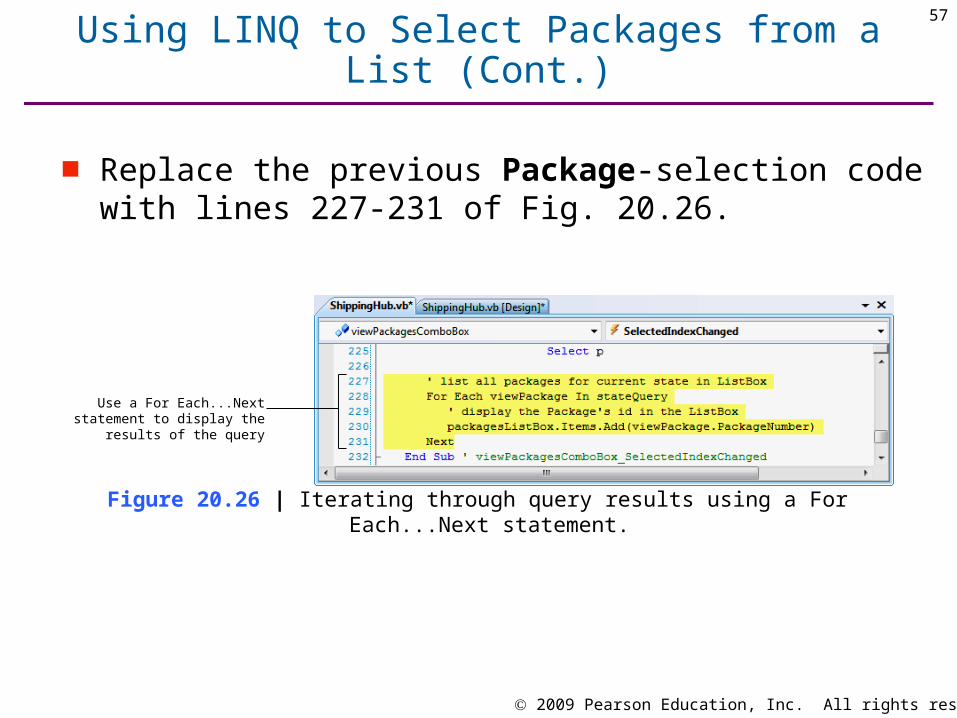
■ Lines 222–225 of Figure 20.25 declare a LINQ query that selects from list all the Packages destined for the specified state.
Figure 20.25 | Declaring a LINQ query.
Using LINQ to Select Packages from a List
Declaring a LINQ query toselect Packages destined
for specified state

2009 Pearson Education, Inc. All rights reserved.
56
■ The query results are contained in an IEnumerable(Of Package) object.
– IEnumerable is an interface—a set of methods that can be called on an object to tell the object to perform some task or return some piece of information.
– You can call any IEnumerable method on an array or collection object to iterate through its elements.
Using LINQ to Select Packages from a List (Cont.)
2009 Pearson Education, Inc. All rights reserved.
57
Figure 20.26 | Iterating through query results using a For Each...Next statement.
Use a For Each...Next statement to display the results
of the query
Using LINQ to Select Packages from a List (Cont.)
■ Replace the previous Package-selection code with lines 227-231 of Fig. 20.26.

2009 Pearson Education, Inc. All rights reserved.
58
1 Public Class ShippingHubForm
2
3 Private list As List(Of Package)
4 Private packageObject As Package ' current package
5 Private position As Integer ' position of current package
6 Private randomObject As Random ' random number for package ID
7 Private packageID As Integer ' individual package number
8
9 ' Form Load event
10 Private Sub ShippingHubForm_Load(ByVal sender As _
11 System.Object, ByVal e As System.EventArgs) _
12 Handles MyBase.Load
13
14 position = 0 ' set initial position to zero
15 randomObject = New Random() ' create new Random object
16 packageID = randomObject.Next(1, 100000) ' new package ID
17
18 ' show first state in ComboBox
19 stateComboBox.SelectedIndex = 0
20
21 list = New List(Of Package)() ' create the List
22 End Sub ' ShippingHubForm_Load
■ Figure 20.27 presents the source codefor the Shipping Hub application.
Outline
(1 of 12 )
Declares a List to be usedto store packages
Initially, there are no objects in the List, so set the position to zero
Use a Random object to generate a random number for package IDs
Create a List object

2009 Pearson Education, Inc. All rights reserved.
59
23
24 ' Scan New Button Click event
25 Private Sub newButton_Click(ByVal sender As System.Object, _
26 ByVal e As System.EventArgs) Handles newButton.Click
27
28 packageID += 1 ' increment package ID
29 packageObject = New Package(packageID) ' create package
30
31 ClearControls() ' clear fields
32 packageNumberLabel.Text = _
33 packageObject.PackageNumber.ToString() ' package number
34 arrivalTimeLabel.Text = _
35 packageObject.ArrivalTime.ToString() ' display arrival time
36
37 ' only allow user to add package
38 informationGroupBox.Enabled = True ' enable GroupBox
39 SetButtons(False) ' enable/disable Buttons
40 addButton.Enabled = True ' enable Add Button
41 newButton.Enabled = False ' disable Scan New Button
42 addressTextBox.Focus() ' transfer the focus to addressTextBox
43 End Sub ' newButton_Click
Outline
(2 of 12 )
Use ToString to convert values

2009 Pearson Education, Inc. All rights reserved.
60
44
45 ' Add Button Click event
46 Private Sub addButton_Click(ByVal sender As System.Object, _
47 ByVal e As System.EventArgs) Handles addButton.Click
48
49 SetPackage() ' set Package properties from TextBoxes
50 list.Add(packageObject) ' add package to the List
51
52 informationGroupBox.Enabled = False ' disable GroupBox
53 SetButtons(True) ' enable appropriate Buttons
54
55 ' package cannot be added until Scan New is clicked
56 addButton.Enabled = False ' disable Add Button
57
58 if package’s state displayed, add ID to ListBox
59 If stateComboBox.Text = viewPackagesComboBox.Text Then
60 packagesListBox.Items.Add(packageObject.PackageNumber)
61 End If
62
63 viewPackagesComboBox.Text = packageObject.State ' list package
64 newButton.Enabled = True ' enable Scan New Button
65 End Sub ' addButton_Click
Outline
(3 of 12 )

2009 Pearson Education, Inc. All rights reserved.
61
66
67 ' Back Button Click event
68 Private Sub backButton_Click(ByVal sender As System.Object, _
69 ByVal e As System.EventArgs) Handles backButton.Click
70
71 ' move backward one package in the list
72 If position > 0 Then
73 position -= 1
74 Else ' wrap to end of list
75 position = list.Count - 1
76 End If
77
78 LoadPackage() ' load package data from item in list
79 End Sub ' backButton_Click
80
81 ' Next Button Click event
82 Private Sub nextButton_Click(ByVal sender As System.Object, _
83 ByVal e As System.EventArgs) Handles nextButton.Click
84
Outline
(4 of 12 )
When the user clicks the < BACK Button, decrement the position. If the position was zero, set the position to the last object in the List

2009 Pearson Education, Inc. All rights reserved.
62
85 ' move forward one package in the list
86 If position < list.Count - 1 Then
87 position += 1
88 Else
89 position = 0 ' wrap to beginning of list
90 End If
91
92 LoadPackage() ' load package data from item in list
93 End Sub ' nextButton_Click
94
95 ' Remove Button click event
96 Private Sub removeButton_Click(ByVal sender As _
97 System.Object, ByVal e As System.EventArgs) _
98 Handles removeButton.Click
99
100 ' remove ID from ListBox if state displayed
101 If stateComboBox.Text = viewPackagesComboBox.Text Then
102 packagesListBox.Items.Remove(packageObject.PackageNumber)
103 End If
104
Outline
(5 of 12 )
When the user clicks the NEXT > Button, increment the position.If the position was the last object in the array, set the position to zero

2009 Pearson Education, Inc. All rights reserved.
63
105 list.RemoveAt(position) ' remove package from list
106
107 ' load next package in list if there is one
108 If list.Count > 0 Then
109 ' if not at first position, go to previous one
110 If position > 0 Then
111 position -= 1
112 End If
113
114 LoadPackage() ' load package data from item in list
115 Else
116 ClearControls() ' clear fields
117 End If
118
119 SetButtons(True) ' enable appropriate Buttons
120 End Sub ' removeButton_Click
121
Outline
(6 of 12 )
Set the position to the next package in the List

2009 Pearson Education, Inc. All rights reserved.
64
122 ' Edit/Update Button Click event
123 Private Sub editUpdateButton_Click(ByVal sender As _
124 System.Object, ByVal e As System.EventArgs) _
125 Handles editUpdateButton.Click
126
127 ' when Button reads "Edit", allow user to
128 ' edit package information only
129 If editUpdateButton.Text = "&Edit" Then
130 informationGroupBox.Enabled = True ' enable GroupBox
131 SetButtons(False)
132 editUpdateButton.Enabled = True
133
134 ' change Button text from "Edit" to "Update"
135 editUpdateButton.Text = "&Update"
136 Else
137 ' when Button reads "Update" remove the old package
138 ' data and add new data from TextBoxes
139 SetPackage()
140 list.RemoveAt(position)
141 list.Insert(position, packageObject)
142
Outline
(7 of 12 )
Using & in the Text property of a Button to create an access key
Removing and inserting items from/into a List

2009 Pearson Education, Inc. All rights reserved.
65
143 ' display state in ComboBox
144 viewPackagesComboBox.Text = packageObject.State
145
146 ' when done, return to normal operating state
147 informationGroupBox.Enabled = False ' disable GroupBox
148 SetButtons(True) ' enable appropriate Buttons
149
150 ' change Button text from "Update" to "Edit"
151 editUpdateButton.Text = “&Edit”
152 End If
153 End Sub ' editUpdateButton_Click
154
155 ' set package properties
156 Private Sub SetPackage()
157 packageObject.Address = addressTextBox.Text
158 packageObject.City = cityTextBox.Text
159 packageObject.State = _
160 stateComboBox.SelectedItem.ToString()
161 packageObject.Zip = zipTextBox.Text
162 End Sub ' SetPackage
163
Outline
(8 of 12 )
Using & in the Text property of a Button to create an access key
Retrieve data from user, and store it in the Package object

2009 Pearson Education, Inc. All rights reserved.
66
164 ' load package information into Form
165 Private Sub LoadPackage()
166
167 ' retrieve package from list
168 packageObject = list(position)
169
170 ' display package data
171 addressTextBox.Text = packageObject.Address
172 cityTextBox.Text = packageObject.City
173 stateComboBox.Text = packageObject.State
174 zipTextBox.Text = packageObject.Zip
175 arrivalTimeLabel.Text = _
176 packageObject.ArrivalTime.ToString()
177 packageNumberLabel.Text = _
178 packageObject.PackageNumber.ToString()
179 End Sub ' LoadPackage
180
Outline
(9 of 12 )
Using ToString to convert values

2009 Pearson Education, Inc. All rights reserved.
67
181 ' clear all the input controls on the Form
182 Private Sub ClearControls()
183 addressTextBox.Clear()
184 cityTextBox.Clear()
185 zipTextBox.Clear()
186 stateComboBox.SelectedText = ""
187 arrivalTimeLabel.Text = ""
188 packageNumberLabel.Text = ""
189 End Sub ' ClearControls
190
191 ' enable/disable Buttons
192 Private Sub SetButtons(ByVal state As Boolean)
193 removeButton.Enabled = state
194 editUpdateButton.Enabled = state
195 nextButton.Enabled = state
196 backButton.Enabled = state
197
198 ' disable navigation if not multiple packages
199 If list.Count < 2 Then
200 nextButton.Enabled = False
201 backButton.Enabled = False
202 End If
Outline
(10 of 12 )
Enable or disable Buttons depending on value of state

2009 Pearson Education, Inc. All rights reserved.
68
203
204 ' if no items, disable Remove and Edit/Update Buttons
205 If list.Count = 0 Then
206 editUpdateButton.Enabled = False
207 removeButton.Enabled = False
208 End If
209 End Sub ' SetButtons
210
211 ' event raised when user selects a new state in ComboBox
212 Private Sub viewPackagesComboBox_SelectedIndexChanged( _
213 ByVal sender As System.Object, ByVal e As System.EventArgs) _
214 Handles viewPackagesComboBox.SelectedIndexChanged
215
216 Dim state As String = _
217 viewPackagesComboBox.SelectedItem.ToString()
218
Outline
(11 of 12 )

2009 Pearson Education, Inc. All rights reserved.
69
219 packagesListBox.Items.Clear() ' clear ListBox
220
221 ' LINQ query to select packages destined for specified state
222 Dim stateQuery = From p In list _
223 Where p.State = state _
224 Select p
225
226 ' list all packages for current state in ListBox
227 For Each viewPackage As Package In stateQuery
228 ' display the Package’s id in the ListBox
229 packagesListBox.Items.Add(viewPackage.PackageNumber)
230 Next
231 End Sub ' viewPackagesComboBox_SelectedIndexChanged
232 End Class ' ShippingHubForm
Outline
(12 of 12 )
Declare a LINQ query to select Packages destined for specified state