Embed Size (px)
DESCRIPTION
På http://www.wagner.dk kan du finde t-shirts online – der er mange forskellige slags t-shirts online.
Citation preview
Design Your Own T-Shirt Page 1
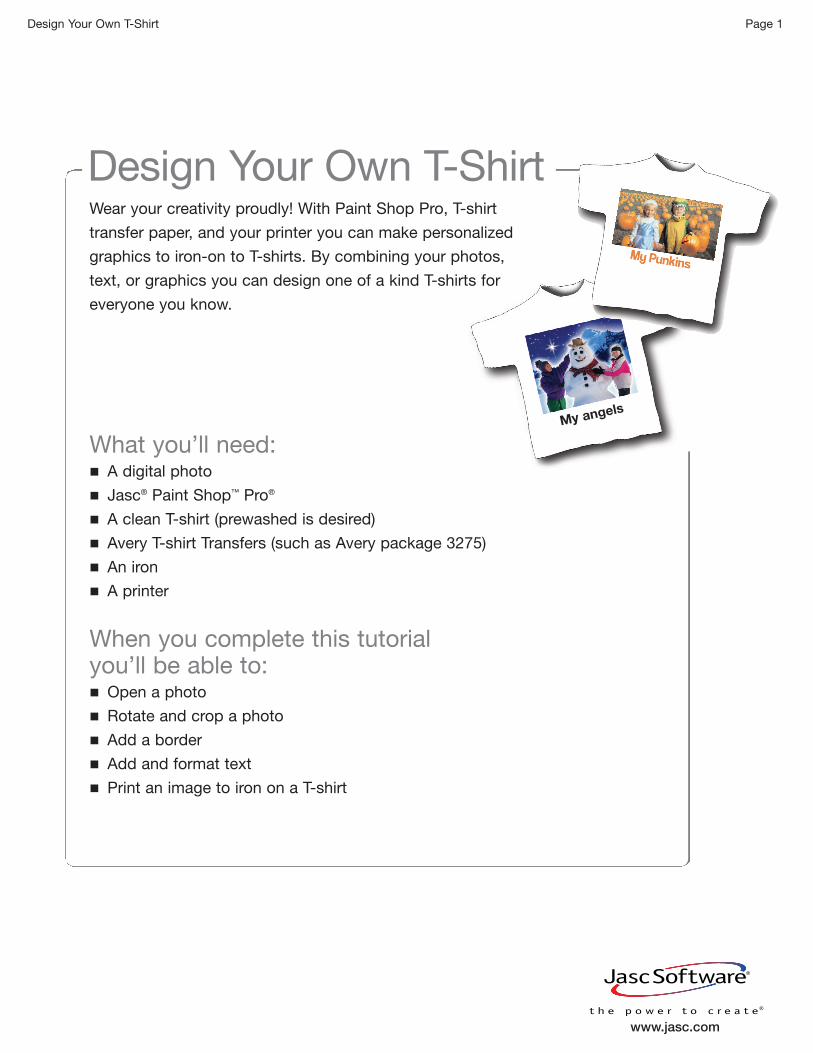
Design Your Own T-Shirt
My angels
What you’ll need:� A digital photo
� Jasc® Paint Shop™ Pro®
� A clean T-shirt (prewashed is desired)
� Avery T-shirt Transfers (such as Avery package 3275)
� An iron
� A printer
When you complete this tutorial you’ll be able to:� Open a photo
� Rotate and crop a photo
� Add a border
� Add and format text
� Print an image to iron on a T-shirt
Wear your creativity proudly! With Paint Shop Pro, T-shirt
transfer paper, and your printer you can make personalized
graphics to iron-on to T-shirts. By combining your photos,
text, or graphics you can design one of a kind T-shirts for
everyone you know.
www.jasc.com
Design Your Own T-Shirt Page 2
Open the Image
1. Choose Start > Programs > Jasc Software > Jasc Paint Shop Pro or
double click the Paint Shop Pro Icon on your desktop to open Paint Shop Pro.
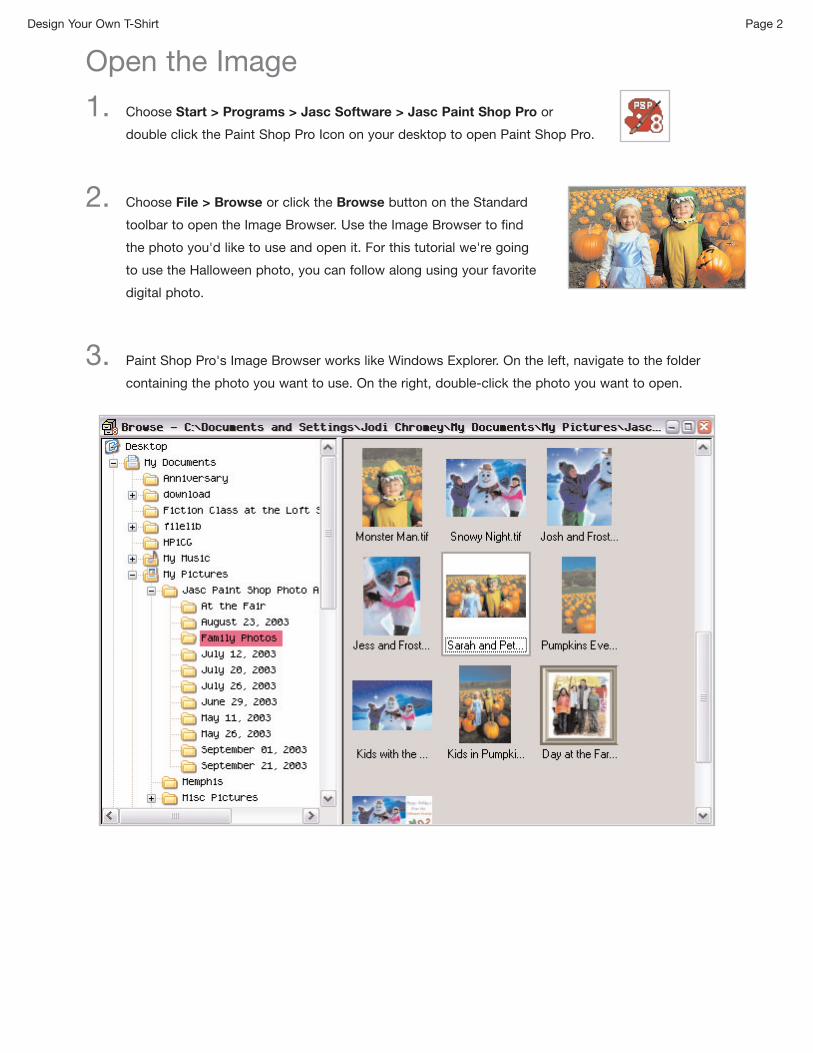
2. Choose File > Browse or click the Browse button on the Standard
toolbar to open the Image Browser. Use the Image Browser to find
the photo you'd like to use and open it. For this tutorial we're going
to use the Halloween photo, you can follow along using your favorite
digital photo.
3. Paint Shop Pro's Image Browser works like Windows Explorer. On the left, navigate to the folder
containing the photo you want to use. On the right, double-click the photo you want to open.
Design Your Own T-Shirt Page 3
Rotate and Crop Your Photo
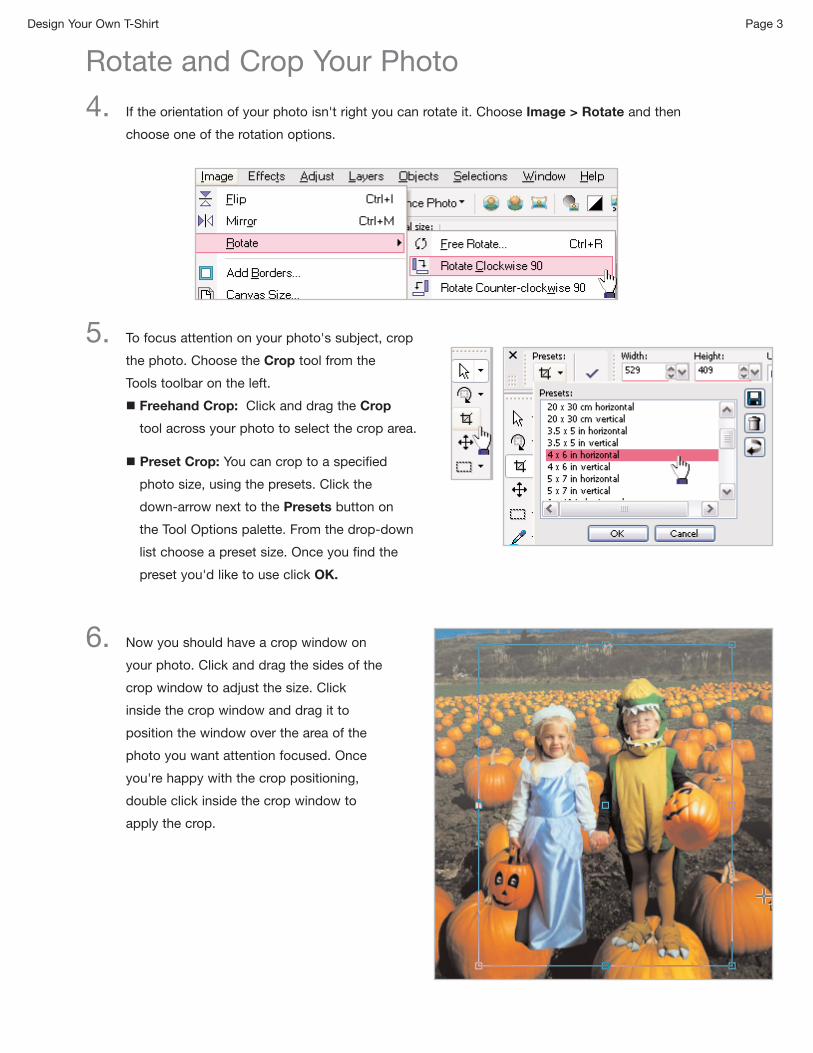
4. If the orientation of your photo isn't right you can rotate it. Choose Image > Rotate and then
choose one of the rotation options.
5. To focus attention on your photo's subject, crop
the photo. Choose the Crop tool from the
Tools toolbar on the left.
� Freehand Crop: Click and drag the Crop
tool across your photo to select the crop area.
� Preset Crop: You can crop to a specified
photo size, using the presets. Click the
down-arrow next to the Presets button on
the Tool Options palette. From the drop-down
list choose a preset size. Once you find the
preset you'd like to use click OK.
6. Now you should have a crop window on
your photo. Click and drag the sides of the
crop window to adjust the size. Click
inside the crop window and drag it to
position the window over the area of the
photo you want attention focused. Once
you're happy with the crop positioning,
double click inside the crop window to
apply the crop.
Design Your Own T-Shirt Page 4
Add a Border
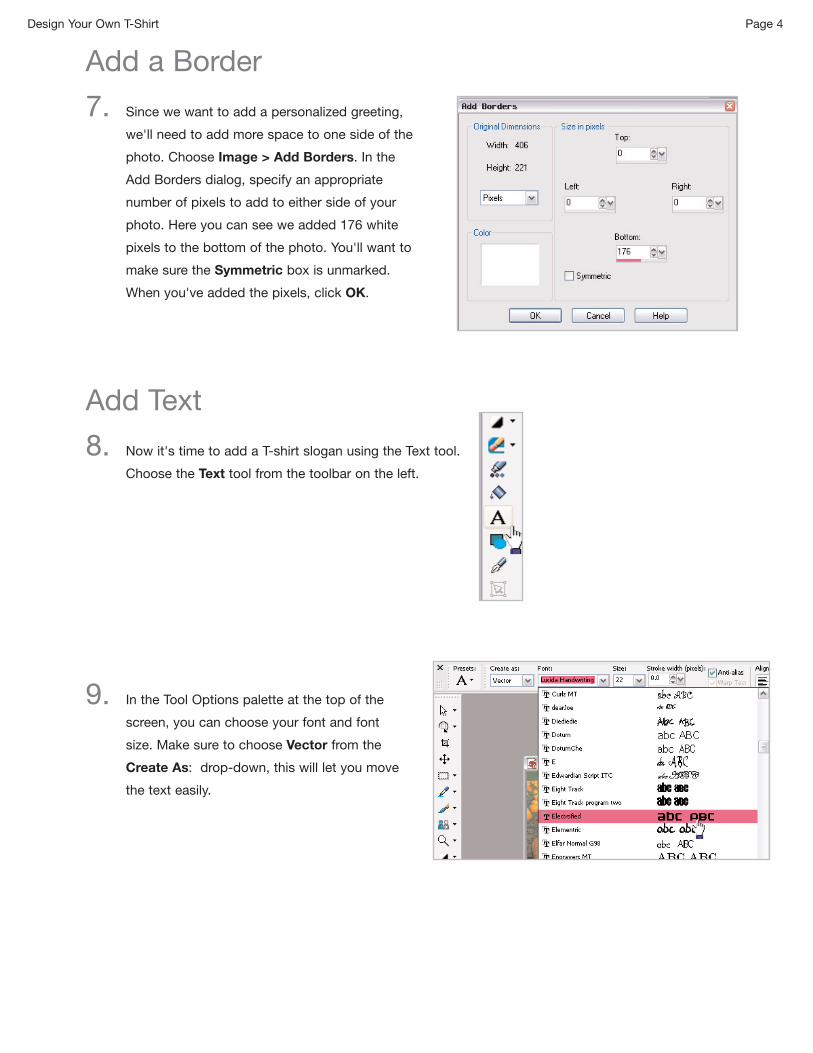
7. Since we want to add a personalized greeting,
we'll need to add more space to one side of the
photo. Choose Image > Add Borders. In the
Add Borders dialog, specify an appropriate
number of pixels to add to either side of your
photo. Here you can see we added 176 white
pixels to the bottom of the photo. You'll want to
make sure the Symmetric box is unmarked.
When you've added the pixels, click OK.
Add Text
8. Now it's time to add a T-shirt slogan using the Text tool.
Choose the Text tool from the toolbar on the left.
9. In the Tool Options palette at the top of the
screen, you can choose your font and font
size. Make sure to choose Vector from the
Create As: drop-down, this will let you move
the text easily.
Design Your Own T-Shirt Page 5
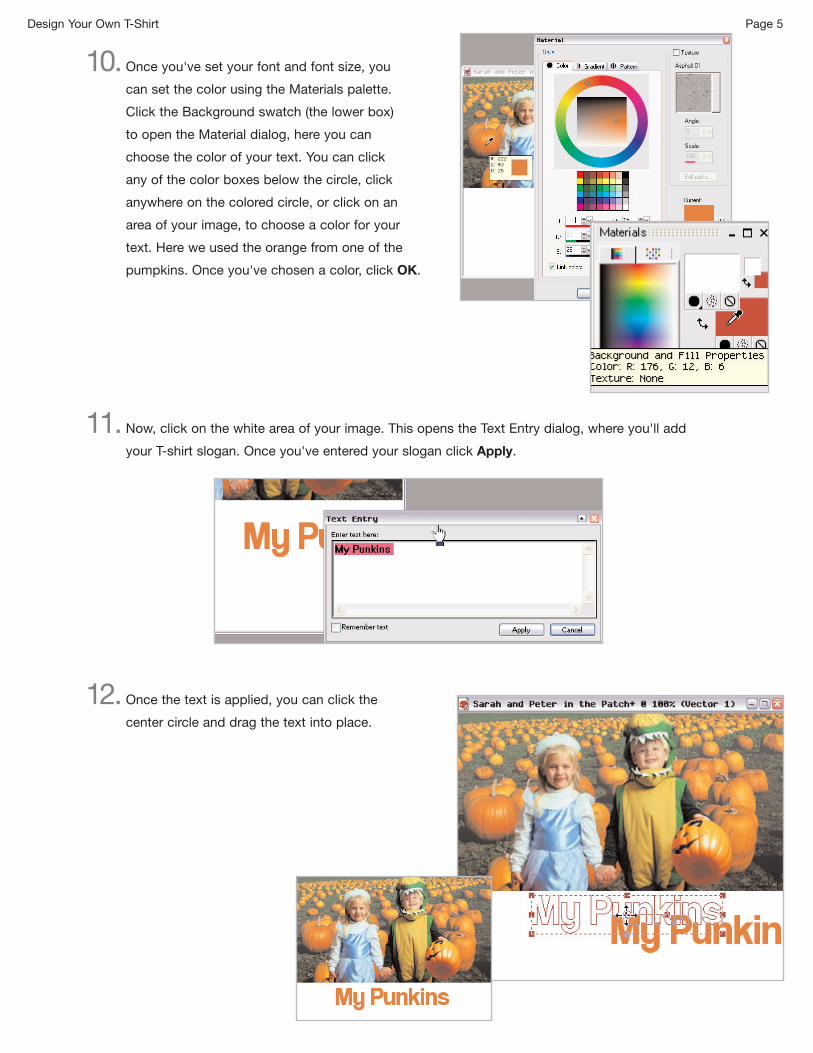
10. Once you've set your font and font size, you
can set the color using the Materials palette.
Click the Background swatch (the lower box)
to open the Material dialog, here you can
choose the color of your text. You can click
any of the color boxes below the circle, click
anywhere on the colored circle, or click on an
area of your image, to choose a color for your
text. Here we used the orange from one of the
pumpkins. Once you've chosen a color, click OK.
11. Now, click on the white area of your image. This opens the Text Entry dialog, where you'll add
your T-shirt slogan. Once you've entered your slogan click Apply.
12. Once the text is applied, you can click the
center circle and drag the text into place.
Design Your Own T-Shirt Page 6
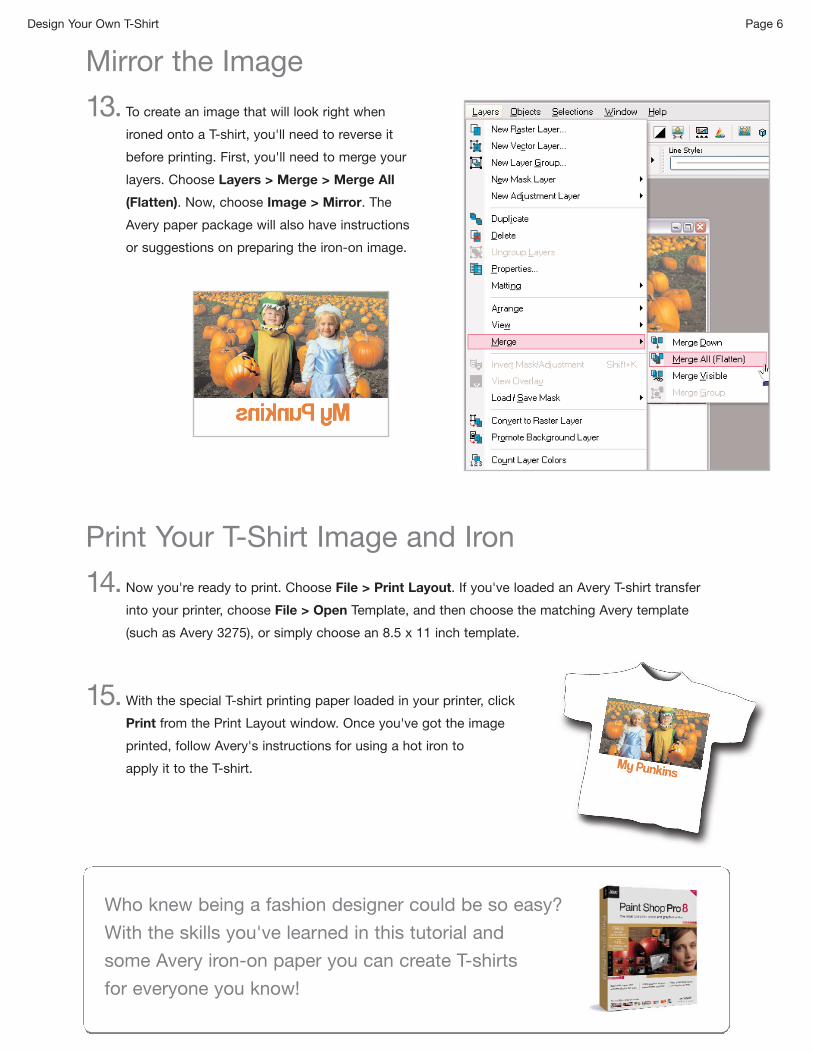
Mirror the Image
13. To create an image that will look right when
ironed onto a T-shirt, you'll need to reverse it
before printing. First, you'll need to merge your
layers. Choose Layers > Merge > Merge All
(Flatten). Now, choose Image > Mirror. The
Avery paper package will also have instructions
or suggestions on preparing the iron-on image.
Print Your T-Shirt Image and Iron
14. Now you're ready to print. Choose File > Print Layout. If you've loaded an Avery T-shirt transfer
into your printer, choose File > Open Template, and then choose the matching Avery template
(such as Avery 3275), or simply choose an 8.5 x 11 inch template.
15. With the special T-shirt printing paper loaded in your printer, click
Print from the Print Layout window. Once you've got the image
printed, follow Avery's instructions for using a hot iron to
apply it to the T-shirt.
Who knew being a fashion designer could be so easy?
With the skills you've learned in this tutorial and
some Avery iron-on paper you can create T-shirts
for everyone you know!